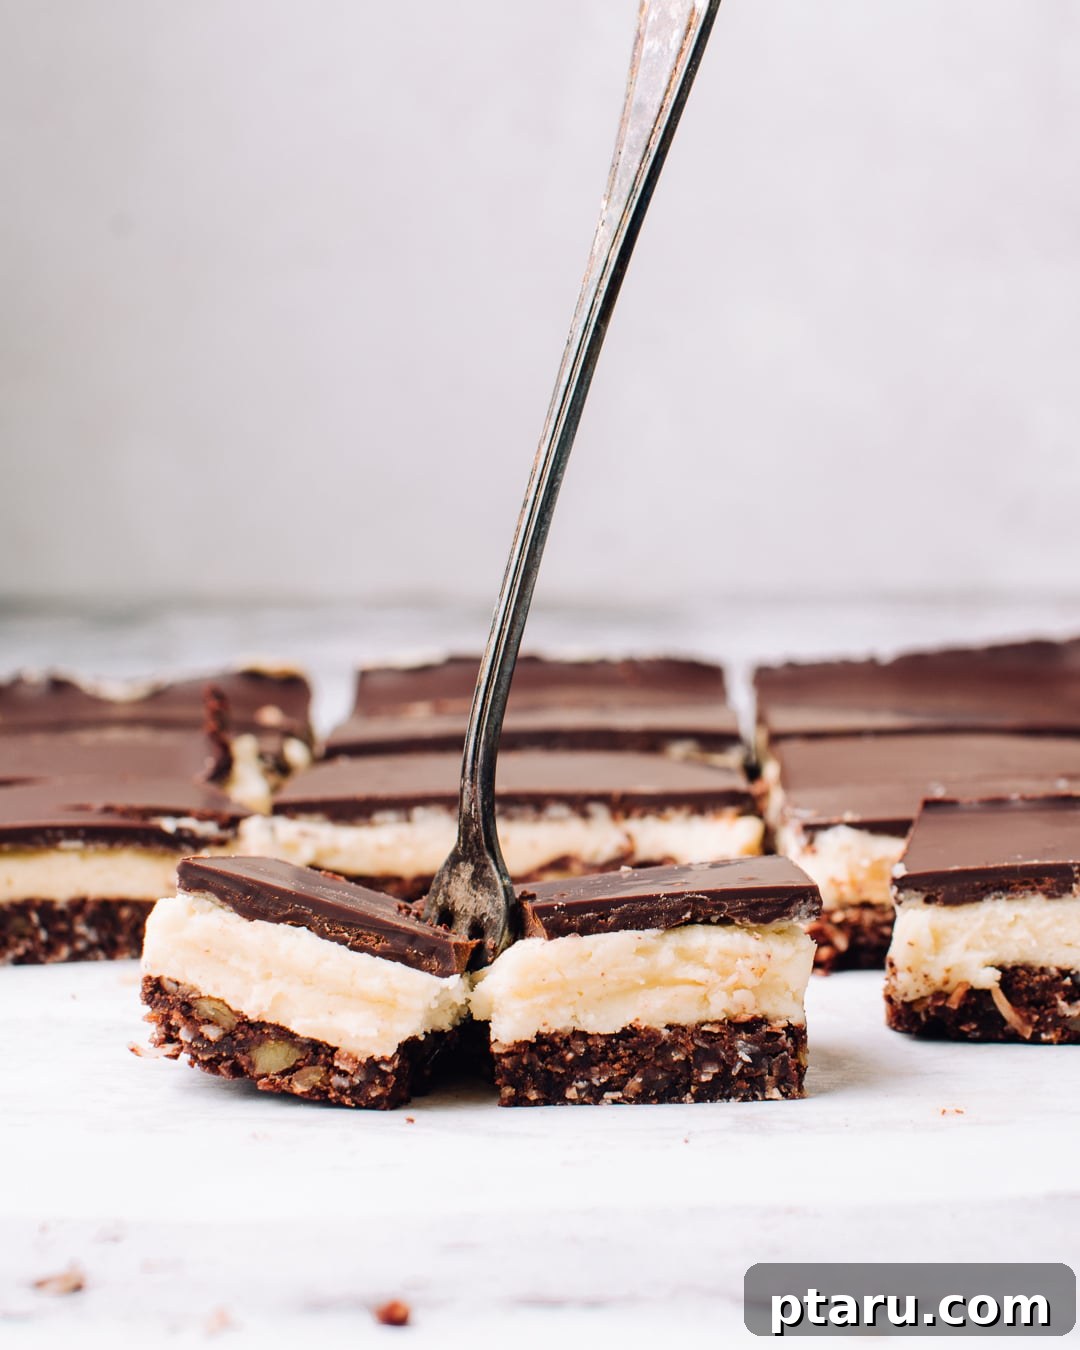
Are you ready to discover the irresistible charm and delightful layers of Classic Nanaimo Bars? As a passionate home baker and devoted fan of this iconic Canadian treat, I’ve spent years refining and perfecting this traditional no-bake dessert. My meticulously tested recipe incorporates a wealth of proven techniques, guaranteeing an exceptionally fluffy filling, a perfectly structured base, and distinct, beautifully layered results that will impress even the most discerning palates. Prepare to indulge in a confection that consistently earns rave reviews and becomes an instant favorite!
The Sweet Story: Tracing the Origins of Canada’s Beloved Nanaimo Bar
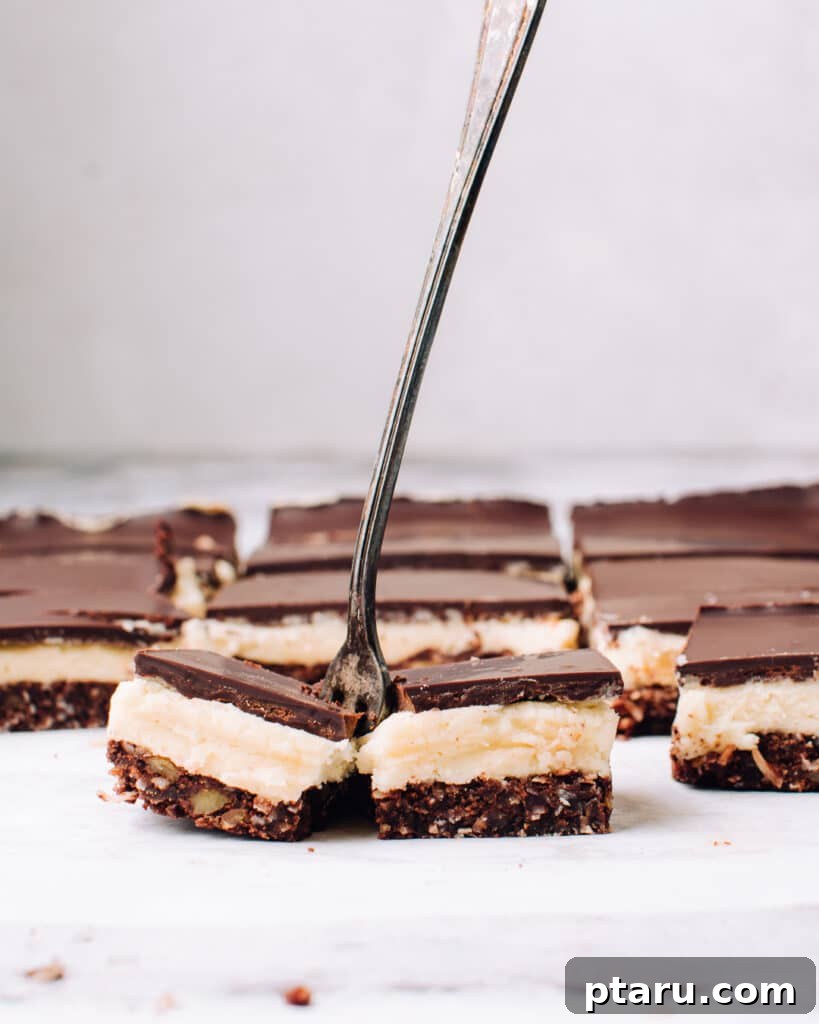
The iconic Nanaimo Bar holds a truly special place in the hearts of Canadians, a genuine culinary gem whose precise origins trace back to the picturesque coastal city of Nanaimo, British Columbia, during the 1950s. While the exact story of its invention is intertwined with a delightful blend of local legend and passionate culinary experimentation, there is absolutely no doubt that these exquisite bars quickly transcended their humble beginnings on Vancouver Island to become a cherished national treasure. For many Canadians, myself included, Nanaimo Bars are proudly considered BC’s most delicious, most iconic, and most enduring culinary export.
Each bite of a perfectly crafted Nanaimo Bar is nothing short of a symphony of textures and flavors. The journey begins with a deeply flavorful, satisfyingly nutty, and wonderfully crumbly cocoa crust, which forms the sturdy yet delicate foundation of this layered masterpiece. This rich, chocolatey base provides the perfect counterpoint to the central layer: a wonderfully cool, intensely creamy, and generously whipped vanilla-infused filling. The grand finale is a glossy, remarkably silky-smooth layer of rich chocolate that elegantly crowns the entire confection. As your teeth make contact, the chocolate topping offers a delightful, almost audible snap, reminiscent of the satisfying crack heard when breaking into a perfectly made crème brûlée. This layered structure then gives way to a blissful mouthful of fluffy, vanilla-kissed cream, rich chocolate, and a medley of delightful nutty crumbs, creating an unforgettable sensory experience.
Custard Powder: A Traditional Ingredient We’re Innovating Without (And Why It’s Worth It)
For decades, many classic Nanaimo bar recipes have traditionally called for the inclusion of custard powder within the creamy middle layer. However, through extensive baking, experimentation, and a commitment to refining this beloved recipe, I’ve made a confident decision to deliberately omit it, and for two very compelling reasons. Firstly, custard powder is typically sold in large tubs, quantities that far exceed the small amount required for a single batch of Nanaimo bars. This often leads to unnecessary waste, as the remaining powder languishes, forgotten, in the pantry – a familiar sight I recall from my own mother’s kitchen throughout my childhood, where expired tubs became a regular fixture. It often feels like a single-use item destined to collect dust rather than be fully utilized.
Secondly, when one examines the ingredient list for most commercially available custard powders, it reveals a predominance of artificial flavors, synthetic colors, and cornstarch. My personal philosophy in baking leans strongly towards using simpler, more natural ingredients to achieve superior, authentic flavor and a truly delightful texture. Instead of relying on these additives, I have painstakingly developed a super-fluffy, intensely vanilla-flavored whipped filling that achieves the same, if not a far more exquisite, creamy consistency and rich aromatic notes without any artificial components. The results have been overwhelmingly positive and consistently praised, with numerous taste-testers declaring my Nanaimo Bars to be the “BEST EVER” they’ve ever experienced. While I hope you’ll pardon a moment of culinary “bargging,” I am absolutely thrilled and eager to share all my secrets for this incredible, naturally delicious filling below. For those who are steadfast traditionalists and prefer the classic approach, rest assured – the recipe still provides the option to include custard powder if that’s truly your preference!
Essential Ingredients: The Building Blocks of Perfect Nanaimo Bars
It wasn’t until I embarked on my journey as an adult baker that I truly began to appreciate the unique and fascinating composition of a Nanaimo bar. The base layer, in particular, always intrigued me with its flourless blend of cocoa, sugar, graham crumbs, coconut, and nuts. This combination creates an utterly distinctive flavor profile – a delightful mystery that makes it impossible to stop at “just one nibble.” To recreate these irresistible bars at home, you’ll need a carefully selected array of high-quality ingredients, each playing a critical role in contributing to the overall harmony of taste, aroma, and texture:
- Unsweetened Cocoa Powder: The cornerstone for the base, providing that essential rich, deep chocolatey flavor. Investing in a good quality cocoa powder makes a noticeable difference in the final taste.
- Granulated Sugar: Not only sweetens the base but also contributes to its delightful crumbly yet cohesive texture.
- Graham Cracker Crumbs: The quintessential binding agent and flavor foundation for the bottom layer, offering that signature delicate crunch and a familiar, comforting sweetness.
- Unsweetened Shredded Coconut: Adds a wonderful, chewy texture and a subtle tropical undertone that perfectly complements the robust chocolate and nutty flavors.
- Toasted, Finely Chopped Nuts (Walnuts or Pecans): Absolutely essential for imparting crunch, rich earthiness, and a profound depth of nutty flavor to the base. Toasting these nuts beforehand is a non-negotiable step to maximize their aromatic qualities and enhance their taste.
- Soft Salted Butter: A critical ingredient that acts as a rich binder for the base and forms the incredibly luscious, creamy foundation of our middle filling layer. Using high-quality butter is paramount for both flavor and texture.
- Confectioners’ Sugar (Powdered Sugar): The key to achieving an exquisitely smooth, melt-in-your-mouth texture for the middle layer. Its finely milled consistency is crucial for preventing any undesirable graininess.
- Pure Vanilla Extract: Elevates the flavor profile of the filling layer, adding a warm, aromatic sweetness and complexity that truly allows the other ingredients to shine.
- Heavy Cream or Whole Milk: Contributes significantly to the perfect consistency, richness, and overall creaminess of the whipped filling. Heavy cream will yield a more luxurious and decadent texture.
- Good Quality Dark Chocolate (Finely Chopped): This is paramount for the top layer. A superior quality dark chocolate will not only melt more smoothly but will also possess a richer, more complex flavor and provide that desirable, satisfying “snap” when fully cooled and set.
- Vegetable Oil (or Coconut Oil): A small but mighty touch of neutral-flavored oil mixed with the chocolate topping is a true game-changer. It not only imparts an extra-beautiful, glossy sheen to the chocolate but also ensures it remains just soft enough to bite through cleanly without a brittle, solid crack, thereby greatly enhancing the overall eating experience.
Unlocking Perfection: 5 Expert Tricks for the Best-Ever Nanaimo Bars You’ll Ever Make
While the Nanaimo Bar recipe might appear deceptively straightforward, achieving truly exceptional results – bars that are perfectly balanced, texturally divine, and visually stunning – lies in understanding and diligently applying a few key, often overlooked, techniques. These are not mere suggestions; they are the fundamental secrets to transforming a simply good bar into an unforgettable masterpiece. Here are my top five essential tricks for crafting Nanaimo Bars that consistently earn rave reviews and leave everyone asking for your secret:
-
1. The Transformative Power of Toasted Nuts for the Base
One of the simplest yet most profoundly impactful steps for the base layer is toasting your nuts first. This brief but crucial process completely transforms the flavor profile from the somewhat flat, sometimes slightly raw or oily taste of un-toasted nuts into a deeply aromatic, complex, and beautifully nutty essence. My dear friend Marnie, a seasoned chef, once playfully quipped, “Why do people who don’t toast nuts even BUY nuts?” and her voice now playfully echoes in my head every single time I’m tempted to skip this quick but incredibly transformative step. I simply spread the finely chopped pecans or walnuts on a small baking sheet and allow them to toast lightly in the oven for a few minutes while it’s preheating for the base. This minimal effort yields immense dividends in the overall depth and richness of flavor in your final bars.
-
2. Master the Art of Whipping for an Ethereal Filling
The absolute ultimate secret to achieving a light, airy, and truly delectable middle layer is the thorough and prolonged whipping of the butter and confectioners’ sugar. This isn’t just about merely combining the ingredients; it’s fundamentally about incorporating a significant amount of air. If you are fortunate enough to be using a stand mixer, it is imperative that you use the whisk attachment – a paddle attachment, while useful for other tasks, simply will not incorporate enough air to achieve the desired texture. You need to beat the mixture well past the point where the ingredients are just initially combined. Keep whipping, diligently, until the mixture undergoes a dramatic and noticeable transformation: it will visibly turn several shades lighter in color, become incredibly fluffy and voluminous, and develop a beautiful, almost glossy, silky sheen. Stopping too soon will inevitably result in a dense, overly sweet, and somewhat pasty, heavy frosting-like texture, which is decidedly not the delicate, cloud-like, melt-in-your-mouth filling we are striving for. Patience in this step is your greatest ally, and your perseverance will be generously rewarded with a filling that feels like a dream on the palate. (And as previously mentioned, if you are a true traditionalist and deeply desire to incorporate two tablespoons of custard powder, I fully understand and won’t be offended – simply whisk it in along with the confectioners’ sugar!)
-
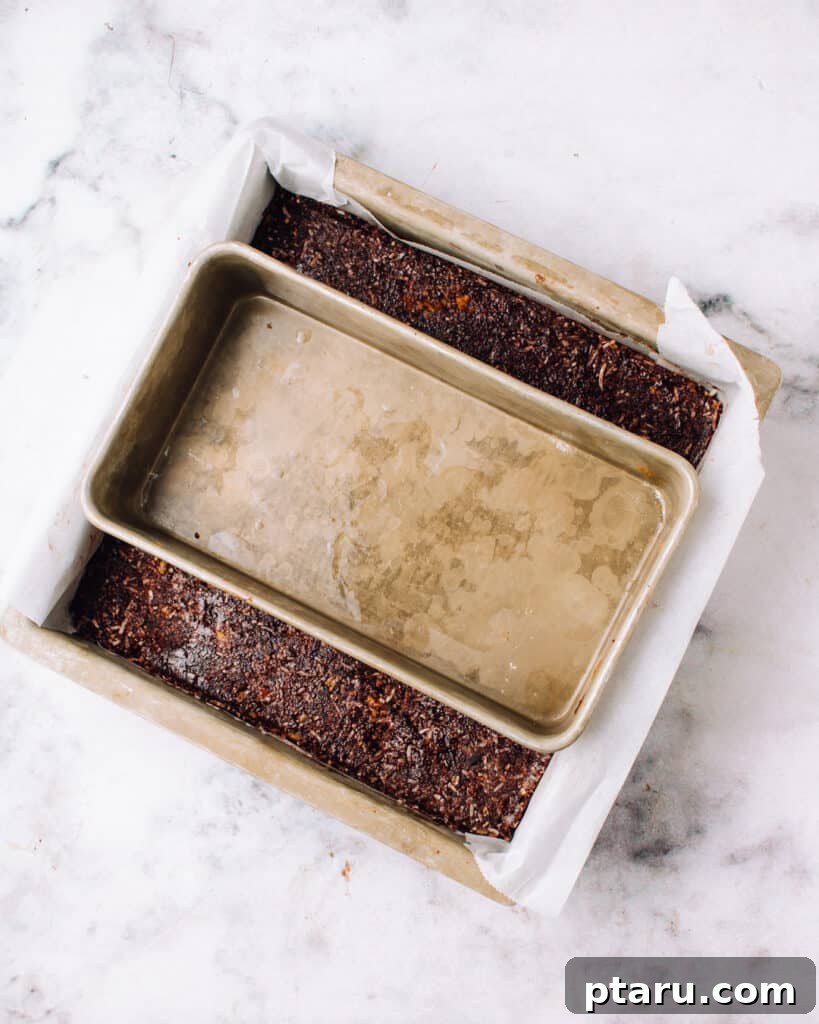
3. Achieving Precision Layering with an Oiled Loaf Pan
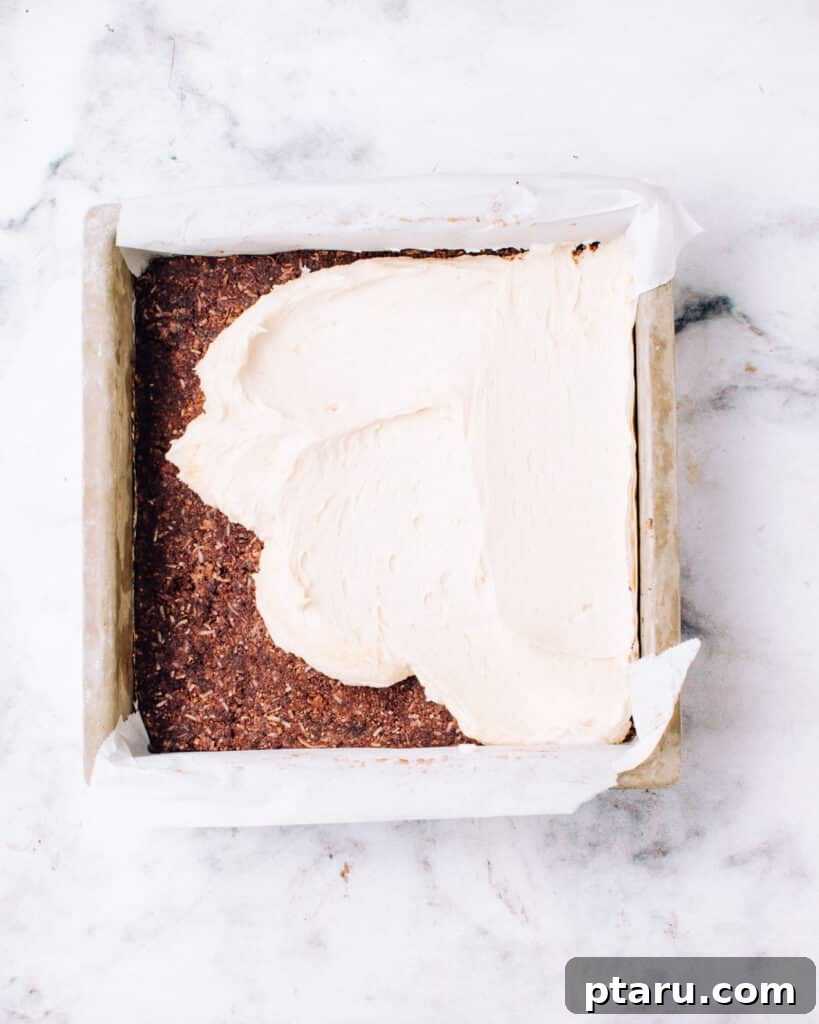
To produce those famously beautiful, clean, and distinct layers that make Nanaimo Bars so visually appealing and professional-looking, a remarkably simple yet indispensable trick involving an oiled loaf pan is your secret weapon. After the base has finished baking and has inevitably puffed up slightly in spots (a natural occurrence due to the egg content), and while it’s still warm and pliable, immediately use the flat bottom of an oiled loaf pan (one that conveniently fits snugly within your baking dish) to firmly and evenly press the crust down. The slight oiling on the loaf pan prevents any sticking and helps create a perfectly flat, compact, and consistent surface. Once you have gently spread your creamy filling evenly over the cooled base, clean the loaf pan of any stray crumbs (and re-oil it if necessary for absolute smoothness), then use it again to very gently smooth the filling to an exquisite, glass-like finish. It’s crucial here to use a light, side-to-side motion rather than applying a firm downward press, as this will help you avoid compacting the delicate filling and ensure it retains its desired ethereal fluffiness.
-
4. The No-Touch Method for a Flawless, Mirror-Smooth Chocolate Top
For a truly gorgeous, mirror-smooth chocolate topping – one so perfect you could practically “skate on” – the golden rule is both simple and non-negotiable: absolutely do not touch the chocolate with a spoon, a spatula, or any other utensil once it’s poured. Once your meticulously prepared and perfectly cooled but still pourable chocolate mixture is ready, gently pour it over the impeccably chilled filling layer. Then, with a steady hand, simply tilt and rotate the baking pan around, allowing the chocolate to spread naturally and evenly across the entire surface through gravity and gentle movement. This minimal manipulation is key to preventing unsightly streaks, unwanted lumps, and annoying air bubbles, ultimately resulting in that professional, truly bakery-quality finish. Once the chocolate has evenly coated the top and achieved its smooth perfection, allow the bars to sit undisturbed at room temperature until the chocolate is completely hardened and set. It is critical to resist the temptation to refrigerate warm-ish chocolate, as this rapid temperature change can often lead to harmless but aesthetically undesirable discoloration or “chocolate bloom,” which dulls the surface. This method ensures a beautiful, unblemished, and glossy surface every single time.
-
5. The Art of Proper Chilling and Clean Cutting
After all your careful attention to layering and topping, proper chilling is not just recommended, it is absolutely crucial for the bars to set perfectly and achieve their ideal structure. The base and filling need to be firm before the chocolate topping is applied, and the final, fully assembled bars must be completely set and firm before attempting to cut them. Once the entire confection is thoroughly chilled and solidified, gently lift the bars out of the baking dish using the convenient parchment paper overhang. For the cleanest, most professional-looking slices that truly rival any bakery display, employ this expert technique: run a very sharp, long knife under hot water for a few seconds, then wipe it completely dry with a clean towel. Immediately make a single, decisive cut. Repeat this precise process – hot water, dry, cut – between every single slice. This warmth transferred to the knife blade helps the chocolate topping and the creamy filling cut cleanly and effortlessly without any dragging, cracking, or smudging, yielding perfectly pristine, individual Nanaimo Bar pieces ready to be savored and shared.
Storage and Serving: Keeping Your Classic Nanaimo Bars Fresh and Delicious
One of the many delightful advantages of this classic Nanaimo Bar recipe is its excellent shelf life and remarkable versatility in storage. This allows you the flexibility to prepare them well in advance for special occasions or to simply enjoy them over several days, ensuring you always have a delicious treat on hand. For optimal freshness, texture, and overall enjoyment, here’s how to properly store your delectable creations:
- Room Temperature: Nanaimo bars hold up beautifully and maintain their delightful texture when stored at cool room temperature for up to two days. It is essential to store them in an airtight container to prevent them from drying out, becoming stale, or absorbing any undesirable odors from your kitchen.
- Refrigerator: For extended freshness and to achieve a slightly firmer bite, transfer your Nanaimo bars to an airtight container and refrigerate for up to 5 days. Chilling them will cause the chocolate topping and the creamy filling to firm up a bit more, which some people actually prefer for a denser, more structured indulgence.
- Freezer: These bars are exceptionally freezer-friendly, making them perfect for meal prepping desserts or for enjoying a taste of Canada anytime! To freeze, wrap individual bars or a full slab tightly in plastic wrap, then place them within an airtight freezer-safe container or a heavy-duty freezer bag. They can be safely stored in the freezer for up to one month without significant loss of quality. To serve, simply thaw them at room temperature for approximately 30 minutes before indulging.
While I personally believe you experience the absolute best mouthfeel and the most nuanced flavor complexity when Nanaimo bars are served closer to room temperature – allowing the chocolate to soften just slightly and the filling to achieve its wonderfully creamy, almost custard-like consistency – I must admit a guilty pleasure: a personal partiality to an occasional frozen bar. There’s something uniquely satisfying about the intense cold and the firmer, almost ice cream-like texture – a delightful contrast that is particularly appealing for those who enjoy a super chilled treat! I encourage you to experiment with different serving temperatures to discover your own preferred way to enjoy these magnificent bars.
Classic Nanaimo Bars: Your Detailed Recipe Guide
Ready to bake Canada’s most beloved no-bake treat? Follow these precise, step-by-step instructions to create Nanaimo Bars that are perfectly layered, incredibly flavorful, and undeniably irresistible. This recipe yields approximately 16 generous servings, making it perfect for entertaining guests, gifting to loved ones, or simply enjoying throughout the week as a delightful indulgence.
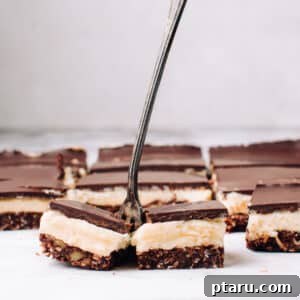
Classic Nanaimo Bars
By: Sangeetha
A timeless Canadian classic, this Nanaimo bar recipe delivers a rich, nutty cocoa crust, a luxuriously creamy whipped vanilla filling, and a perfectly snappy chocolate topping. Simple to make, impossible to resist!
- Prep Time: 20 minutes
- Cook Time: 12 minutes
- Total Time: 32 minutes (plus chilling time)
- Servings: 16 large bars
Ingredients
For the Decadent Base Layer:
- ¼ cup unsweetened cocoa powder
- ¼ cup granulated sugar
- 1 ¼ cup graham cracker crumbs (finely crushed)
- 1 cup unsweetened shredded coconut
- ½ cup finely chopped pecans or walnuts (for best flavor, toast them lightly)
- ½ cup salted butter, melted
- 1 large egg, lightly beaten
For the Luxurious Creamy Filling:
- ⅔ cups unsalted butter, softened to room temperature
- 3 cups confectioners’ sugar (sifted for extra smoothness)
- 1 tbsp pure vanilla extract (use good quality for rich flavor)
- 5 tbsp heavy cream or whole milk
- (Optional: 2 tbsp custard powder, added with confectioners’ sugar for a traditional touch)
For the Smooth Chocolate Topping:
- 8 ounces good quality dark chocolate, finely chopped (chocolate chips also work)
- 1 tbsp vegetable oil (or coconut oil, for gloss and a softer bite)
Instructions
-
1. Prepare Your Baking Pan: Begin your Nanaimo bar journey by preheating your oven to 350ºF (175ºC). Line an 8×8-inch (20×20 cm) square baking dish with parchment paper, making sure to leave a generous 1-inch overhang on all sides. This thoughtful overhang will serve as convenient “handles” to easily lift the entire slab of bars out of the pan once they are fully set.
-
2. Craft the Flavorful Base: In a medium-sized mixing bowl, combine the unsweetened cocoa powder, granulated sugar, finely crushed graham cracker crumbs, unsweetened shredded coconut, and your pre-toasted, finely chopped pecans or walnuts. Stir these dry ingredients together thoroughly with a fork until they are uniformly mixed. Drizzle the melted salted butter over the mixture and continue to toss with the fork until everything is well combined and has a crumbly yet cohesive texture. Add the lightly beaten egg and stir diligently until the mixture is fully incorporated and holds together. Press this base mixture firmly and evenly into the bottom of your prepared baking dish. Bake for approximately 10 minutes, or until the crust appears just set. Immediately after removing it from the oven, use the flat bottom of an oiled loaf pan (or a sturdy, flat-bottomed glass) to firmly press the hot crust down into a smooth, even, and compact layer. This step is crucial for a tidy base. Allow the base to cool completely in the pan on a wire rack to room temperature.
-
3. Whip the Ethereal Filling: While your base is cooling, prepare the star of the show – the creamy filling. In the bowl of a stand mixer fitted with the whisk attachment (this is paramount for maximum aeration!), combine the softened unsalted butter, sifted confectioners’ sugar, pure vanilla extract, and heavy cream (or milk). Begin beating on low speed until the ingredients are just combined and no dry sugar remains, then increase the speed to high. Beat vigorously for a full 2 to 3 minutes, making sure to stop and scrape down the sides of the bowl occasionally to ensure even mixing. Continue whipping until the mixture is transformed into a very fluffy, significantly lighter-in-color, and wonderfully airy consistency, boasting a beautiful, silky sheen. This extended whipping creates the signature cloud-like texture that makes these bars so irresistible.
-
4. Thoughtful Layer Assembly: Once the chocolatey crust is completely cool to the touch, carefully and evenly spread the magnificently whipped filling over the top of the base. For an impeccably smooth and flat surface, gently use the bottom of the oiled loaf pan again (ensuring it’s clean of any crumbs first, and re-oiling if necessary) to lightly smooth the filling. Remember to use a very gentle, side-to-side motion rather than pressing down hard, which could compact your fluffy filling. Transfer the entire baking dish to the freezer to firm up the filling for approximately 10-15 minutes. This chilling step ensures the filling is firm enough to receive the chocolate topping without blending.
-
5. Create the Glossy Topping: In a microwave-safe measuring cup or bowl, combine the finely chopped dark chocolate and vegetable oil. Microwave on 50% power for 2 minutes. Remove and stir well. Continue microwaving in short 20-second intervals, stirring diligently after each, until the chocolate is about 80-90% melted. Remove from the microwave and continue stirring until the chocolate is completely smooth, luscious, and glossy from the residual heat. This gentle melting process prevents scorching. Pour this perfectly cooled-but-pourable chocolate mixture evenly over the chilled filling layer. Instead of spreading with a spoon or spatula (which can create streaks), simply tilt and gently rotate the pan to allow the chocolate to naturally spread and cover the entire surface uniformly. Let the bars stand undisturbed at room temperature until the chocolate topping is completely hardened and set. It’s important to avoid refrigerating warm chocolate, as this rapid temperature change can often cause harmless but visually undesirable discoloration, known as chocolate bloom, dulling its beautiful sheen.
-
6. Precision Slicing and Serving: Once your Nanaimo bars are completely set and firm (this may take a few hours at room temperature, or less if briefly refrigerated after the chocolate sets), carefully lift the entire slab out of the baking dish using the parchment paper overhang. For the cleanest, most professional-looking slices, employ this expert technique: run a very sharp, long knife under hot water for a few seconds, then wipe it completely dry with a clean towel. Immediately make a single, decisive cut. Repeat this precise hot water, wipe dry, and cut process between each individual slice. This warmth helps the chocolate topping and the creamy filling cut cleanly and effortlessly without any dragging, cracking, or smudging, yielding perfectly pristine, beautiful Nanaimo Bar pieces. Slice into 16 generous bars or 24 smaller squares, depending on your desired serving size. Serve and savor every exquisite bite!
Notes
*For a more traditional flavor profile in your creamy filling, you have the option to add 2 tablespoons of custard powder. If choosing this, simply whisk it in along with the confectioners’ sugar.
Nanaimo bars are incredibly versatile when it comes to storage, making them an ideal make-ahead dessert. They remain fresh and delicious at cool room temperature for up to two days (always in an airtight container). For extended freshness, they can be refrigerated for up to 5 days, or even frozen for up to one month. While the best texture and full flavor complexity are typically enjoyed when the bars are served at room temperature, allowing the chocolate to soften slightly and the filling to become wonderfully creamy, many (myself included!) find a uniquely satisfying experience in a chilled or even frozen bar. Experiment to find your personal favorite serving temperature!
Approximate Nutrition Information (Per Serving)
- Calories: 325 kcal
- Carbohydrates: 42g
- Protein: 4g
- Fat: 27g
- Saturated Fat: 16g
- Polyunsaturated Fat: 3g
- Monounsaturated Fat: 6g
- Trans Fat: 1g
- Cholesterol: 48mg
- Sodium: 167mg
- Potassium: 201mg
- Fiber: 3g
- Sugar: 10g
- Vitamin A: 448 IU
- Vitamin C: 0.1mg
- Calcium: 34mg
- Iron: 3mg
Disclaimer: Nutrition information provided here is automatically calculated based on typical ingredient values and should only be used as an approximation. Actual nutritional content may vary depending on the specific brands of ingredients used and precise preparation methods.
Looking for More Indulgent Cookie Plate Favorites?
If you’ve thoroughly fallen in love with the rich flavors, delightful textures, and sheer joy of creating these Classic Nanaimo Bars, you’re absolutely in for a treat! Here are a few more irresistible dessert recipes from my kitchen that I’m confident you’ll adore. They make perfect additions to any holiday cookie plate, family gathering, or simply for satisfying your sweet cravings:
- Decadent Toblerone Cookies
- Festive Peppermint Whoopie Pies
- Bright & Zesty Lemon Pistachio White Chocolate Cookies
- My Famous Chewy Gingerbread Cookies (A true holiday staple, I literally make several pounds of this delightful dough every single year!)