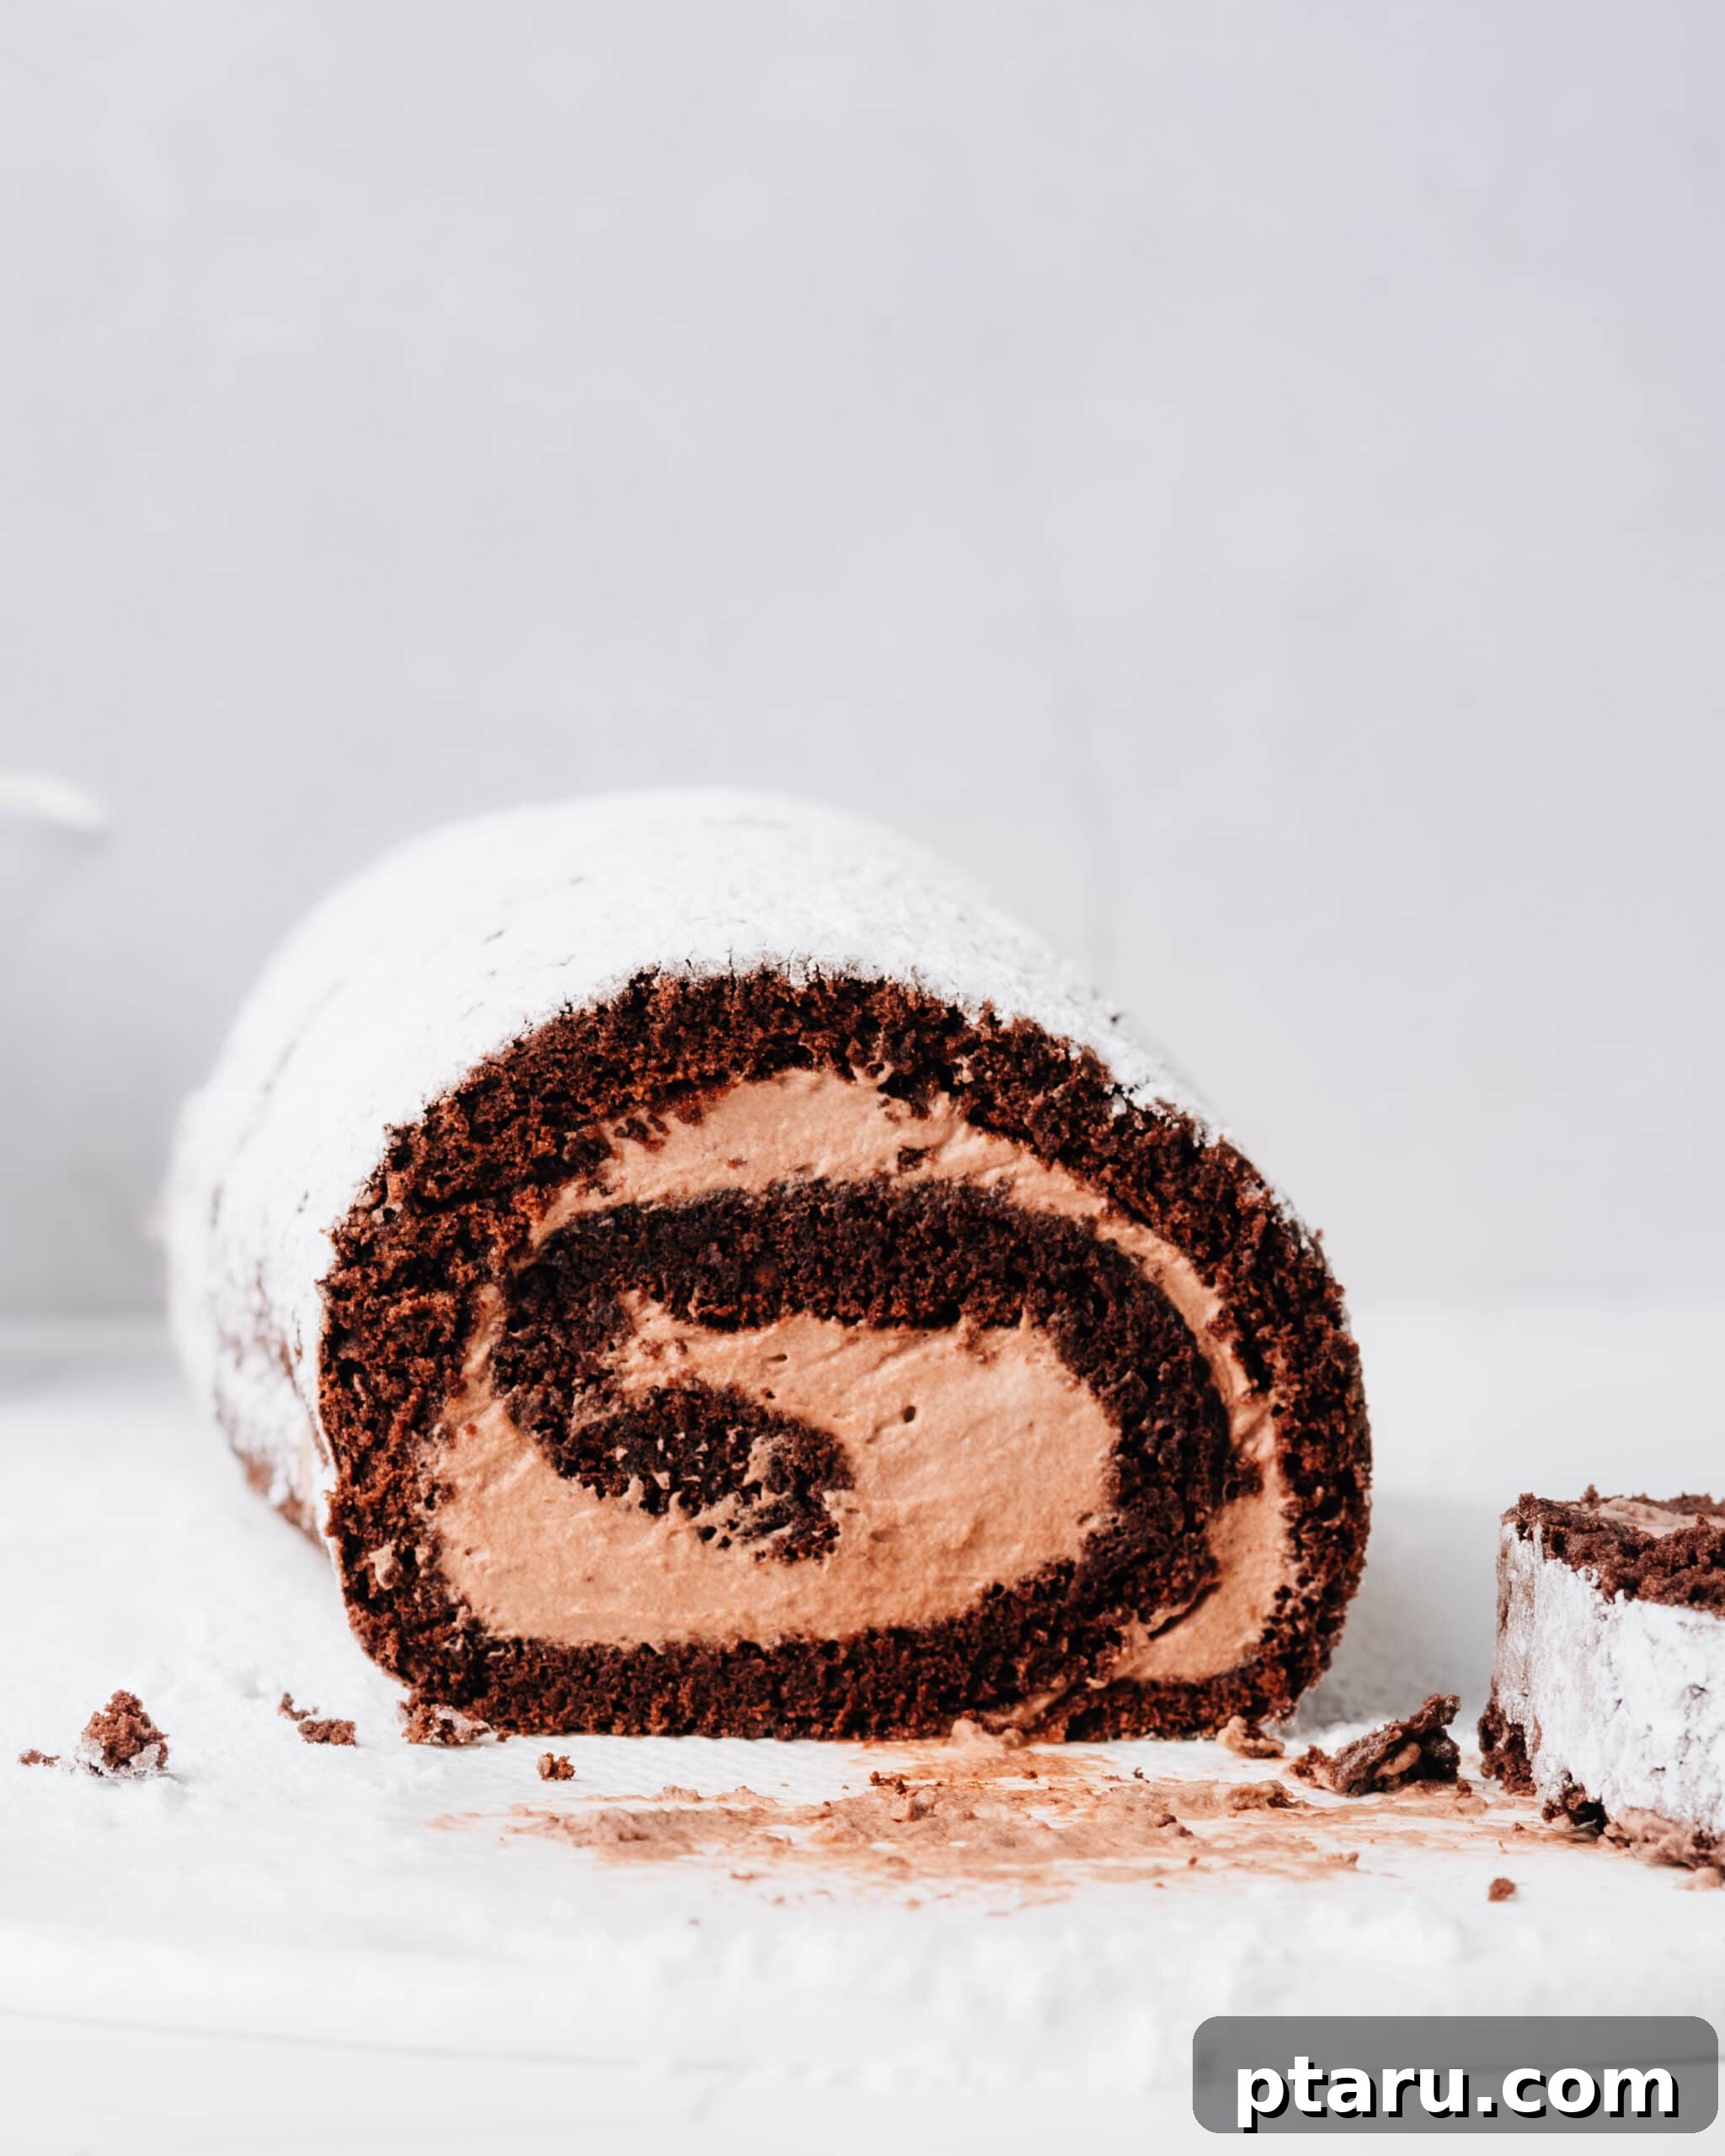
Ultimate Chocolate Swiss Roll Cake: Light, Fluffy & Decadent
Prepare to fall in love with this exquisite Chocolate Swiss Roll Cake. Imagine a feather-light, intensely chocolatey sponge cake, delicately rolled to perfection, encasing a generous swirl of luscious, fluffy chocolate cream. This dessert isn’t just a treat for the taste buds; its elegant appearance makes it a true showstopper, perfect for any special occasion or a delightful everyday indulgence.
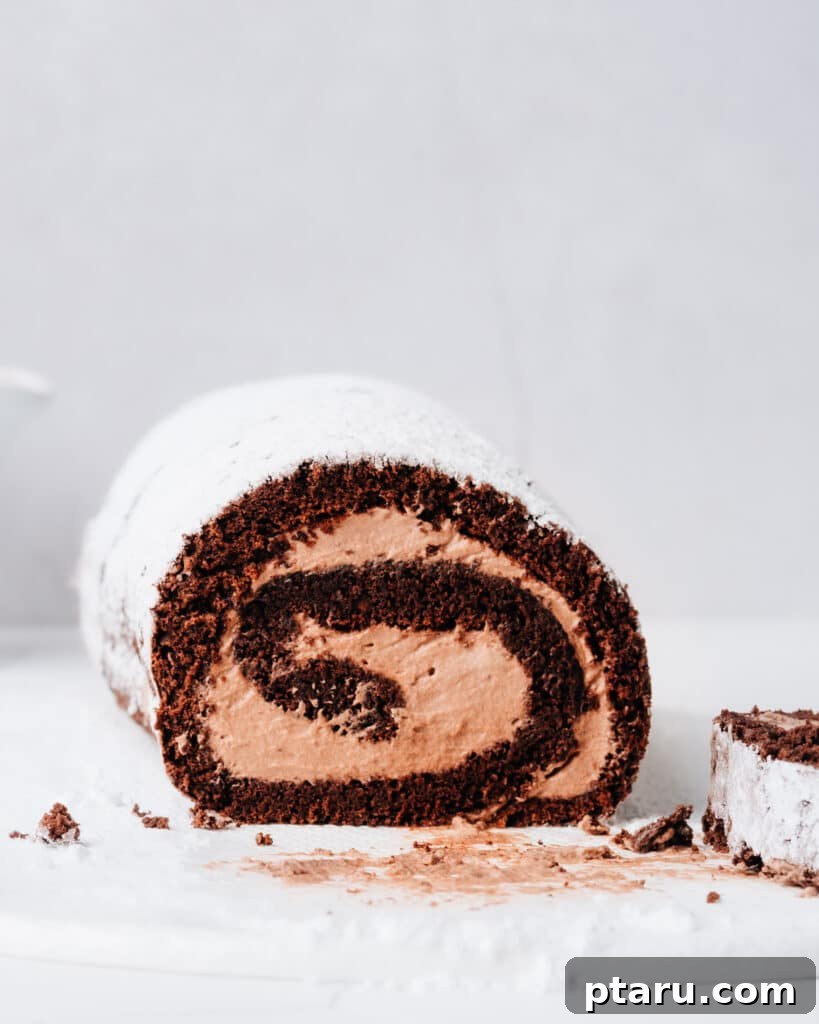
There’s a special magic in an airy, cream-stuffed sponge cake, and this Chocolate Swiss Roll embodies it beautifully. While the process involves the separation and careful whipping of egg whites and yolks – a step that might seem a tad more intricate than some conventional cakes – the resulting texture is absolutely worth the effort. The cloud-like chocolate sponge holds its shape as you slice through the pillowy chocolate cream filling, creating a delightful contrast between the rich, smooth cream and the melt-in-your-mouth cake. Each bite is a symphony of textures and deep chocolate flavor, promising an unforgettable dessert experience.
The Art of the Light & Fluffy Chocolate Sponge
The secret to an ethereal Swiss roll lies in its sponge cake. Unlike denser butter cakes, this recipe relies on the power of whipped eggs to create its signature airy texture. There’s no oil or butter in the cake batter, allowing the pure chocolate flavor and delicate crumb to shine through. Achieving this lightness is simpler than you might think, especially with our detailed tips.
Key Ingredients for a Flawless Chocolate Swiss Roll
Each ingredient in this recipe plays a crucial role in achieving the perfect balance of flavor and texture. Understanding their function will help you bake with confidence.
- Eggs: These are the backbone of our airy sponge. For optimal whipping volume and stability, ensure your eggs are at room temperature before you begin. Cold eggs simply won’t whip as high or as stable. If you’re short on time, a quick trick is to place them in a bowl of warm (not hot) water for 5-10 minutes. We’ll be separating the whites and yolks to maximize aeration.
- Granulated Sugar: Sugar isn’t just for sweetness; it’s a stabilizer, especially for egg foams. In this recipe, the sugar is divided between the egg whites and yolks, helping each component reach its full potential. When added gradually to egg whites, it creates a strong, glossy meringue.
- Cocoa Powder: This provides the rich, deep chocolate flavor and beautiful dark color. Both Dutch-processed and natural cocoa powder work well in this recipe. Dutch-processed cocoa tends to be darker and less acidic, yielding a milder chocolate flavor, while natural cocoa is lighter in color and fruitier. Choose based on your preference!
- All-Purpose Flour, Baking Powder, and Fine Sea Salt: These dry ingredients provide structure and lift. The baking powder works in conjunction with the whipped eggs to ensure a wonderfully light sponge, while a pinch of salt balances the sweetness and enhances the chocolate flavor.
- Milk: A splash of milk adds a touch of moisture to the batter, helping to keep the sponge tender without weighing it down.
Crafting the Velvety Chocolate Cream Filling
The filling is a simple yet decadent component that complements the light sponge beautifully. It’s a quick 4-ingredient whipped cream that comes together effortlessly.
- Cold Whipping Cream: Unlike the eggs, your whipping cream *must* be cold straight from the fridge. Cold cream whips faster and holds its shape better, resulting in a stable, fluffy filling.
- Confectioners’ Sugar: Also known as powdered sugar, this is ideal for whipped cream as it dissolves instantly, leaving no gritty texture. It also contains a small amount of cornstarch, which acts as a stabilizer, helping the whipped cream maintain its peak longer.
- Cocoa Powder: For a delightful chocolate kick in the cream. Sifting it ensures a smooth, lump-free filling.
- Vanilla Extract: A touch of vanilla enhances the overall flavor profile, adding warmth and depth to the chocolate.
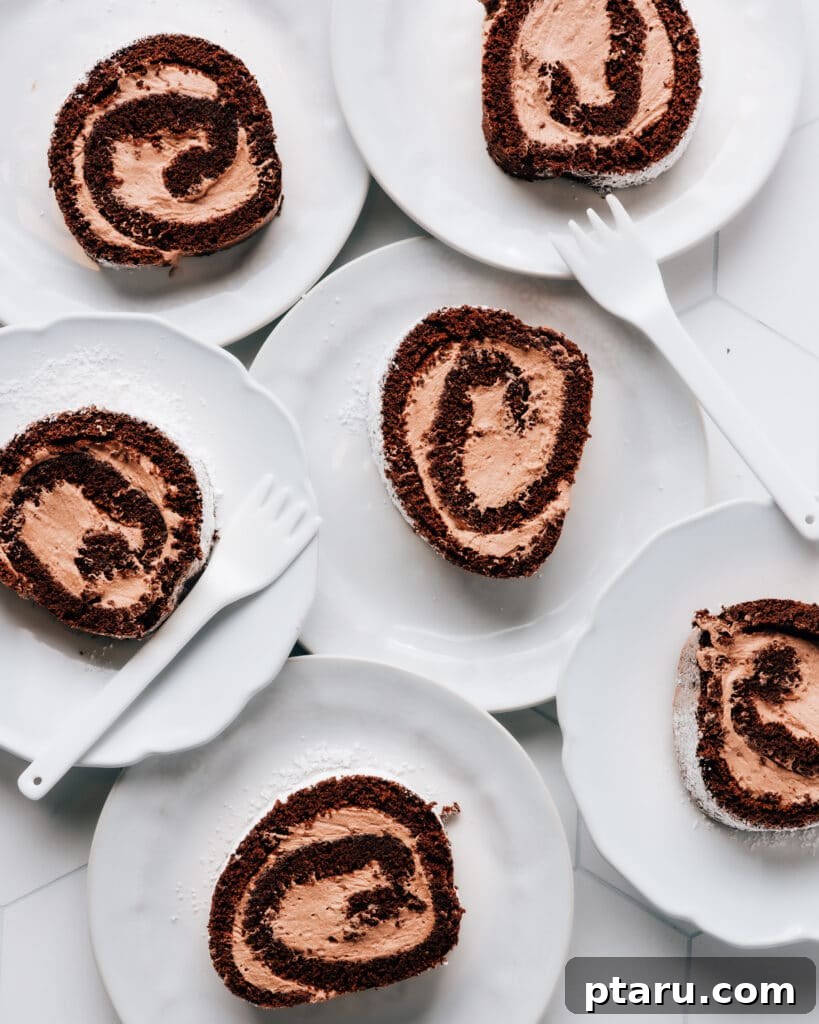
How to Make a Decadent Chocolate Swiss Roll Cake: Step-by-Step Guide
Creating this stunning cake involves a few key steps, but don’t be intimidated! We’ll guide you through each stage to ensure success.
Whipping Egg Whites and Yolks Separately: A Simplified Approach
The thought of whipping egg whites and yolks separately might sound like extra effort, or perhaps a task reserved for seasoned bakers who “make meringue on the regular.” But here’s a secret: for this particular recipe, my extensive testing has shown that whether your egg whites are slightly over-beaten, a little under-beaten, or perfectly firm, the final cake results in remarkably little difference. So, take a deep breath and don’t let it stress you out!
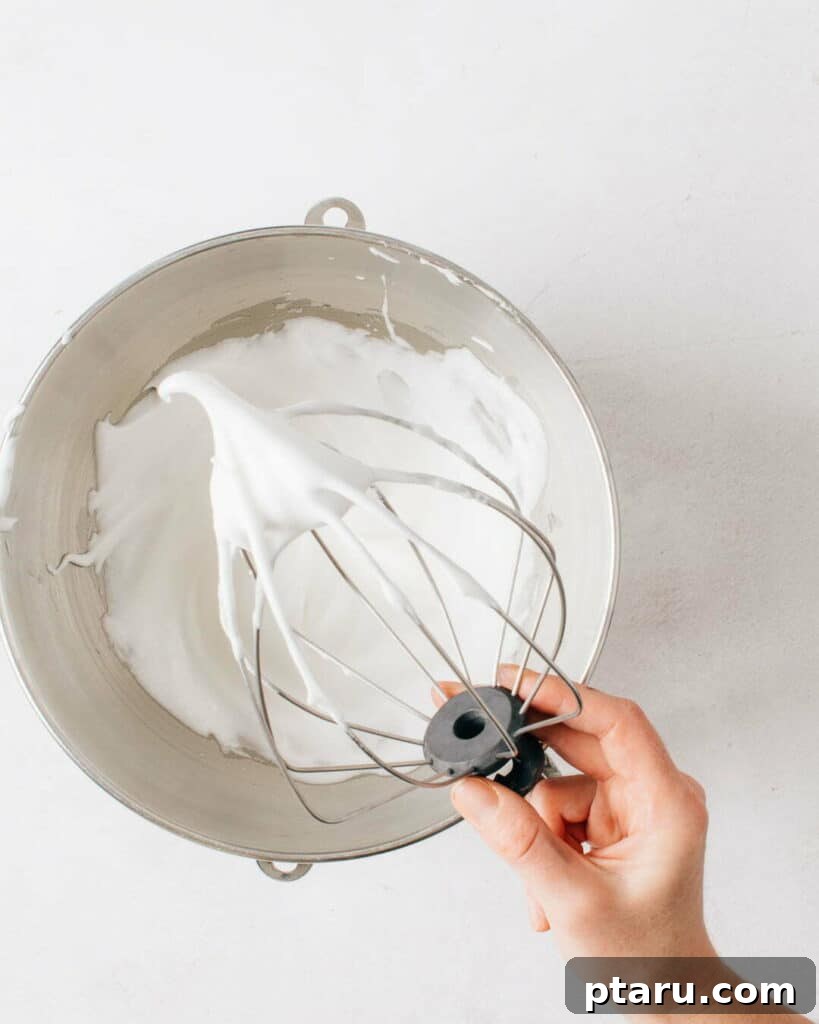
Your goal for the egg whites is to whip them to medium-firm peaks. This means that when you lift the whisk, the meringue will hold a distinct peak, but the very tip might gently droop. Once you reach this stage, simply scrape the beautiful, cloud-like beaten whites into a separate bowl. The best part? You don’t even need to wash out your mixer bowl before moving on to the yolks! We’re all about efficiency here, not complicating things unnecessarily.
Next, we’ll beat the egg yolks with a portion of the granulated sugar. Think of this as our alternative to creaming butter and sugar – it’s a different technique, not necessarily more work. This step lightens the yolks and adds volume. Finally, we’ll gently incorporate the dry ingredients and a splash of milk, ensuring a smooth, cohesive batter before folding in the airy egg whites.
The Simple, Foolproof Way to Roll Up a Swiss Roll Cake
Perhaps the most intimidating aspect of making a Swiss roll cake is the rolling process itself. Many bakers fear cracks or breaks. The traditional method often involves flipping a hot cake onto a sugar-dusted tea towel, which can be a messy and tricky endeavor. But what if we told you there’s a much simpler, cleaner, and foolproof way? It leverages the very parchment paper the cake bakes on!
Revolutionizing the Rolling Technique
I questioned the long-standing tradition of the tea towel. Why introduce a messy towel when non-stick parchment paper already does the job so well? My experiments led to a revelation: you can roll the cake right in the parchment it was baked on, directly in the hot pan! This innovative approach eliminates the most finicky and challenging part for even experienced bakers – the precarious flip of a floppy, thin cake onto a separate surface. This method has likely remained unquestioned since the 1800s when this cake was probably invented, long before parchment paper was a kitchen staple. It’s fascinating how we often stick to old ways, even when simpler solutions exist.
This cake, despite its airy nature, is surprisingly strong and pliable due to its high egg content. Follow these steps with confidence, and remember, if the cake happens to tear a little, it’s genuinely no big deal. Chances are, any minor imperfection will be neatly concealed once the cake is filled and re-rolled. And if not, a simple dusting of confectioners’ sugar will gracefully hide any mistakes, ensuring a beautiful presentation every time. After all, deliciousness makes any imperfections irrelevant!
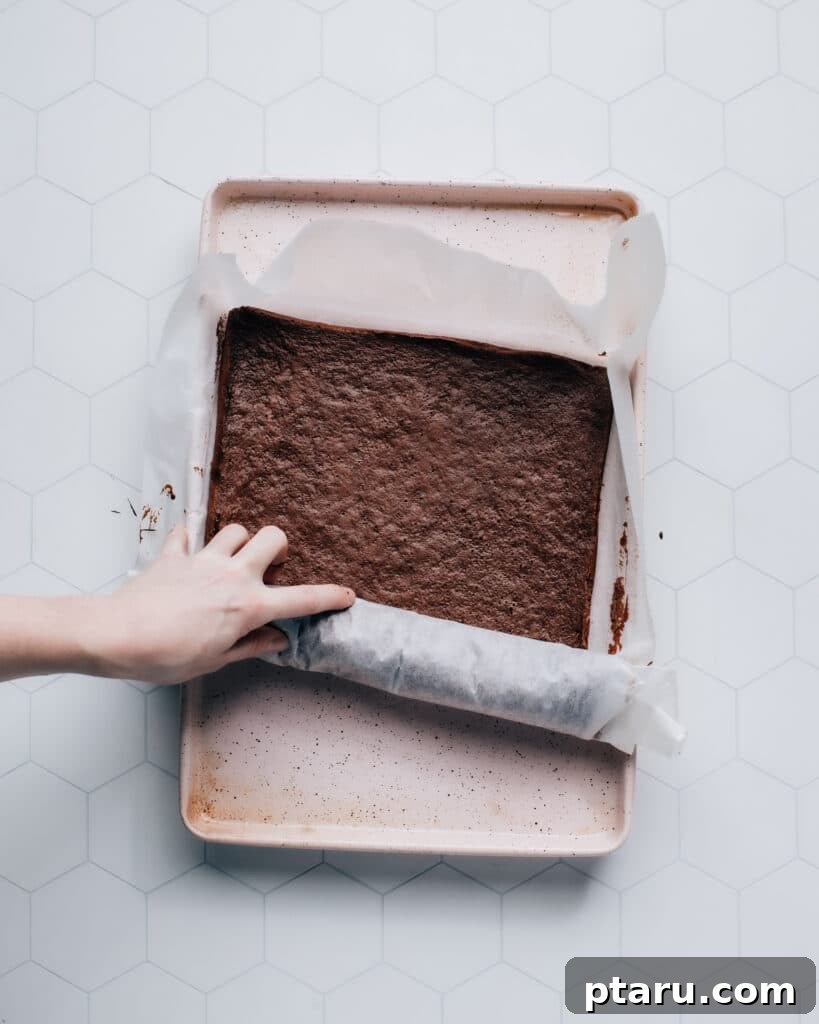
Initial Roll (While Warm)
The critical first step for a perfect Swiss roll is to roll the cake while it’s still warm. This trains the cake to set and cool in the correct spiral shape, preventing cracks when you unroll it later for filling. Here’s how to do it with ease:
- Allow the cake to cool for just a few minutes in the pan, until it’s warm enough to handle without burning your fingers.
- Leave the cake exactly where it is in the pan, and start gently rolling it up with the parchment paper, beginning from one of the short edges. The parchment acts as a natural guide and prevents sticking.
- Once rolled, transfer the parchment-wrapped roll to a wire cooling rack to cool completely. It’s crucial for the cake to be fully cooled before you attempt to unroll and fill it.
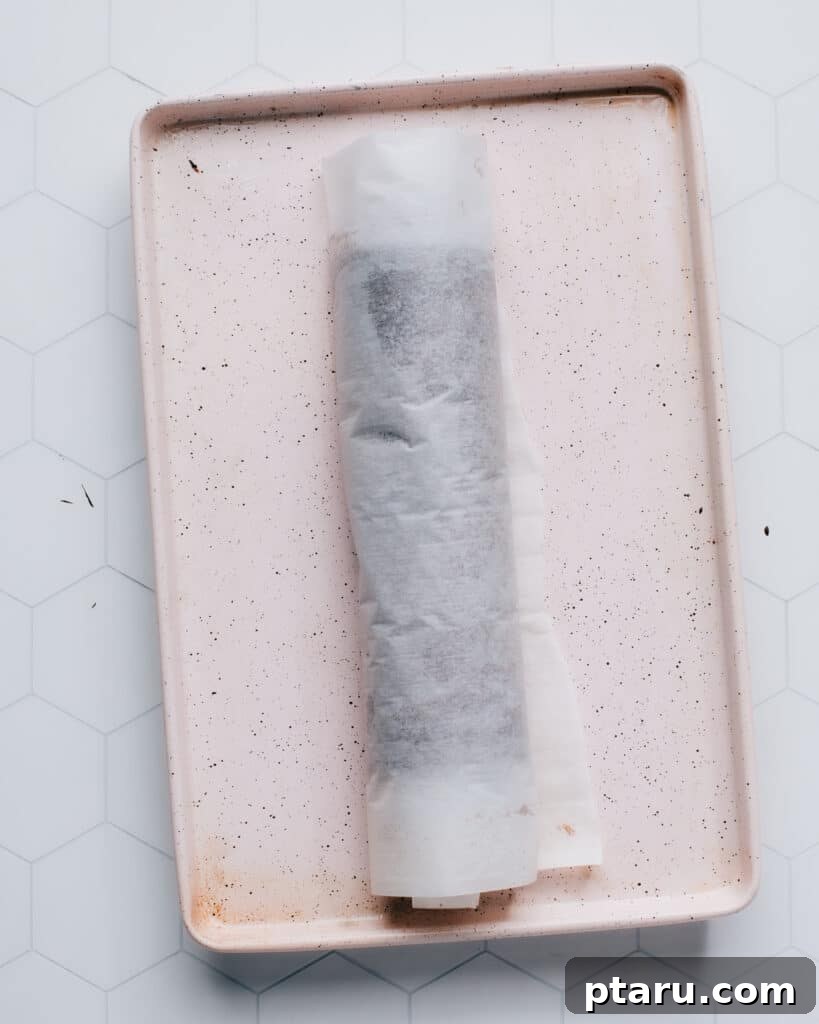
Serving Suggestions & Creative Decorations
While a dusting of confectioners’ sugar is classic and elegant, there are many ways to elevate your Chocolate Swiss Roll Cake. This versatile dessert can be dressed up for any occasion.
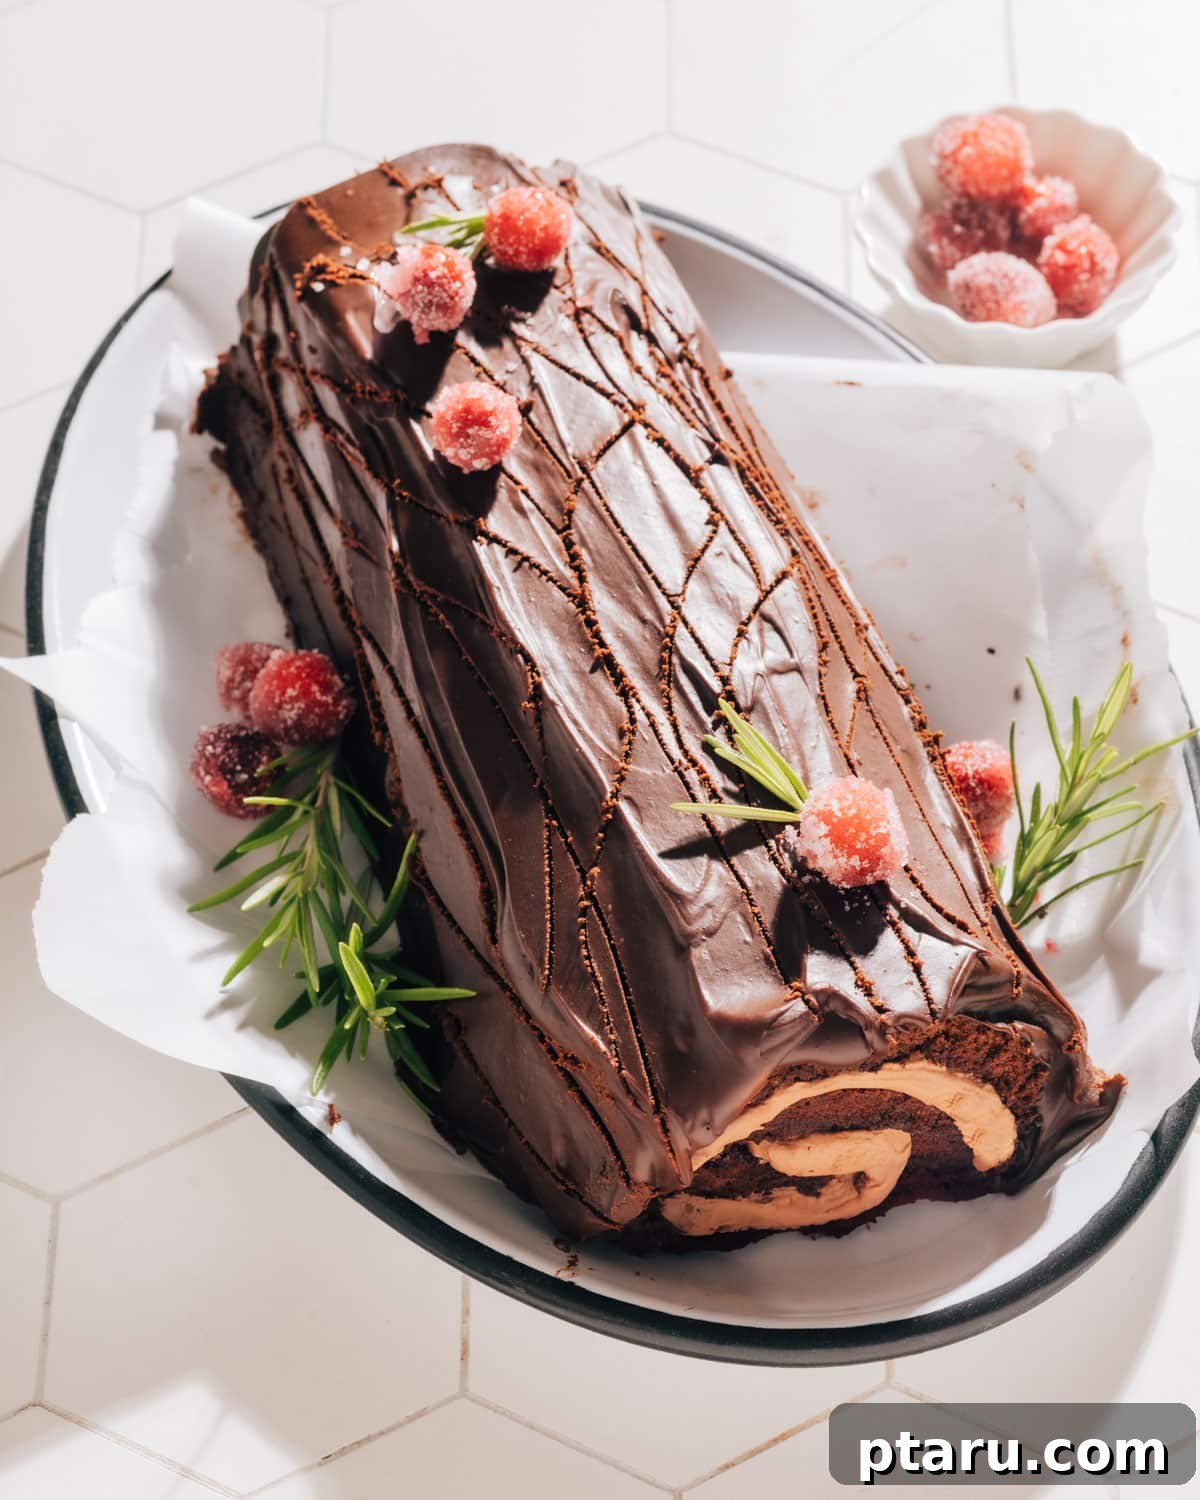
Transform into a Festive Yule Log (Bûche de Noël)
For a stunning holiday dessert, transform your Chocolate Swiss Roll into a beautiful Yule Log. This festive presentation requires just a few extra touches:
- Decorate the entire roll cake with a rich, smooth ganache. A simple microwave ganache works perfectly and is quick to prepare.
- Garnish with festive elements like sugared cranberries (which add a beautiful sparkle and tart contrast) and fresh sprigs of rosemary, mimicking evergreen branches. You can also add meringue mushrooms or chocolate bark for an even more rustic, woodland effect.
Other Decoration Ideas
- Chocolate Shavings: Use a vegetable peeler or grater to create elegant chocolate curls or shavings over the top of the cake.
- Fresh Berries: Strawberries, raspberries, or cherries add a burst of color and fresh flavor, especially during warmer months.
- Cocoa Dusting: A light dusting of cocoa powder instead of confectioners’ sugar can deepen the chocolate aesthetic.
- Chocolate Glaze Drizzle: For extra indulgence, drizzle melted chocolate or a thin chocolate glaze over the top.
Recipe: Chocolate Swiss Roll Cake
By: Jennifer Pallian BSc, RD
Prep Time: 45 minutes
Cook Time: 10 minutes
Servings: 10
Ingredients
For Cake
- 4 large eggs, separated
- ½ cup + ⅓ cup granulated sugar (divided use)
- 1 tsp pure vanilla extract
- ½ cup all-purpose flour (64 g)
- ⅓ cup cocoa powder (35 g)
- 1 tsp baking powder
- ⅛ tsp fine sea salt
- ⅓ cup milk
- Confectioners’ sugar for dusting
For Chocolate Cream Filling
- 1 cup whipping cream, very cold
- 2 ½ tbsp cocoa powder, sifted
- ¼ cup confectioners’ sugar, sifted
- ½ tsp vanilla extract
Instructions
For Cake:
- Preheat oven to 375ºF (190ºC). Line an 11×17″ (28×43 cm) sheet pan with parchment paper, allowing an overhang on the short edges. Lightly grease the parchment paper.
- In a stand mixer fitted with the whisk attachment, beat the egg whites on medium speed until foamy.
- With the mixer still running, gradually add ½ cup of the granulated sugar, about a tablespoon at a time, allowing each addition to incorporate before adding more.
- Increase speed to high and beat until medium-stiff peaks form. The meringue should hold its shape but have a slightly droopy tip. Scrape the beaten egg whites into a separate bowl and set aside. Do not wash the mixer bowl.
- Return the mixer bowl to the stand mixer. Add the egg yolks and the remaining ⅓ cup granulated sugar. Beat with the whisk attachment on medium speed until the mixture is creamy and light in color, approximately 2 minutes.
- Reduce speed to low and beat in the vanilla extract until just combined.
- In a separate medium bowl, whisk together the all-purpose flour, cocoa powder, baking powder, and fine sea salt until well combined.
- With the mixer on low speed, add ⅓ of the dry flour mixture to the egg yolk mixture and beat until just incorporated. Add ½ of the milk and beat on low until combined. Repeat this process, adding the remaining flour mixture in two additions and the remaining milk in one addition. Beat only until just combined after each addition to avoid overmixing.
- Remove the mixer bowl from the stand mixer. Gently fold in the reserved beaten egg whites using a large silicone spatula. Use a cutting and folding motion to maintain the airiness, being careful not to deflate the batter.
- Scrape the batter onto the prepared sheet pan and spread it evenly into the corners using an offset spatula.
- Bake for 10-12 minutes, or until the cake loses its glossy shine and the center feels slightly springy to the touch.
- Remove the pan from the oven. Let the cake cool in the pan for a few minutes, just until you can comfortably handle it without burning your fingers.
- While still warm, gently roll the cake up with the parchment paper, starting from one of the short edges. Transfer the parchment-wrapped roll to a wire cooling rack and allow it to cool completely to room temperature. This cooling step is essential for preventing cracks during the final unrolling and filling.
For Chocolate Cream Filling:
- In a stand mixer fitted with the whisk attachment, whip the very cold whipping cream on high speed until soft peaks form.
- Sift in the cocoa powder and confectioners’ sugar. Continue whipping on high speed until medium-stiff peaks form, ensuring the cream is light, fluffy, and holds its shape. Stir in the vanilla extract.
To Assemble:
- Once the cake is completely cold, gently unroll it on a clean work surface, leaving it on top of the parchment paper it was rolled in.
- Evenly spread the chocolate cream filling over the entire surface of the cake, leaving a small border free along the short edges.
- Carefully roll the cake back up, starting from the same short edge you used for the initial roll. As you roll, gently peel the cake away from the parchment paper.
- Place the finished Swiss roll seam-side down on your desired serving platter. If you are worried about transfer, you can use a rimless baking sheet or a pizza peel to help move it.
- For a neater presentation, you may wish to trim away the slightly less-than-perfect end slices.
- Cover the cake loosely with plastic wrap and refrigerate for at least 2 hours. Chilling allows the cake to firm up, making it much easier to slice cleanly. It also allows the cake to absorb moisture from the filling, improving its texture.
- Just before serving, lightly dust the cake with additional confectioners’ sugar. This cake can be made up to 24 hours in advance.
Notes
Make-Ahead Tip: Chilling this cake overnight not only makes it significantly easier to slice, but the cake also absorbs moisture from the filling, resulting in an even more tender and harmonious texture. Consider baking and assembling it a day before you plan to serve for the best results.
Optional Ganache Topping
- ¾ cup heavy cream
- 6 oz finely chopped dark chocolate
Instructions for Ganache:
- In a microwave-safe bowl, combine the heavy cream and finely chopped dark chocolate.
- Microwave in 20-second intervals, stirring thoroughly between each burst, until the chocolate is completely melted and the mixture becomes smooth and glossy.
- Allow the ganache to cool slightly at room temperature to thicken to a spreadable consistency before applying it to your Swiss roll or Yule log.
Tip: Don’t be afraid to stir more than you think is necessary – residual heat from the cream will continue to melt any tiny chocolate pieces, ensuring a perfectly smooth ganache.