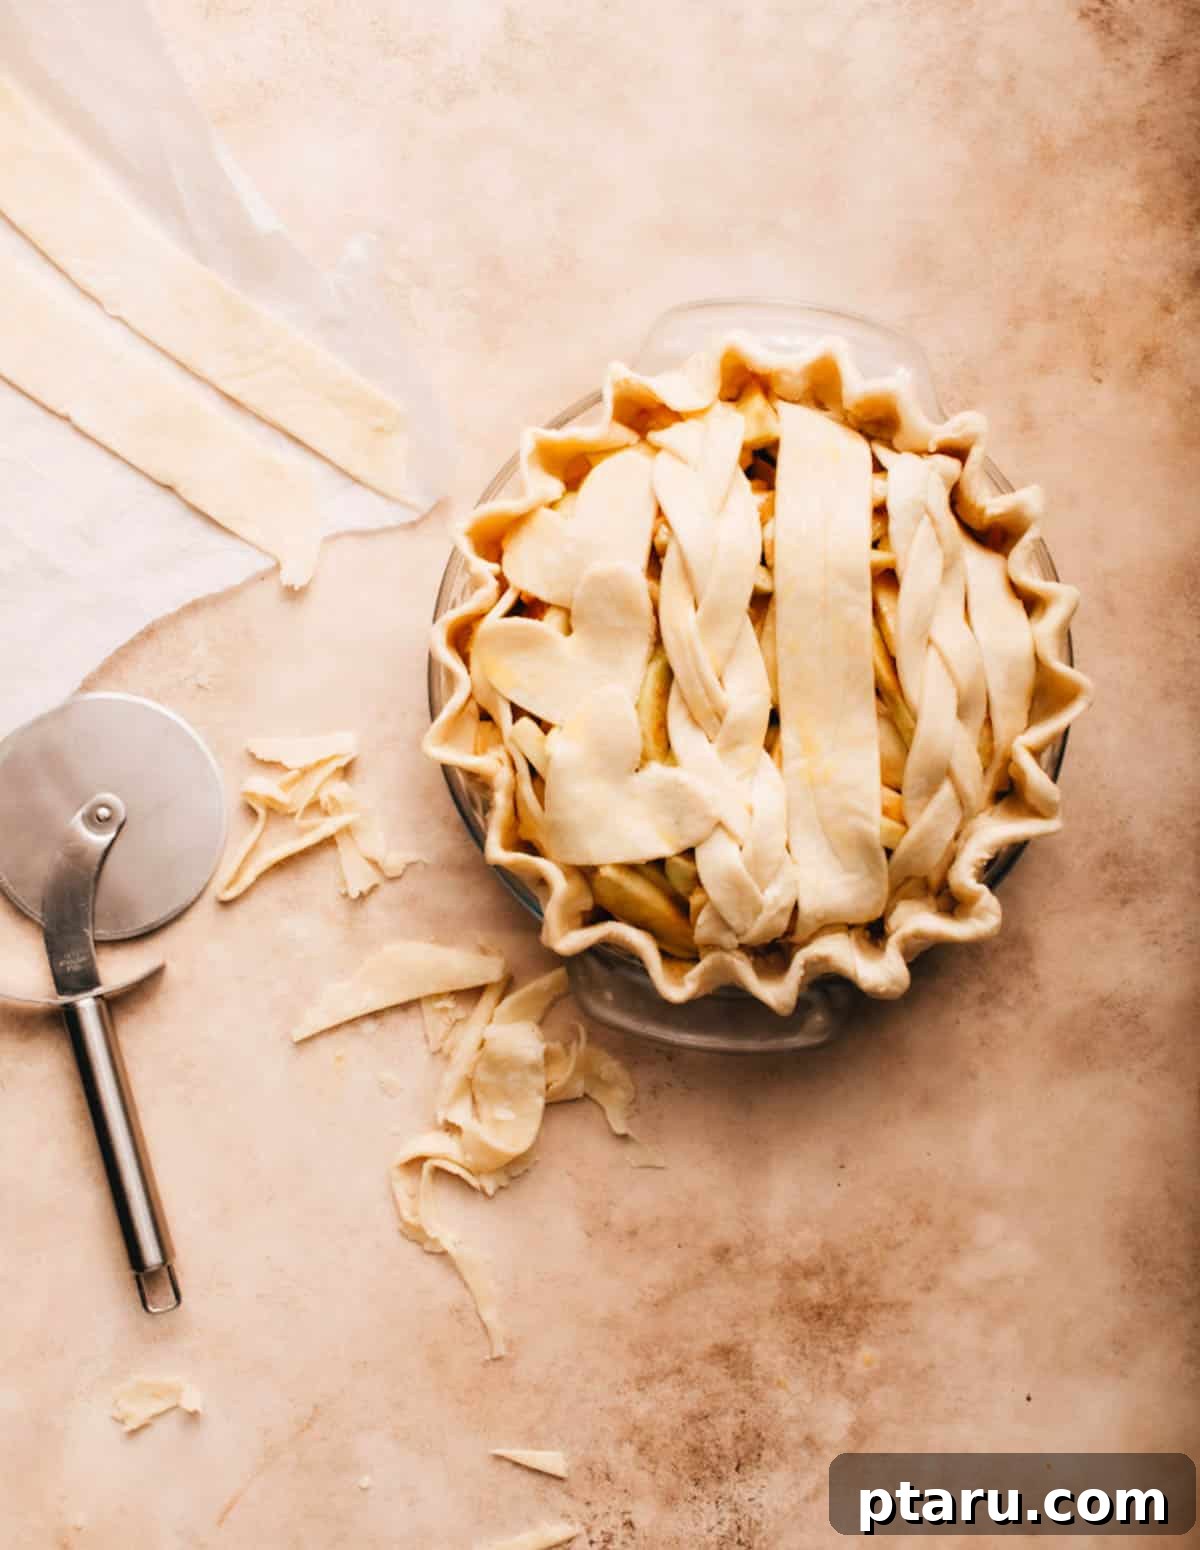
Welcome to the ultimate guide for creating a truly **foolproof, easy pie crust (without a food processor** or any other specialized equipment). This recipe promises a **PERFECTLY flaky, tender, and richly buttery pie crust every single time**, transforming your baking experience and impressing anyone lucky enough to taste your pies.
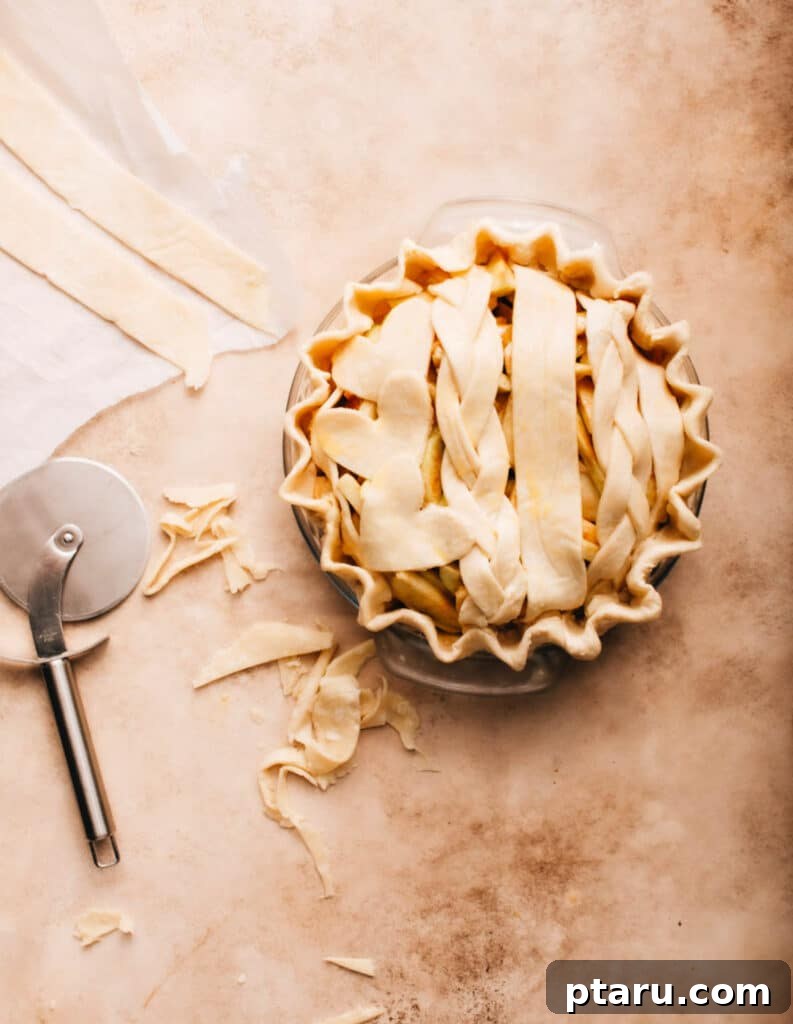
As a food scientist, I’ve dedicated years to perfecting this recipe, ensuring it’s not only incredibly simple but also scientifically sound. In fact, this very pie crust recipe was featured in Chatelaine magazine, and their Creative Director declared it the best pie crust she’d ever had. This isn’t just a recipe; it’s a meticulously crafted method designed to demystify pie baking and empower you to create professional-quality results right in your own kitchen.
I rely on this versatile pie dough annually for my quintessential easy apple pie and easy pumpkin pie recipes, especially during Thanksgiving celebrations. Its consistent quality and delightful texture make it the ideal foundation for both sweet and savory fillings. Forget complicated techniques or expensive gadgets; with a few fundamental principles and readily available ingredients, you’re about to unlock the secret to homemade pie crust perfection.
The Science Behind the Perfect Pie Crust: Achieving Flaky & Tender Harmony
Creating an exceptional pie crust involves a delicate balance of opposing forces: you want it to be both exquisitely **flaky** and remarkably **tender**. This seemingly contradictory goal is where many home bakers encounter challenges. However, by understanding a few key scientific principles, you can consistently achieve both.
The Pie Crust Paradox: Flakiness vs. Tenderness
The quest for the perfect pie crust often feels like a battle between two desires:
- For a crust to be truly **tender**, the fat (butter, in our case) needs to be thoroughly worked into the flour. This coats the flour particles, inhibiting gluten development and resulting in a melt-in-your-mouth texture.
- Conversely, to achieve that coveted **flakiness**, you need distinct chunks of fat within the dough. These chunks create steam pockets during baking, which separate the layers of dough, giving you a light, airy, and flaky structure.
The challenge is to incorporate fat in a way that allows for both outcomes. My method addresses this by dividing the butter incorporation into two strategic phases.
Embracing Butter for Unrivaled Flavor
Beyond texture, flavor is paramount. If you, like me, insist on a pie crust that is a delicious component of the pie rather than merely a vehicle for filling, then **butter is the only choice for your fat**. Its rich, creamy flavor is unmatched by shortening or lard. However, butter presents its own challenge: a lower melting point.
- Butter tends to melt quickly, especially in a warm kitchen. If the butter melts too soon during baking, it can spread out before the dough structure is set, leading to a tough, greasy crust and loss of any decorative crimping.
- The solution lies in temperature control: ensuring your dough is freezer-cold before it enters a super-hot oven. This rapid temperature change allows the starch in the flour to set and the gluten structure to firm up *before* the butter completely melts and spreads, thereby preserving both flakiness and intricate details.
5 Secrets to the Best Pie Crust (Without a Food Processor)
These five principles, rooted in baking science, are the cornerstone of this foolproof recipe:
1. **Strategically Mix Most of the Butter into the Flour until it Resembles Damp Breadcrumbs.** This crucial initial step focuses on creating tenderness. By coating a significant portion of the flour in fat, you effectively minimize gluten formation. Gluten, when overdeveloped, makes pie crust tough. Using about two-thirds of your cold butter for this step ensures your dough will be incredibly soft and tender. The flour particles become enrobed in butter, preventing them from absorbing excessive water and forming strong gluten strands.
2. **Then, Incorporate the Remaining Butter in Visible Pieces.** This second phase is all about achieving that delightful flakiness. The visible chunks of cold butter will melt during the baking process, releasing steam that creates distinct layers and air pockets within the crust. These pockets are what give pie crust its characteristic light, airy, and flaky texture. Think of it as creating tiny internal ovens that lift and separate the dough.
3. **Always Choose Real Butter as Your Primary Fat.** For a pie crust that boasts exceptional flavor and texture, unsalted butter is non-negotiable. While shortening or lard can yield flakiness, they simply can’t compete with butter’s rich, dairy-forward taste. To overcome butter’s lower melting point, ensure your dough is exceptionally cold – ideally freezer-cold – before it goes into a preheated, super-hot oven. This shock of temperature allows the crust to set quickly, locking in those flaky layers before the butter has a chance to fully liquefy and disperse.
4. **Embrace the Power of Chilling the Dough.** Chilling is not merely a suggestion; it’s a vital step for three fundamental reasons:
- **Maximizes Flakiness and Prevents Spread:** A preliminary chill hardens the butter, ensuring those precious fat pockets remain intact. This prevents the butter from melting out too quickly in the oven, leading to a flakier crust and helping the dough hold its shape and decorative crimping.
- **Relaxes Gluten and Prevents Shrinkage:** Working the dough (even gently) develops gluten. Resting time allows these tightened gluten strands to relax, resulting in a softer, more pliable crust that won’t spring back when rolled or shrink excessively during baking.
- **Ensures Optimal Hydration for a Smooth Texture:** During resting, water has time to fully absorb into the flour particles, distributing moisture evenly throughout the mixture. This hydration process makes the dough smoother, more cohesive, and easier to handle without cracking.
5. **Work Smarter, Not Harder: Roll the Dough Out *Before* Chilling it for the Long Rest.** This ingenious technique saves you considerable effort and yields a far more tender crust. Attempting to roll out rock-hard, fridge-cold dough is an exercise in frustration, often leading to cracked edges and an over-worked, tough final product. By rolling the dough while it’s still pliable, *before* its extended refrigeration, you complete all the necessary pressing and pulling actions *before* the gluten has a chance to fully relax during the subsequent long chill. This allows the dough to truly soften and retain its perfectly rolled shape, giving you an unparalleled tender crust with minimal effort. Your arms will thank you, and your pies will be legendary!
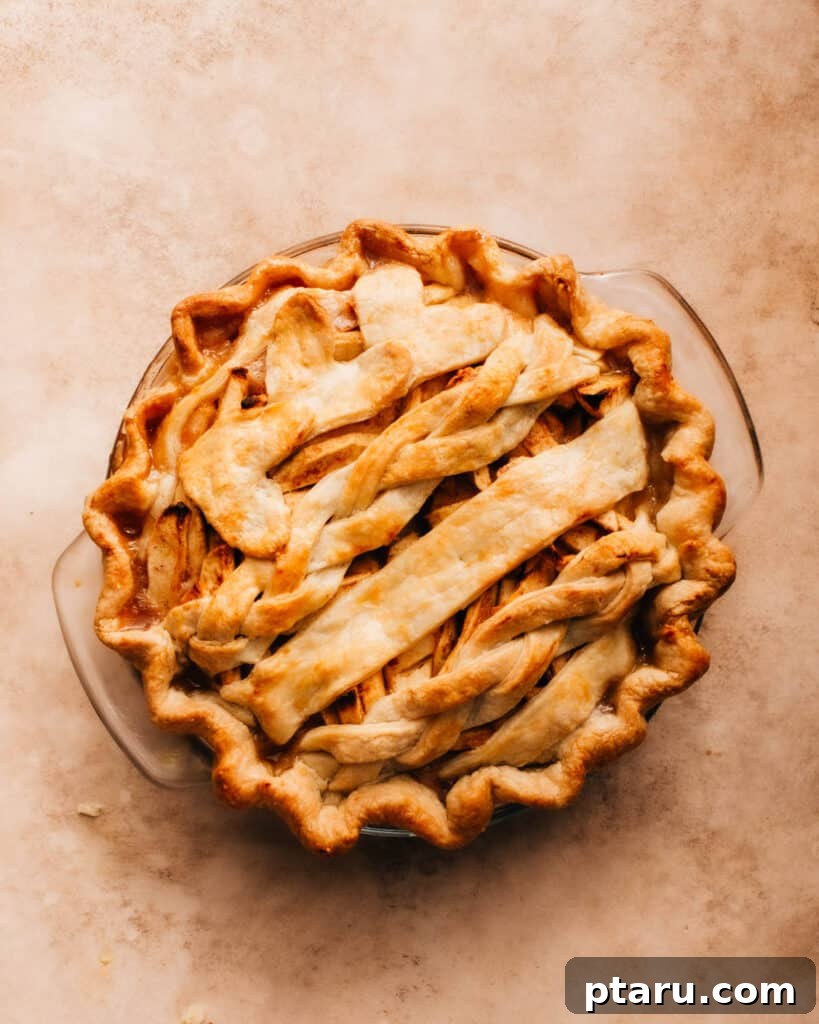
Perfect Pie Crust: Just 3 Essential Ingredients
Achieving pie crust perfection doesn’t require a long list of exotic ingredients. This recipe simplifies baking down to three fundamental components, each playing a critical role in the final texture and flavor:
- All-Purpose Flour: This is the backbone of your pie crust, providing the essential structure that holds everything together. Its moderate protein content is ideal for developing just enough gluten for elasticity without becoming tough, especially when handled correctly.
- Kosher Salt: Far more than just a flavor enhancer, salt plays a crucial role in balancing the richness of the butter and bringing out the natural taste of your pie filling. It also contributes to the strength and elasticity of the gluten network, leading to a firmer, more stable crust.
- Unsalted Butter: The star of the show! Unsalted butter is key for its tenderizing properties, rich flavor, and its ability to create that highly sought-after flaky texture. Using unsalted butter gives you precise control over the salt content in your recipe. Ensure it’s very cold when you start, as this is critical for achieving optimal flakiness.
Explore More Crust Creations: Once you’ve mastered this classic, why not try my No Roll Pie Crust for effortless baking or my delicious Graham Cracker Crust Recipes for a different kind of dessert base!
Variations and Substitutions for Your Pie Crust
While the classic butter crust is unparalleled, you can easily adapt this recipe to suit different dietary needs or flavor preferences:
- Salted Butter: If your pantry only holds salted butter, simply adjust the recipe by reducing the kosher salt to 1 teaspoon. This ensures a balanced flavor profile without making your crust overly salty.
- Whole Wheat Flour: For a rustic, nuttier flavor and added fiber, substitute half of the all-purpose flour with whole wheat flour. This will result in a slightly denser texture but a wonderfully earthy taste that pairs well with fruit pies.
- Crisco or Vegetable Shortening: For a dairy-free pie crust, or if you prefer a different kind of flakiness, you can replace the butter entirely with vegetable shortening. Keep in mind that shortening will result in a less flavorful crust compared to butter, as it lacks the rich dairy notes.
- Lard: For a truly traditional, old-school pie crust with exceptional flakiness and a unique savory depth, consider replacing up to half of the butter with cold lard. This is a favorite among seasoned bakers for a reason!
Essential Tools for Homemade Pie Crust Success
One of the beauties of this no-food-processor method is that you don’t need fancy equipment. Before you embark on your pie crust journey, gather these basic tools to ensure a smooth and efficient baking process:
- Kitchen Scale: While optional, a digital kitchen scale provides the most accurate measurements for flour, butter, and water. Precision in baking, especially for pie crust, significantly impacts the outcome.
- Large Bowl: Essential for combining your dry ingredients and incorporating the butter without making a mess.
- Whisk: Perfect for aerating your flour and evenly distributing the salt.
- Silicone Spatula: Ideal for gently mixing in the ice water and bringing the dough together without overworking it.
- Parchment Paper: A baker’s best friend! You’ll use this to help shape, roll out the dough without sticking, and for convenient chilling. (Ever wondered what parchment paper is made of, anyway?)
- Rolling Pin: A standard rolling pin is all you need to achieve an even thickness.
- Pie Plate: Your vessel for pie perfection. A standard 9-inch pie plate is versatile for most recipes.
- Baking Sheet: Placing your pie plate on a baking sheet in the oven helps distribute heat evenly and catches any potential drips, keeping your oven clean.
- Aluminum Foil: Useful for covering and chilling the rolled-out dough and crucial for protecting the edges of your pie crust from over-baking and burning.
Step-by-Step Guide: How to Make Pie Crust Without a Food Processor
Follow these detailed steps, complete with the “why” behind each action, to create the most incredible homemade pie crust you’ve ever tasted.
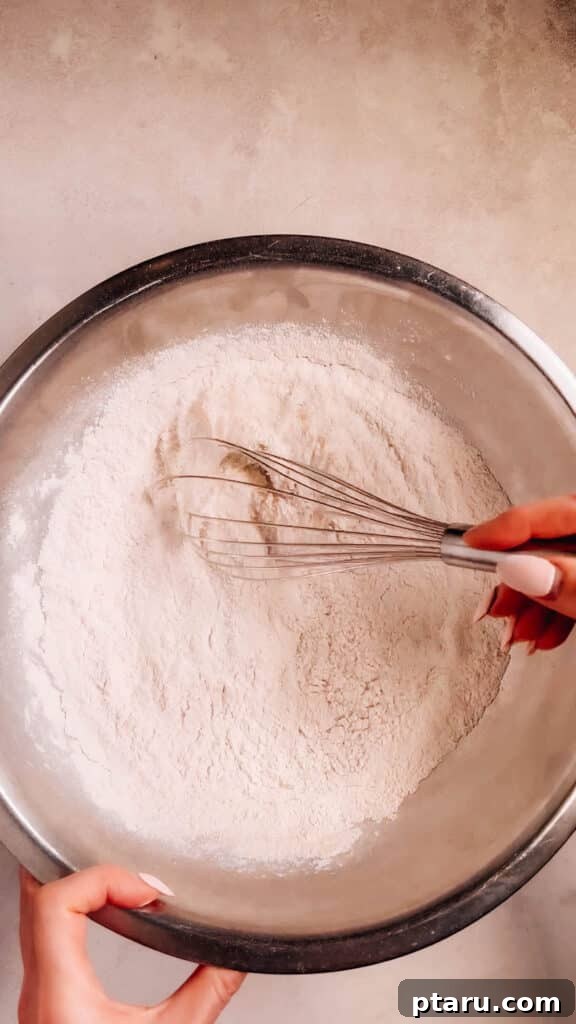
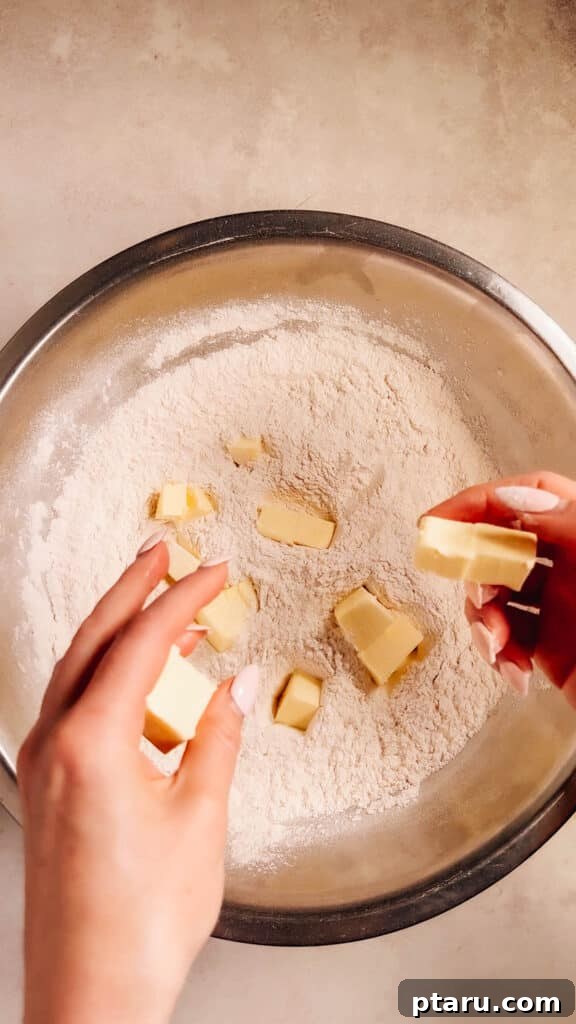
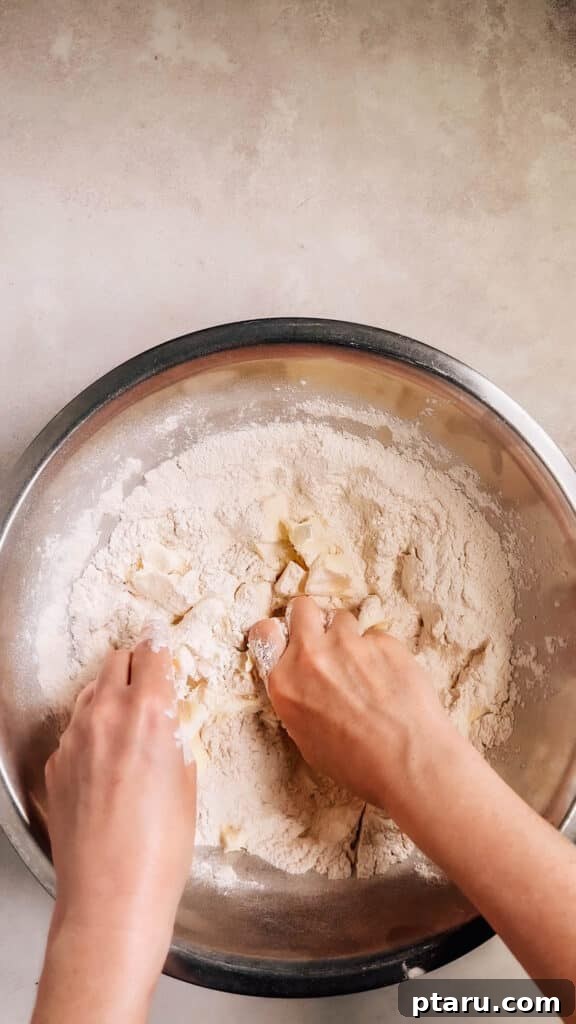
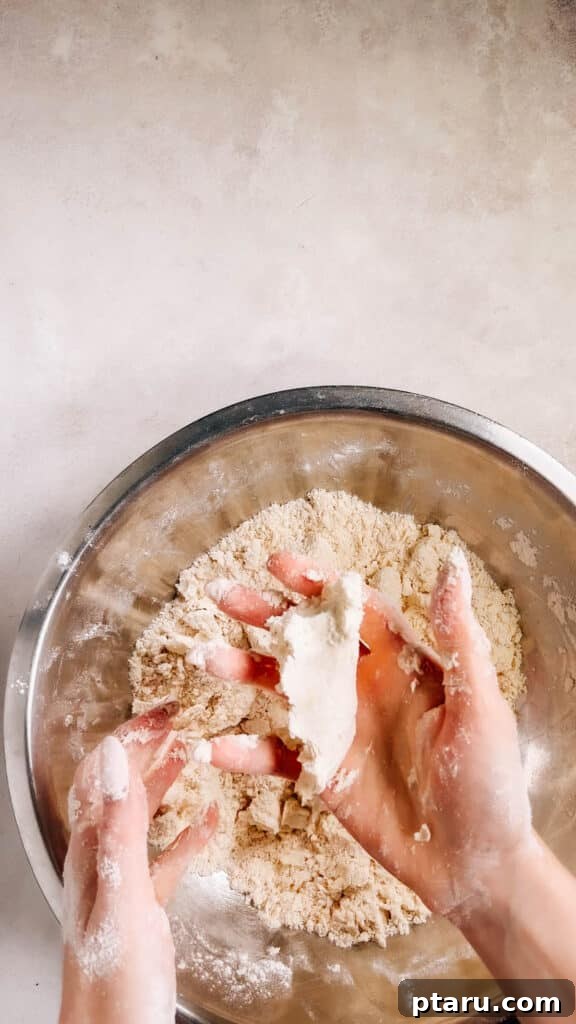
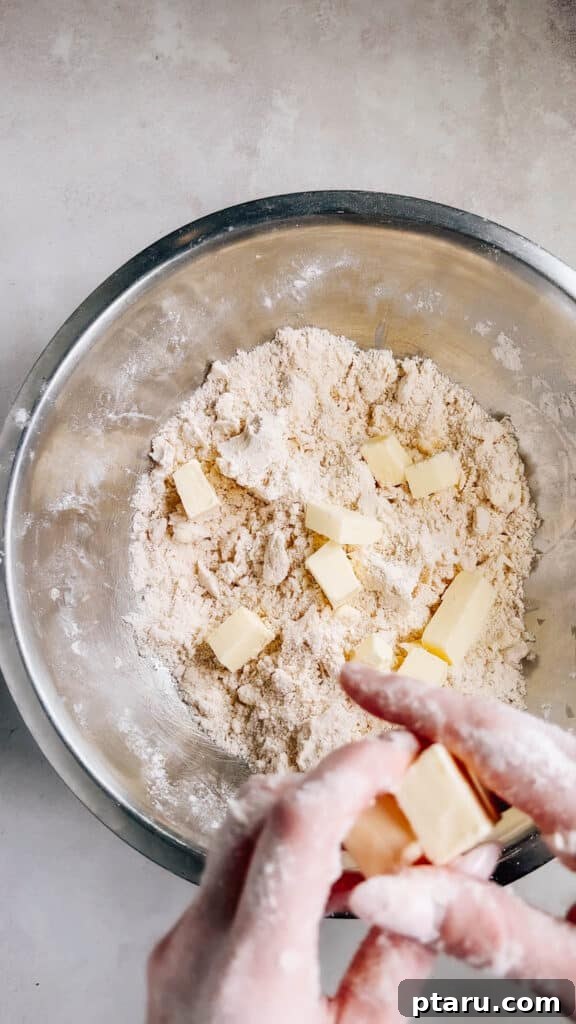
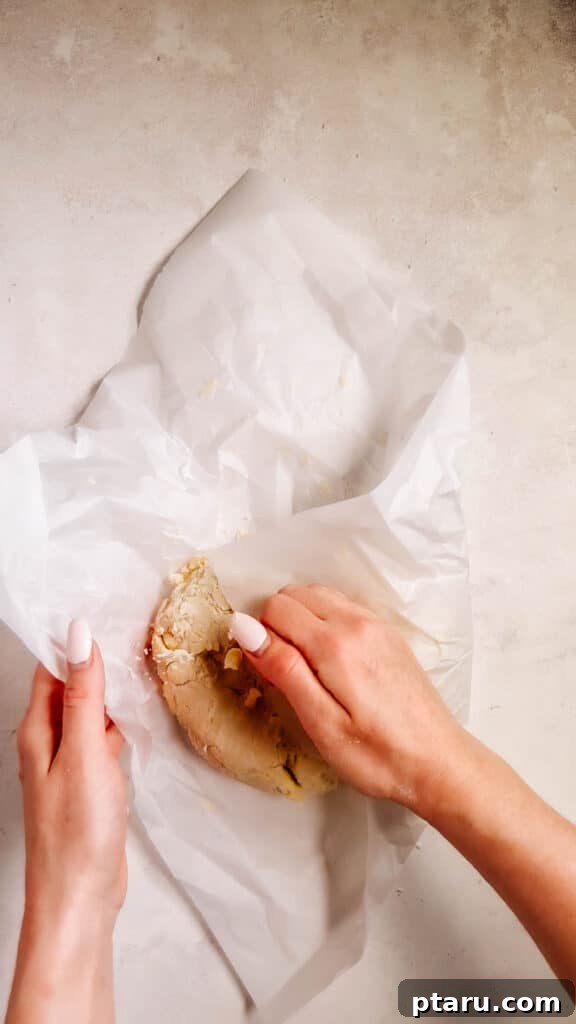
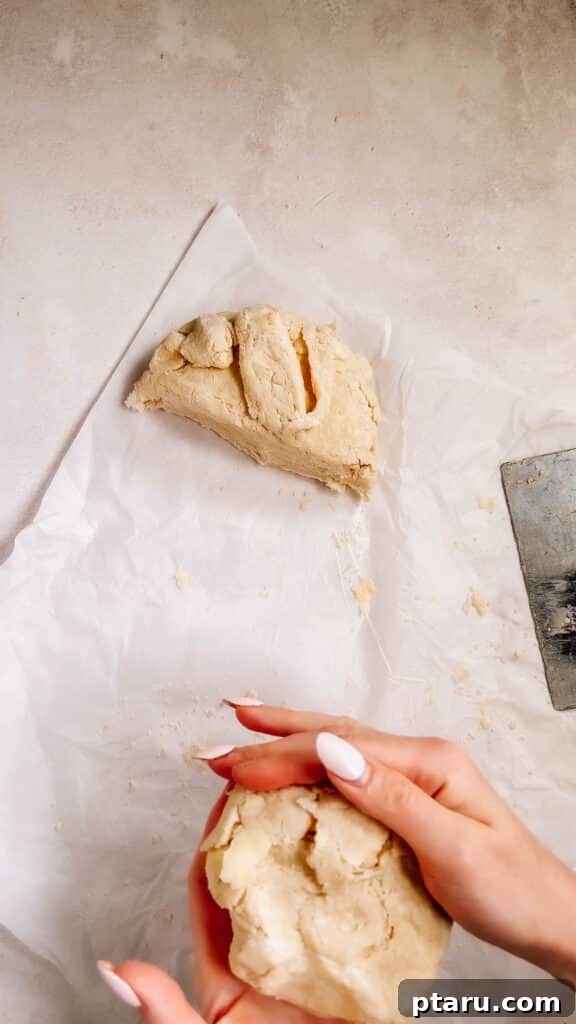
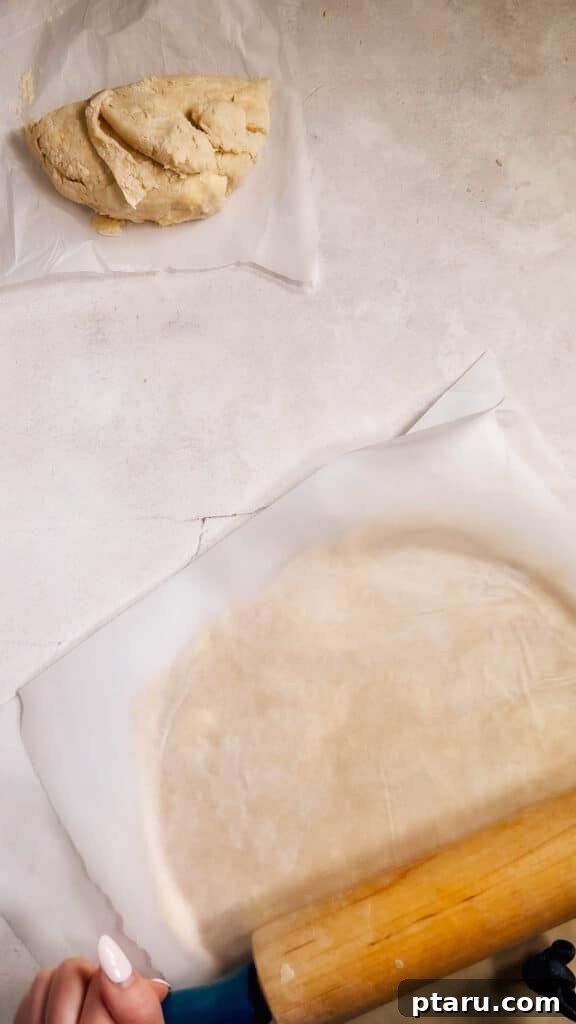
As a food scientist, I believe understanding the “why” behind each step is crucial for mastering baking. Here, I’ll provide the rationale to ensure your pie crust turns out perfectly every time.
1. Measure Ingredients with Precision:
While it might seem basic, accurate measurement is the foundation of baking success. Using a kitchen scale is highly recommended for flour, butter, and water, as volume measurements (cups) can vary greatly depending on how ingredients are packed. For instance, one cup of flour can differ significantly in weight if measured loosely versus tightly packed. Always use the “metric” option on recipe cards for precise weights if available. This eliminates inconsistencies and ensures the correct ingredient ratios.
- Science: A precise ratio of ingredients is paramount. Too much flour leads to dry, crumbly dough. Excess butter can make the dough greasy and unable to hold its shape. Too much water results in a tough crust due to increased gluten development.
2. Incorporate the First Portion of Butter (for Tenderness):
In a large bowl, combine your dry ingredients. Then, add approximately two-thirds of your very cold butter, cut into 1-inch pieces. Using your fingertips, gently rub and squeeze the butter pieces into the flour. Continue until the mixture resembles coarse almond meal or damp breadcrumbs. The goal is to coat the flour particles in fat, creating a fine, crumbly texture. This stage is dedicated to achieving ultimate tenderness.
- Science: By coating the flour particles with fat, you create a barrier that prevents them from absorbing too much water when liquid is added. This limits gluten formation, which is key to a soft, tender, and melt-in-your-mouth crust. When this first batch of butter is properly worked in, the mixture will hold together when squeezed, as shown in image #4.
3. Add Remaining Butter (for Flakiness):
Now, add the remaining one-third of your cold butter to the mixture. This time, instead of fully incorporating it, aim to leave some visible, pea-sized chunks of butter. Gently mix it in, but don’t overwork it. Once combined, place the bowl in the freezer for about 10 minutes to ensure the butter stays super cold.
- Science: These distinct chunks of cold butter are essential for flakiness. During baking, the water within these butter pieces turns to steam, creating pockets of air that separate the layers of dough. This rapid steam expansion is what gives your pie crust its light, airy, and wonderfully flaky texture. You should see distinct butter pieces like those visible in image #5.
4. Introduce Ice Water:
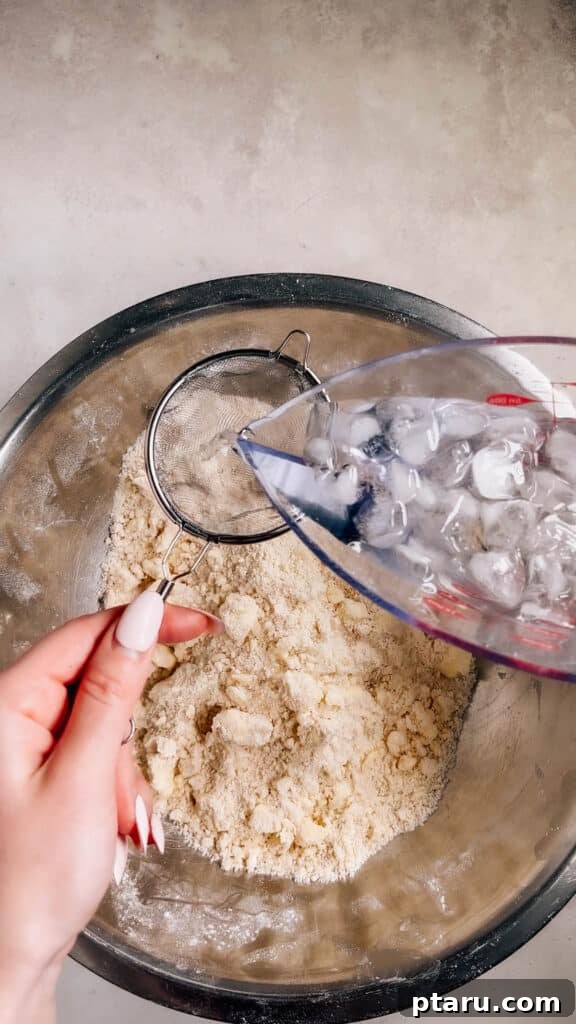
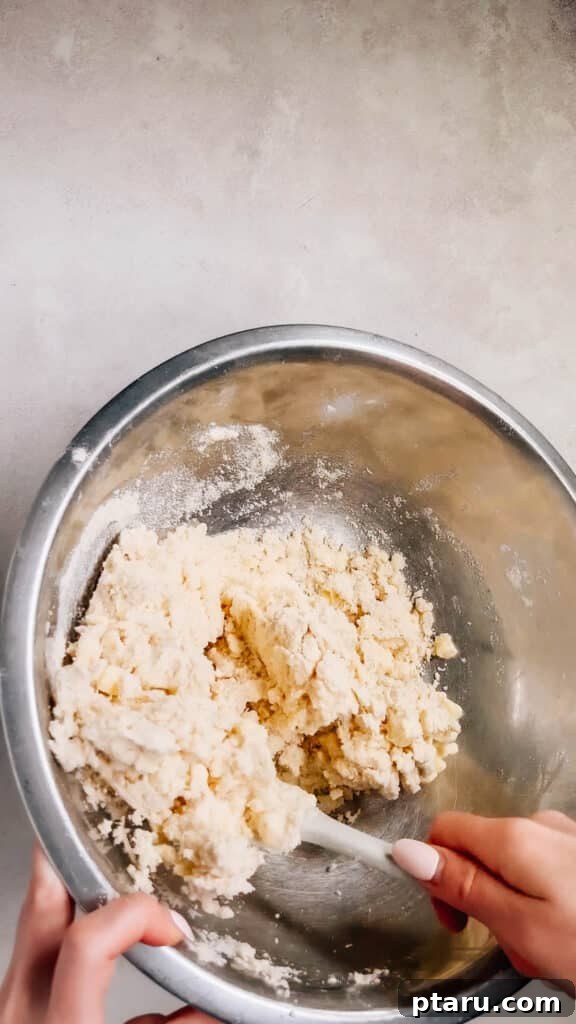
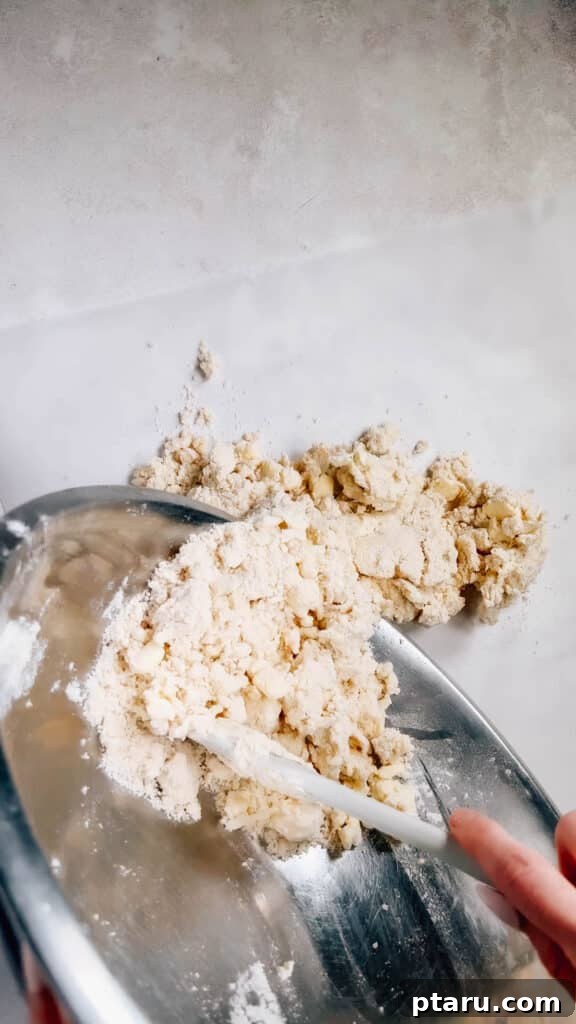
Remove the bowl from the freezer. Carefully add very cold ice water to the mixture. To ensure accuracy and maintain the cold temperature, fill a large measuring cup with ice, top it with water, then pour the required amount through a sieve into another measuring cup. Alternatively, if you have a kitchen scale, weigh the water directly into the bowl. Using a rubber spatula, gently toss the water through the flour mixture until it just begins to clump together and looks like a shaggy, messy mixture (similar to images #6 & #7). Do not knead it. Dump this mixture onto a large sheet of parchment paper.
- Science: Cold water is crucial for two reasons: it helps keep the butter solid, which is vital for developing flaky layers, and it brings the dough together with minimal gluten development, preventing a tough crust. The less warm your hands or environment, the better for maintaining butter integrity.
5. Gently Fold and Press to Form the Dough:
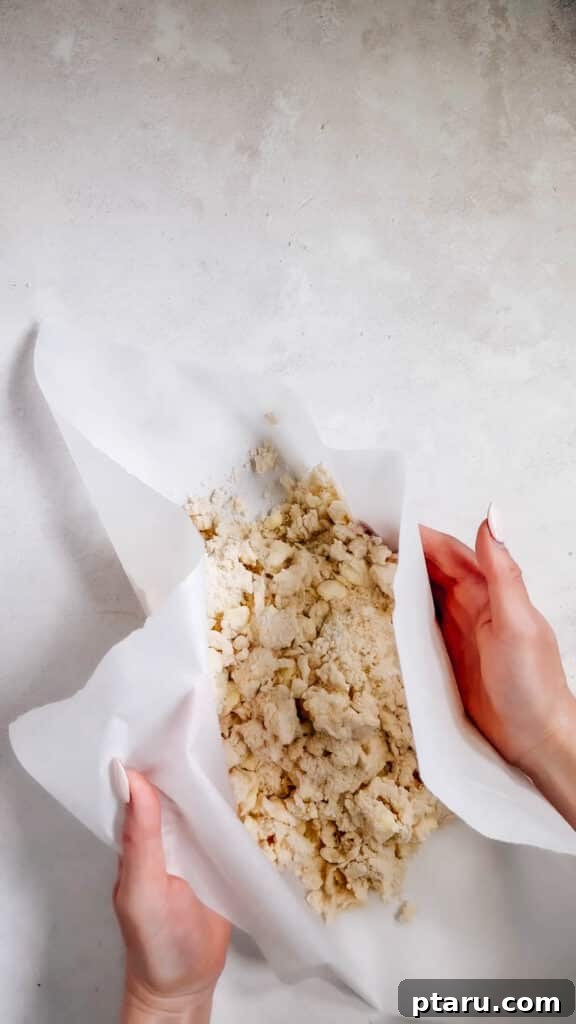
Using the parchment paper, fold the sides over the messy dough mixture. Gently press the mixture together, moving the dough around as you press, until it forms a cohesive, round disc. This technique is much gentler than traditional kneading, which can overdevelop gluten. As you press, the mixture will gradually come together into a rough disc (as seen in image #8). It might still appear dry and slightly cracked at the edges at this point, which is perfectly normal.
- Science: This folding and pressing action combines the ingredients without overworking them, which is essential for maintaining a tender crust. By minimizing direct hand contact and kneading, you control gluten development, ensuring the dough remains pliable and delicate.
6. Allow a Short Rest:
Once formed into a disc, set the dough aside at room temperature for about 30 minutes.
- Science: This brief resting period allows the flour to fully hydrate, meaning the water is completely absorbed and distributed throughout the mixture. Proper hydration makes the dough softer, smoother, and significantly easier to roll out without tearing or breaking, leading to a more consistent and beautiful crust.
7. Divide and Roll the Dough (The Smart Way!):
After resting, divide the dough in half. Take each piece and roll it out immediately between two sheets of parchment paper. Notice how the dough is now smoother and less crumbly than before resting (refer to image #9). You can trim away any very shaggy edges with a knife or pastry cutter, discarding the excess dough. Each rolled-out dough circle should be approximately 2 inches larger in diameter than your pie plate.
- Science: This is one of the most critical “secrets”: rolling the dough out *before* its extended chilling time. This ingenious step saves you immense effort and results in a dramatically more tender crust. By performing the rolling, which involves pressing and pulling, *before* the long rest, you give the gluten ample time to relax completely during the subsequent chill. Attempting to roll out cold, stiff dough would tighten the gluten again, making it tough and challenging to work with. Rolling warm, pliable dough is not only easier but also preserves the tenderness.
8. Chill the Rolled Dough (The Long Chill):
Stack the two pieces of rolled-out dough with their parchment paper in between, then wrap the entire stack tightly in aluminum foil. Place it in the refrigerator for a minimum of 2 hours, or ideally, overnight. This step is non-negotiable for success.
- Science: This extended chilling period is supremely important. It allows the fat in the dough to firm up completely, ensuring those precious butter chunks are solid and ready to create flaky layers when baked. Furthermore, it provides sufficient time for the gluten network to fully relax, guaranteeing an exceptionally tender and easy-to-handle crust. Do not skip or shorten this vital step!
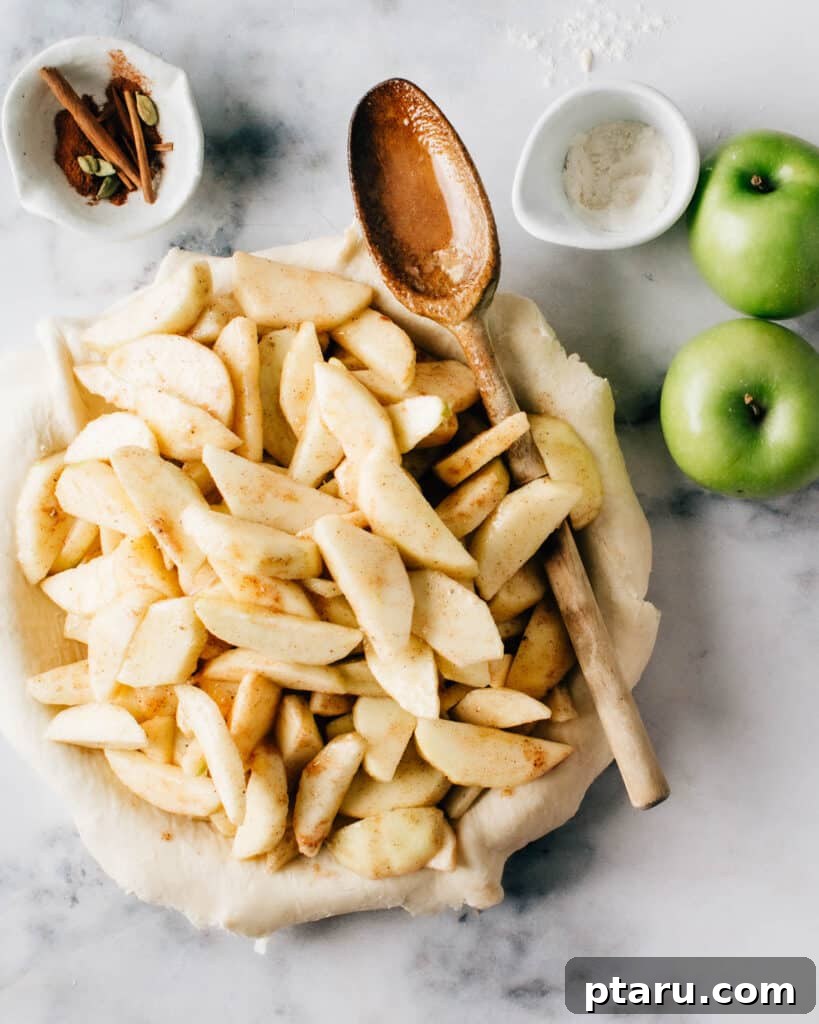
9. Prepare Your Pie for Baking:
Once your pie is assembled with its filling and top crust (if applicable), crimp the edges to your liking and cut a few steam vents in the top crust. Then, place the entire pie in the freezer for 30 minutes. Meanwhile, put a baking sheet into your oven and preheat the oven to 425°F (220°C).
- Science: This pre-bake freezing step is a game-changer. It sets the shape and structure of the pie, ensuring that any delicate crimping or decorative elements hold up beautifully during baking and don’t collapse. Starting with a cold pie also provides a larger temperature differential, which is beneficial for flakiness.
10. Bake Your Pie with Confidence:
Place the frozen pie on the preheated baking sheet in the hot oven. Bake at 425°F (220°C) for 20 minutes. After 20 minutes, lower the oven temperature to 350°F (175°C) and continue baking until the pie is golden brown and the filling is cooked through and bubbling. If the edges of your crust start to brown too quickly, loosely cover them with strips of aluminum foil.
- Science: The initial burst of high heat is critical. It rapidly converts the water in the butter chunks to steam, causing the crust to puff up dramatically and create those desired flaky layers. This high heat also quickly sets the outer structure of the crust, preventing your meticulously crimped edges from melting and spreading. Lowering the heat allows the pie to continue cooking gently through to the center without burning the exterior, ensuring a perfectly baked pie from crust to core.
Mastering the Rolling Technique: Rotating and Flipping for Even Thickness
Even with perfectly prepared dough, the rolling technique can make or break your pie crust. This method, my tried-and-true approach, ensures an evenly thin crust without sticking or overworking the dough:
- **Prepare Your Workspace:** Begin by placing your dough disc squarely between two generously sized sheets of parchment paper. This genius trick eliminates the need for extra flour, preventing a dry crust and making sticking a non-issue. For stability, let one corner of the bottom parchment sheet hang slightly over the edge of your counter, and use your hip or body weight to gently pin it down. This stops the parchment from slipping as you roll.
- **Initial Gentle Roll:** Using your rolling pin, start rolling the dough gently from the center outward. Avoid pressing down too hard; allow the natural weight of the rolling pin to do most of the work. The goal is to gradually expand the dough disc.
- **First Quarter Turn:** After a few rolls, carefully give the entire dough-parchment sandwich a quarter turn (90 degrees). This rotation is crucial for achieving an even circular shape and consistent thickness.
- **Continue Rolling:** Roll the dough a few more times, again working from the center outward. Focus on applying even pressure across the surface.
- **Second Quarter Turn & Repeat:** Rotate the dough another quarter turn. Continue this pattern of rolling and turning. By consistently rotating the dough, you prevent it from being rolled out more in one direction than another, which is a common cause of unevenly shaped crusts.
- **Careful Flip (The Thinning Secret):** Gently peel back the top layer of parchment paper. Carefully flip the dough over, and then reposition the parchment paper back on top. This flipping action helps you roll the dough even thinner and ensures that the dough isn’t adhering to one side of the parchment, preventing wrinkles or uneven stretching.
- **More Rolling and Turning with Another Flip:** Continue the rolling and rotating process. You’ll likely want to flip the dough one more time during this stage. Keep a close eye on the thickness of the dough; you’re aiming for a uniform level across the entire piece.
- **Final Check & Transfer:** Once you’re satisfied with the thickness – typically about 1/8-inch (3mm) for a standard pie crust – you’re ready! Gently peel off the top parchment paper. You can then easily invert the dough into your pie dish, using the bottom parchment paper to guide and support it.
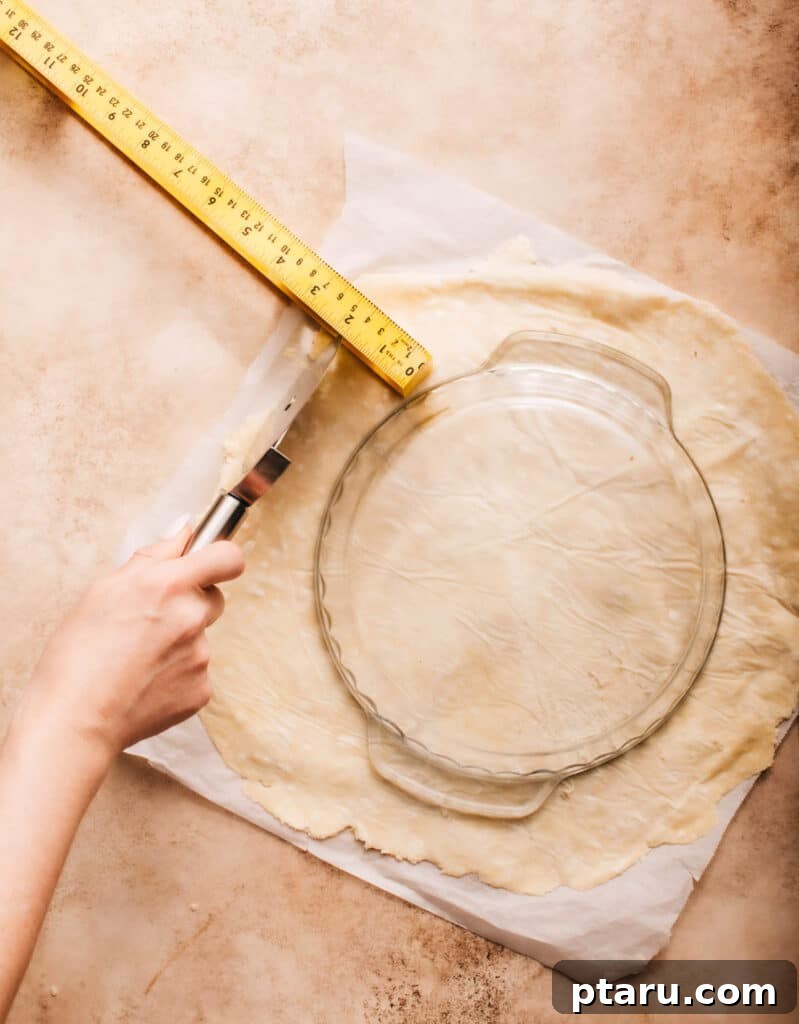
Determining the Ideal Size for Your Rolled Pie Crust
Knowing how large to roll out your pie dough is crucial for a perfectly fitting crust with ample overhang for crimping. The exact diameter depends on the size and depth of your specific pie pan.
Generally, a good rule of thumb is to roll the dough to be about **2 to 3 inches larger in diameter** than the top edge of your pie pan.
Let’s use a common example: for a standard 9-inch pie pan:
- The **base diameter** of the pan is typically 9 inches.
- You need to account for the **depth of the pan**. For a standard pan, this usually means adding an extra 1 to 1.5 inches for each side to cover the slope and reach the rim. This brings your required diameter to approximately 11-12 inches.
- Finally, if you plan to create a decorative **overhang or crimped edges**, you’ll want to add another 1 to 2 inches beyond the pan’s rim.
Therefore, for a standard 9-inch pie pan, you would typically aim to roll out your dough to a diameter of **about 12 to 14 inches**. This generous sizing ensures you have more than enough dough to fully line the base and sides, and to create beautiful, robust edges without stretching or tearing the dough, which can lead to shrinkage during baking.
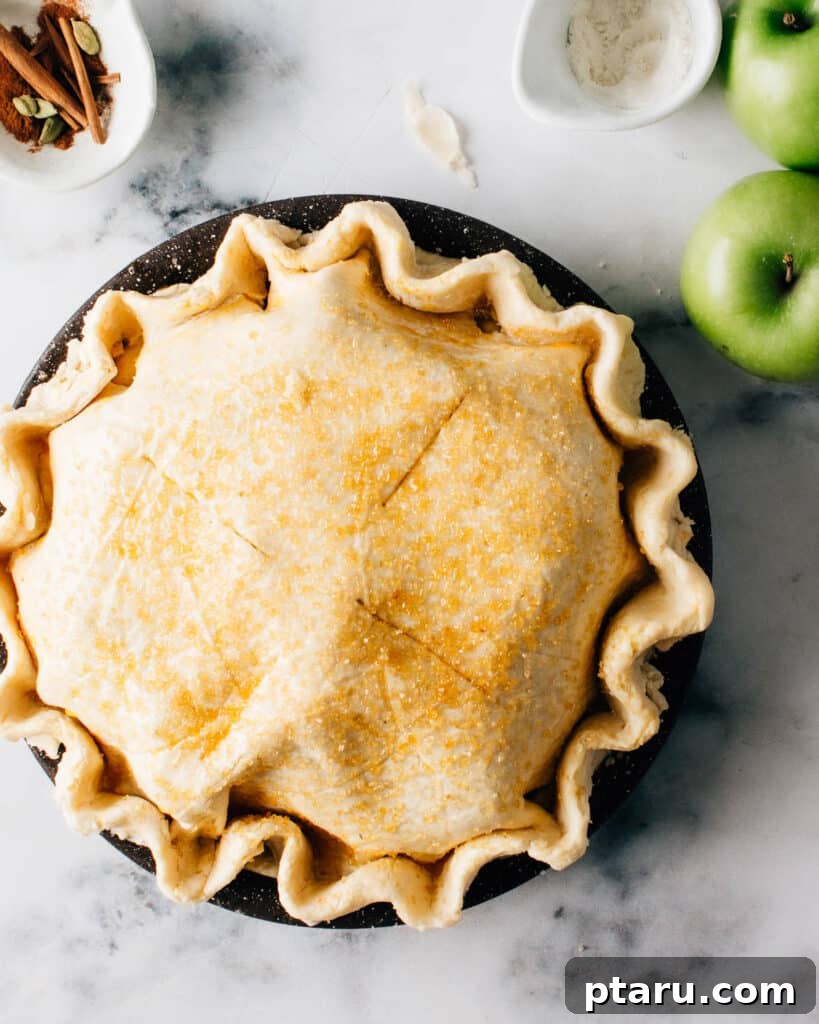
Homemade Pie Crust: Make-Ahead and Storage Tips
Maximize your baking efficiency and enjoyment by preparing your pie crust in advance and storing any leftovers correctly. This makes impromptu pie baking a breeze!
- Make Ahead (Refrigerated Dough): You can prepare this pie dough up to 3 days in advance. After rolling it out between parchment paper sheets, simply stack the sheets with the dough in between, wrap them tightly in aluminum foil or plastic wrap, and store flat in the refrigerator. This allows you to have fresh dough ready to go when inspiration strikes.
- Freeze Unbaked Dough: For longer storage, this dough freezes beautifully for up to 3 months. Again, I highly recommend rolling it out between parchment paper before freezing. This saves a significant amount of effort later. Wrap the rolled-out dough (still between parchment) tightly in foil and then place it in a freezer-safe zip-top bag to prevent freezer burn. When ready to use, thaw it in the refrigerator overnight before baking.
- Freeze Baked Pie: If you’ve baked an entire pie and want to save some for later, it freezes exceptionally well for up to 2 months. Ensure the pie is completely cooled to room temperature before wrapping it thoroughly in aluminum foil, then placing it in an airtight container or a heavy-duty freezer bag. This prevents moisture loss and ice crystal formation.
- Reheating Frozen Pie: To reheat a frozen, fully baked pie, there’s no need to thaw it first. Simply bake it from frozen at 350°F (175°C), covered loosely with foil, for about 60 minutes, or until it’s warmed through to the center. If you do opt to thaw it in the refrigerator first, you can reduce the reheating time.
- Storing Leftovers (Baked Pie): Any leftover slices of baked pie can be stored in the refrigerator for up to 5 days. Keep it in an airtight container or covered tightly with plastic wrap to maintain its freshness and prevent it from drying out or absorbing refrigerator odors.
With these comprehensive tips and techniques, you are now perfectly positioned to create the most flaky, tender, and beautiful pies of your dreams. Mastering this fundamental pie crust recipe opens up a world of baking possibilities. Now that you know how to make pie crust, here’s how to make virtually any kind of fruit pie with one easy recipe!
Absolute Must-Try Pie Recipes to Showcase Your Perfect Crust
Now that you’re a pie crust master, it’s time to put your skills to delicious use! This versatile all-butter crust is the ideal foundation for an endless array of sweet and savory fillings. Here are some of my all-time favorite pie recipes that I highly recommend trying:
Favourite Sweet Pies:
- Easy Apple Pie Recipe: A classic for a reason, perfect with this flaky crust.
- Easy Pumpkin Pie Recipe: Creamy, spiced, and utterly delightful, especially for the holidays.
- Strawberry Rhubarb Pie: A wonderful balance of tart and sweet, celebrating seasonal flavors.
- Blueberry Pie: Bursting with juicy blueberries, a true summer favorite.
- Chai Apple Pie: A unique twist on apple pie with aromatic chai spices.
- Peanut Butter Pretzel Pie: An indulgent and irresistible dessert for peanut butter lovers.
Favorite Savory Pies:
- Hearty Beef Pot Pie: Comfort food at its finest, topped with a rich, tender crust.
- Delicious Turkey Pot Pie: A fantastic way to use up leftovers or enjoy a comforting meal.
- Flavorful Samosa Pie: An innovative and delicious fusion, bringing Indian flavors to a classic format.
Frequently Asked Questions About Making Pie Crust
Here are some common questions bakers have when making pie crust, along with my expert answers:
Why is my pie crust tough?
A tough pie crust is almost always a sign of overdeveloped gluten. This can happen if you: 1) add too much water to the dough, 2) overwork the dough by kneading too vigorously, or 3) don’t chill the dough sufficiently, allowing the butter to warm up and the gluten to activate. Follow my tips for gentle handling and precise water measurement, and always prioritize proper chilling and resting times to ensure tenderness.
Can I use margarine instead of butter?
While technically possible, using margarine is not recommended for the best flavor and texture. Margarine contains more water and less fat than butter, and often has different melting characteristics. This can result in a greasier crust with less flakiness and an inferior flavor compared to an all-butter crust. For truly exceptional results, stick to high-quality unsalted butter.
Do I need to blind bake my pie crust?
Blind baking (pre-baking) your pie crust is typically necessary for pies with wet fillings that won’t be baked for very long (e.g., custard pies, quiches) or for pies with no-bake fillings (e.g., cream pies). It prevents a soggy bottom crust and ensures the crust is fully cooked. For fruit pies with longer baking times, you often don’t need to blind bake, but a short pre-bake can still help guarantee a crispy bottom. Always check your specific pie recipe for instructions.
How can I prevent my pie crust edges from burning?
Pie crust edges often brown faster than the rest of the pie. To prevent burning, create a “pie shield” from aluminum foil. Once the edges reach your desired golden color (usually after the initial high-heat baking phase), loosely cover them with strips of foil. You can buy pre-made pie shields, or easily fashion one yourself from a large piece of foil.
My dough is cracking when I roll it. What should I do?
Cracking dough is often a sign that it’s too cold or too dry. If it’s too cold, let it sit at room temperature for 5-10 minutes to warm up slightly and become more pliable. If it feels too dry, you may not have added enough water initially, or it needs more resting time for hydration. Sometimes, gently pressing the cracked edges back together with your fingers or patching with a small piece of dough works too.
Print Recipe
Foolproof, Easy Pie Crust Recipe (Without Food Processor)
Jennifer Pallian BSc, RD
20 minutes
1 hour 3 minutes
2 hours 30 minutes
3 hours 53 minutes
12
Video
For a visual guide on making this pie crust, watch the video below:
Note: This video is an embedded placeholder and may not reflect the original dynamic player.
Ingredients
- 3 cups all-purpose flour
- 1 ½ tsp kosher salt
- 1 ⅛ cup unsalted butter cold, and cut into 1-inch pieces
- 9 ½ tbsp ice water (that’s 1/2 cup + 1 1/2 tbsp)
Instructions
-
**Measure Your Dry Ingredients:** In a large bowl, combine flour and salt. Whisk briefly to ensure even distribution.
-
**Add Most of the Butter:** Add about two-thirds of the cold, 1-inch butter pieces (roughly 3/4 cup or 170 g butter) to the flour mixture. Using your fingers, rub and squeeze the butter into the flour until the mixture resembles almond meal or damp crumbs. This step is crucial for a super tender crust.
-
**Add Remaining Butter and Chill:** Incorporate the remaining butter into the mixture, but leave some small, visible chunks. These distinct chunks create pockets of steam during baking, making the pie flaky. Place the bowl containing the mixture in the freezer for 10 minutes to ensure the butter remains very cold.
-
**Add Ice Water:** Take the bowl out of the freezer and gently mix in the precisely measured ice-cold water. Use a rubber spatula to toss the water through the flour mixture until it starts to clump together. The mixture will look somewhat messy, and that’s perfectly normal at this stage.
-
**Form the Dough:** Dump the entire clumpy mixture onto a large piece of parchment paper. Use the parchment paper to help you gently fold and press the dough together a few times until it forms a cohesive, flattened ball or disc. Let this disc rest at room temperature for 30 minutes to allow the flour to hydrate.
-
**Roll Out the Dough:** Divide the dough into two equal pieces. For each piece, place it between two sheets of parchment paper and roll it out using your preferred technique (see the “Rolling Technique” section above) until it forms a circle approximately 1/8-inch thick. Trim away any very shaggy edges. The rolled dough circles should be about 2 inches larger in diameter than your pie plate to allow for depth and crimping.
-
**Chill the Rolled Dough:** Stack the two rolled-out dough pieces with their parchment paper in between. Wrap the entire stack tightly in aluminum foil and chill in the refrigerator for at least 2 hours, or ideally, overnight. This crucial step firms the butter and relaxes the gluten for a tender, flaky crust.
-
**Preheat Oven with Baking Sheet:** When ready to bake, place a baking sheet in your oven and preheat the oven to 425°F (220°C).
-
**Assemble and Bake Your Pie:** Carefully transfer one rolled dough circle into your pie plate. Fill your pie with your desired filling, then top with the second crust if making a double-crust pie. Crimp the edges of the pie crust to seal, and cut a few steam vents in the top crust. Place the assembled pie in the freezer for 30 minutes while the oven finishes preheating. Bake the frozen pie on the hot baking sheet for 20 minutes at 425°F (220°C). Then, lower the oven temperature to 350°F (175°C) and continue baking until the crust is golden brown and the filling is cooked through and bubbling (baking time will vary depending on the pie filling).
Nutrition
Nutrition information (per serving, 1 of 12 servings):
- Calories: 239 kcal
- Carbohydrates: 22 g
- Protein: 3 g
- Fat: 17 g
- Saturated Fat: 10 g
- Polyunsaturated Fat: 1 g
- Monounsaturated Fat: 4 g
- Trans Fat: 1 g
- Cholesterol: 41 mg
- Sodium: 414 mg
- Potassium: 5 mg
- Fiber: 3 g
- Sugar: 1 g
- Vitamin A: 480 IU
- Calcium: 25 mg
- Iron: 1 mg
Nutrition information is automatically calculated and should only be used as an approximation.