
My easy Chicken Biryani recipe is a fast, incredibly satisfying one-pot dinner that my half-Indian family absolutely adores. It brings the rich, aromatic flavors of traditional Indian biryani to your table with significantly less effort, making it a perfect solution for busy weeknights.

The Allure of Biryani: Traditional vs. Shortcut
Traditional Indian biryani is a culinary masterpiece, often reserved for celebrations due to its intricate preparation. It involves a meticulous process: marinating the meat for hours, patiently frying onions to a deep, golden crisp, separately cooking aromatic basmati rice, blooming whole spices in ghee, and then carefully layering everything with fresh herbs, toasted nuts, and sometimes saffron-infused milk. This multi-pot, extended timing endeavor yields an incredibly delicious and complex dish, but it’s undoubtedly a project.
My shortcut biryani offers all the beloved flavors and textures of this classic Indian dish, streamlined into a single pot. It cleverly skips many of the traditional, time-consuming steps, allowing you to achieve tender, perfectly spiced chicken and fluffy rice cooked together. This method makes it one of my favorite chicken and rice dinner recipes, delivering authentic taste without the all-day commitment. You get a hearty, flavorful meal that feels special, yet is entirely weeknight-friendly.
Essential Ingredients for Your Shortcut Chicken Biryani
While my Amma’s real biryani might call for an extensive list of both whole and ground Indian spices, this simplified version uses a much more approachable selection. Each ingredient plays a crucial role in building the layered flavors that define a great biryani, even a shortcut one.
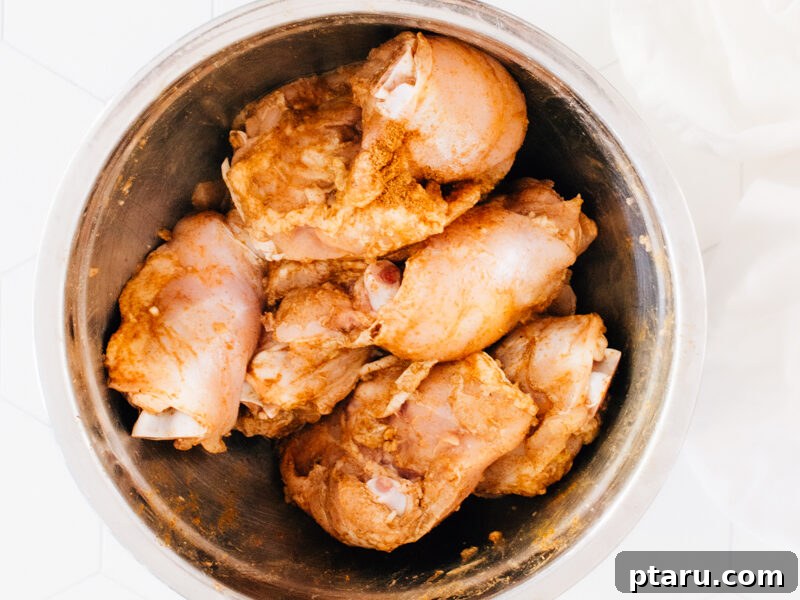
For the Flavorful Chicken Marinade
- Bone-in, skinless chicken thighs: I highly recommend bone-in chicken (simply remove the skin if it comes with it). The bones infuse the dish with incredible depth and flavor as it cooks, resulting in a more succulent and aromatic biryani. If using boneless, see variations below for cooking time adjustments.
- Lemon juice: Provides acidity to tenderize the chicken and brighten the overall flavor profile.
- Garlic: A foundational aromatic in Indian cuisine, adding pungent depth to the marinade.
- Garam masala: This fragrant spice blend is key to authentic biryani flavor. It’s a warming mix of spices like cumin, coriander, cardamom, cinnamon, and cloves. If you don’t have it, a good quality British/US-style curry powder can be substituted, though it will alter the color and exact flavor.
- Kosher salt: Essential for seasoning the chicken from within.
Building the Biryani Base
- Avocado oil: Or any neutral cooking oil with a high smoke point, used for sautéing the aromatics.
- Butter: Adds richness and a delicious nutty flavor that complements the spices beautifully.
- Onion: The base of almost any Indian dish. Slowly cooked until golden, onions provide sweetness and depth.
- Green chillies: For a gentle, fresh heat. Adjust quantity or remove seeds based on your spice preference.
- Garlic: More garlic for the biryani base amplifies the aromatic foundation.
- Garam masala or curry powder: As mentioned, garam masala offers the classic deep, earthy biryani flavor (resulting in a darker dish), while curry powder will yield a lighter color and a slightly different, though still delicious, taste.
- Paprika: Adds a beautiful reddish hue and a mild, sweet peppery note.
- Cayenne: For an adjustable kick of heat. Omit for a milder version.
- Turmeric: Contributes a vibrant yellow color and earthy, slightly bitter notes, also known for its health benefits.
- Tomato: Adds tanginess, moisture, and a rich umami depth to the sauce. Fresh diced tomatoes work best, but canned options are also noted in the recipe.
- Chicken broth: The liquid base for cooking the rice, ensuring deep chicken flavor throughout.
- White basmati rice: The star grain of biryani. Rinsing well is crucial for fluffy, separate grains.
- Bay leaf (optional): Adds a subtle, warm, aromatic background note.
- Kosher salt: For seasoning the biryani base and ensuring overall balanced flavor.
Full recipe quantities are meticulously listed in the detailed recipe card found at the bottom of this article.
Customizing Your Biryani: Variations and Substitutions
Feel free to adapt this versatile biryani recipe to suit your preferences and what you have on hand in your kitchen:
- Boneless chicken swap: If using boneless chicken thighs, cut them into large, even chunks. To prevent overcooking, cook them for approximately 15 minutes before the final resting period, ensuring they remain juicy. Boneless chicken breasts can also be used but may dry out more easily.
- Mild heat preference: To reduce the spice level, simply omit the cayenne pepper entirely. For a very mild flavor, you can also remove the seeds from the green chillies before chopping them.
- Vegetable add-ins: Boost the nutritional content and color by stirring in vegetables. Frozen peas or a few handfuls of fresh spinach can be gently folded in during the final rest period, allowing them to warm through without becoming overcooked or soggy.
- Dairy-free option: For a dairy-free version, effortlessly replace the butter with an equal amount of additional avocado oil or your preferred plant-based cooking oil.
- No broth on hand?: Don’t let a lack of chicken broth stop you! You can easily use water combined with a good quality bouillon cube or powder for a flavorful substitute.
- Add Fresh Herbs: A handful of fresh cilantro and mint, chopped, can be added to the biryani during the final rest or as a fresh garnish.
Should you love comforting chicken and rice dishes, you might also enjoy some of my other favorites, such as my hearty Cheesy Chicken Broccoli and Rice Casserole, or the elegant Oven-Baked Chicken and Rice with Lemon and Mushrooms.
Step-by-Step: Crafting Your Easy Chicken Biryani
This simple guide breaks down the process into easy, manageable steps, promising a cozy, delicious payoff. It’s truly weeknight-friendly and packs a huge punch of flavor. If you’re a fan of rich Indian flavors, you might also want to try my life-changing butter chicken recipe!
Marinating for Maximum Flavor
In a medium bowl, combine your chicken thighs with fresh lemon juice, minced garlic, garam masala (or curry powder), and kosher salt. Toss everything together until the chicken is thoroughly coated. Set this aside at room temperature while you prepare the rest of the biryani components. Even a quick 15-20 minute marinade works wonders for infusing the chicken with flavor and keeping it tender.
The Golden Onion Foundation
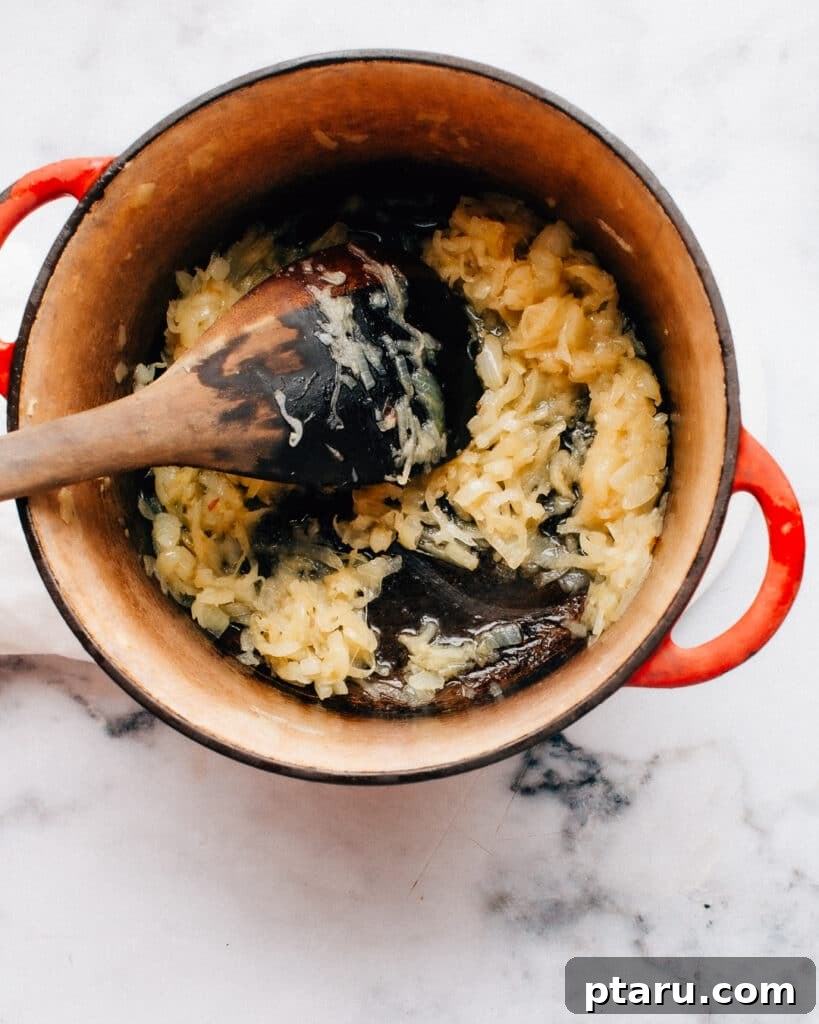
In a large, heavy-bottomed Dutch oven or pot, heat the avocado oil and butter over medium heat. Add the chopped onions along with a pinch of salt. Cook them slowly and patiently, stirring occasionally, until they become beautifully soft and achieve a deep golden-brown color. This slow caramelization is a critical step, as it builds the essential sweet and savory foundation for the biryani’s rich flavor profile.
Infusing Aromatic Spices and Tomato
Once the onions are golden, stir in the minced garlic, garam masala, paprika, cayenne, turmeric, and finely chopped green chillies. Cook this aromatic mixture for about two minutes, stirring constantly, until the spices are incredibly fragrant and have bloomed in the hot oil. Then, add the diced tomato (or tomato puree) and cook for just one minute more, allowing its juices to meld with the spices and create a vibrant, flavorful paste.
The Rice and Broth Harmony
Pour in the chicken broth, followed by the well-rinsed and drained basmati rice, the remaining kosher salt, and the optional bay leaf. Give everything a gentle stir to combine, ensuring the rice is evenly distributed. Bring the mixture to a gentle simmer. Rinsing the rice thoroughly beforehand is crucial, as it removes excess starch, preventing the grains from clumping together and ensuring a beautifully fluffy biryani.
Nestling the Chicken and Steaming to Perfection
Carefully nestle the marinated chicken thighs, along with any marinade juices, into the simmering rice and liquid in an even layer. Make sure the chicken is mostly submerged. Cover the pot tightly with a lid, reduce the heat to very low, and let it cook undisturbed for 20 minutes. This gentle steaming process ensures the chicken cooks through and remains incredibly tender, while the rice absorbs all the flavorful liquid.
The Final Fluff and Rest
After 20 minutes, turn off the heat but keep the pot covered. Let it rest for an additional 5 minutes. This crucial resting period allows the steam to equalize, finishing the cooking process, ensuring the rice is tender, separate, and perfectly cooked, and the chicken is juicy throughout. Finally, remove the lid and gently fluff the biryani with a fork to evenly distribute all the delicious spices and chicken. Cover and let rest for 5 more minutes before serving.

Common Pitfalls to Avoid for Perfect Biryani
Even with a shortcut recipe, there are a few frequent mix-ups that can hinder your biryani’s perfection. Avoiding these common mistakes will ensure your dish is as flavorful and texturally excellent as possible:
- Skipping the rice rinse: This is a cardinal sin in biryani making! Unrinsed basmati rice retains excess surface starch, which leads to sticky, clumpy grains. Always rinse your rice thoroughly under cold running water until the water runs completely clear before adding it to the pot. This guarantees fluffy, separate grains, a hallmark of authentic biryani.
- Using high heat during simmering: Boiling the biryani hard will agitate the rice grains, causing them to split and become mushy. Once the liquid comes to a boil, immediately reduce the heat to the lowest possible setting and maintain a gentle simmer. Patience here is key to beautifully cooked rice.
- Under-cooking the onions: Pale onions mean a flat, underdeveloped flavor profile. The onions are the backbone of your biryani’s taste. Take your time to cook them slowly until they are deeply soft and boast a rich, golden-brown hue. This caramelization adds crucial sweetness and umami.
- Lifting the lid prematurely: The steam trapped inside the pot is essential for cooking both the rice and the chicken evenly and thoroughly. Resist the urge to peek! Every time you lift the lid, precious steam escapes, leading to undercooked rice or chicken. Wait for the recommended resting period after cooking before uncovering.
- Oversalting late in the process: Biryani’s flavor is built in layers. Seasoning in stages—when marinating the chicken, sautéing the onions, and adding the broth—ensures a balanced and evenly seasoned dish. Adding a lot of salt at the very end can make the biryani taste unevenly seasoned and potentially too salty.
Elevating Your Biryani Experience: Serving Suggestions
I always serve this shortcut chicken biryani piping hot, directly from the Dutch oven. Spoon generous portions into individual bowls, and for a truly authentic and balanced meal, pair it with cool, creamy, and crunchy sides.
Delectable Toppings
- Raita (Indian yogurt sauce): A cool, refreshing yogurt-based condiment, often made with cucumber or mint, that provides a delightful contrast to the rich, warm biryani spices.
- Fresh herbs: A sprinkle of freshly chopped cilantro and/or mint adds vibrant color and a burst of fresh flavor.
- Fried onions: For an extra layer of crunch and sweet depth, garnish with crispy fried onions.
- Thinly sliced red onion: Offers a sharp, zesty counterpoint to the richness of the biryani.
- Lemon wedges: A squeeze of fresh lemon juice just before eating brightens all the flavors and adds a tangy kick.
- Toasted nuts: Toasted cashews or slivered almonds provide a wonderful crunchy texture and nutty flavor.
Complementary Side Dishes for Chicken Biryani
- My father-in-law’s Indian cucumber yogurt salad: A light and refreshing salad that helps to cleanse the palate.
- Warm butter naan or crispy papadum: Perfect for scooping up every last bit of that flavorful rice and chicken.
- A simple green salad: A light, crisp green salad with a bright, lemony vinaigrette provides a fresh contrast.
- Chutney or pickle: A side of mango chutney or a spicy Indian pickle can add an extra layer of zest and complexity.
Smart Meal Prep: Make Ahead and Storage Tips
This easy chicken biryani is an excellent dish for meal prepping, allowing you to cook once and enjoy delicious, comforting meals throughout the week. Proper storage ensures both safety and optimal flavor.
Storing Leftovers Safely
- Chill fast: To prevent bacterial growth, it’s crucial to cool any leftover biryani rapidly. Divide it into shallow containers and allow it to cool at room temperature for no more than an hour before transferring it to the refrigerator.
- Keep moisture: Biryani rice can dry out in the fridge. To maintain its tender texture, add a small splash of chicken broth or water to the container before sealing it tightly.
- Aroma guard: Indian spices are wonderfully potent. Ensure your containers are airtight to prevent the biryani’s aroma from perfuming your entire fridge and affecting other foods. Properly stored, leftovers will keep deliciously for up to 4 days.
Freezing for Future Enjoyment
- Portion first: For convenience, freeze biryani in individual meal-sized portions. This makes thawing and reheating much easier. Place cooled biryani into freezer-safe containers or heavy-duty freezer bags.
- Max storage: Properly frozen, chicken biryani can be stored for up to 2 months. Beyond this, the texture and flavor may begin to degrade.
- Thawing method: For the best texture and flavor, thaw frozen biryani overnight in the refrigerator. Avoid thawing at room temperature for food safety.
Reheating for Optimal Flavor and Texture
- Microwave method: Place a single portion of biryani in a microwave-safe dish. Add a tablespoon or two of water or broth, cover loosely with a lid or microwave-safe plastic wrap, and heat in short bursts, stirring occasionally, until it is steaming hot throughout. The added liquid helps revive the rice.
- Stovetop method: For larger quantities or a more even reheat, transfer the biryani to a saucepan. Add a splash of broth or water, cover, and warm over low heat, stirring gently, until heated through. This method is excellent for maintaining moisture.
- Oven method: If reheating a larger batch, place the biryani in an oven-safe dish. Add a small amount of liquid, cover tightly with foil, and bake at 300°F (150°C) until it’s steaming and thoroughly heated, usually 20-30 minutes.
Mastering Biryani: Pro Tips and Culinary Insights
Unlock the full potential of your biryani with these key takeaways and science-based secrets for a truly exceptional dish:
- Salt in layers: As with any great dish, seasoning is crucial. Don’t rely on a single dose of salt. Season the chicken marinade, the onions during sautéing, and the liquid with the rice. This layering technique ensures a balanced, deep flavor throughout the entire dish, rather than just on the surface.
- Rinse for fluffiness: The primary reason basmati rice can become clumpy is its surface starch. A quick, thorough rinse under cold water until the water runs clear effectively removes this starch, guaranteeing perfectly separate, fluffy grains—a hallmark of authentic biryani.
- Low and covered heat: This is a non-negotiable step for tender chicken and intact rice grains. Gentle heat and a tightly sealed lid create a steamy environment that cooks the ingredients evenly without boiling them violently. High heat can cause the rice to burst and the chicken to become tough.
- The power of the rest: Don’t skip the off-heat resting period. This allows the rice to continue steaming gently, absorbing any remaining moisture and firming up its texture without becoming mushy. It also ensures the chicken finishes cooking to juicy perfection and allows the flavors to truly meld together.
- Golden onions are flavor bombs: The deep golden caramelization of the onions isn’t just for color; it’s a fundamental flavor builder. These sweet, savory foundations are what elevate the biryani from good to outstanding, contributing a depth that can’t be achieved with lightly cooked onions.
Frequently Asked Questions About Shortcut Chicken Biryani
Just skimming through? Here are some quick, comprehensive answers to the most commonly asked questions about making this easy chicken biryani recipe.
Absolutely! Using boneless chicken for biryani is a convenient choice. For the juiciest results, stick with boneless chicken thighs. Cut them into large, roughly 1.5-inch chunks to prevent them from drying out. When using boneless chicken, reduce the covered cook time to approximately 15 minutes before the final rest period. This shorter cooking duration is crucial for preventing dry meat and ensuring the rice doesn’t overcook.
Soaking basmati rice beforehand can be beneficial, particularly for traditional methods, but it is not strictly required for this shortcut recipe. The most important step is rinsing the rice thoroughly under cold running water until the water runs completely clear. This process removes enough surface starch to ensure the grains remain separate and fluffy in this quick one-pot method. If you do opt to soak your rice (for 20-30 minutes), be sure to slightly reduce the amount of chicken broth to avoid mushy rice, as soaked rice absorbs more liquid initially.
No, garam masala is distinctly different from curry powder. Garam masala is a traditional Indian spice blend, typically used as a finishing spice or in marinades. It is a warm, aromatic blend of roasted and ground spices like cumin, coriander, cardamom, cinnamon, cloves, and black pepper, but notably, it does not typically contain turmeric. Curry powder, on the other hand, is a British invention, a more general blend that almost always includes turmeric, giving it a characteristic yellow color, and often has a sharper, more pronounced flavor profile. For an authentic biryani flavor, especially in both the marinade and the main pot, garam masala is highly recommended.
The spice level of this biryani is quite adjustable to your palate. As written, with one green chili and a modest amount of cayenne, it provides a gentle, pleasant warmth that is enjoyable for most. For those who prefer a milder biryani, you can easily omit the cayenne pepper entirely or remove the seeds from the green chili before chopping. If you crave more heat, feel free to add another green chili (or two!) at the spice-adding step, tasting carefully before the final steaming to achieve your desired kick.
Yes, adding vegetables to this chicken biryani recipe is a fantastic way to boost its nutritional value and visual appeal. For best results, incorporate quick-cooking vegetables like frozen peas or several handfuls of fresh spinach. These can be stirred into the biryani during the final 5-minute resting period after cooking. This method allows them to steam and warm through without becoming overcooked, maintaining their bright color and texture. Avoid adding water-heavy vegetables (like zucchini or bell peppers) during the initial simmering stage, as they can release too much moisture and make the rice soggy.
The ideal pot for making biryani, especially a one-pot version, is a heavy-bottomed Dutch oven or a large, sturdy pot with a very snug-fitting lid. The heavy construction helps to distribute and maintain gentle, even heat, which is crucial for cooking both the chicken and rice perfectly. A tight lid is essential for trapping steam, which steams the rice and chicken effectively. Thin-bottomed pots are prone to hot spots at the base, which can scorch the rice before the ingredients on top have a chance to finish steaming properly.
Preventing soggy rice involves a few critical steps. First, always rinse your basmati rice until the water runs clear to remove excess starch. Second, ensure accurate liquid measurement; too much liquid is the most common cause of soggy rice. Third, cook the biryani over truly gentle, low heat, maintaining a bare simmer. Fourth, resist the urge to lift the lid during the cooking and resting phases, as this allows steam to escape, hindering proper cooking. Finally, the off-heat rest is vital for the rice to steam to perfection without becoming mushy. If your stove burner runs particularly hot, consider placing a baking sheet directly under your pot to diffuse the heat more evenly.
Making this biryani dairy-free is remarkably simple. The primary dairy component is butter. You can easily replace the butter with an equal amount of additional avocado oil or another neutral cooking oil. For serving, instead of traditional yogurt raita, consider offering coconut yogurt or a specially prepared dairy-free raita to provide that same refreshing, cooling contrast without any dairy.
Discover More of My Indian Husband’s Favorite Recipes
If you loved this shortcut biryani, you’ll surely want to put some of Adarsh’s other favorite authentic Indian dishes on your must-make list. These recipes offer a delightful journey through vibrant Indian flavors, perfect for expanding your culinary repertoire:
- Paratha (flaky, layered Indian flatbread): A buttery, soft, and utterly addictive bread, perfect for scooping up curries or enjoying on its own.
- TheChicken Korma that he says will change your life: A rich, creamy, and mildly spiced chicken curry that is truly a culinary revelation.
- Butter Paneer (the vegetarian version of Butter Chicken): A luxurious and indulgent dish featuring soft paneer cheese in a velvety tomato-based sauce.
- Saag Paneer (the tastiest way to eat a pound of spinach): A nutritious and flavorful curry featuring spinach and paneer, showcasing how delicious healthy eating can be.
- Flaky HomemadePotato Samosas,Chicken Samosas andSamosa Pie (we really love samosas!): Learn to make these beloved crispy, savory pastry parcels with various fillings, or try a unique pie version.
- CreamyMadras Lentils (the ultimate vegetarian comfort food): A hearty and deeply satisfying lentil dish, rich with spices and cream.
- Amma’s special Masoor Dal andIndian Chickpea Curry Recipe: Two essential and flavorful vegetarian staples of Indian cuisine.
- Malai Kofta (paneer and potato balls in creamy tomato sauce): A delightful and rich vegetarian dish featuring soft paneer and potato dumplings simmered in a luscious sauce.
- Authentic Indian Chai (tea the authentic Indian way): Learn to brew the perfect cup of spiced Indian tea, a comforting ritual.

Easy Chicken Biryani (Shortcut Recipe!)
Jennifer Pallian BSc, RD
My easy Chicken Biryani recipe is a fast, satisfying one-pot dinner my half-Indian family loves, bringing authentic flavors to your table with minimal effort.
15 minutes
25 minutes
5
Ingredients
For Chicken
- 2.2 lbs bone-in, skinless chicken thighs
- 2 tbsp lemon juice
- 2 cloves garlic, minced
- 1 tbsp garam masala (or curry powder)
- 2 tsp kosher salt
For Biryani
- 3 tbsp cooking oil (such as avocado oil)
- 3 tbsp butter
- 2 ½ cups chopped onion (about 2 medium-large)
- 2 green chillies, finely chopped
- 3 tsp kosher salt, divided use
- 3 tbsp minced garlic
- 1 tbsp garam masala (or curry powder)
- 1 tsp paprika
- ½ tsp ground cayenne
- ½ tsp turmeric
- 1 large diced tomato (or 1/2 cup canned tomato puree or canned diced tomato with juices)
- 3 cups chicken broth
- 1 ½ cups basmati rice, rinsed well and drained
- 2 bay leaves (optional)
Instructions
Marinate Chicken:
- Combine chicken with lemon juice, garlic, garam masala (or curry powder), and the marinade salt. Let stand at room temperature while you prep the biryani rice.
Make Biryani Rice:
- Heat oil and butter in a large Dutch oven over medium heat. Add onion and ½ tsp of the biryani salt; cook until soft and golden.
- Add garlic, curry powder, paprika, cayenne and turmeric and cook 2 minutes, until fragrant.
- Add tomato; cook a minute more, then stir in broth, rinsed rice, remaining 2 1/2 tsp kosher salt and bay leaves, if using.
- Stir in chicken thighs, cover the pot and bring to a boil. Reduce heat to low; cook until chicken is cooked through to 165ºF and rice is tender, about 20 minutes (larger thighs may take a little longer).
- Let stand, covered for 5 minutes. Serve with plain yogurt or coconut chutney.
Notes
- Use garam masala for classic flavor; curry powder works but gives a lighter color.
- If your stove runs hot, slide a baking sheet under the pot to diffuse heat and prevent scorching.
- Leftovers keep up to 4 days when chilled in an airtight container; reheat with a splash of broth or water to maintain moisture.
Nutrition
Calories: 409kcal | Carbohydrates: 60g | Protein: 6g | Fat: 16g | Saturated Fat: 5g | Polyunsaturated Fat: 3g | Monounsaturated Fat: 7g | Trans Fat: 0.3g | Cholesterol: 18mg | Sodium: 3022mg | Potassium: 287mg | Fiber: 4g | Sugar: 6g | Vitamin A: 1002IU | Vitamin C: 16mg | Calcium: 53mg | Iron: 1mg
Nutrition information is automatically calculated, so should only be used as an approximation.