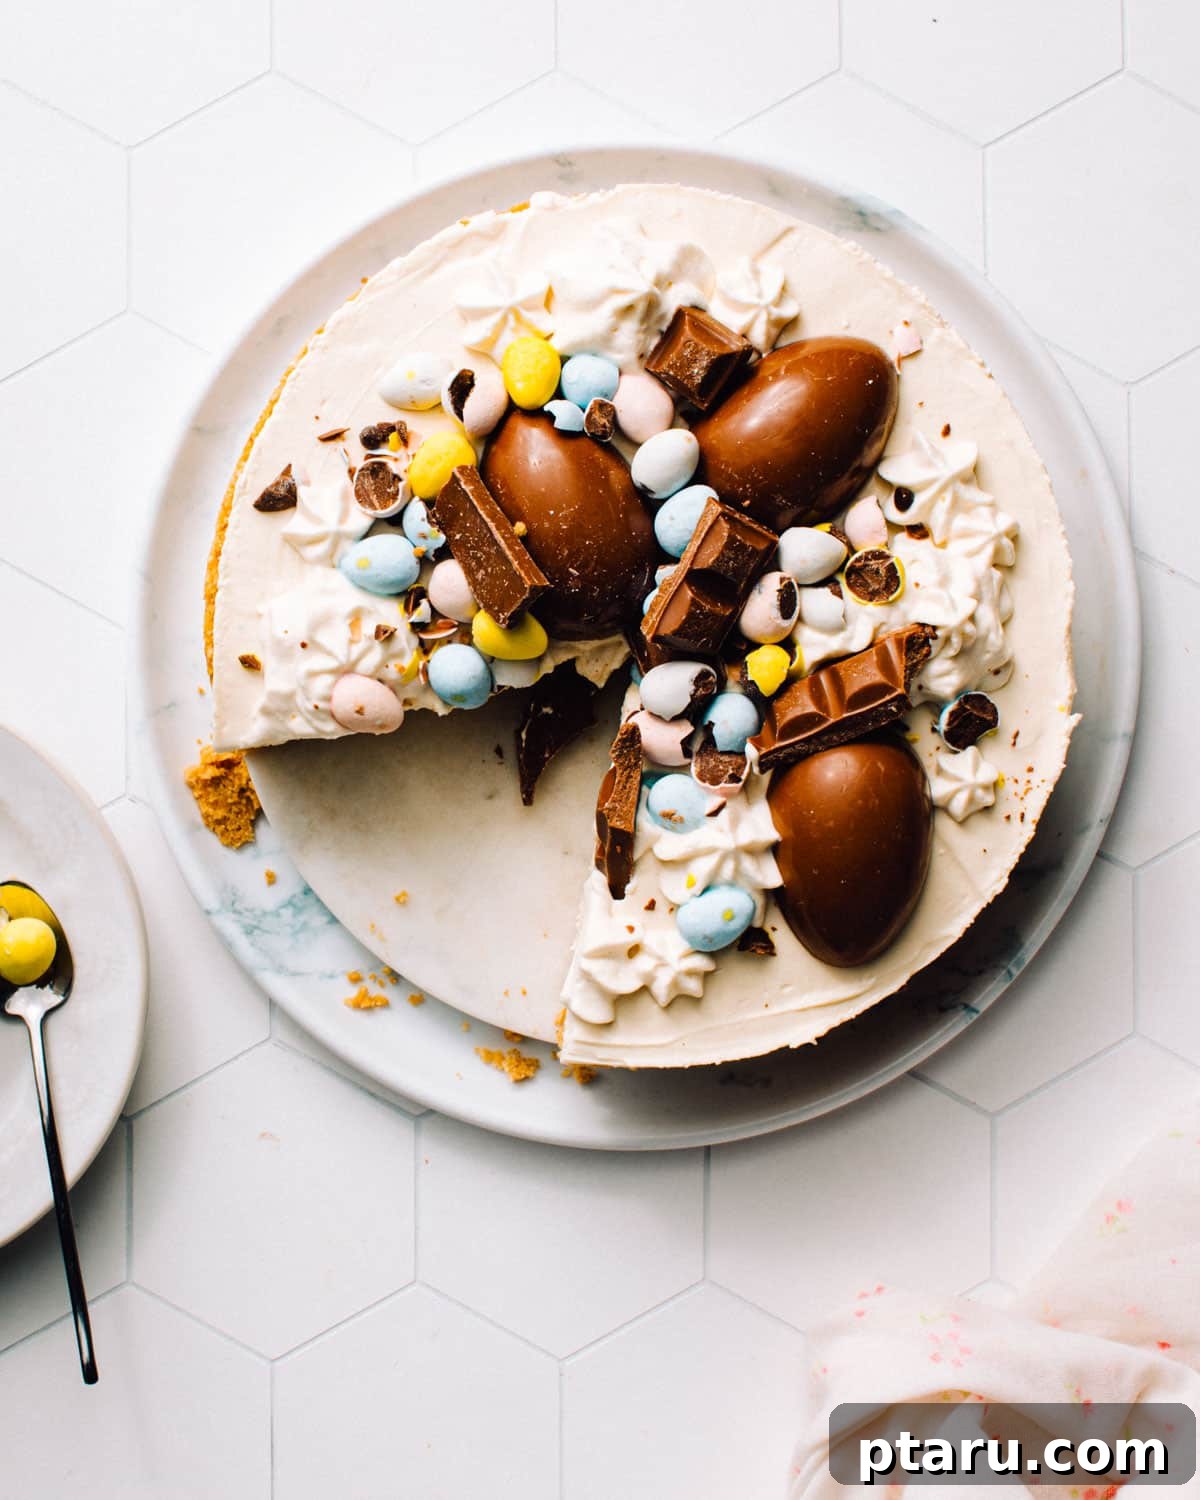
Prepare to fall in love with the ultimate spring dessert: an irresistibly easy, light-as-air No-Bake Easter Egg Cheesecake. This recipe is designed for maximum flavor and minimal effort, making it the perfect showstopper for your Easter celebration, a delightful centerpiece for any spring gathering, or simply a sweet indulgence for a sunny afternoon. Forget the oven, the water baths, and the worry of cracks; this cheesecake delivers a smooth, creamy, and mousse-like texture that will have everyone asking for seconds.
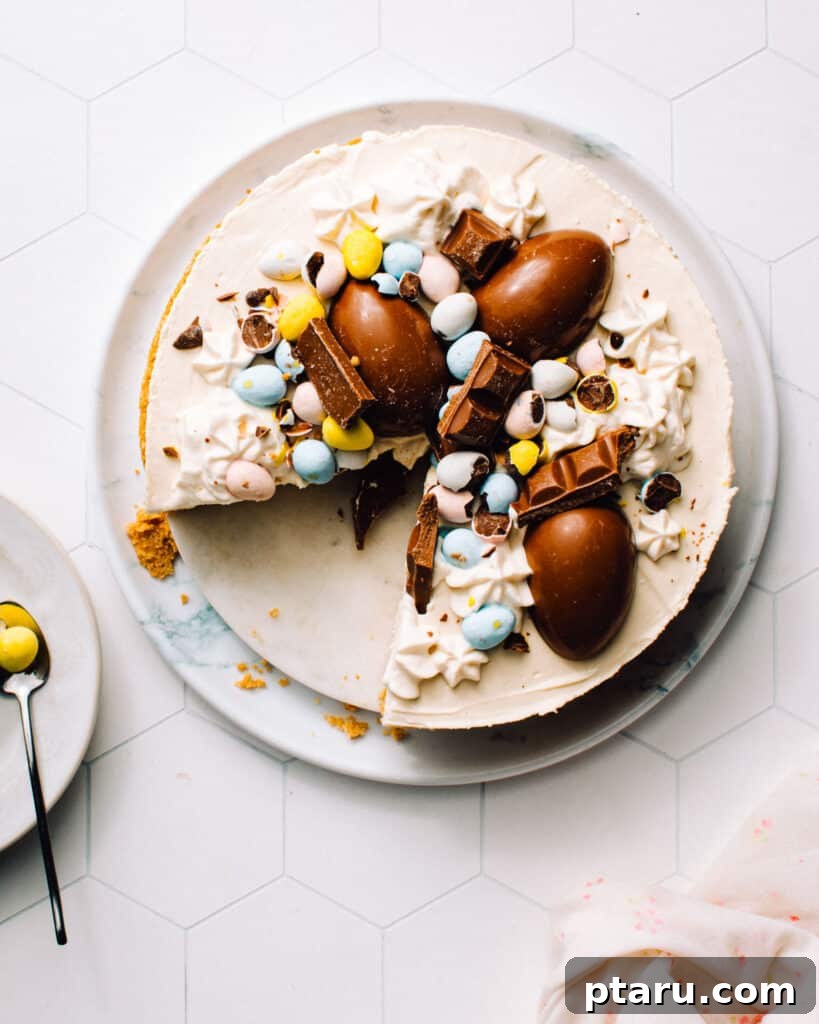
Why This No-Bake Easter Egg Cheesecake Is A Must-Make
This isn’t just another cheesecake recipe; it’s a celebration of simplicity, flavor, and festive charm. Here’s why this No-Bake Easter Egg Cheesecake will become your new favorite:
- Unbelievably Plush, Mousse-Like Texture: The secret to its exquisite lightness lies in a carefully balanced combination of rich cream cheese, airy whipped cream, and tangy yogurt. This trio creates a filling that is incredibly smooth, velvety, and melts in your mouth, offering a refreshing contrast to denser, baked cheesecakes.
- Effortlessly No-Bake Perfection: From its crisp graham cracker base to its cloud-like filling, this cheesecake requires absolutely no oven time. Say goodbye to the stress of water baths, the fear of cracks, or the need for precise baking temperatures. It’s a truly fuss-free dessert that guarantees a beautiful result every time. Perfect for warmer spring days when you want to keep your kitchen cool!
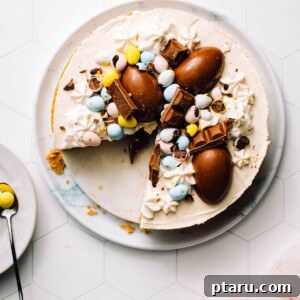
- Visually Stunning & Irresistibly Decorated: Adorned with colorful chocolate Easter eggs, this cheesecake is a feast for the eyes as much as it is for the palate. We love to use a delightful mix of Easter egg sizes and textures, perhaps even a drizzle of extra whipped cream or crumbled chocolate bar, to create a truly spectacular and personalized masterpiece that appeals to both children and adults.
- A Natural Progression to Dessert Bliss: If you’ve enjoyed our scrumptious Cadbury Mini Egg Cookies or our chewy Easter Brownies, then this elegant cheesecake is the perfect next step to complete your holiday dessert repertoire.
- Simple Ingredients, Incredible Flavor: Despite its impressive appearance, this cheesecake relies on readily available ingredients, transforming them into a sophisticated and satisfying sweet treat. The interplay of creamy, tangy, and sweet notes is simply divine.
Related: 61+ Easy and Delicious Easter Dinner Ideas to Complete Your Feast
Essential Ingredients for Your Easter Egg Cheesecake
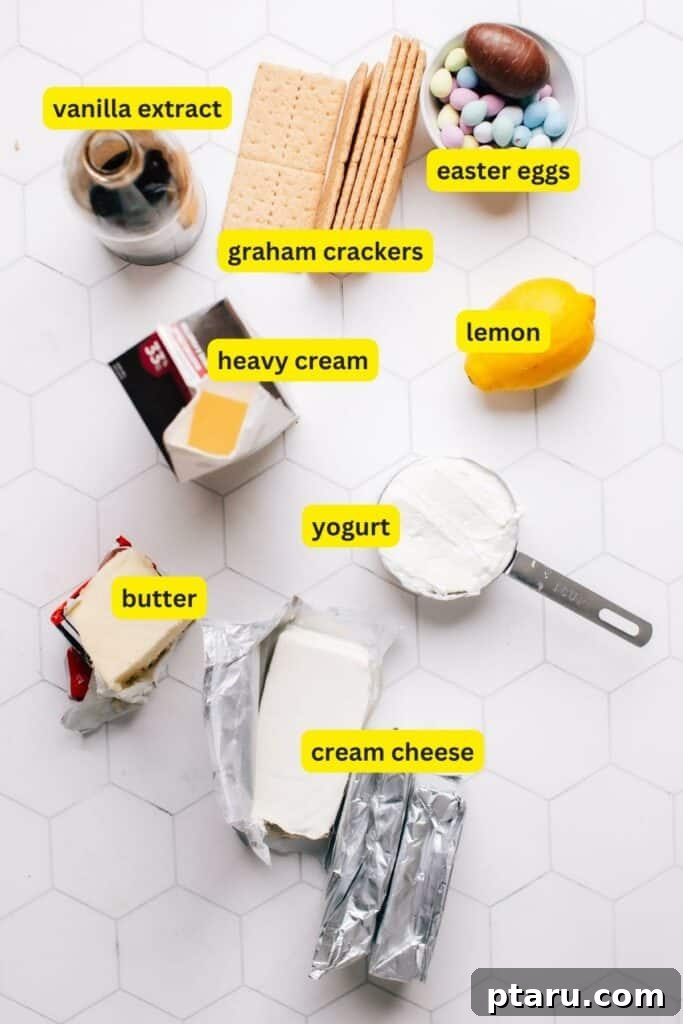
Crafting this heavenly no-bake cheesecake requires a few key components, each playing a crucial role in achieving its signature light and creamy texture:
- Heavy Cream (Whipping Cream): Often labeled as whipping cream, double cream, or 35% m.f. (milk fat) cream, this ingredient is whipped to stiff peaks and gently folded into the mixture. This step is vital for incorporating air and creating that wonderfully fluffy, airy, and mousse-like consistency that sets this no-bake cheesecake apart. Whipping a little extra allows you to reserve some for a beautiful topping.
- Full-Fat Cream Cheese: The heart of any cheesecake! For the absolute best results and optimal creaminess, always opt for full-fat, block-style cream cheese. Brands like Philadelphia cream cheese are a reliable choice. Avoid low-fat, fat-free, whipped, or spreadable varieties, as they often contain additives that can alter the final texture and stability of your cheesecake, preventing it from setting properly. Ensure it’s softened to room temperature for smooth, lump-free blending.
- Plain Yogurt: This is our secret weapon for a truly exceptional no-bake cheesecake! Plain yogurt not only contributes a delightful, subtle tang that perfectly balances the richness of the cream cheese, but its live bacteria also subtly aid in firming up the fluffy filling without the need for gelatin. This natural setting process is akin to making crème fraîche, yielding a beautifully stable and creamy result. Greek yogurt can be used for an even thicker consistency.
- Fresh Lemon Juice: A splash of fresh lemon juice is indispensable. Its bright, zesty tartness cuts through the richness of the dairy, enhancing the tang of the cream cheese and brightening the overall flavor profile. It adds a refreshing lift that prevents the cheesecake from being overly heavy.
- Vanilla Extract: A classic flavor enhancer, vanilla extract infuses the cheesecake base with a warm, comforting aroma and a depth of flavor that complements the chocolate Easter eggs beautifully. Use good quality pure vanilla extract for the best taste.
- Easter Eggs for Decoration: This is where the fun truly begins! While we’re particularly fond of Cadbury Mini Eggs for their superior taste and satisfying crunch, don’t hesitate to get creative. Incorporate a mix of larger chocolate eggs, miniature bunnies, chocolate cream eggs, or even finely chopped chocolate bars to add visual interest and varying textures. The more colorful and diverse, the more festive your cheesecake will look!
The Perfectly Simple 3-Ingredient No-Bake Cheesecake Crust
A truly great cheesecake starts with an exceptional crust, and ours is famously easy and requires just three common ingredients:
- Graham Cracker Crumbs: The foundational element for our delightful crust. You can either purchase pre-crushed graham cracker crumbs for ultimate convenience or easily make your own. To crush whole graham crackers, place them in a zip-top bag and whack them with a rolling pin until finely crushed, or pulse them quickly in a blender or food processor for a uniform texture.
- Melted Butter: This acts as the binding agent, holding the crumbs together to form a sturdy, yet tender, crust. The butter solidifies as it chills, setting the crust without any baking required.
- Granulated Sugar: A touch of sugar adds a subtle sweetness to the crust, balancing the richness of the filling.
The beauty of this crust lies in its simplicity and versatility. Once these three ingredients are mixed, they are simply pressed into a 9-inch springform pan. There’s absolutely no baking necessary! The melted butter works its magic in the refrigerator, solidifying and creating a perfectly firm base that’s easy to slice but won’t crumble apart. Our carefully tested ratio of butter to crumbs ensures a crust that’s tender enough to cut through effortlessly with a fork, yet robust enough to support neat, elegant slices every time. No rock-hard base, no messy crumbs—just perfection!
Feeling adventurous or need an alternative? Feel free to customize your crust! Digestive biscuits provide a similar texture with a slightly different flavor profile. Chocolate wafer crumbs (like those from Oreo cookies, with the cream filling removed) make for a decadent chocolate crust. For a gluten-free option, simply substitute with your favorite gluten-free cookies, crushed to fine crumbs. The possibilities are endless!
Related Recipe: Impress Your Guests with our Miniature Cheesecake Bites with Graham Cracker Crust
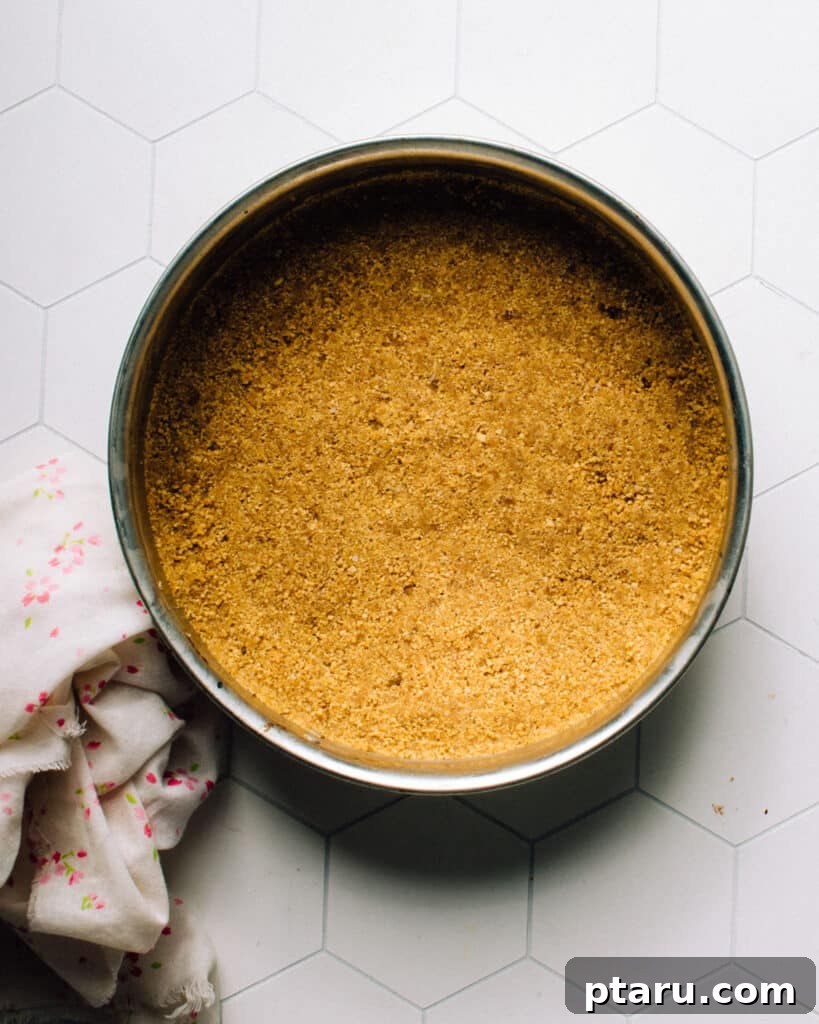
How To Create This Irresistible No-Bake Easter Egg Cheesecake
Making this stunning cheesecake is straightforward and incredibly rewarding. Follow these simple steps for a dessert that’s as delightful to make as it is to eat:
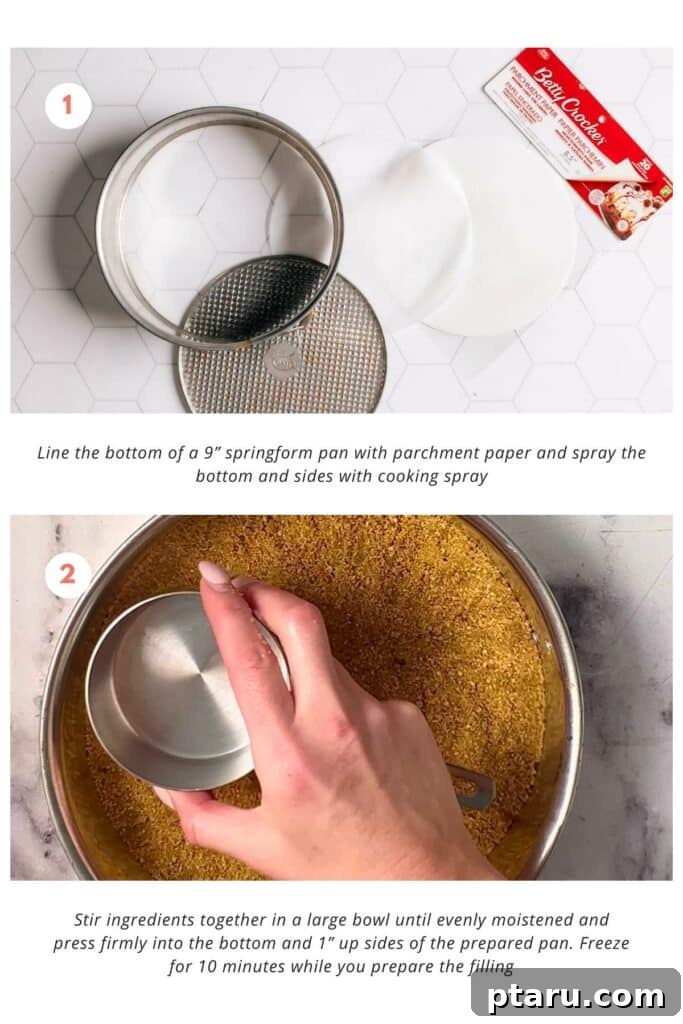
Crafting the Perfect Graham Cracker Crust:
- Prepare Your Pan: Begin by lining the bottom of a 9-inch springform pan with a circle of parchment paper. This crucial step ensures effortless removal of your cheesecake later. Lightly spray the bottom and sides of the pan with cooking spray to prevent sticking.
- Mix the Crust Ingredients: In a medium-sized bowl, combine the graham cracker crumbs, melted butter, and sugar. Stir thoroughly with a fork or spatula until all the crumbs are evenly moistened by the butter. The mixture should resemble wet sand.
- Form the Crust: Scrape the moistened crumb mixture into your prepared springform pan. Using the bottom of a flat-bottomed measuring cup or a glass (lightly sprayed with nonstick spray), firmly press the mixture into an even layer across the bottom of the pan and about 1 inch up the sides. Packing it tightly is key for a stable crust.
- Chill for Stability: Place the crust in the freezer for a minimum of 10 minutes while you prepare the cheesecake filling. This quick chill helps to set the butter, creating a firm foundation for your creamy filling.
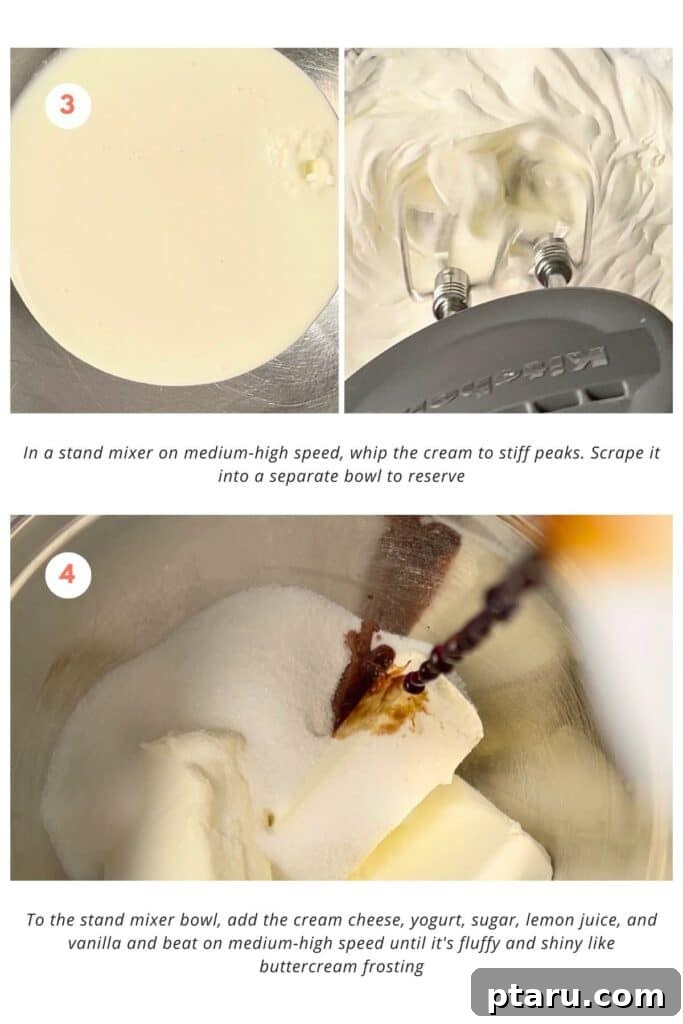
Whipping Up the Velvety Cheesecake Filling:
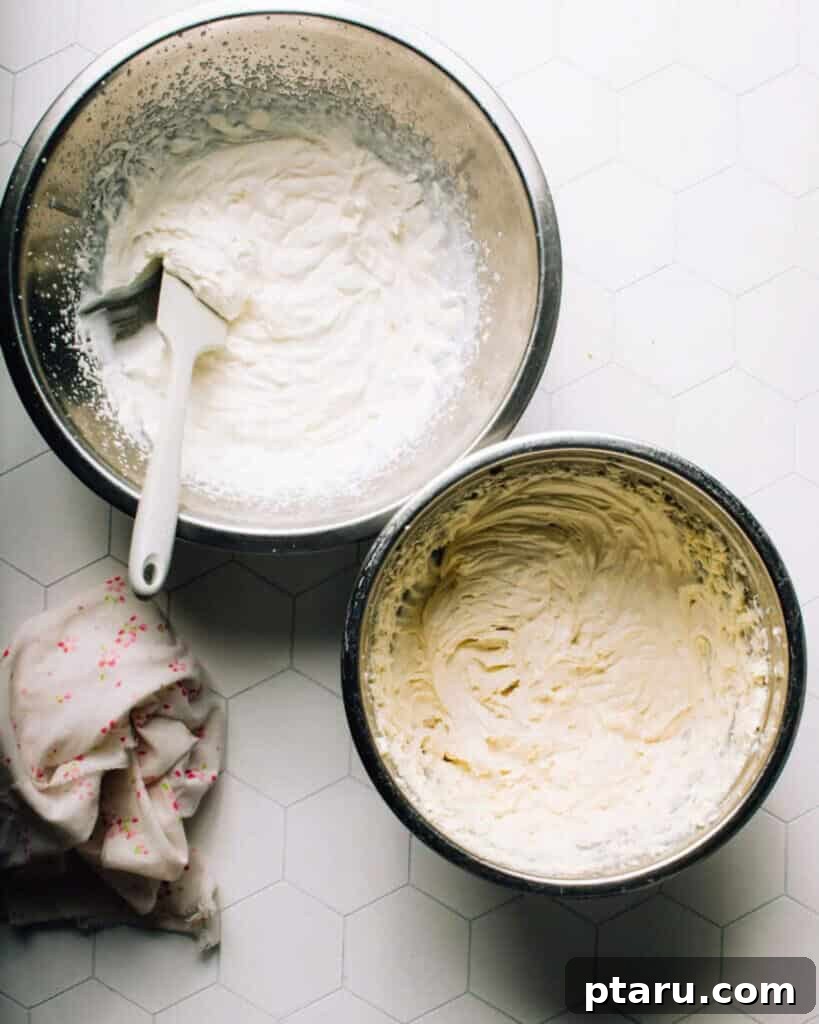
- Whip the Heavy Cream: In a stand mixer fitted with the whisk attachment (or using an electric hand mixer and a large bowl), whip the cold heavy cream on medium-high speed until it forms stiff peaks. The cream should be thick and hold its shape. Gently scrape the whipped cream into a separate bowl and set aside. There’s no need to wash the stand mixer bowl at this point.
- Prepare the Cream Cheese Base: To the unwashed stand mixer bowl, add the softened cream cheese, plain yogurt, granulated sugar, fresh lemon juice, and vanilla extract. Beat on medium-high speed for about 5 minutes, or until the mixture is incredibly fluffy, smooth, and shiny, resembling a luxurious buttercream frosting. If your cream cheese is too cold and isn’t whipping up smoothly, gently warm the bottom of the bowl with a hot, damp towel to help it reach the ideal consistency.
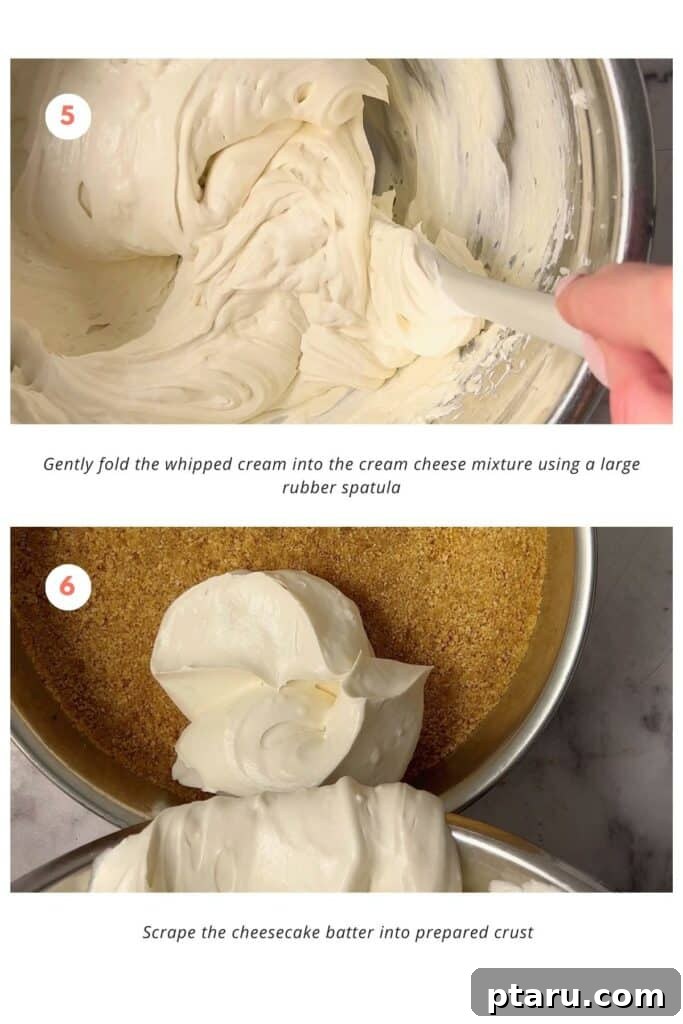
- Gently Fold in Whipped Cream: With a large rubber spatula, carefully and gently fold the reserved whipped cream into the cream cheese mixture. Use a “cut and fold” motion to incorporate the whipped cream without deflating the air, ensuring your cheesecake retains its light and airy texture.
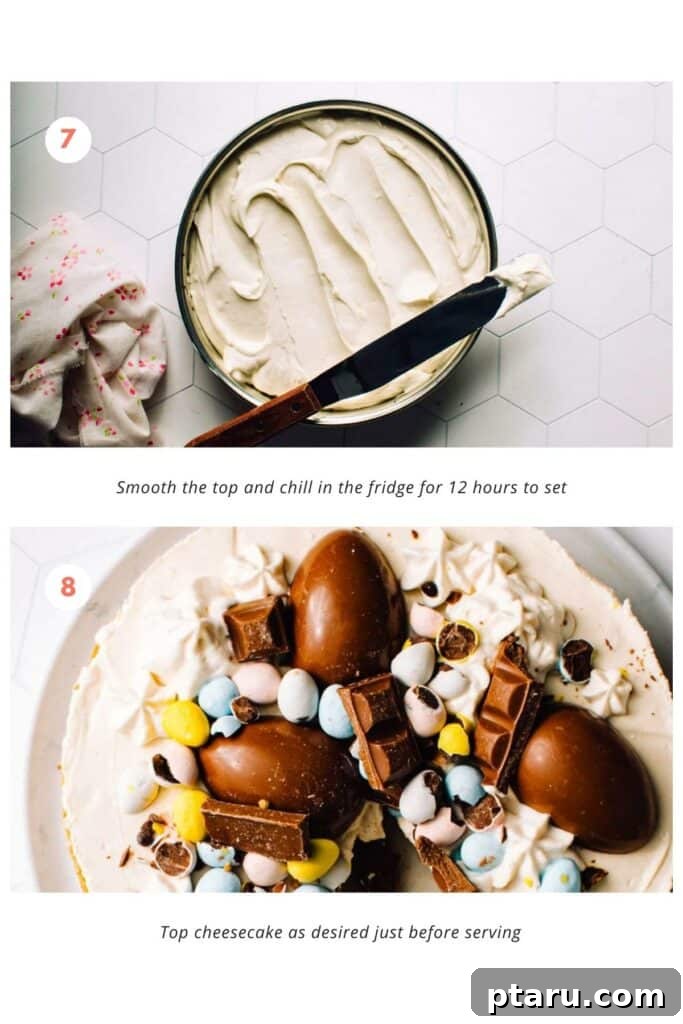
- Assemble and Chill: Scrape the entire cheesecake batter into your prepared, chilled graham cracker crust. Use the spatula to gently smooth the top of the filling, creating an even surface. Cover the pan loosely with plastic wrap and transfer it to the refrigerator. Allow the cheesecake to chill undisturbed for a minimum of 12 hours. This extended chilling time is crucial for the cheesecake to fully set and develop its perfect texture.
Pro Tips for Cheesecake Perfection
Achieve an impeccable no-bake Easter Egg Cheesecake with these expert tips:
- Crust Compression is Key: When pressing the graham cracker crust into the pan, a flat-bottomed glass or measuring cup (lightly sprayed with nonstick spray) is your best friend. Really lean into it and firmly compact the crumbs not just on the bottom, but also about an inch up the sides of the pan. This creates a sturdy foundation that prevents crumbling when sliced. A quick freeze for 10-15 minutes while you prepare the filling helps to set the butter even more securely.
- The Art of Slicing: For impeccably clean and tidy slices, use a sharp, thin-bladed knife. Between each slice, run the knife under hot water and wipe it clean. The warm blade glides through the creamy filling without sticking, resulting in perfectly presented portions.
- Patience is a Virtue (for Chilling): While it’s tempting to rush, a no-bake cheesecake absolutely requires a full 12 hours in the refrigerator to set completely. This extended chilling time allows the dairy proteins and fats to firm up, developing that luscious, stable, and truly mousse-like texture. Planning ahead, perhaps making it the day before or in the morning for evening serving, yields the best results. Always ensure the cheesecake is fully set before adding any decorative toppings.
- Maximize Airiness with the Whisk Attachment: When preparing the filling in a stand mixer, always use the whisk attachment over the paddle attachment. The whisk is designed to incorporate more air into the cream and cream cheese mixture, contributing significantly to the light, fluffy, and mousse-like texture that makes this cheesecake so special.
- Room Temperature Cream Cheese: Ensure your cream cheese is completely at room temperature before mixing. This allows it to whip smoothly with no lumps, creating a silky-smooth base for your filling. Cold cream cheese can result in a lumpy texture.
- Topping Timing: Always add your decorative Easter eggs and any additional whipped cream toppings just before serving. This prevents the chocolate from sinking into the soft filling and ensures whipped cream remains fresh and voluminous.
Can Easter Egg Cheesecake Be Frozen? Understanding the Risks
While the idea of freezing a no-bake cheesecake for longer storage or quick setting might be appealing, it’s generally not recommended for optimal texture and quality. Here’s why:
The main issue arises from the water content naturally present in cream and cream cheese. When these ingredients freeze, the water forms ice crystals. Upon thawing, these ice crystals expand and then melt, creating small holes and disrupting the delicate structure of the cheesecake. This often leads to a gritty or grainy texture, and the water can separate from the fat emulsion, resulting in a “weepy” or watery dessert. The fat molecules may also clump together, further compromising the smooth consistency. Therefore, while technically possible, the resulting texture degradation typically makes freezing an undesirable option for this particular style of cheesecake.
Even if you’re tempted to use the freezer to speed up the setting process, we strongly advise against it. The slow, steady chill in the refrigerator for the recommended 12 hours is truly essential for achieving the perfect, stable, and creamy consistency this no-bake cheesecake is known for.
FAQs: Your No-Bake Cheesecake Questions Answered
Cutting chocolate eggs, especially larger ones, can be tricky. Here’s a simple method:
1. Place the chocolate Easter egg on a stable cutting board.
2. For stability, you can crumple a small piece of aluminum foil to create a “nest” that cradles the egg and prevents it from rolling.
3. Use a small, sharp knife (a cheeseboard knife with a short, square blade and blunt edge works well for leverage).
4. Keep one hand firmly on the knife handle and the other hand on the flat, top side of the knife blade for added pressure. Always keep your fingers well away from the cutting edge.
5. Apply firm, steady pressure to the chocolate egg, using the part of the knife closest to your body (which often provides the most leverage). Rock the knife gently to make a clean, controlled cut. This technique minimizes the chance of the egg shattering.
If Philadelphia cream cheese isn’t available, you can substitute it with any other brand of full-fat, brick-style cream cheese. These typically have the right consistency and fat content for a stable cheesecake. Other excellent alternatives include mascarpone cheese, which will yield an even richer, silkier texture, or Neufchâtel cheese, a French cream cheese that is slightly lower in fat but still provides a wonderful tang and creaminess. Crucially, always avoid low-fat, fat-free, whipped, or spreadable cream cheese products, as their altered compositions will negatively impact the setting and texture of your no-bake cheesecake.
Traditionally, “real” or classic baked cheesecake is typically made from cream cheese, sugar, eggs, and flavorings, often baked in a water bath. This results in a dense, rich, and incredibly creamy dessert. Our no-bake version offers a delightful contrast. By omitting eggs and baking, and incorporating whipped cream and yogurt, we achieve a much lighter, airier, and distinctly mousse-like texture. While both are incredibly delicious, the no-bake Easter Egg Cheesecake provides a refreshing, lighter alternative that’s perfect for spring and significantly easier to prepare, eliminating the common challenges associated with baked cheesecakes.
Other Easter Desserts and Cheesecake Recipes You’ll Love
Looking for more festive treats or delicious cheesecake variations? Explore these popular recipes:
- Chewy Chocolate Mini Egg Easter Cookies
- Easy Easter Egg Brownies
- Chocolate Easter Egg Cookies
More Cheesecake Recipes Everyone LOVES:
- Classic Philadelphia Cheesecake (featuring a creamy 3-ingredient filling!)
- No-Bake Cherry Cheesecake Bars
- Decadent Chocolate Cheesecake
- Spiced Pumpkin Cheesecake Bars
- Easy Caramel Apple Cheesecake Recipe
- Sweet Potato Cheesecake with Oat Pecan Crust
Rating: 4.86 out of 5 stars (based on 7 votes)
No-Bake Easter Egg Cheesecake
Jennifer Pallian BSc, RD
30 minutes
0 minutes
12 hours
12 hours 30 minutes
10
Video
(Video tutorial for this recipe is available on the original blog.)
Ingredients
For Crust:
- 1 ½ cups graham cracker crumbs
- ¼ cup melted butter
- 2 tbsp sugar
For Filling:
- 1 cup cold heavy whipping cream
- 3 x 8 oz bricks of cream cheese, softened to room temperature
- ¼ cup plain Greek yogurt
- 1 cup granulated sugar
- 4 tbsp fresh lemon juice
- 2 tsp vanilla extract
Optional Toppings:
- 1 cup whipped cream
- 1 cup chocolate Easter eggs (e.g., Cadbury Mini Eggs)
- 1-2 larger chocolate cream eggs or small chocolate bunnies
Instructions
For Crust:
-
Line the bottom of a 9” springform pan with parchment paper and spray the bottom and sides with cooking spray. This ensures easy removal.
-
In a large bowl, stir together the graham cracker crumbs, melted butter, and sugar until evenly moistened. Scrape this mixture into the prepared pan.
-
Firmly press the crust mixture into the bottom and 1 inch up the sides of the pan. Use a greased, flat-bottomed measuring cup to help pack it in tightly and evenly.
-
Freeze the crust for 10 minutes while you prepare the filling. This helps the butter set quickly for a stable base.
For Filling:
-
In a stand mixer (or using an electric hand mixer) on medium-high speed, whip the cold heavy cream to stiff peaks. Scrape the whipped cream into a separate bowl and set aside. There’s no need to wash the mixer bowl.
-
To the same stand mixer bowl, add the softened cream cheese, yogurt, granulated sugar, fresh lemon juice, and vanilla extract. Beat on medium-high speed for about 5 minutes, until the mixture is light, fluffy, and shiny, resembling buttercream frosting. If your cream cheese is too cold, gently warm the bottom of the bowl with a hot, damp towel to achieve a smoother consistency.
-
Using a large rubber spatula, gently fold the whipped cream into the cream cheese mixture until just combined. Be careful not to overmix, as this can deflate the airiness.
-
Scrape the cheesecake batter into the prepared crust and smooth the top evenly with your spatula.
-
Chill the cheesecake in the refrigerator for a minimum of 12 hours to allow it to fully set. This step is crucial for the best texture and stability.
To Decorate & Serve:
-
Just before serving, decorate the cheesecake as desired. You can pipe additional whipped cream onto the cake using a large star tip (or store-bought whipped cream from a can).
-
Arrange the chocolate Easter eggs, starting with larger ones and filling in with smaller ones or finely chopped chocolates for a visually appealing display.
-
To store leftovers, wrap the cheesecake tightly with plastic wrap and keep it in the refrigerator for up to 3-4 days.
Notes
Prepare Ahead: This cheesecake is an excellent make-ahead dessert. You can easily prepare it a day in advance (or in the morning to serve at night). Remember to let the cheesecake set fully before adding any toppings to maintain their freshness and appearance.
Nutrition
Please note: Nutrition information is automatically calculated and should be used as an approximation.
Tried this delightful recipe? We’d love to hear your thoughts! Leave a comment below!