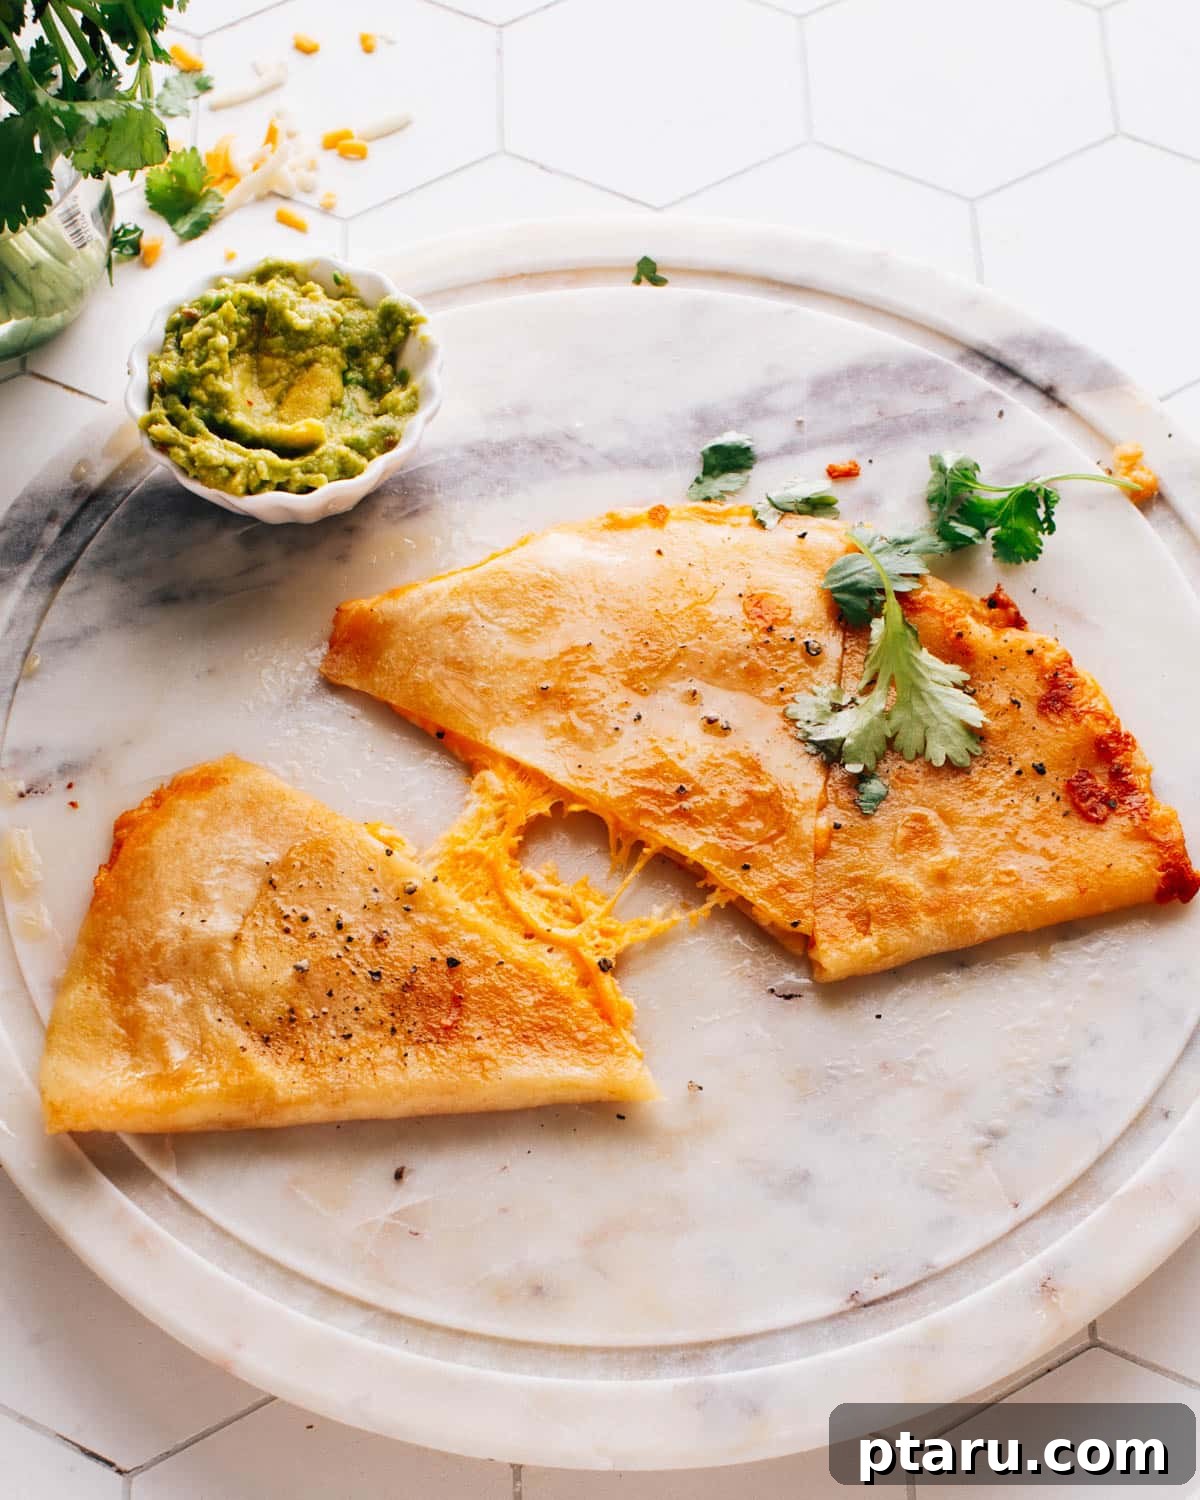
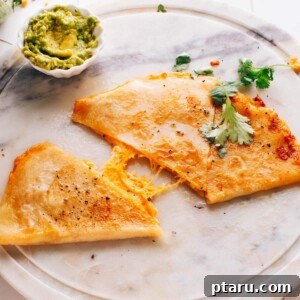
Embark on a culinary journey to master the art of the perfect cheese quesadilla – that gloriously gooey, irresistibly melty, and beautifully golden delight. My extensive travels through Mexico have revealed the true secrets behind this beloved dish, transforming it from a mere quick meal into a cherished staple. It’s more than just an easy weeknight recipe; it’s a simple dinner that truly brings joy, especially when paired with a creamy Baja sauce or a vibrant pico de gallo.
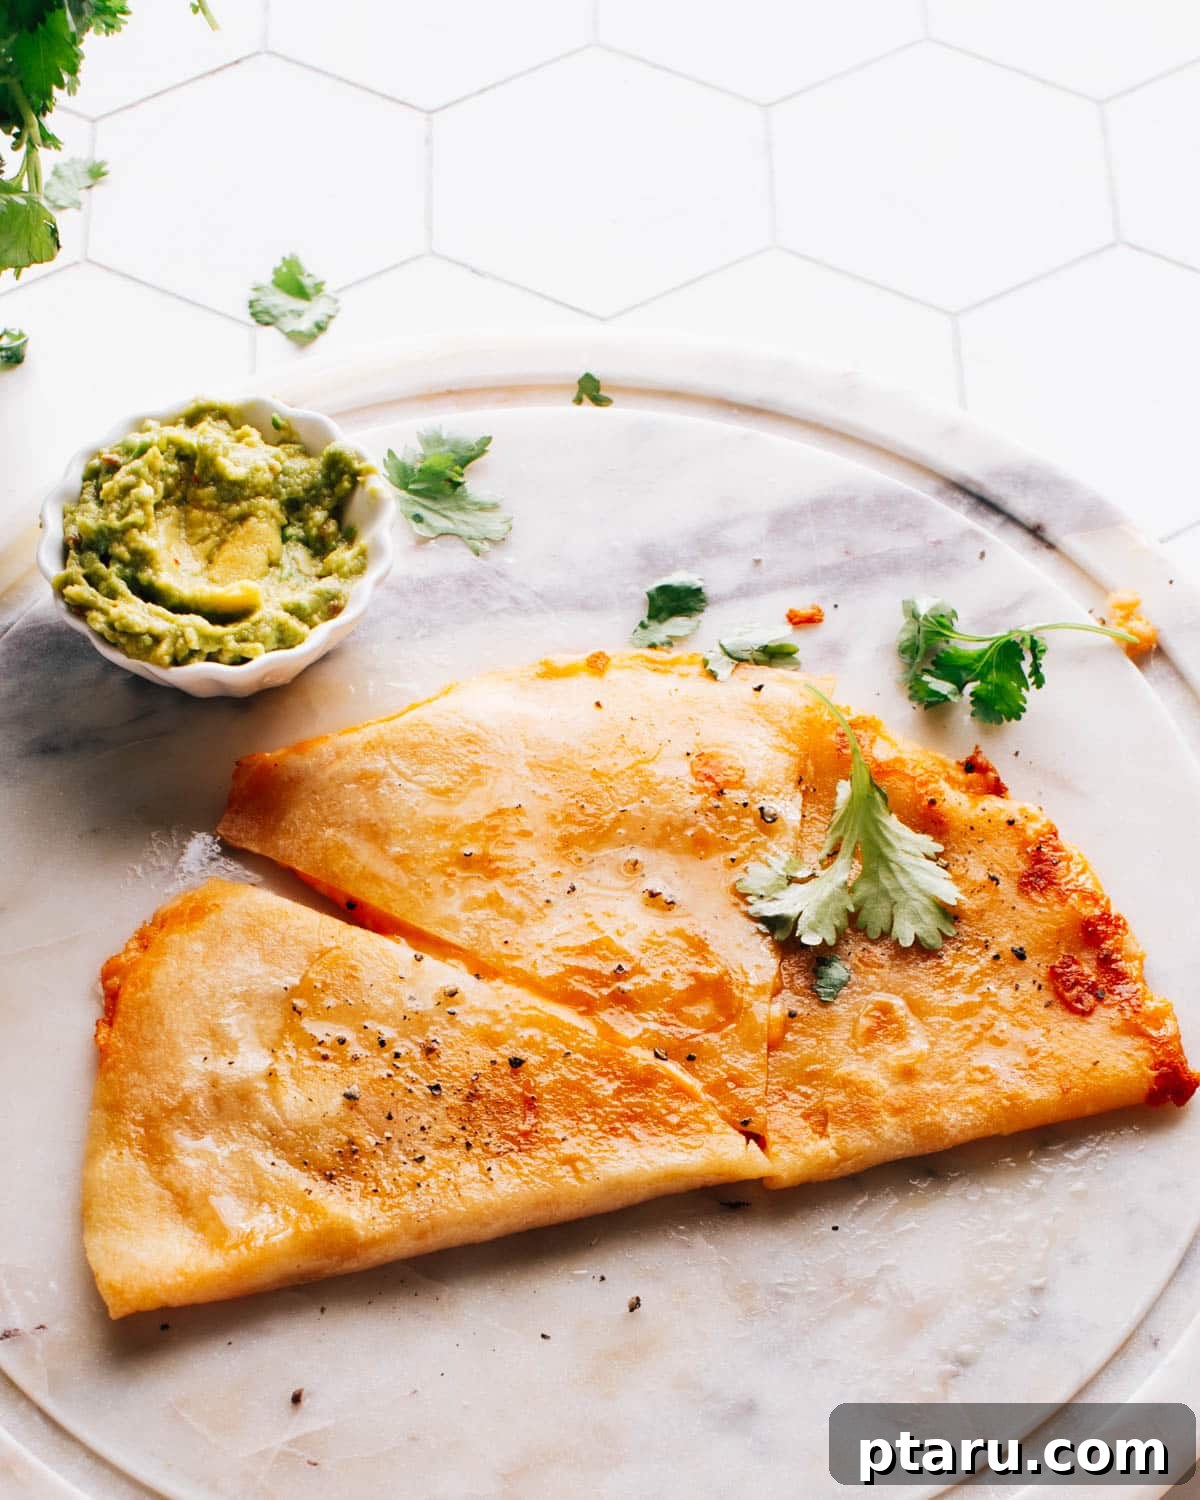
The Ultimate Cheese Quesadilla: Your Guide to Melty Perfection
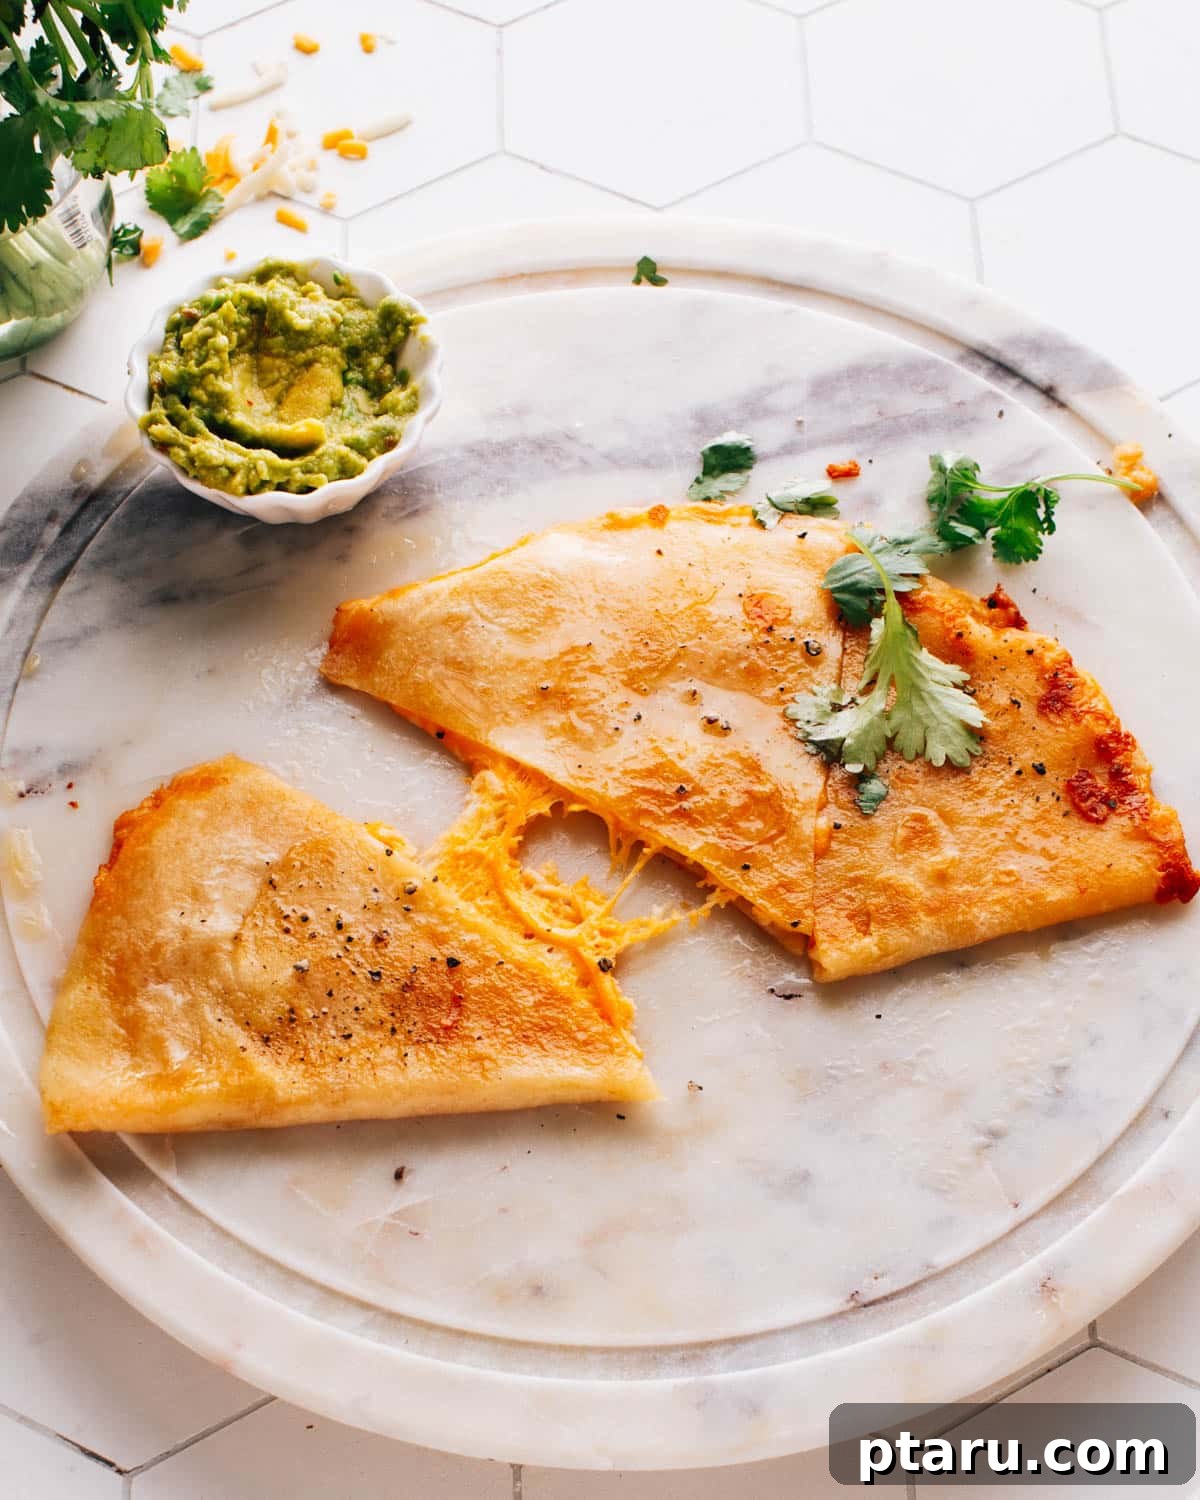
Creating the best cheese quesadilla involves more than just throwing cheese into a tortilla. It’s about understanding the synergy of ingredients and techniques that lead to a truly exceptional result. At its heart, a cheese quesadilla begins with a quality tortilla, typically a soft flour tortilla, chosen for its pliability and ability to perfectly encase the filling. The magic happens when this tortilla is warmed and filled with a carefully selected, exquisitely melty cheese, transforming into a harmonious blend of textures and flavors.
Key Elements for the Best Cheese Quesadilla
Achieving that perfect balance of crisp exterior and molten interior relies on a few critical steps:
- The Crucial Cheese Selection: The type of cheese you choose is paramount. It’s not just about flavor; it’s about the melting properties. The ideal cheese will melt smoothly and evenly, contributing a rich, creamy texture and depth of flavor to every bite.
- Butter for Golden Perfection: Just as you would butter bread for a classic grilled cheese, buttering your tortilla adds an incredible dimension. It creates a beautifully golden-brown, crispy exterior that offers a delightful contrast to the soft, warm interior. It also prevents sticking and enhances flavor.
- Mastering the Cook: The cooking process requires patience and medium heat. You want the tortilla to become wonderfully golden and crispy on the outside, while the cheese inside transforms into a luscious, gooey consistency that stretches invitingly.
This deceptively simple dish stands out as one of the easiest and most satisfying Mexican recipes to master, embodying the very essence of comfort food. It’s quick enough for a busy weeknight yet delicious enough to be a crowd-pleaser.
Choosing the Best Cheese for Your Quesadillas
The soul of a truly great quesadilla lies in its cheese. When selecting the best cheese for quesadillas, you’ll want varieties known for their superior melting capabilities and flavors that complement the tortilla and any additional fillings. Avoid cheeses that become oily or grainy when heated. Here are some top picks, ranging from traditional to widely available options, and why they excel:
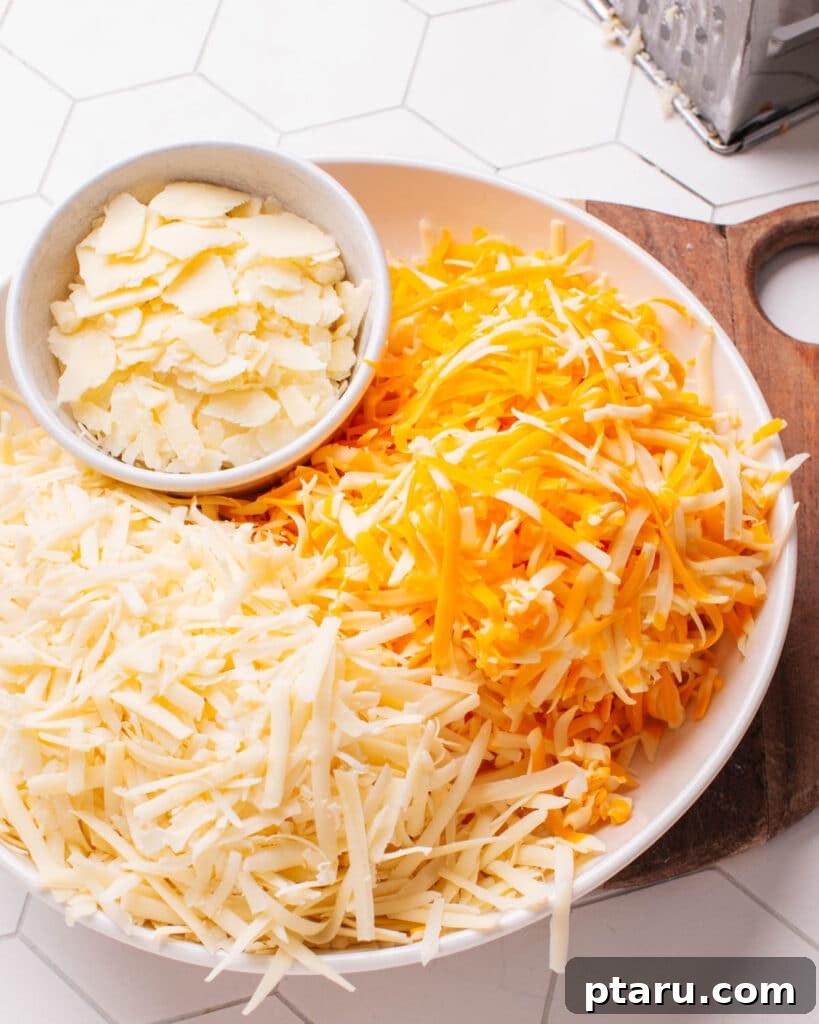
- Monterey Jack Cheese: Often considered the gold standard for quesadillas, Monterey Jack is celebrated for its creamy texture, mild flavor, and exceptional melting qualities. It melts evenly and smoothly, creating that perfect gooey interior without becoming overly oily.
- Cheddar Cheese: For those who prefer a more robust flavor, cheddar is an excellent choice. Its sharper, tangier notes add a wonderful depth to the quesadilla. Many enthusiasts opt for a blend of sharp cheddar and mild Monterey Jack to achieve a balanced flavor profile and ideal melt.
- Colby Jack: This popular blend of Colby and Monterey Jack cheeses offers the best of both worlds. It provides a very smooth, mild, and approachable flavor, combined with reliable melting performance, making it a favorite for family-friendly quesadillas.
- Asadero or Queso Quesadilla: These are authentic Mexican cheeses specifically designed for melting. Asadero is a semi-soft, mild, white cheese that melts into a beautiful, creamy consistency. Queso Quesadilla, as its name suggests, is a traditional choice, offering a delicate flavor and superb melt.
- Mozzarella Cheese: If you’re seeking a mild flavor profile and a truly delightful, stretchy “cheese pull,” mozzarella is a fantastic option. Its neutral taste allows other flavors to shine, while its stringy melt is incredibly satisfying.
- Oaxaca Cheese: Hailing from the region of Oaxaca, Mexico, this unique stringy and semi-soft cheese is famous for its smooth, uniform melt and delicate, milky flavor. It’s traditionally hand-wound into balls, then unwound for use, making it ideal for dishes like quesadillas and other melted cheese applications where a lovely texture is desired.
Don’t hesitate to experiment! The beauty of quesadillas lies in their versatility. Try different cheeses until you discover your personal favorite, or mix and match several varieties for a more complex and nuanced flavor experience. A blend often yields the most interesting results.
While convenience can be tempting, be wary of pre-shredded cheeses, especially those labeled as “Tex-Mex blend.” These often contain anti-caking agents like cellulose or potato starch, which can hinder proper melting and lead to a grainy, less desirable texture. For the absolute best results, grating your own block of cheese will always yield a superior, smoother, and more luxurious melt.
Gather Your Essential Ingredients
Ready to embark on your quesadilla-making adventure? The beauty of this dish lies in its simplicity and reliance on just a few core ingredients. Let’s assemble what you’ll need to create those irresistible, cheesy pockets of goodness:
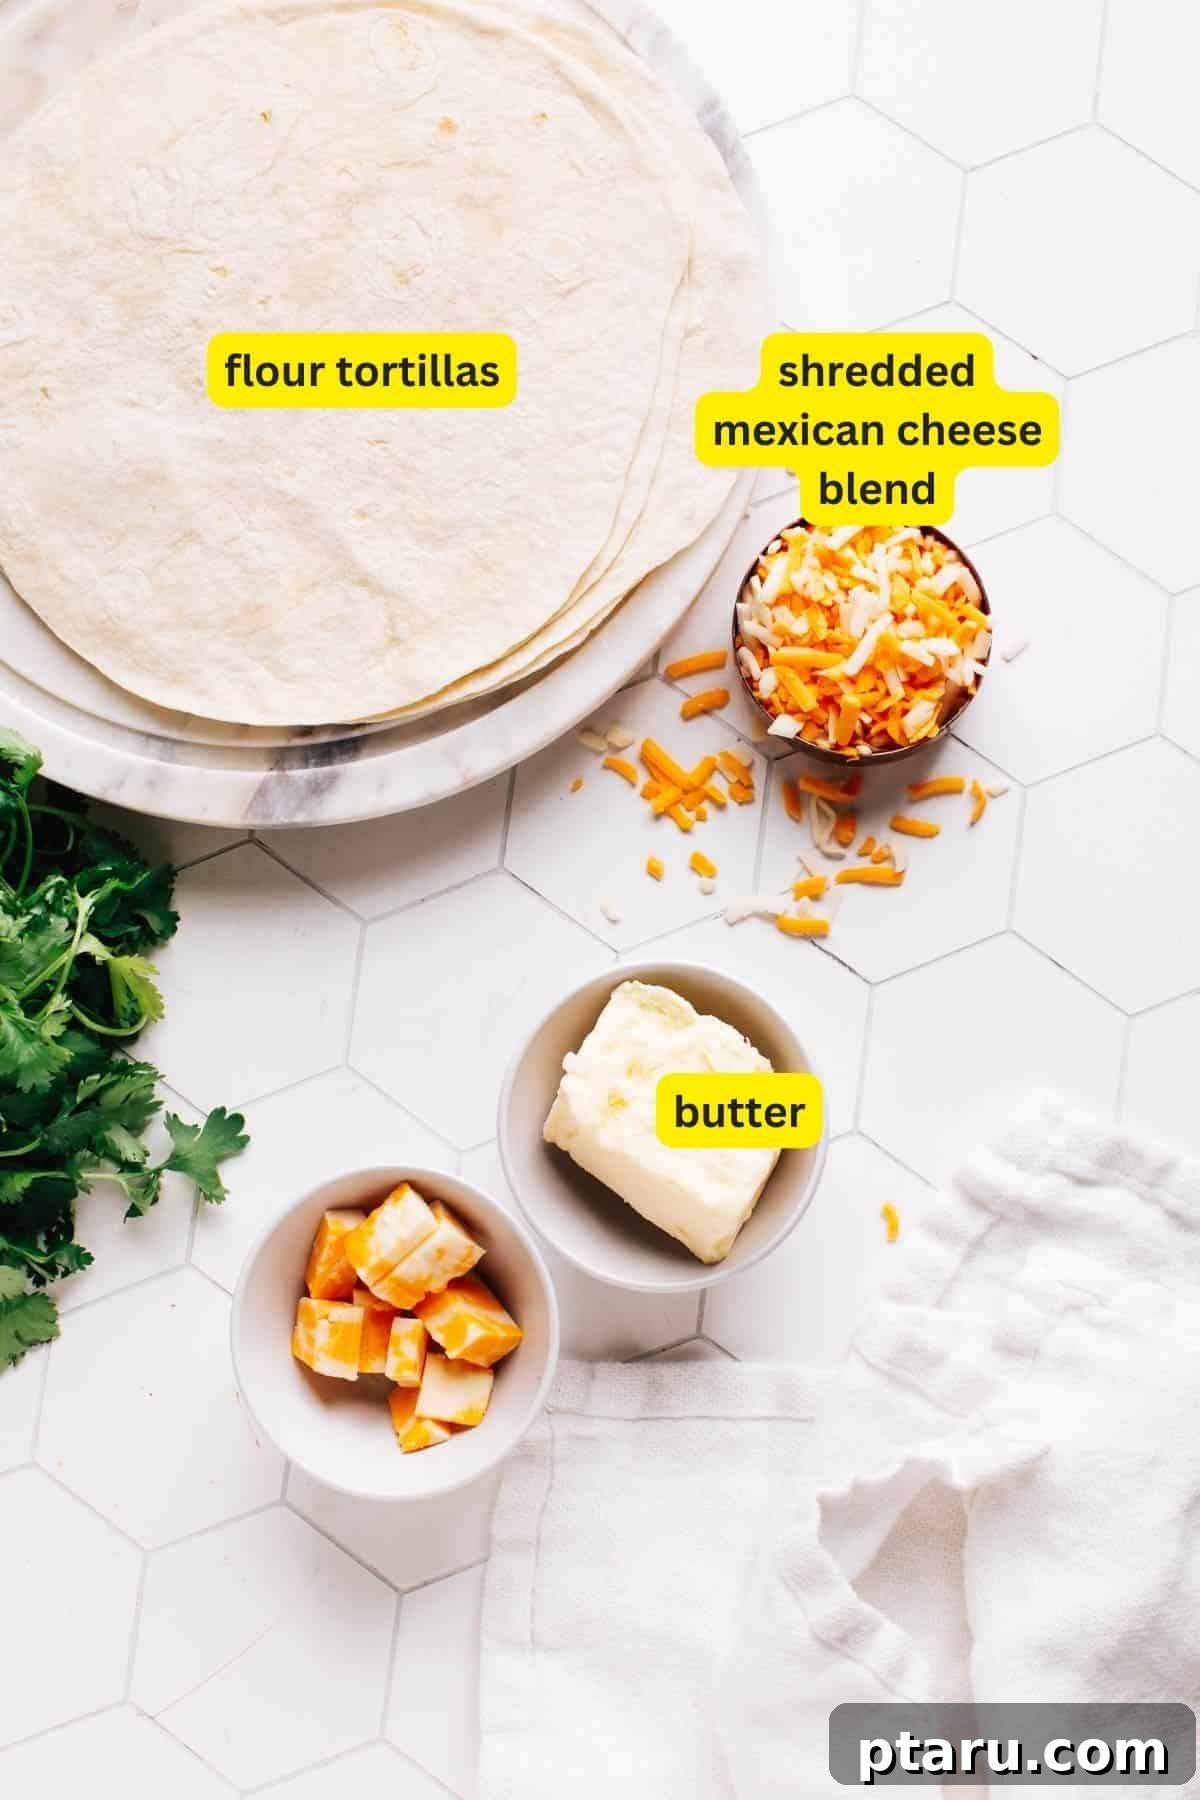
- Large Flour Tortillas: These form the crucial foundation and top layer of your quesadillas, expertly encasing all the delicious fillings. Opt for fresh, soft flour tortillas that are pliable and won’t crack when folded. While flour tortillas are classic, quesadillas can also be wonderfully made with soft corn tortillas, offering a distinct flavor and a fantastic gluten-free alternative.
- Shredded Cheese: As discussed, your choice of cheese is vital. Aim for about ½ cup of shredded cheese per quesadilla. Whether you go for a single cheese or a custom blend, make sure it’s a type known for its excellent melting properties. Freshly shredded cheese is highly recommended for the best texture.
- Butter: This humble ingredient is key to achieving that desirable golden, crispy exterior and rich, savory flavor. Using butter to toast the tortilla in the skillet imparts a far more delicious taste compared to, say, olive oil or other cooking fats. It caramelizes the tortilla beautifully.
- Optional Toppings and Accompaniments: While a plain cheese quesadilla is delightful on its own, a selection of fresh toppings can elevate the experience. Consider creamy sour cream, rich guacamole, zesty taco salsa, or a fresh, vibrant pico de gallo to serve alongside. These provide contrasting textures and flavors that enhance every bite.
Corn or Flour Tortillas for Quesadillas: Which is Best?
The choice between corn and flour tortillas can significantly impact the final taste and texture of your quesadilla. Both have their merits, offering distinct experiences:
- Flour Tortillas: These are the most common choice for quesadillas in many parts of Mexico and particularly in Tex-Mex cuisine. They are soft, highly flexible, and typically larger in diameter, making them excellent for holding a generous amount of fillings. Their mild flavor acts as a perfect canvas, allowing the rich taste of the cheese and other ingredients to truly shine. They crisp up beautifully when buttered and cooked, offering a satisfying chew.
- Corn Tortillas: A more traditional choice in central and southern Mexico, corn tortillas are smaller, sturdier, and boast a wonderfully distinct, earthy flavor. When cooked, they can develop a delightful crunch, adding another layer of texture to your quesadilla. While they hold less filling due to their smaller size and slightly less pliable nature, their robust flavor can add an authentic depth. If you’re a fan of extra crunch and bold flavors, consider using corn tortillas, or for an even crispier experience, explore my recipe for fried tacos! For those seeking a gluten-free option, corn tortillas are the natural choice.
Ultimately, your preference for texture and flavor will guide your choice. Many home cooks keep both on hand to suit different moods and meal types.
Elevate Your Quesadilla: Best Additional Fillings
While a classic cheese quesadilla is divine, it’s also a fantastic canvas for culinary creativity. Quesadillas are incredibly versatile, inviting a wide array of ingredients to be tucked inside, transforming a simple snack into a hearty meal. Remember to pre-cook any raw meats or firmer vegetables before adding them to ensure everything is heated through and the quesadilla doesn’t become soggy.
- Protein Power-Ups: Adding a protein can turn your quesadilla into a more substantial and satisfying meal.
- Chicken: Shredded cooked chicken, especially leftover from recipes like chicken street tacos or a rotisserie chicken, is a popular and delicious choice.
- Steak: Thinly sliced grilled steak, perhaps from leftover beef fajitas, adds a smoky, savory depth.
- Pork: Carnitas or even diced ham can be excellent additions.
- Chorizo: My absolute favorite add-in during my trips to Mexico was fresh, crumbled chorizo. Its spicy, rich flavor pairs beautifully with melty cheese. Cook it thoroughly and drain excess grease before adding.
- Bacon: Crumbled crispy bacon brings a smoky, salty crunch that is universally loved.
- Vibrant Vegetables: Incorporating vegetables adds freshness, texture, and nutrients.
- Sautéed Aromatics: Softened onions, colorful bell peppers, and earthy mushrooms are popular choices. Sauté them beforehand to remove excess moisture and enhance their flavor.
- Fresh & Crunchy: Diced fresh tomatoes, tender spinach (wilted briefly), or sweet corn kernels can be added directly or lightly cooked.
- Spicy Kick: Thinly sliced jalapeños (fresh or pickled) or a pinch of chopped serranos can add a wonderful heat.
- Hearty Beans: Beans are a fantastic way to add substance, fiber, and traditional Mexican flavor.
- Black Beans: Drained and rinsed canned black beans offer a creamy texture and mild flavor.
- Pinto Beans: Similar to black beans, pinto beans are hearty and delicious.
- Refried Beans: A thin layer of refried beans spread over the tortilla before the cheese adds a rich, comforting base.
When adding fillings, remember the golden rule: don’t overstuff! An even, light layer of cheese and additional ingredients will ensure optimal melting and make the quesadilla easier to fold and flip. Too much filling can prevent even cooking and lead to a messy outcome.
Crafting the Ultimate Cheese Quesadilla: Easy Step-by-Step Directions
Now that we’ve gathered our perfect ingredients and pondered our ideal fillings, let’s dive into the straightforward process of making a truly exceptional cheese quesadilla. Follow these simple steps for a golden, gooey masterpiece:
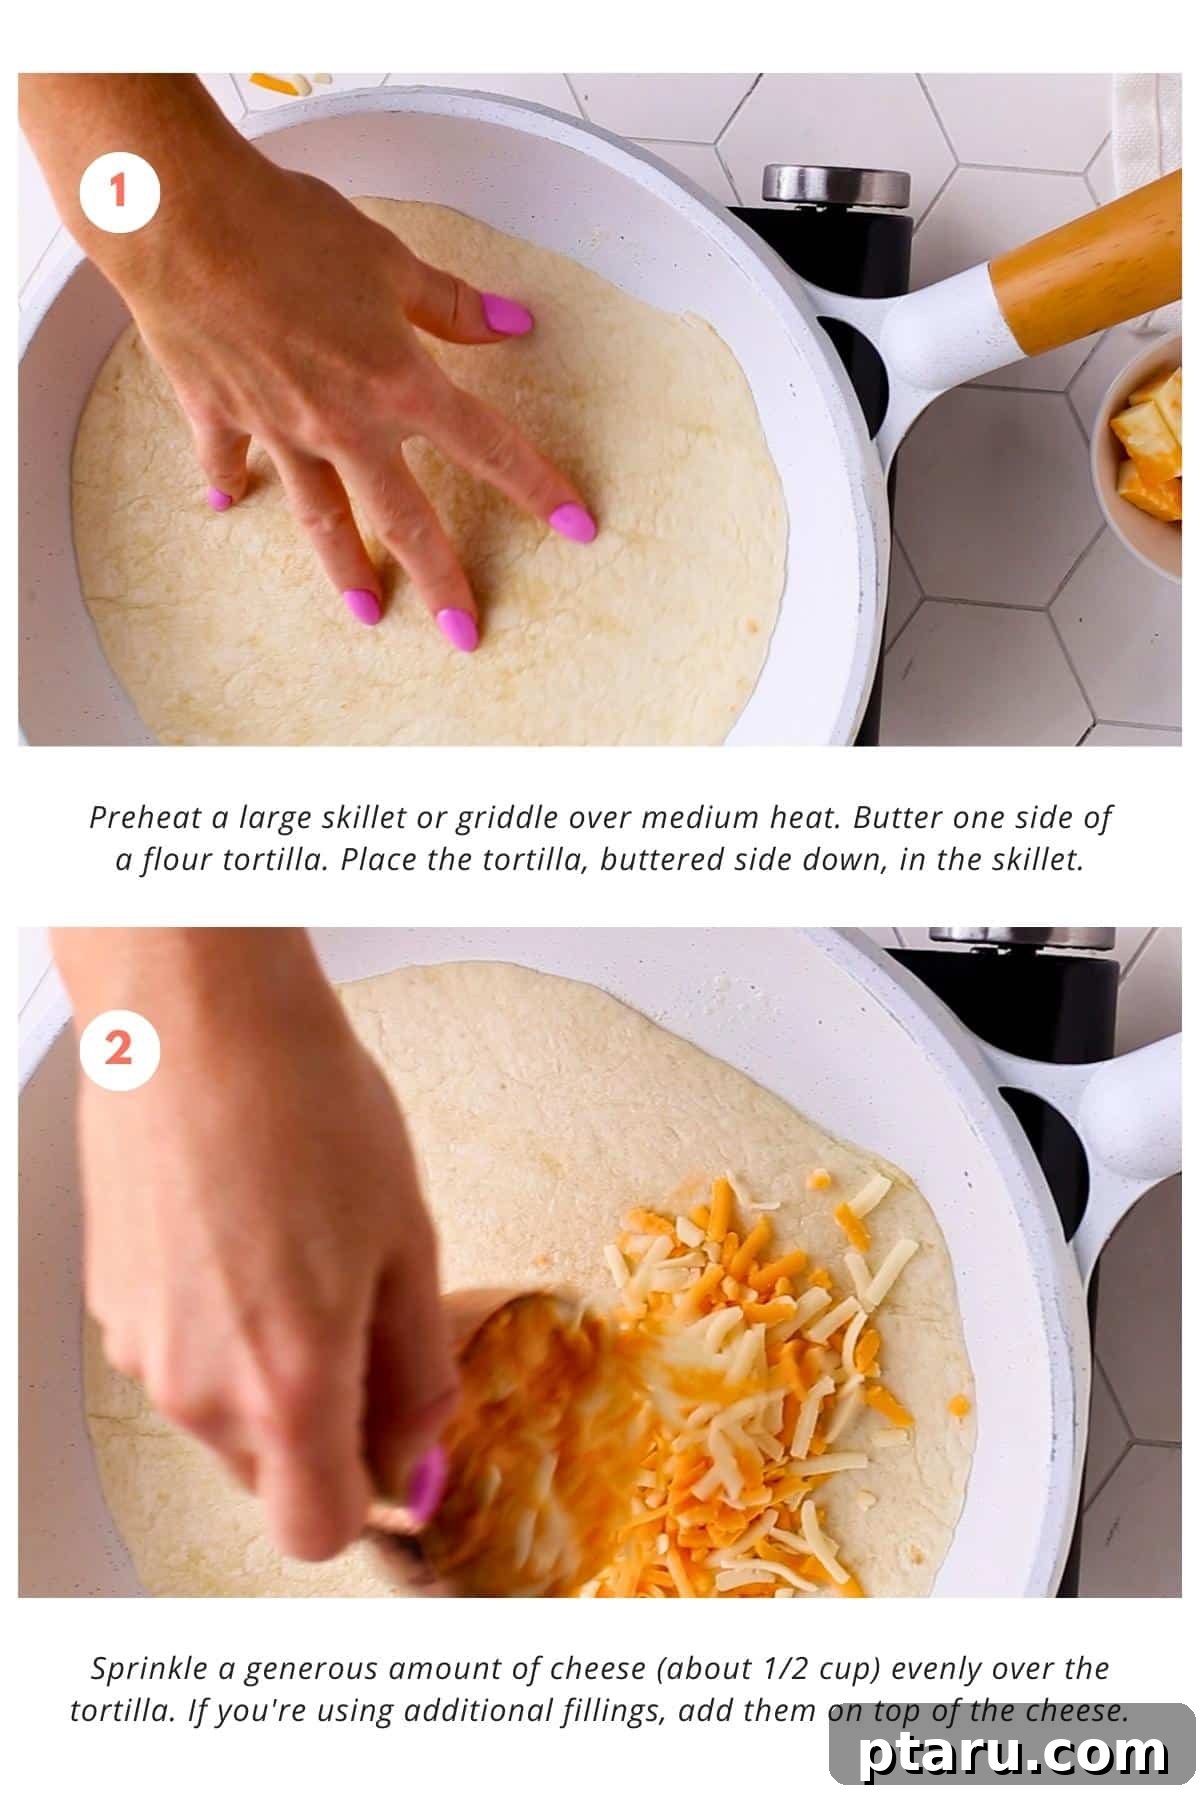
- Step 1: Preheat Your Skillet to Perfection: This initial step is absolutely crucial for achieving that coveted crispy exterior. Place a large skillet or griddle over medium heat and allow it to preheat thoroughly for 2-3 minutes. A hot pan ensures an even cooking temperature from the very beginning, preventing a soggy quesadilla and promoting uniform browning.
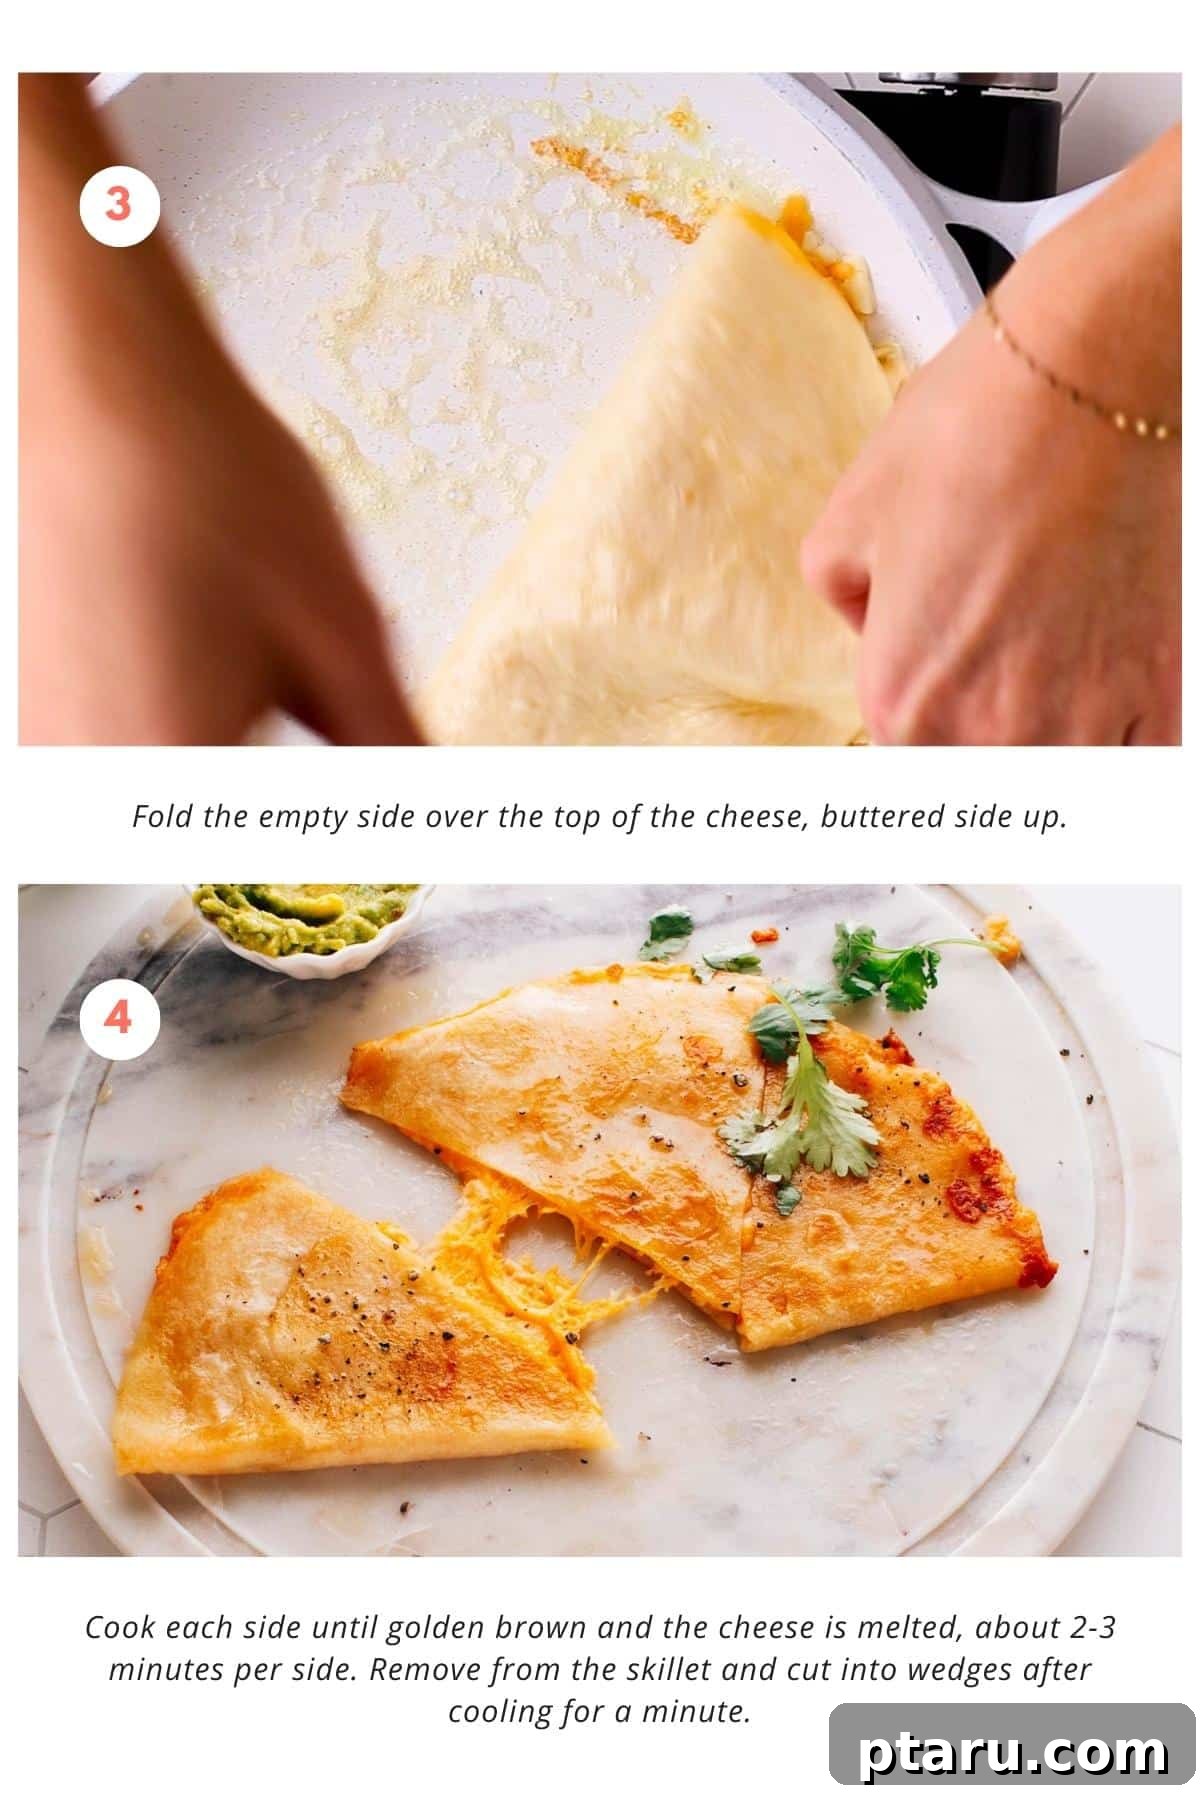
- Step 2: Butter, Fill, and Fold Your Tortilla: Take one flour tortilla and generously butter one side. Place the tortilla, buttered-side down, into your preheated skillet. Immediately sprinkle a generous amount of shredded cheese (about ½ cup) evenly over one half of the tortilla’s surface. If you’re incorporating any additional fillings, layer them thinly over the cheese now. Then, carefully fold the empty side of the tortilla over the cheese, ensuring the buttered side faces upwards.
- Step 3: Cook Until Golden Brown and Melty: Allow the quesadilla to cook undisturbed for about 2-3 minutes. Watch for the bottom tortilla to turn a beautiful golden brown and for the cheese inside to begin visibly melting and softening. The key is medium heat; too high, and it burns; too low, and it won’t crisp.
- Step 4: Flip and Finish Cooking: With a wide, sturdy spatula, carefully flip the quesadilla to cook the second side. Continue cooking for another 2-3 minutes, or until that side is also golden brown and crisp, and the cheese is completely melted into a luscious, gooey consistency.
- Step 5: Slice and Serve Immediately: Once both sides are cooked to golden perfection and the cheese is perfectly molten, remove the quesadilla from the skillet. Allow it to rest on a cutting board for just a minute or two – this helps the cheese set slightly and prevents immediate oozing. Then, using kitchen scissors, a pizza cutter, or a sharp knife, cut the quesadilla into neat wedges. Serve hot with your favorite accompaniments!
Air Fryer Quesadillas: A Quick and Crispy Alternative
For a fantastic hands-off method that yields incredibly crispy results, making an air fryer quesadilla is an excellent option. It’s especially perfect for a quick lunch, a single serving, or when you want to avoid heating up a large skillet. Here’s how:
- Preparation: Assemble your quesadilla as usual – butter one side of the tortilla, place cheese and any fillings on one half, and fold the other half over. You can also lightly brush the outside of the folded quesadilla with a little extra melted butter or oil for enhanced crispness.
- Air Frying: Preheat your air fryer to 375°F (190°C). Carefully place the folded quesadilla(s) into the air fryer basket in a single layer, ensuring they don’t overlap. You may need to cook them in batches.
- Cook Time: Air fry for 4-6 minutes, flipping halfway through, until the tortilla is golden brown and crispy, and the cheese is fully melted and bubbly. Cooking times can vary based on your air fryer model and how full the basket is, so keep an eye on it.
The air fryer method delivers a wonderfully even crispness without much added fat, making it a convenient and delicious way to enjoy your favorite cheesy treat.
5 Pro Tips for Achieving the Best Cheese Quesadillas
Elevate your quesadilla game from good to extraordinary with these expert tips:
- Prioritize Melty Cheeses: Always opt for cheeses known for their smooth melting properties. Monterey Jack, cheddar, Colby Jack, Asadero, or Queso Quesadilla are excellent choices. Even mozzarella works beautifully for a mild flavor and impressive cheese pull. For an extra gooey interior and stretch, consider adding a few small cubes of fresh mozzarella in addition to your shredded cheese.
- Resist the Urge to Overstuff: While it’s tempting to pack your quesadilla with fillings, a light, even layer of cheese and any additional ingredients is crucial. Overstuffing can prevent the cheese from melting properly, make the quesadilla difficult to fold and flip, and lead to an unevenly cooked or soggy result. Less is often more for optimal melt and structure.
- Pre-Cook Your Veggies and Meats: Any vegetables like onions, bell peppers, or mushrooms, and all proteins such as chicken or steak, should be cooked and softened before adding them to your quesadilla. This step ensures they are tender and flavorful, and more importantly, it prevents them from releasing excess moisture during cooking, which can make your tortilla soggy and compromise the crispness.
- Master the Medium Heat: The cooking temperature is vital. Cook your quesadillas over consistent medium heat. If the heat is too low, the tortilla won’t achieve that desirable crisp, golden-brown crust. If the heat is too high, the tortilla will burn before the cheese has a chance to fully melt and become gooey. Patience with medium heat is key to perfection.
- Flip with Care and Confidence: When it’s time to flip your quesadilla, do so gently and confidently. A wide, sturdy spatula is your best friend here. If you’re worried about losing fillings, you can try the “plate flip” method: slide the quesadilla onto a plate, then invert the skillet over the plate and carefully flip it back into the pan. This ensures all the delicious contents stay securely inside.
What Goes Perfectly With Quesadillas? Perfect Pairings
While a cheese quesadilla is a delight on its own, pairing it with complementary sides and sauces can elevate it into a complete and satisfying meal. Here are some of the most popular and delicious serving ideas:
- Creamy Sauces:
- Cilantro Lime Crema or Sour Cream: A dollop of cool, tangy crema or sour cream provides a refreshing contrast to the warm, rich cheese, balancing any potential spiciness and adding a silky texture.
- Avocado Crema: A blend of avocado, lime, and sour cream offers a richer, creamier, and incredibly flavorful dip.
- Fresh Avocado Delights:
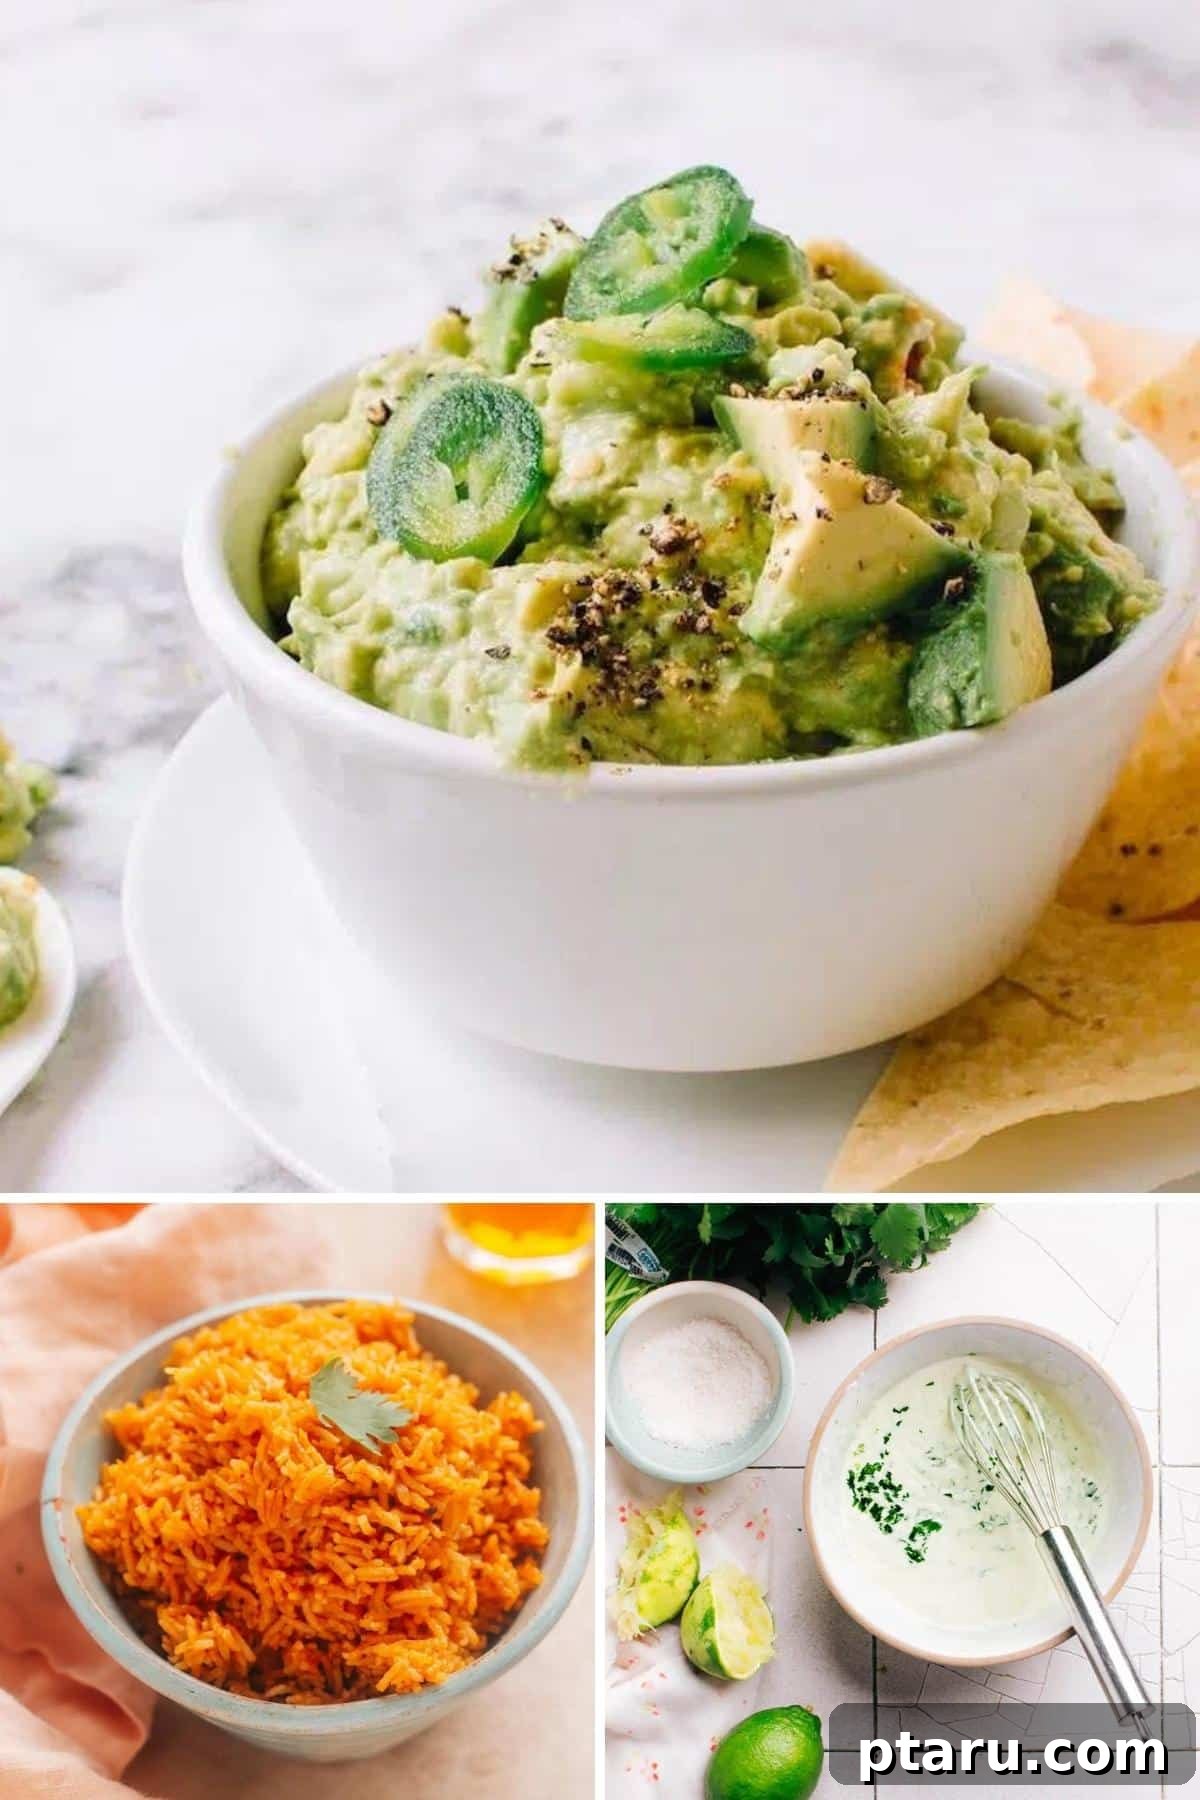
- Guacamole: The ultimate classic! Creamy, zesty guacamole adds a fresh, rich element that beautifully complements the savory quesadilla.
- Sliced Avocado: Simple, fresh slices of ripe avocado are a quick and healthy addition.
- Salsas & Pico de Gallo:
- Salsa or Pico de Gallo: From mild to spicy, a fresh salsa or chunky pico de gallo (a fresh blend of chopped tomatoes, onions, cilantro, and jalapeños) provides a burst of vibrant, tangy, and sometimes spicy flavor.
- Salsa Roja or Salsa Verde: Depending on your preference, a cooked red or green salsa can offer deep, complex flavors.
- Refreshing Salads:
- Simple Green Salad: A light, crisp green salad with a vinaigrette dressing offers a refreshing counterpoint to the richness of the quesadilla.
- Slaw: A crunchy, zesty slaw, much like my slaw for fish tacos, adds a textural crunch and bright flavor.
- Mexican Street Corn Salad (Esquites): A vibrant and flavorful salad featuring corn, cotija cheese, chili powder, and lime, making the meal feel more substantial and festive.
- Hearty Sides:
- Mexican Rice: A traditional and filling side, Mexican rice complements the flavors of the quesadilla and turns it into a more robust and satisfying meal.
- Refried Beans: A classic pairing, refried beans add a creamy, savory element.
Storing and Reheating Leftovers: Keep Them Delicious
Making a batch of cheese quesadillas means you might have delicious leftovers, and thankfully, they store and reheat beautifully, making them perfect for meal prep. Properly storing and reheating ensures your quesadillas retain their flavor and texture.
- Refrigeration: Once cooled completely to room temperature, place any leftover quesadilla wedges in an airtight container or wrap them tightly in foil. Refrigerate them promptly. They will maintain their quality and freshness for approximately 3 days.
- Reheating for Crispness: To bring them back to life with that desirable crispness:
- Toaster Oven/Air Fryer: For the best results, pop them into a toaster oven or air fryer at 350°F (175°C) for 5-7 minutes, or until the cheese is melted and the tortilla is crispy again. This method mimics the original skillet cook, ensuring a delightful crunch.
- Skillet: Reheat them in a dry, preheated skillet over low to medium-low heat for a few minutes per side, until warmed through and crisped. Avoid high heat which can burn the tortilla before the cheese melts.
- Microwave (least recommended): While quick, the microwave tends to make tortillas soft and rubbery, and the cheese can become overly liquid. If using, heat in short bursts (30 seconds) until just warmed.
I often prepare simple cheese quesadillas in batches for my kids’ lunch boxes. Even if daycare reheats them, my older children enjoy them cold, a testament to their enduring appeal.
How to Freeze and Reheat Quesadillas for Future Enjoyment
Quesadillas are excellent candidates for freezing, making them a fantastic option for quick, homemade meals whenever hunger strikes. Properly frozen quesadillas can be a lifesaver on busy days.
- Freezing Instructions:
- First, allow your cooked quesadillas to cool completely to room temperature. This is essential to prevent ice crystals from forming and making them soggy.
- Next, arrange the cooled quesadillas in a single layer on a baking sheet. Place the baking sheet in the freezer and freeze until the quesadillas are solid, typically 1-2 hours. This “flash freezing” step prevents them from sticking together.
- Once frozen solid, transfer the individual quesadillas to a freezer-safe bag or an airtight container. If stacking, place a piece of parchment paper between each quesadilla to prevent sticking. They can be stored in the freezer for up to two months, retaining their quality and flavor.
- Reheating from Frozen: The best part is there’s no need to thaw them first!
- Oven Method: Preheat your oven to 375°F (190°C). Place the frozen quesadillas directly on a baking sheet. Bake for about 15-20 minutes, or until they are thoroughly heated through, the cheese is beautifully melted, and the tortilla is crisp. They’ll have a satisfying crunch, much like my favorite Crispy Baked Ground Chicken Tacos.
- Skillet Method: You can also reheat them in a skillet over medium heat. Place the frozen quesadilla in a preheated, dry skillet. Cover it to trap heat and help the cheese melt, flipping occasionally to ensure even warming and crisping on both sides. This method might take slightly longer than reheating from chilled, but still yields great results.
Whichever method you choose, you’ll be enjoying a delicious, cheesy quesadilla in minutes, straight from the freezer!
Frequently Asked Questions About Cheese Quesadillas
Traditionally, quesadillas often feature a Mexican cheese blend, such as Asadero or Queso Oaxaca. However, any cheese that melts well can be used. Popular choices in home kitchens include Monterey Jack, cheddar, Colby Jack, and even mozzarella, often used individually or in various combinations for a rich flavor and perfect melt.
Quesadillas are incredibly versatile! Beyond the essential cheese, you can add almost anything. Cooked proteins like shredded chicken, grilled steak, or crumbled chorizo are popular. Vegetables such as sautéed onions, bell peppers, mushrooms, spinach, or corn add freshness. Black beans, pinto beans, or refried beans provide a hearty touch. Just remember to pre-cook any raw ingredients and avoid overstuffing.
When grating your own cheese, opt for blocks of Monterey Jack, sharp or mild cheddar, or Colby Jack. These cheeses are renowned for their superior melting properties, resulting in a smooth, creamy, and flavorful interior without becoming oily or grainy. Freshly grated cheese always yields the best texture and taste compared to pre-shredded varieties.
Quesadillas are inherently Mexican due to their historical origins and deep roots in Mexican culinary traditions. They typically feature tortillas (corn or flour) and distinct Mexican cheeses, along with a wide range of fillings and flavors that are quintessential to Mexican cuisine. The name itself, “quesadilla,” is derived from the Spanish word “queso” (cheese).
Many authentic Mexican restaurants primarily use traditional Mexican cheeses for their quesadillas. Common choices include Queso Quesadilla (a creamy, smooth-melting cheese with a mild flavor), Asadero, or Oaxaca cheese. Some may also use a blend of these or incorporate Monterey Jack for its reliable melt and popular appeal.
Popular white cheeses for quesadillas include Monterey Jack, Asadero, Oaxaca, and Queso Quesadilla. While Queso Fresco is a mild, crumbly white cheese often served with Mexican dishes, it does not melt well and is typically used as a topping rather than an interior filling for quesadillas.
Yes, absolutely! The word “quesadilla” literally translates to “little cheesy thing” (from “queso” for cheese and “-illa” as a diminutive suffix) in Spanish. While some regional variations might exist that don’t *always* contain cheese, the fundamental and most recognized form of a quesadilla in Mexico and globally includes cheese as a primary, defining ingredient.
Explore More Easy Mexican Recipes You’ll Love
If you enjoyed crafting this ultimate cheese quesadilla, you’ll love these other mouthwatering Mexican recipes. They’re quick, packed with flavor, and many can be whipped up in under 30 minutes for a burst of irresistible taste:
- Chicken Street Tacos: Authentic flavors in a bite-sized package.
- Tacos Al Pastor: Experience the vibrant taste of marinated pork.
- Fried Tacos: For those who crave an extra crispy shell.
- Spicy Fish Tacos: A fresh and zesty seafood delight.
- Authentic Ground Beef Tacos: A classic done right, with rich, savory beef.
Pin Recipe
Print Recipe
Classic Cheese Quesadilla
Jennifer Pallian BSc, RD
5 minutes
6 minutes
11 minutes
4
Quesadillas
Video
Watch the video for a visual guide on making perfect cheese quesadillas.
Equipment
-
Measuring Cups and Spoons
-
Sharp Knife
-
Wide Spatula
-
Cast Iron Skillet (or other large non-stick pan)
Ingredients
-
4
large flour tortillas -
2
cups
shredded Mexican cheese blend
or a mix of cheddar and other favorite melty cheeses, like Monterey Jack -
4
tablespoons
unsalted butter -
Serving Suggestions:
sour cream, guacamole, salsa, or pico de gallo -
Optional Fillings:
cooked onions, bell peppers, mushrooms, jalapeños, cooked shredded chicken or beef, black beans, corn, chopped tomatoes, or any other favorite ingredients
Instructions
-
1. Preheat a large skillet or griddle over medium heat for 2-3 minutes until hot.
-
2. Butter one side of a flour tortilla. Place the tortilla, buttered side down, in the preheated skillet.
-
3. Sprinkle approximately 1/2 cup of cheese evenly over one half of the tortilla. Add any additional fillings on top of the cheese, ensuring not to overfill, as this can make the quesadilla difficult to flip.
-
4. Carefully fold the empty side of the tortilla over the cheese and fillings. The buttered side of the folded tortilla should now be facing upwards.
-
5. Cook the quesadilla until the bottom tortilla turns golden brown and the cheese begins to melt, which typically takes about 2-3 minutes.
-
6. Using a wide spatula, carefully flip the quesadilla. Cook on the second side for another 2-3 minutes, or until it is also golden brown and crispy, and the cheese is fully melted and gooey.
-
7. Remove the cooked quesadilla from the skillet and let it cool for a minute on a cutting board. Use kitchen scissors, a pizza cutter, or a sharp knife to cut it into wedges. Serve immediately with your favorite toppings.
Nutrition
Carbohydrates: 17g |
Protein: 17g |
Fat: 25g |
Saturated Fat: 15g |
Polyunsaturated Fat: 2g |
Monounsaturated Fat: 6g |
Trans Fat: 0.5g |
Cholesterol: 65mg |
Sodium: 752mg |
Potassium: 94mg |
Fiber: 1g |
Sugar: 1g |
Vitamin A: 683IU |
Calcium: 700mg |
Iron: 1mg
Nutrition information is automatically calculated and should only be used as an approximation. Values may vary based on specific ingredients and preparation methods.
Tried this recipe? Leave a comment!
We love to hear your feedback and see your creations!