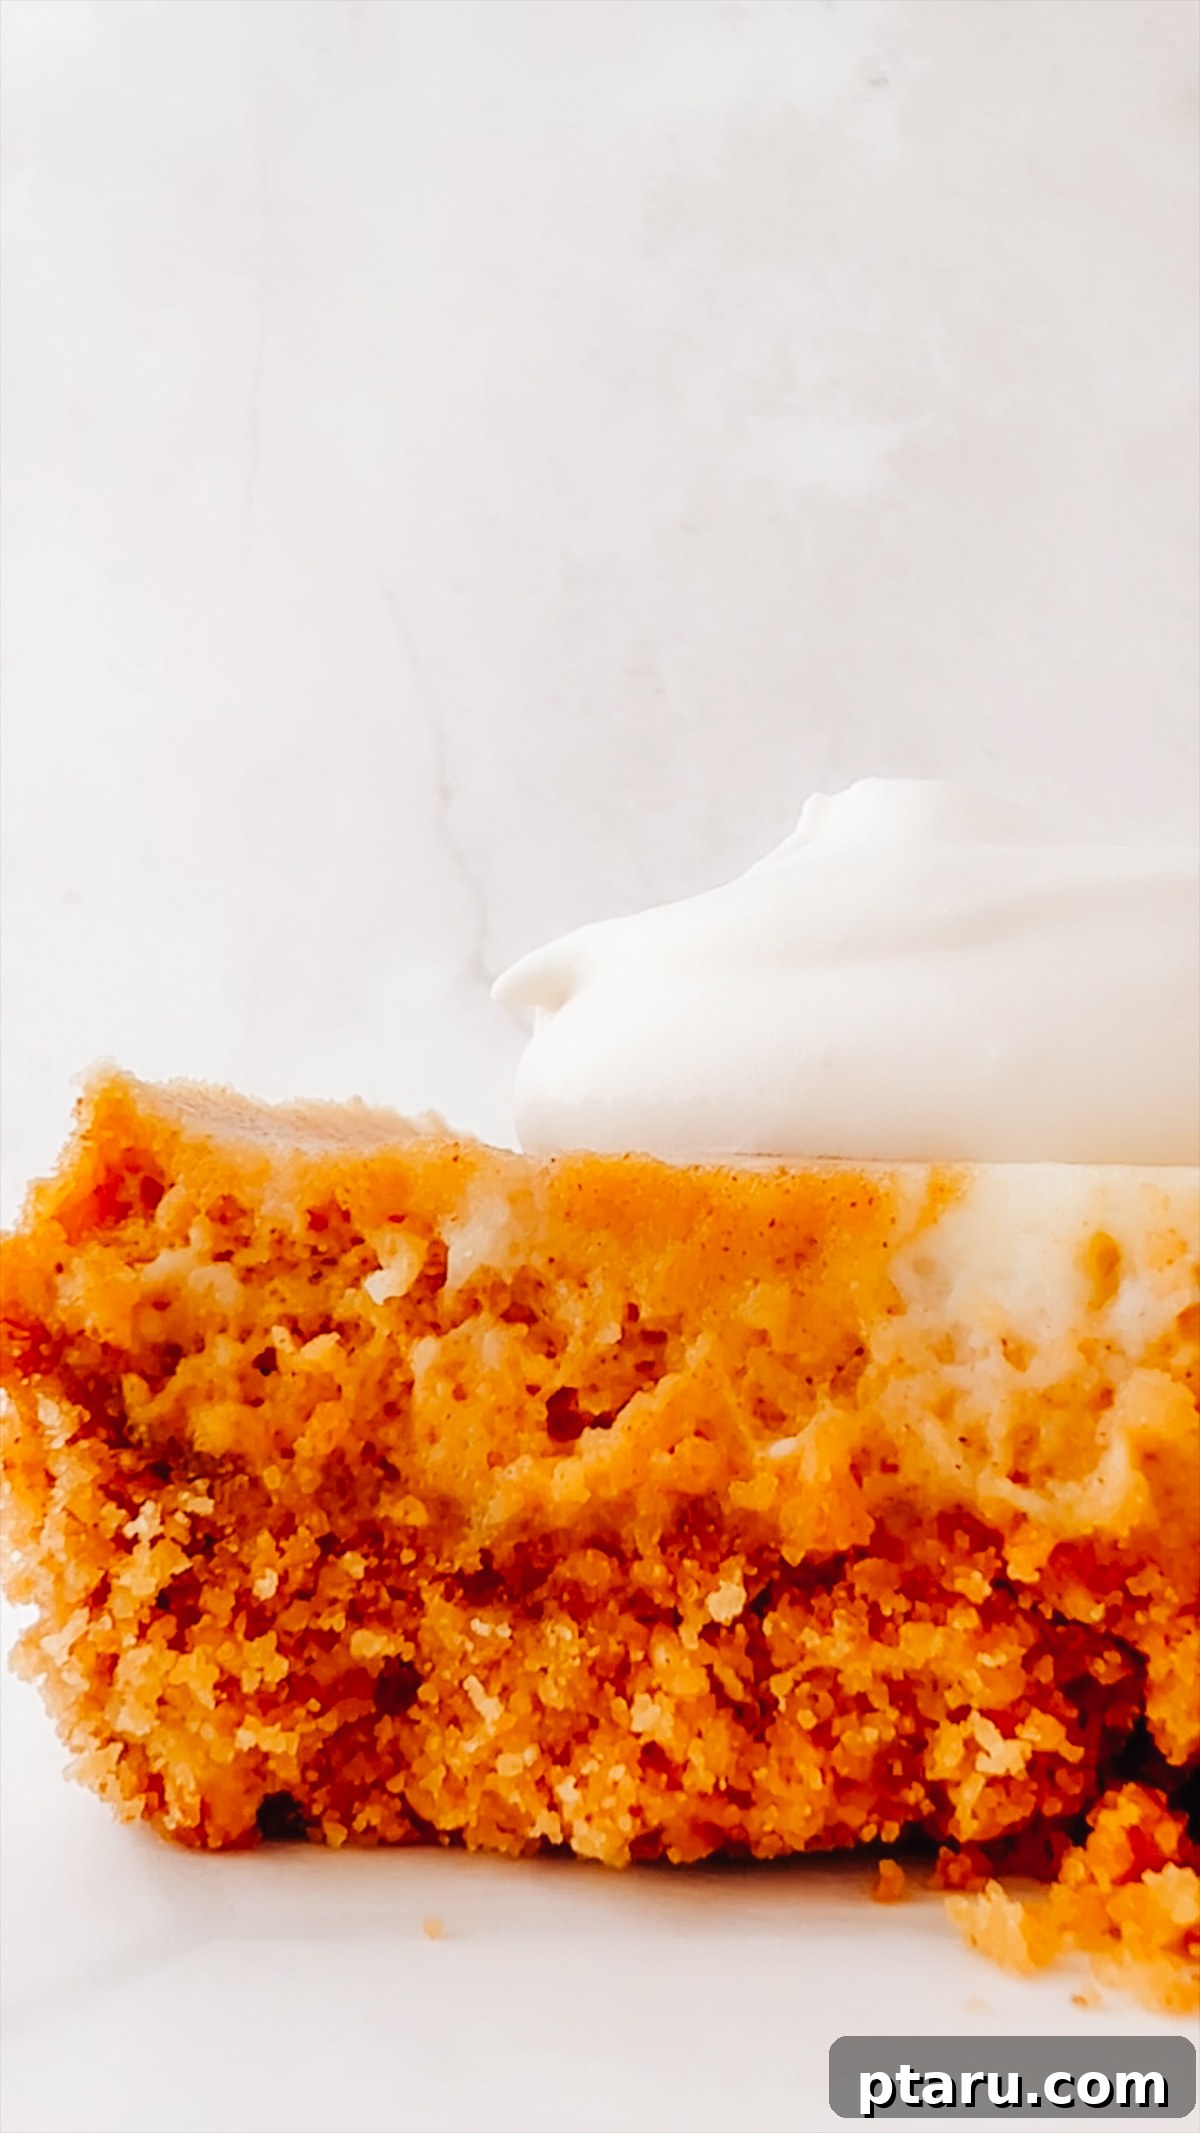
As autumn leaves begin to fall and a crisp coolness fills the air, there’s nothing quite like the comforting aroma of pumpkin spice wafting from the kitchen. These incredibly easy Pumpkin Cheesecake Bars are more than just a dessert; they are a celebration of the season. Combining the rich, earthy flavors of pumpkin with the decadent creaminess of cheesecake, these bars are a perfect harmony of textures and tastes. Despite their elegant, marbled appearance, they are surprisingly simple to make, making them an ideal treat for both seasoned bakers and beginners alike. Get ready to impress your family and friends with this beloved fall favorite that everyone will adore!
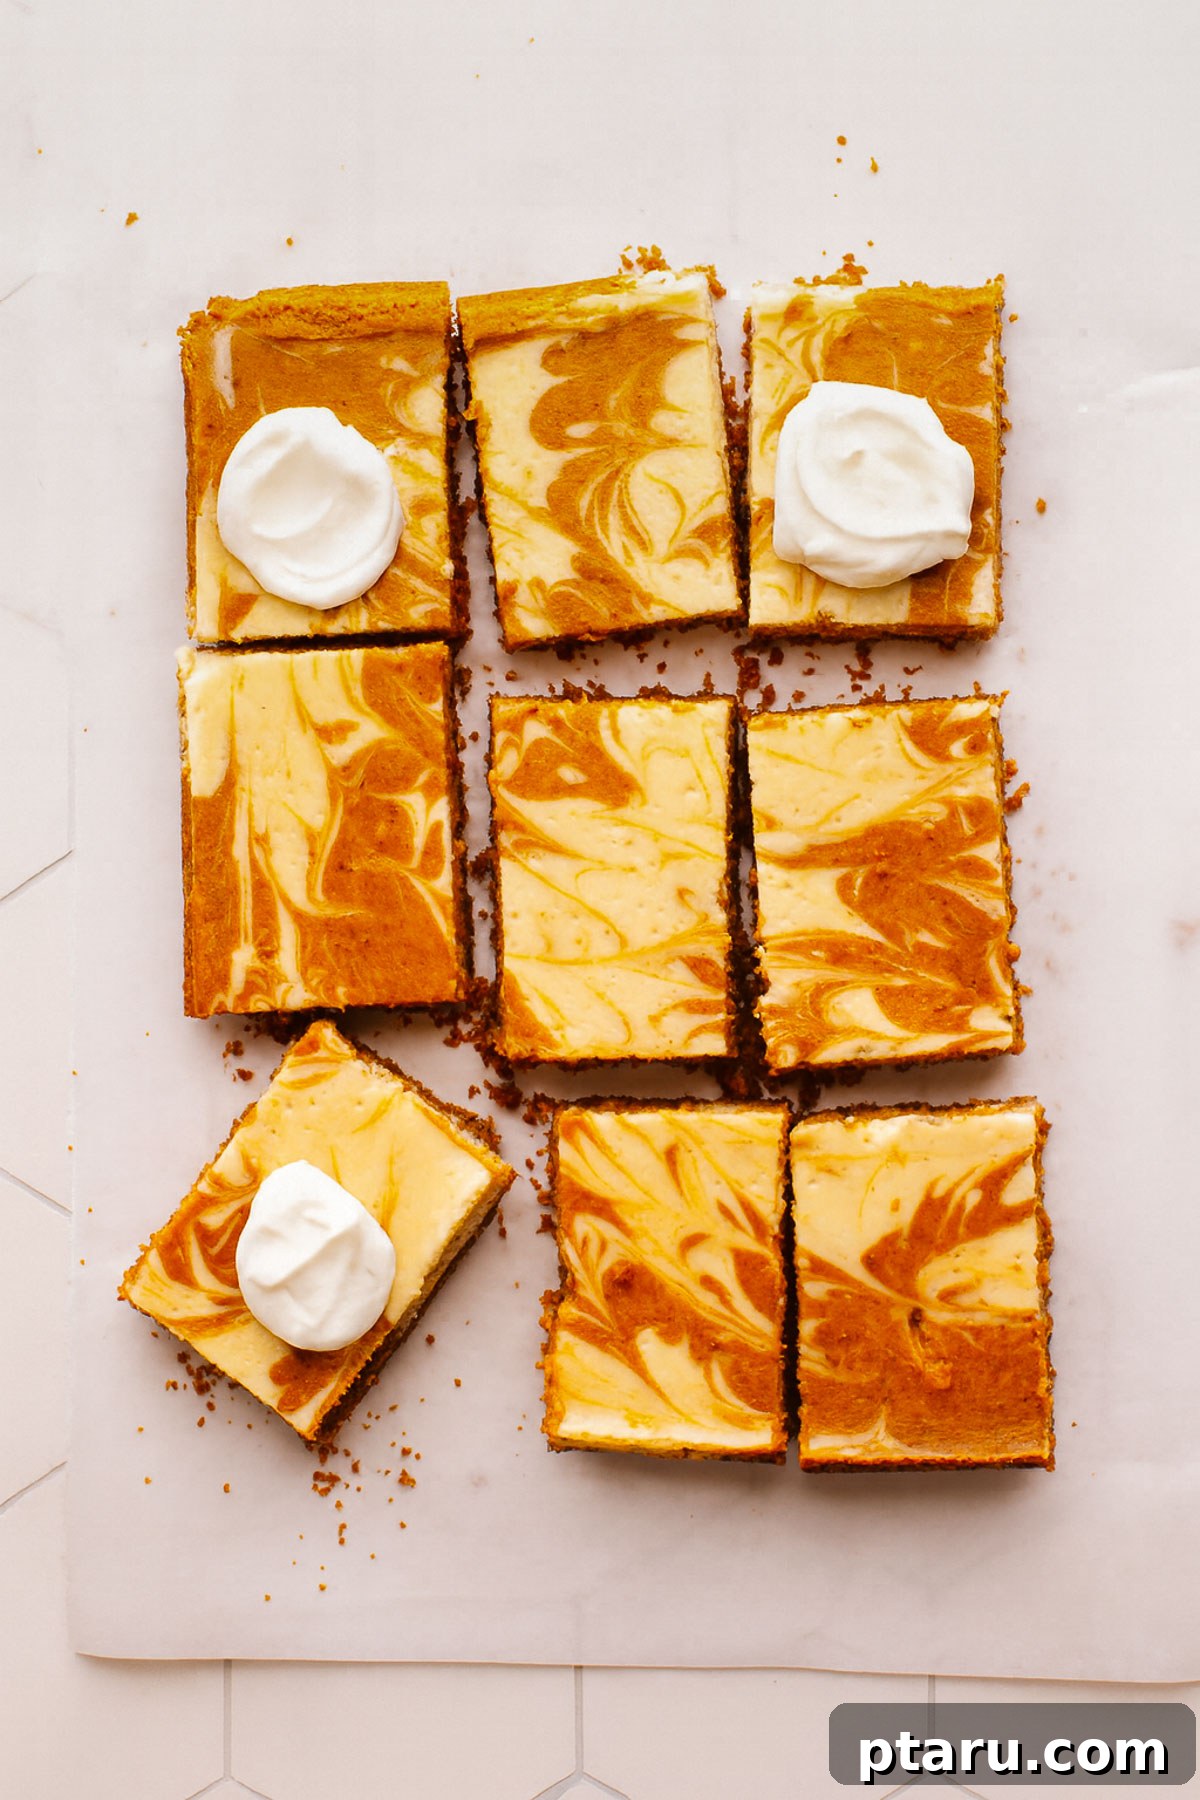
Experience the Best Pumpkin Cheesecake Bars
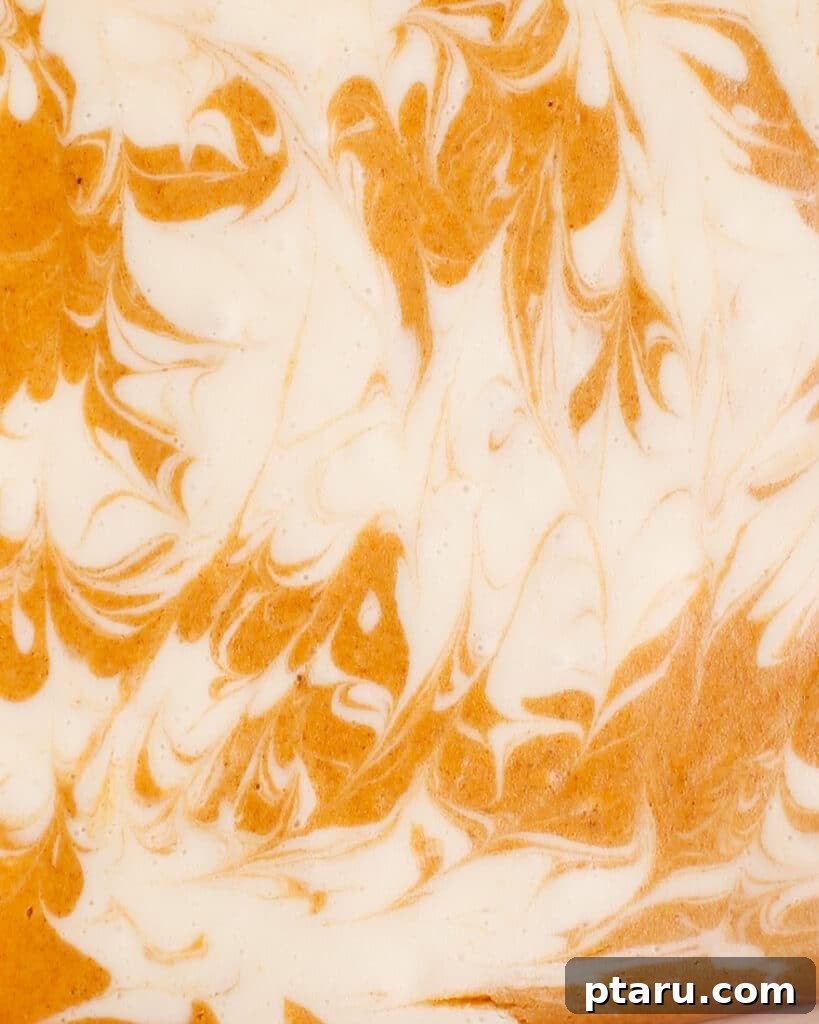
Fall is indeed in full swing, and what better way to embrace this magical time of year than with a batch of these mouthwatering pumpkin bars? Each bite delivers an exquisite blend of creamy vanilla cheesecake batter artfully swirled into a spiced pumpkin cheesecake filling. The result is an ultra-creamy, smooth texture bursting with authentic pumpkin spice flavor, all resting on the most delightful buttery graham cracker crust. These bars truly capture the essence of autumn in a single, irresistible dessert.
Why You’ll Fall in Love with This Recipe
Beyond their stunning appearance and incredible taste, there are several compelling reasons why these Pumpkin Cheesecake Bars will become your go-to fall dessert:
- Effortless 2-Ingredient Crust: Forget complicated crusts! Our graham cracker base comes together in a flash with just two simple ingredients, creating a sturdy yet delicate foundation that perfectly complements the rich, creamy filling. It’s a true breeze to whip up.
- Significantly Shorter Bake Time: Unlike traditional cheesecake recipes that demand lengthy baking and cooling processes, these bars offer a much quicker turnaround. You’ll be enjoying this autumn-inspired treat in a fraction of the time, perfect for last-minute cravings or busy schedules.
- No Fuss, All Flavor: Say goodbye to the complexities of a hot water bath or the need for a specialized springform pan. This recipe simplifies the cheesecake-making process without compromising on flavor or texture. It’s wonderfully straightforward, quick, and irresistibly delicious, making gourmet baking accessible to everyone.
Ready to embark on a delightful baking adventure? Let’s dive into the details!
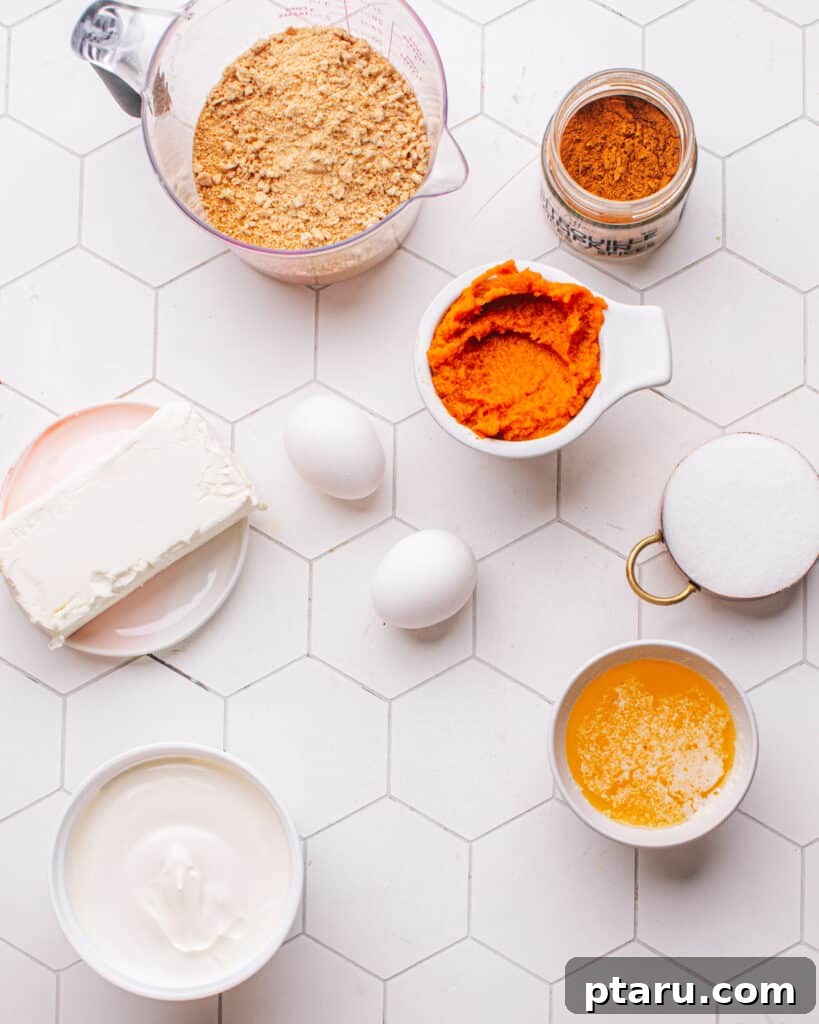
Essential Ingredients and Tools for Perfect Pumpkin Cheesecake Bars
Before we begin crafting one of the most beloved pumpkin desserts, let’s gather all the simple yet crucial ingredients and equipment. Quality ingredients are key to achieving that rich, creamy texture and vibrant pumpkin flavor.
Pumpkin Cheesecake Bar Ingredients Breakdown
For the Irresistible Graham Cracker Crust:
- Graham Cracker Crumbs: The foundation of our bars. Fine crumbs create a beautifully cohesive and crumbly base. If you’re starting with whole graham crackers, you’ll need approximately 28 square crackers (or 14 long crackers). You can easily crush them into fine crumbs using a food processor or by hand with a rolling pin and a Ziploc bag.
- Melted Butter: This essential ingredient binds the graham cracker crumbs together, forming a firm crust, and infuses it with a delightful richness and buttery flavor that perfectly complements the cheesecake filling.
For the Luscious & Creamy Pumpkin Pie Cheesecake Filling:
This recipe features two distinct yet harmoniously swirled flavors: a classic vanilla cheesecake filling and a spiced pumpkin cheesecake filling. The best part? They both start with the same base, minimizing extra dishes and simplifying the process!
- Full-Fat Cream Cheese: This is non-negotiable for achieving that signature rich, creamy, and velvety cheesecake texture. Ensure your cream cheese is softened to room temperature for a lump-free batter.
- Sour Cream: Adds a crucial tanginess and contributes significantly to the smooth, tender consistency of the cheesecake. It also helps prevent cracking during baking.
- Granulated Sugar: Sweetens the bars to a perfectly balanced level, allowing the natural flavors to shine. For an added layer of molasses flavor in the pumpkin mixture, you could consider swapping a portion of the granulated sugar for light brown sugar.
- Large Eggs: Act as the primary binding agent, providing structure and richness to the cheesecake. They contribute to the smooth, custardy texture that we all love.
- Pure Vanilla Extract or Vanilla Bean Paste: Elevates the flavor profile with its warm, aromatic notes. Vanilla bean paste offers a more intense flavor and visible flecks of vanilla bean.
After preparing this foundational cream cheese mixture, you’ll portion out some for the plain vanilla swirl. To the remaining base, you’ll then add:
- Pumpkin Puree: The star of the show! It infuses the bars with authentic, deep pumpkin flavor and color. Always use 100% pure pumpkin puree, not pumpkin pie filling, which contains added spices and sugar. If you have any leftover in the can, here’s a guide to freezing canned pumpkin puree for future use.
- Pumpkin Pie Spice: A pre-blended mix of classic fall spices like cinnamon, nutmeg, ginger, and cloves, bringing all the warm, aromatic notes characteristic of a traditional pumpkin pie. It’s the easiest way to achieve that quintessential autumn taste.
Creative Variations and Smart Substitutions
A truly great recipe is one that can be customized to suit your preferences or what you have on hand. Here are some fantastic ways to personalize these Pumpkin Cheesecake Bars:
- Alternate Crust Options: Experiment with different cookie crumbs for a unique base. Oreo crumbs provide a chocolatey twist, while ginger snap cookies offer a spicier, more sophisticated flavor. Cinnamon graham crackers can enhance the autumnal theme, and for gluten-free diets, simply opt for gluten-free graham crackers. For a truly indulgent base, Biscoff cookies make an amazing biscoff cookie crust – simply delicious!
- Creamy Alternatives: If you’re looking for a slightly healthier touch or prefer a different tang, Greek yogurt can be used as a substitute for sour cream. Ensure it’s plain, full-fat Greek yogurt for best results.
- Spice It Up Your Way: If you don’t have a pre-made pumpkin pie spice blend, don’t fret! You can easily create your own with individual warm spices. Use ground cinnamon, nutmeg, ginger, and ground cloves. Detailed measurements are provided in the notes section of the recipe card.
- Textural & Flavorful Add-ins: For an extra layer of texture and flavor, gently fold in mini chocolate chips, chopped pecans, walnuts, or even candied ginger into the pumpkin portion of the cheesecake filling.
Essential Tools to Grab
Having the right tools makes the baking process smoother and more enjoyable:
- 9x9x2” Square Baking Pan: This specific size is crucial for achieving the perfect thickness and shape for your cheesecake bars.
- Stand Mixer (or Hand Mixer): An electric mixer is highly recommended for ensuring a silky-smooth, lump-free cheesecake filling, saving you significant time and effort.
- Large or Medium Bowl: Indispensable for mixing the graham cracker crust ingredients efficiently.
- Spatula: For scraping down the sides of the bowl and gently folding ingredients, ensuring everything is well combined.
- Small Knife or Skewer: Perfect for artfully swirling the two batters together to create that beautiful marbled effect.
- Wire Rack: Essential for allowing the bars to cool gradually and evenly to room temperature, which helps prevent cracking and ensures a perfect set.
With all your ingredients measured and tools at the ready, you are now perfectly equipped to whip up these unforgettably delicious Pumpkin Cheesecake Bars, destined to be a huge hit at any gathering or simply as a cozy treat for yourself.
Effortless Steps to Craft These Swirled Pumpkin Cheesecake Bars
You might think these beautiful, marbled pumpkin cheesecake bars look super fancy and complex, but the truth is, they’re incredibly easy to create! The process is straightforward: simply fill a pre-baked graham cracker crust with a marbled cheesecake layer, then bake until perfectly set. Let’s break it down into simple steps.
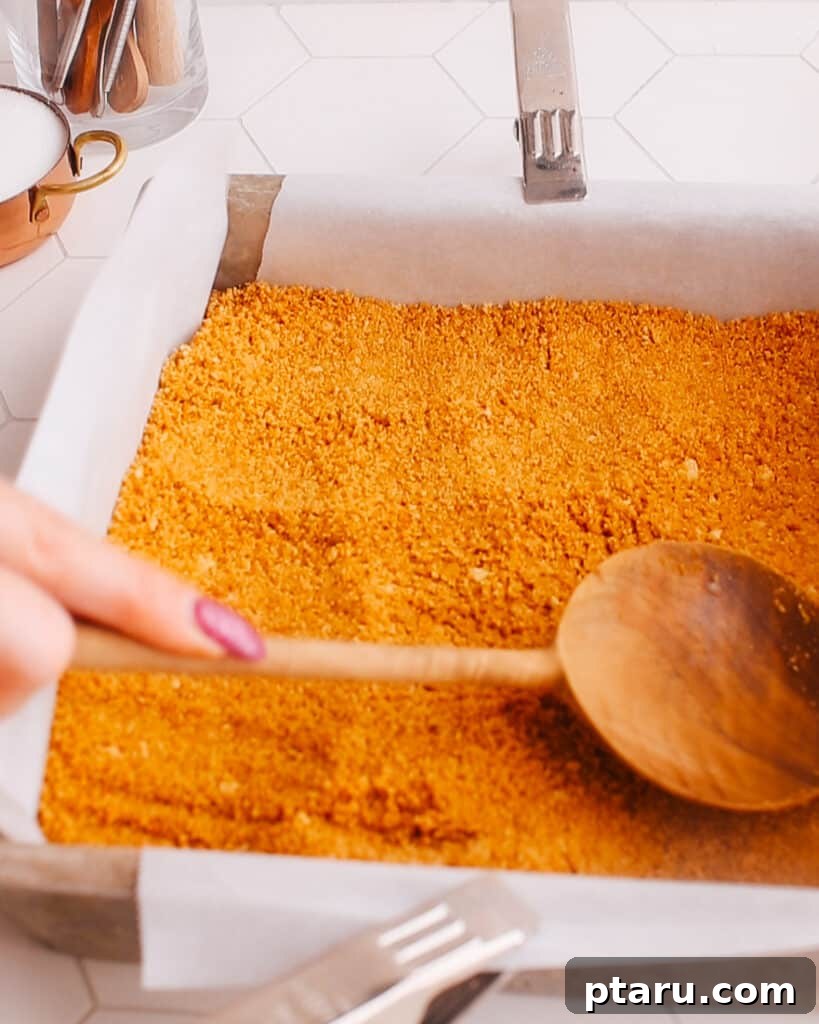
Crafting the Perfect Graham Cracker Crust:
- First things first, let’s prepare your oven and baking pan. Preheat your oven to 350°F (175°C). Next, take your 9x9x2” square baking dish and either line it with parchment paper (leaving an overhang on two sides for easy removal), grease it thoroughly with cooking spray, or give it a generous buttering.
- In a large mixing bowl, combine the graham cracker crumbs and the melted butter. Stir these two ingredients together until the crumbs are evenly moistened and resemble wet sand. Press this mixture firmly and evenly into the bottom of your prepared baking pan. For a perfectly compact crust, use the bottom of a flat glass or a measuring cup to press down. Bake for 12 minutes. Remember to keep your oven heated at 350°F (175°C) for the subsequent steps.
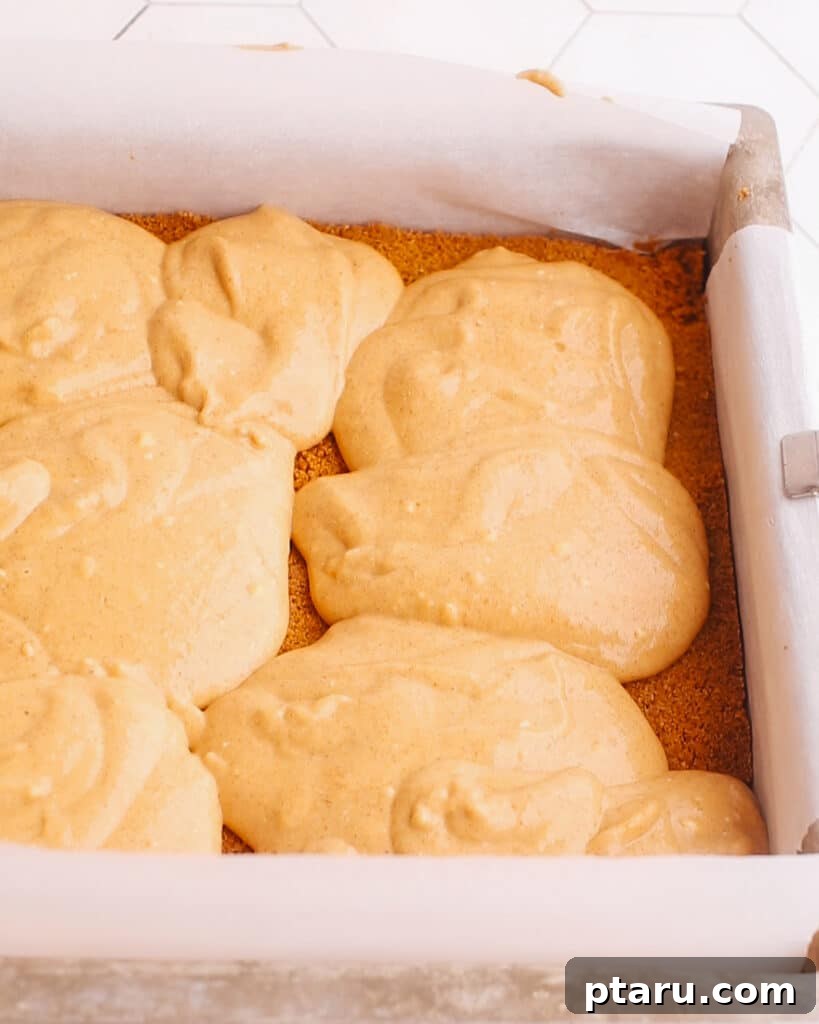
Preparing the Creamy Cheesecake Filling:
- Place your softened cream cheese and sour cream into the large bowl of your stand mixer (or use a hand mixer with a large mixing bowl). Using the whisk or paddle attachment, beat them together on medium speed until the mixture is completely smooth and free of lumps. This is crucial for a silky cheesecake. Next, gradually add 1/2 cup of granulated sugar and continue beating until the mixture becomes light and fluffy, usually for about 2-3 minutes.
- Gently incorporate the eggs, adding them one at a time and beating just until each egg is combined. Avoid overmixing once the eggs are in. Follow this by mixing in the pure vanilla extract. Periodically, stop the mixer and scrape down the sides of the bowl with a spatula to ensure all ingredients are well incorporated. Once combined, carefully scoop out exactly 1 cup of this plain cream cheese mixture and set it aside in a separate bowl. This will be your vanilla swirl.
- To the remaining cheesecake batter in the mixer bowl, add the pumpkin puree, the remaining 3 tablespoons of sugar, and the pumpkin pie spices. Beat these ingredients until they are all thoroughly combined and the batter is uniformly orange and fragrant.
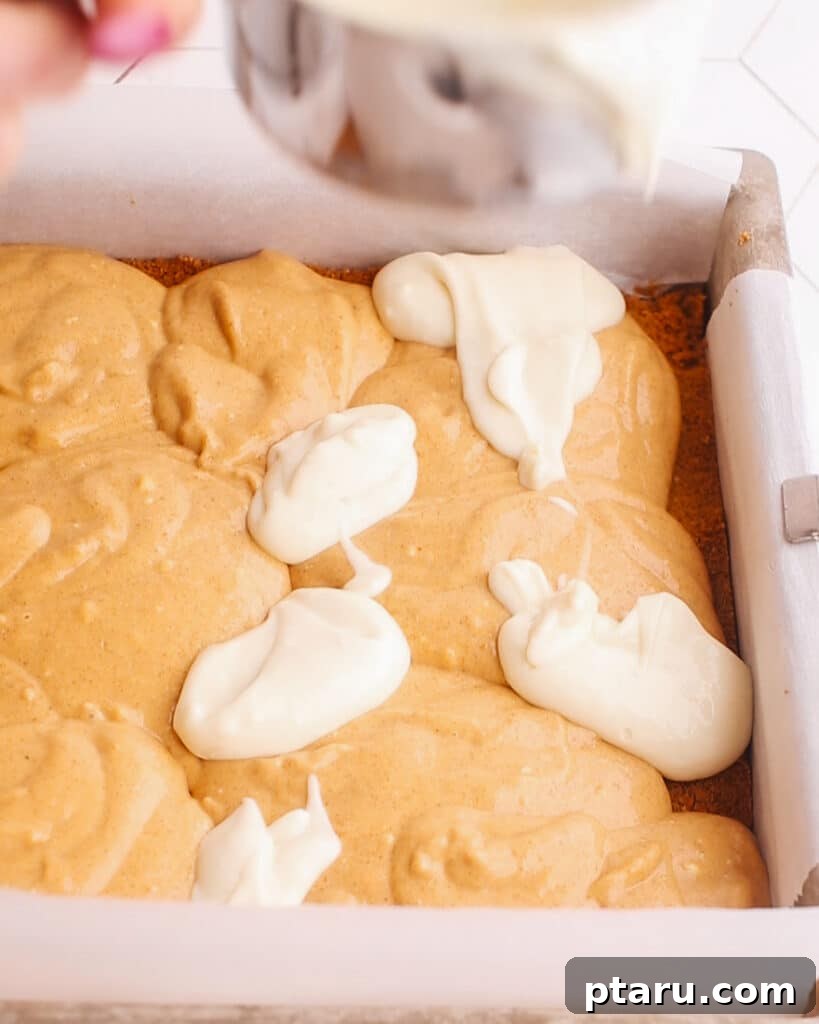
Assembling and Baking Your Marbled Bars:
- Now for the fun part: creating that stunning marbled effect! Onto your pre-baked graham cracker crust, alternately dollop spoonfuls of the plain vanilla cheesecake mixture and the pumpkin cheesecake mixture. Try to distribute them somewhat evenly across the pan. For a beautiful marbled look, gently take a small knife or a skewer and swirl the batters together in a figure-eight or zig-zag pattern. Be careful not to overmix, as you want distinct swirls, not a fully blended color.
- Carefully transfer your pan to the center rack of your preheated oven. Bake the pumpkin cheesecake bars for 20-25 minutes. You’ll know they are done when the edges have puffed up slightly, and the center has just a slight, gentle jiggle when the pan is lightly tapped. Overbaking can lead to cracks.
- Once baked, remove the pan from the oven and allow it to cool completely to room temperature on a wire rack. Gradual cooling is essential for a perfectly set cheesecake. Once fully cooled, these bars are ready to be sliced and enjoyed. Any leftovers should be refrigerated in an airtight container for up to 3 days to maintain their freshness and flavor.
These exquisite swirled pumpkin cheesecake bars are destined to be a showstopper, whether as a delicious Thanksgiving dessert or for any fall gathering that calls for truly memorable autumn flavors. Enjoy every delightful bite!
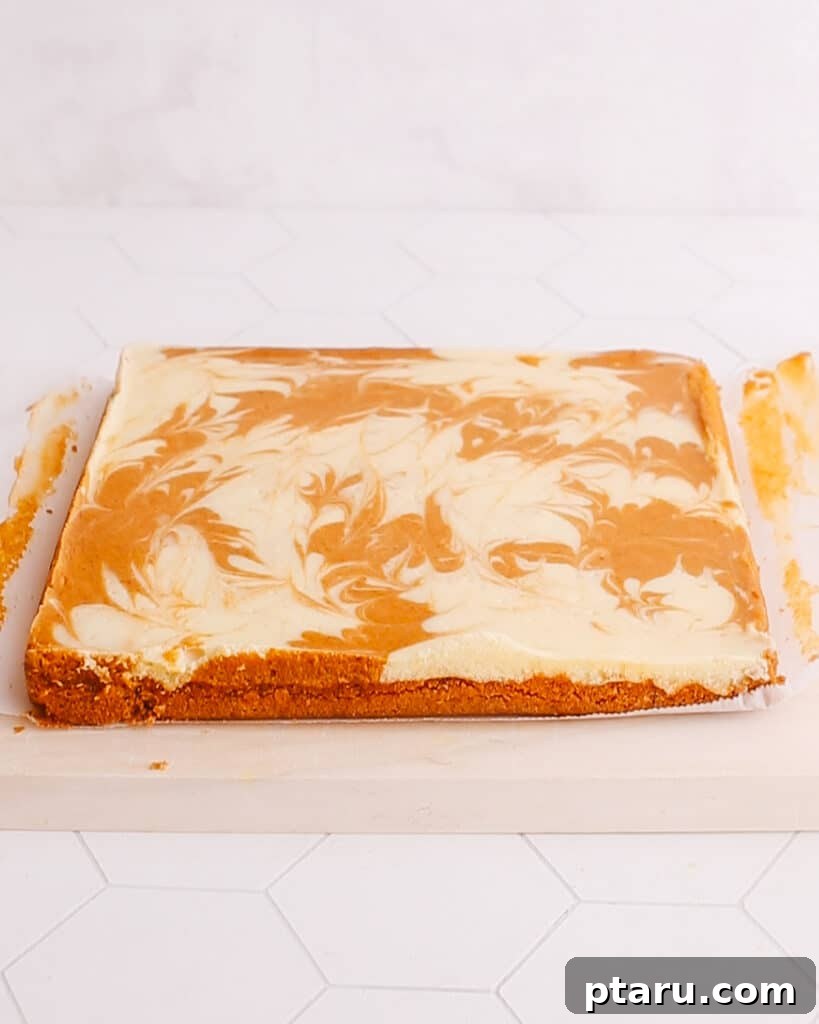
Elevating Your Serving Experience: Perfect Pumpkin Cheesecake Bars
To truly appreciate these delightful pumpkin cheesecake bars, proper presentation and serving techniques can make all the difference. Here’s how to serve them for maximum enjoyment and visual appeal:
- Achieve Optimal Cooling for Clean Slices: Patience is a virtue when it comes to cheesecake. Before attempting to slice, ensure the bars have cooled completely to room temperature, and ideally, have been chilled in the refrigerator for at least 2-3 hours. This allows the cheesecake to firm up, making cutting cleaner, easier, and preventing crumbling.
- Elegant Dusting for a Festive Touch: For a simple yet elegant finish, give the cooled bars a light dusting of ground cinnamon, a sprinkle of pumpkin pie spice, or a delicate sifting of powdered sugar. This adds a beautiful visual element and enhances the aromatic experience.
- Decadent Accompaniments: Elevate each slice into a truly memorable dessert with these delicious pairings:
- Whipped Cream: A classic choice. A generous dollop of freshly whipped cream adds a cloud-like lightness and balances the richness of the cheesecake.
- Vanilla Ice Cream: A scoop of creamy vanilla ice cream provides a delightful contrast in temperature and texture.
- Caramel Drizzle: A luscious drizzle of homemade or store-bought caramel sauce adds a touch of sophistication and another layer of sweet, buttery flavor.
- Toasted Nuts: A sprinkle of lightly toasted pecans or walnuts can add a pleasant crunch and nutty flavor.
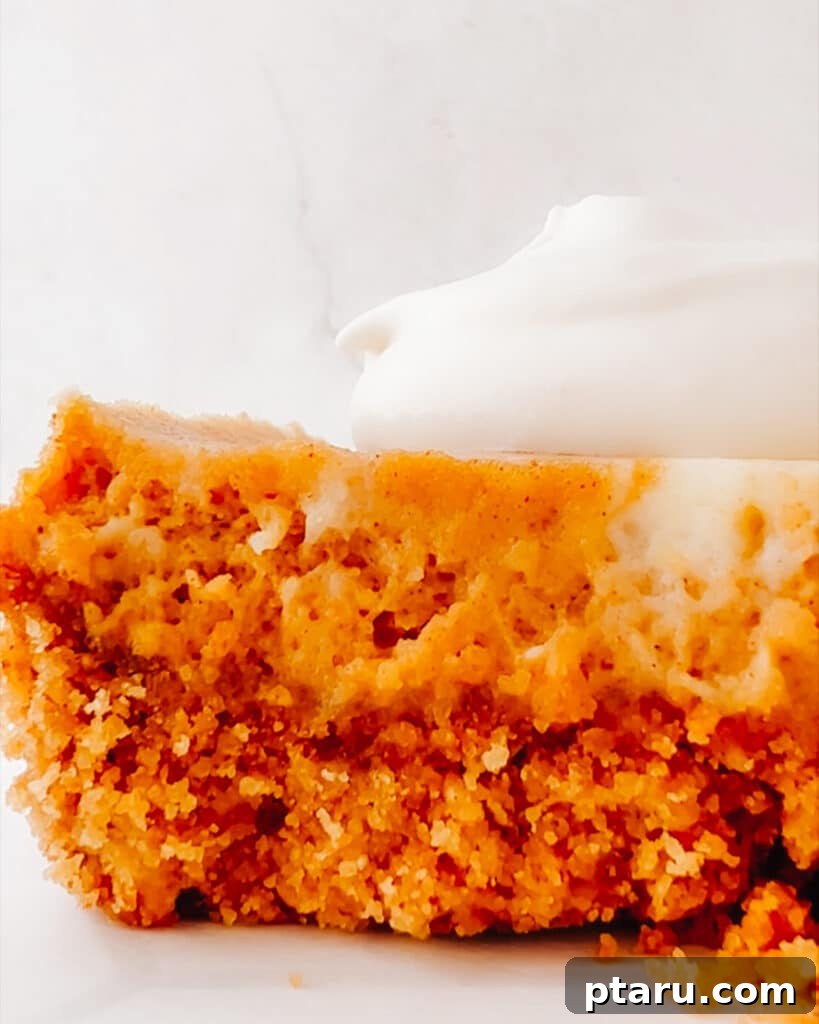
Make-Ahead Tips and Storage Solutions
These pumpkin cheesecake bars are perfect for preparing in advance, making them an excellent choice for holiday entertaining or simply to have a delicious treat on hand. Proper storage ensures they remain fresh and flavorful.
- Freezer-Friendly Option: Yes, these bars freeze beautifully! Once your bars are completely baked and cooled to room temperature, you can freeze them. For best results, place the uncut bars (or individual slices) in a single layer on a parchment-lined baking sheet and freeze until firm. Once frozen, transfer them to an airtight freezer-safe container or wrap them individually in plastic wrap and then foil. They will maintain their quality for up to 3 months. When ready to serve, thaw them in the refrigerator overnight or at room temperature for a few hours.
- Refrigerator Storage: After baking and cooling, it’s crucial to store these delicate bars in the refrigerator. Wrap the entire pan tightly with plastic wrap or transfer individual slices to an airtight container. Chilling enhances their flavor and firms up the texture. They taste best when thoroughly chilled and will keep delightfully fresh for up to 3 days.
- Serving Temperature for Optimal Flavor: While they are delicious chilled, allowing the bars to sit at room temperature for about 15 minutes before serving can enhance their creamy texture and allow the nuanced flavors of pumpkin and spice to become more pronounced.
Avoid These 4 Common Mistakes for Perfect Pumpkin Cheesecake Bars
Even seasoned bakers can sometimes encounter pitfalls. Being aware of these common mistakes will help you achieve flawless pumpkin cheesecake bars every time:
- Over-mixing the Batter: This is perhaps the most frequent culprit behind cracked cheesecakes. Over-mixing, especially after adding the eggs, incorporates too much air into the batter. This air expands during baking, then contracts as the cheesecake cools, leading to unsightly cracks. Beat just until ingredients are combined and smooth.
- Insufficient Cooling Time: The temptation to cut into warm cheesecake is strong, but yielding to it can result in a crumbly mess. Cutting while the bars are still hot or even warm might cause them to fall apart or have a less-than-perfect texture. Always allow them to cool completely to room temperature, then ideally chill them for several hours in the refrigerator before slicing for clean, firm bars.
- Using the Wrong Pumpkin Product: A critical distinction! Always ensure you are using 100% pure pumpkin puree, which contains only pumpkin. Avoid using pumpkin pie filling, which is pre-sweetened and pre-spiced. The latter will throw off the carefully balanced flavors and sweetness of this recipe.
- Inconsistent Oven Temperature: Both not preheating the oven adequately and frequently opening the oven door during baking can lead to significant temperature fluctuations. These changes stress the cheesecake, causing uneven baking, sinking, or cracking. Always ensure your oven is fully preheated to the correct temperature and try to resist peeking too often!
Frequently Asked Questions About Pumpkin Cheesecake Bars
Just skimming through? Here are some quick answers to the most commonly-asked questions about making and enjoying these delightful bars:
- Can I use homemade pumpkin puree? Absolutely! Homemade pumpkin puree can offer an even fresher flavor. Just ensure it’s well-drained and as concentrated as the canned variety to prevent excess moisture in your cheesecake.
- What’s the best way to store leftovers? Store any leftover pumpkin cheesecake bars in an airtight container in the refrigerator. They will remain delicious for up to 3 days.
- Can I freeze these bars? Yes, you can! Once completely cooled, place them in a single layer in a freezer-safe container or wrap them well individually. They can be frozen for up to 3 months. Thaw in the refrigerator before serving.
- Why did my cheesecake bars crack? Cracks are usually caused by over-mixing the batter (introducing too much air) or sudden, drastic temperature changes during baking or cooling. Don’t worry, even with cracks, they will still taste absolutely amazing!
- Can I use a different type of crust? Certainly! Feel free to experiment with other crusts. An Oreo crust offers a chocolatey crunch, while a gingersnap crust adds a spicy kick. Gluten-free graham crackers or gingersnaps also work wonderfully for those with dietary restrictions.
- Is there a dairy-free alternative for this recipe? While the recipe relies on full-fat dairy for its signature richness, you can explore dairy-free cream cheese and coconut cream as replacements. Be aware that these substitutions might slightly alter the taste and texture of the final product.
Final Notes, Pro Tips, & Science-Based Secrets for Success
Unlock the full potential of your Pumpkin Cheesecake Bars with these expert takeaways and baking wisdom:
- The Golden Rule of Room Temperature Ingredients: This is a non-negotiable for a perfectly smooth batter. Room temperature ingredients, especially cream cheese and eggs, emulsify better and prevent lumps. Cold cream cheese will result in a lumpy, uneven batter, no matter how much you beat it.
- Always Opt for Pure Pumpkin: To achieve a genuine, unadulterated pumpkin flavor and the correct consistency, always use 100% pure pumpkin puree. Pumpkin pie filling is already seasoned and sweetened, which will throw off the balance of your recipe. Double-check the label!
- The Art of Gentle Mixing: Once the eggs are introduced into the batter, mix only until they are just combined. Overmixing at this stage whips in too much air, which can cause the cheesecake to puff up excessively during baking and then collapse and crack as it cools. A low speed and a light hand are your best friends here.
- Mastering the Doneness Test: Knowing when your cheesecake bars are perfectly baked is key. The edges should appear set and slightly puffed, but the very center of the cheesecake should still have a slight, gentle jiggle when the pan is carefully nudged. This indicates a custardy interior that will firm up beautifully upon cooling.
- Cooling is Crucial for Crack-Free Perfection: Patience during cooling is paramount. Allow your bars to cool gradually, first at room temperature on a wire rack until fully cooled, then transfer to the refrigerator to chill completely. This slow, even cooling process minimizes temperature shock, which is a common cause of cracks, and ensures a flawless texture.
- Achieving the Perfect Swirl: For a striking marbled effect, don’t overwork the swirl. After dolloping the two batters, make only a few swift, deliberate passes with a knife or skewer. Too much swirling will cause the colors to blend completely rather than create distinct, beautiful patterns.
- Clean Slices Every Time: For neat, professional-looking slices, use a sharp knife. For the best results, dip your knife in hot water and wipe it clean between each cut. This prevents the cheesecake from sticking to the blade and dragging, resulting in clean, crisp edges.
Other Irresistible Pumpkin Recipes You’ll Love:
- Indulge in this super-moist, wonderfully soft Pumpkin Bread recipe – perfect for breakfast or a snack.
- My absolute favorite Pumpkin Zucchini Muffin recipe – a brilliant way to sneak in some veggies!
- Treat yourself to these incredibly soft and wonderfully chewy Soft Pumpkin Cookies.
- For a comforting and warming dinner, try this unique Pumpkin and Rice Soup.
- I truly adore this rich and creamy Pumpkin Pasta Sauce recipe – a fantastic savory option.
If your heart beats for all things pumpkin, be sure to head over to my full collection of pumpkin recipes for more inspiration! And don’t forget to check out my other delectable cheesecake recipes, too.
Pumpkin Cheesecake Bars (Easy Recipe!)
By: Jennifer Pallian BSc, RD
Creamy swirled Pumpkin Cheesecake Bars in an easy, buttery 2-ingredient graham cracker crust. So quick, beautiful and tasty!
- Prep Time: 20 minutes
- Cook Time: 30 minutes
- Servings: 12
Ingredients
For graham cracker crust:
- 2 cups graham cracker crumbs (see notes)
- ⅓ cup melted butter
For cheesecake filling:
- 8 oz cream cheese
- ½ cup sour cream
- ½ cup + 3 tbsp sugar (divided use)
- 2 large eggs
- ½ tsp pure vanilla extract
- 1 cup pumpkin puree (see notes)
- 1 tbsp pumpkin pie spice (see notes)
Instructions
To make crust:
- Preheat oven to 350 degrees F (175°C). Prepare a 9x9x2” square baking pan by lining with parchment paper or buttering generously.
- In a large bowl, stir together graham cracker crumbs and melted butter; stir until evenly moistened. Press firmly and evenly into baking pan. Bake for 12 minutes. Keep oven temperature at 350 degrees F (175°C).
To make cheesecake:
- In the large bowl of a standing mixer, beat together cream cheese and sour cream until smooth. Add 1/2 cup sugar and beat until light and fluffy. Beat in eggs, one at a time, then vanilla, scraping down the bowl as needed. Remove 1 cup of cheesecake batter and set aside.
- To remaining batter, add pumpkin puree, remaining 3 tablespoons of sugar, and pumpkin pie spices; beat to combine.
- Drop spoonfuls of cheesecake batter onto the prepared crust, alternating between the plain and pumpkin batters. Gently swirl with a knife to create a marbled effect. Bake in the center of the preheated oven for 20-25 minutes, or until set (edges will be puffed a bit and the center will jiggle only slightly).
- Cool on a wire rack to room temperature before cutting into 12 slices. Refrigerate leftovers for up to 3 days.
Notes
- Make sure to use 100% pure pumpkin. Avoid pumpkin pie filling.
- If you don’t have pumpkin pie spice, you can create your own blend: use 1 ½ tsp of ground cinnamon, ¼ tsp of ground ginger, ¼ tsp of nutmeg, and a pinch of ground cloves.
- If using whole graham crackers, that’s approximately 28 square graham crackers or 14 double graham crackers. Crush them finely in a food processor or by hand using a rolling pin.
- For clean, perfect slices, use a sharp knife and wipe it with a warm, wet cloth between each cut.
Nutrition (Approximate)
Nutrition information is automatically calculated and should only be used as an approximation.
- Calories: 178 kcal
- Carbohydrates: 22g
- Protein: 2g
- Fat: 9g
- Saturated Fat: 5g
- Polyunsaturated Fat: 0.5g
- Monounsaturated Fat: 3g
- Trans Fat: 0.2g
- Cholesterol: 47mg
- Sodium: 150mg
- Potassium: 95mg
- Fiber: 1g
- Sugar: 13g
- Vitamin A: 3486 IU
- Vitamin C: 1mg
- Calcium: 36mg
- Iron: 1mg