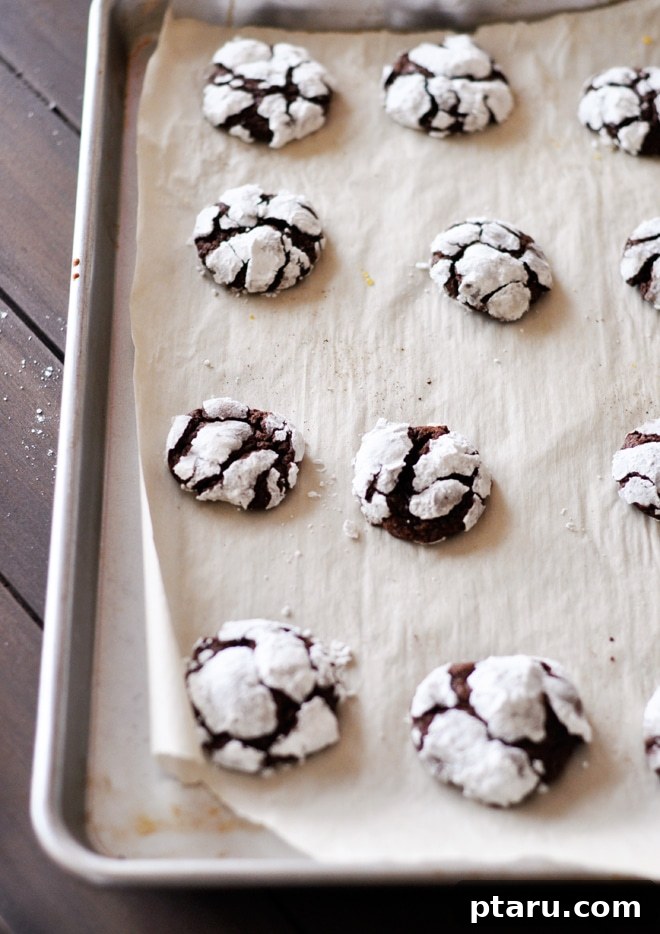
Indulge in the ultimate chocolate experience with these exquisite chocolate snowball cookies. Imagine a cookie that’s not just a treat, but a delightful journey for your senses. This recipe promises fudgy, intensely chocolatey, and wonderfully chewy cookies, crowned with a crackled, snowy white top that’s almost too beautiful to disturb. Perfect for holiday gatherings, cozy evenings, or simply to satisfy a deep chocolate craving, these cookies are a true masterpiece of texture and flavor.
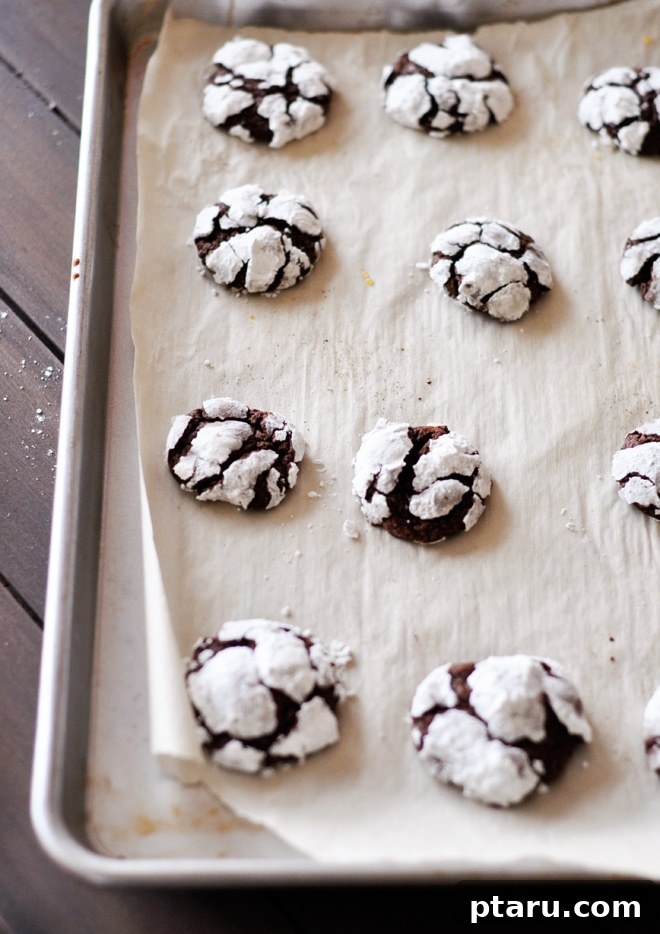
Chocolate Snowball Cookies: Why They’ll Become Your New Favorite
These chocolate snowball cookies aren’t just a recipe; they’re an experience waiting to happen. They consistently impress with their perfect balance of richness and sweetness, making them an instant crowd-pleaser. Here’s why you’ll absolutely fall in love with them:
- Unforgettable Fudgy and Chewy Texture: Unlike many holiday cookies that can be dry or crumbly, these snowballs boast an incredibly fudgy interior that yields to a satisfyingly chewy bite. Every morsel melts in your mouth, leaving you craving more. The secret lies in using high-quality chocolate and careful baking times, ensuring that ideal moistness.
- Elegantly Not Overly Sweet: While coated in powdered sugar, the deep, slightly bitter notes of dark chocolate and cocoa powder create a harmonious balance. This isn’t a tooth-achingly sweet cookie; instead, it offers a sophisticated chocolate flavor that highlights the quality of its ingredients, making it appealing to even the most discerning palates.
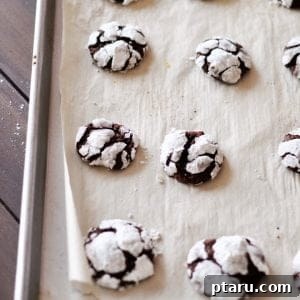
- Visually Stunning with Crackled Snowy Tops: The aesthetic appeal of these cookies is undeniable. Rolling the dough in powdered sugar before baking creates a magical transformation in the oven. As the cookies bake and expand, the sugar topping beautifully crackles, forming a pristine, snowy white exterior against the dark chocolate base. This striking contrast makes them an absolute showstopper on any dessert platter, perfect for gifting or impressing guests.
- Effortlessly Impressive: Despite their gourmet appearance and taste, these cookies are surprisingly simple to make. With straightforward steps and readily available ingredients, even novice bakers can achieve spectacular results. They require minimal fuss but deliver maximum impact.
- Versatile for Any Occasion: While they shine brightly during the holiday season, their timeless chocolate appeal makes them suitable for any time of year. Serve them at birthdays, potlucks, or simply enjoy them as an indulgent everyday treat with a cup of coffee or a glass of milk.
Essential Ingredients for Your Chocolate Snowball Masterpiece
Creating these perfect chocolate snowball cookies starts with selecting the right ingredients. Each component plays a vital role in achieving that signature fudgy texture and rich flavor. Here’s a closer look at the key players you’ll need, along with some tips for choosing the best:
- Good-Quality Dark Chocolate (Melted): This is the heart of your chocolate snowball. Opt for a dark chocolate with a cocoa content of 60-75% for the best flavor depth without excessive bitterness. High-quality baking bars or chocolate chips work well. Melting it correctly is crucial; a double boiler method (a heatproof bowl over simmering water) offers gentle, even melting. Alternatively, the microwave is a quick favorite: heat in 30-second intervals at 60% power, stirring thoroughly between each interval until mostly melted, then stir off the heat to achieve a smooth, glossy consistency. Allow it to cool slightly before incorporating into the dough.
- Unsweetened Cocoa Powder: For an intense, double dose of rich chocolate flavor and a beautiful dark hue, unsweetened cocoa powder is essential. It enhances the depth of the chocolate and contributes to the fudgy texture. For a richer, less acidic flavor, Dutch-processed cocoa powder is an excellent choice, though natural unsweetened cocoa works perfectly fine.
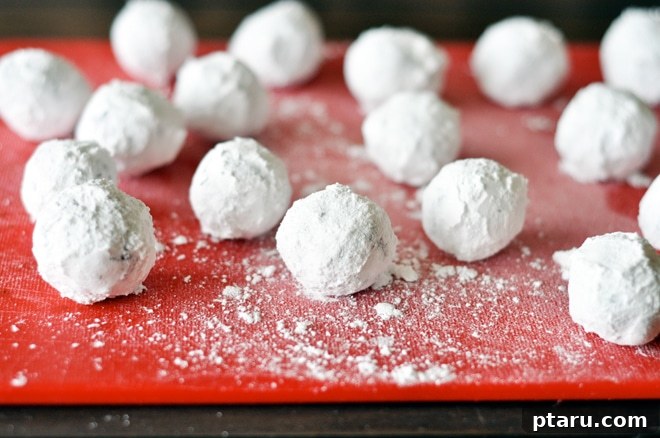
- Powdered Sugar (Confectioners’ Sugar): This ingredient serves a dual purpose. Firstly, it’s used for generously rolling the cookie dough before baking, creating the iconic “snowball” appearance. Secondly, as the cookies bake and expand, the powdered sugar topping gently cracks, forming that signature snowy, crackled effect that makes these cookies so visually appealing and unique. Ensure you have enough for a thick, even coating.
- Packed Brown Sugar: While powdered sugar handles the exterior sweetness, a touch of brown sugar in the dough itself adds a deeper, more nuanced flavor profile. Its molasses content contributes moisture, resulting in a chewier cookie, and a subtle caramel note that complements the dark chocolate beautifully. We use just enough to enhance the flavor without making the dough overly sweet, allowing the powdered sugar finish to take care of the primary sweetness.
- All-Purpose Flour, Baking Powder, and Salt: These dry ingredients form the structural base of the cookie. All-purpose flour provides body, while baking powder acts as a leavening agent, giving the cookies a slight lift and contributing to their soft texture. Salt is crucial for balancing the sweetness and enhancing all the other flavors, making the chocolate taste even more prominent.
- Unsalted Butter (Softened): Room temperature butter is key for proper creaming with sugar, which creates air pockets that contribute to the cookie’s light yet fudgy texture. Using unsalted butter allows you to control the exact amount of salt in the recipe.
- Large Egg: The egg acts as a binder, holding the dough together and adding richness and moisture. Ensure it’s at room temperature for better incorporation into the batter.
- Vanilla Extract: A touch of vanilla extract always elevates chocolate flavors, adding a warm, aromatic note that rounds out the overall taste profile. Use pure vanilla extract for the best results.
Achieving Perfection: Essential Tips for Your Chocolate Snowball Cookies
While this recipe is straightforward, a few key techniques will ensure your chocolate snowball cookies turn out absolutely perfect every single time. Pay attention to these expert tips for that ultimate fudgy, chewy, and beautifully crackled result:
- CHILL THE DOUGH – Patience is a Virtue: I know, waiting when delicious chocolate is involved can be agonizing, but this step is non-negotiable for success. Chilling the dough for at least 1 hour (or up to 2-3 hours for best results) is crucial. Why? It helps prevent the cookies from spreading too much in the oven, ensuring they maintain their delightful snowball shape and thickness. A chilled dough is also much easier to handle, scoop, and roll into smooth balls. Furthermore, chilling allows the flavors to meld and deepen, resulting in a more complex and satisfying cookie. Don’t skip this step unless you prefer flat, runny cookies!
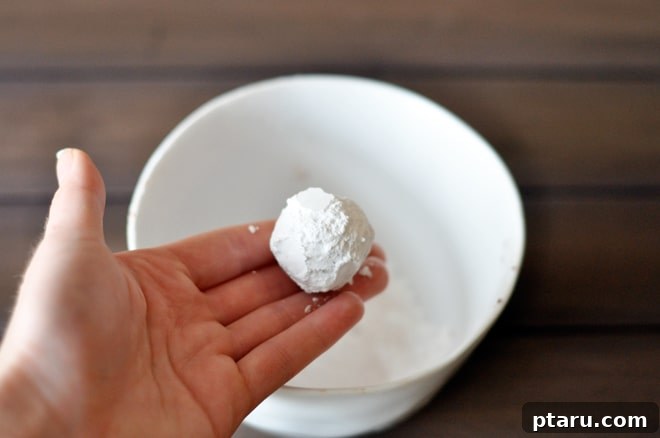
- Roll Generously in Confectioners’ Sugar – More is More: When you think you’ve applied enough powdered sugar, roll them one more time! The key to those gorgeous, snowy white, crackled tops is a thick, even coating of confectioners’ sugar. Place the sugar in a shallow dish or bowl and roll each dough ball thoroughly, pressing gently to ensure the sugar adheres well from all angles. A robust coating provides the necessary layer that melts and then recrystallizes during baking, creating the distinctive crackle and beautiful white contrast against the dark chocolate cookie.
- Do NOT Overbake – Embrace the Underdone: This is perhaps the most critical tip for achieving that blissful chewy and fudgy texture. Take the cookies out of the oven when their edges are just set, and the center still looks slightly soft or even a little underdone. They will continue to set as they cool on the hot baking sheet. Overbaking, even by a minute or two, can lead to dry, crumbly cookies that lose their signature fudgy characteristic. Aim for about 10 minutes at 375°F (190°C), but trust your instincts and oven.
- Room Temperature Ingredients: Ensure your butter and egg are at room temperature. This allows them to cream together more efficiently, incorporating more air into the mixture, which contributes to the cookies’ texture. Cold ingredients can result in a lumpy batter and a denser cookie.
- Don’t Overmix the Flour: Once you add the flour mixture, mix on low speed only until just combined. Overmixing develops the gluten in the flour, which can lead to tough cookies. A few streaks of flour are fine; they will disappear during the final few stirs or during baking.
- Use Parchment Paper: Always line your baking sheets with parchment paper. This prevents sticking, ensures even baking, and makes for super easy cleanup. It also helps the cookies maintain their shape and prevents their delicate powdered sugar coating from sticking to the pan.
Frequently Asked Questions About Chocolate Snowball Cookies
Absolutely! These cookies are perfect for preparing ahead of time, which makes them ideal for busy holiday seasons. You can prepare the dough balls and store them tightly wrapped in the refrigerator for up to 3 days before baking. For longer storage, the dough balls can be frozen (again, tightly wrapped in an airtight container or freezer bag) for up to 3 weeks. Thaw them slightly in the refrigerator before rolling in powdered sugar and baking as directed.
Yes, baked chocolate snowball cookies freeze beautifully! Allow them to cool completely before transferring them to an airtight container or freezer-safe bag. They can be stored in the freezer for up to 3 weeks. When ready to enjoy, simply thaw them at room temperature. A note on the powdered sugar effect: it may not be as pronounced after freezing, as some of the sugar might dissolve slightly on the surface during storage. For the freshest look, you can re-roll them lightly in fresh powdered sugar just before serving.
For the richest flavor and to ensure the cookies aren’t overly sweet once rolled in powdered sugar, I highly recommend using 70% dark chocolate. This level of cocoa provides a deep, complex chocolate profile that perfectly balances the sweetness of the coating. However, if 70% dark chocolate is not available or not to your preference, standard dark chocolate chips (around 60% cocoa) or even semi-sweet chocolate chips will also work perfectly fine, yielding a slightly sweeter, milder chocolate flavor.
Looking for even more easy and delicious treats to brighten your festivities? Be sure to check out my comprehensive collection of 15+ Delicious No-Bake Christmas Treats for inspiration!
Serving Suggestions and Creative Variations
These chocolate snowball cookies are delightful on their own, but here are some ideas to elevate your experience or customize them:
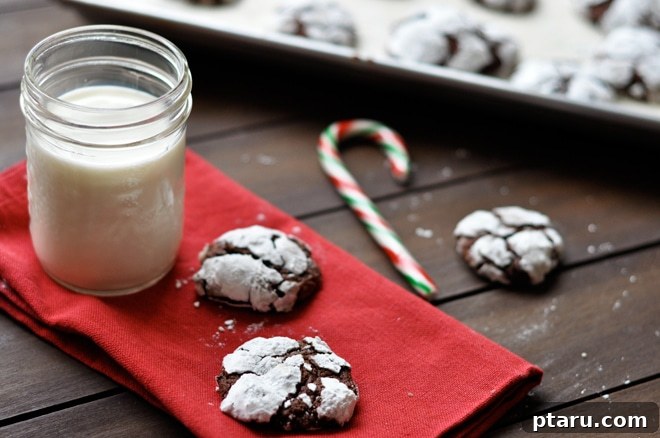
- Classic Pairing: Serve them with a tall glass of cold milk, a warm cup of coffee, or a rich hot chocolate for the ultimate comfort treat.
- Holiday Platters: Their striking appearance makes them a fantastic addition to any holiday cookie platter, contrasting beautifully with other festive treats.
- Gifting: Pack them in decorative tins or boxes as thoughtful homemade gifts for friends, family, or neighbors.
- Nutty Crunch: For added texture and flavor, finely chop some pecans, walnuts, or almonds and fold them into the dough before chilling.
- Minty Fresh: Add 1/2 teaspoon of peppermint extract along with the vanilla for a festive mint-chocolate twist, perfect for the holidays.
- Spiced Snowballs: A pinch of cinnamon or a dash of chili powder can add an unexpected depth and warmth to the chocolate flavor.
- White Chocolate Drizzle: Once cooled, drizzle the cookies with melted white chocolate for an extra touch of elegance and sweetness.
Print Recipe
Average Rating: 4.50 from 4 votes
Chocolate Snowball Cookies
Ingredients
- 6 ounces chopped dark chocolate (or 1 cup dark chocolate chips)
- ¾ cup all-purpose flour
- ⅓ cup unsweetened cocoa powder
- 1 ½ tsp baking powder
- ¼ tsp salt
- ½ cup unsalted butter (softened to room temperature)
- ½ cup packed brown sugar
- 1 large egg (room temperature)
- 1 tsp vanilla extract
- ⅔ cup confectioners’ sugar (also known as icing sugar/powdered sugar, for rolling)
Instructions
-
Melt the Chocolate: Place the chopped dark chocolate or chocolate chips in a heatproof bowl. Melt gently over a saucepan of simmering water (ensuring the bowl does not touch the water) or in the microwave. If using a microwave, heat at 60% power in 30-second intervals, stirring well after each interval. Stop heating when the chocolate is about 80% melted, then continue to stir until it’s completely smooth and glossy. Set aside and allow to cool to room temperature.
-
Combine Dry Ingredients: In a medium-sized bowl, whisk together the all-purpose flour, unsweetened cocoa powder, baking powder, and salt. Whisk until thoroughly combined, ensuring no lumps of cocoa remain. Set aside.
-
Cream Wet Ingredients: In a large bowl, using an electric mixer on medium-high speed, beat the softened butter and packed brown sugar until the mixture is light, fluffy, and pale in color (about 2-3 minutes). Scrape down the sides of the bowl as needed. Beat in the room temperature egg until fully incorporated, then add the vanilla extract and the cooled melted chocolate. Mix until just combined.
-
Form the Dough: Reduce the mixer speed to low. Gradually add the prepared flour mixture to the wet ingredients, mixing until just combined. Be careful not to overmix, as this can lead to tough cookies. The dough will be soft.
-
Chill the Dough: Cover the bowl with plastic wrap and chill the cookie dough in the refrigerator for at least 1 hour, or until firm enough to handle. This step is essential for preventing the cookies from spreading too much during baking.
-
Prepare for Baking: Preheat your oven to 375ºF (190ºC). Line baking sheets with parchment paper. Scoop tablespoonfuls of the chilled dough. Roll each portion between your palms to form smooth, uniform balls.
-
Roll in Powdered Sugar: Place the confectioners’ sugar in a shallow dish or bowl. Roll each dough ball generously in the powdered sugar, ensuring a thick and even coating all around. Don’t be shy – a good coating is key for that crackled snowy effect!
-
Bake: Arrange the sugar-coated dough balls on the prepared parchment-lined baking sheets, spacing them about 2 inches apart. Bake for approximately 10 minutes. The cookies are done when their tops are beautifully crackled, the edges are just set, and the center is still slightly soft. Remember, slight underbaking is crucial for that chewy-fudgy texture.
-
Cool: Allow the cookies to cool on the baking sheet for about 3 minutes after removing them from the oven. This allows them to firm up slightly. Then, carefully transfer them to wire racks to cool completely. The crackled tops will become even more defined as they cool.
Notes
Nutrition
Nutrition information is automatically calculated, so should only be used as an approximation.
Tried this recipe? Share your thoughts!Leave a comment below to let us know how your chocolate snowballs turned out!