You want to know something truly exhilarating and perhaps a little bit audacious? I’ve just embarked on planning a much-anticipated getaway to Hawaii. The travel companions? A couple of my closest friends and our combined troop of seven children, all under the age of five. Yes, you read that right – seven energetic toddlers and preschoolers ready to explore the Hawaiian islands.
Seven.
Under five.
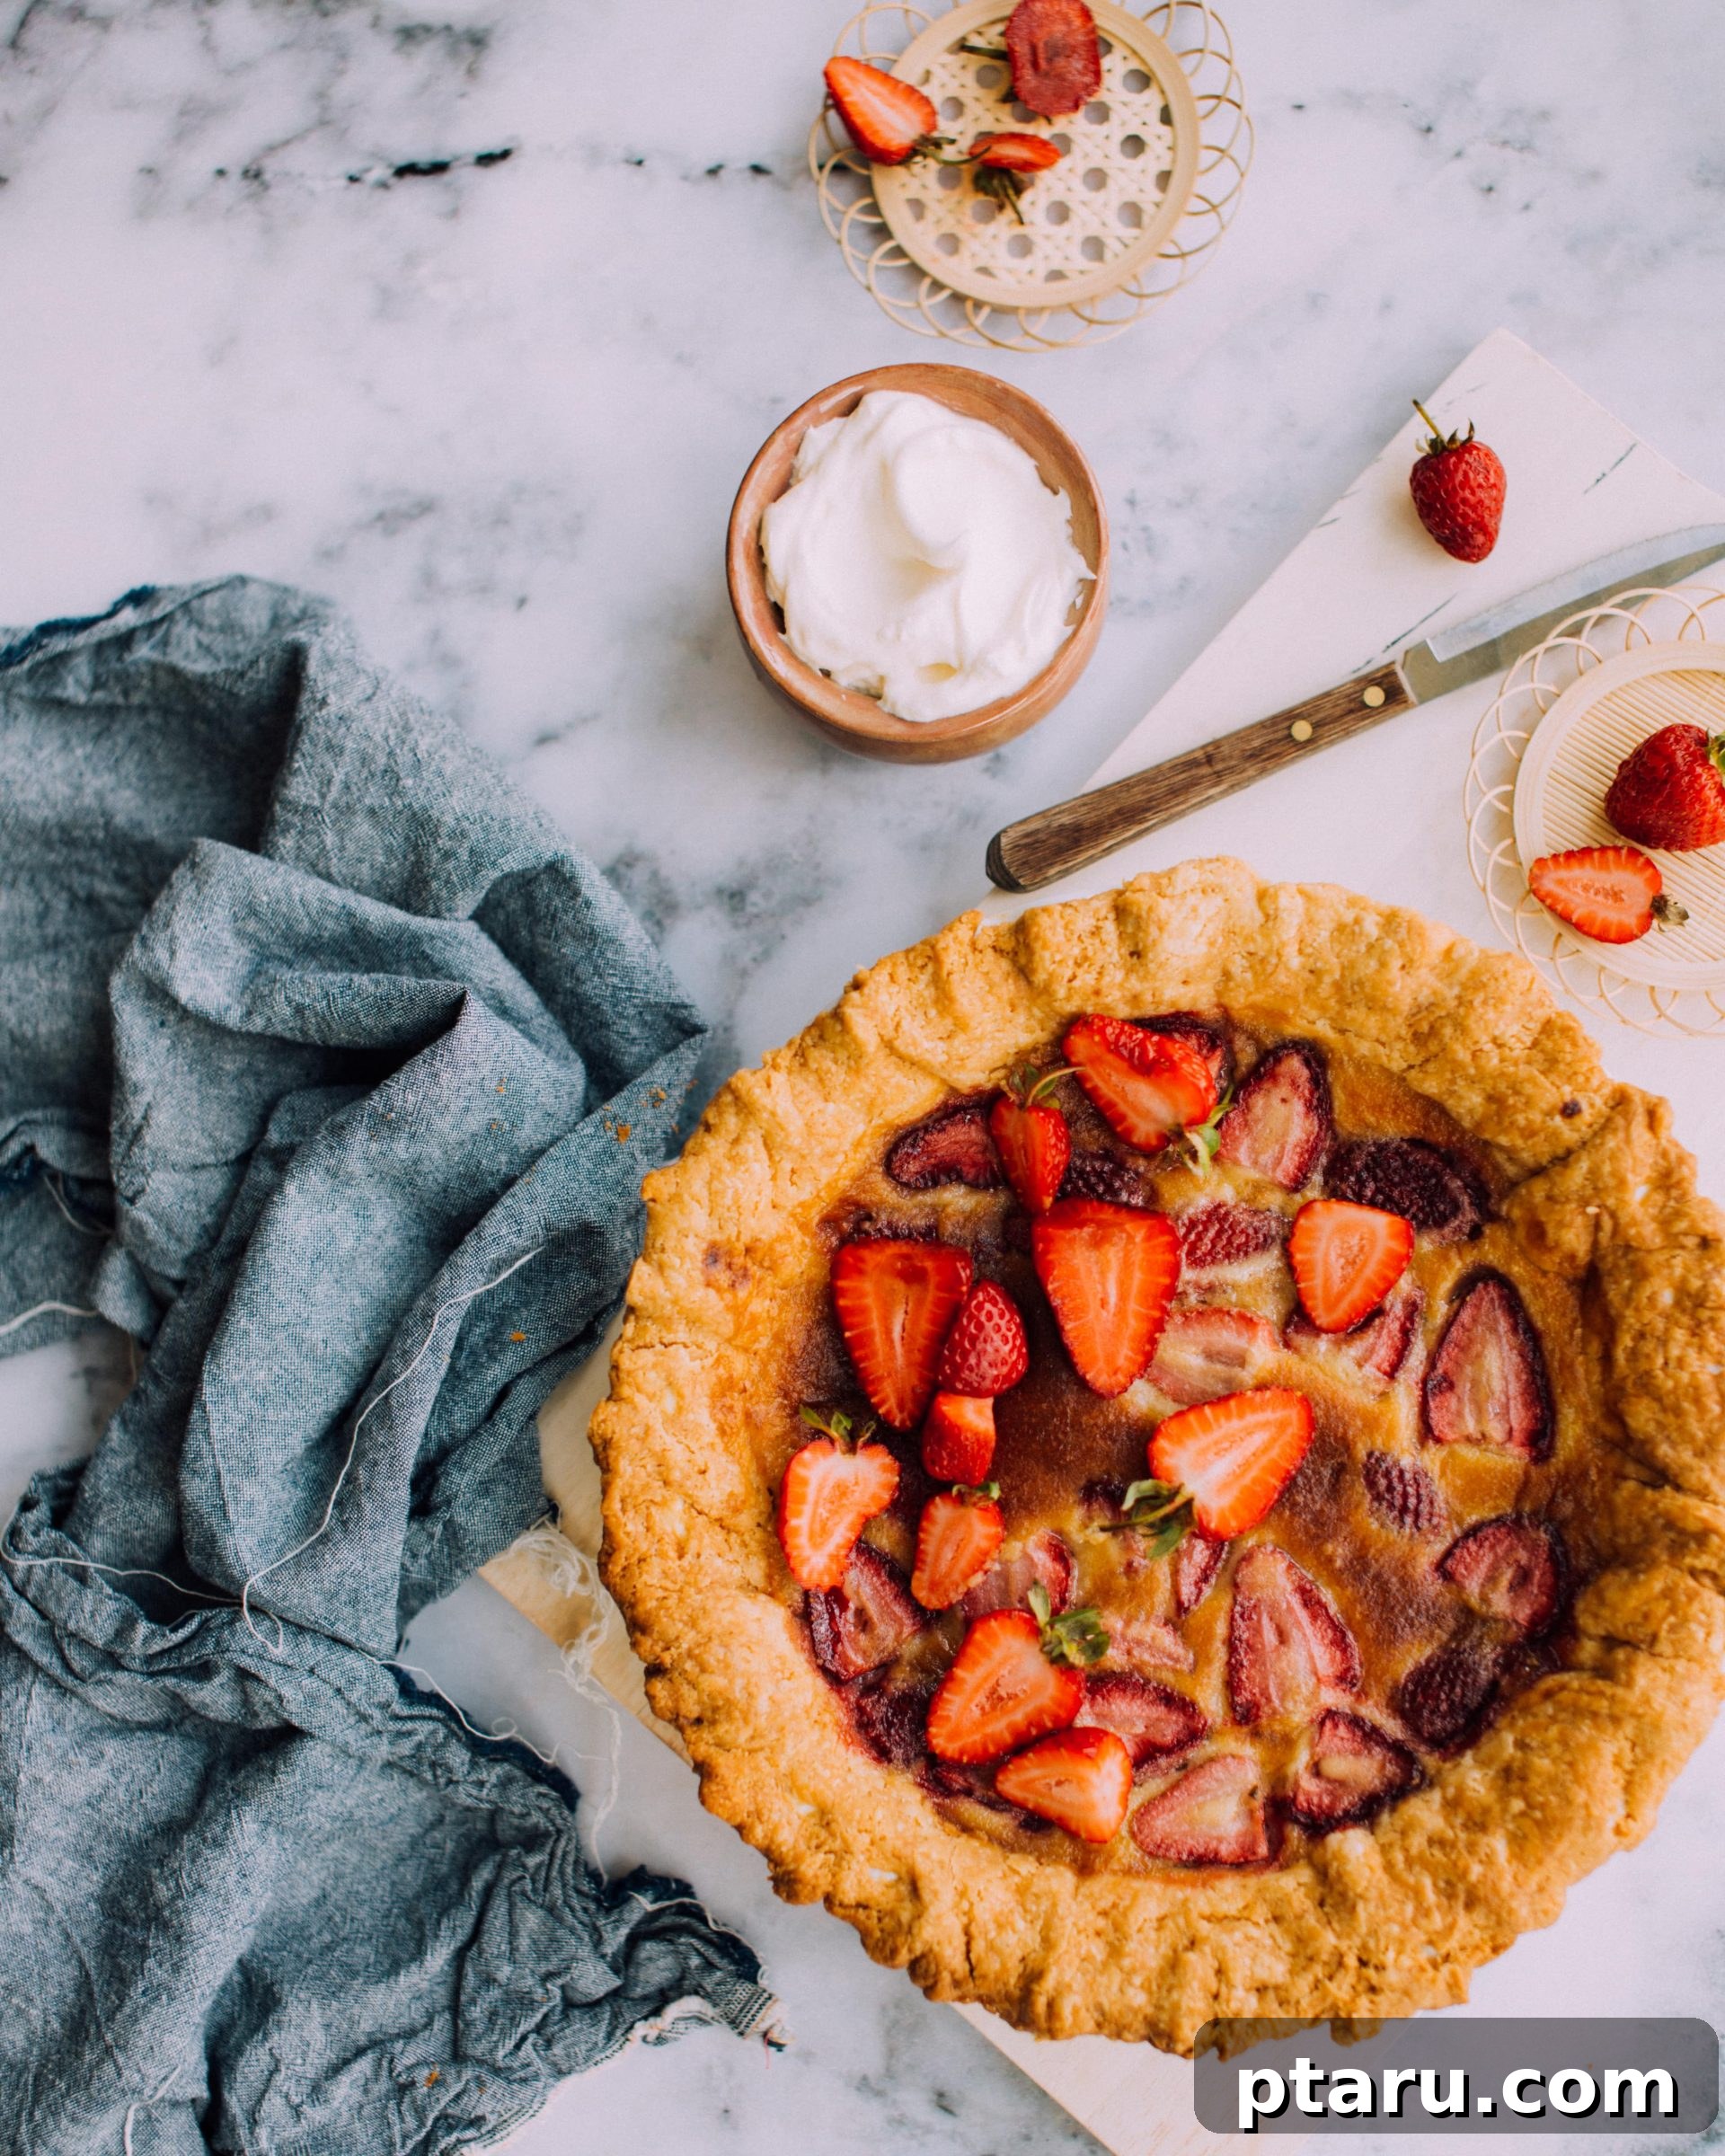
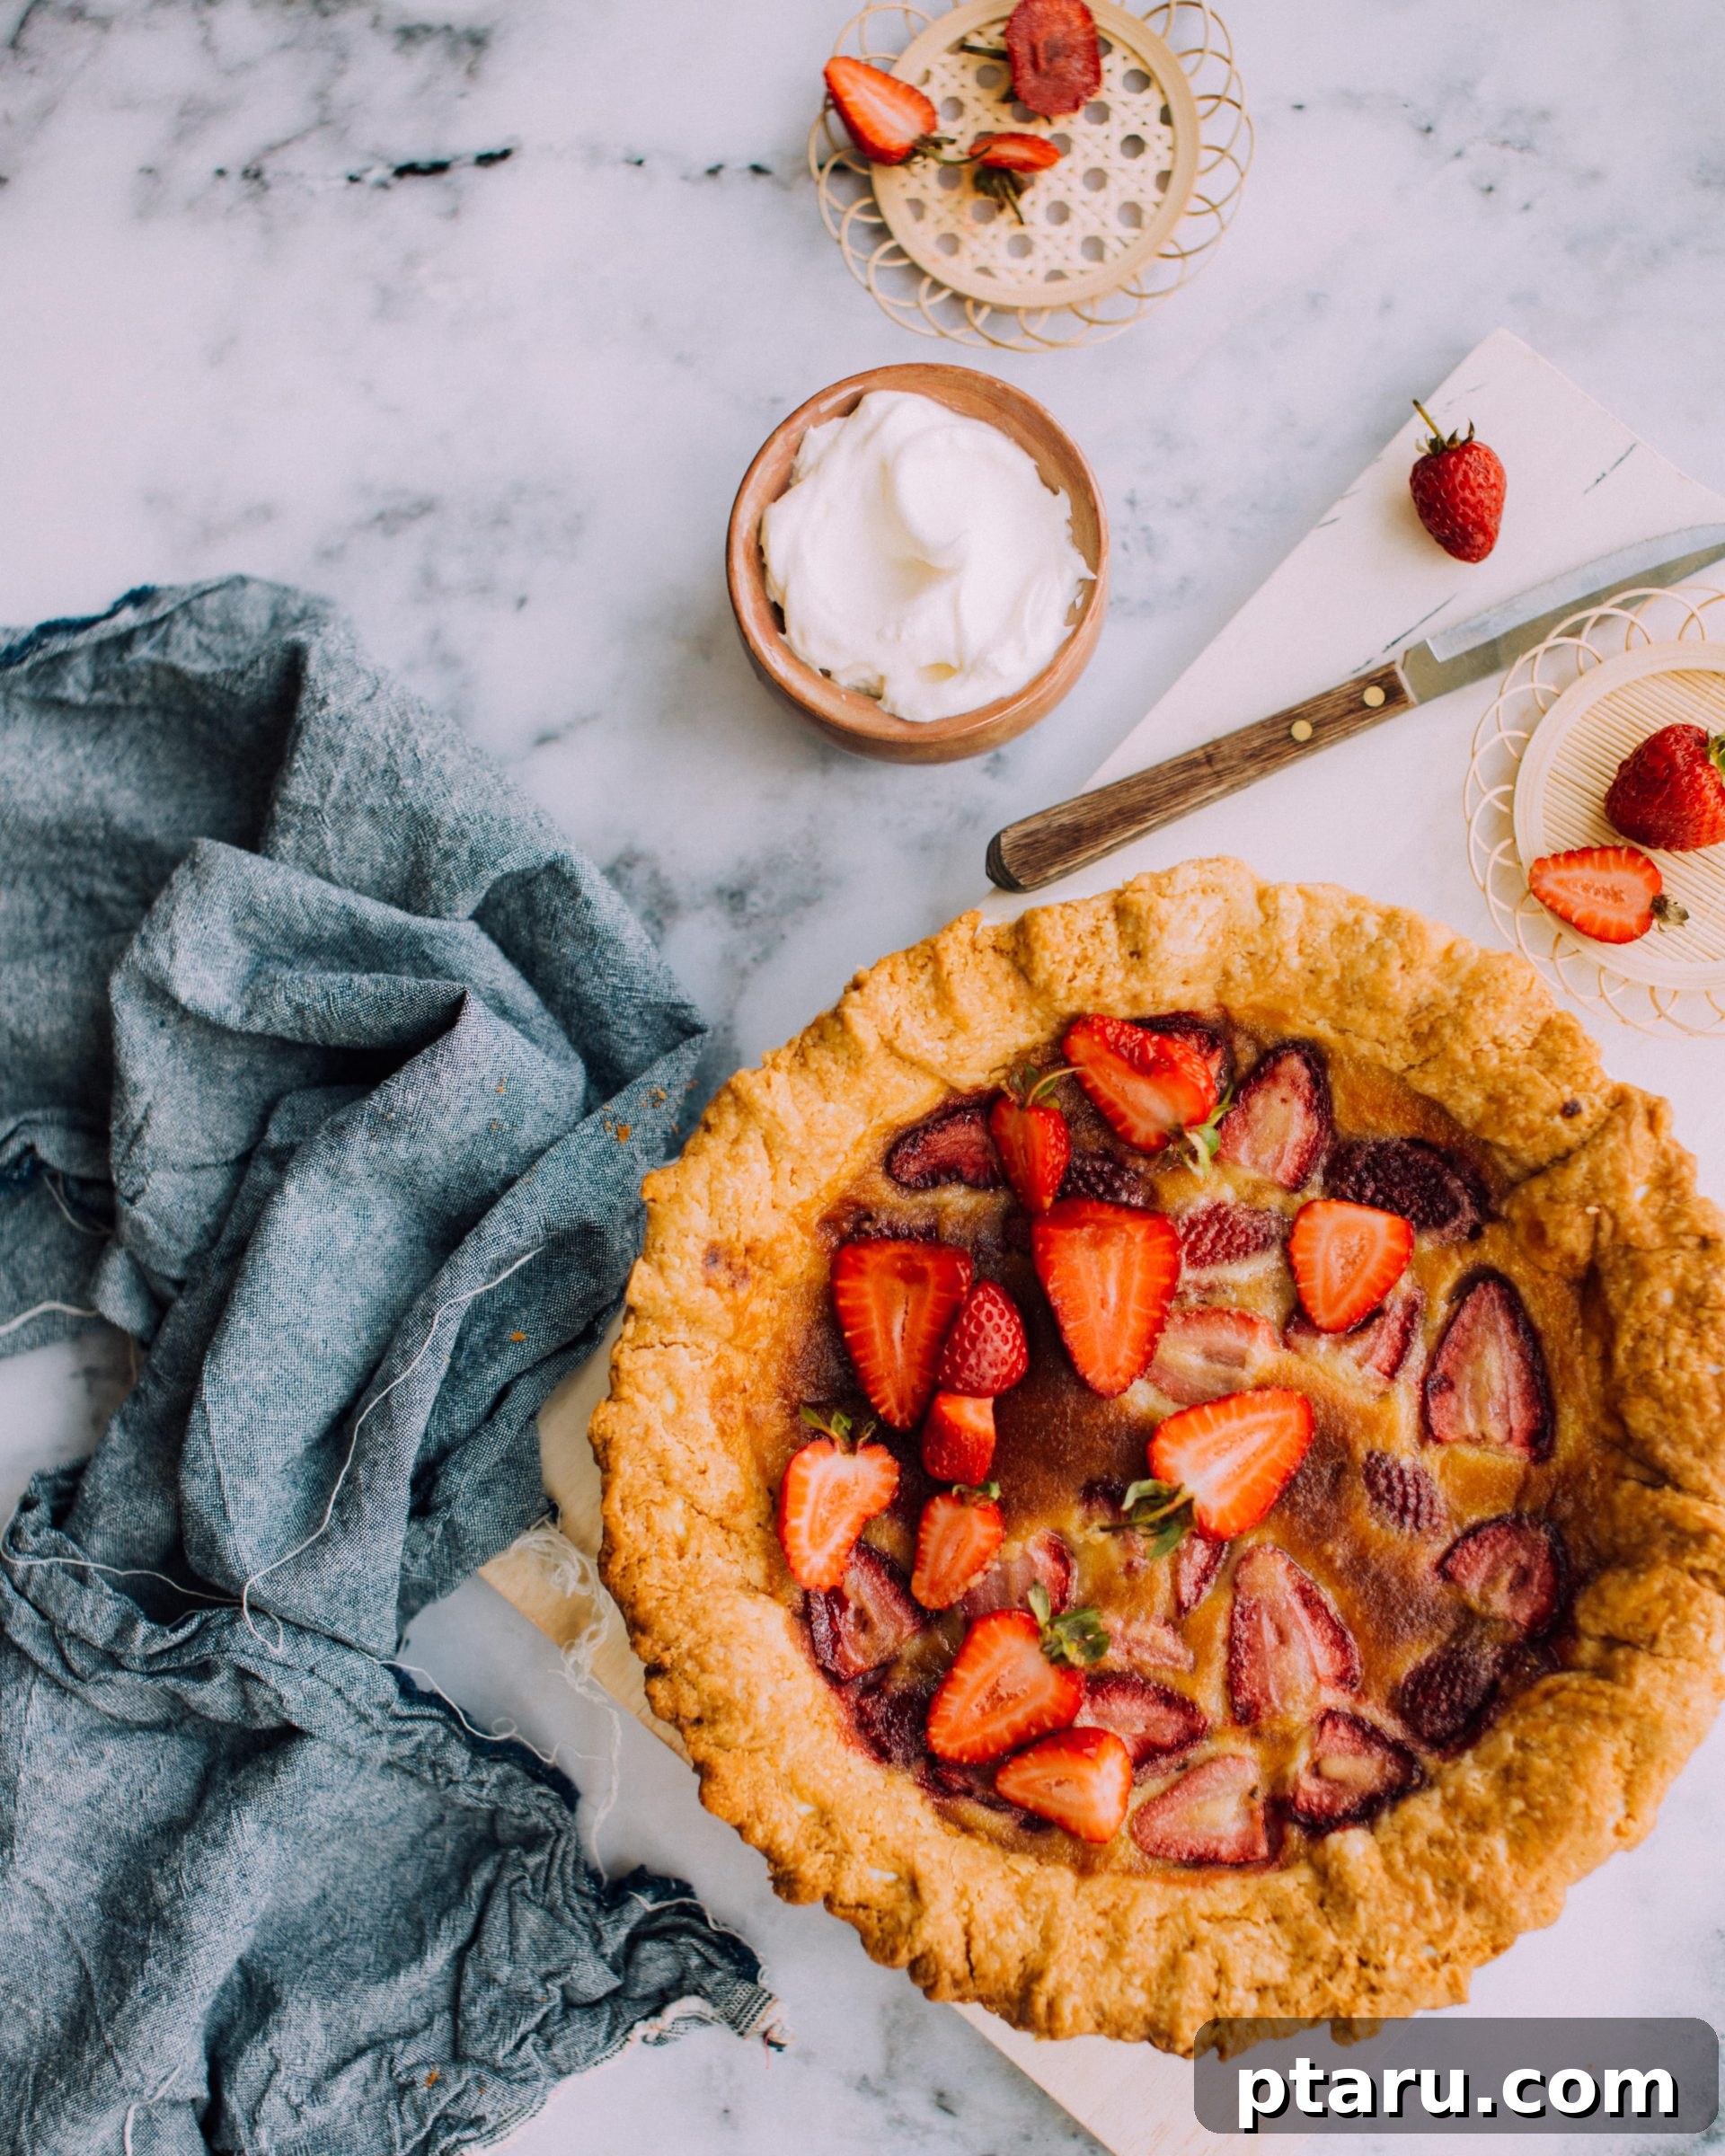
A little piece of me hopes they form an impromptu childcare cooperative, with the four-year-olds bravely taking on babysitting duties for the younger ones. A girl can dream, right? Amidst the delightful chaos and upcoming travel plans, one thing brings me back to a comforting sense of calm: pie. Not just any pie, but a luscious Strawberry Buttermilk Pie. Imagine a sweet-tart, creamy custard, bursting with baked strawberry filling, all encased in a perfectly buttery, flaky crust. Served generously piled high with even more fresh strawberries and a cloud-like dollop of whipped cream, it’s a slice of pure heaven.
Celebrating the Arrival of Summer: A Harvest of Flavors
This past winter felt exceptionally long and brutal, pushing back the growing season in our area. The moment spring hinted at its arrival, I found myself practically haunting the local farmer’s market. My routine involved pacing around tables laden with hopeful tomato plant starters and casting longing glances at the empty spot where the peach vendor would eventually set up shop. The anticipation of fresh, local produce after months of colder weather is a special kind of joy, a quiet celebration of nature’s rhythm.
My trusted tree-fruit farmer, a true oracle of seasonal delights, recently whispered an insider tip: sour cherries were due to arrive this very weekend! The news was so thrilling that I, without a moment’s hesitation, cancelled pre-existing travel plans just to ensure I’d be here to welcome them. (Okay, perhaps to hoard them, if I’m being entirely honest). There’s something incredibly satisfying about securing those first-of-the-season fruits, knowing they’ll soon transform into delicious homemade treats.
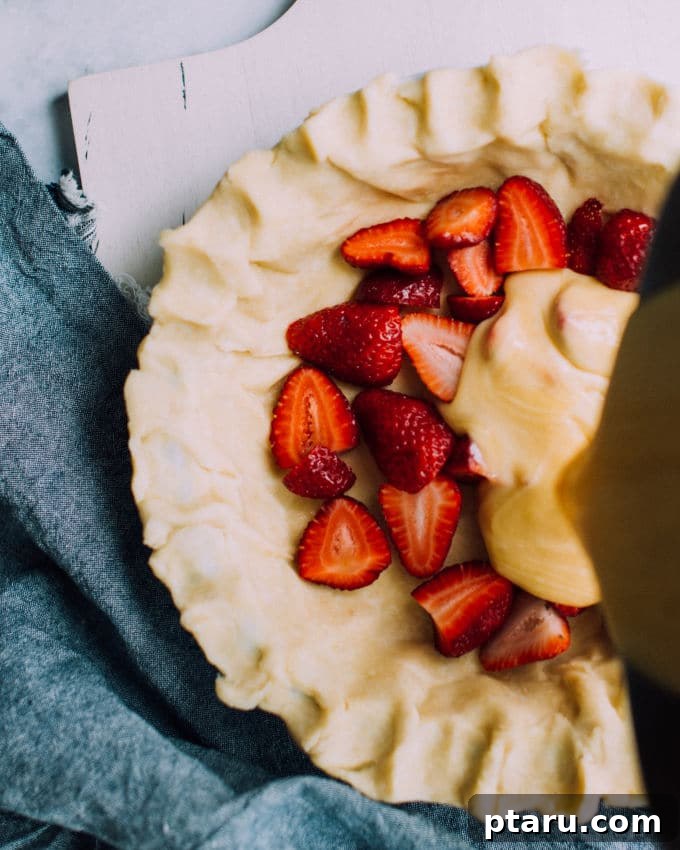
And then, just like that, strawberries made their grand entrance. The sight of those plump, ruby-red berries filled me with an almost urgent need to buy them by the bucketful. I’ve been “binge-buying” them as if preparing for a “berry-pocalypse,” ensuring our kitchen is perpetually stocked with these sweet jewels. You can definitely anticipate a delightful onslaught of strawberry-infused recipes gracing our table over the coming weeks, and this Strawberry Buttermilk Pie is just the beginning.
The Perfect Harmony: Why Strawberries and Buttermilk Belong Together
In this exquisite pie, the star attraction is undoubtedly the fresh, juicy strawberries. Baked into a creamy, luscious custard, they transform into tender, jammy pockets of sweetness. But what truly elevates this dessert is the addition of buttermilk. Often overlooked, buttermilk plays a crucial role, providing a subtle tang that beautifully complements the inherent sweet-tartness of the strawberries. Its acidic notes create a nuanced flavor profile, preventing the pie from being overly sweet and adding a wonderful depth that leaves you craving another slice. The buttermilk also contributes to the custard’s velvety texture, making each bite incredibly smooth and satisfying.
Mastering the Art of the Flaky Pie Crust
A truly exceptional pie begins with an equally exceptional crust. My pastry recipe, specifically designed for this pie, yields two crusts, even though only one is required for a single pie. Why this seemingly generous provision? Because we are currently on the cusp of glorious fruit abundance! When the other berries — blueberries, raspberries, and those coveted sour cherries — make their appearance, you’ll be incredibly grateful to have an extra, ready-to-go pie crust waiting patiently in your freezer. It’s a small act of foresight that pays huge dividends in future baking endeavors, saving you precious time and effort when inspiration strikes.
For me, making pie pastry is a ritual. I never bother making just a single batch; I almost always quadruple the recipe. This particular doubling left me with three perfectly formed, ready-to-roll dough discs nestled comfortably in my freezer. These versatile discs are ideal for impromptu free-form tarts, charming hand pies, or even quick and easy savory dinners, like a hearty samosa pie, when friends drop by. Having a homemade crust on hand makes entertaining and everyday baking infinitely simpler and more rewarding.
Tips for a Flawless Flaky Crust:
- **Keep it Cold:** The secret to a flaky crust is cold butter and ice water. This prevents the butter from fully incorporating into the flour, creating pockets that steam during baking and result in those coveted flaky layers.
- **Don’t Overwork:** Handle the dough as little as possible. Overworking develops the gluten, leading to a tough crust instead of a tender one. Pulse briefly in the food processor or mix gently by hand.
- **Chill Time is Crucial:** Allowing the dough to chill in the refrigerator helps the gluten relax and solidifies the butter, making it easier to roll out and ensuring a more tender crust.
- **Parchment Paper Magic:** Rolling dough between two sheets of parchment paper prevents sticking, minimizes the need for extra flour (which can toughen the dough), and makes transferring the crust to the pie plate a breeze.
No Buttermilk? No Problem!
If you find yourself short on buttermilk, there’s no need to fret or rush to the store. You can easily whip up a quick and effective substitute right in your own kitchen. Simply combine regular milk (dairy or non-dairy) with an acid like lemon juice or white vinegar. For every cup of buttermilk required, pour one tablespoon of lemon juice or white vinegar into a liquid measuring cup, then fill the rest of the way with milk. Let it sit for 5-10 minutes until it slightly curdles. Voila! You have a perfectly acceptable buttermilk substitute ready to use in your recipe. For more detailed instructions and alternative methods, refer to these quick and easy buttermilk substitutes.
The Star of the Show: Strawberry Buttermilk Pie Recipe
This Strawberry Buttermilk Pie is a true celebration of summer, combining the irresistible sweetness of fresh strawberries with a tangy, creamy buttermilk custard, all nestled in a buttery, flaky homemade crust. It’s surprisingly easy to make and guaranteed to be a crowd-pleaser.
By: Jennifer Pallian BSc, RD
Summary: Strawberries baked into a sweet-tart creamy custard in a buttery crust. Serve it piled high with more fresh strawberries and a dollop of whipped cream.
Prep Time: 30 minutes
Cook Time: 45 minutes
Total Time: 1 hour 15 minutes
Servings: 6
Ingredients
For 2 Pie Crusts
- 11.25 oz (2 1/2 cups) all-purpose flour
- 1 tsp kosher salt
- 10 oz cold unsalted butter, cubed
- 6 tbsp ice water
For Filling
- ½ cup melted butter
- 1 cup granulated sugar
- ¾ cup buttermilk
- 2 tbsp flour
- 2 large eggs + 2 yolks
- 1 ½ tsp vanilla extract
- ¼ tsp kosher salt
- 1 lb strawberries, hulled and halved
Instructions
- Prepare the Pie Crust: In a food processor, combine flour and salt. Pulse a few times to mix. Scatter the cold, cubed butter over the flour mixture and pulse until the mixture resembles coarse crumbs with some pea-sized pieces of butter remaining. Drizzle in the ice water gradually, pulsing just a few times until the mixture begins to come together. Dump the shaggy dough onto a large sheet of parchment paper and use your hands to gently press it together into a cohesive mass. Divide the dough into two equal pieces and form each into a flat disc, about 5 inches wide. Wrap one disc tightly in parchment paper and refrigerate for at least 1 hour (or up to 2 days). Wrap the second disc in parchment paper, then place it in a freezer bag and freeze for future use – you’ll be glad you did!
- Roll Out the Crust: On a lightly floured surface or between two sheets of parchment paper, roll out one chilled dough disc into a 12-inch circle. Carefully drape the rolled dough into a 9-inch pie plate, gently pressing it down into the bottom and sides without stretching. Trim any excess dough from the edges, leaving about a ½-inch overhang, then crimp the edges decoratively. Freeze the pie crust for 10 minutes to help prevent shrinking during baking. Meanwhile, preheat your oven to 375ºF (190ºC) and place a baking stone or sheet on the lowest rack.
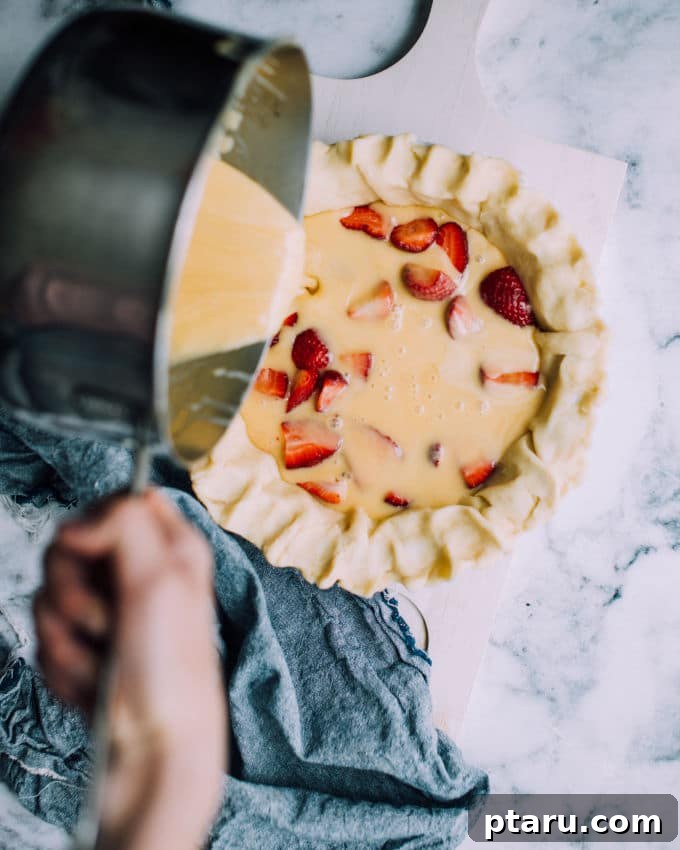
- Prepare the Filling: In a small saucepan, melt the butter over medium heat. Remove the saucepan from the burner and stir in the granulated sugar. Set aside to cool slightly. In a large mixing bowl, add the buttermilk and whisk in the 2 tablespoons of flour until completely dissolved and smooth. This step prevents lumps. Whisk in the large eggs, egg yolks, vanilla extract, and ¼ teaspoon of kosher salt until well combined. Finally, slowly whisk in the cooled butter and sugar mixture until fully incorporated, creating a smooth, custard-like base.
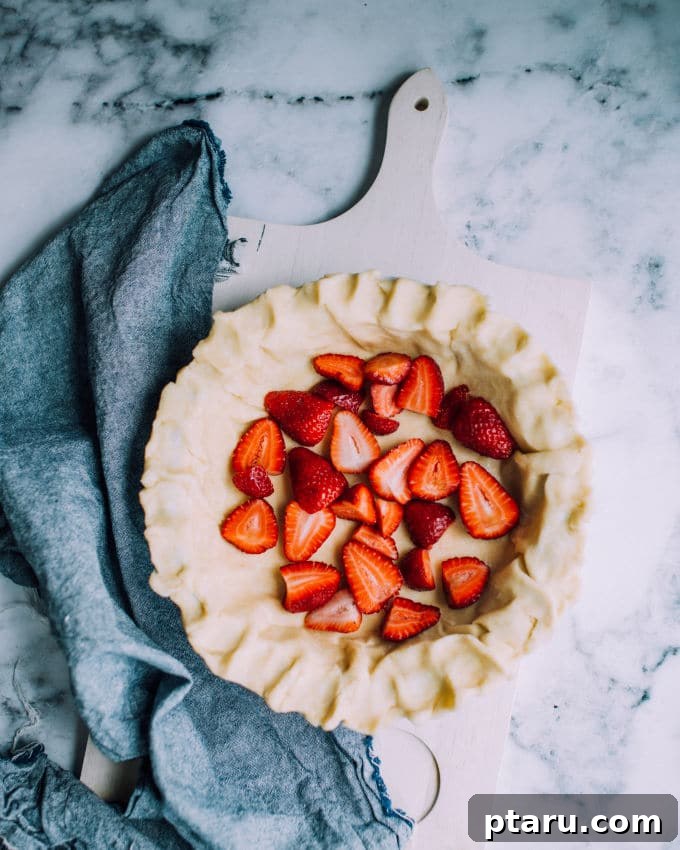
- Assemble and Bake the Pie: Arrange half of the hulled and halved strawberries evenly over the bottom of the chilled pie crust. Carefully pour the prepared buttermilk filling mixture over the strawberries. Place the pie on the preheated baking stone or sheet on the lowest rack of the oven. Bake for approximately 45-50 minutes, or until the top is beautifully golden brown and the center of the pie has just a slight, gentle jiggle when lightly tapped (much like a perfectly set cheesecake). If the crust or the top of the pie begins to brown too quickly before the filling is fully set, loosely tent the pie with aluminum foil.
- Cool and Serve: Once baked, carefully remove the pie from the oven and transfer it to a wire rack to cool completely. Allowing it to cool to room temperature is essential for the filling to fully set. Serve your magnificent Strawberry Buttermilk Pie topped generously with the remaining fresh strawberries and a luxurious dollop of freshly whipped cream. Any leftover pie can be covered and refrigerated for up to 2 days. Enjoy this taste of pure summer joy!
Serving Suggestions & Variations
While this Strawberry Buttermilk Pie is magnificent on its own, a few simple additions can elevate the experience even further. A generous spoonful of homemade whipped cream is almost mandatory, its light, airy texture and delicate sweetness providing a perfect counterpoint to the rich custard and tart berries. For an extra touch of elegance and flavor, consider adding a hint of vanilla bean paste or a dash of almond extract to your whipped cream.
Beyond whipped cream, a scoop of vanilla bean ice cream that slowly melts into the warm (or room temperature) pie is an indulgent delight. For those who enjoy a bit of crunch, a sprinkle of toasted slivered almonds or finely chopped pistachios could add an interesting textural contrast. If you’re feeling adventurous, a light drizzle of balsamic glaze over the fresh strawberries before serving can enhance their natural sweetness and add a sophisticated, unexpected twist.
Troubleshooting & Baking Success Tips
Even seasoned bakers encounter challenges, but with a few tips, your Strawberry Buttermilk Pie will be a resounding success every time.
- **Preventing a Soggy Bottom:** Freezing the pie crust before baking (as instructed) and baking it on a preheated baking stone or baking sheet on the lowest rack helps ensure a perfectly crisp bottom crust. The cold crust meets the hot surface, creating an immediate crisping effect.
- **Crust Browning:** If your pie crust edges are browning too quickly, simply create a pie shield using aluminum foil or purchase a reusable silicone pie crust protector. This will protect the edges while the filling continues to bake.
- **Checking for Doneness:** The “jiggle test” is key for custard pies. The center should jiggle slightly, like gelatin, but not appear liquid. It will continue to set as it cools. An internal temperature of about 180-185°F (82-85°C) is also a good indicator of doneness.
- **Cooling Patience:** Resist the urge to cut into the pie too soon! Cooling thoroughly allows the custard to firm up and the flavors to meld beautifully. This is crucial for clean slices.
We hope this delightful Strawberry Buttermilk Pie brings a ray of sunshine and a touch of homemade comfort to your kitchen. It’s the perfect dessert to share with loved ones, celebrating the simple joys of seasonal baking and the vibrant flavors of summer. We’d love to hear about your baking experience!
Tried this recipe? Share your thoughts and leave a comment below!