
Ultimate Homemade Garlic Naan: Impossibly Soft, Stretchy & Restaurant-Quality
Welcome to the ultimate guide for crafting the most incredible Garlic Naan you’ll ever taste! Forget dry, stiff store-bought versions; this acclaimed recipe, refined over two decades with my Indian husband, promises a truly authentic, melt-in-your-mouth experience. This isn’t just a recipe; it’s a culinary journey to transform your Indian meals with homemade naan so impossibly soft and wonderfully stretchy, it almost dissolves in your mouth. Perfect for dipping into rich curries, scooping up savory delights, or simply enjoying on its own, this flatbread is a game-changer.

This particular garlic naan recipe didn’t go totally viral (amassing over 12 million views!) by accident. It’s an enhanced and perfected version of our highly popular Butter Naan Recipe, enriched with aromatic garlic and fresh herbs, making it the perfect accompaniment to virtually any Indian dish. Prepare to impress your family and friends with this next-level homemade Indian bread that’s guaranteed to be better than any restaurant offering.
Why Homemade Garlic Naan is a Culinary Revelation
While the convenience of store-bought naan is tempting, the unparalleled freshness, texture, and flavor of homemade garlic naan are truly unmatched. Baking naan at home offers several advantages that elevate your dining experience:
- Superior Freshness: Enjoy naan hot off the skillet, when it’s most aromatic, tender, and delicious. The difference between freshly made and reheated naan is substantial.
- Incredible Texture: Achieve that distinctive pillowy soft interior and delightful chewiness, combined with crisp, slightly charred spots on the exterior – a hallmark of perfectly cooked naan that often eludes mass-produced versions.
- Customizable Flavor Profile: You have complete control over the intensity of garlic, the amount of herbs, and the inclusion of other spices, allowing you to tailor the naan to your exact preferences.
- Cost-Effective: Making your own naan from scratch is significantly more economical than purchasing it regularly, especially if you’re a frequent naan consumer.
- A Rewarding Experience: There’s immense satisfaction in crafting such a beloved bread from basic ingredients. The aroma filling your kitchen and the joy on your diners’ faces are priceless.
Essential Ingredients for Your Perfect Garlic Naan
Creating the best homemade garlic naan begins with gathering these simple, yet potent, pantry staples. Each ingredient plays a vital role in achieving the signature softness and flavor of this beloved Indian flatbread.
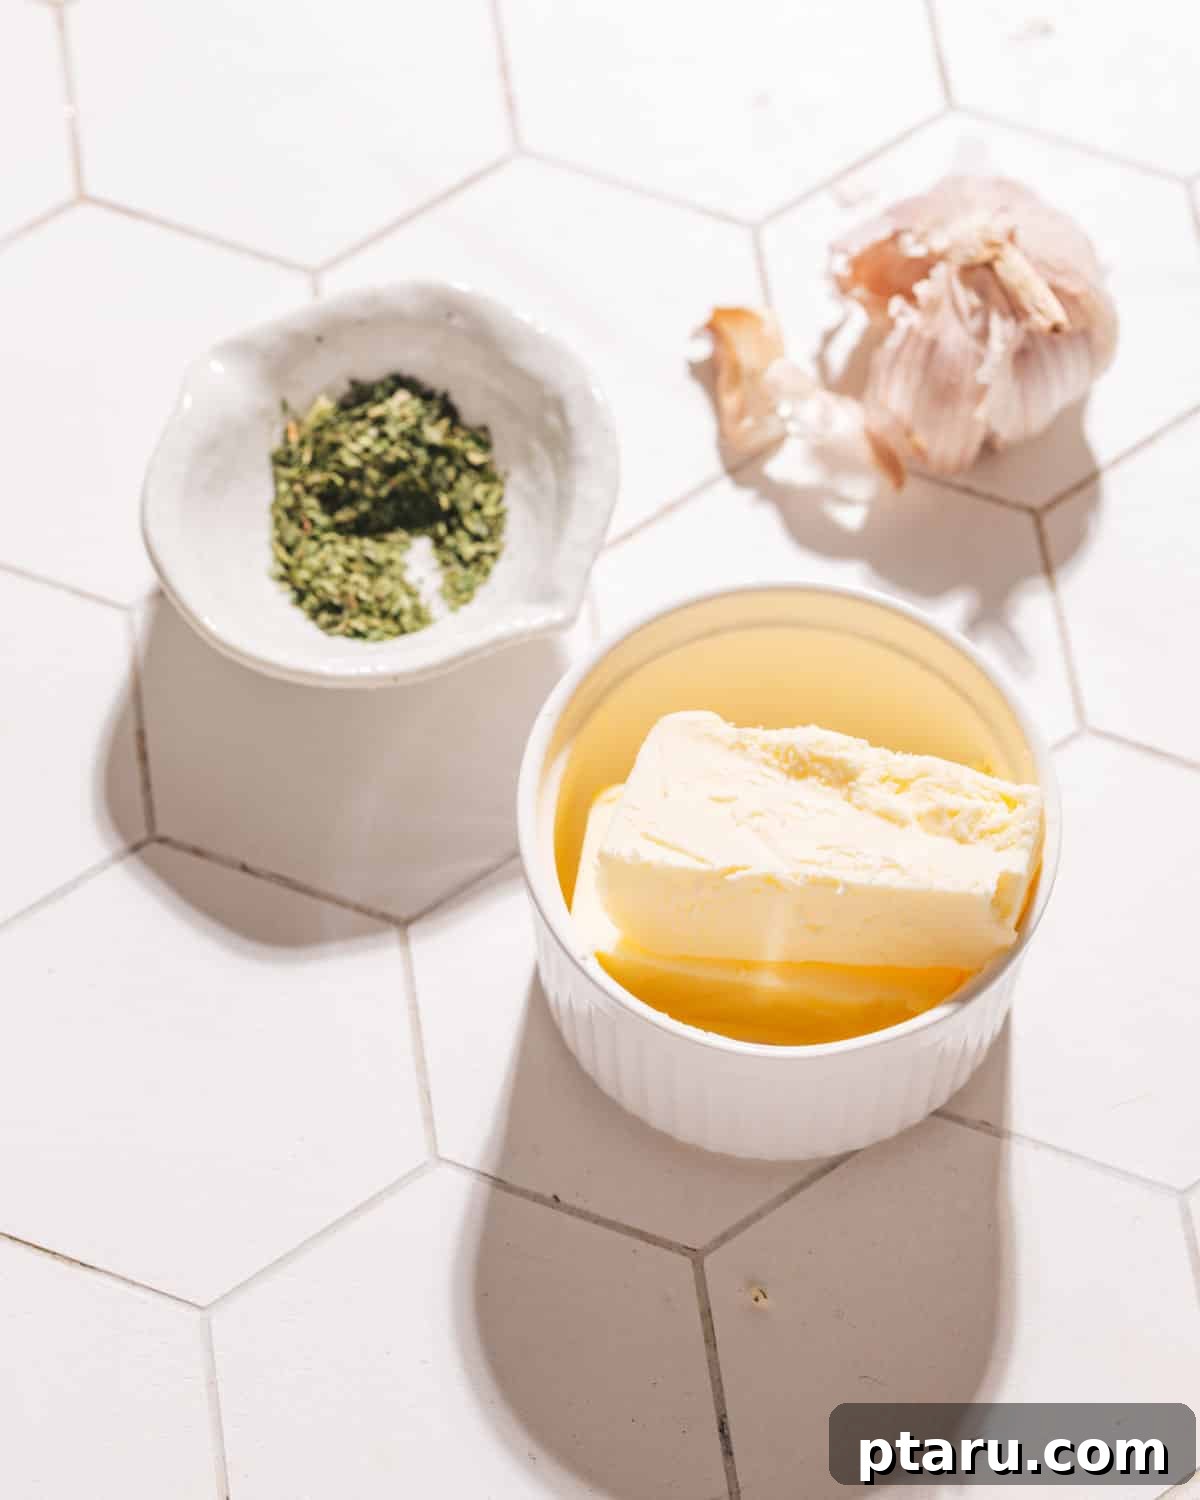
Key Ingredients Breakdown for Naan Dough and Topping
- All-Purpose Flour: This forms the base of our naan. Its gluten content is ideal for developing the elasticity needed for stretchy naan, while still maintaining a tender crumb.
- Instant Dry Yeast: This is the leavening agent responsible for the naan’s airy, bubbly texture. Always check that your yeast is fresh and active for optimal rising. Instant yeast is convenient as it can be mixed directly with dry ingredients, skipping the proofing step required for active dry yeast.
- Kosher Salt: More than just a seasoning, salt strengthens the gluten structure in the dough and balances the flavors, preventing the naan from tasting bland.
- Baking Powder and Baking Soda: Do you really need both? YES! This combination is key to the extraordinary softness and fluffiness of this magical naan. Baking powder reacts with moisture and heat, providing initial lift, while baking soda reacts with the acidity in the yogurt, creating additional gas bubbles for an incredibly light and airy result with beautiful internal pockets.
- Plain Yogurt or Buttermilk: A non-negotiable ingredient for truly tender naan. The lactic acid in yogurt tenderizes the gluten in the flour, making the dough incredibly soft and pliable. Full-fat plain yogurt yields the richest results, but buttermilk can be used as an alternative. For a plant-based option, an unflavored, unsweetened plant-based yogurt works very well.
- Warm Water: Activated the yeast and helps bring the dough together to the right consistency. Ensure it’s warm (around 105-115°F or 40-46°C), not hot, to avoid killing the yeast.
- Butter (Melted): Adds richness to the dough itself and is essential for brushing over the freshly cooked naan. This step imparts a luxurious flavor and keeps the naan soft and moist.
- Fresh Garlic: The star flavor of our garlic naan! Freshly minced garlic delivers a vibrant, pungent aroma and taste that powdered or bottled versions simply cannot replicate. Use a garlic press or finely mince by hand.
- Cilantro (Optional): Freshly chopped cilantro adds a beautiful touch of vibrant color and a fresh, herbaceous aroma. If you’re not a fan of cilantro, it’s perfectly fine to omit it, or you could substitute with finely chopped fresh parsley for a different, yet equally pleasant, flavor. This makes it a fantastic alternative to traditional garlic bread with Italian-inspired meals.
Creative Variations for Your Naan Adventure
Once you master the basic garlic naan, feel free to experiment with these delicious twists:
- Butter Swaps: Elevate the richness by using ghee (clarified butter) instead of regular butter, which lends a deep, nutty flavor. For a dairy-free option, non-dairy butter can be swapped in with excellent results.
- Herb Alternatives: While fresh cilantro is classic, don’t hesitate to experiment. Fresh parsley provides a milder, earthy note. In a pinch, dried cilantro from a bottle can be used, as shown in some video guides (check the recipe card for video link), but fresh is always superior.
- Yeast Flexibility: If you only have active dry yeast, you can absolutely use it. Simply proof it first by dissolving it in the warm water (with a pinch of sugar) for 5-10 minutes until it becomes foamy, then add this mixture along with the yogurt to your dry ingredients.
- Gluten-Free Naan: Many home bakers, including reports from my Instagram community, have found this recipe to work surprisingly well with all-purpose gluten-free flour blends. Keep in mind that the texture might be slightly different, but it can still be wonderfully soft.
- Cheese Naan: Before cooking, sprinkle your favorite shredded cheese (like mozzarella, cheddar, or a mix) over one side of the rolled-out naan, then fold it in half, seal the edges, and gently roll it back out. Cook as directed for a cheesy delight.
Tools to Grab for Naan Making
Equip your kitchen with these essential bits and bobs to ensure a seamless naan-making process:
- Stand Mixer with Paddle and Hook Attachments: This is a highly recommended tool for effortless dough preparation. The paddle attachment mixes the dry ingredients, while the dough hook kneads the dough consistently, ensuring perfect gluten development for that desirable chewy-stretchy texture. If you don’t have one, manual kneading works too!
- Large Mixing Bowl: If kneading by hand, a sturdy bowl is essential for combining ingredients.
- Cast Iron Skillet: The MVP of this recipe! A heavy cast iron skillet is crucial for mimicking the high, even heat of a traditional tandoor oven, which is key to achieving naan’s characteristic puffiness and charred spots.
- Rolling Pin: For rolling out the dough balls evenly.
- Parchment Paper: Ideal for preventing the sticky dough from adhering to your work surface during resting and shaping.
- Pastry Brush: For generously slathering that delicious garlic butter onto your warm naan.
- Kitchen Scale (Optional but Recommended): For precise flour measurements, ensuring consistent results every time.
How to Make Garlic Naan: An Easy Step-by-Step Guide
Follow these precise steps to create authentic, impossibly soft, and perfectly charred Indian garlic naan bread at home.
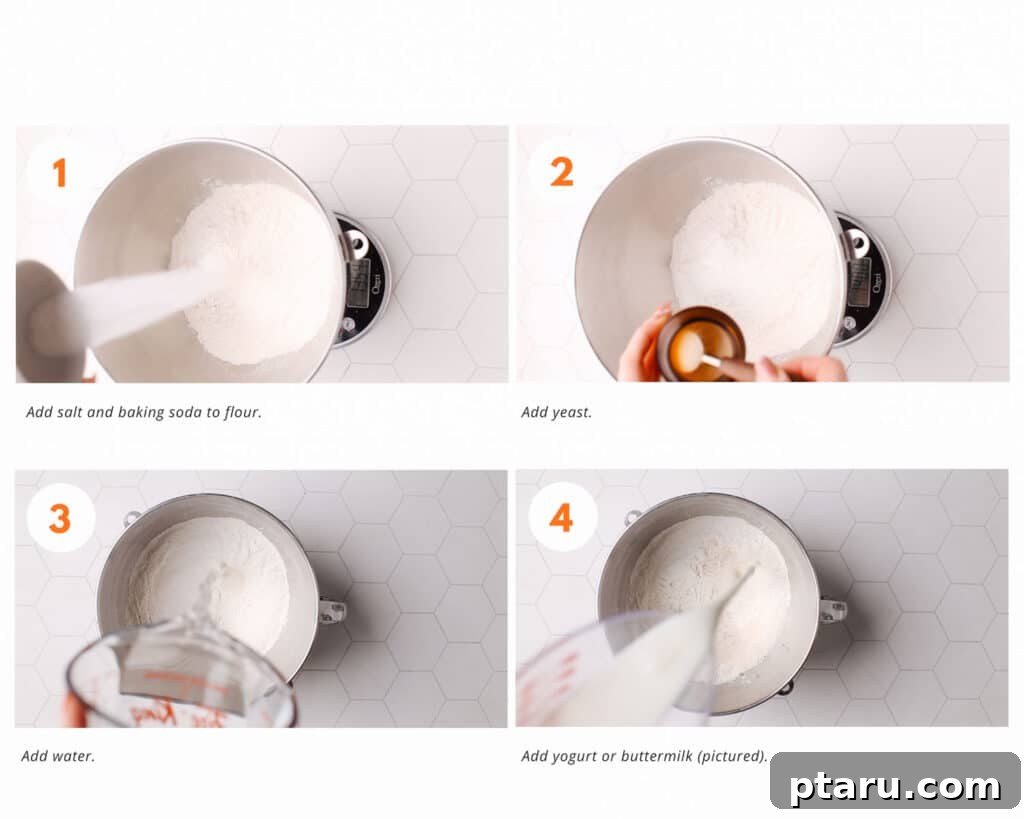
1. Mix the Dry Ingredients for the Dough
In the bowl of a stand mixer, fitted with the paddle attachment, combine 4 cups of all-purpose flour, 1 tablespoon of instant dry yeast, 2 teaspoons of kosher salt, 1 teaspoon of baking powder, and ½ teaspoon of baking soda. Turn the mixer on low speed and allow it to mix until all dry ingredients are thoroughly combined and evenly distributed. This ensures that the leavening agents and salt are dispersed throughout the flour.
2. Combine the Wet Ingredients with Dry
Next, add ¾ cup of plain yogurt (or buttermilk) and 1 cup of warm water to the bowl with the dry mixture. Continue mixing on low speed. The ingredients will gradually come together, forming a “shaggy” dough – this means it will look somewhat wet, crumbly, and sticky, not yet smooth or cohesive. This is perfectly normal at this stage.
3. Knead the Dough to Develop Gluten
Remove the paddle attachment and switch to the dough hook attachment. Increase the mixer speed to medium-low and knead the dough for exactly 4 minutes. Initially, the dough will appear quite sticky and may cling to the sides of the bowl. Resist the strong urge to add extra flour! As the kneading progresses, the dough will start to come together, become smoother, more elastic, and begin to pull away from the sides of the bowl. Only add a tiny amount of flour if the dough remains excessively sticky and is not forming a cohesive ball after about 2-3 minutes of kneading.
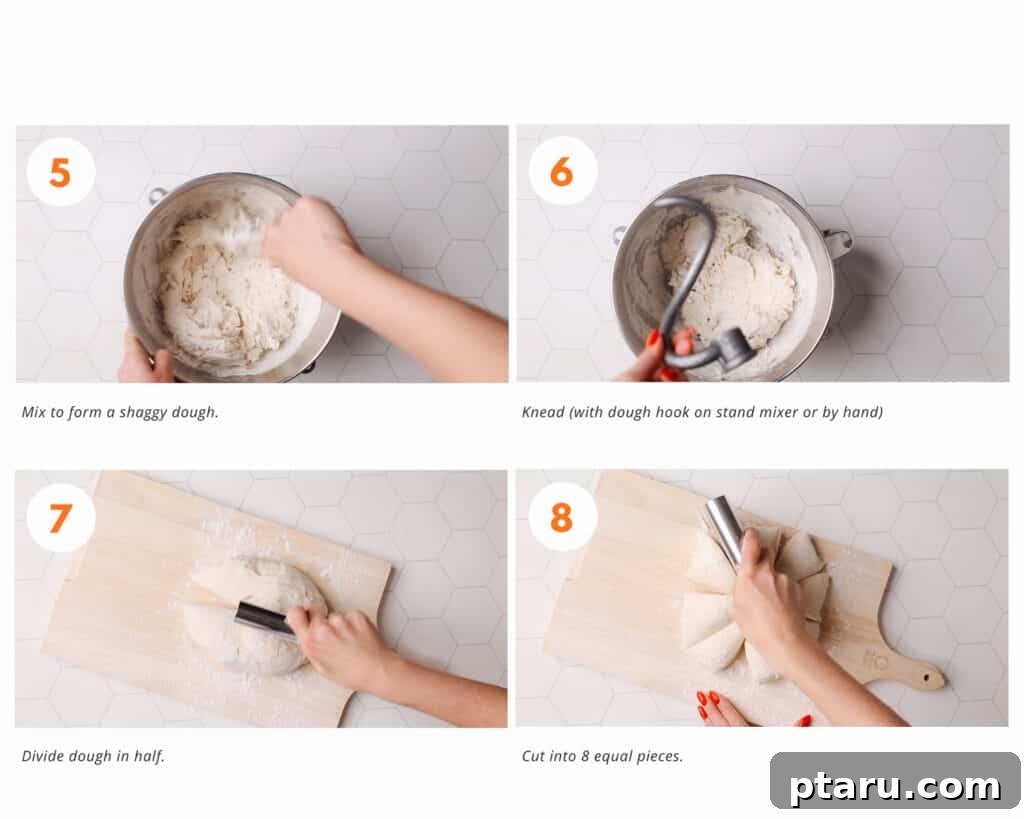
4. Divide and Shape the Dough Balls
Generously flour your clean work surface. Carefully turn the soft, slightly sticky dough out onto the floured surface. Sprinkle a little more flour over the dough and knead it briefly by hand, just enough to form it into a large, smooth ball. Using a bench scraper or knife, divide this large dough ball into 8 equal portions. Roll each portion into a tight, smooth ball with your hands. Remember, this dough is designed to be on the stickier side for maximum softness, so don’t be alarmed. If it’s too difficult to handle, lightly dampen your hands with water or add a slight dusting of flour to your palms, not to the dough itself.
5. Initiate the First Rise (Proofing)
Lightly oil a large sheet of parchment paper. Place the divided dough balls onto the oiled parchment, rolling each one gently to ensure its entire surface is coated with a thin layer of oil. This crucial step prevents a dry skin from forming on the dough as it rises. Cover the dough balls with another piece of parchment paper or a clean, damp kitchen towel. Find a warm spot in your kitchen (such as a slightly warmed, turned-off oven or near a sunny window) and let the dough rise undisturbed for 1 hour. The dough balls should visibly increase in size and become noticeably plump and airy.
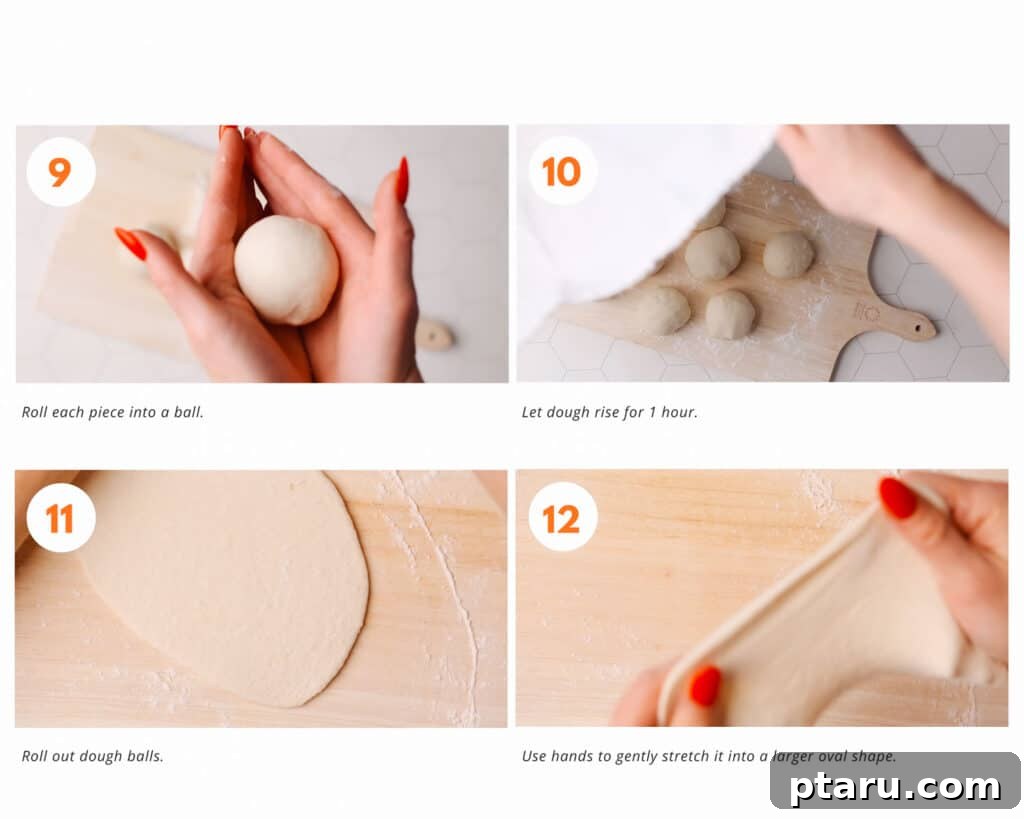
6. Roll and Briefly Rest the Shaped Naan
Once the dough has risen, gently transfer each dough ball onto a lightly floured surface. Using a rolling pin, carefully roll each ball flat to approximately ¼ inch thick, or slightly thinner. You can lightly flour your rolling pin and the dough as needed to prevent sticking, but avoid using too much. After rolling, use your hands to gently stretch the dough into a slightly oblong, oval, or teardrop shape, aiming for that characteristic naan look. Arrange the rolled naan in a single layer on your work surface and allow them to rest for about 10 minutes. This brief resting period is essential as it helps the gluten relax, making the naan easier to cook without shrinking back excessively.
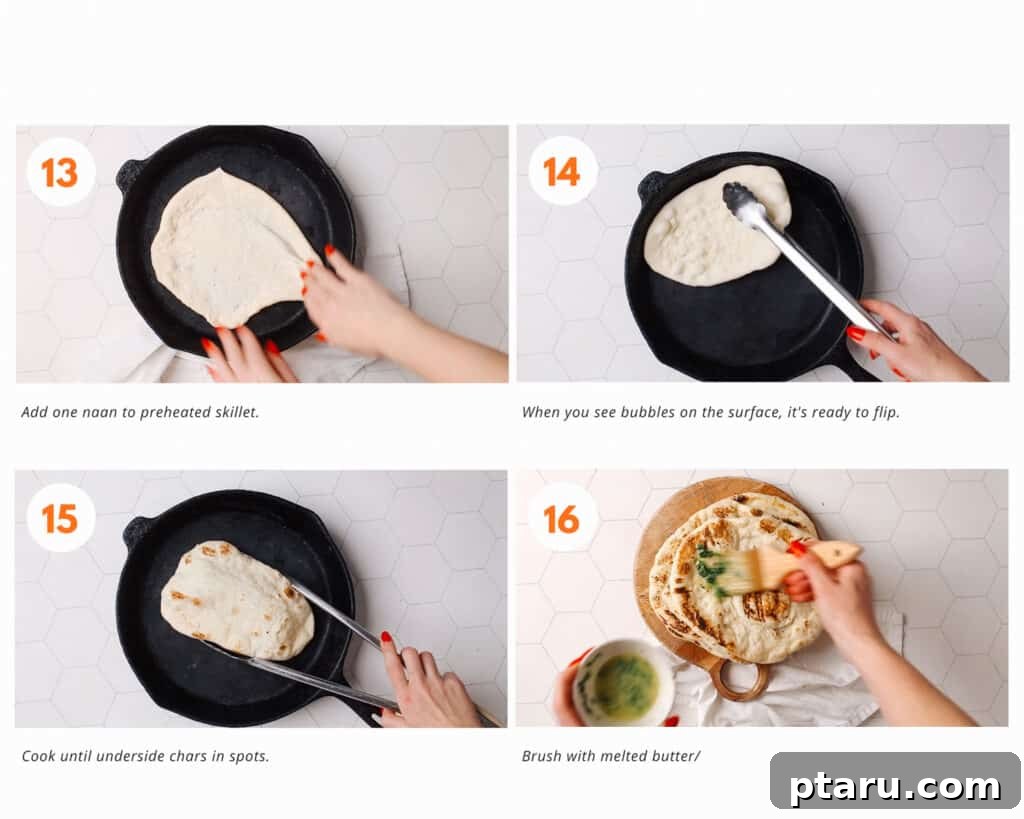
7. Preheat Skillet and Cook Each Naan
While the rolled naan is resting, place your cast iron skillet over medium-high heat and allow it to preheat for a full 5 minutes. Achieving the correct, high temperature is critical for rapid cooking and the signature puff. Test the heat by sprinkling a few drops of water onto the pan; if they sizzle immediately and evaporate, your pan is ready. Carefully place one rolled naan into the hot, dry skillet. Cover the skillet with a lid (or another large pan) to trap steam, and cook until you see distinct bubbles forming rapidly on the top surface of the naan, typically within 30-60 seconds. Lift the lid, flip the naan with tongs, and cook the other side uncovered for about 30 seconds more, or until it develops attractive charred spots and loses its raw, doughy appearance.
8. Brush with Aromatic Garlic Butter
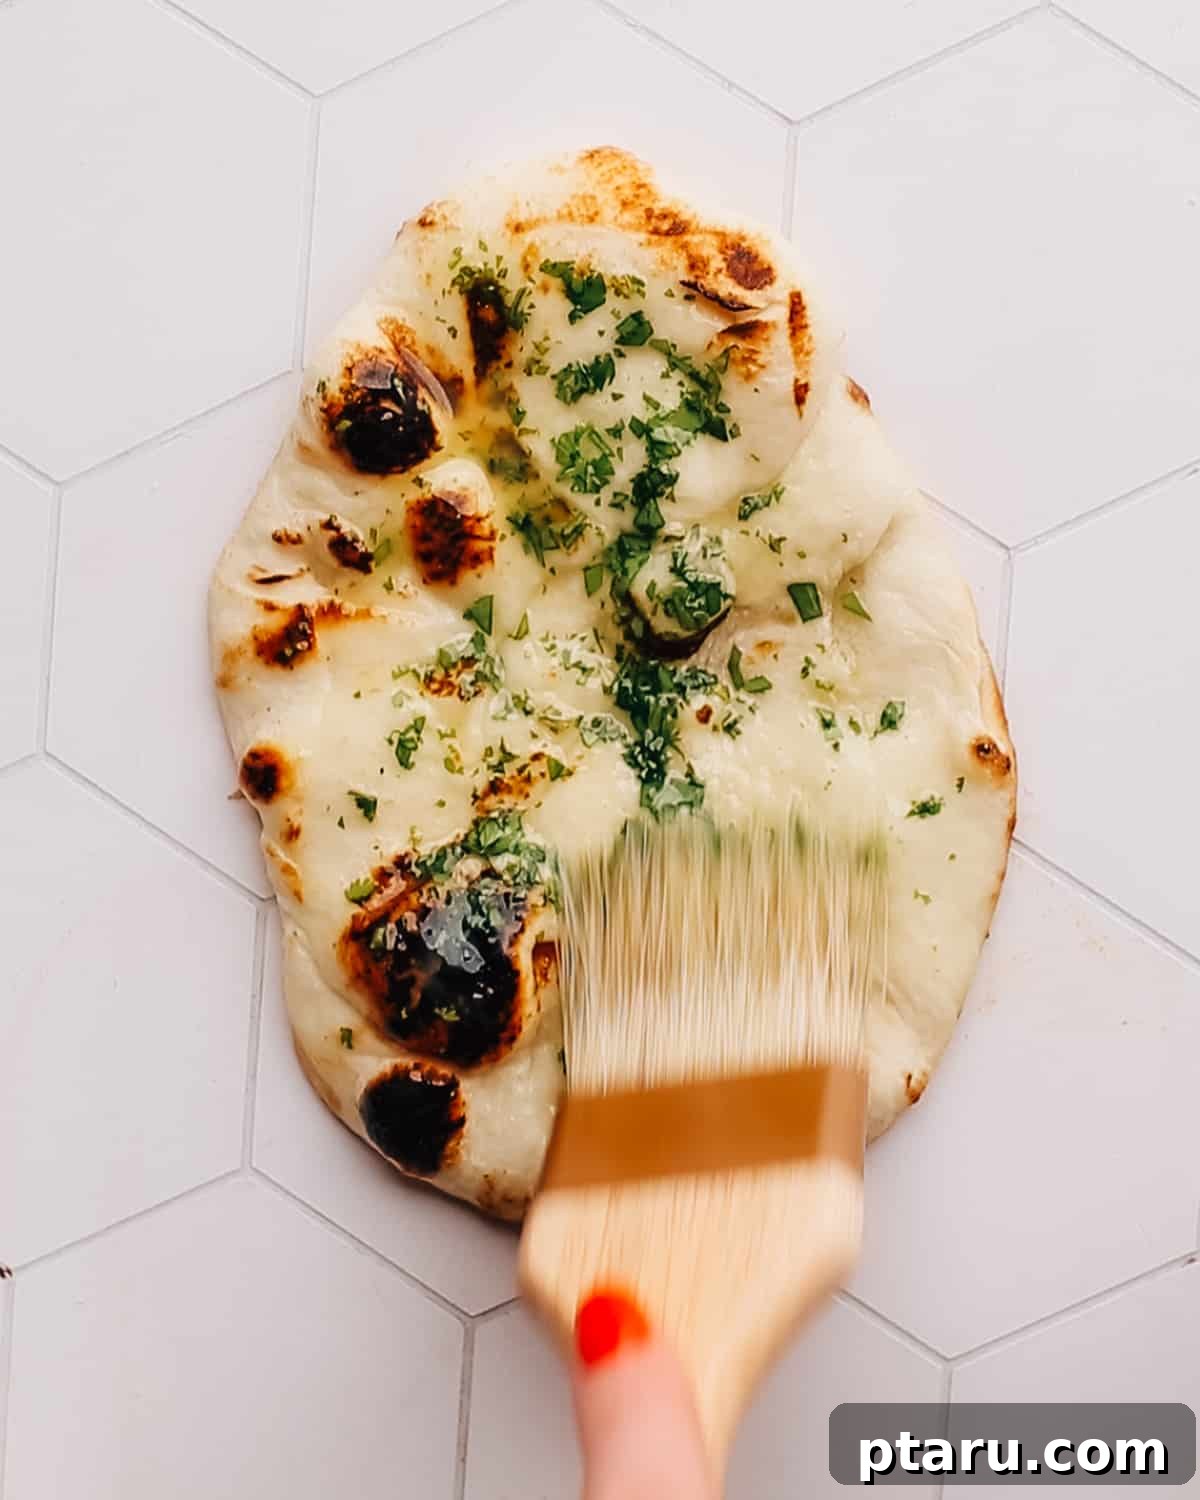
As each naan finishes cooking, immediately transfer it to a plate and cover it with a clean kitchen towel. This keeps the naan warm and helps retain its moisture and softness. In a small bowl, combine the 4 tablespoons of melted butter with your freshly minced garlic and optional chopped cilantro. Generously brush the warm naan with this aromatic garlic butter mixture. The warmth of the naan will help the butter and garlic flavors meld beautifully, infusing every bite with incredible taste and ensuring an irresistibly soft finish. Repeat for all remaining naan.
Expert Tips for Flawless Garlic Naan Every Time
Achieving consistently perfect, impossibly soft, and stretchy garlic naan is simple when you avoid these common pitfalls and embrace these expert techniques:
- Adequate Resting Time is Non-Negotiable: Allowing the dough to rest sufficiently is absolutely essential for gluten relaxation and optimal texture. Skipping or shortening the designated resting times will result in a less soft, less fluffy, and less stretchy naan that can be tough and difficult to chew. Patience truly pays off in naan making.
- Mastering Heat Management: A hot skillet is paramount. Thoroughly preheat your cast iron skillet over medium-high heat for at least 5 minutes before cooking your first naan. A screaming hot skillet mimics the high temperatures of a traditional tandoor oven, which is essential for achieving the signature rapid puffing, bubbly surface, and deliciously charred spots.
- Perfect Cooking Temperature is Key: Cooking naan at too high a temperature can cause it to burn quickly on the outside while remaining raw and doughy inside. Conversely, cooking at too low a temperature will prevent the naan from puffing up beautifully and developing those gorgeous, authentic tandoor-style charred blisters. Maintain a consistent medium-high heat.
- Smart Handling of Sticky Dough: This dough is intentionally sticky; it’s the secret to its incredible softness and moisture. Do not be tempted to add excessive amounts of flour to the dough itself. Instead, generously flour your work surface, your rolling pin, and your hands. For handling the dough balls, lightly dampen your hands with water if they become too sticky. A little stickiness is a good sign!
- Measure Flour Accurately: For consistent baking results, using a kitchen scale to weigh your flour is highly recommended. If measuring by volume, remember to spoon the flour into your measuring cup and level it off, rather than scooping directly from the bag, which can compact the flour and lead to adding too much.
- Don’t Overcrowd the Pan: Cook naan one at a time. Overcrowding the skillet will lower the temperature of the pan, leading to uneven cooking and preventing the naan from puffing up correctly.
- Cover to Keep Warm & Soft: As each naan finishes cooking, immediately transfer it to a plate and cover it with a clean kitchen towel. This traps steam and helps keep the naan warm, soft, and pliable while you cook the remaining pieces.
Make Ahead and Storage Solutions for Your Naan
This garlic naan recipe is wonderfully adaptable for busy schedules, allowing you to prepare parts of it in advance or store leftovers for later enjoyment.
Storing Uncooked Naan Dough:
You can prepare the garlic naan dough ahead of time and store it in the refrigerator for up to 4 days, which can even enhance its flavor slightly due to a longer fermentation period. Here’s how:
- Follow all the steps to make and knead the dough. Instead of dividing it into small individual balls right away, leave it as one large, cohesive dough ball. This makes it significantly easier to handle once it’s cold and has become even stickier.
- Lightly oil a large, clean mixing bowl. Place the dough ball into the bowl and roll it around to ensure it is completely coated with a thin layer of oil. This crucial step prevents a hard, dry crust from forming on the surface of the dough during its time in the refrigerator.
- Tightly wrap the bowl with plastic wrap, ensuring no air can get in, or use an airtight lid. Refrigerate the dough.
What to Do When You’re Ready to Use Chilled Dough:
When you’re ready to make fresh naan from your refrigerated dough:
- Remove the bowl from the refrigerator. Your dough will be cold and quite sticky. Liberally flour your work surface.
- Gently dump the naan dough out onto the well-floured surface. Divide it into 8 equal portions and roll each into a ball, as directed in the main recipe instructions.
- Allow the dough balls to come to room temperature. This can take anywhere from 30 minutes to an hour, depending on your kitchen’s ambient temperature. This step is important for the dough to become pliable and for the yeast to reactivate fully. Once at room temperature, proceed with rolling, resting, and cooking as outlined in the recipe.
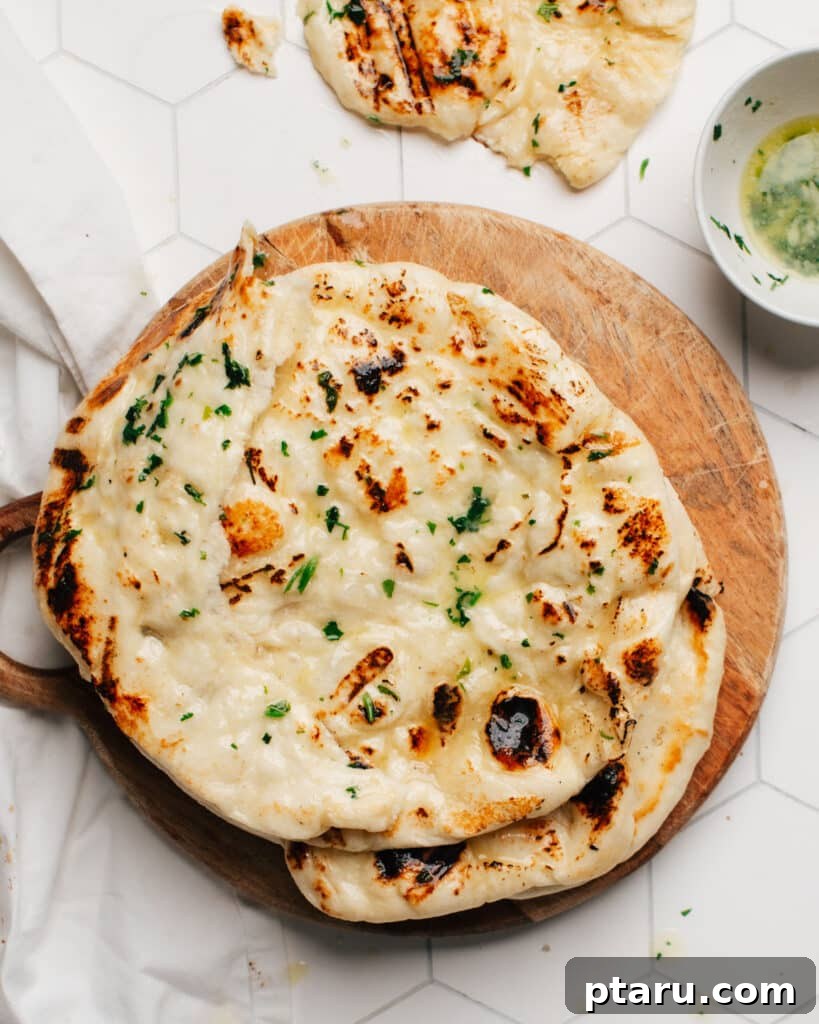
Once cooked, garlic naan is undeniably best when enjoyed fresh and warm. However, if you have leftovers, allow the naan to cool completely before storing it. Place the cooled naan in an airtight container or a resealable plastic bag and keep them at room temperature for up to 2 days. For longer preservation, freezing is your best option to maintain their softness and quality!
How to Reheat Cooked Garlic Naan:
Restore your leftover naan to its fresh-baked glory with these simple reheating methods:
- Oven Reheating: For a stack of naan, wrap them loosely in aluminum foil to lock in moisture. Reheat in a preheated oven at 350ºF (175°C) for approximately 5-10 minutes, or until they are warm and pliable again.
- Toaster Method: For reheating individual pieces, a toaster or toaster oven works incredibly well. You may need to break larger pieces in half to make them fit. Toast until warm and slightly crisp on the edges, usually 1-2 minutes.
- Skillet Reheating: Lightly oil a skillet and heat it over medium heat. Place a naan in the hot skillet and warm it for about 30 seconds per side until soft and heated through.
How to Serve Your Delicious Homemade Garlic Naan
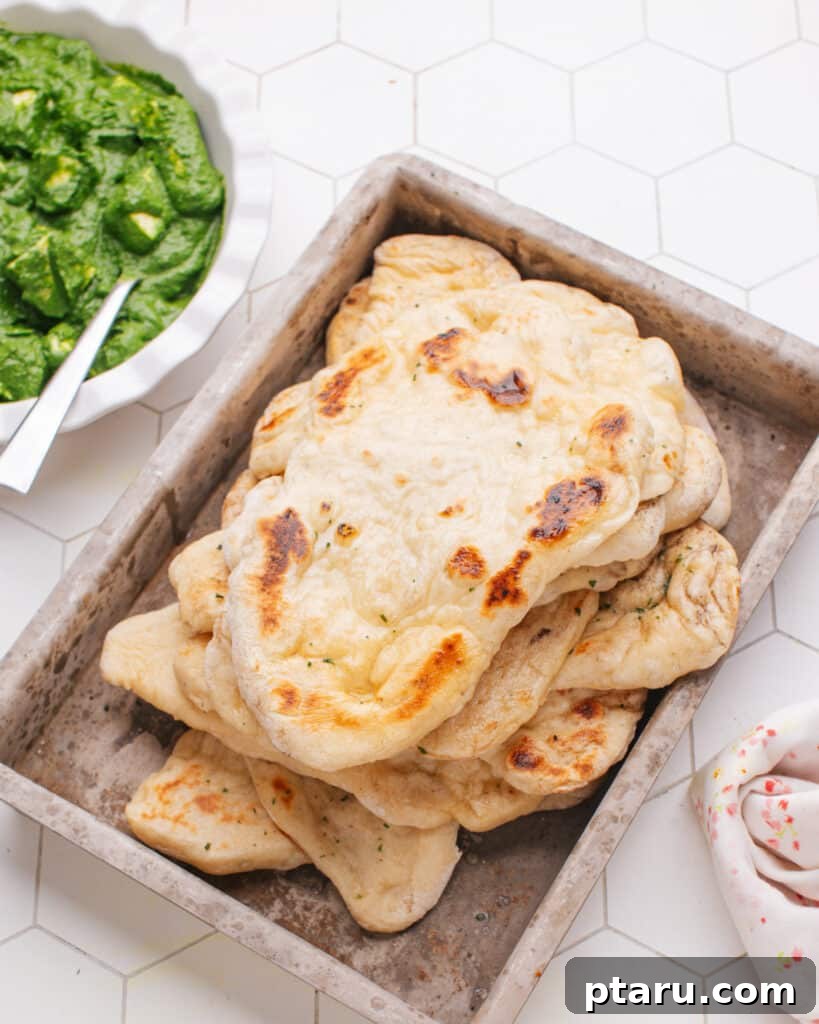
This ultra-soft and stretchy garlic naan is incredibly versatile and makes the perfect companion for a wide array of dishes. While it’s a natural fit for Indian cuisine, its delicious flavor transcends cultural boundaries. Here are some delectable serving suggestions:
- The Perfect Curry Companion: Garlic naan is designed to be dipped and scooped! Pair it with creamy, rich curries like our beloved Paneer Butter Masala or a comforting pot of Saag Paneer, a delicious spinach and cheese curry. Its robust flavor stands up beautifully to bold spices.
- Hearty Main Courses: Serve it alongside other savory Indian main dishes such as delicate Malai Kofta (vegetable kofta in a rich gravy) or more of the vibrant Palak Paneer. Serve one, or create a grand Indian banquet!
- Appetizer Extravaganza: Begin your Indian feast with classic appetizers like our crispy Beef Samosas, flavorful Chicken Samosas, or traditional Potato Samosas. Naan is also fantastic for scooping up any accompanying chutneys or dipping sauces.
- Beyond Indian Cuisine: Don’t limit your naan! Use it as a base for quick mini pizzas, serve it with Mediterranean dips like hummus or baba ghanoush, or enjoy it simply as a flavorful bread with soups and stews.
Frequently Asked Questions About Homemade Garlic Naan
Just skimming through? No problem! Here are detailed answers to common questions about making perfect garlic naan:
Yes, you can substitute a portion of the all-purpose flour with whole wheat flour. For a good balance of nutrition and the desired soft, stretchy texture, a 50/50 mix of whole wheat and all-purpose flour is often recommended. Using 100% whole wheat flour, however, might result in a denser, less pliable naan due to the higher fiber content and different gluten structure. You might need to adjust the water slightly.
Absolutely! While a stand mixer simplifies the kneading process, you can certainly mix and knead the dough by hand. Combine the dry ingredients in a large bowl. Then, add the yogurt and warm water, stirring with a sturdy wooden spoon or your hands until a shaggy dough forms. Turn the dough out onto a lightly floured surface and knead by hand for about 10-12 minutes until it becomes smooth, elastic, and less sticky. Manual kneading will take a bit more effort but yields equally fantastic results.
The dough for this naan recipe is intentionally designed to be quite sticky; this high hydration is precisely what contributes to its incredible softness, moisture, and characteristic stretchiness. Do not add excessive amounts of extra flour to the dough itself, as this will make your naan tough and dry. Instead, liberally flour your work surface and your hands when handling and shaping the dough. You can also lightly dampen your hands with water to manage the stickiness. A little stickiness is a sign of a perfectly hydrated, tender dough!
Yes, you can certainly bake naan in a preheated oven if you prefer. For best results, preheat your oven to its highest setting (typically around 475°F or 245°C) with a pizza stone or an inverted heavy baking sheet inside for at least 30 minutes. This creates a very hot surface for cooking. Carefully place the rolled naan directly onto the hot stone/sheet and bake for about 2-3 minutes per side, or until it puffs up and develops golden-brown spots. The skillet method often produces a more distinct char, but the oven is a great alternative.
Several factors contribute to a good puff: using fresh, active yeast; thorough kneading to develop strong gluten; allowing sufficient resting time for the dough to rise; and most critically, cooking on a very hot surface. The high heat of the skillet or oven quickly creates steam inside the dough, which gets trapped and causes the naan to inflate. Covering the skillet for the first side also helps trap this steam, encouraging a bigger puff.
To keep cooked naan soft, allow it to cool completely before storing. Place it in an airtight container or a resealable plastic bag at room temperature for up to 2 days. For longer storage, tightly wrap individual naan pieces in plastic wrap, then place them in a freezer-safe bag. They can be frozen for 1-2 months. Thaw at room temperature and reheat using one of the methods described above.
Discover More Indian Recipes You’ll Adore
If you’ve enjoyed creating this incredibly soft and flavorful homemade garlic naan, expand your culinary repertoire with these other authentic Indian treasures from our collection. Each recipe is designed to bring the rich tastes of India to your home kitchen:
- Creamy Madras Lentils: A hearty and comforting vegetarian dish, perfect for soaking up with your freshly made naan or soft roti.
- Hearty Potato Curry (Aloo Masala): A simple, budget-friendly curry where potatoes are infused with tons of aromatic flavors.
- Authentic Indian Chai Tea: Learn to brew traditional masala chai for a truly invigorating and aromatic beverage experience.
- Flaky Kerala Paratha: Elevate your bread-making skills with this unique, layered South Indian flatbread known for its delightful flakiness.
- Flavorful Indian Chickpea Curry (Channa Masala): A super tasty, cost-effective, and protein-rich vegetarian curry that pairs wonderfully with any Indian bread.
Explore Our Naan Recipe Collection
Can’t get enough of delicious homemade naan? We’ve got you covered with more irresistible variations to explore:
- Classic Butter Naan: The foundational recipe for perfectly soft and versatile naan, ideal for any Indian meal.
- Cheese Naan: A delightfully cheesy twist on classic naan, perfect for comfort food cravings.
- Aloo Naan: Naan bread generously stuffed with a savory, spiced potato filling.
- Keema Naan: A hearty and flavorful naan filled with seasoned minced meat, a complete meal in itself.

Garlic Naan (Impossibly Soft + Stretchy!)
Jennifer Pallian BSc, RD
Learn how to make ULTRA soft and stretchy homemade garlic naan (better than restaurant!) with this easy, viral recipe perfected for 20 years!
15 minutes
2 minutes
8
Ingredients
For the Garlic Naan Dough:
- 4 cups all-purpose flour
- 1 tbsp instant dry yeast
- 2 tsp kosher salt
- 1 tsp baking powder
- ½ tsp baking soda
- ¾ cup plain yogurt or buttermilk
- 1 cup warm water
For the Garlic Butter Topping:
- 4 tbsp butter, melted
- 4 cloves garlic, minced (fresh is best!)
- 1 tbsp minced cilantro (optional, for garnish)
Instructions
- 1. Mix Dry Ingredients: In a stand mixer with a paddle attachment, combine all-purpose flour, instant dry yeast, kosher salt, baking powder, and baking soda. Mix on low speed until well combined.
- 2. Add Wet Ingredients: Add plain yogurt (or buttermilk) and warm water to the bowl. Continue mixing on low speed until a shaggy dough forms.
- 3. Knead the Dough: Switch to the hook attachment. Knead at medium-low speed for 4 minutes. The dough will be sticky but will come together; avoid adding extra flour unless absolutely necessary to prevent tough naan.
- 4. Divide and Shape: Generously flour your work surface. Turn out the dough, sprinkle with flour, and knead briefly into a large ball. Divide into 8 equal portions, rolling each into a ball. Dampen hands or lightly flour if the dough is too sticky.
- 5. First Rise: Lightly oil a sheet of parchment paper. Place dough balls on it, roll them to coat with oil, and cover with another piece of parchment or a clean towel. Let rise in a warm place for 1 hour until visibly plump.
- 6. Roll and Rest: On a floured surface, roll each dough ball with a rolling pin to about ¼ inch thick. Lightly flour as needed. Gently stretch the dough into a slightly oblong shape with your hands. Let rest for 10 minutes.
- 7. Preheat and Cook: Preheat a cast iron skillet over medium-high heat for 5 minutes. Test with water drops (they should sizzle and evaporate). Place a naan in the skillet, cover, and cook until bubbles form (30-60 seconds). Flip and cook until charred spots appear (about 30 seconds more).
- 8. Brush with Garlic Butter: Transfer cooked naan to a plate and cover with a towel to keep warm. Mix melted butter with minced garlic and optional cilantro. Brush the warm naan immediately with this garlic butter for maximum flavor and moisture.
Notes
- Flour Measurement Tip: For accuracy, use a kitchen scale to weigh flour. If measuring by volume, spoon flour into the measuring cup and level off to avoid compacting.
- Hand-Mixing Option: No stand mixer? No problem! Combine dry ingredients in a large bowl, then add wet, stirring with a wooden spoon until shaggy. Turn onto a floured surface and knead by hand for about 10-12 minutes until smooth and elastic.
- Direct Flame Variation: For authentic tandoor-style naan, after cooking one side in the skillet, briefly hold the naan (using tongs) directly over a lit gas burner until it puffs and develops charred spots (just a few seconds). Watch carefully to prevent burning.
Nutrition Information (Approximate Per Serving)
Calories: 271kcal | Carbohydrates: 46g | Protein: 7g | Fat: 9g | Saturated Fat: 4g | Polyunsaturated Fat: 1g | Monounsaturated Fat: 2g | Trans Fat: 0.2g | Cholesterol: 18mg | Sodium: 761mg | Potassium: 49mg | Fiber: 6g | Sugar: 3g | Vitamin A: 202IU | Vitamin C: 1mg | Calcium: 104mg | Iron: 2mg
Nutrition information is automatically calculated and should only be used as an approximation.
Tried this recipe? Leave a comment below! We’d love to hear about your experience and see your homemade garlic naan creations.