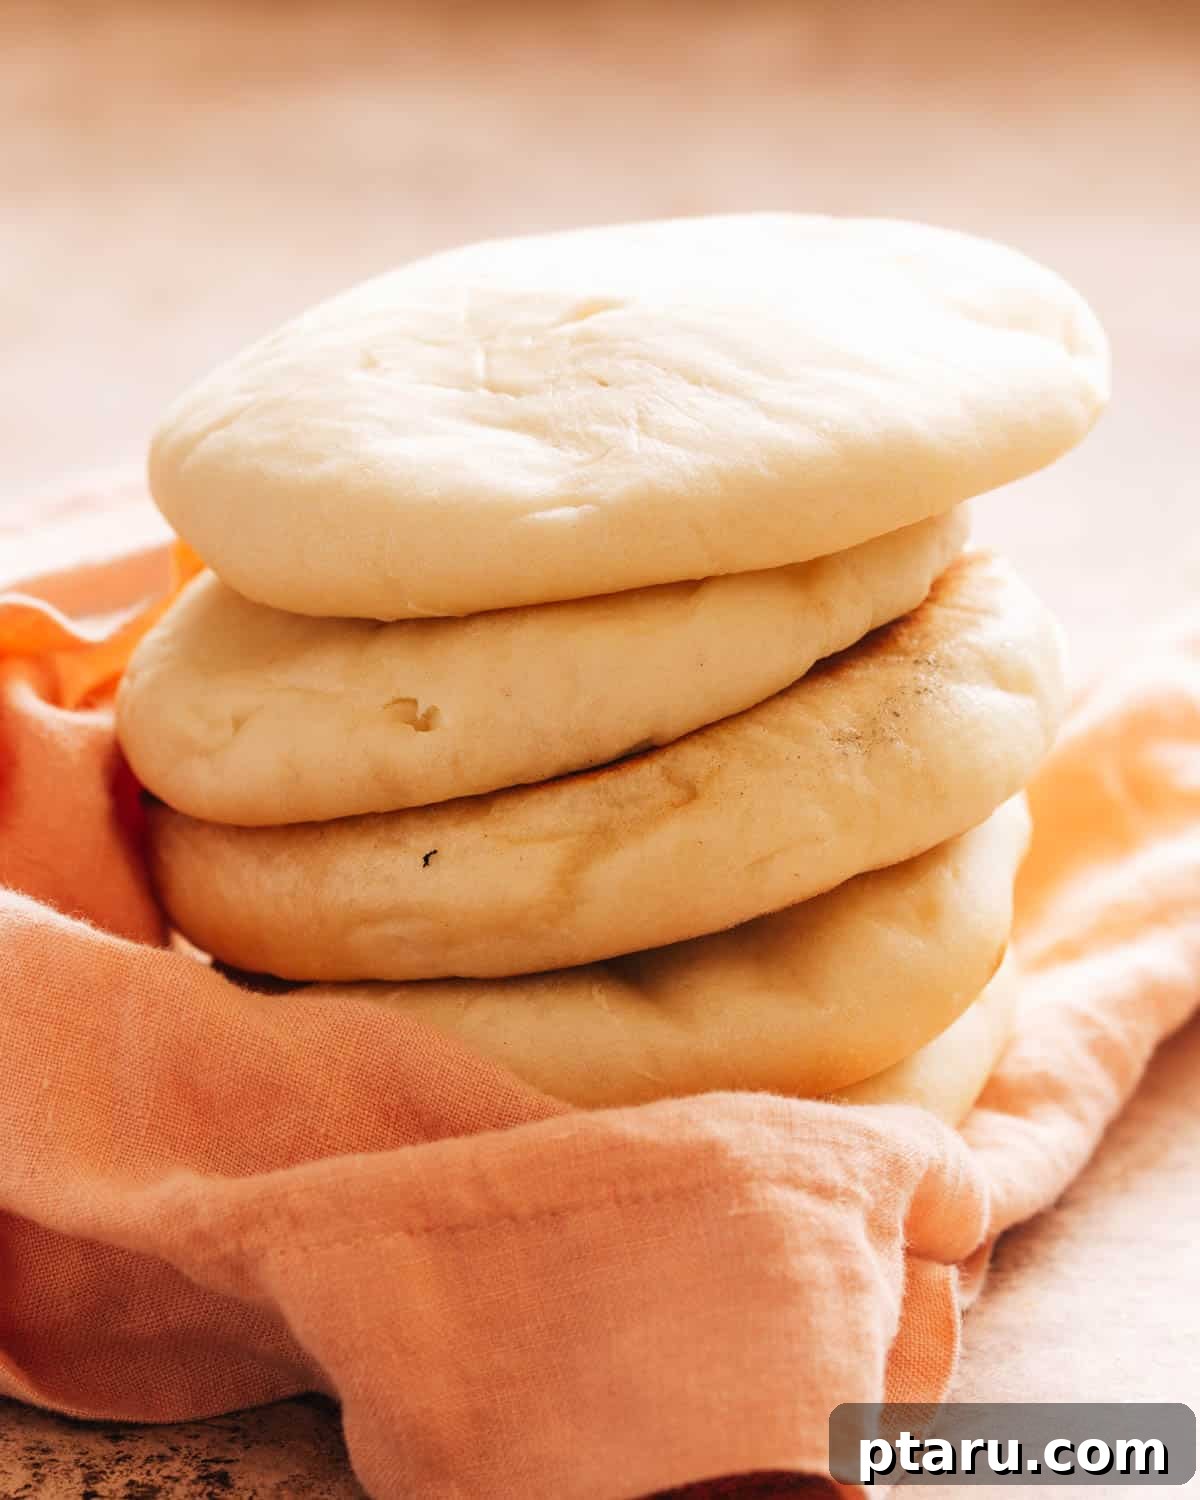
Embark on a culinary journey to Turkey with this incredible Turkish bread recipe. Crafted for optimal tenderness and a gloriously fluffy texture, this dough is enriched with milk, ensuring an extra-soft crumb that melts in your mouth. After numerous tests and adjustments, I’ve perfected this recipe to guarantee consistently delicious results. If you’ve enjoyed my widely popular Butter Naan recipe, prepare to fall in love with this Turkish delight!
Exploring the Rich Variety of Turkish Breads
Turkey boasts an astonishing array of breads, each deeply woven into the country’s culinary heritage. These diverse offerings range from thin, delicate flatbreads to hearty loaves, each possessing its own unique characteristics, regional nuances, and distinctive flavor profile. Understanding these varieties is key to appreciating the richness of Turkish baking. Here are some of the most common and beloved Turkish bread types you might encounter:
- Pide: Often likened to a flatbread or even a pizza crust, Turkish pide is a traditional bread typically baked in an elongated or oval shape. It serves as a versatile base for an exciting array of toppings, including savory cheeses, seasoned minced meats, fresh vegetables, and aromatic herbs. Pide is a staple, especially during religious holidays and special gatherings, symbolizing community and celebration.
- Simit: Instantly recognizable by its circular form and generous coating of toasted sesame seeds, Simit is an iconic Turkish bread roll. It’s a hugely popular breakfast item, frequently enjoyed on its own, dipped in tea, or paired with complementary toppings such as creamy cheese, rich butter, or sweet fruit jam. Simit carts are a common sight in Turkish cities, offering a quick and delicious snack.
- Lavash: This exceptionally thin, unleavened flatbread holds a significant place in Turkish and wider Middle Eastern cuisines. Lavash is incredibly pliable, making it ideal for wrapping various fillings, from grilled meats to fresh salads. It can also be torn into pieces and ingeniously used as a natural utensil to scoop up a multitude of dips and flavorful sauces. Its simple yet effective preparation makes it a versatile companion to many meals.
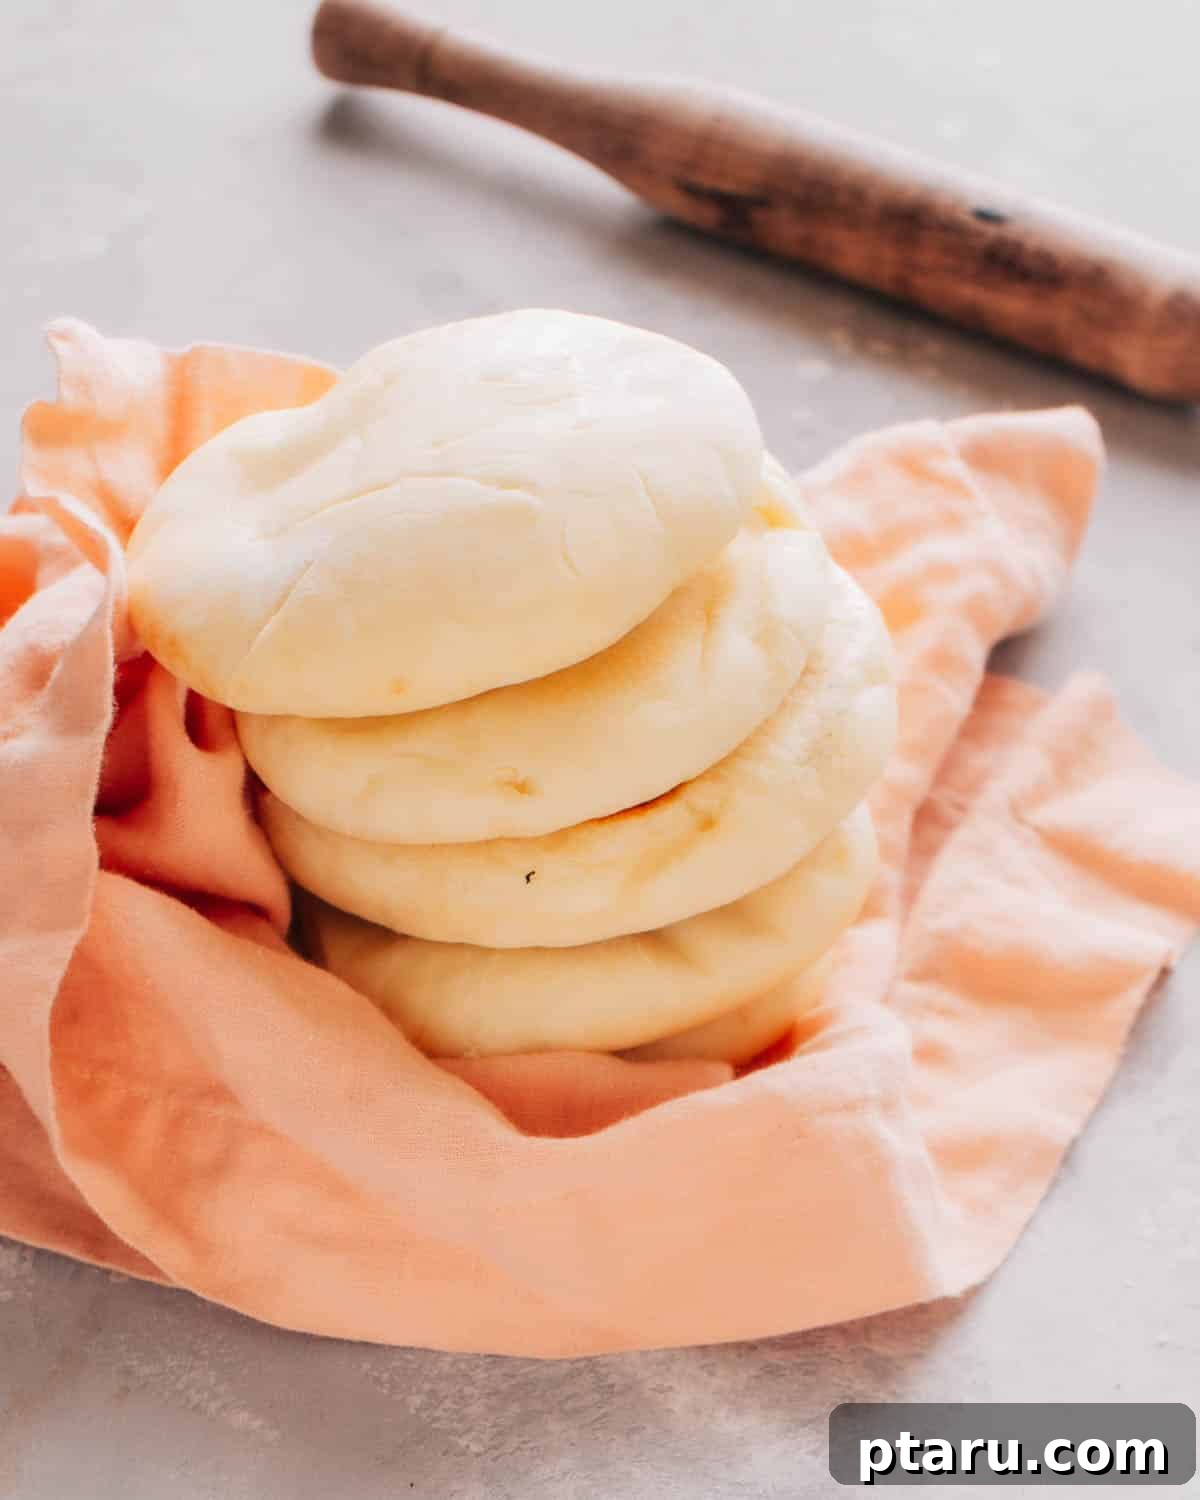
- Bazlama: This recipe focuses on Bazlama, a truly delightful thick and fluffy flatbread, sometimes affectionately referred to as Turkish pita bread, though it typically lacks the internal pocket found in traditional pita. Bazlama is particularly cherished at breakfast, often served alongside a spread of eggs, various cheeses, olives, and fresh produce. Its soft, pillowy texture makes it an absolute favorite, and this particular rendition aims to be your go-to Turkish flatbread recipe.
- Ekmek: The term “ekmek” broadly refers to a diverse category of crusty white bread loaves that are fundamental to the Turkish diet. Ekmek is a daily essential, found on almost every dining table. It can be savored simply plain, or enhanced with delectable toppings such as various cheeses, sweet honey, or a drizzle of fragrant olive oil. Each region may have its unique take on Ekmek, showcasing slight variations in crust and crumb.
The beauty of Turkish flatbread recipes lies in their incredible diversity. From their varying shapes and sizes to their unique textures and toppings, each bread tells a story rooted in the specific region of Turkey where it is lovingly crafted, reflecting local ingredients and culinary traditions.
Why This Authentic Bazlama Recipe Will Become Your Favorite
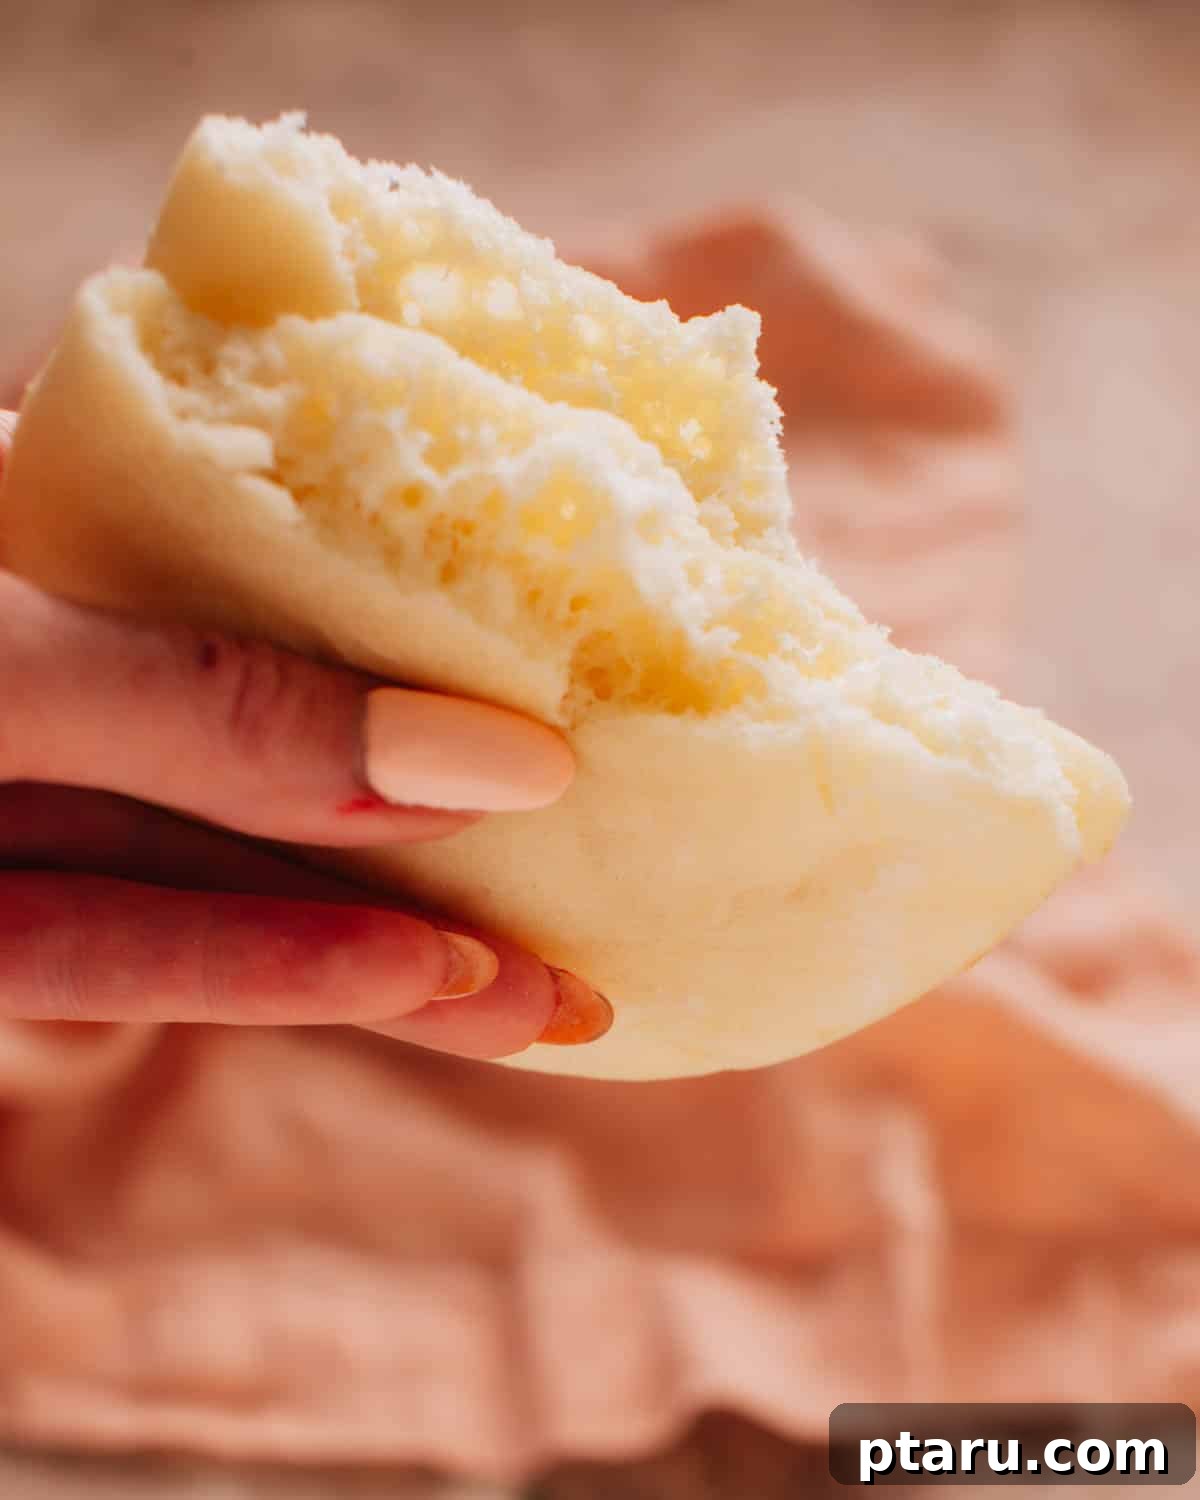
This authentic Turkish flatbread recipe introduces you to a special bread known as Bazlama. While it’s sometimes drawn into comparisons with global counterparts like pita or naan, Bazlama truly stands in a league of its own. It’s distinctly thicker and possesses a far fluffier interior than both, offering a unique and absolutely delicious experience. I would argue its closest resemblance is to a Greek-style pita bread, which, like Bazlama, doesn’t typically form an internal pocket. However, this particular recipe goes a step further, yielding a bread that is remarkably softer and boasts more inherent moisture than any store-bought Greek pita I’ve ever encountered.
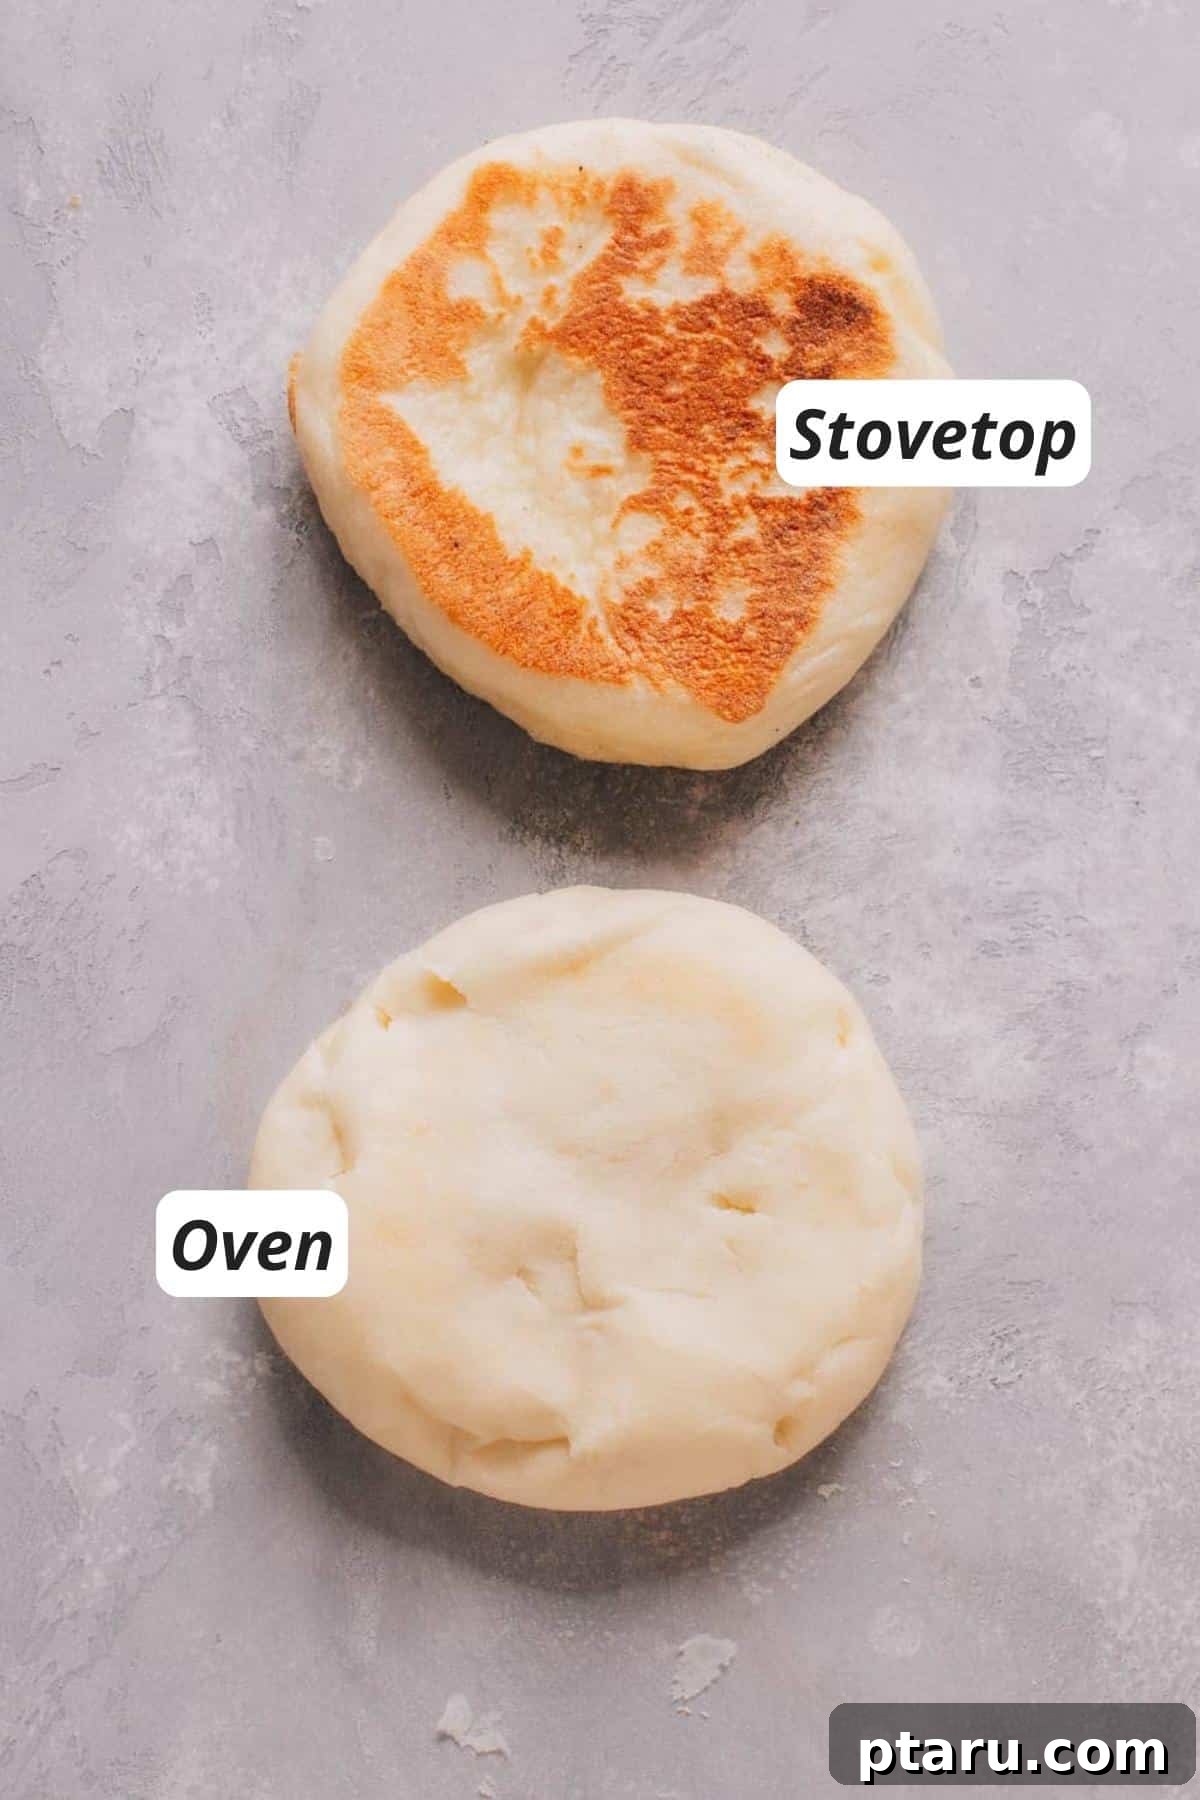
The creation of Bazlama involves a delightful process where the dough is carefully divided into individual portions, which are then skillfully shaped into uniformly round, flat discs. Traditionally, Bazlama is often cooked on a griddle or directly on a stovetop. Yet, through extensive experimentation, I’ve discovered that baking it in the oven not only results in an even fluffier texture but also ensures it retains its incredible softness for longer, making it superior in both taste and keeping quality.
Bazlama bread is a truly versatile staple, commonly enjoyed as a comforting breakfast item or as a wonderful accompaniment to various meals throughout the day. It can be served simply plain, allowing its natural flavor to shine, or adorned with a diverse range of toppings such as rich butter, savory cheese, sweet honey, or fruit preserves. Beyond that, its robust yet soft structure makes it an excellent foundation for sandwiches, or a perfect partner for scooping up delightful dips, hearty soups, and flavorful stews. This adaptable Turkish bread’s popularity extends beyond Turkey’s borders, making a beloved appearance in Middle Eastern cuisine and throughout the Balkans, a testament to its universal appeal.
This particular Turkish flatbread recipe has rapidly ascended to the top of my list of favorite bread recipes. Here’s why I believe you’ll adore it too:
- Effortlessly Simple to Master: Don’t be intimidated by homemade bread! This recipe requires only a handful of basic ingredients and a modest investment of your time to create truly astounding bread right in your own kitchen. It’s approachable for bakers of all skill levels.
- Incredibly Versatile for Any Meal: One of Bazlama’s greatest strengths is its chameleon-like ability to pair with virtually anything. Whether you’re serving creamy hummus, robust soups, hearty stews, crisp salads, or crafting gourmet wraps, this bread complements them all flawlessly.
- Unforgettable Texture: I simply cannot overstate this enough – its texture is simply divine. It’s not just soft; it’s pillowy, airy, and utterly fluffy. Every bite is a testament to its perfected crumb, making it an experience that will leave you craving more.
Crafting Your Turkish Bread: Essential Ingredients
Before we delve into the enjoyable process of baking, let’s gather the foundational ingredients for this utterly fabulous Turkish flatbread recipe. You’ll be pleased to discover that this bread is remarkably simple to prepare, utilizing basic, readily available kitchen staples:
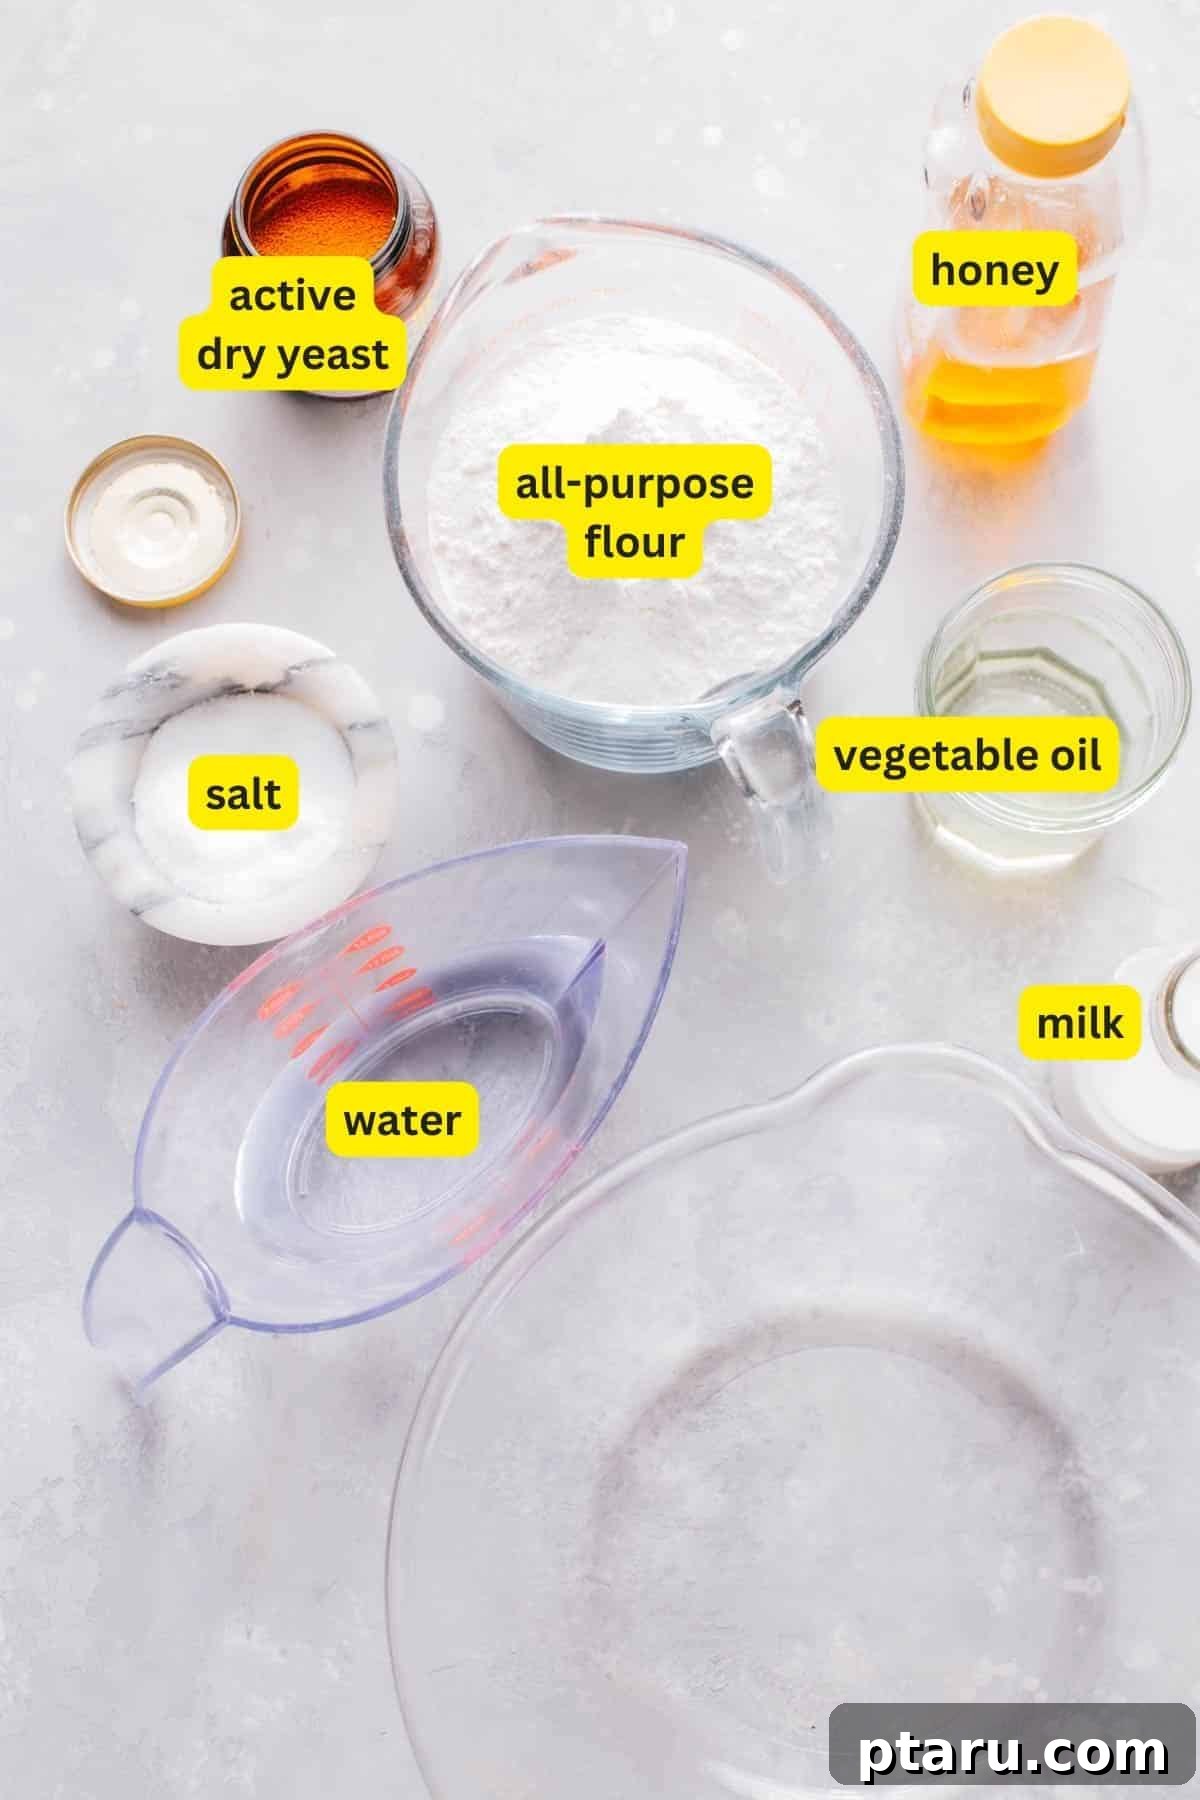
- All-purpose flour: This is the cornerstone of our Turkish bread, acting as the primary building block. It provides the essential structure, allowing for the formation of gluten networks that are responsible for giving our bread its distinctive, satisfying texture and chewiness.
- Water: Far from being a mere filler, this humble component plays a critical, multifaceted role. It hydrates the flour, which is fundamental for initiating the gluten-development process. Furthermore, it’s crucial for activating the yeast, enabling it to perform its magic. Without adequate water, our bread simply wouldn’t rise.
- Milk: Our secret weapon for imparting unparalleled richness and achieving that exquisitely tender crumb. The natural sugars present in milk also contribute significantly to boosting the bread’s color during baking, resulting in an irresistibly golden-brown and appealing exterior.
- Honey: Beyond its role as a natural sweetener, honey is a vital ingredient for stimulating yeast activity. It provides a readily available food source for the yeast, which in turn enhances the dough’s rise, leading to a lighter, airier bread. It also bestows a subtle, delightful hint of natural sweetness to the finished product.
- Active dry yeast: Consider this the powerhouse of our bread-making endeavor, the catalyst that helps our dough “rise to the occasion.” When activated, yeast produces carbon dioxide, creating the airy pockets that give Turkish bread its characteristic fluffiness.
- Vegetable oil: Introducing a touch of moisture and fat, vegetable oil is integral to keeping our Turkish bread wonderfully soft and tender for an extended period. This ingredient is truly the unsung hero behind every luscious bite, conveying that unmistakable sense of homemade warmth.
- Salt: The ultimate flavor enhancer and an essential structural component. Salt not only strengthens the gluten structure within the dough, contributing to its elasticity and texture, but it also brilliantly brings out and balances all the other flavors, preventing the bread from tasting bland.
With these simple yet powerful ingredients in hand, your kitchen is about to be transformed into a cozy, aromatic Turkish bakery, filling your home with the promise of freshly baked bread.
Essential Tools for Baking Turkish Bread
Before we embark on our delightful baking adventure, let’s ensure our toolkit is properly organized. Rest assured, you won’t need any specialized or overly fancy equipment for this recipe; most items are likely already in your kitchen.
- Large Microwave-Safe Bowl: This bowl will be your starting point for gently warming your liquid ingredients (water and milk) and creating the ideal environment for your yeast to bloom and become active.
- Wooden Spoon: An indispensable utensil for initially mixing your ingredients. A wooden spoon helps to incorporate the flour without overworking the dough, which is crucial for maintaining its soft texture.
- Baking Sheet with Parchment Paper: Lining your baking sheet with parchment paper is a simple yet effective step. It ensures that your delicate bread rounds won’t stick to the pan during baking, guaranteeing easy removal and making cleanup an absolute breeze.
- Stand Mixer with a Dough Hook (Optional): While not strictly necessary, if you possess a stand mixer equipped with a dough hook attachment, it will undoubtedly save you considerable effort and elbow grease during the kneading process, making the dough preparation even more convenient.
- Damp Towel or Plastic Wrap: Essential for covering your dough while it rises. This helps create a warm, moist environment that encourages optimal fermentation and prevents the dough from drying out.
- Rolling Pin: A standard rolling pin is needed to shape your dough portions into uniform circular discs before baking.
Your Guide to Making Easy Turkish Bread: Step-by-Step Directions
Get ready to roll up your sleeves and immerse yourself in this delightful culinary adventure, transforming simple ingredients into a batch of incredible Turkish bread. Follow these detailed steps to become your neighborhood’s favorite amateur baker, producing fluffy, soft Bazlama that will impress everyone.
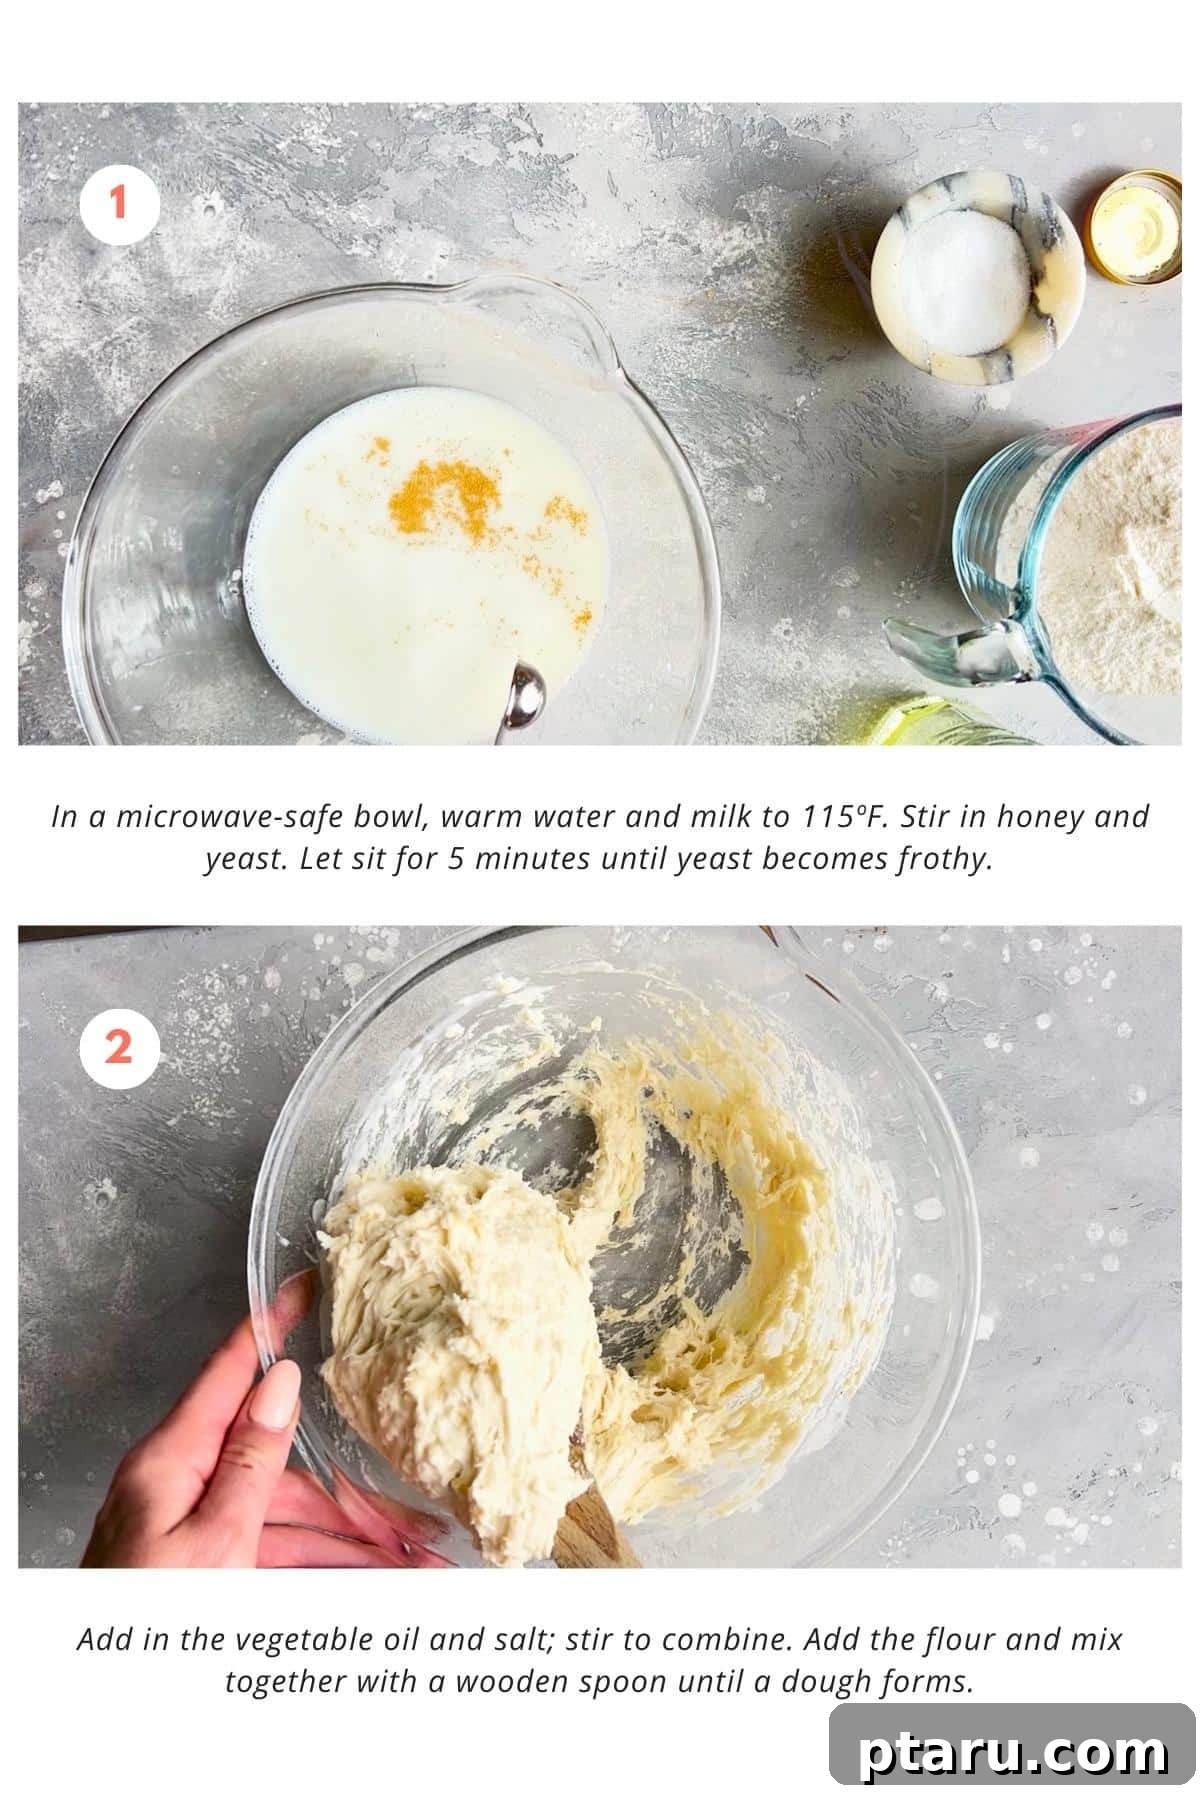
- Warm Water and Milk: The initial step of gently warming the water and milk to the correct temperature (around 115ºF) is crucial. This creates an optimal, comforting environment that effectively wakes up the active dry yeast, allowing it to begin its fermentation process efficiently.
- Stir in Honey and Yeast: Once your liquids are perfectly warmed, stir in the honey, which serves as a delectable food source for the yeast. Following this, sprinkle in the yeast. This combination encourages the yeast to “bloom,” forming a frothy layer that signals its vitality and readiness to make your bread rise beautifully.
- Add Oil and Salt: Next, incorporate the vegetable oil and salt into your yeast mixture. These two ingredients are not just for flavor; the oil contributes significantly to the dough’s tenderness, ensuring each bite is as rich and enjoyable as the last, while salt enhances all the other flavors.
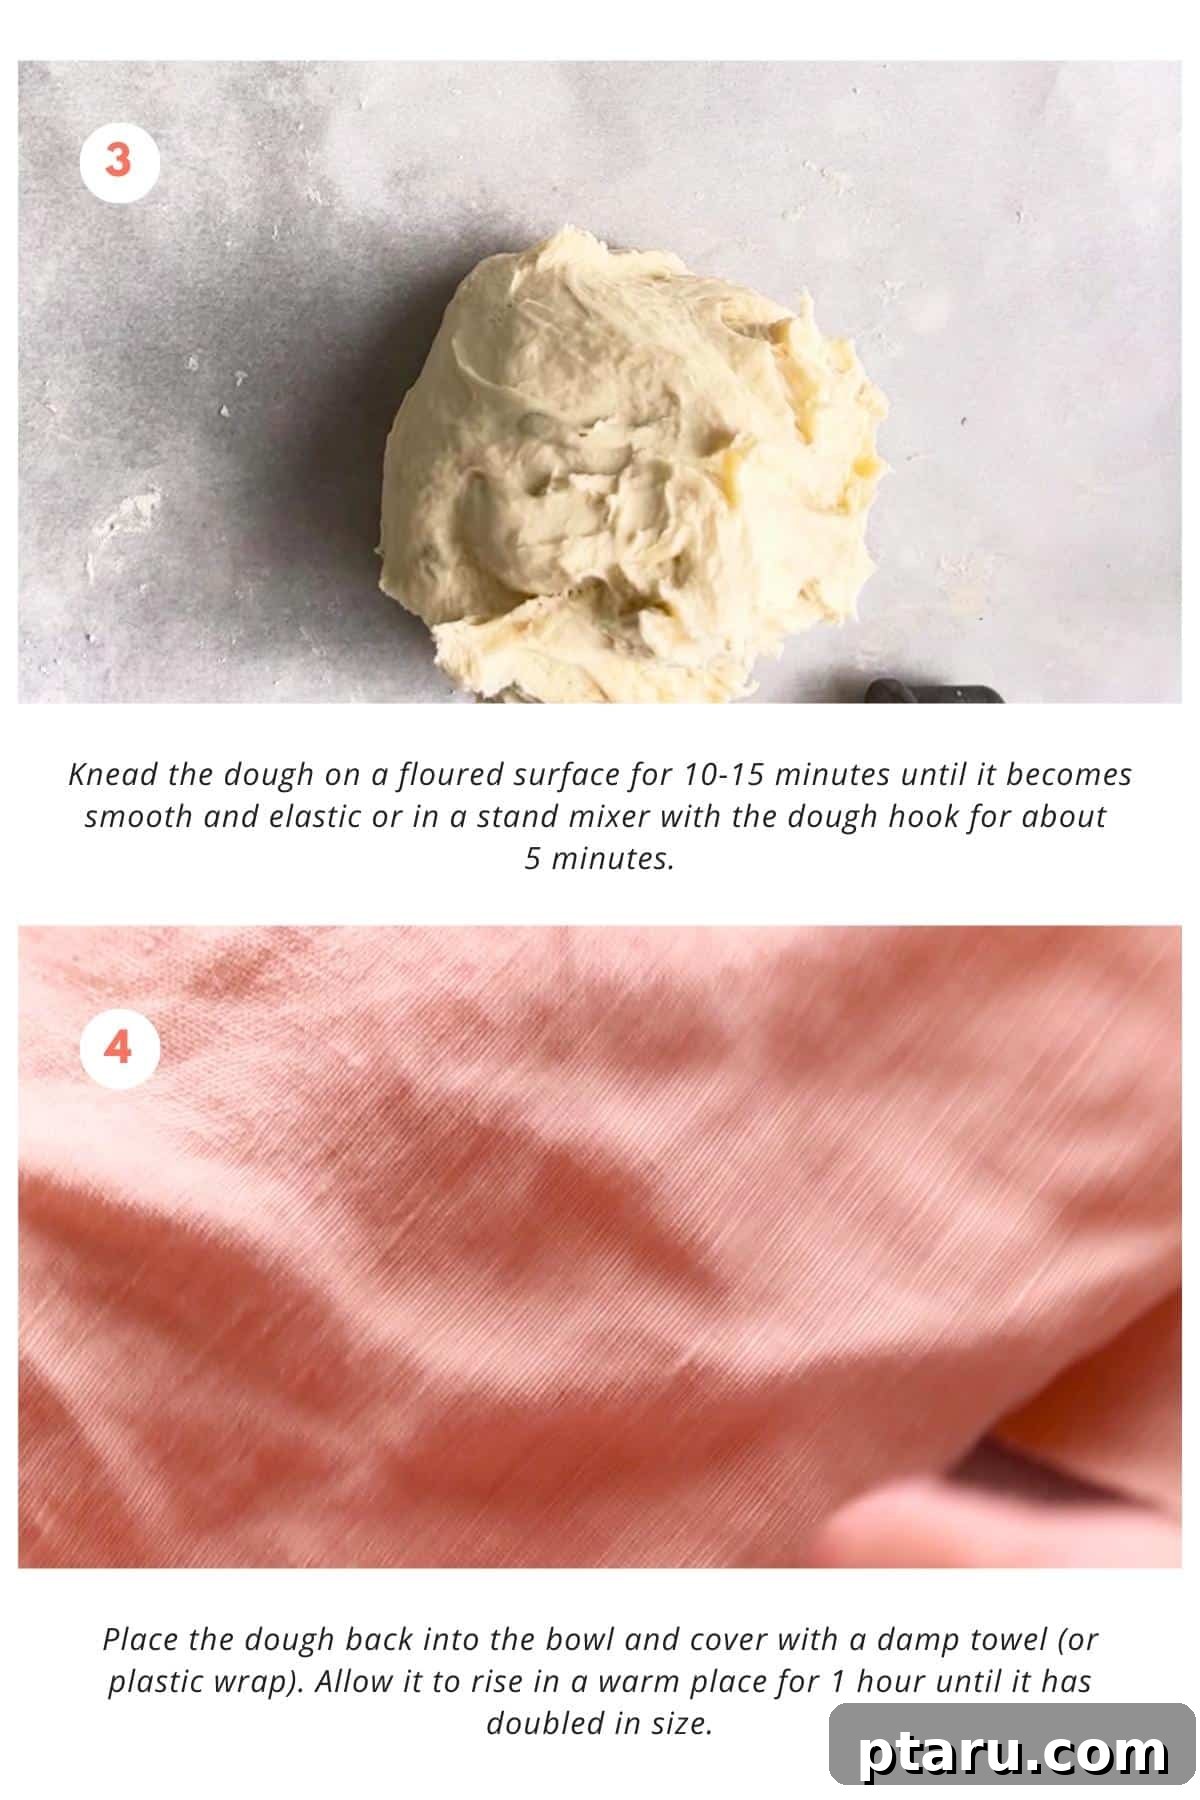
- Incorporate Flour: Gradually adding the all-purpose flour initiates the vital process of gluten formation. This network of gluten is precisely what will give your Turkish bread its signature soft yet delightfully chewy texture, providing structure without being dense.
- Knead the Dough: This stage is your moment to truly connect with the dough. Transfer it onto a clean, lightly floured work surface. Through a rhythmic motion of folding the dough over on itself and pushing it away, you’ll actively strengthen its gluten networks. This kneading action is paramount, making the dough elastic, supple, and perfectly primed to rise.
- Let it Rise: This is where patience is a virtue. After kneading, the dough needs ample time to ferment. During this period, the yeast produces gases that become trapped within the gluten structure, causing the dough to puff up and double in size, which is essential for airy, light bread.
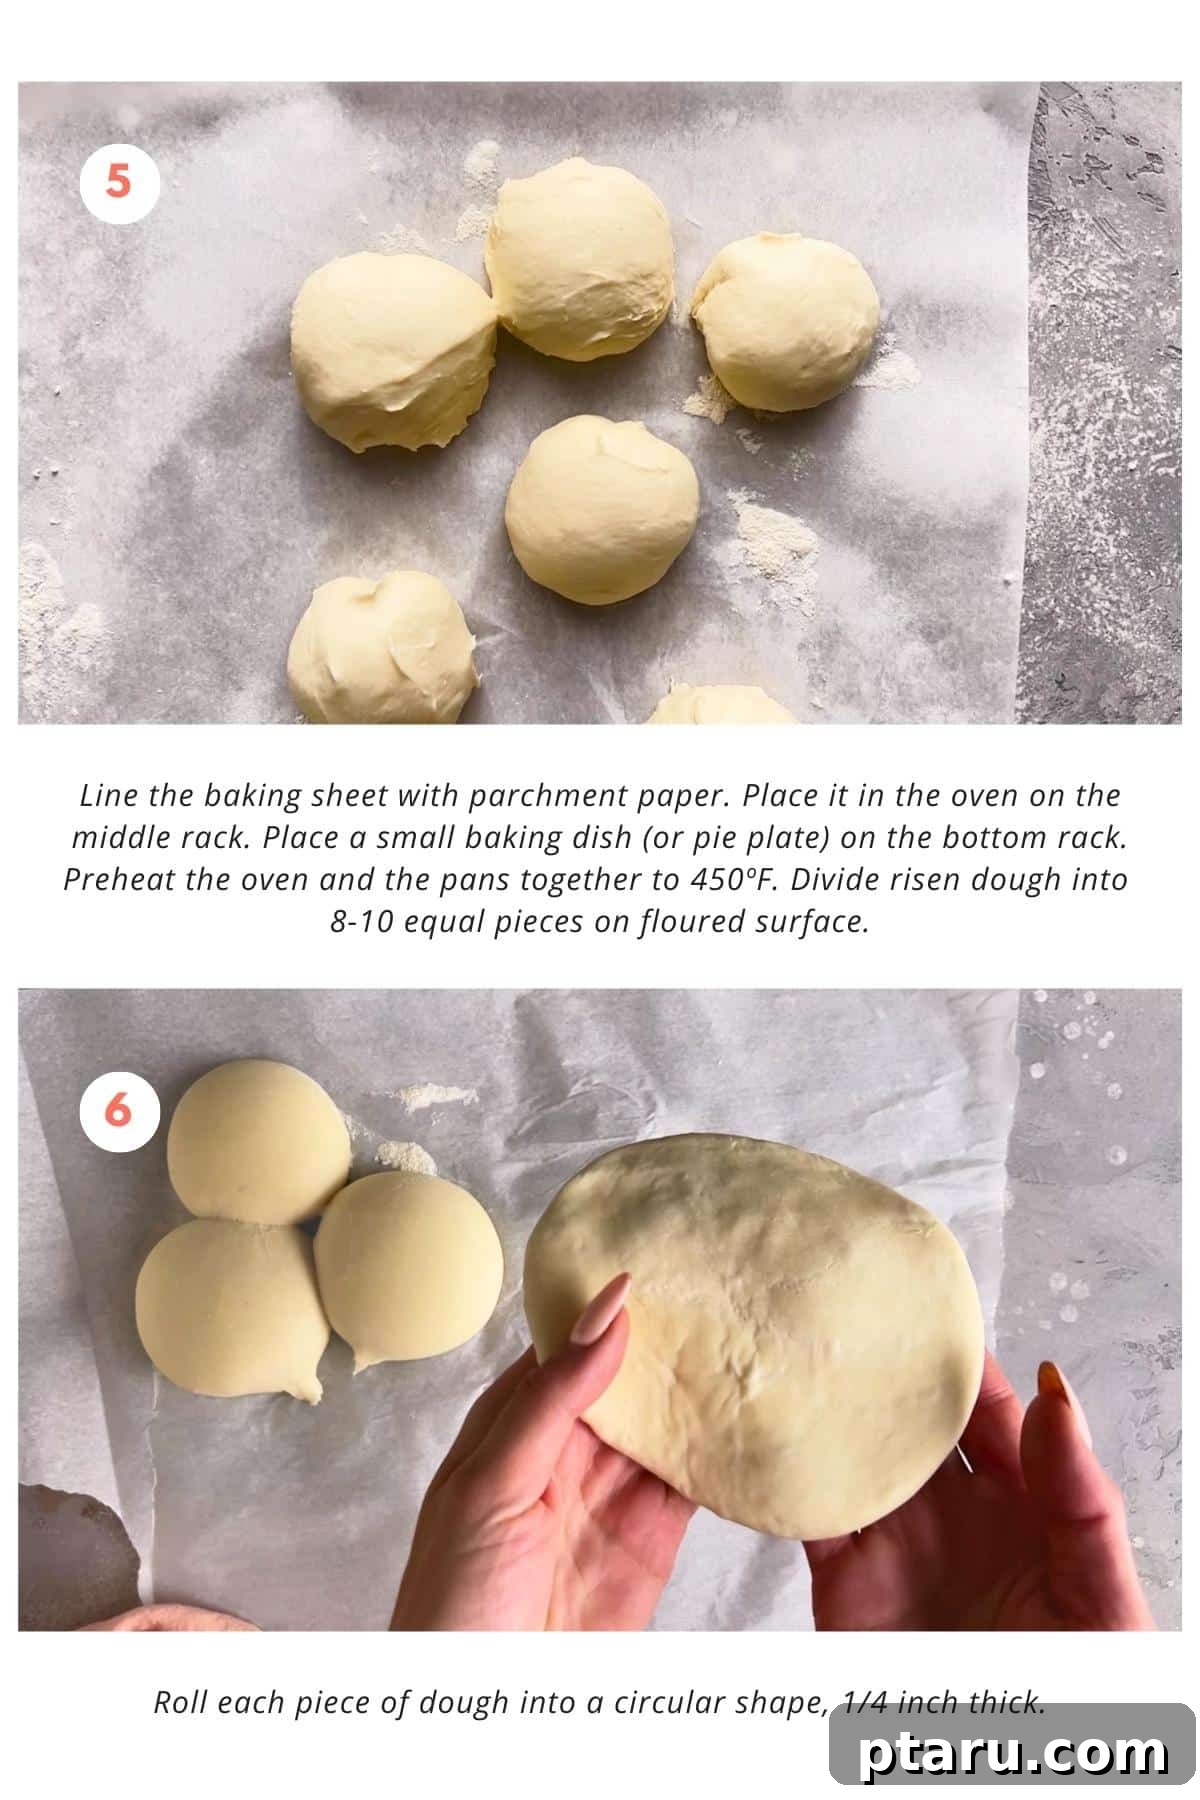
- Preheat the Oven with Pans: Achieving a consistently hot oven, along with preheated baking pans, is fundamental for success. This high, initial burst of heat ensures a rapid and significant rise in your bread, directly contributing to the formation of those coveted internal air pockets that make it so light and airy.
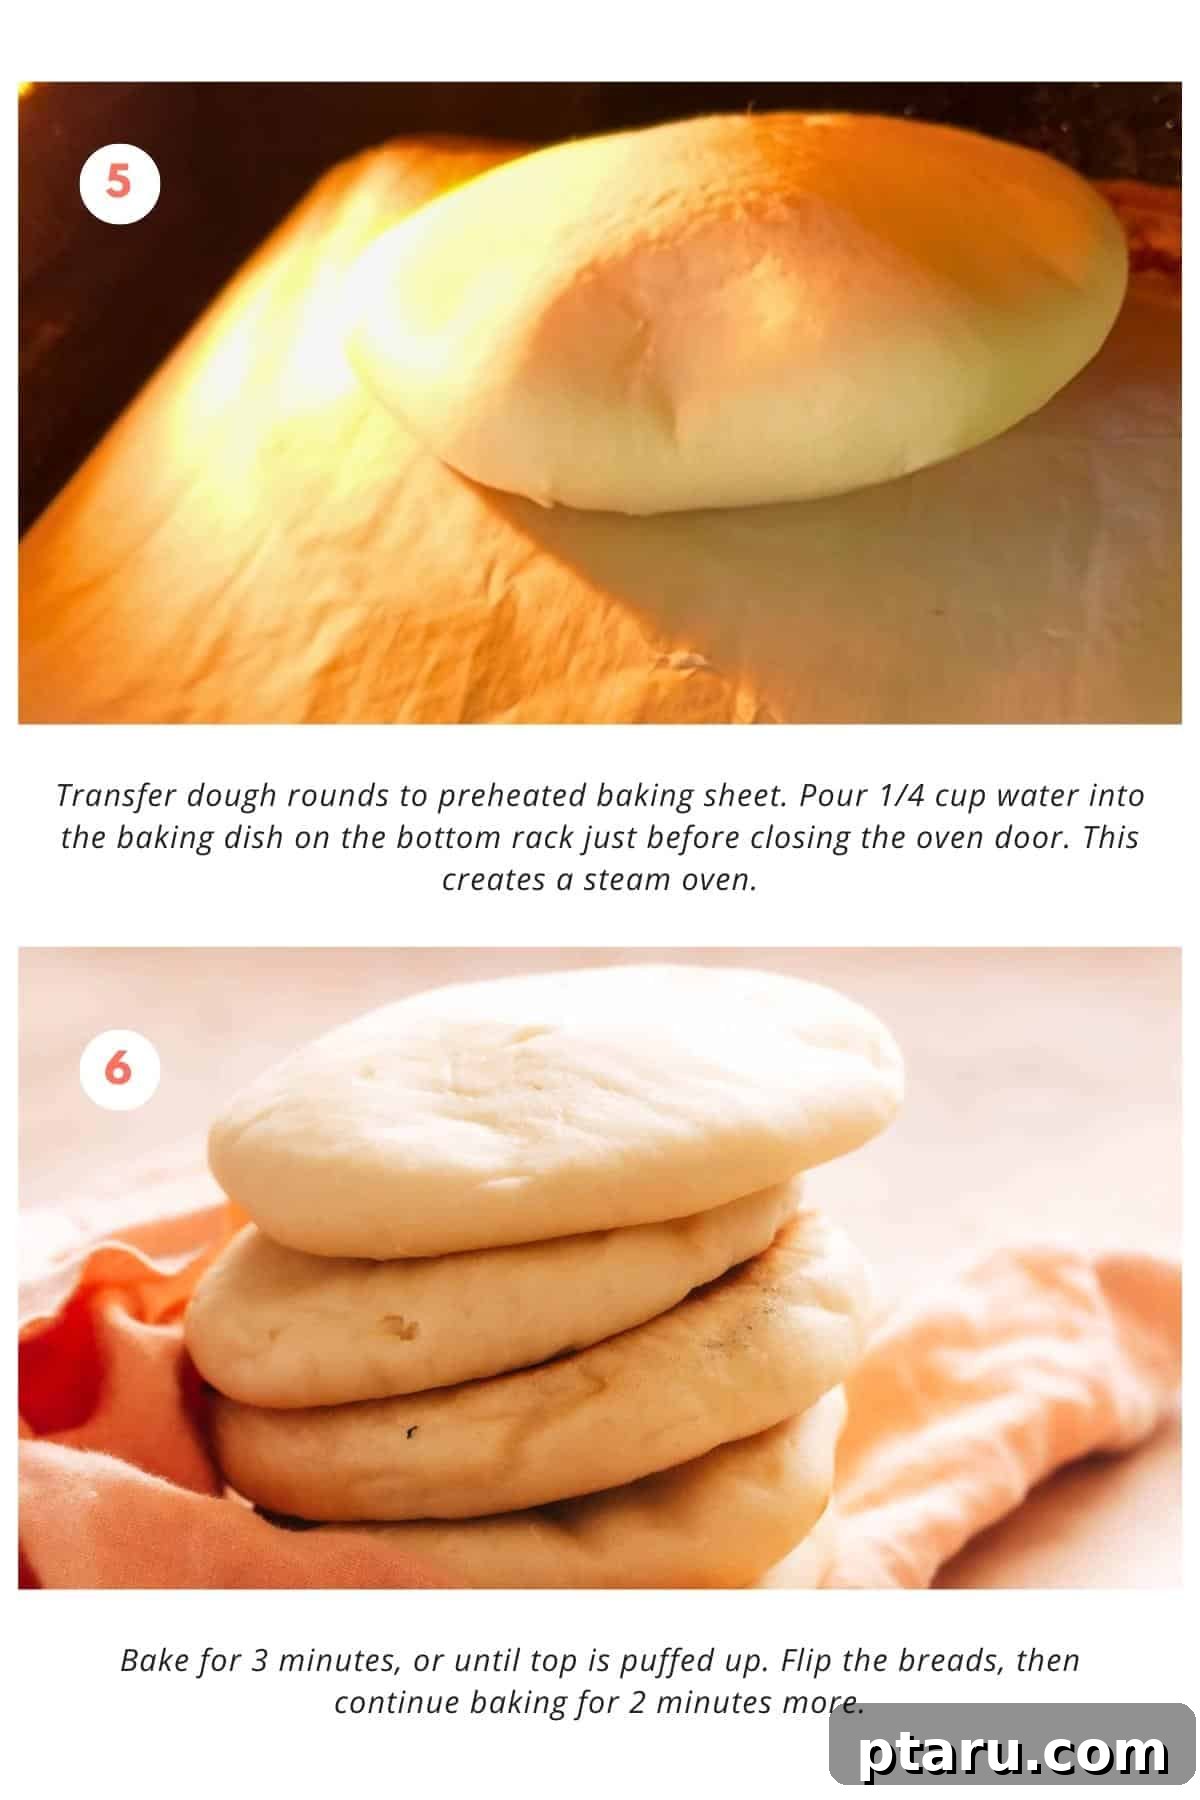
- Shape and Bake: With your oven hot, roll out your risen dough portions into their final shapes before carefully transferring them to the preheated baking sheet. Once inside the oven, the intense heat rapidly converts the water within the dough into steam. This trapped steam vigorously puffs up the dough, creating that exquisite, delicious, and airy texture we crave in authentic Turkish bread.
- Cool and Serve: After its brief but intense baking journey, give your freshly baked bread a few moments to cool. This cooling period is important as it allows the internal structure of the bread to stabilize and set, making it much easier to handle, slice, and ultimately, to enjoy its perfect texture before you eagerly dive in.
That’s the complete process! While it might require a little practice to achieve perfection, with each attempt, you’ll grow more confident and skilled. Soon, you’ll be effortlessly making the most delectable Turkish bread like a seasoned professional baker, much to the delight of your family and friends.
Creative Ways to Enjoy Your Homemade Turkish Bread
Now that you’ve successfully baked these beautifully puffed rounds of Turkish perfection, the exciting question arises: how best to serve and savor them? Allow me to ignite your imagination and inspire your taste buds with a few delightful suggestions for enjoying your freshly baked Bazlama.
- The Ultimate Dip Transporter: The soft, fluffy texture of Turkish bread makes it the ideal vehicle for scooping up your favorite dips. Use it to generously dollop creamy hummus, a rich spinach dip, or a refreshing Cucumber Raita (an Indian yogurt sauce). Its robust structure won’t break, ensuring every bite is loaded with flavor.
- Versatile Kebab Wrap: Elevate your wrap game by using Turkish bread as the base for incredible fillings. Stuff it with sizzling, tender grilled meats like succulent Lamb Kofta, spicy Harissa Lamb Chops, or aromatic Indian Lamb Chops. For a fantastic vegetarian option, try filling it with vibrant Indian Chickpea Salad or zesty Buffalo Chickpeas. Your homemade Turkish bread will flawlessly complement all your cherished kebab recipes.
- A Perfect Start to Your Day: Transform your morning routine by incorporating Bazlama into breakfast. Lightly toast a piece, then lavishly slather it with some golden honey or your favorite fruit jam. Serve it alongside a medley of fresh fruits for a truly invigorating and satisfying start to your day. Mornings, meet your new favorite breakfast hero!
- Soup’s Indispensable Companion: There’s nothing quite like fresh bread to accompany a warm bowl of soup or stew. Serve your homemade Turkish bread with your go-to soup and stew recipes, allowing its soft texture to soak up every last delicious drop from the depths of your bowl. I highly recommend pairing it with this incredible homemade tomato soup recipe, my comforting Ground Turkey Soup, or this tender and delicious Beef Vegetable Soup for a truly wholesome meal.
Make-Ahead and Storage Tips for Your Turkish Bread
To maximize convenience and minimize food waste, here are some invaluable practical tips for preparing your Turkish bread in advance and ensuring any delightful leftovers are stored and enjoyed optimally. These strategies will help you always have fresh, delicious Bazlama ready when you crave it.
- Prepare Dough in Advance: For ultimate flexibility, you can prepare the dough a day ahead. After the initial kneading, instead of letting it rise at room temperature, simply place it in a lightly oiled bowl, cover it tightly with plastic wrap, and let it slowly rise in your refrigerator overnight. Before you’re ready to bake, allow the dough to return to room temperature (about 30-60 minutes) for easier handling and optimal puffing. This ensures you have freshly made dough ready to bake whenever the craving strikes.
- Freezing Fully Baked Bread: If you’ve baked a larger batch or want to save some for later, fully baked and completely cooled Turkish bread freezes beautifully. Wrap each piece individually in plastic wrap, then place them in a freezer-safe bag or airtight container. It will maintain its superb quality for up to 3 months. When ready to serve, simply reheat them in a toaster, oven, or even a dry skillet until warm and soft again.
- Room Temperature Storage: To keep your freshly baked Turkish bread at its best for daily enjoyment, store it at room temperature. Place the cooled bread in a clean, airtight zip-top bag or a bread box. This method will keep it wonderfully fresh and soft for up to a few days, perfect for quick meals or snacks.
- Refresh Stale Bread: Should your beautiful bread rounds lose a bit of their initial freshness and become slightly firm, don’t despair! Lightly dampen the bread (you can spray it with a little water or quickly run it under a faucet) and pop it into a preheated oven (around 350°F / 175°C) for a few minutes. The heat will work wonders, restoring its original soft, inviting texture.
- Transform into Breadcrumbs: If any Turkish bread has truly passed its prime and can’t be revived, absolutely do not throw it out! Instead, convert it into homemade breadcrumbs. Simply tear or cut the stale bread into small pieces, toast them in the oven until dry and crisp, then process them in a food processor until fine. These flavorful breadcrumbs can be used in a myriad of other recipes, from meatloaf to crispy coatings, reducing your food waste footprint and enhancing your next dish.
Flavorful Variations and Smart Substitutions for Bazlama
Unlock the boundless potential of your homemade Bazlama with these exciting and mouthwatering variations and thoughtful substitutions. These ideas will not only elevate your flatbread experience but also allow you to tailor your creation to specific dietary needs or adventurous flavor preferences.
- Add Aromatic Herbs: Infuse your Bazlama with an inviting bouquet of aromatic flavors. Finely chop fresh herbs such as vibrant parsley, delicate dill, or fragrant cilantro, and gently incorporate them into the dough during the kneading stage. This adds a layer of freshness and complexity.
- Spice it Up: For those who enjoy a little kick or a touch of exotic flavor, give your Bazlama an exciting twist by adding ground spices to the dough. Cumin provides an earthy warmth, paprika offers a sweet and smoky note, while za’atar delivers a unique Middle Eastern blend. These spices create a distinctive flavor profile that beautifully complements a wide range of dips and spreads.
- Cheesy Delight: Transform your Bazlama into an irresistible, gooey treat by stuffing it with your favorite cheese before cooking. Crumbly feta, stretchy mozzarella, or salty halloumi are excellent choices. As the bread bakes, the cheese melts into a warm, utterly irresistible center, creating a truly decadent experience.
- Go Gluten-Free: Make your delicious Bazlama accessible to everyone by opting for gluten-free flour blends. Alternatively, explore using alternative flours like nutrient-rich chickpea flour or delicate almond flour. This ensures that even those with specific dietary restrictions can fully indulge in the joy of homemade Turkish bread.
- Sweet Tooth Satisfaction: Turn your savory flatbread into a delectable dessert by introducing sweet elements to the dough. A sprinkle of warm cinnamon, a hint of nutmeg, or even a touch of cocoa powder can create a delightful base. Serve these sweet Bazlama creations with a drizzle of honey, a dollop of fruit preserves, or a generous spread of Nutella for a truly satisfying finish.
- Seedy Goodness: Enhance both the nutritional value and the textural complexity of your Bazlama by mixing in various seeds. Sesame seeds, sunflower seeds, or pumpkin seeds can be incorporated directly into the dough or sprinkled on top before baking, creating a delightful crunch with every single bite.
- Flour Variations: For a heartier, higher-fiber version of this traditional bread, you can easily substitute half of the all-purpose flour with wholesome whole wheat flour. This will add a nuanced nutty flavor and increased nutritional benefits without compromising too much on tenderness.
- Dairy-Free Option: To create a delicious plant-based or vegan Turkish bread, simply swap out the dairy milk with a non-dairy alternative. Unsweetened almond milk, soy milk, or oat milk are excellent choices that will still provide richness and contribute to a wonderfully tender crumb.
The Secret to Fluffy Turkish Bread: Expert Tips and Tricks
Achieving that perfect, airy pouf in your Turkish bread is not simply a matter of luck; it lies in understanding and executing a few key factors during the baking process. These expert tips are designed to help you consistently make Turkish flatbread that puffs up beautifully, delivering that coveted light and airy texture every time.
- Maintain a High Oven Temperature: It is absolutely crucial to preheat your oven to a very high temperature, typically around 450°F (230°C) or even higher. The intense, rapid heat of a hot oven is what causes the moisture inside the dough to instantly convert into steam, leading to an explosive expansion and quick puffing of the Turkish breads.
- Utilize a Preheated Baking Surface: For optimal results, place a baking stone, a sturdy baking sheet, or a cast-iron skillet into the oven while it is preheating. A searing hot surface creates an immediate burst of steam upon contact with the dough, which is a primary driver behind the bread’s dramatic puffing.
- Achieve Proper Dough Consistency: The ideal dough for Turkish bread should be soft, wonderfully smooth, and possess a slight tackiness. It’s essential that the dough is thoroughly kneaded to develop its gluten structure. Well-developed gluten is what provides the necessary elasticity and strength for the bread to trap gases and puff up without tearing.
- Allow Sufficient Resting Time: After the dough has undergone its thorough kneading, it is vital to allow it to rest and rise for a minimum of one hour. This resting period is not merely for expansion; it allows the gluten strands to relax, making the dough more extensible and significantly easier for the trapped gases to stretch, facilitating a more impressive puff when baked.
- Master Rolling Out the Dough: When shaping, roll out the individual dough portions into uniform rounds or ovals, aiming for a consistent thickness of approximately 1/4 to 1/2 inch (0.6 to 1.2 cm). Uniform thickness is paramount for ensuring even cooking throughout each piece and guaranteeing that every bread round puffs up consistently.
- Embrace a Quick Baking Time: Turkish bread is designed for a very quick bake. Once placed onto the preheated baking surface in the oven, it should puff up remarkably fast, typically within a mere 3 to 5 minutes. It is important to keep a vigilant eye on them to prevent any risk of overcooking, which could lead to a dry texture.
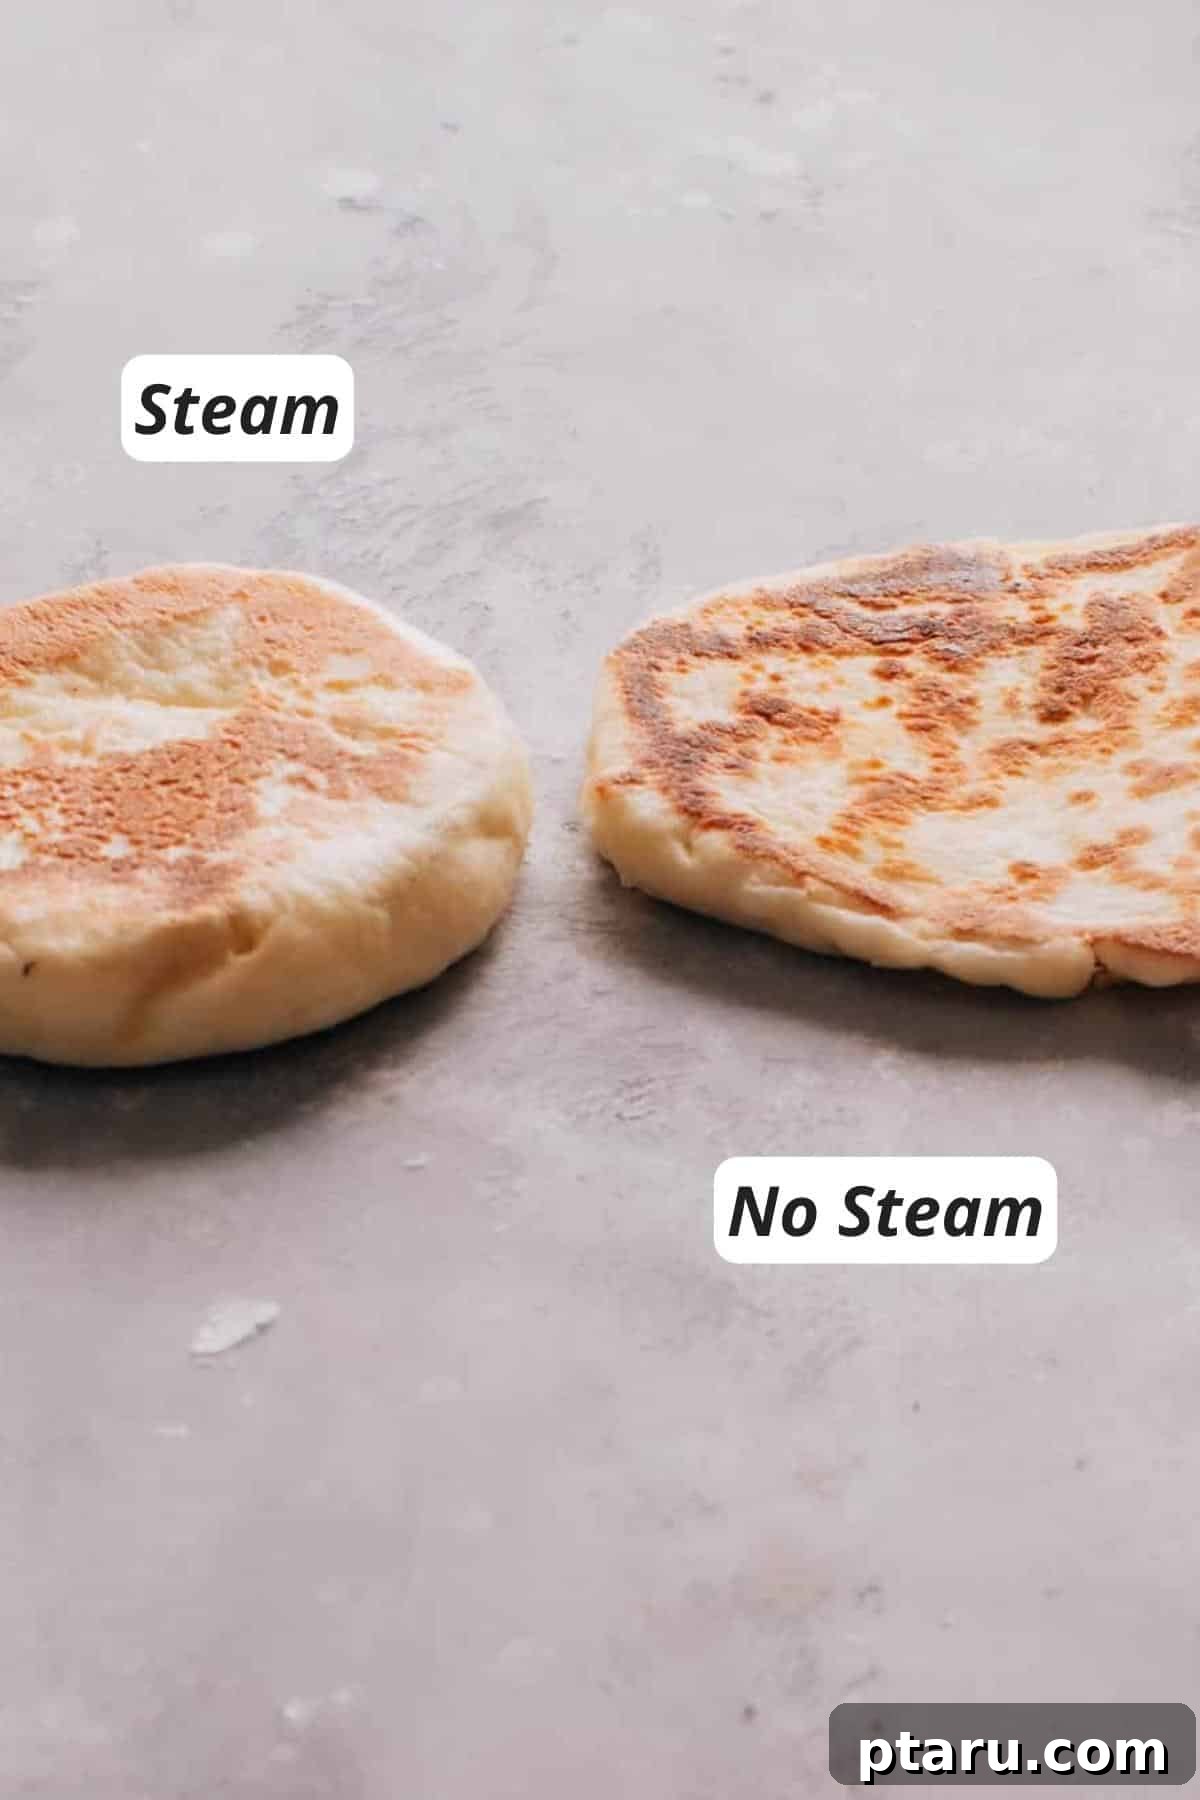
- Leverage the Power of Steam: The presence of steam in the oven is arguably the most critical factor for successful puffing. As demonstrated in this recipe, adding a small amount of water to a hot dish on the bottom rack creates a humid environment. This steam keeps the surface of the dough moist, allowing it to stretch more easily before setting, thus promoting maximal puffing. Crucially, avoid opening the oven door unnecessarily during baking to maintain optimal steam and heat levels.
By diligently adhering to these expert tips, you will be exceptionally well-equipped to totally nail this soft and fluffy Turkish flat bread recipe, consistently producing beautifully puffed, tender Bazlama that will be the highlight of any meal.
Frequently Asked Questions About Turkish Bread
What are Turkish breads called?
Turkish cuisine features a delightful variety of breads, each with its own unique name reflecting its form, ingredients, and preparation. Some of the most well-known and beloved Turkish breads include:
- Simit: A highly popular circular bread, distinctly coated with sesame seeds, and often compared to a bagel. Simit is widely cherished throughout Turkey for breakfast or as a convenient snack.
- Pide: This is a thick, boat-shaped flatbread typically adorned with a rich array of toppings such as various cheeses, savory minced meat, fresh vegetables, or eggs. Pide is sometimes affectionately known as “Turkish pizza” due to its customizable nature.
- Bazlama: As highlighted in this recipe, Bazlama is a soft, wonderfully chewy, and characteristically thicker Turkish flatbread. It’s traditionally cooked on a griddle or stovetop, though oven baking yields the fluffiest results.
- Lavash: A remarkably thin, unleavened flatbread that holds a prominent place in Turkish culinary traditions. It is typically baked on the heated walls of a tandoor oven and frequently used as a versatile wrap for kebabs or other flavorful fillings.
- Ekmek: This is a general term referring to a range of bread loaves commonly found in Turkey, including white or whole wheat varieties. Ekmek is a staple in most Turkish households, served routinely with almost every meal.
What is different about Turkish bread?
What truly distinguishes Turkish bread from other global bread traditions is its incredible diversity in shapes, textures, and flavor profiles, coupled with the rich heritage of traditional methods employed in its preparation and cooking. Unlike many European breads, a significant characteristic is that many types of Turkish bread are meant to be enjoyed incredibly fresh and warm, often served straight from the oven or griddle, emphasizing their tender texture and inviting aroma. The cultural emphasis on freshly baked bread as a cornerstone of meals also sets it apart.
What is the most famous bread in Turkey?
Among the vast selection of Turkish breads, Simit is arguably the most famous and universally iconic. Its distinctive circular shape, generous coating of toasted sesame seeds, and satisfyingly delicious flavor make it an exceptionally beloved choice for both local residents and international tourists alike. It’s a culinary symbol of Turkey, often enjoyed on the go.
How do you eat Turkish bread?
Turkish bread is incredibly versatile and can be enjoyed in a multitude of ways, adapting to different meal times, preferences, and bread types. Here are some of the most common and delightful ways to savor Turkish bread:
- Dipping: Its soft and sturdy texture makes Turkish bread perfect for tearing off pieces and using them to generously scoop up various dips, creamy spreads, or flavorful sauces. Think classic hummus, smoky baba ganoush, refreshing tzatziki, or spicy muhammara.
- Sandwiches and Wraps: Utilize the bread as a delicious base for creating satisfying sandwiches or wraps. Fill it with succulent grilled meats, a medley of fresh cheeses, crisp vegetables, or flavorful falafel for a wholesome and hearty meal.
- Accompaniment to Meals: Turkish bread is an indispensable side dish, frequently served alongside a diverse range of main courses. It pairs wonderfully with comforting soups, rich stews, vibrant salads, or any main dish, adding a delicious and versatile carbohydrate component.
- Topped: Depending on the specific type of bread, you can enhance it by adding various toppings before or after baking. Pide, for instance, is often topped with cheese, minced meat, or vegetables and baked until golden and bubbly.
- Breakfast Staple: Enjoy Turkish bread as a cornerstone of a traditional Turkish breakfast. Serve it with spreads like sweet butter, golden honey, fruity preserves, or creamy Nutella. For a more savory breakfast, pair it with an assortment of cheeses, briny olives, fresh tomatoes, and crisp cucumbers.
- Lightly Toasted: For a simple yet incredibly tasty snack, slice your Turkish bread and toast it lightly until warmed through. Drizzle it with high-quality olive oil and a pinch of za’atar, or spread with butter for a comforting treat.
These are just a few suggestions, but the possibilities for enjoying Turkish bread are truly endless. Feel empowered to get creative and explore new, delicious ways to savor these wonderfully versatile and flavorful breads in your own kitchen.
More Delicious Homemade Bread Recipes You’ll Adore
If you’ve enjoyed the process of making this delightful Turkish bread, you’re likely to appreciate the satisfaction of baking other fantastic bread recipes. Here are some more homemade bread recipes that are sure to become new favorites in your kitchen:
- Paratha (a flaky and layered South Indian flatbread, a true restaurant favorite that’s surprisingly easy to make at home)
- Roti (my Amma’s cherished recipe for a super soft and staple Indian flatbread, perfect for everyday meals)
- Aloo Naan (the viral naan recipe stuffed generously with a flavorful and spicy potato mixture, a satisfying meal in itself)
- Keema Naan (a hearty naan variation filled with deliciously spiced ground meat, offering a rich and savory experience)
- Fresh Flour Tortillas (an incredibly easy recipe that guides you through making delicious, pliable flour tortillas from scratch, far superior to store-bought)
- Oatmeal Brown Bread: Enjoy the wholesome goodness of rolled oats combined with a touch of molasses, yielding a dense yet tender bread with a delightful nutty flavor.
- Chapati: A fundamental Indian flatbread, known for its soft texture, incredible versatility, and remarkable ease of preparation. It closely resembles a whole wheat wrap or a lighter tortilla.
- Butter Naan: This homemade naan recipe is the culmination of years of perfection, achieving a soft, stretchy texture and authentic flavor that truly rivals the finest offerings from your favorite Indian restaurant!
- Homemade Pizza Dough: Master the art of the perfect pizza with this recipe that yields a thin, crispy crust, bringing the authentic essence of wood-fired oven pizza directly to your home kitchen.
Soft, Fluffy Turkish Bread Recipe
This comprehensive recipe guide will walk you through creating truly exceptional Turkish Bazlama right in your own kitchen. Prepare to impress with perfectly puffed and tender bread.
By: Jennifer Pallian BSc, RD
Summary: Learn how to make super soft, fluffy Turkish bread with our easy step-by-step guide! This is the only Turkish Bread recipe you’ll ever need.
Prep Time: 25 minutes
Cook Time: 5 minutes
Resting Time: 1 hour
Total Time: 1 hour 30 minutes
Servings: 8 Turkish Breads
Ingredients
- 4 cups all-purpose flour
- 1 cup water
- ½ cup milk
- 2 tsp honey
- 2 tsp active dry yeast
- ¼ cup vegetable oil
- 2 tsp salt
Instructions
-
Prepare the dough:
- In a large microwave-safe bowl, gently warm the water and milk until it reaches approximately 115ºF (46°C). It should feel very warm to the touch, but comfortable enough to keep your finger immersed for a few seconds. Stir in the honey until dissolved, then sprinkle in the active dry yeast. Allow the mixture to sit undisturbed for 5 minutes, or until a frothy layer appears on the surface, indicating the yeast is active and ready.
- Add the vegetable oil and salt to the yeast mixture, stirring well to combine all the liquid ingredients thoroughly. Gradually add the all-purpose flour, mixing with a sturdy wooden spoon until a shaggy dough begins to form, pulling away from the sides of the bowl.
- Transfer the dough onto a clean, lightly floured surface. Begin kneading vigorously for 10-15 minutes until the dough transforms into a smooth, elastic ball that springs back when gently poked. Initially, the dough will be quite sticky; resist the urge to add excessive amounts of flour. As you continue kneading, the flour will fully hydrate, and the dough will become more manageable and less tacky. Alternatively, if using a stand mixer with a dough hook, knead on medium speed for about 5 minutes until smooth and elastic.
- Carefully place the kneaded dough back into the bowl. Cover the bowl with a damp towel or plastic wrap, ensuring it’s airtight to prevent a skin from forming. Let the dough rise in a warm, draft-free place for 1 hour, or until it has visibly doubled in size, indicating successful fermentation.
-
Heat the oven and roll the dough:
- Prepare your baking setup by lining a large baking sheet with parchment paper. Position this sheet on the middle rack of your oven. On the bottom rack, place a small baking dish or pie plate. Preheat the oven and both pans together to a high temperature of 450ºF (230°C). Once the dough has successfully risen, gently transfer it onto a lightly floured surface and divide it into 8-10 equal pieces.
- Take each piece of dough and roll it out into a perfectly circular shape, aiming for a consistent thickness of about 1/4 inch (approximately 6mm). The dough may still feel somewhat sticky; keep your hands lightly floured or damp to manage it easily. This slight tackiness is crucial for achieving the bread’s signature soft, pliable texture.
- When you are ready to bake, carefully transfer the rolled dough rounds onto the preheated parchment-lined baking sheet. Depending on the size of your baking sheet, you may need to bake them in two batches to avoid overcrowding. Just before closing the oven door, pour 1/4 cup of water into the small baking dish on the bottom rack. This rapid addition of water will immediately create a burst of steam, mimicking a steam oven environment crucial for perfectly puffed bread.
- Bake the bread for 3 minutes, or until the top of each bread round has puffed up significantly and dramatically. Then, using tongs or a spatula, carefully flip the breads and continue baking for an additional 2 minutes to ensure even cooking. The finished bread should be wonderfully puffed and feel dry to the touch, reaching an internal temperature of around 180ºF (82°C). They will typically not develop a deep brown crust, maintaining their soft, pale appearance, which is characteristic of Bazlama baked with steam.
Notes
- This recipe typically yields 8 fluffy Turkish breads, though the exact number can vary slightly depending on the size you roll each piece of dough. Adjust the portioning to your preference.
- Freezing Dough: For future convenience, the prepared dough can be frozen after the first rise. Simply punch it down gently, divide into portions, wrap each tightly in plastic wrap, and then in foil. Store in the freezer for up to 1 month. Thaw in the refrigerator overnight before allowing it to come to room temperature for about an hour, then roll and bake as directed.
- Stovetop Method (Alternative): While baking in a steam oven yields the softest and fluffiest results, you can also cook Turkish bread on the stovetop. Heat a large cast iron skillet, griddle, or nonstick pan over medium-low heat until hot. Place one circle of dough onto the hot skillet, carefully add a small splash of water (use an oven mitt as it will instantly turn to steam), cover immediately, and cook for 1 minute. Uncover, flip the bread, add another little splash of water, and cover again. Continue cooking for about 2 minutes more, checking the underside after 1-2 minutes to ensure it isn’t getting too dark (if it is, flip it again and reduce the heat slightly). When it’s done, it will be golden brown and wonderfully fluffy. Note that stovetop-cooked breads tend to be slightly less soft and can dry out more quickly than their oven-baked counterparts.
Nutrition (per serving)
Calories: 287kcal | Carbohydrates: 48g | Protein: 7g | Fat: 10g | Saturated Fat: 1g | Polyunsaturated Fat: 4g | Monounsaturated Fat: 2g | Trans Fat: 0.05g | Cholesterol: 2mg | Sodium: 588mg | Potassium: 53mg | Fiber: 6g | Sugar: 5g | Vitamin A: 135IU | Vitamin C: 2mg | Calcium: 62mg | Iron: 2mg
Nutrition information is automatically calculated and should be used as an approximation.