The Ultimate Guide to Making Perfect Homemade Flour Tortillas: Soft, Fresh & Flavorful
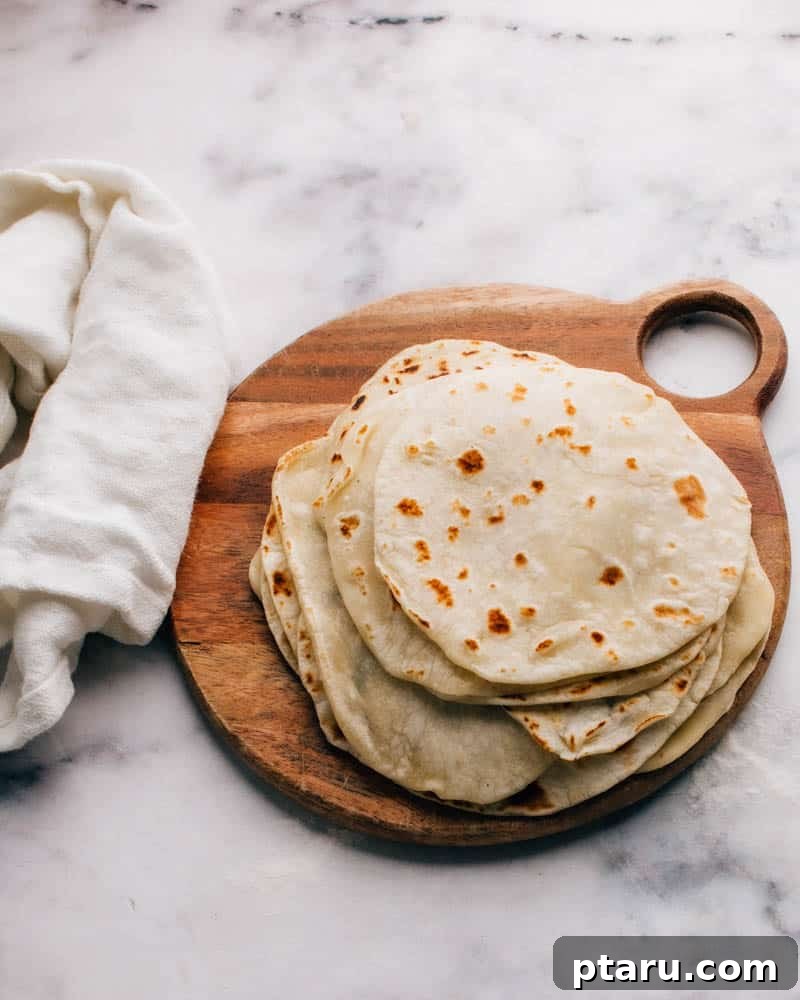
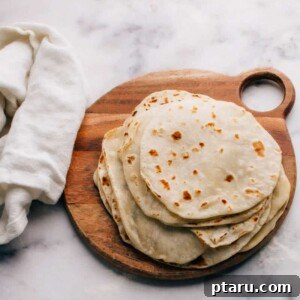
Imagine biting into a warm, tender, and incredibly soft tortilla, still carrying the faint aroma of freshly cooked dough. This isn’t a dream! These fresh flour tortillas require only four basic ingredients – flour, oil, salt, and water – and come together in mere minutes. The result is a truly heavenly experience, far superior to anything you’ll find on a supermarket shelf. Prepare to transform your taco nights, breakfast wraps, and everyday meals with this simple yet revolutionary recipe.
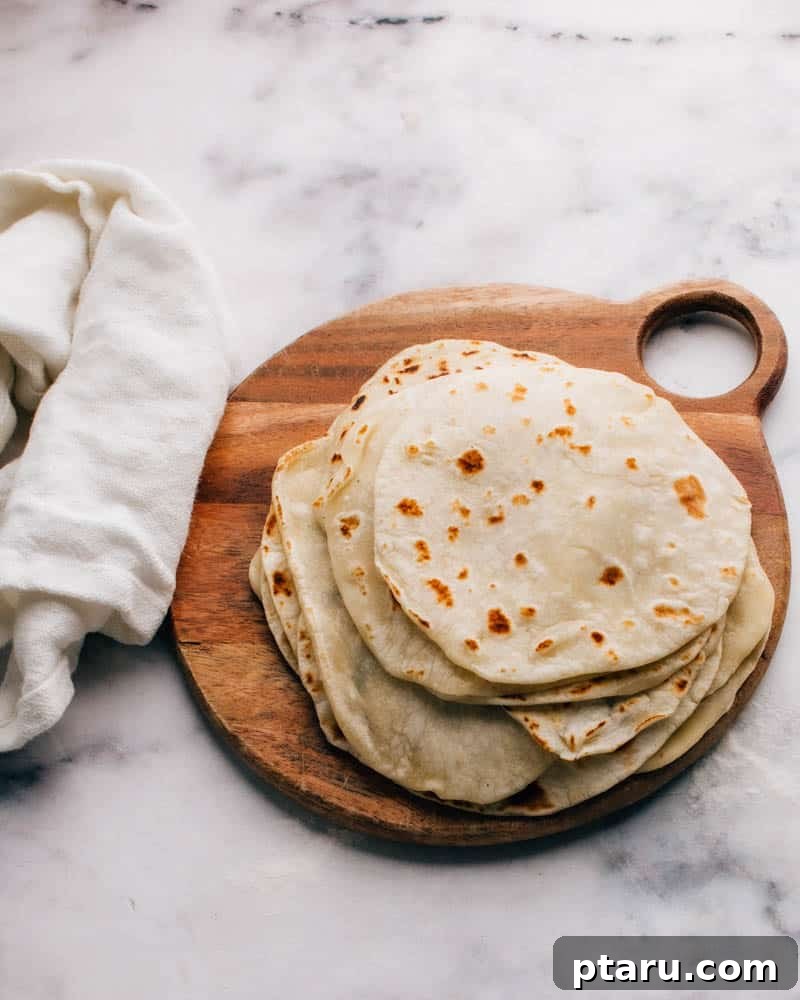
Learning how to make your own fresh flour tortillas (and even soft corn tortillas!) is remarkably quick and simple. I can confidently promise that your efforts will be richly rewarded with an abundance of soft, pliable, and utterly delicious wraps. These aren’t just any tortillas; they’re the perfect canvas for your favorite dishes, from robust chicken street tacos generously topped with creamy guacamole, to succulent fish tacos drizzled with zesty baja sauce. Once you experience the homemade difference, you’ll wonder how you ever settled for less.
Why Homemade Flour Tortillas Are a Game Changer
The stark contrast between homemade and store-bought tortillas is truly astounding. For years, I, like many others, found myself reaching for the pre-packaged varieties in the international aisle of the supermarket. These often come with a perplexing list of twenty or more ingredients, most of which are mysterious and unpronounceable. While those supermarket tortillas boast an unnervingly long shelf life – I’ve seen them sit on the counter for weeks, maintaining their “freshness” as if just purchased, a highly suspicious feat if you ask me – they simply cannot compare to the authentic flavor and texture of a freshly made tortilla.
Homemade tortillas are at their absolute peak on the first day, offering an unparalleled softness and a subtle chewiness that elevates any meal. The good news is, they take mere minutes to whip up, making them an easy addition to your cooking routine. Moreover, they freeze beautifully, ensuring you can enjoy fresh, homemade tortillas anytime the craving strikes for your favorite Mexican recipes or any other culinary creation.
The Magic of Just Four Simple Ingredients
The beauty of this recipe lies in its simplicity. With just four common pantry staples, you can create something truly extraordinary. Let’s break down why each ingredient is essential to achieving that perfect homemade flour tortilla:
- All-Purpose Flour: This forms the structure of your tortillas. While some recipes call for bread flour for a chewier texture, all-purpose flour provides a wonderfully tender and pliable result that’s easy to work with.
- Vegetable Oil (or other fats): Fat is crucial for tenderness and flavor. Vegetable oil is a neutral choice that keeps the tortillas soft. You can also experiment with lard or shortening for a more traditional, richer flavor, which many consider the secret to truly authentic tortillas.
- Salt: A pinch of salt enhances the overall flavor of the tortillas, making them taste savory and delicious on their own, not just as a vehicle for fillings.
- Warm Water: The temperature of the water is key. Warm water helps activate the gluten in the flour, making the dough easier to knead and more elastic. It also aids in creating that desirable soft texture.
This minimalist approach ensures that the natural flavors of the ingredients shine through, providing a clean and authentic taste profile that store-bought versions can only dream of replicating.
Step-by-Step Guide to Crafting Perfect Flour Tortillas
Making tortillas from scratch might seem intimidating at first, but with a little guidance, you’ll find it incredibly satisfying and straightforward. Here’s a detailed breakdown of the process to ensure your success.
Essential Equipment:
- A large mixing bowl
- A sturdy rolling pin
- A cast iron skillet or comal (a nonstick pan can work but a cast iron gives best results)
- Plastic wrap
- A clean kitchen towel
Preparation and Kneading:
The journey to perfect tortillas begins with the dough. Start by combining your dry ingredients, then slowly incorporate the wet ones. The key here is not just mixing, but proper kneading.
- Combine Ingredients: In a medium-sized bowl, whisk together the flour and salt until well combined. This ensures the salt is evenly distributed.
- Add Wet Ingredients: Pour in the vegetable oil and warm water. Using a spoon or your hands, stir the ingredients together until a shaggy dough forms.
- Knead the Dough: Turn the dough out onto a lightly floured surface. Knead it for about 3 minutes. The dough will feel a bit rough at first, but as you knead, it will become smooth, elastic, and supple. This kneading step is vital for developing the gluten, which gives the tortillas their structure and chewiness. Avoid over-kneading, as this can make the tortillas tough.
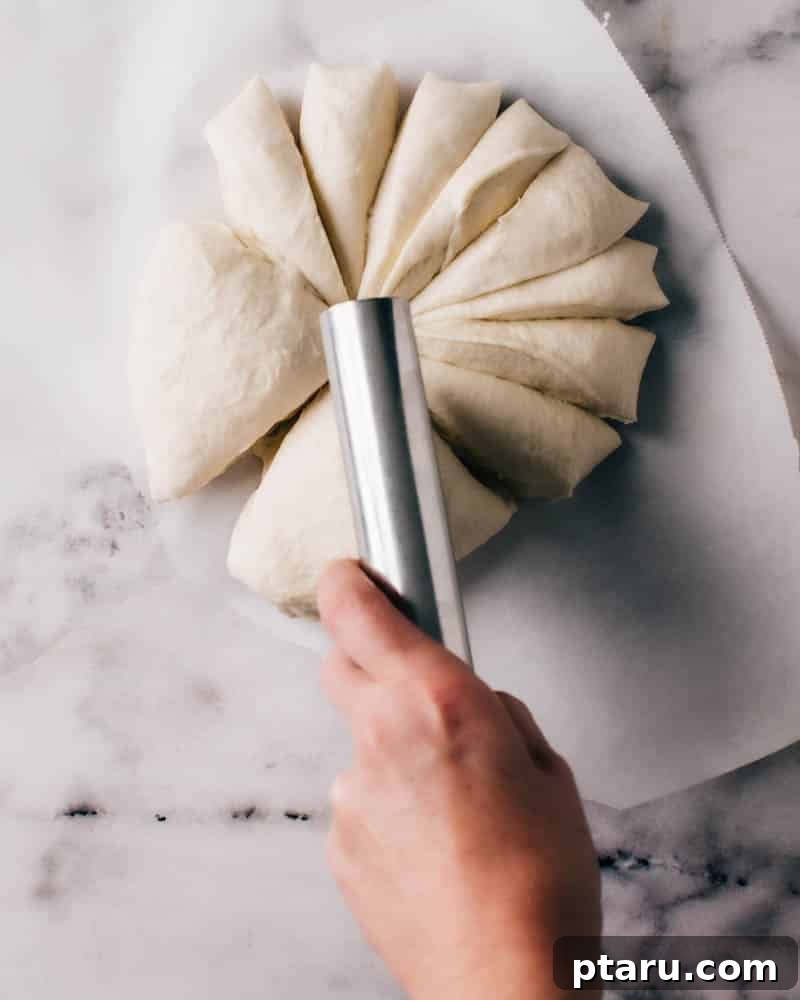
- Resting Period: Divide the smooth dough into 10 equal pieces. The easiest way to do this is to roll the dough into a log and then cut it into even portions. Roll each piece into a small ball. Arrange the dough balls on a plate or baking sheet and cover them tightly with plastic wrap. Let them rest for at least 30 minutes. This resting period is crucial; it allows the gluten to relax, making the dough much easier to roll out thinly without springing back, and contributing significantly to the final softness of your tortillas.
Shaping and Cooking:
With the dough rested and ready, it’s time for the fun part – rolling and cooking!
- Preheat Skillet: While the dough is resting, place your cast iron skillet (or comal) over medium-high heat. It’s important for the skillet to be thoroughly hot before you start cooking. Nonstick pans can be used, but a well-seasoned cast iron skillet will give you the best charring and puffing.
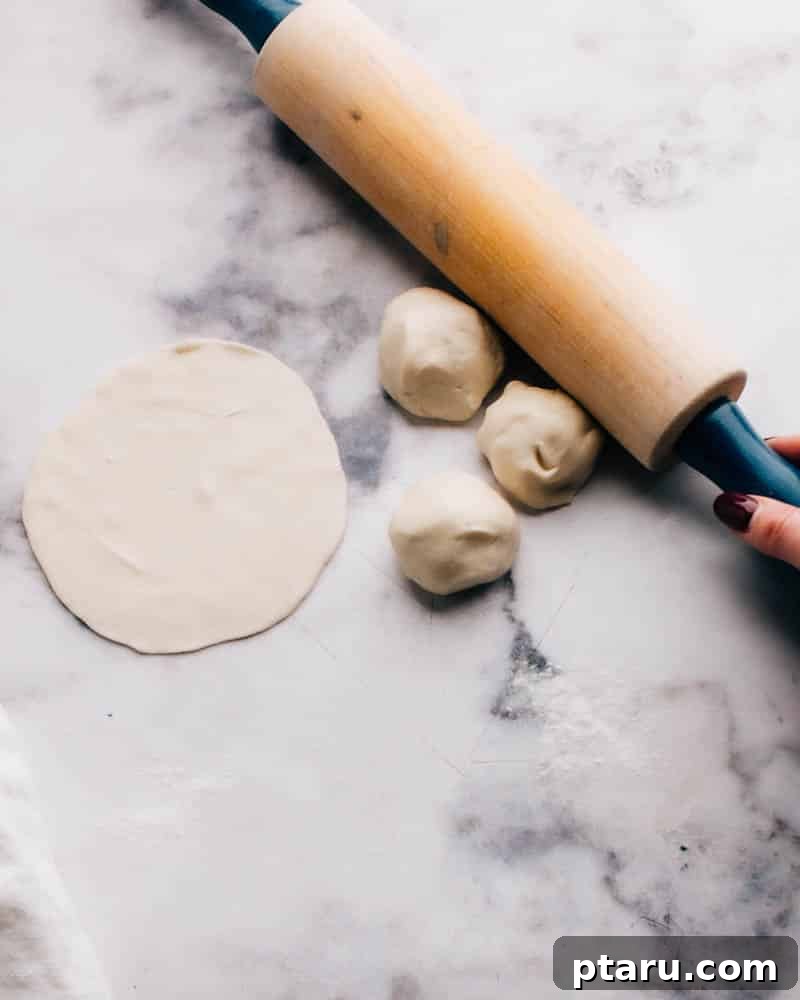
- Roll Out Tortillas: Take one dough ball and place it on a lightly floured surface. Using a rolling pin, roll it out into a thin circle, approximately 6 inches in diameter. Aim for an even thickness. If the dough springs back, let it rest for another minute or two, then continue rolling.
- Cook the Tortillas: Carefully place the rolled-out tortilla onto the hot, dry skillet. Cook for about 30 seconds on the first side. You’ll notice small bubbles forming and the edges starting to look dry. Flip the tortilla and cook for another 20-30 seconds. The tortilla should puff up in places, and you’ll see a few lovely golden-brown spots appear on both sides.
- Keep Them Warm: As each tortilla cooks, immediately transfer it to a stack wrapped in a clean kitchen towel. This traps the steam and keeps the tortillas warm and soft until you’re ready to serve. Repeat the process with the remaining dough balls.
Tips for Tortilla-Making Success
- Don’t Skip the Rest: The 30-minute resting period is non-negotiable for tender, easy-to-roll tortillas.
- Warm Water is Best: It helps create a more pliable dough.
- Lightly Flour Your Surface: Too much flour will dry out your dough, making the tortillas stiff.
- Hot Skillet is Key: A properly hot skillet ensures quick cooking, puffing, and those delicious browned spots without drying out the tortilla.
- Don’t Overcook: Each side only needs about 20-30 seconds. Overcooking will make your tortillas dry and brittle.
- Practice Makes Perfect: Rolling perfectly round tortillas takes a little practice. Don’t worry if your first few aren’t perfectly circular; they’ll still taste amazing!
Creative Ways to Enjoy Your Fresh Tortillas
The versatility of homemade flour tortillas is truly limitless. They are not just for tacos; they can elevate a wide array of dishes and even become a star on their own.
Traditional Mexican Dishes:
Naturally, these tortillas are a match made in heaven for classic Mexican cuisine:
- Tacos: Perfect for ground beef tacos, flavorful shredded beef tacos, authentic tacos al pastor, crispy fried tacos, and of course, fish tacos (spicy fish tacos with cabbage slaw!).
- Fajitas: Wrap up sizzling beef fajitas or chicken fajitas.
- Enchiladas: Ideal for hearty slow cooker enchiladas or a comforting chicken enchilada casserole.
- Quesadillas: The ultimate base for a gooey cheese quesadilla or any filled quesadilla creation.
- Burritos: While smaller than typical burrito-sized tortillas, these are perfect for smaller, individual burritos or “street style” burritos.
Beyond Mexican Cuisine:
Don’t limit yourself to just Mexican fare! These soft flatbreads can be enjoyed in countless other ways:
- Lunch Wraps & Sandwiches: Roll them into a delicious and fresh lunch sandwich. Try turkey slices with creamy avocado crema, crisp lettuce, and thinly sliced red onions.
- Breakfast Delights: My kids adore them filled with peanut butter and wrapped around a whole banana for a quick and nutritious breakfast. You can also use them for breakfast tacos with scrambled eggs and salsa.
- Mini Pizza Bases: Top with sauce, cheese, and your favorite toppings for quick personal pizzas.
- Homemade Chips: Cut them into wedges, bake or fry until crispy, and serve with salsa or guacamole.
- Inspired Flatbreads: I love making various homemade flatbreads. These flour tortillas share similarities with other global favorites like chapati (which are essentially Indian tortillas), savory roti, and fluffy butter naan. They offer a simple, unleavened bread that’s incredibly versatile.
Storing and Freezing Homemade Tortillas
One of the best features of these homemade tortillas is how well they store, allowing you to enjoy fresh-tasting tortillas long after they’ve been made.
- Short-Term Storage (Room Temperature): Once cooled, stack the tortillas and place them in an airtight container or a resealable plastic bag. They will stay fresh and soft at room temperature for 2-3 days. Reheat them quickly in a dry skillet for a few seconds per side, or microwave them briefly wrapped in a damp paper towel.
- Long-Term Storage (Freezing): Homemade tortillas freeze beautifully! To freeze, allow them to cool completely. Place a piece of parchment paper between each tortilla to prevent sticking. Stack them up, then wrap the stack tightly in plastic wrap and place it in a freezer-safe bag. They can be frozen for up to 3 months.
- Reheating Frozen Tortillas: When ready to use, simply take out the desired number of tortillas (no need to thaw first if you have parchment between them). Reheat them one by one in a hot, dry skillet for about 30 seconds per side, or until warm and pliable. They will taste almost as fresh as the day they were made!
Save this recipe!
Bookmark this page or share it to remember this amazing recipe later.
Pin Recipe
Print Recipe
Fresh Flour Tortillas
Jennifer Pallian BSc, RD
30 minutes
10 minutes
30 minutes
1 hour 10 minutes
10
Ingredients
- 2 cups all-purpose flour
- ¼ cup vegetable oil
- 1 tsp salt
- ⅔ cup warm water
Instructions
-
In a medium sized bowl, stir together flour and salt. Add oil and warm water, stirring to combine. Dump dough onto a lightly floured surface, and knead for about 3 minutes, until dough is smooth. Divide dough into 10 equal pieces, rolling each piece into a ball. Allow to rest, covered with plastic wrap, for at least 30 minutes.
-
Once dough has rested, preheat cast iron skillet over medium-high heat (do not use nonstick for this if you want best results). Roll out each ball into a thin circle, about 6 inches in diameter. Cook one at a time in the hot skillet for about 30 seconds per side, flipping once it starts to puff and a few brown spots appear. Keep warm by wrapping the stacked tortillas in a clean kitchen towel.
Nutrition
Calories: 130kcal
|
Carbohydrates: 18g
|
Protein: 2g
|
Fat: 6g
|
Saturated Fat: 1g
|
Polyunsaturated Fat: 3g
|
Monounsaturated Fat: 1g
|
Trans Fat: 0.04g
|
Sodium: 233mg
|
Potassium: 0.05mg
|
Fiber: 2g
|
Sugar: 1g
|
Calcium: 17mg
|
Iron: 1mg
Nutrition information is automatically calculated, so should only be used as an approximation.
Conclusion: Embrace the Homemade Difference
There’s a unique satisfaction that comes with creating something delicious from scratch, and homemade flour tortillas are a prime example. The process is simple, the ingredients are minimal, and the reward is a stack of soft, flavorful, and truly authentic tortillas that will elevate any meal. Say farewell to the dry, flavorless, and additive-filled store-bought varieties. Embrace the joy of kneading dough, the anticipation of a warm skillet, and the sheer delight of a freshly cooked tortilla.
Whether you’re planning a lively taco night, a quick lunch wrap, or a creative breakfast, these homemade flour tortillas are your new secret weapon. Give this recipe a try, and prepare to be amazed by how easy it is to bring a taste of genuine freshness to your table. Your taste buds (and your family!) will thank you.
Tried this recipe? Share your experience in the comments below!