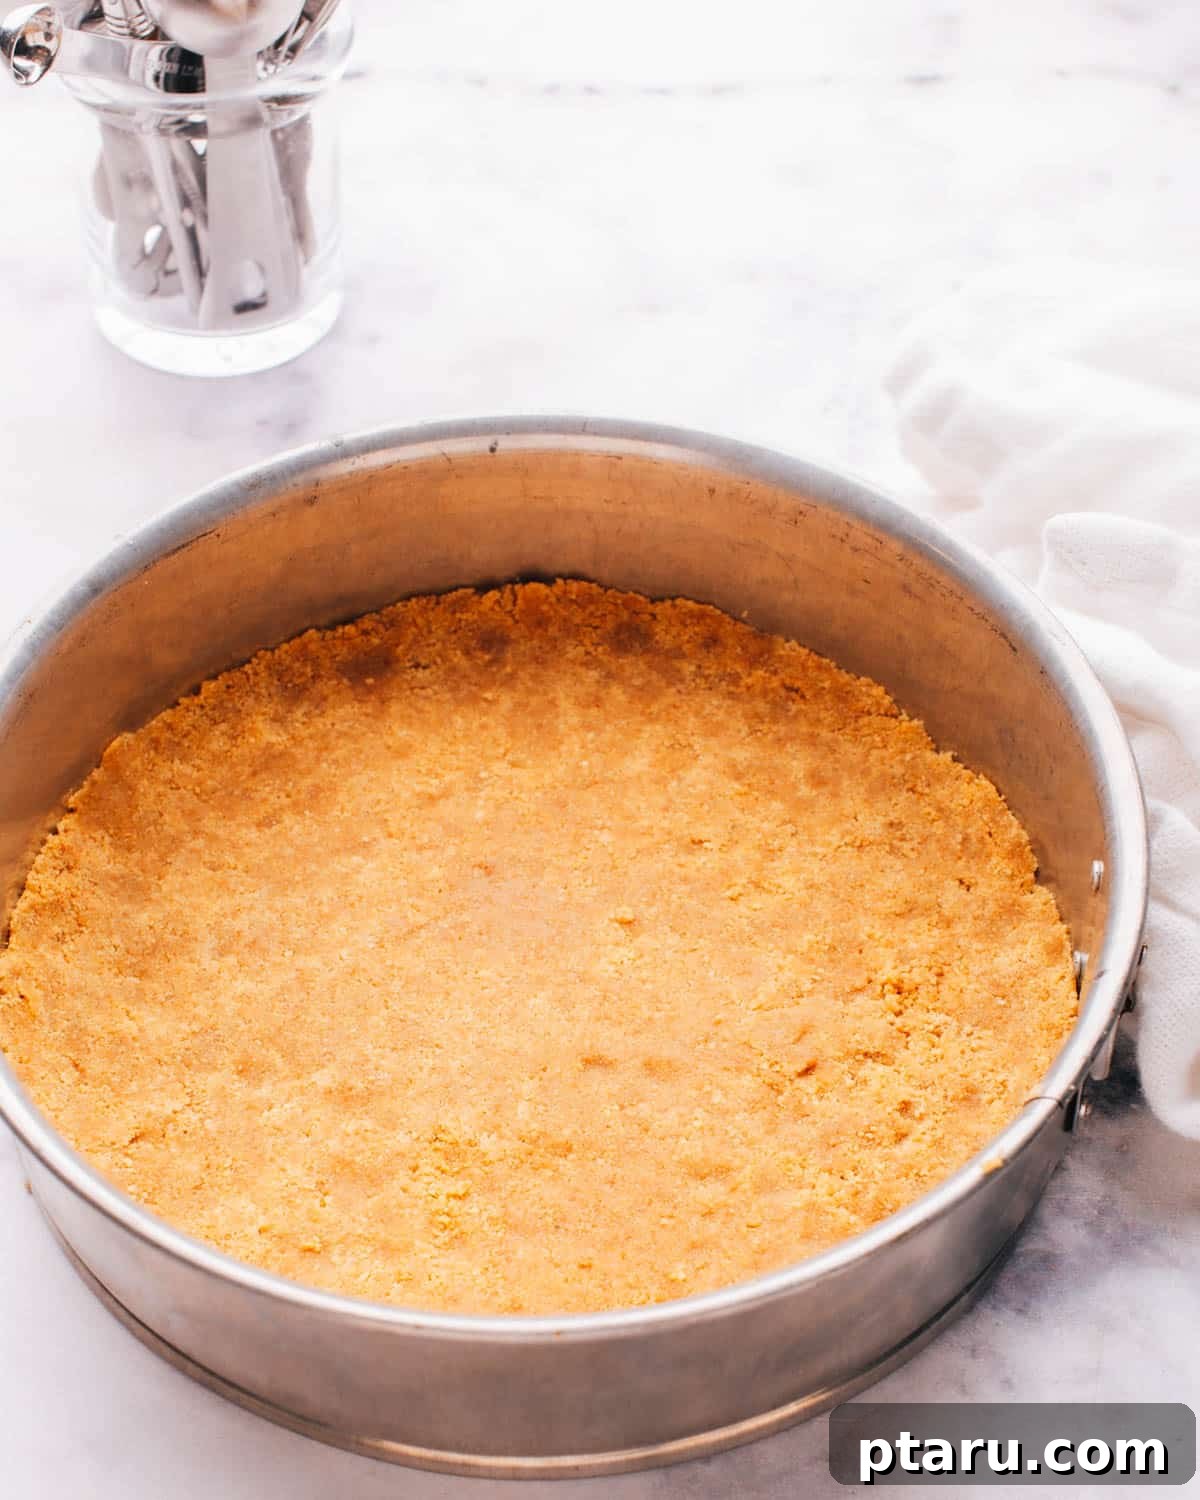
Searching for the ultimate graham cracker crust recipe? Look no further! This simple, 3-ingredient wonder is not only incredibly easy to make but also promises perfectly clean slices and a delightfully firm texture every time. Whether you opt for a no-bake approach or a quick bake, this crust comes together in just 5 minutes, making it an absolute winner for all your dessert needs. Say goodbye to flimsy, store-bought alternatives and hello to a homemade base that truly elevates any sweet treat.
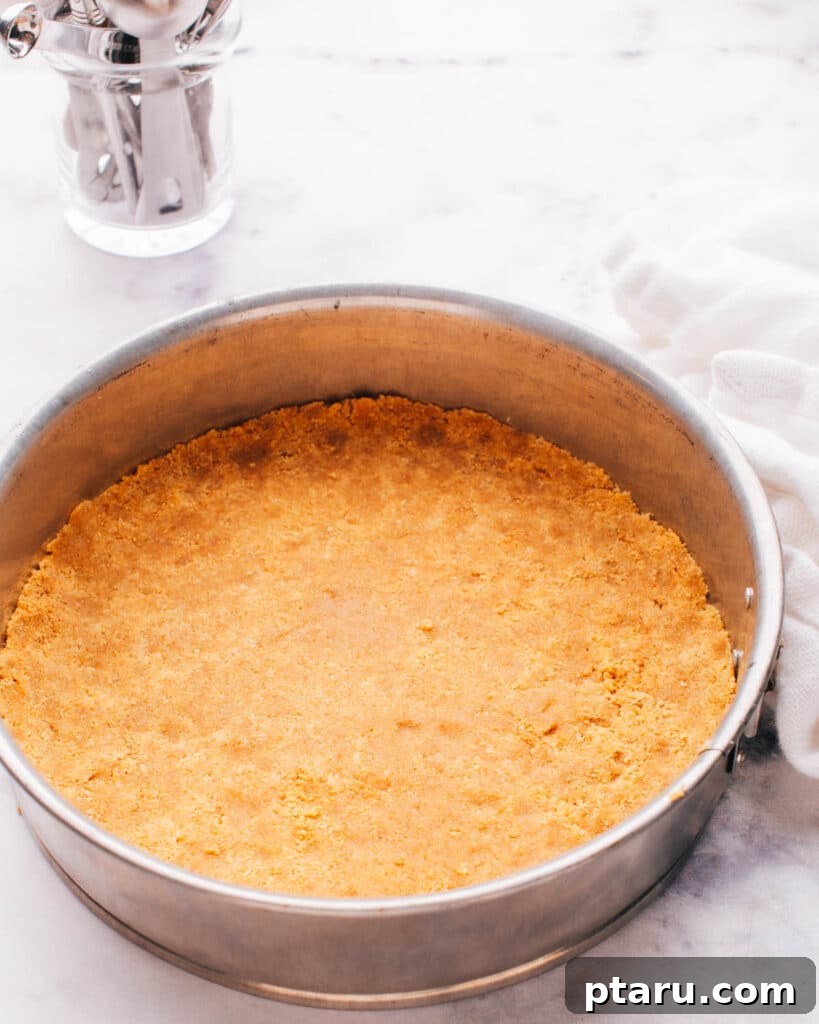
The Ultimate 3-Ingredient Graham Cracker Crust Recipe
Forget bland, crumbly store-bought crusts! Crafting your own homemade graham cracker crust is surprisingly simple and yields a far superior taste and texture. With just three pantry staples, you can create a versatile, sturdy base that perfectly complements and enhances any dessert, from creamy cheesecakes to luscious pies and tarts. This recipe is designed for ease and reliability, ensuring your crust holds together beautifully without crumbling, providing a delightful foundation for your culinary creations.
Essential Ingredients for Your Perfect Crust
The beauty of this recipe lies in its absolute simplicity. You only need a handful of common, readily available ingredients to achieve a stellar crust that’s both flavorful and structurally sound.
- Graham Cracker Crumbs: These form the very foundation of our delightful crust. You’ll typically need about 11 full graham cracker sheets to yield 1 ½ cups of finely crushed crumbs. For the best, most consistent results and to ensure your crust binds perfectly, use a food processor to crush them into a fine, uniform powder. If you don’t have a food processor, a sturdy Ziploc bag and a rolling pin work just as well – simply crush them thoroughly until no large pieces remain. The finer the crumbs, the more compact and cohesive your crust will be, reducing the chances of it falling apart when sliced.
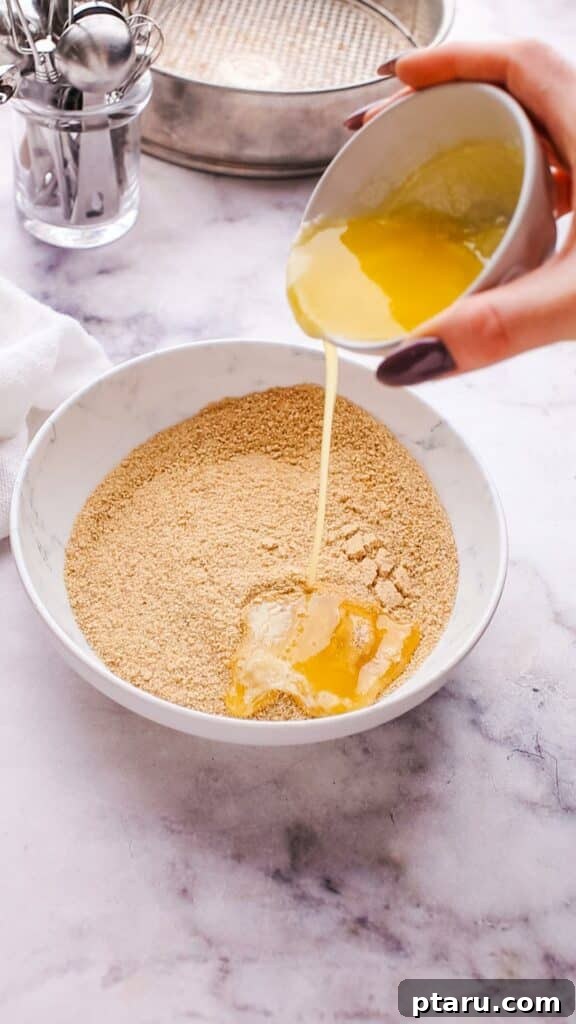
- Salted Butter, Melted: This is the crucial binding agent that brings all those delicious crumbs together. Salted butter not only acts as a glue but also adds a wonderful depth of rich, buttery flavor, perfectly balancing the sweetness of the graham crackers and sugar. Ensure the butter is fully melted so it can evenly coat all the crumbs, creating that essential “wet sand” consistency we’re looking for. If your pantry only holds unsalted butter, simply add a small pinch (about ¼ teaspoon) of fine sea salt to the crumb mixture to achieve that balanced taste.
- Granulated Sugar: Beyond simply adding sweetness, sugar plays a vital role in the crust’s texture and structure. It helps the crumbs bind together more effectively, and if you choose to bake the crust, it performs a magical trick: it slightly caramelizes in the heat, enhancing the flavor with toasted, nutty notes and contributing to a crisper texture. While standard granulated sugar is perfect, you can experiment with light or dark brown sugar for a deeper, molasses-like flavor profile, especially if you’re making a fall-inspired dessert.
Flavorful Variations and Smart Substitutions for Your Crust
This basic graham cracker crust is incredibly adaptable, serving as a blank canvas for countless dessert ideas. Feel free to experiment with different crackers or add spices to customize the flavor profile to perfectly match your chosen dessert.
- Unsalted Butter Adjustment: As mentioned, if you’re using unsalted butter, remember to add a pinch of salt (approximately ¼ teaspoon) to the dry ingredients. This simple step significantly enhances the overall flavor and prevents the crust from tasting flat or one-dimensional.
- Creative Crumb Swaps for Unique Flavors: Don’t limit your imagination to just graham crackers!
- For a richer, almost caramel-like crust that’s fantastic with coffee or spice-flavored fillings, try using crushed Biscoff cookie crumbs.
- For a classic European touch that pairs wonderfully with fruit tarts, opt for finely ground digestive biscuits.
- Craving something decadent and chocolatey? Crushed chocolate wafers or even whole Oreos (with their cream filling) make an exceptional “Oreo pie crust” that’s perfect for chocolate mousses, mint desserts, or peanut butter pies.
- Spice It Up: Elevate your crust’s aroma and taste by adding a small amount of ground spices. A pinch of ground cinnamon (about ½ teaspoon), nutmeg, cardamom, or even a blend like pumpkin pie spice can add a delightful warmth and complexity, especially fitting for fall-inspired desserts or apple pies.
- Gluten-Free Alternative: This recipe is easily adaptable for those with dietary restrictions. Simply use your favorite gluten-free graham-style crackers. The binding properties of the butter and sugar remain the same, ensuring a delicious and safe option for everyone.
Exact ingredient quantities are provided in the static recipe card below for your convenience.
Essential Tools for Crust-Making Success
You won’t need any specialized, fancy gadgets for this recipe. Just a few basic kitchen items that you likely already own will ensure a smooth process and a perfectly formed crust.
- Baking Pan of Choice: A 9-inch springform pan is typically ideal for cheesecakes, as its removable sides allow for effortless release and pristine presentation. Alternatively, a standard 9-inch pie plate works perfectly for traditional pies and tarts. If you’re planning on making individual mini cheesecakes or tarts, a muffin pan (lined with paper cups for easy removal) is an excellent choice.
- Medium Mixing Bowl: This is where the magic happens! A medium-sized bowl is essential for combining your crumbs, melted butter, and sugar thoroughly, ensuring every crumb is evenly coated.
- Measuring Cup or Flat-Bottomed Glass: These seemingly simple tools are your secret weapons for achieving a perfectly compact and sturdy crust. The flat, smooth surface helps you press the mixture firmly and evenly into the pan, creating a cohesive base that won’t crumble.
- Parchment Paper & Cooking Spray: For springform pans, lining the bottom with a circle of parchment paper is a game-changer for easy removal. Additionally, lightly spraying the bottom and sides of your chosen pan with cooking spray ensures a pristine, effortless release of your finished dessert, preventing any sticking and ensuring those picture-perfect slices.
- Food Processor (Optional but Highly Recommended): While not strictly necessary, a food processor is the quickest and most efficient way to achieve finely crushed graham cracker crumbs, leading to a more uniform and stable crust.
Step-by-Step: How to Craft the Best Homemade Graham Cracker Crust
Making this graham cracker crust is incredibly quick and straightforward. The entire hands-on process takes only a few minutes, leaving you with a perfect, versatile base ready for your chosen filling. You’ll simply decide whether to bake or not based on your dessert’s specific requirements, making it adaptable to any recipe.
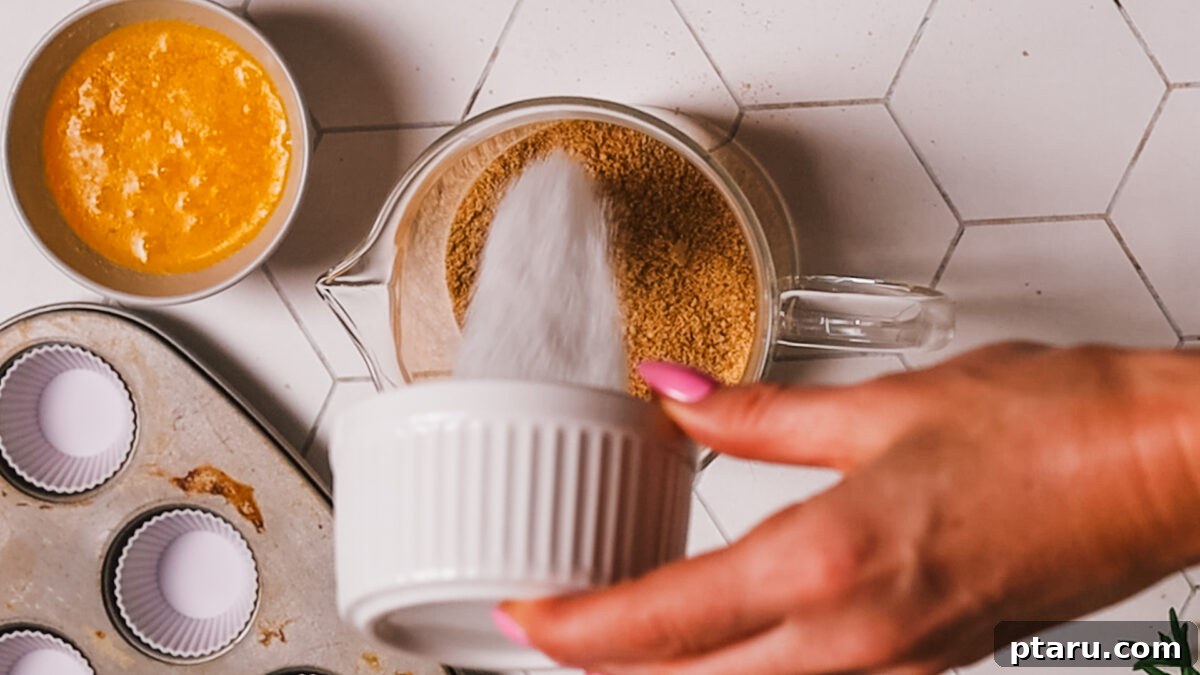
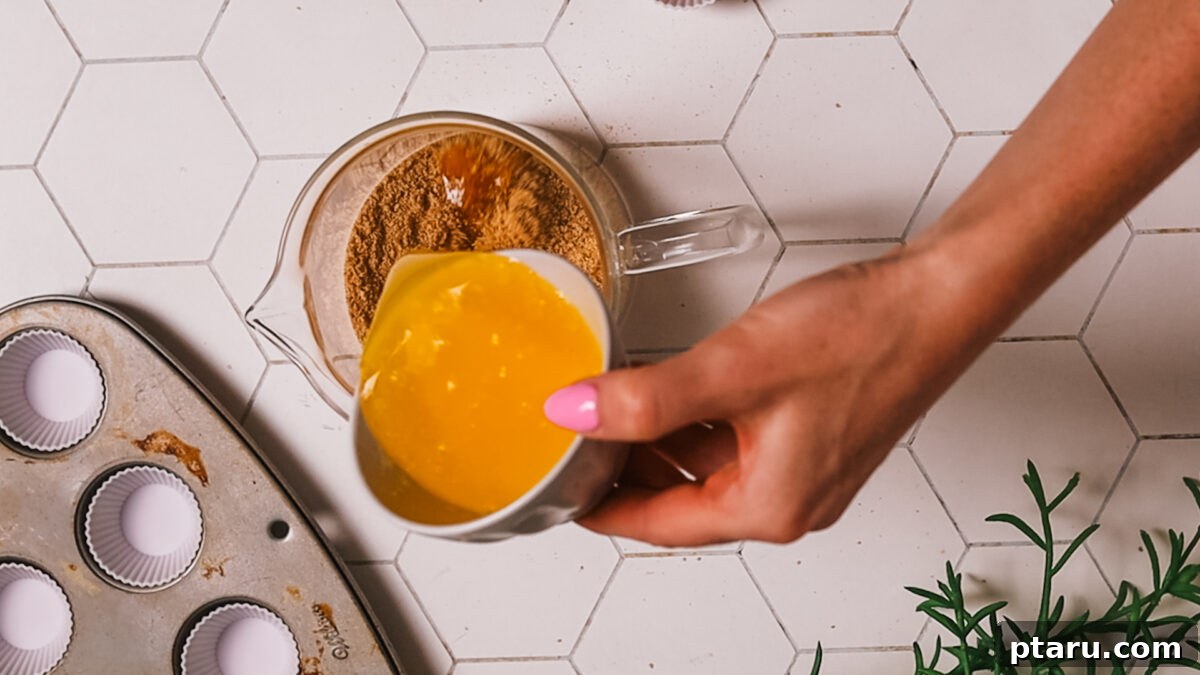
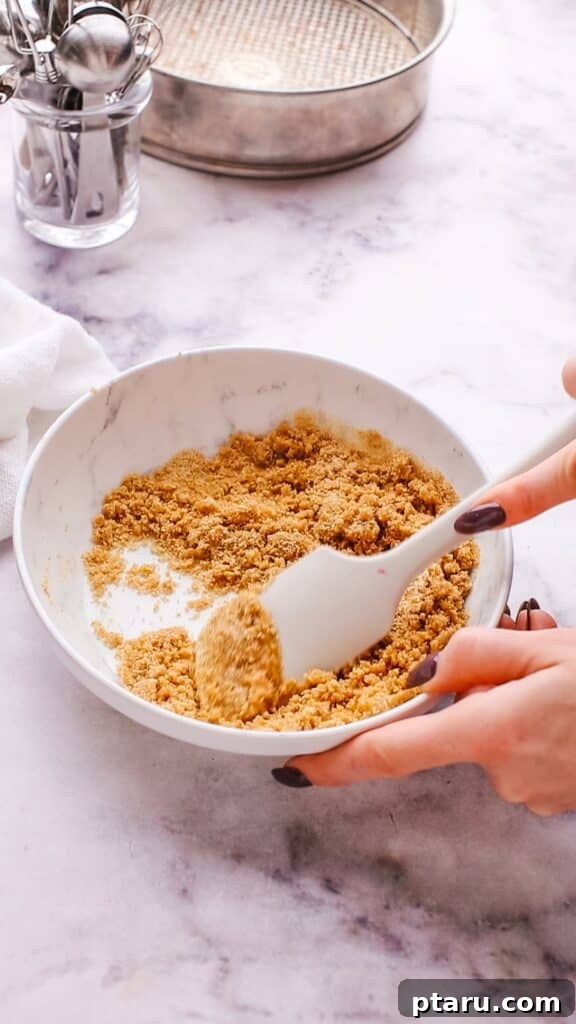
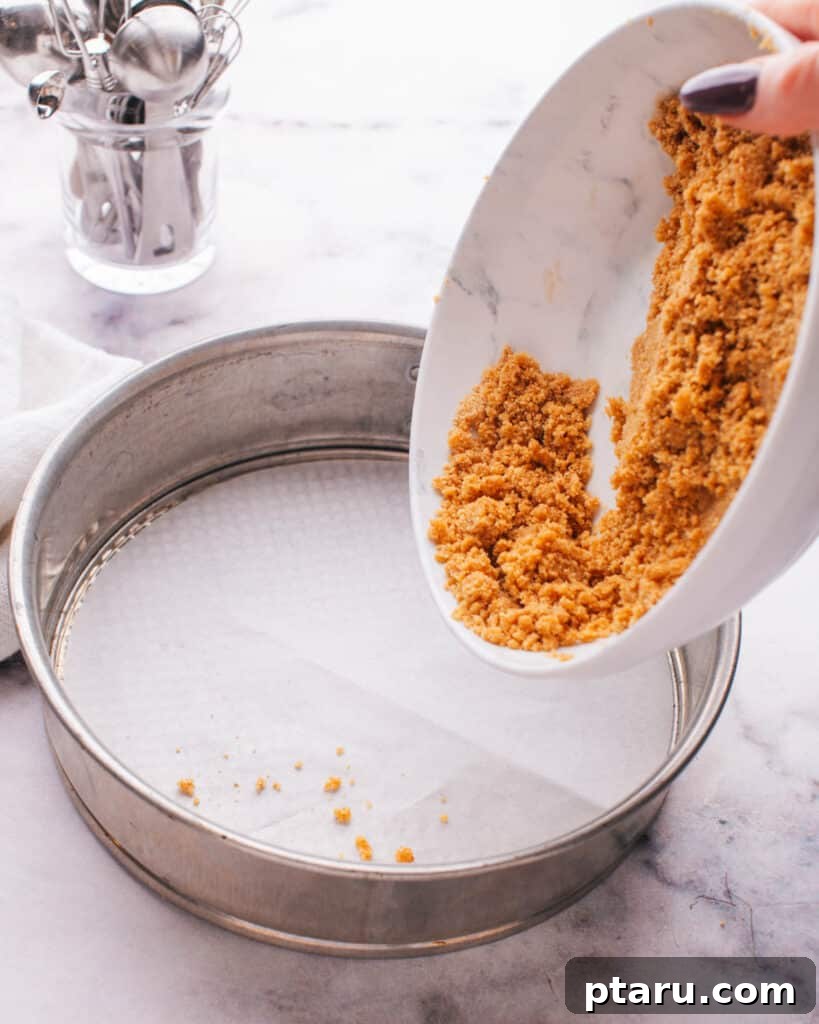
1. Prepare Your Baking Pan
- For a 9-inch springform pan, line the bottom with a carefully cut circle of parchment paper. This simple step is absolutely key for easy removal and achieving pristine slices of your finished dessert. Lightly spray the bottom and sides of the pan with cooking spray to further prevent any sticking. If you’re using a standard pie plate, a light coating of cooking spray or butter is usually sufficient.
2. Mix the Ingredients Thoroughly
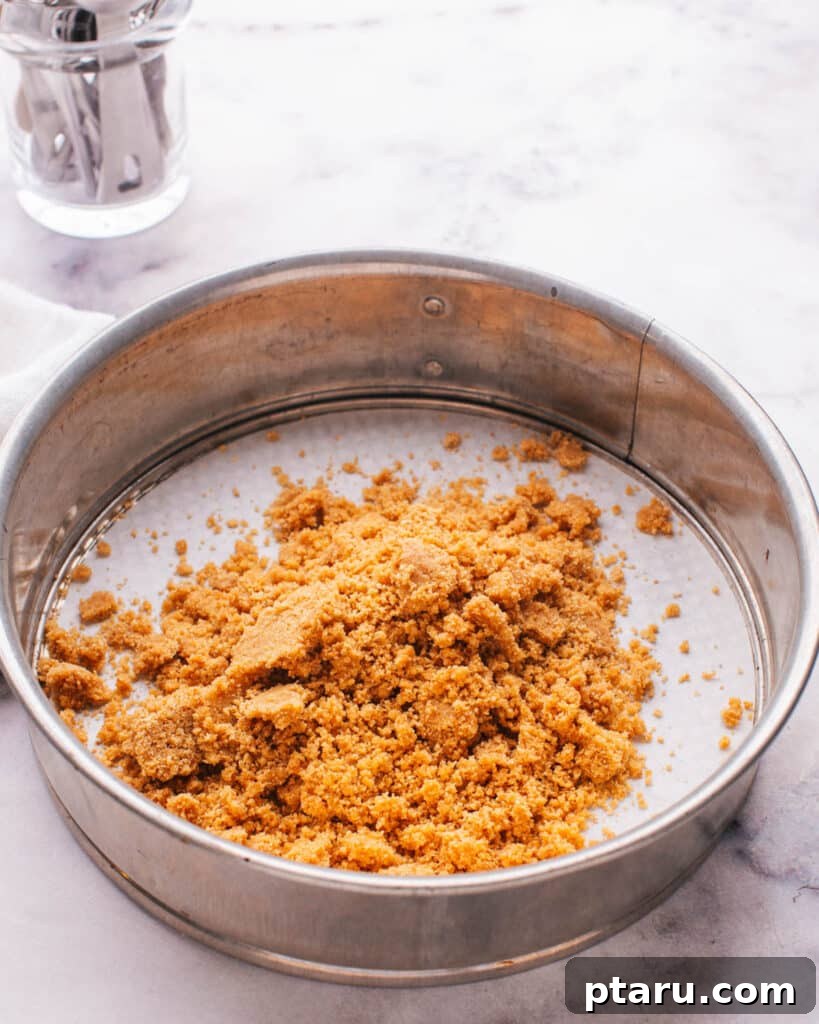
- In a medium-sized mixing bowl, combine the finely crushed graham cracker crumbs, the melted salted butter, and the granulated sugar. Use a sturdy spoon or a rubber spatula to stir everything together. Continue mixing until all of the crumbs are evenly moistened by the butter and the mixture takes on the appearance and texture of wet sand. A good test: when you squeeze a handful of the mixture, it should hold together without crumbling apart. This indicates you’ve achieved the perfect butter-to-crumb ratio for a cohesive crust.
3. Press the Crust Firmly into Place
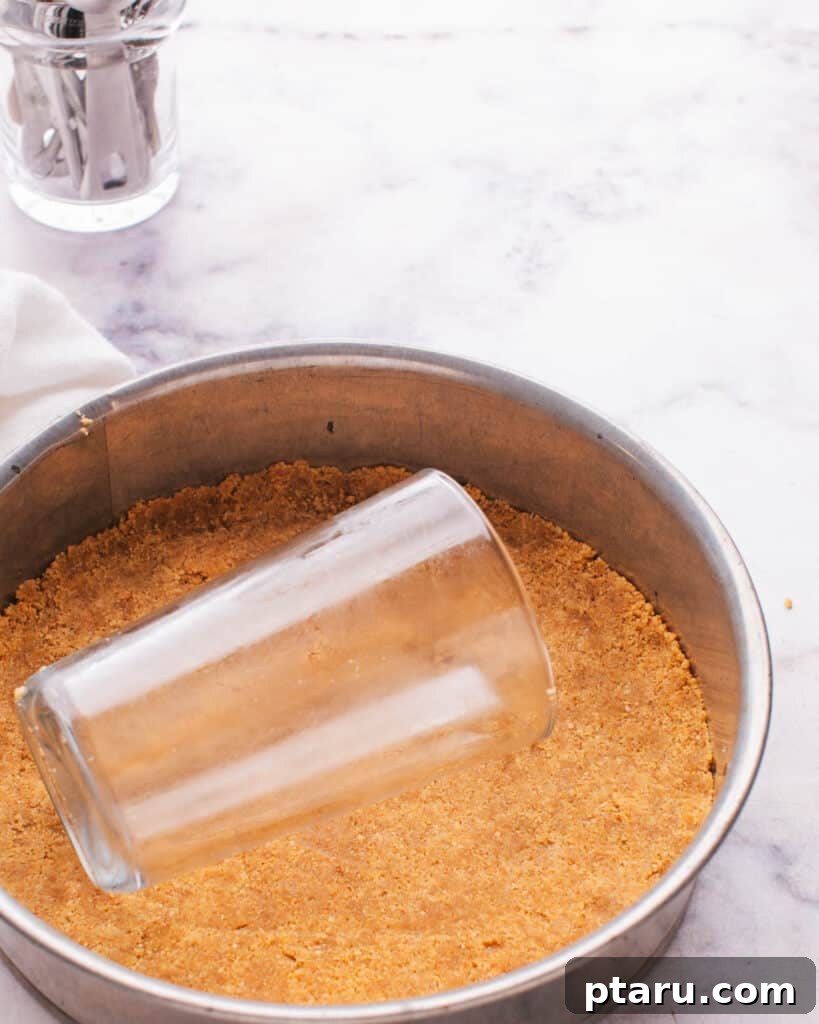
- Transfer the prepared crumb mixture into your meticulously prepared pan. This is the crucial step where you build the foundation for a truly sturdy crust. Using the bottom of a flat-bottomed measuring cup or a glass, press the mixture firmly and evenly across the bottom of the pan. Once the bottom is solid, work your way up the sides, creating a consistent rim about 1 inch high. Applying firm, even pressure throughout this step is paramount; it compresses the crumbs and butter, creating a dense, sturdy crust that won’t fall apart or crumble when sliced.
4. Chill or Bake Your Crust to Perfection
- For No-Bake Desserts: If your filling is a no-bake variety – such as a no-bake cherry cheesecake, a key lime pie, or a rich chocolate mousse pie – simply place the prepared crust in the freezer for at least 10-15 minutes. This quick chill allows the butter to firm up rapidly, setting the crust without any need for oven time. Keep it thoroughly chilled until you’re ready to add your filling and throughout serving.
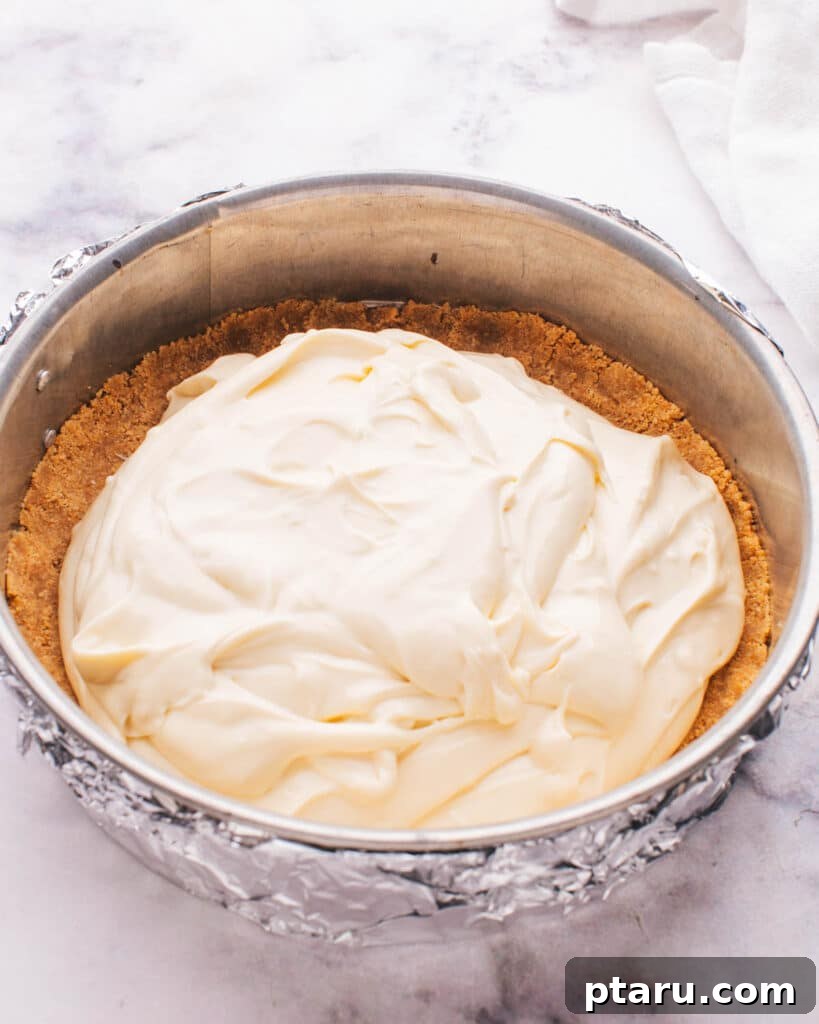
- For Baked Desserts: For fillings that require baking, like a classic Philadelphia cheesecake or a pumpkin pie, pre-bake the crust for 8-10 minutes in a preheated oven at 350°F (175°C). This light baking process not only enhances the flavor by toasting the graham crackers and caramelizing the sugar but also creates a crisper, more stable crust that acts as a barrier against moisture from the filling. Ensure the crust cools completely on a wire rack before adding any warm or liquid filling to prevent it from becoming soggy.
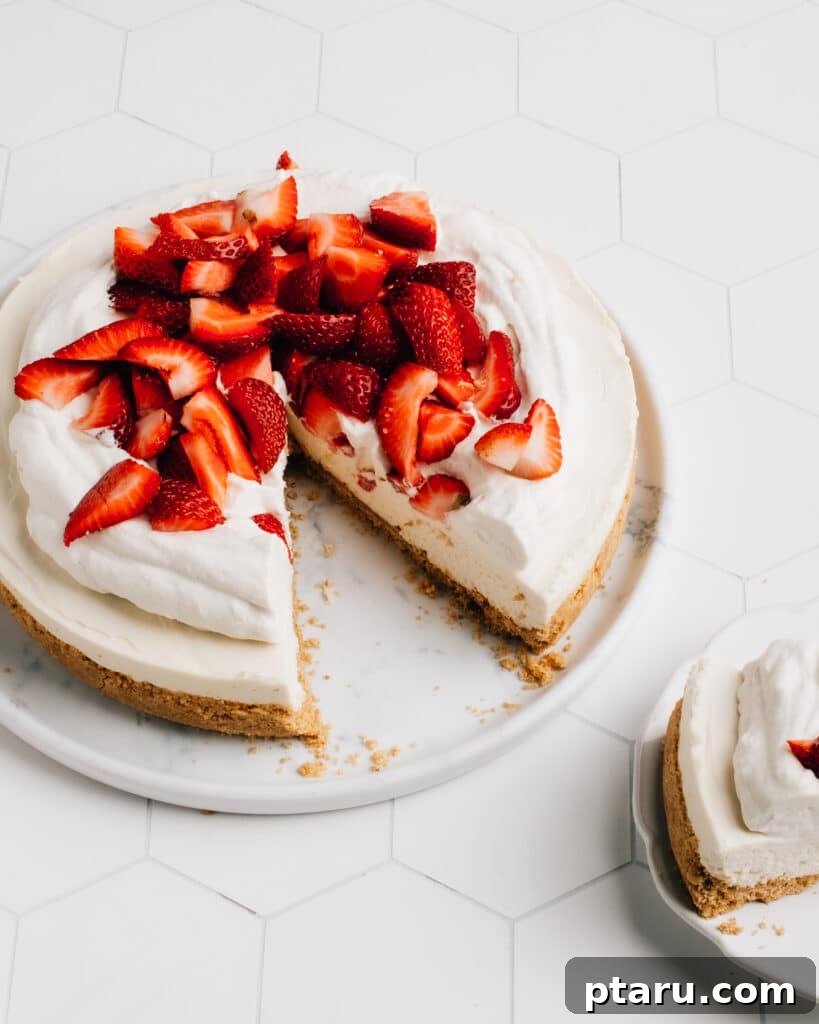
To Bake or Not to Bake? Understanding Your Graham Cracker Crust Options
The decision to bake or not to bake your graham cracker crust often sparks a friendly debate among bakers, but the choice truly depends on the desired texture and the specific type of filling you’re pairing it with. Each method offers distinct advantages that can significantly enhance your final dessert’s appeal and structural integrity.
Baking the crust for a short period results in a firmer, crunchier bite and a more pronounced, intensely toasty flavor profile. The gentle heat from the oven encourages the sugar in the crust to caramelize, adding a subtle depth and richness that is simply irresistible. This baking process also helps create a slight barrier, which is incredibly beneficial for preventing the crust from becoming soggy, especially when paired with moist or liquid-heavy fillings.
Conversely, a no-bake crust retains a softer, more tender, and luxuriously buttery texture with a milder, fresher graham cracker taste. It’s an incredibly quick and convenient option, completely skipping the oven and relying solely on the butter to firm up and bind the crumbs together when chilled in the refrigerator or freezer.
Ideal for No-Bake Cheesecakes and Creamy Pies
When preparing delectable no-bake cheesecakes, light puddings, or rich cream pies, simply chilling the crust is perfectly acceptable and, in many cases, preferred. The melted butter solidifies as it cools, effectively binding the crumbs together into a cohesive base. This method is exceptionally quick, energy-efficient, and results in a wonderfully tender crust. However, it’s crucial to remember that a no-bake crust relies on being kept cold; at room temperature, the butter will soften, potentially making the crust more prone to crumbling. For the best structural integrity and cleanest slices, always keep your no-bake desserts thoroughly chilled until the moment of serving.
The Advantage of Pre-Baking for Baked Cheesecakes and Tarts
If your dessert filling requires baking (such as a classic New York-style cheesecake, a delicate fruit tart, or a pumpkin pie), I highly recommend taking the extra step to pre-bake the graham cracker crust. While it is technically possible to skip this step, pre-baking offers significant, undeniable benefits that will elevate your dessert:
- Enhanced Stability: During baking, the sugar melts and then solidifies as it cools, acting as a strong adhesive that makes the crust significantly more robust and less likely to crumble when sliced. This is particularly important for taller or denser baked desserts.
- Crucial Moisture Barrier: Pre-baking creates a protective barrier between the crust and any liquid-heavy filling. This barrier is vital for preventing the crust from absorbing too much moisture and becoming soggy during the longer baking process, ensuring a crisp, flavorful base every time.
- Deeper, More Complex Flavor: The slight caramelization of the sugar and the toasting of the graham crackers during pre-baking imparts a richer, deeper, and more complex flavor. This warm, nutty aroma beautifully complements and enhances rich, creamy fillings, adding another layer of deliciousness to your dessert.
My Professional Recommendation: Weighing the Benefits
As a seasoned baker, my personal approach often balances convenience with the desired final outcome. For truly effortless desserts where time is of the essence or a very tender crust is specifically desired (especially if the filling is also no-bake and the dessert will be served immediately from the fridge), I’ll happily opt for the no-bake crust. It’s fantastic for impromptu treats!
However, if I’m aiming for impeccable presentation with super-clean, sturdy slices and a superior depth of flavor that really makes the dessert shine, I will always take the extra 8-10 minutes to pre-bake the crust. That brief time in the oven truly transforms the crust, providing a robustness and an irresistible toasty aroma that is, in my opinion, undeniably “worth it” for a truly impressive and memorable dessert experience.
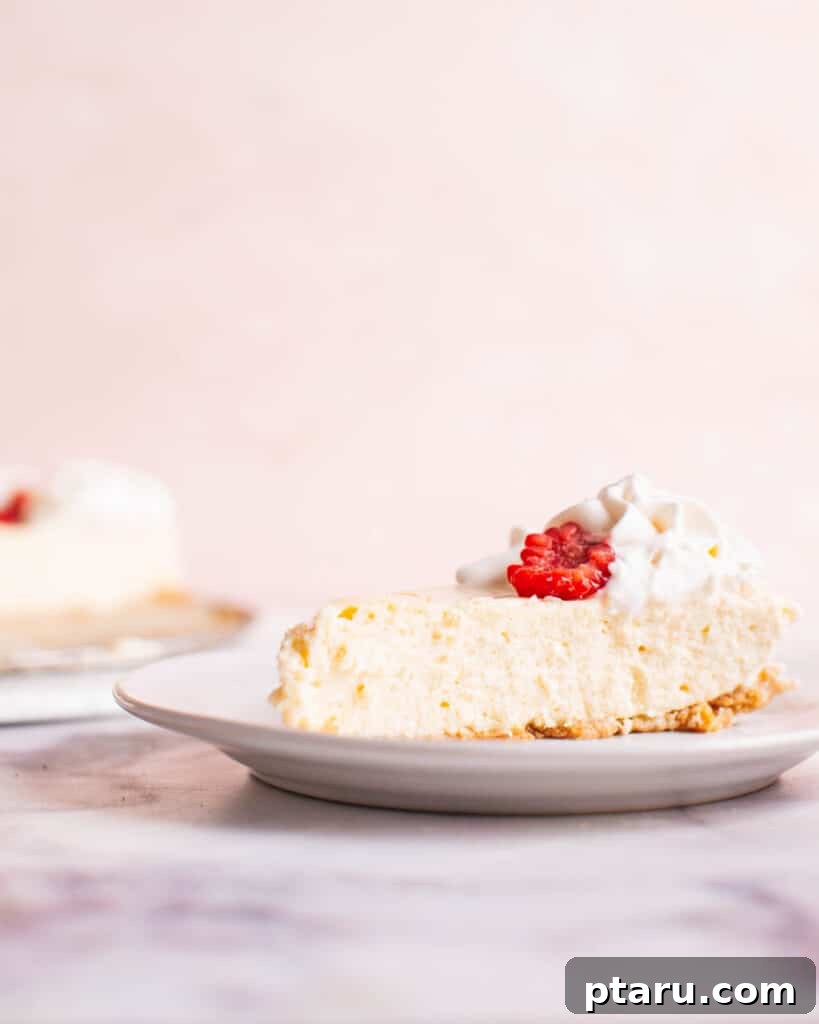
Make-Ahead Tips and Storage Solutions
One of the many advantages of this homemade graham cracker crust recipe is its fantastic make-ahead potential. Preparing your crust in advance can significantly streamline your dessert assembly process, making entertaining or simply enjoying a homemade treat much easier, even on busy days.
Storing Leftovers (Filled Desserts)
- Once your cheesecake or pie is fully prepared, filled, and set, it’s crucial to cover it tightly. Use plastic wrap or aluminum foil, ensuring a good seal to prevent it from absorbing refrigerator odors and to maintain freshness. Store the dessert in the refrigerator for up to 5 days. This crust, especially if it was firmly packed and pre-baked, holds up exceptionally well when kept cold, maintaining its texture and preventing sogginess for days.
Freezing Homemade Crusts (Empty)
- You can prepare empty crusts (either baked and cooled, or unbaked) well in advance, giving you a head start on future desserts. Simply wrap the entire pan (with the crust securely inside) tightly in plastic wrap, followed by a layer of heavy-duty aluminum foil to prevent any freezer burn. Store it in the freezer for up to 3 months.
- When you’re ready to use a frozen crust, simply thaw it overnight in the refrigerator before filling. This is a fantastic time-saver for busy schedules, allowing you to whip up a fresh dessert with minimal effort.
Freezing Entire Cheesecakes or Pies
- For ultimate convenience, you can also freeze entire cheesecakes or pies (with both the crust and filling) after they’ve been fully prepared and thoroughly chilled. Wrap them securely first in plastic wrap and then in foil. To serve, simply thaw the entire dessert overnight in the refrigerator. You’ll find that the crust retains its integrity beautifully, making it a perfect option for advance preparation.
Delicious Desserts to Pair with This Graham Cracker Crust
This buttery, versatile graham cracker crust is truly a culinary chameleon, pairing wonderfully with a vast array of both baked and no-bake dessert recipes. Its subtle sweetness, crisp texture, and firm structure make it the perfect counterpoint to rich, creamy, or fruity fillings, creating a harmonious balance of flavors and textures. Here are some of our absolute favorite cheesecake and pie recipes that truly shine with this simple, homemade base:
- Pumpkin Cheesecake Bars: A quintessential seasonal delight, perfectly complemented by the warm, spiced notes of the graham crust.
- Zesty Lemon Swirl Cheesecake: The bright, zesty lemon filling cuts beautifully through the sweet, buttery crust, creating a refreshing contrast.
- Delightful Cheesecake Bites: Ideal for individual servings or party platters, this sturdy crust ensures each bite is perfectly contained and delicious.
- Rich Chocolate Cheesecake: The classic pairing of chocolate and graham crackers is always a timeless hit, offering deep, comforting flavors.
- Caramel Mascarpone Cheesecake: A truly luxurious choice, where the crisp graham cracker crust provides an essential textural contrast to the incredibly smooth and creamy filling.
- Festive Easter Egg Cheesecake: A fun and delicious option that’s perfect for holiday celebrations, offering a festive and flavorful base.
Beyond Cheesecake: Graham Cracker Pie Crust Versatility
While often instantly associated with creamy cheesecakes, this incredible graham cracker crust is far more versatile than you might initially imagine! It serves as an exceptional, easy-to-make base for a wide variety of pies, tarts, and other dessert bars, offering a delightful and often quicker alternative to more traditional pastry crusts. Its ease of preparation alone makes it a favorite over complex homemade pie crusts.
- Perfect for No-Bake Pies: For pies that don’t require any oven time, such as chilled mousse pies, refreshing ice cream pies, or elegant fresh fruit tarts, simply follow the chilling instructions for the crust. If your pie filling is warm (like a warm chocolate ganache or pudding), it’s highly advisable to pre-bake the crust first. A baked crust creates a more robust barrier against moisture and adds a pleasant toasted flavor that beautifully balances rich, sweet fillings. The firm texture also prevents the crust from softening too much underneath the warm filling.
- An Excellent Choice for Baked Pies with Short Cook Times: This versatile crust also performs wonderfully for baked pies that don’t require extensive oven time. Consider it for creamy custard pies, delicate fruit tarts that bake quickly, or even certain types of pudding pies that need minimal setting time in the oven. For these applications, use the “blind baking” method: par-bake the empty crust in your pie pan for 8-10 minutes (as directed in the recipe instructions), then allow it to cool completely before adding your filling and baking as your specific pie recipe instructs. This process imparts a buttery, crunchy contrast that complements smooth, creamy fillings marvelously.
- Especially Good with Creamy, Cold-Set Pies: Its inherent stability and inviting flavor make it particularly outstanding with desserts that set up beautifully in the refrigerator. Imagine the perfect combination of textures and tastes with beloved classics like:
- The Easiest No-Bake Chocolate Tart
- Exquisite Strawberry White Chocolate Mousse Tart
- Decadent Peanut Butter Pretzel Pie
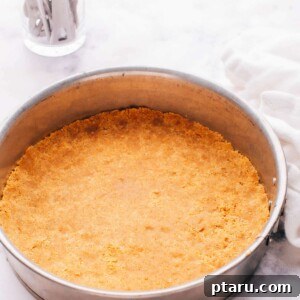
The BEST 3-Ingredient Graham Cracker Crust Recipe
By: Jennifer Pallian BSc, RD
This ultimate 3-ingredient graham cracker crust recipe is foolproof! It requires no pre-baking (or a quick bake), slices cleanly, and always holds firm – perfect for any cheesecake, pie, or tart.
Cook Time: 0-10 minutes (optional)
Total Time: 5-15 minutes
Yield: 1 (9-inch) crust, serves 12
Ingredients
- 1 ½ cups graham cracker crumbs (from about 11 full graham cracker sheets, finely crushed)
- ¼ cup salted butter, melted (if using unsalted, add ¼ tsp salt)
- 2 tbsp granulated sugar
Instructions
- Prepare Your Pan: Line the bottom of a 9-inch springform pan with parchment paper. Lightly spray the bottom and sides of the pan with cooking spray. For a pie plate, just spray with cooking spray.
- Mix Ingredients: In a medium bowl, combine the graham cracker crumbs, melted salted butter, and sugar. Stir thoroughly until all crumbs are evenly moistened and the mixture resembles wet sand. It should hold together when squeezed.
- Press the Crust: Transfer the crumb mixture into your prepared pan. Use the bottom of a flat-bottomed measuring cup or a glass to press the mixture very firmly and evenly into the bottom of the pan and about 1 inch up the sides. Ensure it’s very compact for a sturdy crust.
- No-Bake Option: For fillings that don’t require baking, place the crust in the freezer for at least 10-15 minutes to allow the butter to set. Keep it chilled until ready to fill and serve.
- Baked Option: For fillings that require baking, preheat your oven to 350°F (175°C). Bake the crust for 8 to 10 minutes, or until lightly golden and fragrant. Let it cool completely on a wire rack before adding your filling.
Recipe Notes
- Baked vs. No-Bake: Baking the crust provides a firmer texture and a deeper, toastier flavor, and helps prevent sogginess for liquid fillings. A no-bake crust is quicker, softer, and perfect for cold-set desserts. The key for either method is firmly pressing the crumbs.
- Graham Crackers: You’ll need approximately 11 full graham cracker sheets to yield 1 ½ cups of fine crumbs. A food processor makes this quick and easy; otherwise, use a sturdy Ziploc bag and a rolling pin.
- Butter: Salted butter adds excellent balance. If using unsalted butter, add about ¼ teaspoon of fine salt to the crumb mixture to enhance flavor.
- Packing the Crust: Firm, even pressure is absolutely crucial for a crust that holds together and slices cleanly. Use the flat bottom of a glass or measuring cup for best results.
- Storage: An empty crust (baked and cooled, or unbaked) can be wrapped tightly and stored in the fridge for up to 3 days or frozen for up to 3 months. Filled desserts should be covered and refrigerated for up to 5 days.
Nutrition Information (per serving, approx.)
Calories: 89kcal | Carbohydrates: 11g | Protein: 1g | Fat: 5g | Saturated Fat: 3g | Polyunsaturated Fat: 0.2g | Monounsaturated Fat: 1g | Trans Fat: 0.2g | Cholesterol: 10mg | Sodium: 101mg | Potassium: 20mg | Fiber: 0.4g | Sugar: 5g | Vitamin A: 120IU | Calcium: 10mg | Iron: 0.4mg
Nutrition information is automatically calculated and should be used as an approximation.
Loved this Easy Graham Cracker Crust Recipe?
If you’ve tried this foolproof recipe and created a fantastic dessert, we’d absolutely love to hear from you! Share your thoughts, tips, and culinary creations in the comments section below. Your feedback helps other bakers!