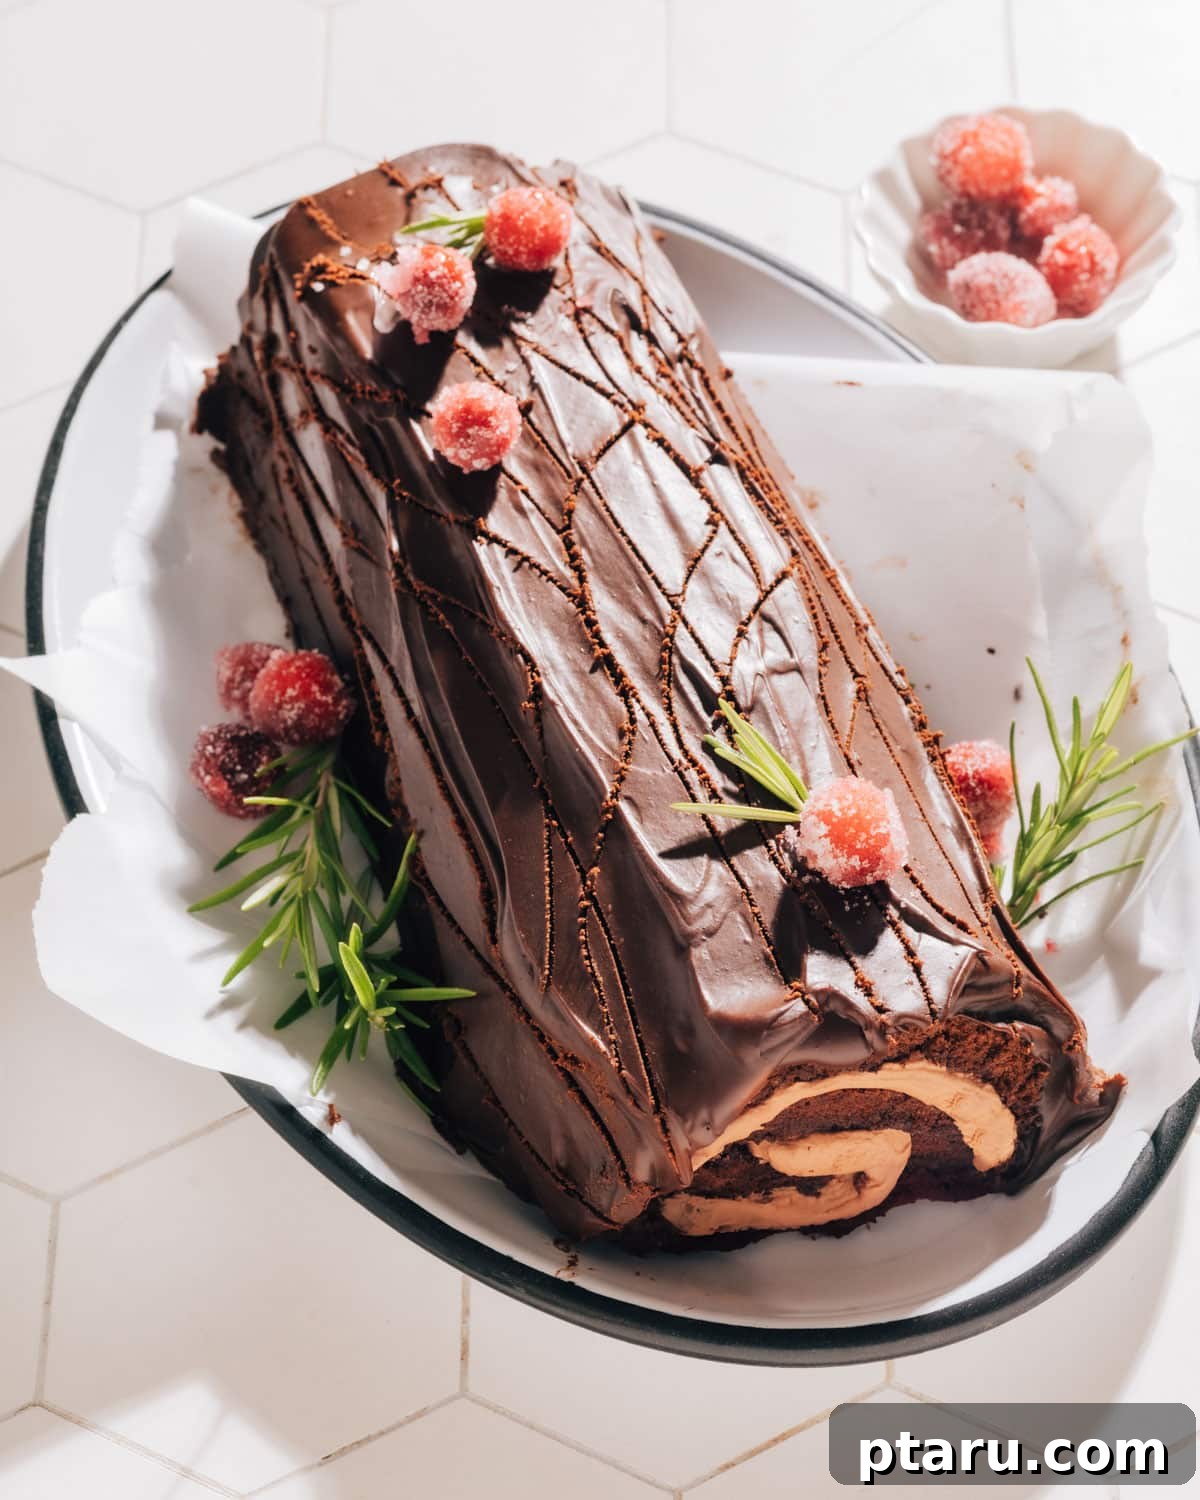
Unlock the secrets to crafting the ultimate Buche de Noel, also affectionately known as the Yule Log cake. This comprehensive, step-by-step recipe guarantees a show-stopping holiday dessert, featuring a tender chocolate sponge cake rolled with the fluffiest chocolate cream filling and elegantly adorned with a rich chocolate ganache. Designed for both novice and experienced bakers, this guide is packed with expert tips, common mistakes to avoid, and creative variations to make your holiday baking truly unforgettable. Prepare to impress your guests with this traditional French Christmas confection!
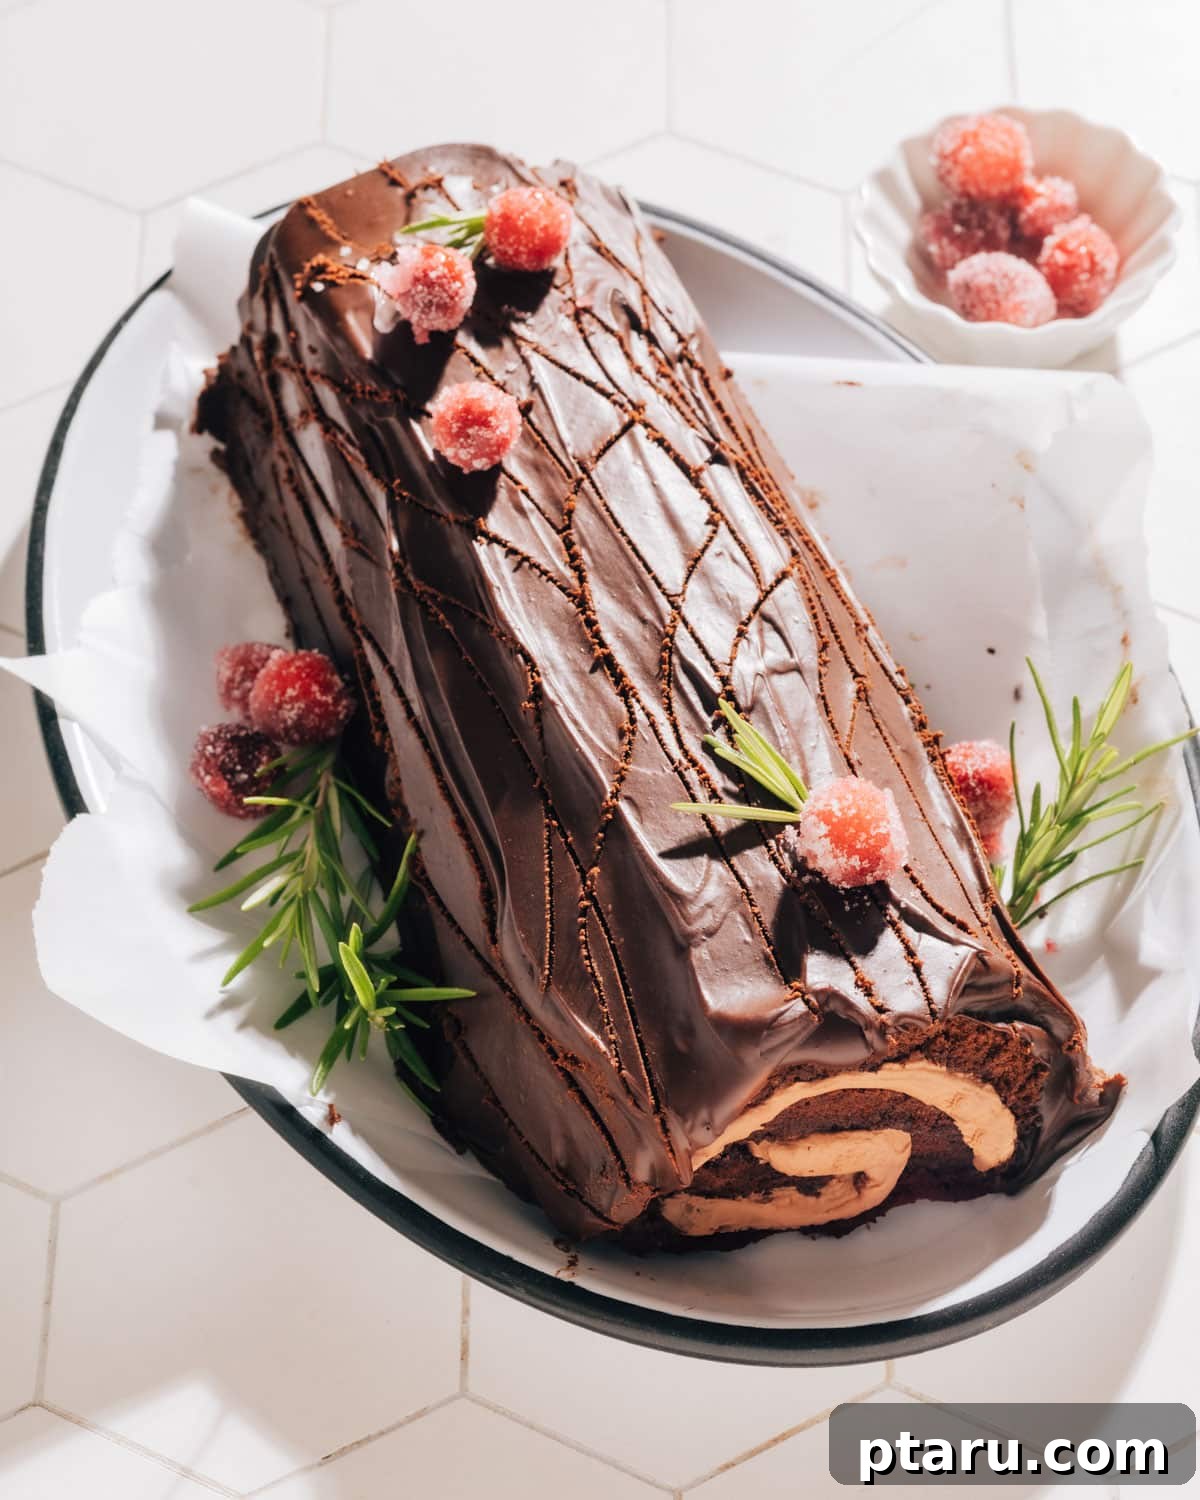
The Buche de Noel recipe transforms a simple, soft chocolate Swiss Roll cake into an exquisite, festive centerpiece for your holiday table. For years, this delightful Yule Log has been a cherished tradition in my home, consistently ranking among my favorite chocolate Christmas dessert recipes. Its impressive appearance belies a surprisingly straightforward baking process, making it an accessible project for anyone looking to add a touch of elegance to their seasonal celebrations. Dive into the magic of holiday baking with this truly foolproof guide.
Essential Buche de Noel Ingredients for a Perfect Yule Log
Crafting this magnificent chocolate Yule Log begins with selecting the right ingredients. Here’s a detailed look at what you’ll need to create each layer of this festive dessert, along with helpful insights for optimal results.
Cake Ingredients: The Foundation of Your Yule Log
- Eggs: Crucial for the cake’s light and airy texture. For best whipping results, bring them to room temperature from the fridge. A quick method for bringing ingredients to room temperature involves placing them in a bowl of warm water for a few minutes. Separating whites and yolks while cold, then letting whites warm, can also be effective.
- Granulated Sugar: Divided between the egg whites and yolks. Sugar not only sweetens but also plays a vital role in stabilizing the delicate egg foams, ensuring your cake achieves that perfect, flexible sponge.
- Pure Vanilla Extract: Adds a warm, comforting aroma and enhances the overall flavor profile of the chocolate cake.
- All-Purpose Flour: The structural backbone of the cake. Measure it accurately by weight if possible (64g for ½ cup) to avoid a dense cake.
- Cocoa Powder: Both Dutch-processed and natural cocoa powder work beautifully in this recipe, providing a deep chocolate flavor. Dutch-processed tends to be darker and less acidic, resulting in a slightly smoother chocolate taste.
- Baking Powder: A leavening agent that helps the cake rise, contributing to its fluffy texture. Ensure it’s fresh for maximum efficacy.
- Fine Sea Salt: A pinch of salt balances the sweetness and intensifies the chocolate notes, making the flavors pop.
- Milk: Adds moisture to the cake batter, ensuring a tender and pliable sponge that won’t crack easily when rolled.
Filling Ingredients: Creating the Fluffy Chocolate Cloud
- Whipping Cream: The star of your fluffy filling. It’s essential to keep it very cold from the fridge for optimal whipping. Cold cream produces a more stable and voluminous whipped cream.
- Cocoa Powder: Infuses the cream with rich chocolate flavor, turning it into a decadent filling.
- Confectioners’ Sugar: Also known as icing sugar, it dissolves easily into the cream, ensuring a smooth texture. The cornstarch often found in confectioners’ sugar also helps stabilize the whipped cream, preventing it from weeping.
- Vanilla Extract: A touch of vanilla complements the chocolate, adding depth and warmth to the filling.
Ganache Ingredients: The Luxurious Bark-Like Coating
- Heavy Cream: Provides the rich, creamy base for your ganache, ensuring it’s smooth and glossy.
- Dark Chocolate: Finely chopped for smooth and even melting. Using high-quality dark chocolate (around 60-70% cocoa solids) will yield the best flavor and texture for your ganache, offering a beautiful contrast to the sweet filling.
Exact recipe quantities are meticulously listed in the detailed recipe section below for your convenience.
Creative Variations and Easy Substitutions for Your Yule Log
Customize your Buche de Noel to suit your taste and dietary preferences with these simple yet impactful swaps and additions. Make this classic French dessert truly your own!
- Classic Vanilla Filling: For a lighter, more traditional take, simply omit the cocoa powder from the whipped cream to create a delightful vanilla-flavored filling. This allows the chocolate cake and ganache to truly shine.
- Espresso Kick: Introduce a subtle coffee note by adding 1 teaspoon of instant espresso powder to either the cake batter or the chocolate cream filling. Coffee is a fantastic enhancer of chocolate flavor, adding a sophisticated depth.
- Elegant White Chocolate Ganache: Swap the dark chocolate for white chocolate in your ganache recipe. This creates a visually striking contrast and a sweeter, milder chocolate coating. Adjust the cream slightly as white chocolate has a different fat and sugar content.
- Gluten-Free Option: Easily adapt this recipe for gluten-sensitive guests by replacing all-purpose flour with a 1:1 gluten-free flour blend. Ensure your chosen blend contains xanthan gum or add ½ teaspoon per cup of flour for better structure.
- Nutty Additions: Fold finely chopped toasted nuts like pecans or walnuts into the chocolate cream filling for added texture and a rich, earthy flavor.
- Boozy Bliss: For an adult twist, add a tablespoon of your favorite liqueur (such as Grand Marnier, Kahlua, or rum) to the chocolate cream filling or lightly brush it over the cooled cake before spreading the filling.
Looking to expand your holiday baking repertoire? Don’t miss my recipes for soft gingerbread cookies and festive Christmas sugar cookies—they’re perfect companions for your Buche de Noel!
Essential Tools for Your Buche de Noel Baking Adventure
Having the right equipment at hand makes the Buche de Noel baking process smooth and enjoyable. Here’s a list of essential tools you’ll need to achieve professional-looking results:
- 11×17-inch Sheet Pan: Also commonly referred to as a jelly roll pan or half sheet pan, this size is ideal for baking the thin sponge cake layer that forms the base of your Yule Log.
- Parchment Paper: Absolutely crucial for this recipe! It prevents sticking and, more importantly, facilitates the easy rolling of the warm cake, which is key to preventing cracks.
- Stand Mixer or Hand Mixer with Whisk Attachment: Essential for efficiently whipping the egg whites, egg yolks, and the chocolate cream filling to their desired consistencies. A stand mixer provides consistent power, while a hand mixer offers portability.
- Large Silicone Spatula: Perfect for gently folding the whipped egg whites into the batter, preserving as much air as possible for a light cake. It’s also great for scraping down bowls.
- Offset Spatula: This baker’s best friend is indispensable for evenly spreading the cake batter on the sheet pan and achieving a smooth, professional finish when applying the chocolate ganache.
- Wire Rack: Necessary for cooling the rolled cake completely, allowing air circulation on all sides and preventing it from becoming soggy.
- Microwave-Safe Bowl: Ideal for preparing the ganache, allowing for controlled melting of the chocolate with minimal risk of scorching. A double boiler method can also be used.
- Fine-Mesh Sieve: Handy for sifting cocoa powder and confectioners’ sugar into the whipped cream, ensuring a lump-free, smooth filling.
How to Make Buche de Noel: An Easy, Step-by-Step Guide
Despite its elaborate appearance, this classic French Yule Log is surprisingly straightforward to make. The secret lies in a few key techniques, particularly rolling the warm cake with parchment paper to set its shape, which prevents cracking during the final assembly. Follow these detailed steps to create your own magnificent holiday centerpiece.
Step 1: Prepare the Pan and Oven for Baking
Begin by preheating your oven to 375°F (190°C). Line an 11×17-inch sheet pan (or jelly roll pan) with parchment paper. It’s important to leave an overhang on the two shorter edges; this overhang will act as a handle for rolling. Lightly grease the parchment paper to ensure easy release of the baked cake. This preparatory step is vital for a smooth process.
Step 2: Whip the Egg Whites to Stiff Peaks
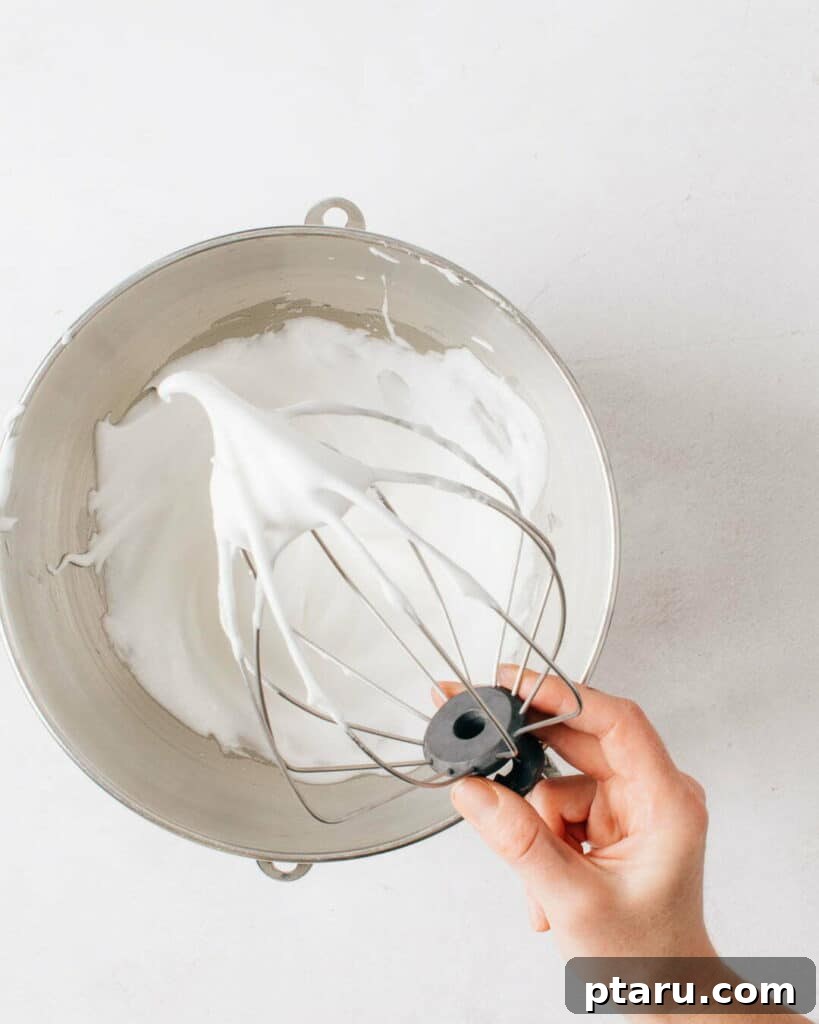
In the bowl of a stand mixer fitted with the whisk attachment (or using a hand mixer), beat the room-temperature egg whites on medium speed until they become foamy and opaque. Gradually, add ½ cup of granulated sugar, one tablespoon at a time, ensuring each addition is fully incorporated before adding the next. Increase the speed to high and continue beating until medium-stiff, glossy peaks form. The peaks should hold their shape but still have a slight curl at the tip. Carefully scrape these whipped egg whites into a separate, clean bowl and set aside.
Step 3: Beat the Egg Yolks for Richness
Using the same mixer bowl (no need to clean it), add the egg yolks and the remaining ⅓ cup of granulated sugar. Beat on medium speed for about 2 minutes, until the mixture is creamy, pale yellow, and noticeably lightened in color. Reduce the mixer speed to low and beat in the pure vanilla extract until just combined. This creates a rich, emulsified base for your cake batter.
Step 4: Incorporate Dry and Wet Ingredients Alternately
In a separate medium bowl, whisk together the all-purpose flour, cocoa powder, baking powder, and fine sea salt until well combined. With the mixer on low speed, add approximately one-third of the dry flour mixture to the egg yolk mixture and beat until just incorporated. Next, add half of the milk and beat again until smooth. Repeat this process with another third of the flour mixture, then the remaining milk, and finally the last third of the flour mixture. Mix only until just combined after each addition to avoid overdeveloping the gluten, which can lead to a tough cake.
Step 5: Gently Fold in the Whipped Egg Whites
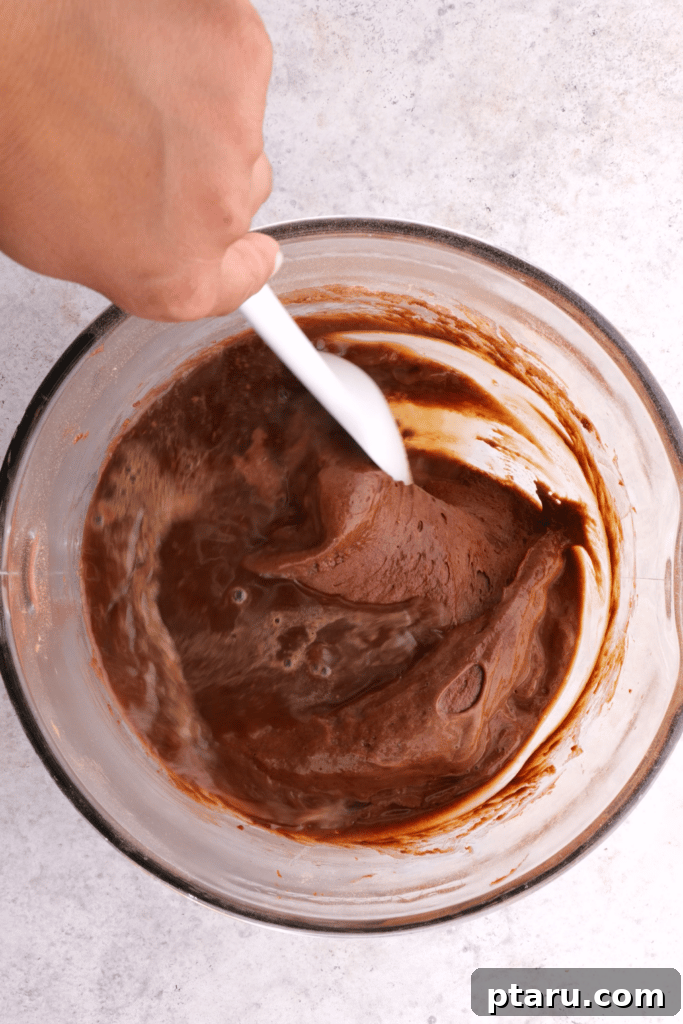
Remove the mixer bowl from the stand. Using a large silicone spatula, gently fold the reserved whipped egg whites into the chocolate batter in two or three additions. Be very careful and use a light hand to preserve as much of the air as possible from the egg whites. This aeration is what gives the cake its signature light and airy sponge texture. Scrape the delicate batter onto your prepared pan and use the offset spatula to spread it evenly into all corners, creating a uniform layer.
Step 6: Bake the Cake to Perfection
Transfer the pan to the preheated oven and bake for 10 to 12 minutes. The cake is done when it loses its glossy sheen, the edges are slightly firm, and the center feels gently springy to the touch. Avoid overbaking, as a dry cake will inevitably crack when rolled. A slightly underbaked cake is better than an overbaked one for flexibility.
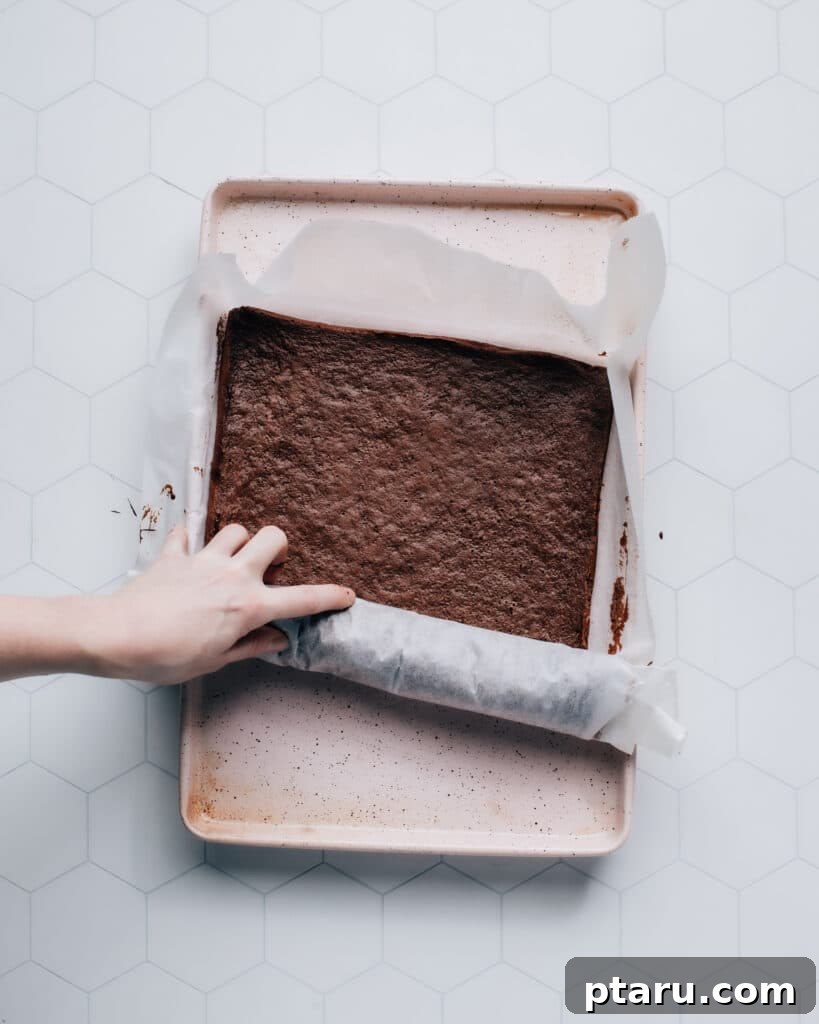
Step 7: Roll the Warm Cake for Shape Retention
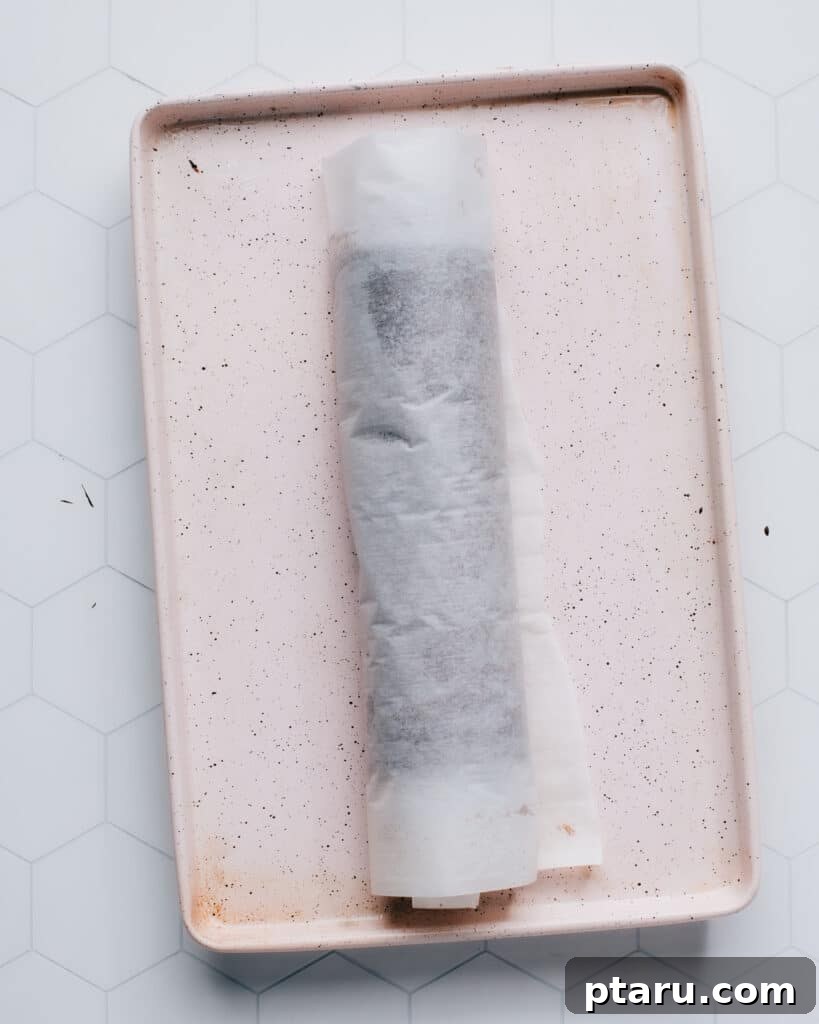
Once baked, remove the cake from the oven and let it cool in the pan for just a few minutes, until it’s warm enough to handle comfortably without burning your fingers, but not cold. This brief cooling period allows it to firm up slightly. While still warm and pliable, carefully roll the cake up with the parchment paper, starting from one of the shorter edges. Transfer this rolled cake, still encased in parchment, to a wire rack to cool completely to room temperature. This crucial step sets the shape of the cake, preventing it from cracking later when you unroll it to add the filling.
Step 8: Prepare the Luxurious Chocolate Cream Filling
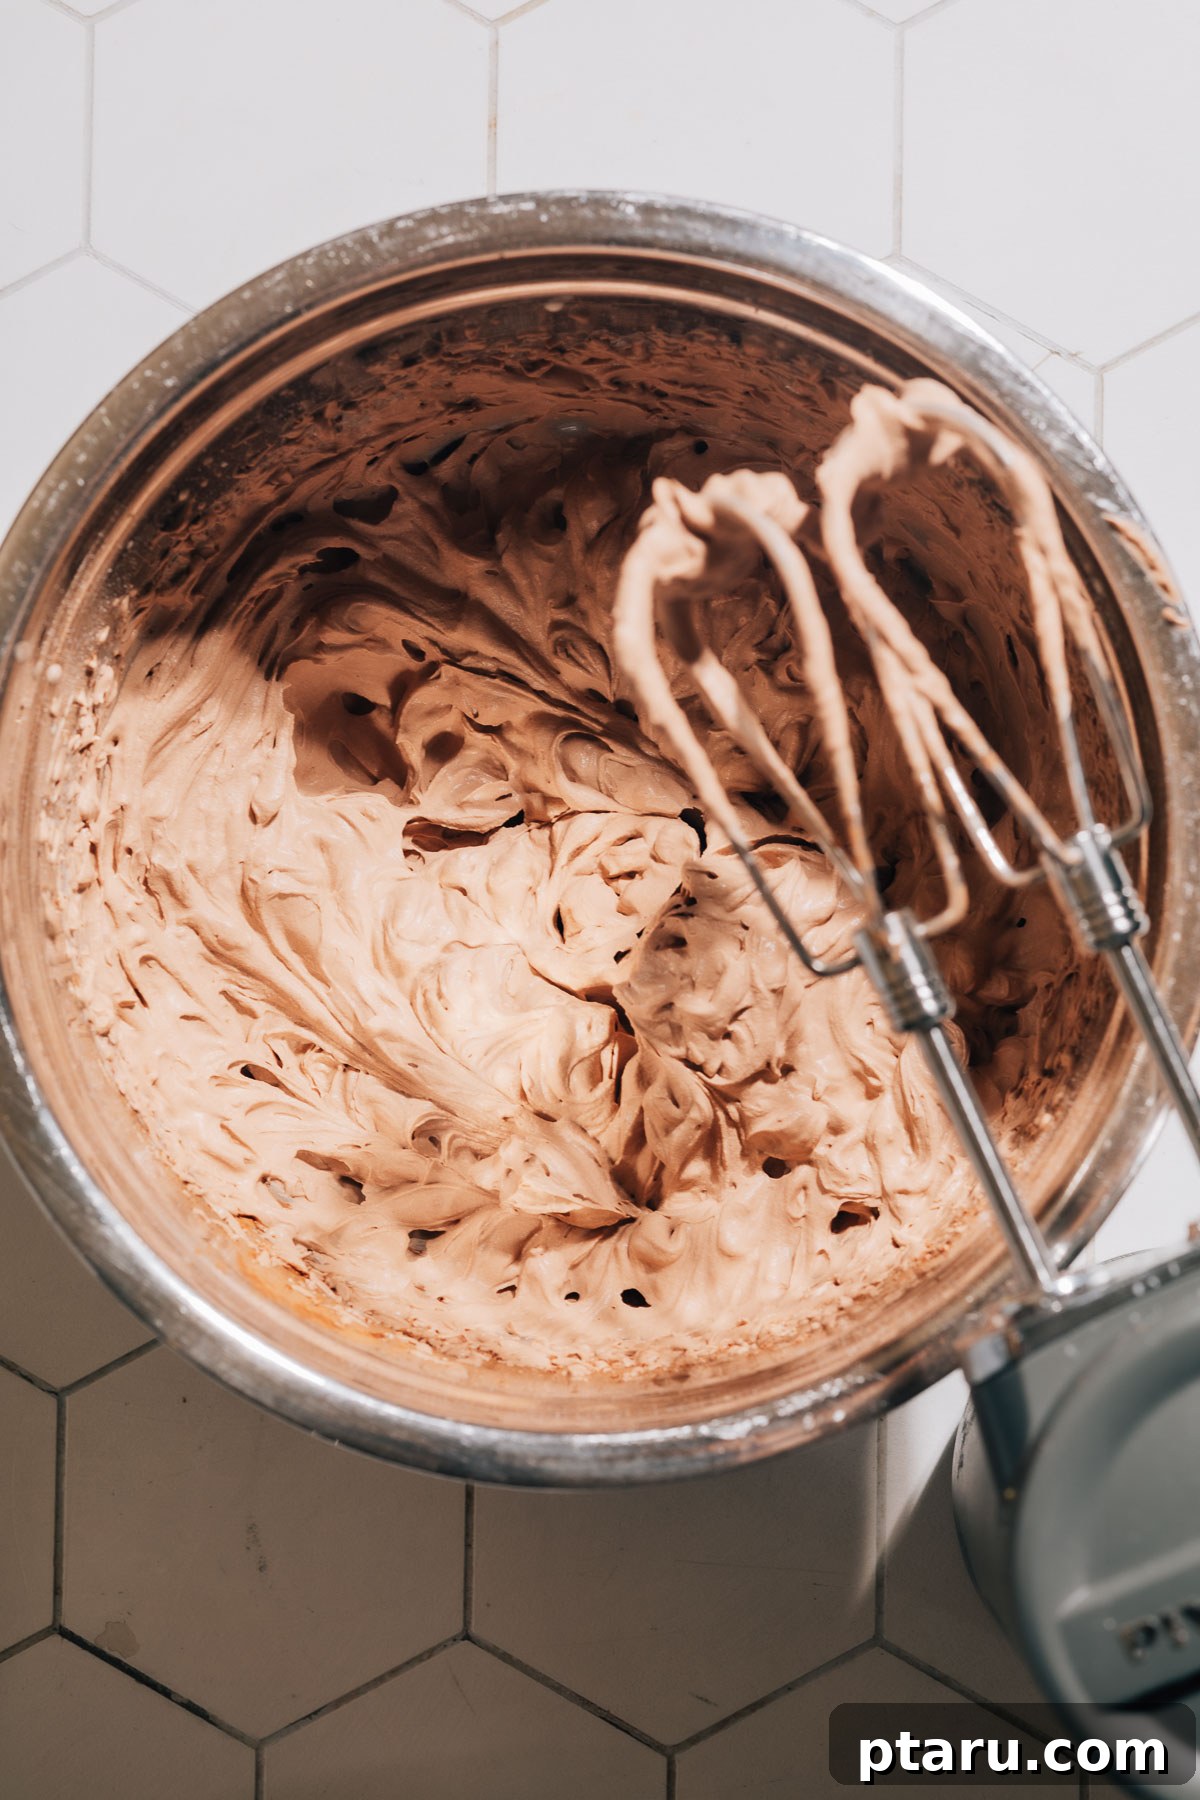
While the cake cools, prepare your filling. In a clean, chilled bowl of a stand mixer (or using a hand mixer) with a whisk attachment, whip the very cold heavy cream on high speed until soft peaks begin to form. Reduce the speed to low, then sift in the cocoa powder and confectioners’ sugar. Increase the speed back to high and continue whipping until medium-stiff peaks form. Be careful not to overbeat, as this can cause the cream to become grainy. The filling should be light, airy, and hold its shape.
Step 9: Fill and Re-Roll Your Buche de Noel
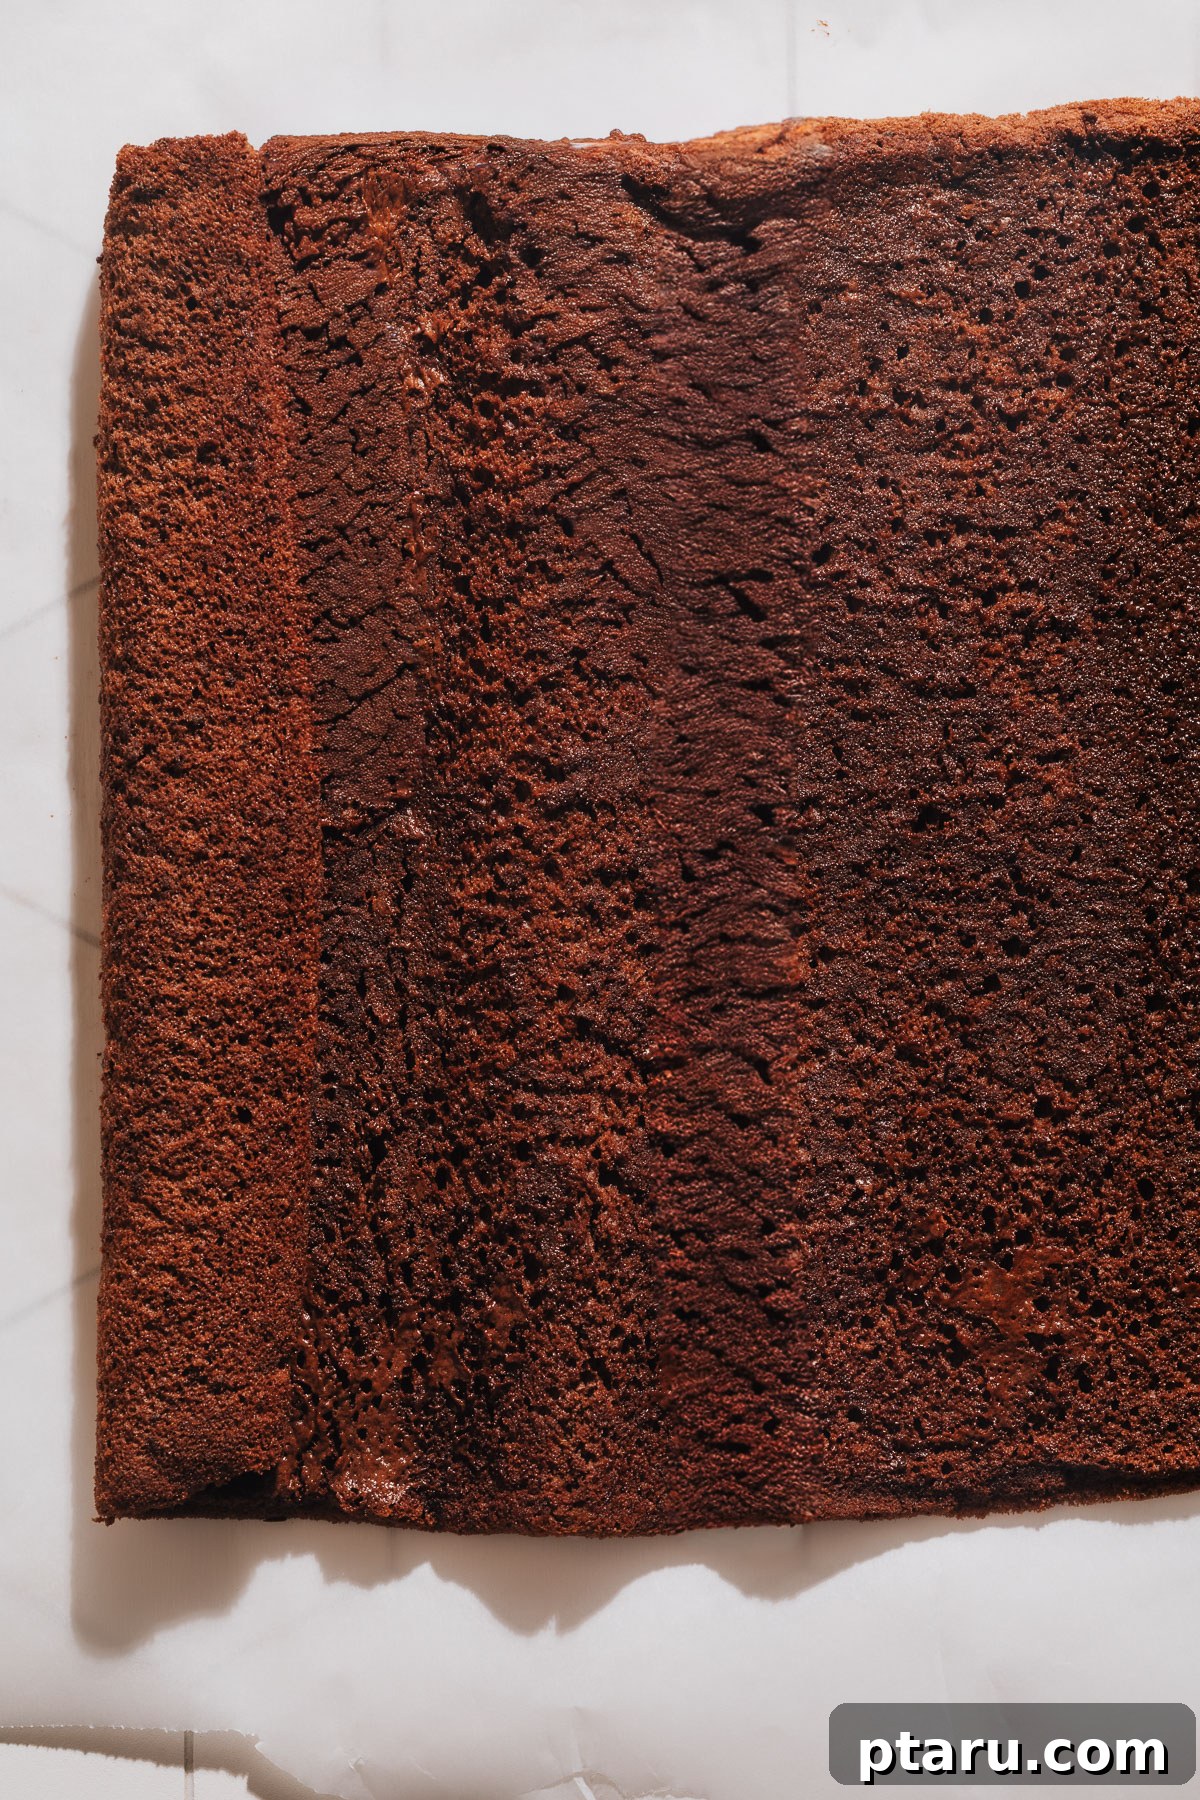
Once the cake is completely cool, gently unroll it on a clean work surface, keeping it on the parchment paper. Using an offset spatula, spread the prepared chocolate cream filling evenly over the entire surface of the cake, leaving a small border at the edges. Now, carefully roll the cake back up, this time gently peeling it away from the parchment paper as you go. Place the finished log seam-side down on your chosen serving platter or board. For a neater presentation, you can trim a small portion off each end of the log using a sharp knife to reveal the beautiful spiral pattern.
Step 10: Craft the Decadent Chocolate Ganache
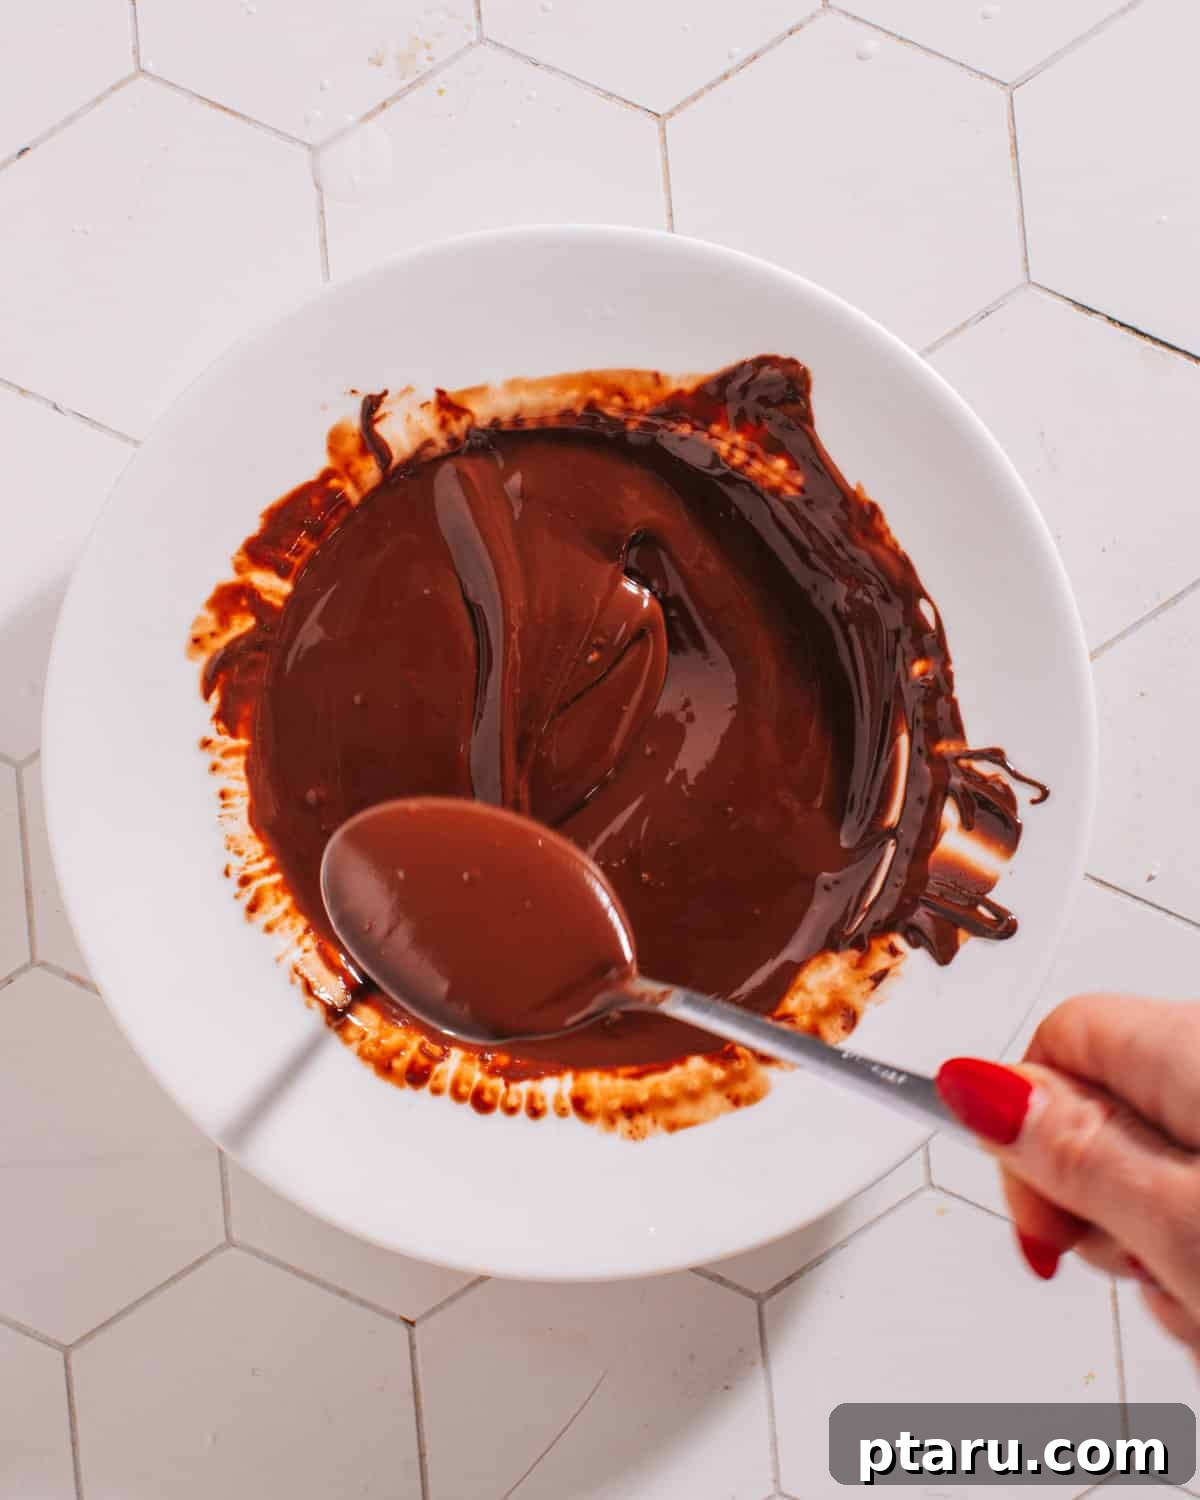
In a microwave-safe bowl, combine the heavy cream and finely chopped dark chocolate. Heat in 20-second bursts in the microwave, stirring thoroughly after each interval, until the chocolate is completely melted and the mixture is smooth and glossy. Alternatively, you can melt it over a double boiler. Let the ganache cool slightly at room temperature until it thickens to a spreadable consistency, similar to a thick frosting. This might take 15-20 minutes, stirring occasionally. If it’s too warm, it will simply run off the cake.
Step 11: Decorate Your Festive Yule Log
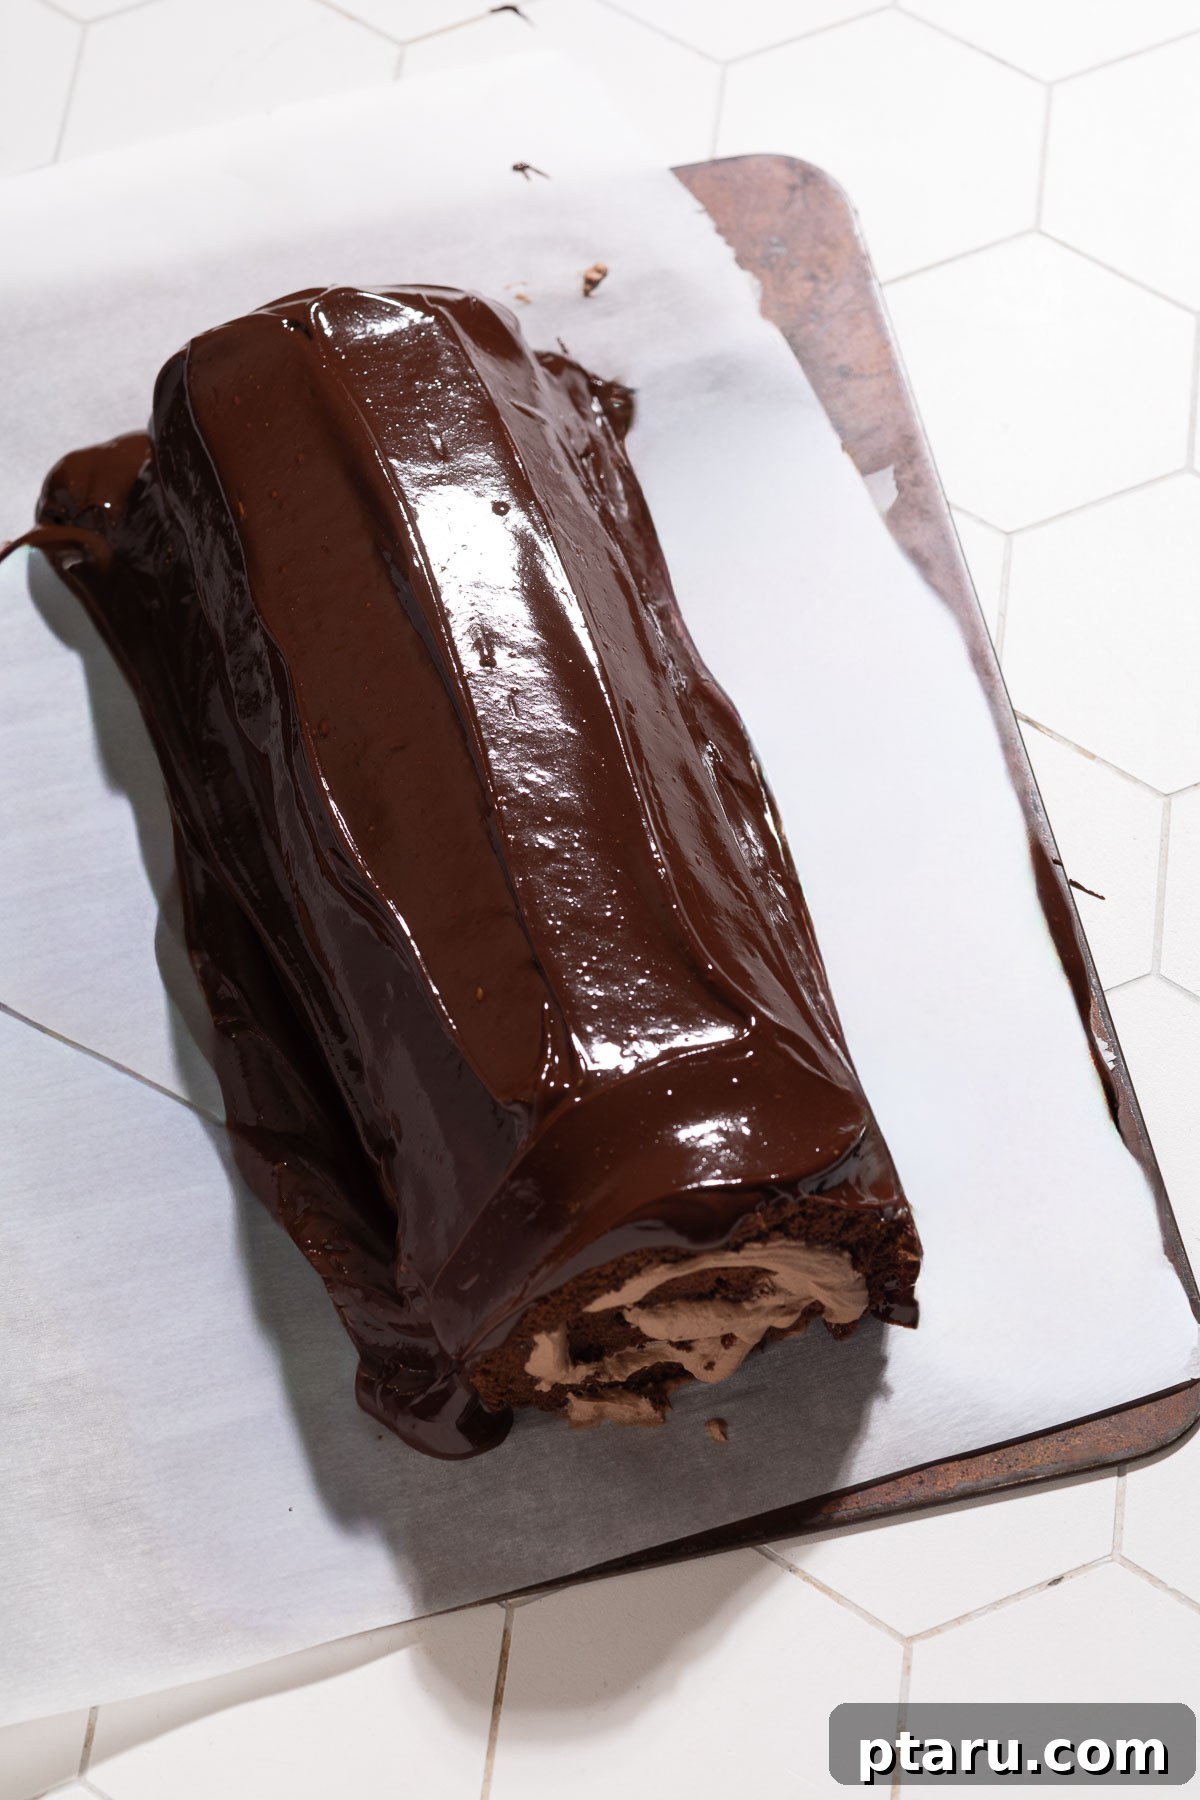
With an offset spatula, spread the cooled, thickened ganache evenly over the entire exterior of the Buche de Noel, covering the log completely. To create the characteristic “bark” effect of a Yule log, use the tines of a fork to gently drag lines across the surface of the ganache. For a truly festive look, garnish with sugared cranberries and fresh rosemary sprigs, resembling holly and pine branches in a winter forest. Dust with confectioners’ sugar for a snowy finish just before serving.
5 Common Mistakes to Avoid When Making Buche de Noel
Even experienced bakers can stumble with a few key steps when making Buche de Noel. Knowing these common pitfalls in advance will significantly increase your chances of success and ensure a flawless Yule Log. Here are the most frequent mix-ups and how to expertly avoid them:
- Overbaking the Chocolate Cake: This is perhaps the most critical mistake. An overbaked cake will be dry and brittle, making it incredibly prone to cracking when you attempt to roll it.
- Solution: Keep a close eye on your oven. Start checking the cake at 10 minutes. The moment it loses its glossy shine and the center feels lightly springy to the touch, pull it from the oven. A slightly underbaked cake is far more forgiving than an overbaked one.
- Rolling the Cake When It’s Cold: Waiting too long to roll the cake can lead to stiffness, resulting in cracks as you attempt to manipulate it into a log shape.
- Solution: The cake needs to be warm and pliable. Roll it immediately after it comes out of the oven, after allowing just a few minutes (3-5) for it to be cool enough to handle without burning your fingers. Rolling it warm ensures it’s flexible and sets its shape as it cools.
- Overbeating the Whipped Cream Filling: While you want fluffy cream, overbeating can quickly turn it grainy, curdled, or even into butter.
- Solution: Whip the cream on high speed only until soft peaks form, then add your cocoa and sugar. Continue whipping to medium-stiff peaks, where the cream holds its shape well but still looks light and airy. Stop the mixer the moment it reaches this consistency.
- Applying Hot or Too-Thin Ganache: If your ganache is too warm or hasn’t thickened sufficiently, it will simply run right off the cake, leaving a messy, uneven coating.
- Solution: After melting the ganache ingredients, let it cool at room temperature for 15-20 minutes, stirring occasionally. It should thicken to a spreadable consistency, similar to a thick syrup or soft frosting. Test a small amount on the back of a spoon; if it holds, it’s ready. If it’s too thin, a few minutes in the fridge with occasional stirring can help.
- Skipping the Essential Chill Time: While tempting to slice right away, serving a freshly assembled Buche de Noel can lead to a messy presentation.
- Solution: Refrigerate your decorated Yule Log for at least 2 hours (or preferably overnight) before slicing. This allows the cake to absorb moisture from the filling, the ganache to firm up, and the entire dessert to set, resulting in clean, beautiful slices.
Make Ahead and Storage: Enjoy Your Buche de Noel with Ease
The Buche de Noel is a fantastic make-ahead dessert, perfect for holiday entertaining, as its flavors and textures often improve with a bit of time. Plan your baking schedule to reduce stress during the festive season.
Storing Leftovers for Lasting Freshness
- Refrigerate Promptly: Due to the whipped cream filling, any leftover Buche de Noel must be stored in the refrigerator. Cover the entire log tightly with plastic wrap or place it in an airtight container to prevent it from drying out or absorbing refrigerator odors. It will stay fresh and delicious for up to 3 days.
- Slice as You Go: For optimal moisture and freshness, it’s best to leave the Buche de Noel whole and slice individual servings as needed. The uncut log retains its moisture better than pre-sliced pieces.
- Overnight Enhancement: This dessert truly shines the next day. As the cake rests overnight in the fridge, it absorbs moisture and flavor from the rich chocolate cream filling, resulting in an even more tender and harmonious taste experience.
Freezing Your Buche de Noel for Future Enjoyment
- Freeze Without Ganache: For best results when freezing, prepare and fill the Buche de Noel, but do not apply the ganache or decorations. Wrap the filled log tightly first in plastic wrap, then in a layer of aluminum foil. This double layer protects against freezer burn. Freeze for up to 1 month.
- Thaw Gently Overnight: When you’re ready to serve, transfer the frozen log to the refrigerator and let it thaw slowly overnight. Avoid thawing at room temperature, which can lead to condensation and a soggy cake.
- Decorate After Thawing: Once thawed, prepare a fresh batch of chocolate ganache and decorate your Yule Log as desired, adding sugared cranberries, rosemary, or meringue mushrooms just before serving to ensure they look their best.
Serving Temperature: The Best Way to Enjoy Your Yule Log
- Serve Chilled: The Buche de Noel is designed to be a delightful chilled dessert. The cool, firm texture of the ganache and the creamy filling are best enjoyed straight from the refrigerator. No reheating is needed or recommended for this cake.
- Room Temperature Option: If you prefer a slightly softer texture and more pronounced flavors from the chocolate, allow individual slices to sit at room temperature for about 10-15 minutes before serving. This slight warming can enhance the creaminess of the filling and the richness of the chocolate.
How to Serve This Buche de Noel Recipe: Presentation and Pairings
Presenting your homemade Buche de Noel is part of the holiday magic! This stunning dessert deserves a grand reveal and pairs beautifully with warm, comforting beverages. Elevate your festive table with these serving suggestions.
For maximum impact and a touch of drama, present the entire decorated Yule Log on an elegant serving board or platter. Slice individual portions at the table, allowing your guests to admire the beautiful spiral of cake and filling before it’s served. Each slice reveals the delicate layers, making for an appetizing sight. This delicious dessert pairs perfectly with a warming cup of chai coffee or a soothing mug of authentic Indian chai tea, enhancing the cozy holiday atmosphere.
Exquisite Buche de Noel Toppings to Elevate Your Presentation
The decorations truly bring the Yule Log to life, transforming it into a charming forest scene. Here are some elegant and traditional topping ideas:
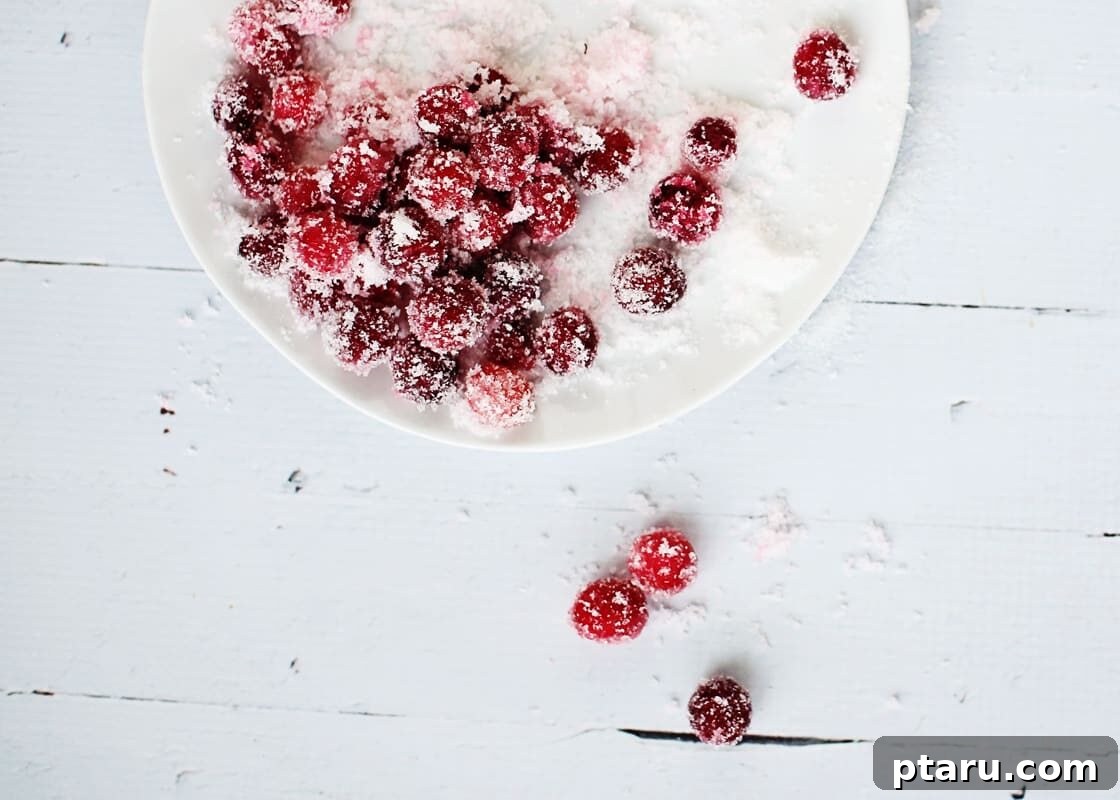
- Sugared Cranberries: These vibrant, glistening berries add a beautiful pop of festive color and a delightful tart-sweet contrast to the rich chocolate.
- Fresh Rosemary Sprigs: Placed strategically, these sprigs mimic miniature pine branches, instantly evoking a woodland theme. (They also look stunning on my Holiday Spice Cake!)
- A Dusting of Confectioners’ Sugar: A light sprinkle of powdered sugar creates the magical illusion of freshly fallen snow, adding a delicate finish.
- Delicate Meringue Mushrooms: For an authentic traditional French touch, small meringue mushrooms are piped and baked, then artfully arranged on and around the log.
- Elegant Chocolate Shavings or Curls: Use a vegetable peeler or a sharp knife to create delicate chocolate curls from a bar of dark chocolate, scattering them over the ganache for extra chocolatey goodness and texture.
- Candied Orange Peel: Thin strips of candied orange peel add a bright, zesty flavor and a sophisticated appearance.
Perfect Pairings: Dishes and Drinks to Serve with Buche de Noel
To complete your holiday dessert experience, consider pairing your Buche de Noel with these festive beverages:
- Warm Mulled Wine: The spiced, fruity notes of mulled wine complement the deep chocolate flavors beautifully, creating a cozy and luxurious pairing.
- Rich Homemade Hot Chocolate: For a non-alcoholic option, a velvety, decadent hot chocolate is the perfect comforting accompaniment, doubling down on the chocolate indulgence.
- Freshly Brewed Coffee or Espresso: The robust bitterness of coffee cuts through the richness of the cake, offering a balanced and satisfying end to a meal.
Final Notes, Pro Tips, and Science-Based Secrets for Buche de Noel Success
Having tested this recipe numerous times, I’ve gathered invaluable insights and refined techniques that will empower you to create a perfect Buche de Noel with confidence. These pro tips, often backed by a touch of culinary science, are designed to make your baking journey smoother and your final dessert more spectacular.
- The Golden Rule of Egg Temperature: This is a classic baking paradox! Remember: room temperature eggs whip better and create a more stable, voluminous foam for the cake sponge. Conversely, cold cream whips better for your fluffy filling. Keep these opposites in mind for optimal results. For eggs, setting them in a bowl of warm water for 5-10 minutes is a quick trick.
- Don’t Sweat the Meringue Too Much: While technique is generally important, I’ve found through extensive testing that whether your egg whites are slightly over-beaten, slightly under-beaten, or perfectly stiff, the final cake sponge will still be wonderfully light and flexible. The key is gentle folding. So, take a deep breath; a perfect meringue isn’t the make-or-break factor here.
- Roll Directly in the Pan: Forget the fuss of flipping a hot cake onto a tea towel! My preferred method is to roll the warm cake right on the parchment paper it baked on, directly in the sheet pan. This minimizes handling, reduces the risk of tearing, and makes the whole process much simpler and less stressful.
- Tears Are Fine, Embrace Imperfection: It’s common for sponge cakes to have small tears or cracks, especially when rolling. Don’t panic! The beauty of the Buche de Noel is that the rich, textured chocolate ganache generously hides all imperfections. Nobody will ever know, and the charm of homemade baking often lies in its unique character.
- Make It Ahead for Enhanced Flavor: This is one of those rare desserts that actually improves with time. The cake truly tastes even better the next day as it absorbs moisture and flavor from the luscious chocolate cream filling, becoming incredibly tender and flavorful. This makes it an ideal dessert for stress-free holiday entertaining.
- Cut with a Hot, Clean Knife for Perfect Slices: For elegant, clean slices that don’t drag the ganache or tear the cake, heat a long, thin-bladed knife under hot running water, then wipe it completely dry. Make each cut swiftly and firmly, cleaning the knife between each slice. This creates those beautiful, defined spirals.
- Quality Ingredients Matter: While basic ingredients work, using good quality cocoa powder and dark chocolate for your ganache will significantly elevate the flavor of your Buche de Noel. Invest in ingredients you love to eat on their own.
FAQs About Buche de Noel: Your Questions Answered
Curious about specific aspects of this delightful holiday dessert? Here are some quick, helpful answers to the most commonly asked questions about Buche de Noel.
Buche de Noel translates directly to “Christmas log” in French. It’s a cherished traditional French holiday dessert, artfully shaped and decorated to resemble a festive Yule log, often complete with an authentic bark-like texture created by the chocolate ganache coating.
Your Buche de Noel most likely cracked because the cake was either overbaked, making it dry and brittle, or it cooled too much before you attempted to roll it. To prevent this, bake the cake only until the center is just set and still springy, and roll the warm cake immediately while it’s still pliable and flexible.
Absolutely! You can successfully make Buche de Noel using a hand mixer. While the whipping process for the egg whites and cream may take a bit longer, you will still achieve the same wonderfully fluffy results. Just ensure you use a large, deep bowl to prevent splattering.
You can prepare and assemble your Buche de Noel up to 24-48 hours in advance of serving. In fact, many bakers agree that it tastes even better the next day, as the chocolate sponge cake has ample time to absorb moisture and flavor from the creamy filling, resulting in a more tender and cohesive dessert.
There is no distinction or difference between a Yule log and Buche de Noel; they refer to the exact same festive dessert. “Buche de Noel” is simply the traditional French name for the cake, while “Yule log” is its direct English translation.
Yes, you can certainly use milk chocolate for your ganache to achieve a sweeter and lighter-colored coating. When doing so, it’s advisable to slightly reduce the amount of heavy cream in your ganache recipe, as milk chocolate contains more sugar and fat, making it melt differently and potentially thinner.
If your ganache is too thin, it’s likely due to using too much cream in relation to chocolate, or because you haven’t allowed it to cool and thicken sufficiently. To fix this, let the ganache sit at room temperature for an additional 15 to 20 minutes (or briefly in the refrigerator), stirring occasionally, until it reaches a thick, spreadable consistency.
Yes, it is absolutely essential to refrigerate your Buche de Noel. Given that it contains a delicious whipped cream filling, it needs to be kept cold to ensure food safety and maintain its structure. Cover it tightly with plastic wrap and store it in the fridge for up to 3 days.
Yes, you can freeze Buche de Noel, but for the best quality, it’s recommended to freeze it without the final ganache coating and decorations. Wrap the filled log tightly first in plastic wrap, then in aluminum foil, and it will keep well in the freezer for up to 1 month. Thaw it overnight in the refrigerator, then prepare fresh ganache and decorate before serving.
If you’re looking for an alternative to traditional whipping cream for the filling, you have a couple of options. Coconut cream is an excellent dairy-free choice: chill a can of full-fat coconut milk overnight, then scoop out the thick solid cream at the top and whip it. A stabilized cream cheese frosting or a rich buttercream could also be used, though they will yield a denser filling than classic whipped cream.
Other Holiday Recipes You’ll Love
- Soft Gingerbread Cookies: Chewy, spiced, and utterly delightful – a holiday classic everyone adores.
- Classic Nanaimo Bars: These no-bake Canadian treats feature a crumbly base, creamy custard filling, and rich chocolate topping.
- Moist Chocolate Cake: A reliable recipe for a perfectly moist, deeply chocolatey cake that’s a crowd-pleaser any time of year.
- 3-Ingredient Chocolate Truffles: Surprisingly simple yet incredibly decadent truffles that make elegant gifts or quick party desserts.
- Chocolate Orange Cake: A vibrant and zesty twist on classic chocolate cake, perfect for brightening winter days.

Easy Buche de Noel Recipe (Yule Log Cake)
This classic Buche de Noel recipe features soft chocolate sponge cake rolled around fluffy chocolate cream and coated in rich ganache. This traditional French Christmas dessert looks stunning and tastes even better.
Ingredients
For the Cake
- 4 large eggs separated
- ½ cup + 1/3 cup granulated sugar divided
- 1 tsp pure vanilla extract
- ½ cup all-purpose flour (64 g)
- ⅓ cup cocoa powder (35 g)
- 1 tsp baking powder
- ⅛ tsp fine sea salt
- ⅓ cup milk
- Confectioners’ sugar for dusting (optional)
For the Chocolate Cream Filling
- 1 cup whipping cream (very cold)
- 2 ½ tbsp cocoa powder (sifted)
- ¼ cup confectioners’ sugar (sifted)
- ½ tsp vanilla extract
For the Ganache
- ¾ cup heavy cream
- 6 oz finely chopped dark chocolate (high quality)
Instructions
For the Cake
- Preheat oven to 375°F (190°C). Line an 11×17″ sheet pan with parchment paper, leaving an overhang on the short edges, and lightly grease the paper.
- In a stand mixer with a whisk attachment, beat egg whites on medium speed until foamy.
- Gradually add ½ cup of the granulated sugar, a tablespoon at a time, beating well after each addition until incorporated.
- Increase speed to high and beat until medium-stiff, glossy peaks form. Scrape egg whites into a separate bowl.
- Add egg yolks and remaining ⅓ cup sugar to the same mixer bowl. Beat on medium speed until creamy and lightened in color, about 2 minutes.
- Reduce speed to low and beat in vanilla extract.
- In a separate bowl, whisk together the flour, cocoa, baking powder, and salt.
- Add ⅓ of the flour mixture to the yolk mixture in the mixer and beat on low speed until just combined.
- Add ½ of the milk and beat on low again until just combined.
- Repeat with the remaining flour mixture and milk (totaling 3 additions of flour and 2 of milk), mixing only until just combined after each addition.
- Remove mixer bowl. Gently fold in the whipped egg whites with a large silicone spatula until no streaks remain.
- Scrape batter onto the prepared pan and spread evenly into all corners.
- Bake for 10 to 12 minutes, or until the cake loses its shine and the center feels slightly springy to the touch.
- Let the cake cool in the pan for a few minutes until warm but handleable. Starting from a short edge, roll the cake up with the parchment paper. Transfer the rolled cake (still in parchment) to a wire rack to cool completely.
For the Chocolate Cream Filling
- In a chilled bowl with a whisk attachment, whip cold whipping cream on high speed until soft peaks form.
- Sift in cocoa powder and confectioners’ sugar. Continue whipping until medium-stiff peaks form. Do not overbeat.
To Assemble
- Once the cake is completely cold, gently unroll it on a clean work surface (leave it on the parchment).
- Spread the chocolate cream filling evenly over the cake. Carefully roll it back up, gently peeling it off the parchment paper this time.
- Place the assembled log seam-side down on your serving dish or board. Trim off any uneven end slices for a neater presentation, if desired.
For the Ganache & Decoration
- In a microwave-safe bowl, combine the heavy cream and finely chopped dark chocolate.
- Microwave in 20-second bursts, stirring well after each, until the chocolate is completely melted and the mixture is smooth and glossy.
- Let the ganache cool slightly at room temperature, stirring occasionally, until it thickens to a spreadable consistency (like thick frosting).
- Spread the ganache evenly over the entire Buche de Noel. Use a fork to create bark-like lines on the surface.
- Cover the finished log with plastic wrap and refrigerate for at least 2 hours (or overnight) to allow it to set, making slicing much easier.
- Just before serving, decorate with sugared cranberries, fresh rosemary sprigs, a dusting of confectioners’ sugar, or other festive toppings.
Notes
Eggs: Warm them from the fridge for best whipping. Set them in a bowl of warm water for 5-10 minutes.
Whipping Cream: Keep it very cold from the fridge for optimal whipping. This is the opposite principle to eggs!
Cocoa Powder: Both Dutch-processed or natural cocoa powder work fine in this recipe.
Rolling Tip: Roll the warm cake in the parchment paper right in the pan. There’s no need to flip it to a tea towel.
Cracks: If the cake tears or cracks slightly, don’t stress! The generous ganache coating will hide it completely.
Make Ahead: This cake actually tastes even better the next day as it absorbs moisture from the filling.
Decorations: Sugared cranberries, fresh rosemary sprigs, meringue mushrooms, or a dusting of confectioners’ sugar all look beautiful and add festive flair.
Leftovers: Store any leftover Buche de Noel, tightly covered, in the fridge for up to 3 days.
Nutrition
Calories: 245kcal | Carbohydrates: 22g | Protein: 5g | Fat: 18g | Saturated Fat: 11g | Polyunsaturated Fat: 1g | Monounsaturated Fat: 5g | Trans Fat: 0.01g | Cholesterol: 114mg | Sodium: 112mg | Potassium: 141mg | Fiber: 2g | Sugar: 12g | Vitamin A: 729IU | Vitamin C: 0.3mg | Calcium: 81mg | Iron: 1mg
Nutrition information is automatically calculated and should be used as an approximation only.