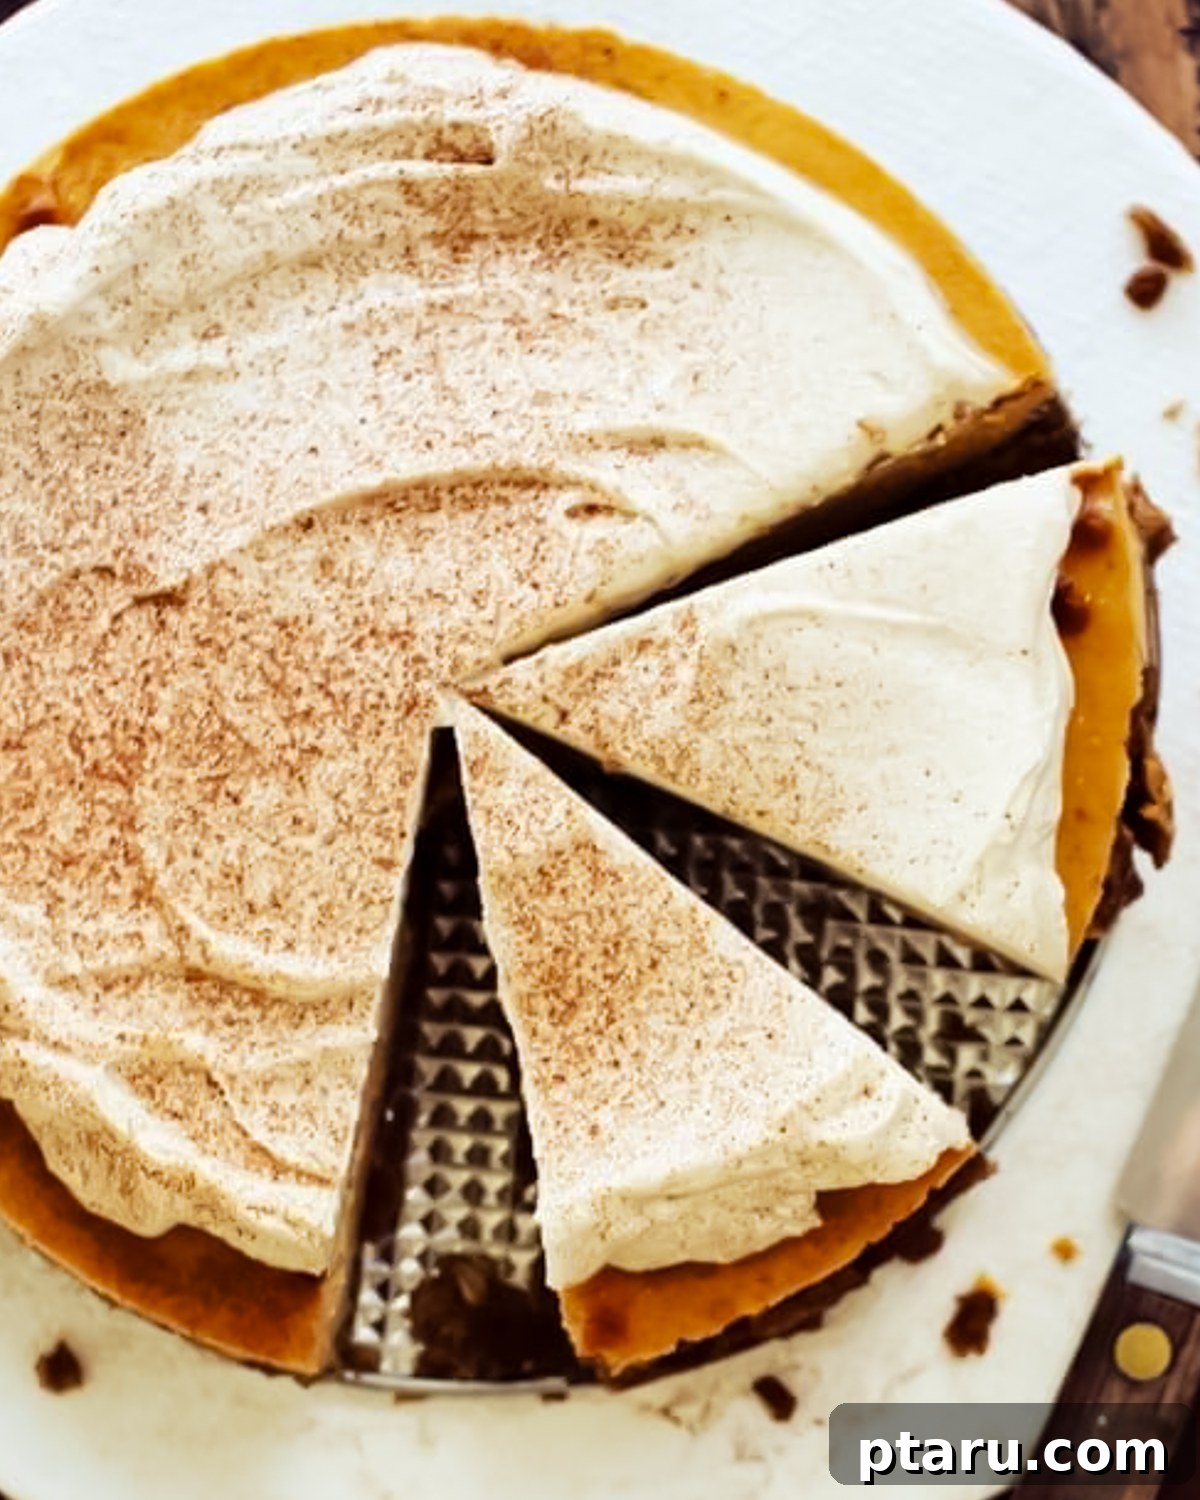
Indulge in the rich, velvety perfection of this Sweet Potato Cheesecake, a seasonal masterpiece that promises to impress. This recipe features a distinctively nutty pecan oat crust, a luxuriously smooth sweet potato filling infused with warm, inviting spices, and is crowned with a light brown sugar whipped cream. Surprisingly easy to make, this cheesecake delivers a sophisticated twist on classic fall flavors, making it an absolute must-have for the holidays or any time you crave a comforting, elegant dessert.
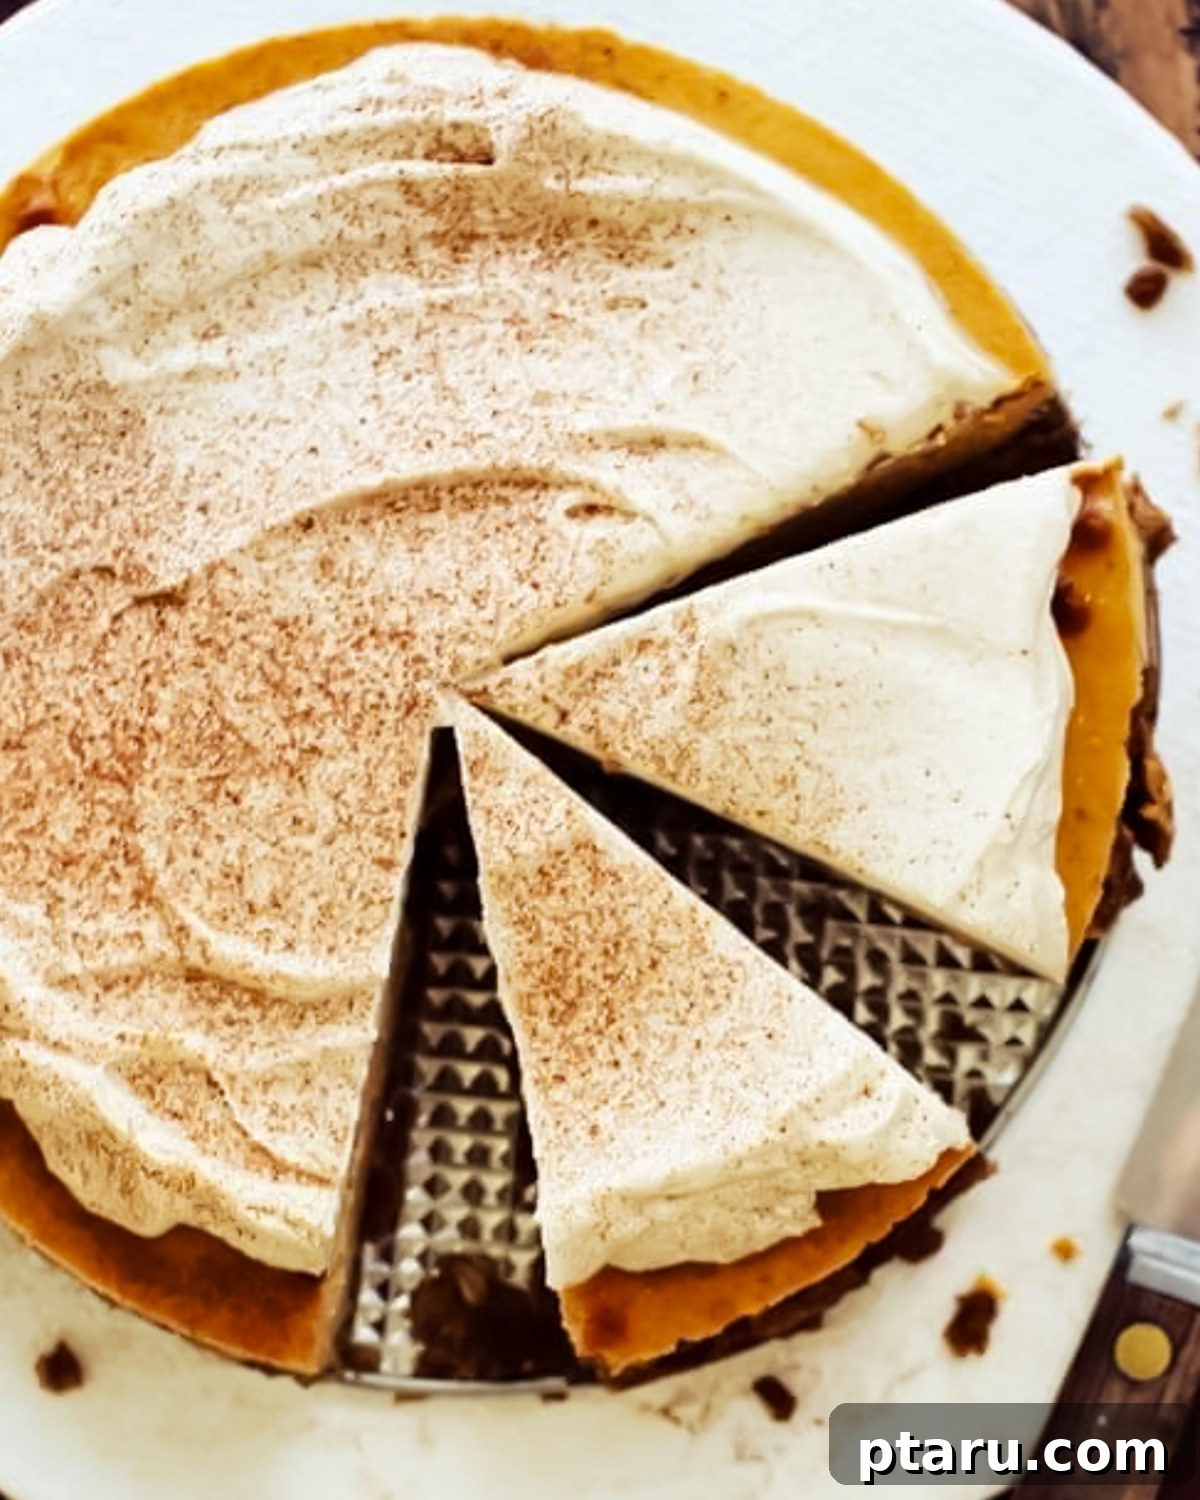
While often compared to pumpkin pie, the sweet potato offers a uniquely mellow, earthier flavor profile that beautifully complements the tanginess of cream cheese. Its natural sweetness and subtle complexity create a cheesecake that is both familiar and exciting, standing out as a truly memorable dessert. This recipe celebrates the comforting essence of autumn and winter, transforming humble sweet potatoes into an extraordinary culinary experience.
Essential Ingredients for Your Sweet Potato Cheesecake
Crafting the perfect sweet potato cheesecake begins with understanding the role each ingredient plays. We’ve meticulously selected components that deliver an unparalleled balance of flavor, texture, and aroma, ensuring every bite is a delightful experience. Pay close attention to ingredient quality and temperature for the best results.
The Signature Oat Pecan Crust
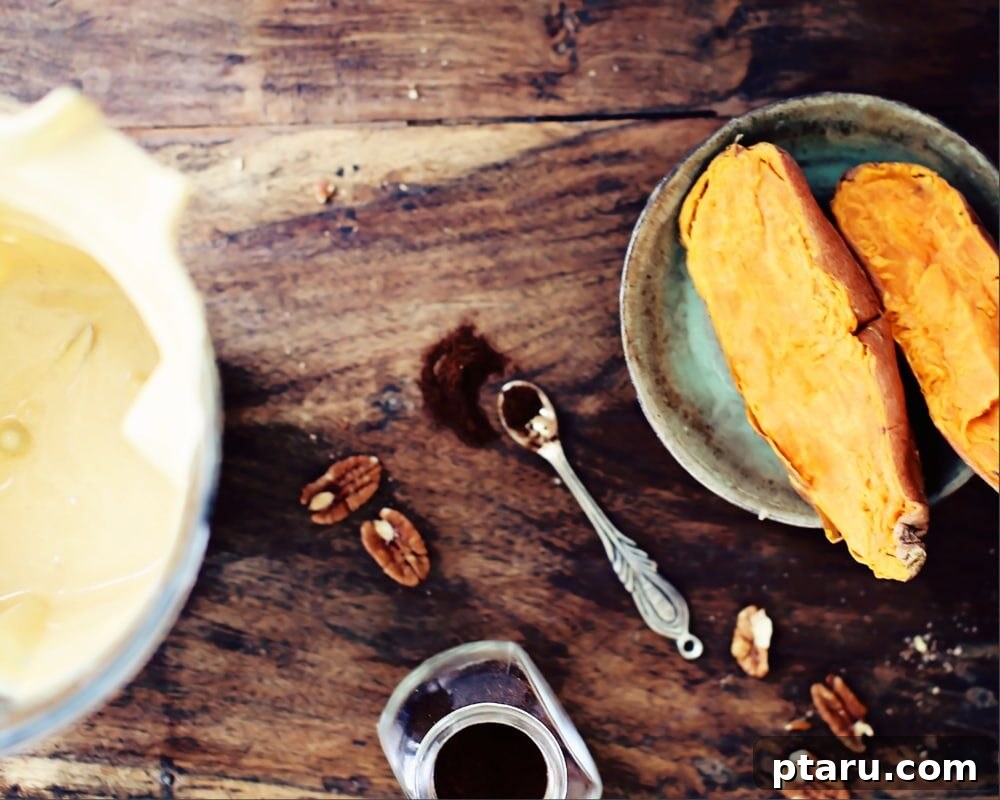
Our unique crust deviates from the traditional graham cracker base, offering a more profound, buttery, and incredibly nutty foundation. Infused with just the right touch of cinnamon, it provides a warm, aromatic counterpoint to the creamy filling. This versatile crust recipe is a fantastic alternative for most cheesecakes, though its robust flavor might not be ideal for lighter, brighter varieties like lemon or rich, intense chocolate cheesecakes.
- Pecans: These provide a rich, buttery flavor and a wonderful toasty aroma once baked. They are crucial for the distinctive nutty profile of the crust.
- Large Flake Oats: Beyond adding a delightful chewiness and hearty texture, oats contribute structure to the crust. For a naturally gluten-free cheesecake, simply opt for certified gluten-free oats.
- Brown Sugar: Not only does brown sugar sweeten the crust, but its molasses content also helps bind the ingredients, ensuring a firm, cohesive base.
- All-Purpose Flour: A small amount of flour adds essential stability to the crust, preventing it from crumbling excessively and helping it hold its shape.
- Cinnamon: This classic spice brings a comforting warmth, perfectly complementing the nutty pecans and sweet oats, setting the stage for the spiced filling.
- Salt: A pinch of salt is vital for balancing the sweetness and enhancing the overall flavors of the crust, making it truly irresistible.
- Unsalted Butter: Melted butter is the binding agent, holding all the crust ingredients together while imparting a rich flavor and contributing to a crisp, golden-brown finish.
The Silky Sweet Potato Cheesecake Filling
The heart of this dessert is its incredibly smooth and richly flavored filling. Each ingredient is carefully chosen to create a harmonious blend of creamy, tangy, and warmly spiced notes.
- Sour Cream: This ingredient is key to achieving a perfectly balanced filling. It adds a delicate tang that cuts through the richness of the cream cheese, and its moisture contributes to a softer, incredibly creamy texture.
- Large Eggs: Eggs are crucial for the cheesecake’s structure and set. They help create a smooth, custardy consistency that bakes beautifully without becoming rubbery.
- Cooked Sweet Potato: The star ingredient! The sweet potato provides the signature flavor and a natural sweetness. For quick preparation, consider using an Instant Pot sweet potato recipe for perfectly soft, mashable results in a fraction of the time. Alternatively, roasting sweet potatoes at 400ºF (200ºC) until tender will yield a deeper, caramelized flavor. Ensure it’s cooled completely before blending.
- Full-Fat Cream Cheese: This is non-negotiable for a truly decadent cheesecake. Always use bricks of regular, full-fat cream cheese, brought to room temperature. Avoid spreadable or whipped cream cheese varieties, as their higher water content and stabilizers can compromise the texture and stability of your cheesecake. For more details on why this matters, refer to my Classic Philadelphia Cheesecake recipe.
- Brown Sugar: Beyond sweetness, brown sugar introduces wonderful caramel notes that enhance the sweet potato’s natural flavor and deepen the overall complexity of the filling.
- Warm Spices (Cinnamon, Cloves, Ginger): This aromatic trio infuses the cheesecake with the comforting essence of autumn and winter. Cinnamon provides a foundational warmth, cloves add a rich, pungent sweetness, and ginger offers a subtle, spicy kick that brightens the blend.
- Pure Vanilla Extract: Vanilla is essential for adding a layer of toasty depth and rounding out the flavors, complementing the spices without overpowering them.
The Cloud-Like Brown Sugar Whipped Cream
A fluffy, homemade whipped cream topping is the perfect accompaniment, adding a light, airy contrast to the dense cheesecake.
- Cold Heavy Whipping Cream: Ensure your cream is very cold for optimal whipping and to achieve a stable, fluffy texture.
- Brown Sugar: Sweetens the cream and adds a delicate caramel flavor that harmonizes beautifully with the cheesecake.
- Pure Vanilla Extract: Enhances the cream’s flavor and ties all the elements of the dessert together.
- Ground Cinnamon (Optional): A light dusting of cinnamon before serving provides an elegant finish and reinforces the warm spice profile.
You’ll find precise ingredient quantities and detailed instructions in the comprehensive recipe card below.
Creative Variations and Simple Substitutions
This sweet potato cheesecake recipe is wonderfully adaptable, allowing you to customize it to your taste or dietary needs. Here are a few simple yet impactful ways to modify this delightful dessert:
- Pumpkin Power: Easily swap the cooked sweet potato for an equal amount of pumpkin puree. This substitution yields a cheesecake with a slightly different but equally festive flavor, reminiscent of a classic pumpkin pie. For another pumpkin-inspired treat, explore my Pumpkin Cheesecake Bars.
- Amp Up the Spices: If you prefer a bolder spice profile, consider adding a pinch of ground cardamom or nutmeg to the filling. These spices complement the existing cinnamon, cloves, and ginger beautifully, adding layers of aromatic complexity. Remember to add small amounts and taste as you go to achieve your desired intensity.
- Nut-Free Crust Option: For those with nut allergies or simply preferring a different texture, replace the pecans in the crust with an equivalent amount of additional large flake oats or finely crushed graham crackers. This ensures a sturdy and delicious crust without any nuts.
- Marshmallow Meringue Topping: For an extra layer of sweetness and a visually stunning presentation, forgo the whipped cream and instead top your cooled cheesecake with the luscious marshmallow frosting from my sweet potato cupcakes. You can even lightly torch the marshmallow topping for a beautiful caramelized finish and an extra “wow” factor!
Essential Tools for Cheesecake Success
Having the right kitchen tools can make the cheesecake-making process smoother, more efficient, and ultimately contribute to a perfectly baked dessert. These items are highly recommended to ensure your sweet potato cheesecake bakes evenly and presents beautifully.
- Blender or Food Processor: This is a key tool for both the crust and the filling. For the crust, it effortlessly blends the nuts and oats into fine, coarse crumbs. For the filling, it ensures an incredibly silky-smooth batter, preventing lumps and promoting a uniform texture.
- 9-inch Springform Pan: Absolutely essential for cheesecakes! The removable sides of a springform pan allow for easy unmolding of the delicate cheesecake without damaging its pristine edges, ensuring a picture-perfect presentation.
- Large Baking Dish: This dish is used to create a water bath, a crucial technique for cheesecake baking. Ensure it’s large enough to comfortably hold your springform pan with about an inch of space around it.
- Kettle (or Saucepan): Used to heat water for the water bath. Boiling water is necessary to create a steamy environment in the oven, which is critical for even baking and preventing cracks.
- Fine Mesh Sieve: Ideal for dusting cinnamon or cocoa powder over the finished whipped cream topping, providing an elegant, uniform sprinkle.
- Rubber Spatula: Indispensable for scraping down the sides of the blender or food processor, ensuring all ingredients are fully incorporated into the filling.
- Wire Rack: Important for cooling the cheesecake gradually after baking, which helps prevent sudden temperature changes that can lead to cracks.
How to Make Sweet Potato Cheesecake: An Easy Step-by-Step Guide
Creating this stunning sweet potato cheesecake is a rewarding process, and with these clear, easy-to-follow steps, you’ll achieve a professional-quality dessert every time. The use of a blender simplifies the filling preparation, yielding an impossibly smooth texture, while the water bath is your secret weapon for a perfectly baked, crack-free cheesecake.
1. Prepare the Nutty Pecan Oat Crust
Begin by preheating your oven to 350ºF (175ºC). In your blender or food processor, combine the whole pecans, large flake oats, packed brown sugar, all-purpose flour, ground cinnamon, and salt. Pulse the mixture for about 5 seconds, or until it resembles coarse, uniform crumbs. While the blender is running on a low pulse, slowly pour in the melted butter through the lid opening. Continue to pulse a few more times until the mixture comes together and looks like wet sand. Transfer this fragrant crust mixture into a 9-inch springform pan. Using the bottom of a glass or your fingers, firmly press the mixture evenly across the bottom of the pan and about 1 inch up the sides. Bake the crust for 12 minutes, just until it’s lightly golden and set. This initial bake creates a firm, flavorful foundation for your cheesecake filling. Once baked, remove from the oven and place the pan on a wire rack to cool completely while you prepare the filling.
2. Craft the Silky Sweet Potato Filling
This step is where the magic happens for an incredibly smooth cheesecake. In the clean container of your blender (or food processor), add all the filling ingredients in the order listed: sour cream, large eggs, cooled cooked sweet potato, room temperature full-fat cream cheese, packed brown sugar, ground cinnamon, pure vanilla extract, ground ginger, and ground cloves. Secure the lid and blend on high for about 10-15 seconds. Pause to scrape down the sides of the blender container with a rubber spatula, ensuring all ingredients are fully incorporated and pushed down towards the blades. Blend again for another 5-10 seconds, or just until the mixture is completely smooth and uniform. The key here is to blend *briefly* until smooth, avoiding overmixing, which can incorporate too much air and lead to cracks in the final cheesecake.
3. Bake to Perfection in a Water Bath
A water bath is essential for a creamy, crack-free cheesecake. Carefully wrap the bottom and sides of your springform pan tightly with heavy-duty aluminum foil to prevent water from seeping in. Place the foil-wrapped springform pan inside a larger baking dish. Slowly pour the prepared sweet potato filling into the cooled, baked crust. Now, bring two quarts (approximately 8 cups) of water to a boil in a kettle or on the stovetop. Carefully pour the boiling water into the larger outer baking dish, ensuring it reaches about 1 inch up the sides of the springform pan, taking care not to splash water into the cheesecake filling itself. Gently transfer the entire baking setup (cheesecake in water bath) to your preheated 350ºF (175ºC) oven. Bake for approximately 50-60 minutes. The cheesecake is done when the edges appear set and slightly puffed, but the center (about 2-3 inches in diameter) still has a slight, delicate wobble when gently shaken. It will continue to set as it cools.
4. Chill for Flawless Slices
Once baked, carefully remove the springform pan from the water bath and place it on a wire rack to cool at room temperature for at least 1 hour. This gradual cooling prevents drastic temperature changes that can cause cracking. After the initial cooling period, transfer the cheesecake (still in its pan) to the refrigerator and chill completely for a minimum of 4 hours, or ideally, overnight. This prolonged chilling period is crucial for the cheesecake to fully set, ensuring clean, perfect slices and an optimal firm, yet creamy, texture. Before serving, run a thin, sharp knife around the inside edge of the pan to release any adhesion, then carefully remove the springform pan sides. Your cheesecake is now ready for its glorious topping!
5. Prepare the Brown Sugar Whipped Cream Topping
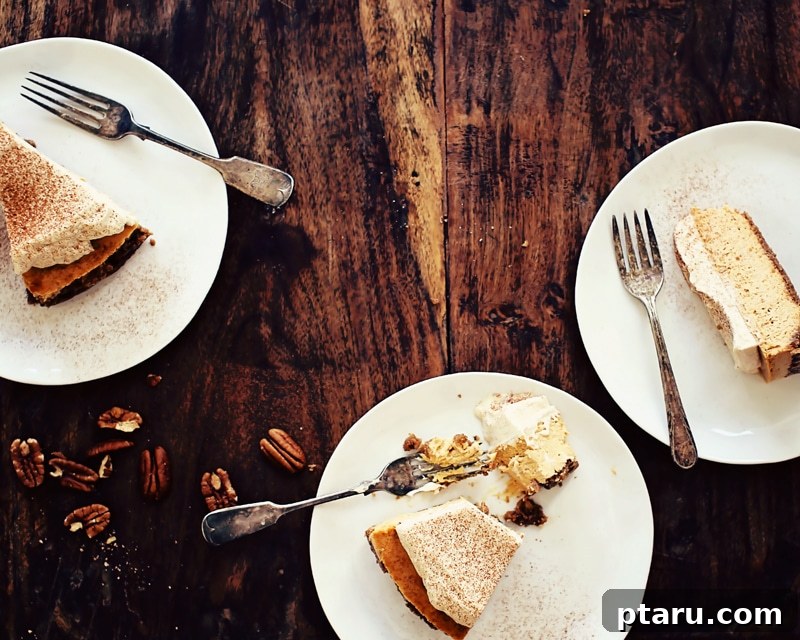
Just before you’re ready to serve, prepare the delightful brown sugar whipped cream. Ensure your heavy whipping cream is very cold, as this is vital for achieving soft, stable peaks. In a large mixing bowl (or using a blender, being extra cautious), combine the cold whipping cream, packed brown sugar, and pure vanilla extract. Whip with an electric mixer on medium-high speed until soft peaks form – the cream should hold its shape but still be light and airy. If using a blender, blend on high for approximately 8 seconds, watching closely to avoid over-processing, which can quickly turn whipped cream into butter. Pile the freshly whipped cream generously over the completely cooled cheesecake. For a beautiful finish, use a fine-mesh sieve to gently dust ground cinnamon over the top, adding a final touch of warm, inviting aroma and visual appeal. Serve immediately and enjoy!
5 Common Mistakes to Avoid for a Perfect Sweet Potato Cheesecake
Even experienced bakers can encounter challenges with cheesecakes. Knowing these common pitfalls and how to avoid them will significantly increase your chances of baking a flawless sweet potato cheesecake, ensuring a smooth, crack-free, and delicious outcome every time.
- Overblending the Filling: This is a frequent culprit for cracked cheesecakes. When you overmix the filling, especially after adding eggs, you incorporate too much air into the batter. This excess air expands rapidly during baking and then collapses as the cheesecake cools, leading to unsightly cracks. Solution: Blend the filling just until it’s smooth and all ingredients are combined. Stop as soon as it reaches a uniform consistency; a few small lumps of cream cheese are better than an overmixed batter.
- Skipping the Water Bath: While it might seem like an extra step, the water bath (bain-marie) is your cheesecake’s best friend. Baking without it often results in a cheesecake that bakes too quickly and unevenly, causing the edges to set and firm up before the center, leading to tension and cracks. Solution: Always use a water bath. It creates a moist, even heat environment in the oven, allowing the cheesecake to bake gently and set slowly, resulting in a supremely creamy texture and preventing cracks.
- Using Hot Sweet Potato: Adding warm sweet potato puree to your cream cheese mixture can prematurely soften the cream cheese and affect the texture of the filling. This can lead to a thinner batter that is more prone to separating or baking unevenly. Solution: Ensure your cooked sweet potato is completely cooled to room temperature before incorporating it into the cheesecake filling. This helps maintain the proper consistency of the batter.
- Baking Until Completely Firm: An overbaked cheesecake is a dry cheesecake. If you bake it until the entire surface is firm and shows no jiggle, you risk a dense, crumbly texture instead of the desired creamy consistency. Solution: Remove the cheesecake from the oven when the outer edges are set but the center (about a 2-3 inch diameter) still has a slight, delicate wobble. The residual heat will continue to cook it as it cools, and the chilling process will firm it up perfectly.
- Not Chilling Long Enough: Impatience can lead to a messy situation. Cutting into a cheesecake before it’s thoroughly chilled will result in soft, crumbly slices that don’t hold their shape, and the flavors won’t be fully developed. Solution: Plan ahead and allow your cheesecake to chill in the refrigerator for at least 4 hours, and ideally, overnight (8-12 hours). This extended chill time is crucial for the cheesecake to fully set, making it firm enough for clean, beautiful slices and allowing the flavors to meld beautifully.
Make-Ahead and Storage Tips for Your Sweet Potato Cheesecake
This sweet potato cheesecake is an excellent dessert for making ahead, significantly simplifying your holiday preparations or event planning. Knowing how to properly store it ensures its freshness and exquisite flavor are preserved.
Storing Leftovers
- Refrigerator Storage: Once cooled and completely chilled, the cheesecake (without the whipped cream topping) can be covered tightly with plastic wrap or stored in an airtight container in the refrigerator for up to 4-5 days. For best results, cover the entire cheesecake or individual slices to prevent drying out and absorbing other fridge odors.
- Topping Note: Always add the fresh brown sugar whipped cream just before serving. Whipped cream tends to lose its fluffy texture and can weep over time, so for the most appealing presentation and best texture, apply it fresh.
Freezing for Future Enjoyment
Cheesecake freezes beautifully, making it perfect for preparing far in advance or enjoying long after the baking day.
- Freezing Whole or Slices: To freeze, ensure the cheesecake is completely cooled and chilled, and do not add the whipped cream topping. For a whole cheesecake, wrap it tightly in several layers of plastic wrap, then an additional layer of aluminum foil. For individual slices, place them on a baking sheet to freeze solid for about an hour, then wrap each slice tightly in plastic wrap and foil. Store frozen cheesecake for up to two months for optimal quality.
- Thawing: For the smoothest, creamiest texture, thaw frozen cheesecake overnight in the refrigerator. Avoid thawing at room temperature, as this can affect the texture. Once thawed, you can add your fresh whipped cream topping before serving.
Reheating Sweet Potato Cheesecake? (Spoiler: You Don’t!)
- No Reheating Needed: Cheesecakes are traditionally served chilled, which enhances their creamy texture and allows the flavors to truly shine. Reheating is generally not recommended as it can alter the delicate texture.
- Warm Topping Option: If you desire a warm element, consider serving slices with a drizzle of warm caramel sauce or maple syrup. This adds a lovely contrast without compromising the cheesecake’s integrity, much like with my Caramel Apple Cheesecake.
How to Serve This Decadent Sweet Potato Cheesecake Recipe
Once your sweet potato cheesecake has undergone its essential chilling period, it’s ready for its grand unveiling. The ultimate serving presentation for this dessert involves a generous cloud of freshly made brown sugar whipped cream.
To truly elevate the experience and highlight all those comforting, warm fall flavors, finish with a delicate dusting of ground cinnamon over the whipped cream. This simple touch adds an elegant visual appeal and an extra aromatic layer that perfectly complements the spiced filling. It’s a flourish I often employ with other seasonal treats, like my beloved Pumpkin Dump Cake recipe, to enhance the overall sensory experience.
For an extra special touch, consider garnishing with a few candied pecans, a light drizzle of maple syrup, or even a very thin slice of orange zest for a bright counterpoint. This cheesecake is rich enough to be a standalone dessert, but it pairs beautifully with a cup of hot coffee, tea, or a glass of dessert wine.
How to Make the Best Sweet Potato Cheesecake: Expert Tips and Secrets
Achieving a truly outstanding sweet potato cheesecake goes beyond just following the steps; it involves understanding the subtle nuances that elevate a good cheesecake to a great one. Unlock the full potential of your baking with these tried-and-true secrets and final notes:
- Start with Room Temperature Cream Cheese: This is a golden rule for any cheesecake. Cold cream cheese will not blend smoothly, leading to lumps in your filling. Room temperature cream cheese (along with other dairy ingredients like sour cream and eggs) incorporates effortlessly, creating a perfectly homogenous and silky batter, which is essential for a crack-free finish.
- Ensure Sweet Potato is Cooled: As mentioned, adding warm or hot sweet potato puree can negatively impact the cream cheese texture and the overall consistency of your filling. Always allow your cooked sweet potato to cool completely to room temperature before blending it with the other ingredients. This ensures the filling remains stable and sets correctly.
- Do Not Skip the Water Bath: This technique is not optional for a truly creamy, smooth, and crack-free cheesecake. The water bath provides a gentle, moist, and even heat during baking, preventing the cheesecake from drying out, overbaking the edges, or cracking due to rapid temperature changes. It’s a small effort for a significant reward in texture and appearance.
- Chill Overnight for Cleaner Slices: While 4 hours of chilling is the minimum, an overnight chill (8-12 hours) is highly recommended. This extended period allows the cheesecake to fully set and firm up, making it much easier to achieve clean, sharp slices that hold their shape beautifully. It also deepens the flavors, allowing them to meld and mature.
- Add Whipped Cream Last: For the freshest, most pillowy, and structurally sound whipped cream topping, prepare and add it just before serving. Pre-applying whipped cream can cause it to deflate, weep, or become less appealing over time, especially if the cheesecake is stored. Freshly whipped cream offers the best contrast in texture and a superior visual appeal.
- Avoid Overmixing the Filling: Beyond the initial blending to combine ingredients, resist the urge to vigorously mix the cheesecake batter. Overmixing incorporates too much air, which expands during baking and contracts during cooling, almost guaranteeing cracks. Blend until just smooth and uniform.
- Know Your Oven: Every oven is different. Pay attention to your cheesecake’s cues rather than strictly adhering to the exact bake time. The “slight wobble” in the center is your key indicator.
Frequently Asked Questions About Sweet Potato Cheesecake
Absolutely, you can easily substitute pumpkin puree for sweet potato in this recipe. Swapping the cooked sweet potato with an equal amount of canned pumpkin puree (make sure it’s 100% pumpkin, not pie filling) will yield a cheesecake with a very similar texture and a flavor profile that leans more towards traditional pumpkin pie. It’s a fantastic alternative if you have pumpkin on hand or prefer the classic pumpkin flavor for your holiday baking.
Cheesecake cracks are quite common and are usually caused by a few factors. The primary reasons are overmixing the filling (which incorporates too much air), skipping the water bath, or sudden temperature changes during baking or cooling. To prevent cracking, blend the filling just until smooth to avoid excess air. Always use a water bath to create a moist, even baking environment. Additionally, ensure the cheesecake cools gradually at room temperature before chilling it completely in the refrigerator. Avoid opening the oven door frequently during baking.
A water bath is highly recommended for achieving the best possible cheesecake. It’s not strictly “necessary” if you’re willing to compromise on texture, but it significantly improves the outcome. The water bath keeps the oven environment moist, which helps the cheesecake bake gently and evenly, preventing it from drying out, cracking, and overbaking the edges. It results in a silkier, creamier filling. Without it, your cheesecake will likely have a firmer texture and be much more prone to cracking.
Yes, sweet potato cheesecake freezes exceptionally well! For best results, freeze the cheesecake before adding any whipped cream topping. You can freeze individual slices or the entire cheesecake. Wrap it tightly in several layers of plastic wrap, then cover with a layer of aluminum foil to prevent freezer burn. It can be stored in the freezer for up to two months. When ready to serve, thaw it overnight in the refrigerator for the smoothest texture. Add fresh whipped cream just before serving.
The key to a perfectly baked cheesecake is to remove it from the oven when the edges are set and lightly puffed, but the center (a circle about 2-3 inches in diameter) still has a slight, delicate jiggle or wobble when the pan is gently shaken. It will continue to set as it cools. For absolute precision, use an instant-read thermometer: the cheesecake is done when its internal temperature reaches 145ºF (63ºC) at the center. Remember, extended chilling time in the fridge helps it firm up completely, so always plan for an overnight chill before slicing.
While a blender or food processor is recommended for achieving the smoothest possible texture, you can certainly make this cheesecake with a handheld electric mixer or a stand mixer. For the crust, you would finely chop the pecans and mix all crust ingredients by hand or with the mixer. For the filling, beat the cream cheese until smooth, then gradually add the remaining ingredients, mixing on low speed until just combined and smooth. Be careful to avoid whipping too much air into the batter, as this can lead to cracks. The result will still be delicious, though potentially slightly less silky than with a blender.
For the best possible texture and stability in your cheesecake, always use full-fat, block-style cream cheese. Brands like Philadelphia are ideal. Reduced-fat or low-fat cream cheese varieties often contain more water and stabilizers, which can result in a softer, less stable, or even grainy filling. Avoid using spreadable cream cheese from tubs or whipped cream cheese, as their formulations are not suitable for baking and will not yield the desired rich, dense, and creamy cheesecake texture.
Yes, you can absolutely customize the spice level to your preference! If you enjoy a bolder spice flavor, you can slightly increase the amount of cinnamon, ginger, or cloves, or even add a touch of nutmeg or cardamom to the filling. However, be cautious not to add too much, as an excessive amount of spices can sometimes make the filling taste bitter or overly dense. It’s always best to start with small additions and taste a tiny bit of the batter (before adding eggs) to ensure the balance is just right for your palate.

Sweet Potato Cheesecake with Pecan Crust
Ingredients
OAT-PECAN CRUST
- ⅔ cup whole pecans
- ⅓ cup large flake oats
- ⅓ cup brown sugar packed
- ¼ cup all-purpose flour
- ½ tsp. ground cinnamon
- ¼ tsp. salt
- ⅓ cup butter melted
CHEESECAKE FILLING
- ½ cup sour cream
- 3 large eggs
- 1 cup cooked cooled sweet potato puree
- 1 ½ lbs. cream cheese room temperature
- 1 cup brown sugar packed
- 1 tsp. ground cinnamon
- 1 tsp. pure vanilla extract
- ½ tsp. ground ginger
- ¼ tsp. ground cloves
BROWN SUGAR WHIPPED CREAM
- 2 cups cold heavy whipping cream
- 2 Tbsp. brown sugar packed
- 1 tsp. pure vanilla extract
- cinnamon for dusting (optional)
Instructions
For the Pecan Oat Crust:
-
Preheat your oven to 350ºF (175ºC). In a blender or food processor, combine the whole pecans, large flake oats, packed brown sugar, all-purpose flour, ground cinnamon, and salt. Pulse for about 5 seconds until the mixture resembles coarse crumbs. With the blender/food processor still running on a low pulse, pour the melted butter through the lid opening and pulse a few more times until the mixture just comes together and is moist.
-
Transfer the crust mixture to a 9-inch springform pan. Press the mixture firmly and evenly into the bottom of the pan and about 1 inch up the sides. Bake for 12 minutes, then remove the pan from the oven and place it on a wire rack to cool completely while you prepare the filling.
For the Sweet Potato Cheesecake Filling:
-
Combine all filling ingredients in the order listed into a blender or food processor: sour cream, large eggs, cooled cooked sweet potato puree, room temperature cream cheese, packed brown sugar, ground cinnamon, pure vanilla extract, ground ginger, and ground cloves. Secure the lid and blend for 10-15 seconds. Pause to scrape down the sides of the container with a rubber spatula, ensuring all ingredients are fully incorporated. Blend briefly again (another 5-10 seconds) until the mixture is completely smooth and uniform. Avoid overmixing.
-
Prepare your water bath. Bring approximately two quarts of water to a boil in a kettle or on the stovetop. Carefully wrap the bottom and sides of your springform pan tightly with heavy-duty aluminum foil to prevent water seepage. Position the foil-wrapped springform pan inside a larger baking dish. Pour the prepared sweet potato filling into the cooled crust. Carefully pour the boiling water into the outer baking dish, ensuring it reaches about 1 inch up the sides of the springform pan, taking care not to get any water into the cheesecake filling itself.
-
Carefully transfer the baking dish with the cheesecake and water bath to your preheated oven. Bake for 50-60 minutes, or until the edges of the cheesecake are set and slightly puffed, but the center (about 2-3 inches in diameter) still has a slight, delicate wobble when gently shaken. Remove the springform pan from the water bath and place it on a wire rack to cool at room temperature for 1 hour. After cooling, transfer the cheesecake (still in its pan) to the refrigerator to chill completely for at least 4 hours, or ideally overnight. Once thoroughly chilled, run a thin, sharp knife around the inside edge of the pan to loosen the cake, then carefully remove the pan sides.
MAKE AHEAD: This cheesecake can be made up to 1 day in advance. Cover and keep chilled in the refrigerator. For longer storage, freeze without the topping, wrapped airtight, for up to 2 weeks.
For the Brown Sugar Whipped Cream:
-
Just before serving, in a large mixing bowl or blender, combine the cold heavy whipping cream, packed brown sugar, and pure vanilla extract. Whip with an electric mixer until soft peaks form. If using a blender, blend on high for about 8 seconds, watching carefully to avoid over-processing. Pile the fluffy whipped cream onto the completely cooled cheesecake. If desired, use a fine-mesh sieve to lightly dust ground cinnamon over the top for an elegant finish. Serve immediately.
Nutrition
Nutrition information is automatically calculated and is an approximation only. It may vary based on specific ingredients and preparation methods.
Tried this recipe? Share your thoughts in a comment!