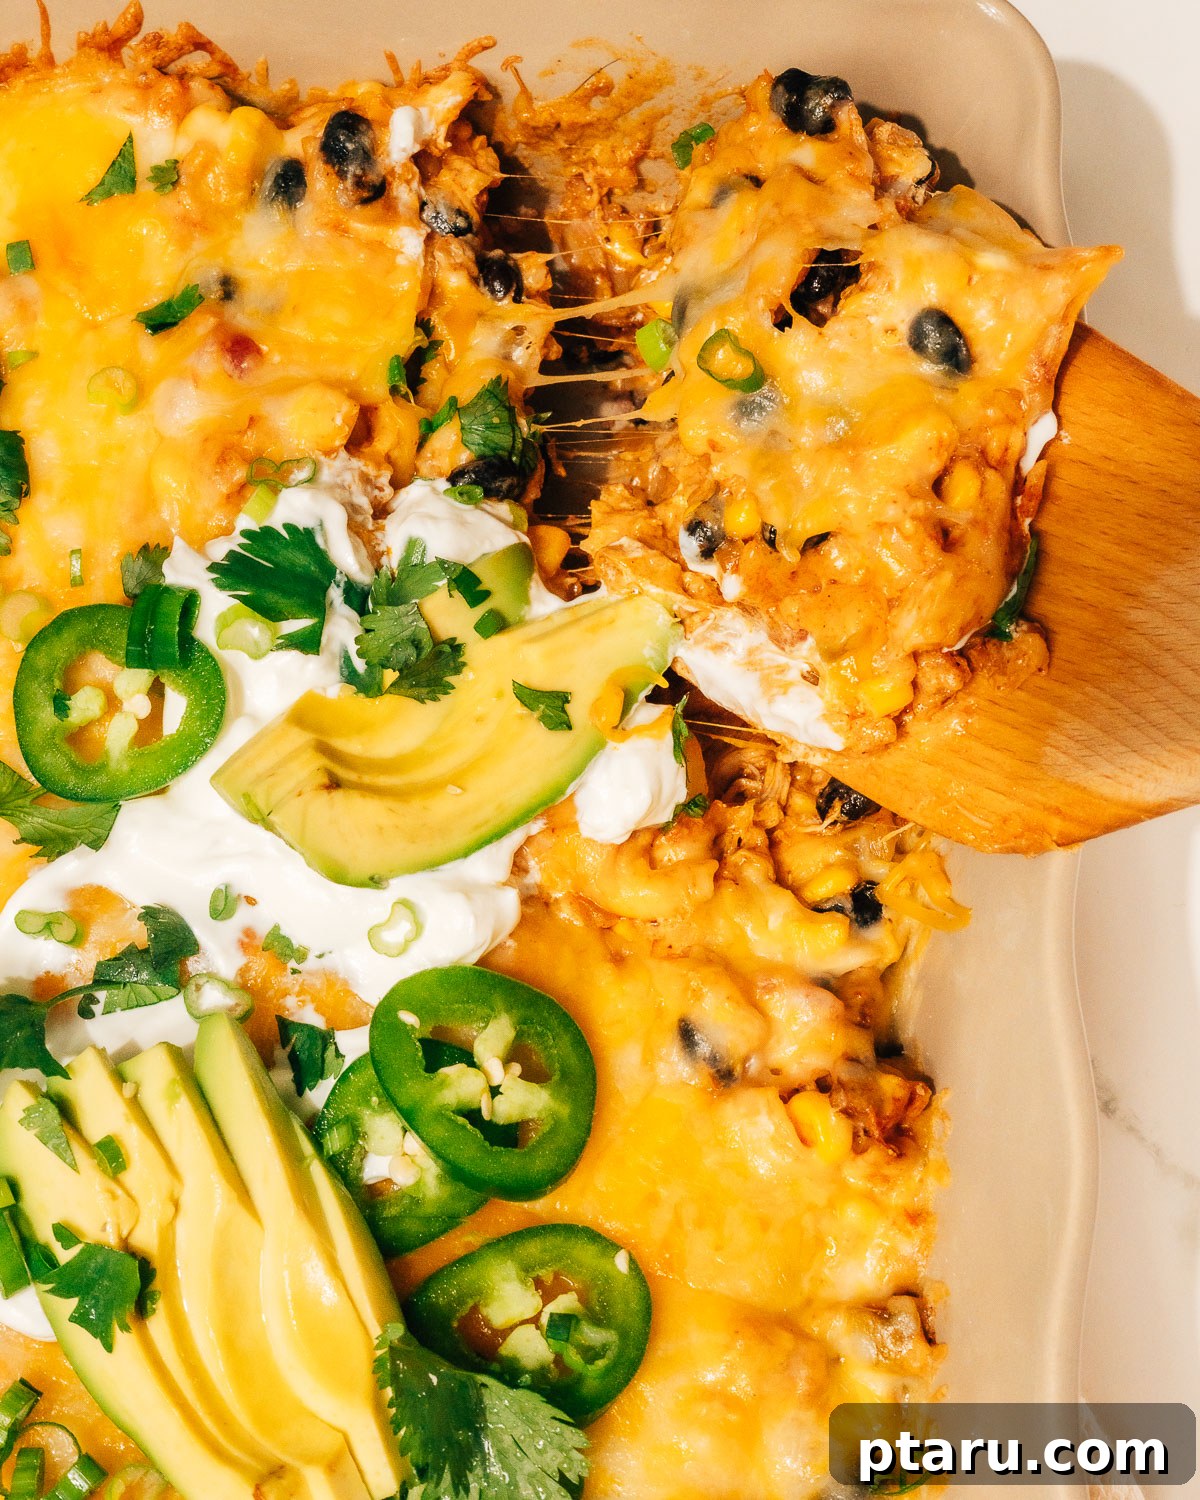
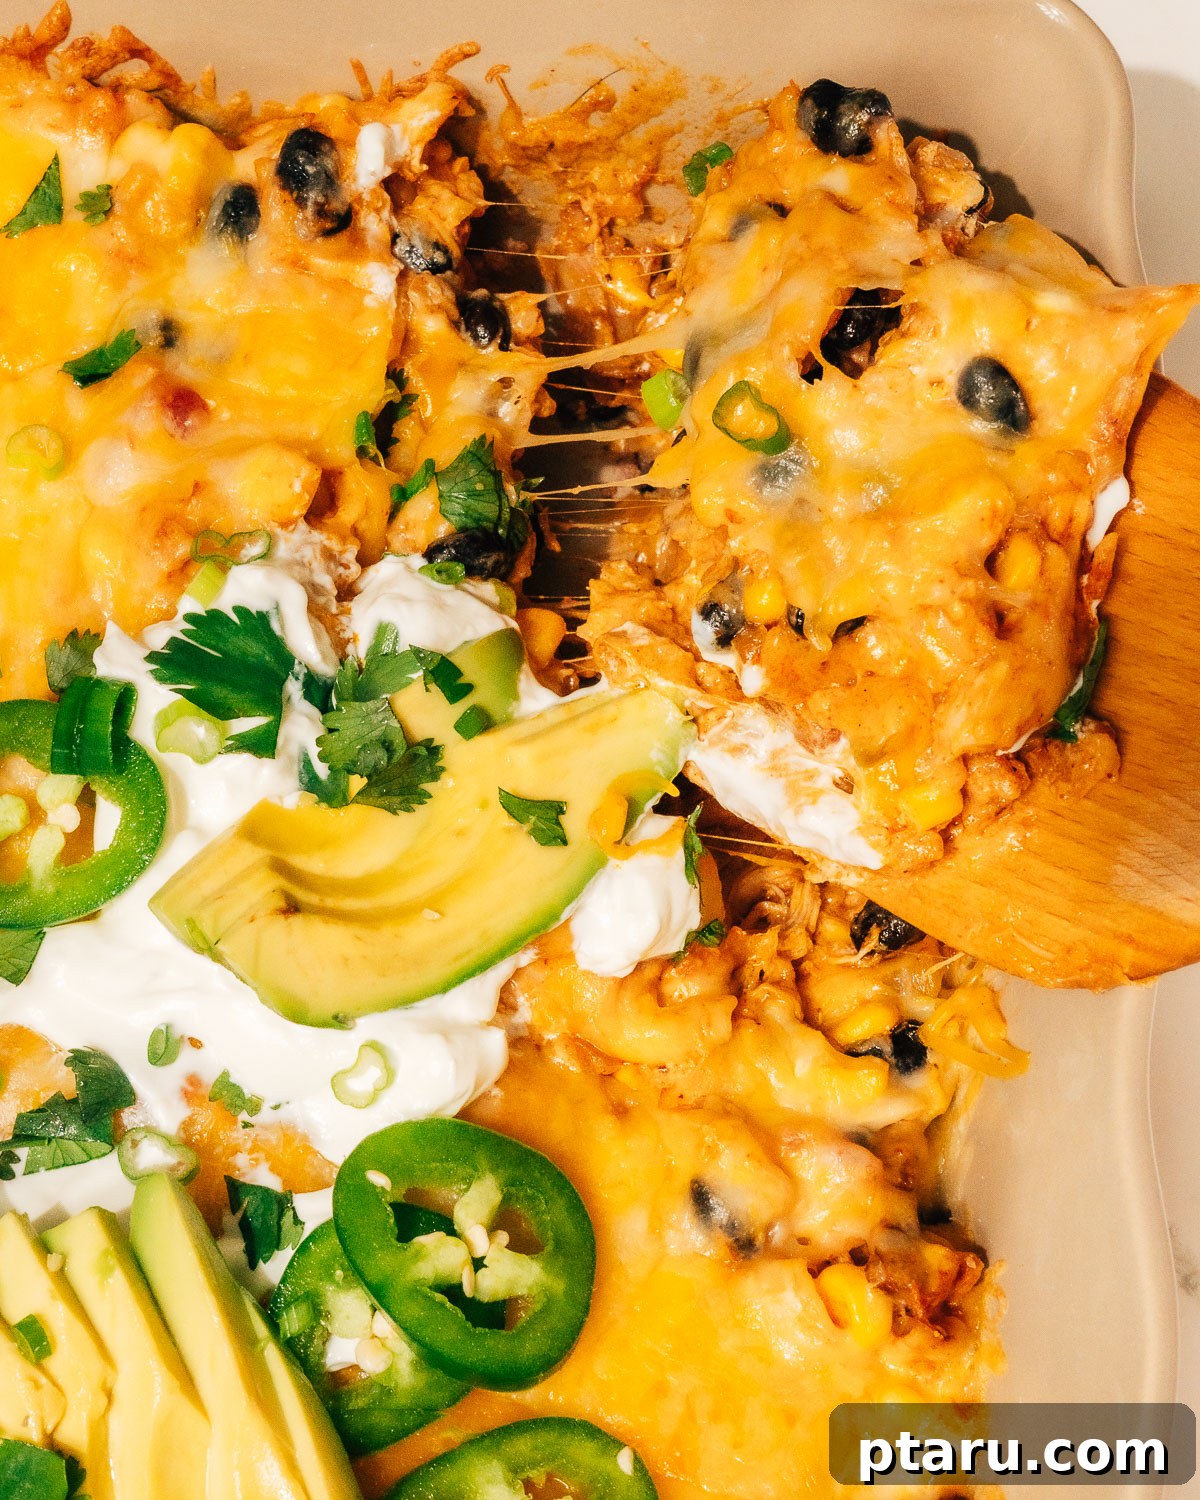
Welcome to your new favorite weeknight savior: this incredibly easy Mexican chicken casserole! It’s the ultimate solution for busy evenings, promising a delicious, family-friendly meal that comes together with minimal fuss. Leveraging the convenience of succulent rotisserie chicken, combined with pantry staples like canned black beans, frozen corn, and your favorite salsa, this dish transforms into a hearty, bubbling masterpiece in under 30 minutes. Imagine a thick layer of golden, melted cheese crowning a savory, spiced chicken and rice filling – pure comfort in every bite. This casserole is not just a meal; it’s an experience, delivering robust Mexican-inspired flavors in a single, satisfying dish.
Essential Ingredients for Your Delectable Mexican Chicken Casserole
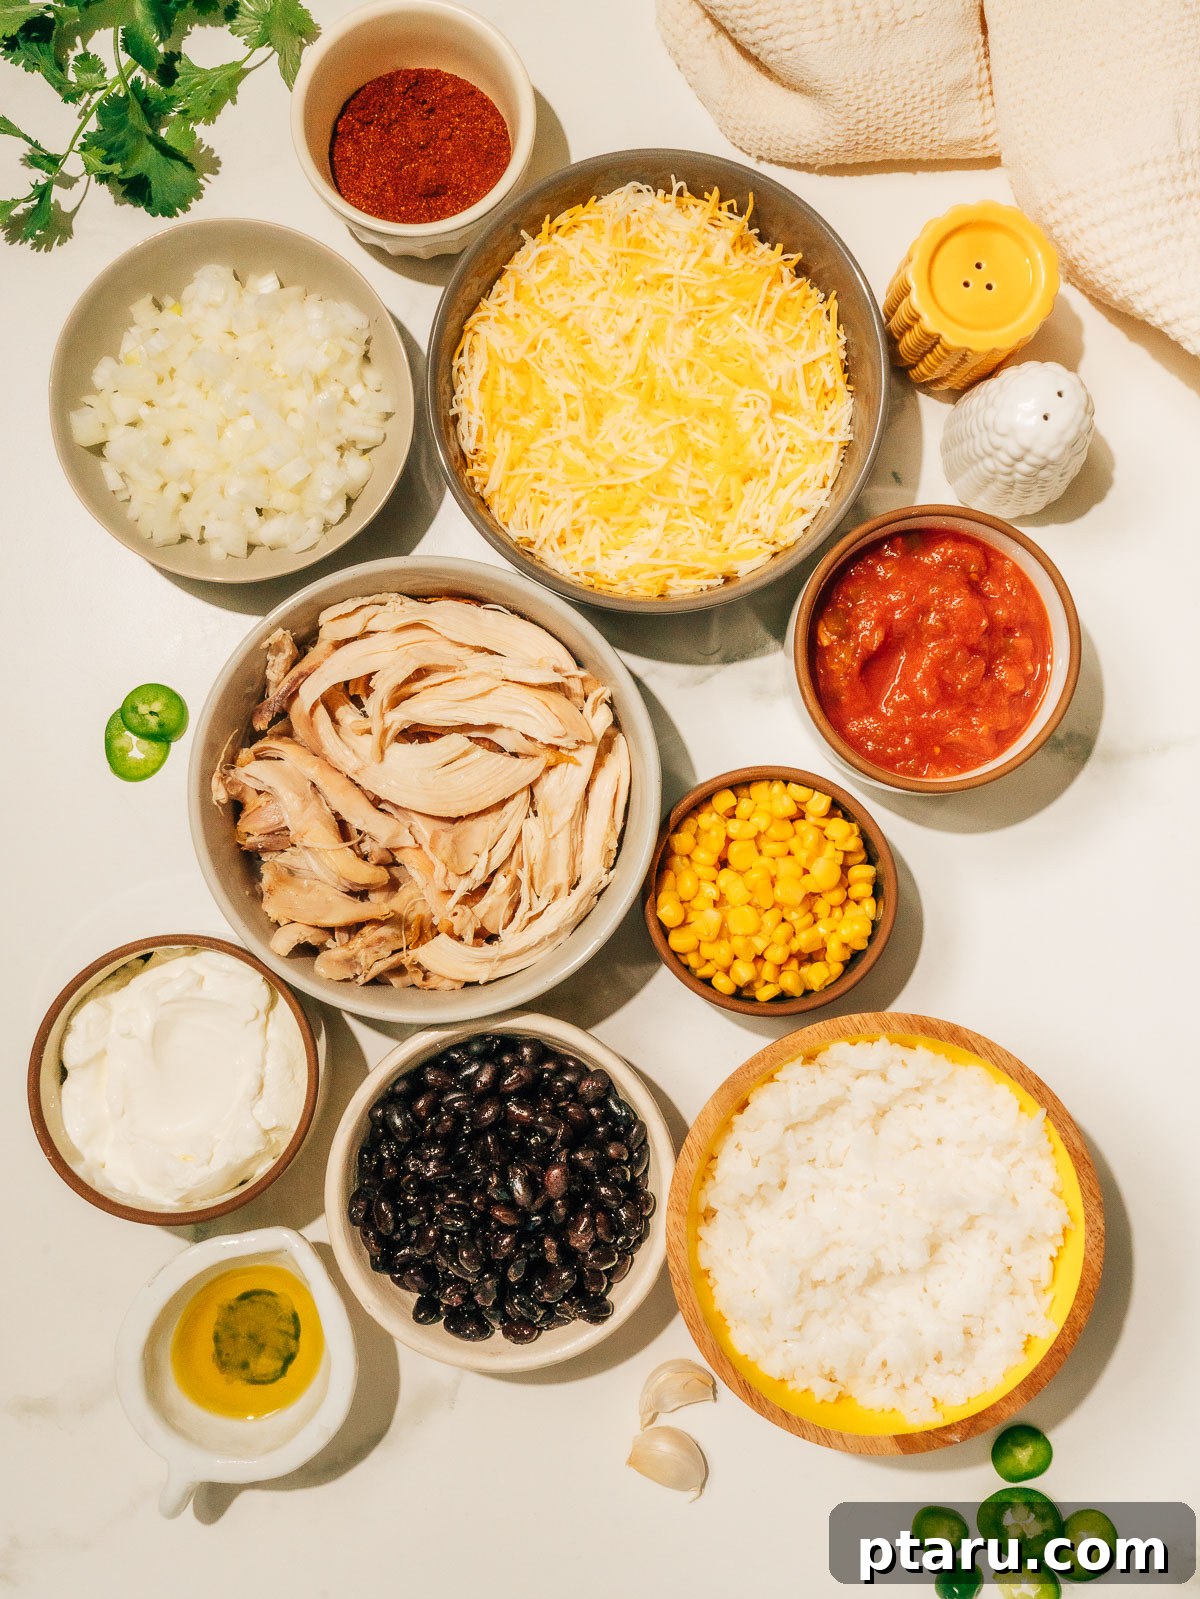
Crafting this flavorful Mexican chicken and rice casserole is incredibly simple, thanks to a list of straightforward, easy-to-find ingredients. Here’s a detailed breakdown of what you’ll need to create this comforting one-dish wonder:
- Oil: Any neutral cooking oil, such as canola, vegetable, or a light olive oil, is perfect. Its primary role is to create a soft, aromatic base by sautéing the onion, which is a crucial step for building foundational flavor.
- Onion: Finely chopped yellow or white onion is recommended. When properly sautéed until tender and translucent, it melts seamlessly into the filling, imparting a delicate sweetness without any harsh raw notes.
- Kosher Salt: Used in two stages: a pinch for the onions to help them soften and sweeten, and the remainder to perfectly season the entire chicken mixture, ensuring a balanced flavor throughout.
- Garlic: Freshly minced garlic provides an indispensable aromatic depth. It’s added after the onion has softened to prevent burning, allowing its fragrant essence to permeate the casserole’s base.
- Rotisserie Chicken: The star of convenience! Pre-cooked and shredded rotisserie chicken is the ultimate time-saver, drastically reducing your prep time. Alternatively, any leftover cooked and shredded chicken breasts or thighs will work wonderfully.
- Chili Powder: This robust spice blend is the heart of the casserole’s Mexican-inspired profile. Typically containing a mix of ground chiles, cumin, oregano, and other spices, it delivers a rich, smoky, and slightly earthy flavor.
- Cooked Rice: Both white or brown rice are suitable. For maximum speed, try preparing microwave rice or use instant rice. If you have leftover basmati rice, its fluffy texture integrates beautifully. Ensure it’s cooked and slightly cooled.
- Black Beans: Canned black beans, thoroughly rinsed and drained, add a fantastic source of plant-based protein, fiber, and a satisfying, creamy texture to every forkful. They absorb the vibrant flavors of the sauce perfectly.
- Frozen Corn: Convenient and versatile, frozen corn kernels can be added directly to the mixture without thawing. They cook through perfectly in the oven, adding pops of sweet flavor and visual appeal.
- Jarred Salsa: Use your favorite brand and preferred spice level. A chunkier salsa, rich with diced tomatoes, onions, and peppers, provides the best texture and brings a bright, tangy acidity to the filling.
- Sour Cream: This key ingredient delivers incredible creaminess and a subtle tang, making the filling rich and luscious without the need for condensed soups. Full-fat sour cream yields the best results, though full-fat Greek yogurt is an excellent, protein-rich substitute.
- Shredded Cheese: A Mexican blend or sharp cheddar cheese melts beautifully. A generous portion is divided: one cup mixes into the filling for internal creaminess, and two cups form that glorious, bubbling, golden-brown crust on top.
The precise quantities for each ingredient can be found in the comprehensive recipe card located at the bottom of this post.
If you’re exploring other delightful casserole options, especially those featuring a crunchy corn chip base, my Walking Taco Casserole is a must-try! For a more traditional layered tortilla experience, don’t miss my savory Chicken Enchilada Casserole.
Customizing Your Comfort: Variations and Substitutions for Mexican Chicken Casserole
This Mexican chicken casserole recipe is incredibly versatile, allowing you to easily adapt it based on what you have on hand, your dietary preferences, or simply what you’re craving. Feel empowered to experiment and make it truly your own with these delicious variations and substitutions:
- Chicken Options: While the convenience of rotisserie chicken is unbeatable, any pre-cooked, shredded chicken works perfectly. This is an ideal way to use up leftover baked chicken breasts or thighs, chicken cooked in a slow cooker, or even chicken prepared in an air fryer. Just ensure it’s fully cooked and shredded before mixing.
- Rice Alternatives: Both white and brown rice are suitable choices for this recipe. To infuse an extra layer of flavor from the start, consider using Instant Pot Mexican rice as your base. For a gluten-free and higher-protein option, cooked quinoa can also be a delicious substitute.
- Bean Swaps: Black beans are classic, but feel free to swap them out for pinto beans or kidney beans if those are what you have. If you’re not a fan of beans, or need to omit them for dietary reasons, the casserole will still be delicious and hearty without them.
- Sour Cream Substitutes: For a lighter but equally creamy outcome, full-fat Greek yogurt is a fantastic 1:1 substitute, adding extra protein and a similar tangy note. If you desire an even richer, denser filling, softened cream cheese can be incorporated, offering a slightly different texture.
- Seasoning Variations: If you don’t have chili powder, or prefer a different flavor profile, use approximately 3 tablespoons of homemade taco seasoning. This often contains similar spices but might introduce unique herbal notes or a touch more heat.
- Cheese Exploration: Beyond the recommended Mexican blend or cheddar, Monterey Jack cheese is an excellent choice for its superior melting qualities and mild, creamy flavor. A combination of Monterey Jack and sharp cheddar often provides the perfect balance of gooey texture and robust taste. For a subtle kick, try Pepper Jack!
- Cream of Chicken Soup Addition: For those who enjoy a nostalgic, extra-saucy casserole, you can replace the sour cream with a 10.5 oz can of cream of chicken soup. This creates a richer, thicker chicken mixture, echoing many traditional casserole recipes.
- Vegetable Enhancements: Dice one green bell pepper and add it to the pan with the onion. It will cook down beautifully, adding extra color, a mild sweetness, and a fresh vegetal bite. Diced zucchini, roasted red peppers, or mild green chiles are also great additions.
- Crunchy Topping Innovation: For an irresistible textural contrast, scatter crushed tortilla chips or even flavored chips like Doritos over the cheese during the last 5 minutes of baking. This ensures they warm through and stay delightfully crispy without becoming soggy.
For more Mexican food nights inspiration, be sure to check out my popular Mexican chicken street tacos and these incredibly satisfying crispy baked chicken tacos with flour tortillas. Both are easy to make and guaranteed to be a hit!
Essential Tools for Crafting Your Easy Mexican Chicken Bake
One of the many appealing aspects of this Mexican chicken casserole is that it doesn’t demand a kitchen full of specialized gadgets. You’ll likely find that you already own most, if not all, of the basic kitchen tools required to bring this delicious meal to life:
- 9×13-inch Baking Dish: This standard-sized rectangular baking dish is perfectly proportioned for serving approximately six hearty portions of casserole, ensuring a fantastic balance of cheesy topping to flavorful filling in every scoop. Lightly greasing it with cooking spray or lining it with parchment paper (leaving a slight overhang) will greatly simplify cleanup.
- Dutch Oven or Large Skillet: An ideal piece of cookware for this recipe. A spacious Dutch oven allows you to perform the initial sautéing, mix all the filling ingredients, and then easily transfer the mixture to your prepared baking dish, thereby minimizing the number of dishes to wash. A large, deep skillet (12 inches or more in diameter) will also work effectively.
- Large Mixing Bowl: You’ll only need this if your chosen Dutch oven or skillet isn’t quite roomy enough to comfortably hold and thoroughly mix all the filling ingredients. If you have a generous-sized cooking vessel, you can likely skip this extra bowl altogether.
- Wooden Spoon or Silicone Spatula: Essential tools for gracefully stirring your ingredients as you build the savory base of the casserole, and for smoothly spreading the creamy chicken mixture evenly into the baking dish before it heads into the oven.
- Measuring Spoons and Cups: Precision is key, especially when it comes to spices and salt. Accurate measurements of chili powder and salt are crucial for ensuring the seasoning of your casserole is perfectly balanced and delicious throughout.
How to Make Mexican Chicken Casserole: A Simple Step-by-Step Guide
Get ready to create a truly delicious and satisfying meal! This easy Mexican chicken and rice casserole is designed for speed and flavor, coming together in approximately 35 minutes. Follow these clear, step-by-step instructions for a perfect result every time:
1. Prepare Your Oven and Baking Dish
First, preheat your oven to a comfortable 375°F (190°C). While the oven heats, take a moment to lightly grease a 9×13-inch (23×33 cm) baking dish. A quick spray of cooking oil or a thin brush of oil will suffice. For the absolute easiest cleanup, consider lining the dish with parchment paper, leaving a slight overhang on the sides for effortless lifting.
2. Build the Flavorful Onion Base
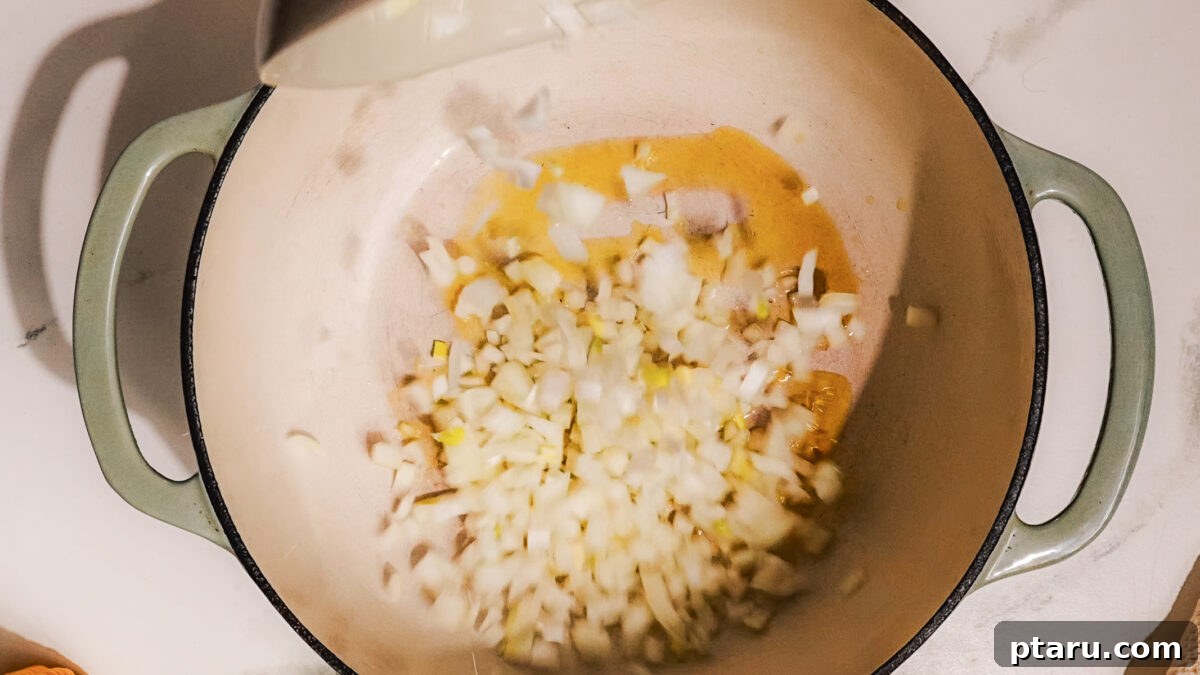
In a large Dutch oven or a deep skillet, heat 2 tablespoons of neutral oil over medium heat. Add the finely-chopped onion along with 1/2 teaspoon of kosher salt. Cook, stirring occasionally, for 5 to 7 minutes. Watch for the onion to become beautifully soft, translucent, and just starting to take on a golden hue – this signifies developing sweetness. Stir in the minced garlic and cook for just 1 more minute until it releases its fragrant aroma. Be careful not to let the garlic brown.
3. Season the Chicken to Perfection
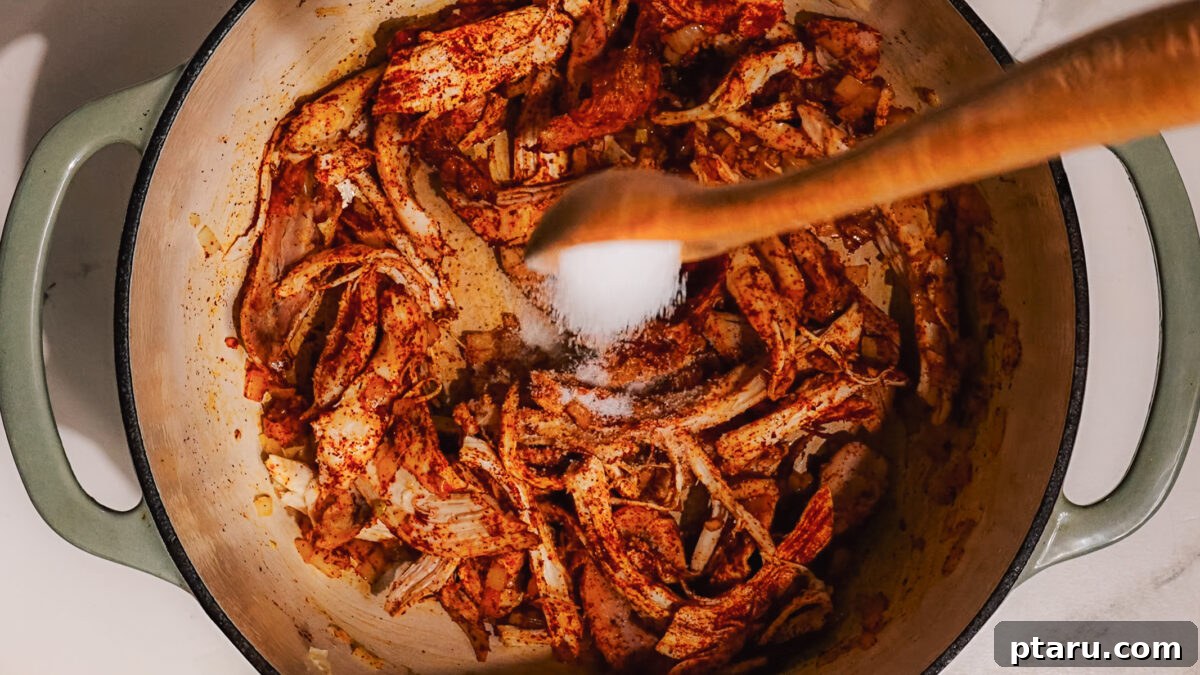
Now, add your shredded rotisserie chicken and the full 3 tablespoons of chili powder to the pan. Stir diligently to ensure every piece of chicken is thoroughly coated in the fragrant spice blend. Continue cooking for 2 to 3 minutes, allowing the chicken to warm through and, importantly, giving the chili powder time to “bloom” in the hot oil. This blooming process intensifies the spice’s flavor and aroma dramatically. Once complete, turn off the heat.
4. Mix the Creamy, Hearty Filling
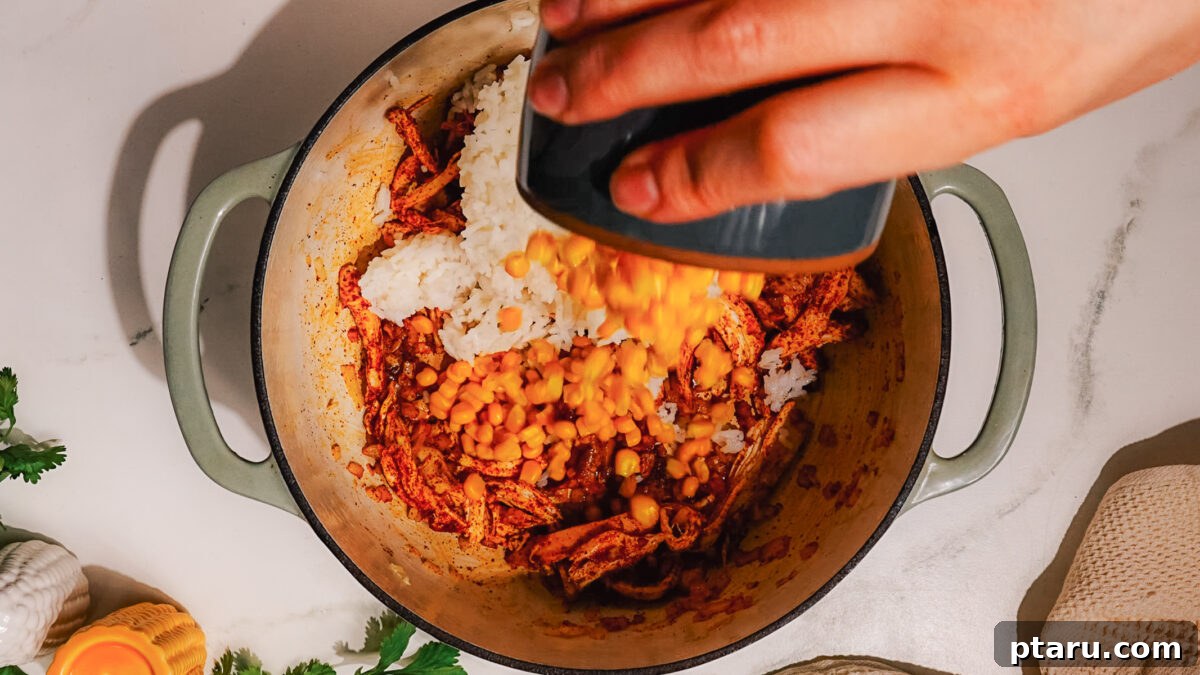
Into the same pan (or transfer to a large mixing bowl if your pan is too full), add the cooked rice, the rinsed and drained black beans, frozen corn (no need to thaw), your favorite jarred salsa, sour cream, the remaining 1 1/2 teaspoons of kosher salt, and 1 cup of the shredded cheese. Mix everything gently but thoroughly until all the ingredients are fully combined and the mixture is uniformly moistened. Take a quick taste and adjust the seasoning if necessary.
5. Assemble and Bake Until Bubbly
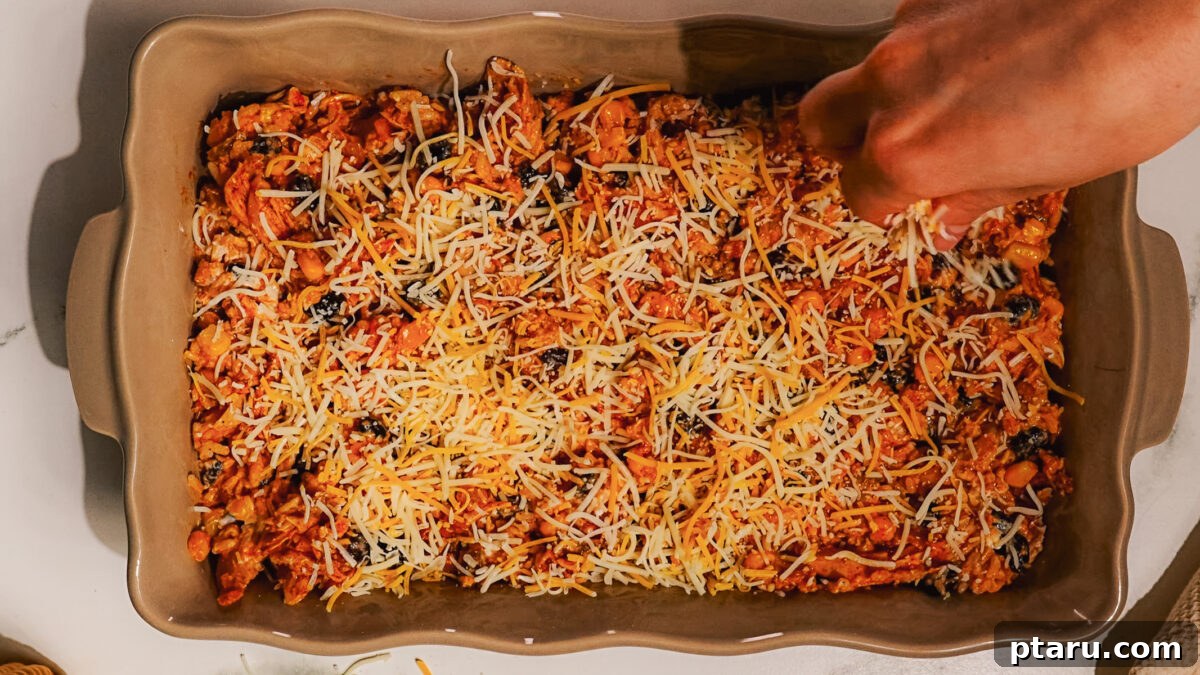
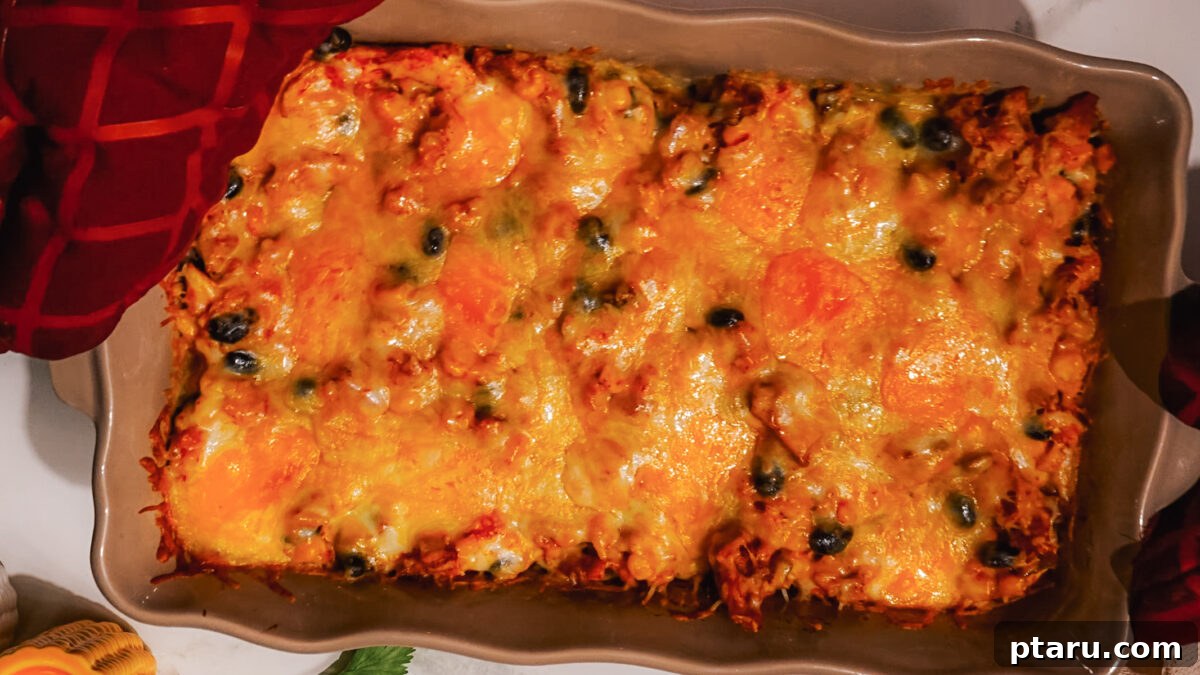
Spoon the rich chicken mixture evenly into your prepared 9×13-inch baking dish, spreading it out into a smooth, even layer. Now for the crowning glory: generously top the entire casserole with the remaining 2 cups of shredded cheese, ensuring an even, decadent blanket. Bake for 20 to 25 minutes, or until the cheese is beautifully melted, golden brown, and bubbling enthusiastically around the edges. The casserole should be piping hot throughout.
6. Rest, Garnish, and Serve
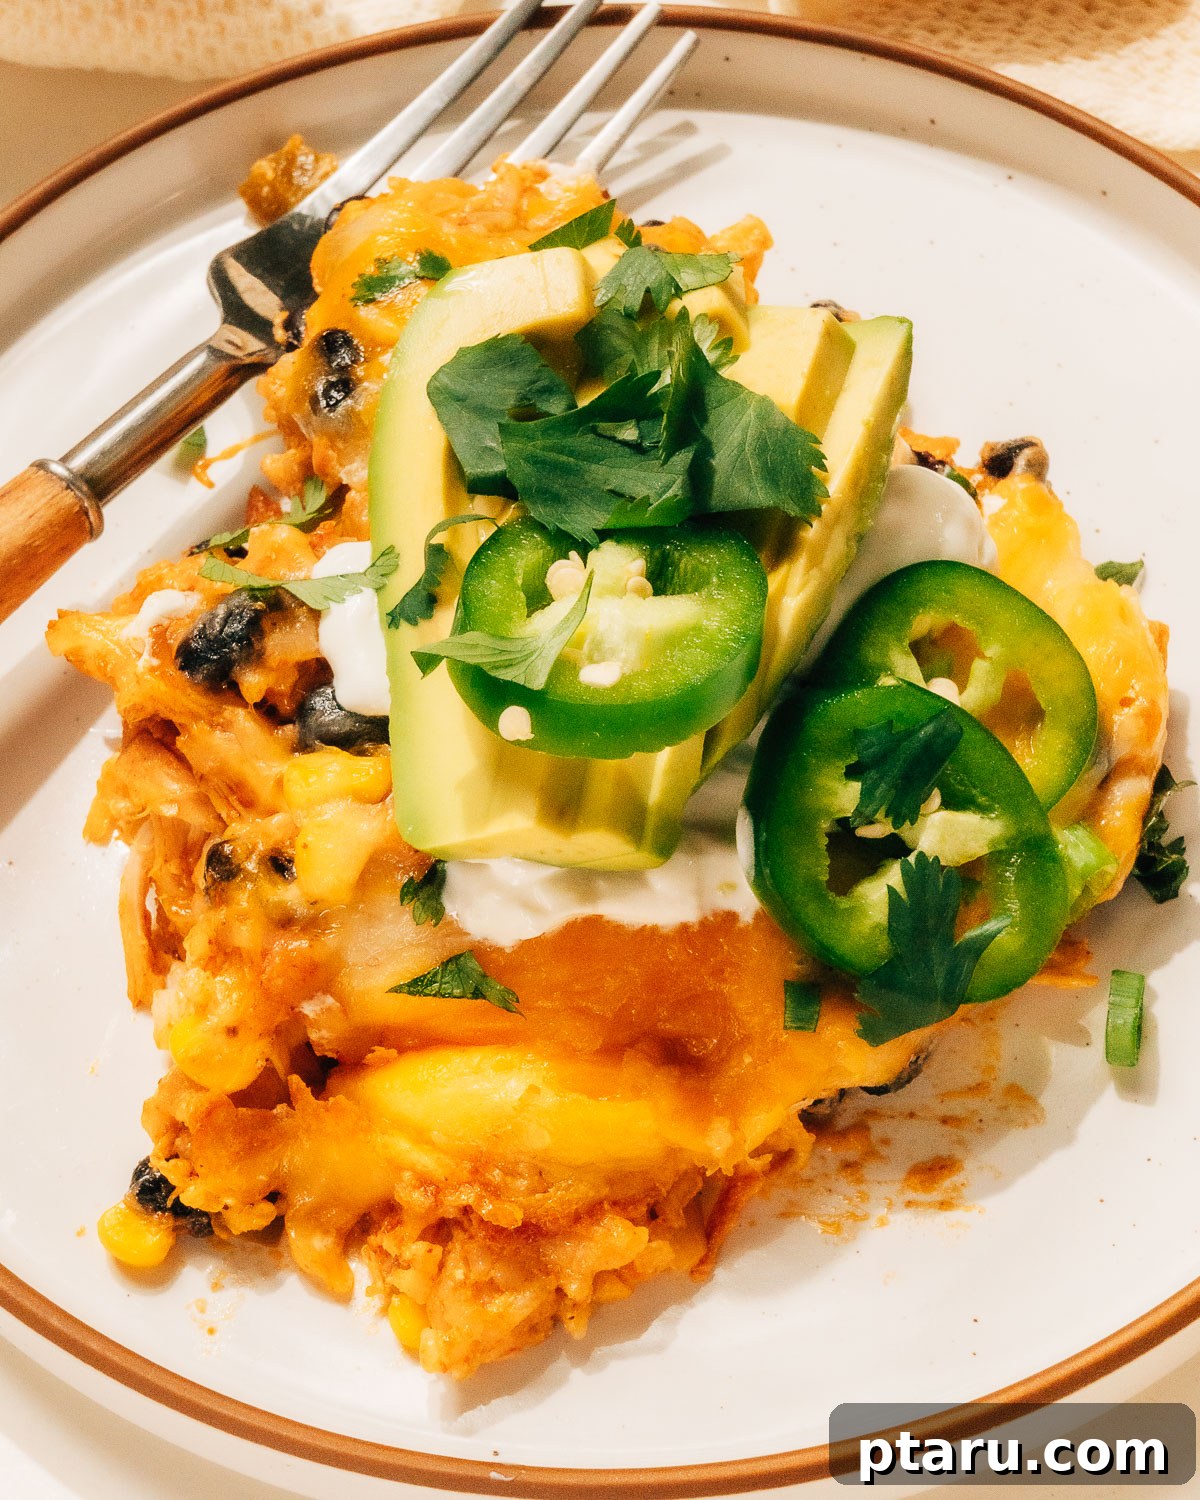
The hardest part is waiting! Once out of the oven, allow the casserole to rest for a few minutes, typically 5 to 10 minutes, before serving. This crucial resting period allows the filling to set and firm up, ensuring neat, cohesive portions when you scoop. Arrange an inviting spread of your preferred toppings – sliced avocado, fresh cilantro, thinly sliced green onion, zesty pickled or fresh jalapeños, extra salsa, or a dollop of cooling sour cream are all wonderful additions.
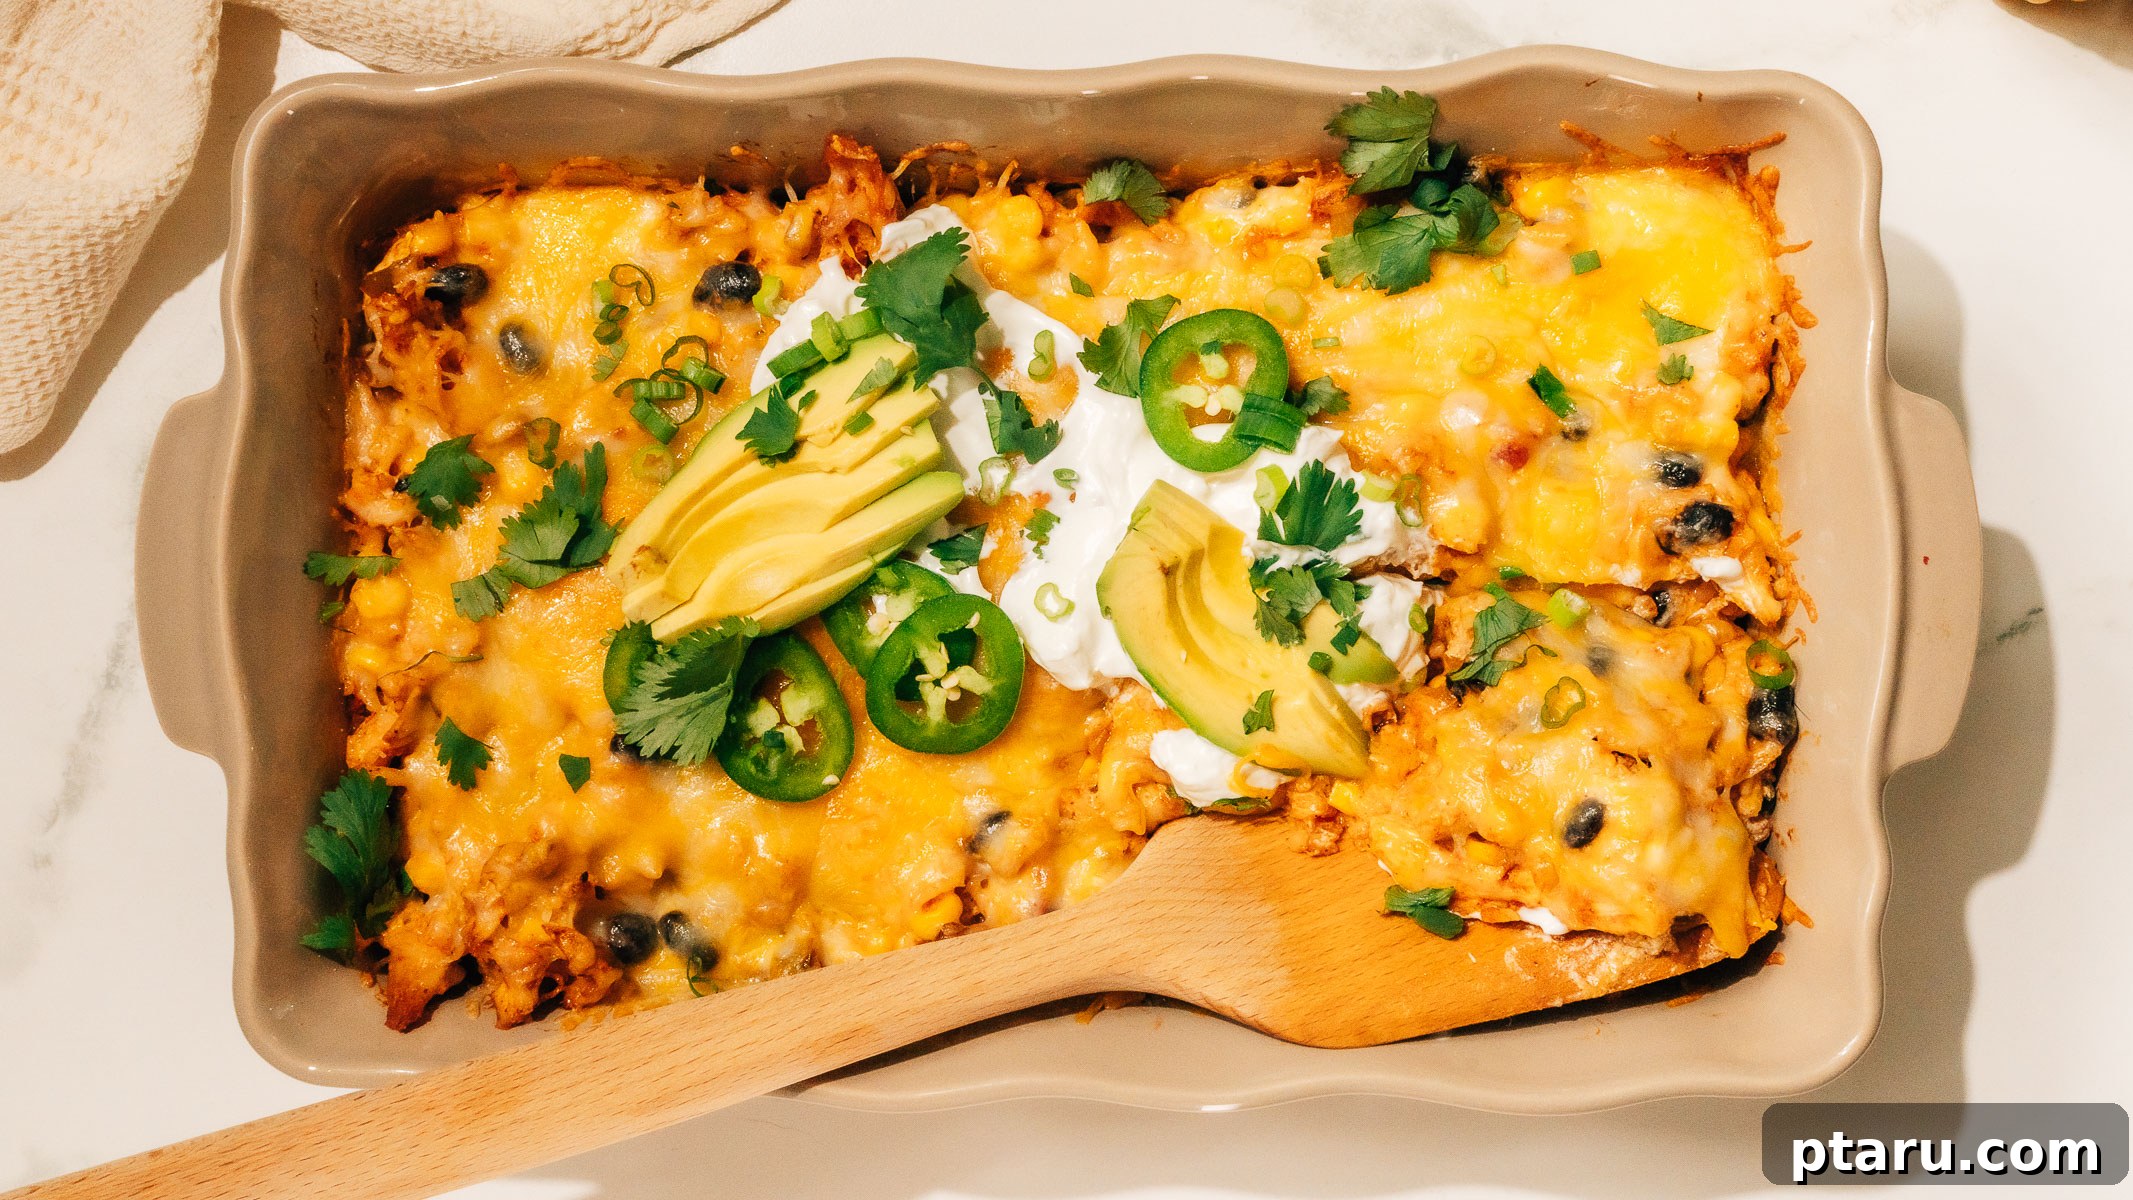
Avoid These 3 Common Mistakes for a Flawless Mexican Chicken Casserole
Even with an easy recipe, there are common missteps that can prevent your casserole from reaching its full potential. By being aware of these frequent mix-ups, you can ensure your Mexican chicken casserole turns out perfectly delicious and satisfying every single time:
- Using Unseasoned or Bland Rice: The rice forms a substantial part of the casserole’s volume and texture. If your cooked rice lacks flavor, it will act as a bland filler and diminish the overall taste of the entire dish. Always ensure your cooked rice has a good pinch of salt, or ideally, use seasoned leftover rice (perhaps cooked with a little garlic or chicken broth). This seemingly small detail significantly impacts the richness and depth of the final casserole.
- Skipping the Initial Onion Sauté: It might feel like an extra step, but skipping the sauté for the onion and garlic is a common mistake that impacts the fundamental flavor. Raw onion, simply mixed into a cold filling, will retain its sharp, pungent flavor and firm texture even after baking, which can be quite jarring. Sautéing the onion first mellows its intensity, transforms it into a tender, sweet foundation, and builds a crucial layer of caramelized flavor that permeates every bite of the casserole.
- Cutting into the Casserole Too Soon After Baking: The aroma emanating from a freshly baked casserole is incredibly tempting, but resist the urge to immediately scoop a portion. Cutting into it straight out of the oven will often result in a messy, soupy consistency that struggles to hold its shape on the plate. Casseroles need a brief resting period—typically 5 to 10 minutes—after baking. This crucial time allows the internal ingredients to set, the cheese to firm up slightly, and the flavors to meld, ensuring clean, cohesive, and perfectly portioned servings.
Make Ahead and Storage Tips for Your Mexican Chicken Casserole
This Mexican chicken casserole is an exceptional candidate for meal prepping, allowing you to prepare it in advance for an even quicker and more convenient dinner on busy weeknights or for future meals. Its flavors often deepen and improve with time, making it a fantastic make-ahead option.
Storing Leftovers Successfully
- Airtight Container for Fridge Storage: To maintain the freshness and deliciousness of your leftovers, transfer any remaining casserole into an airtight container. It will keep beautifully in the refrigerator for up to 4 days. Many find that the flavors actually meld and deepen overnight, creating an even more cohesive and robust taste experience.
- Keep Toppings Separate: For optimal quality, always store fresh toppings such as sliced avocado, cilantro, and sour cream separately from the main casserole. These fresh ingredients tend to lose their ideal texture and vibrant appearance when mixed into the casserole and refrigerated, so add them fresh just before reheating and serving.
Freezing for Future Meals
- Freeze Before Baking for Best Results: For the freshest taste and texture upon reheating, assemble the entire casserole as directed in the recipe, but stop just before placing it in the oven. Cover the dish tightly with a layer of plastic wrap, followed by a layer of aluminum foil, and freeze for up to 3 months. When you’re ready to enjoy, thaw the casserole overnight in the refrigerator, then bake as directed, potentially adding an extra 10-15 minutes to the baking time since it starts from a cold temperature.
- Freeze After Baking for Convenience: If you have baked leftovers, allow the casserole to cool completely. Then, portion it into individual airtight, freezer-safe containers. These convenient single servings can be frozen for up to 3 months, providing quick grab-and-reheat options for lunches or spontaneous dinners.
- Label and Date Everything: Always label your frozen casseroles with the date of preparation. This simple step helps you keep track of freshness and ensures you consume your homemade meals when they are at their best quality. Both unbaked and baked versions maintain excellent quality for up to 3 months in the freezer.
Reheating Your Mexican Chicken Casserole
- Oven Reheating Method: To reheat a larger portion or the entire casserole, cover the baking dish loosely with aluminum foil. Place it in a preheated oven at 350°F (175°C) and bake for approximately 20 minutes, or until it’s thoroughly warmed through. Remove the foil for the last 5 minutes to allow the cheese to re-melt and become beautifully bubbly and golden once more.
- Microwave Reheating Method: For individual portions, the microwave offers the quickest reheating solution. Place a single serving in a microwave-safe dish and cover it loosely with a damp paper towel. Reheat in short 60-second bursts, stirring occasionally, until the casserole is hot all the way through. The damp paper towel helps to retain moisture and prevents the rice and chicken from drying out.
How to Serve Your Delicious Mexican Chicken Casserole
This vibrant Mexican chicken casserole stands proudly as a complete and satisfying meal on its own, making it an effortless centerpiece for any dinner. Simply scoop generous portions directly from the baking dish and invite everyone at the table to customize their plates with an array of fresh, zesty, and creamy toppings.
Irresistible Mexican Chicken Casserole Toppings
Elevate the flavors and textures of your casserole with these fantastic, crowd-pleasing topping ideas:
- Sliced Avocado or Avocado Crema: A cool, creamy, and healthy contrast to the warm, spiced filling. Sliced fresh avocado adds a buttery richness, while a drizzle of homemade avocado crema brings a bright, tangy element.
- Fresh Herbs: A generous sprinkle of vibrant fresh cilantro and thinly sliced green onion not only adds a burst of color but also introduces a wonderfully herbaceous and fresh flavor that brightens the entire dish.
- Heat and Tang: For those who enjoy a little kick, thin slices of fresh jalapeños provide a welcome heat. Alternatively, zesty pickled red onions offer a delightful tangy crunch that cuts through the casserole’s richness beautifully.
- Extra Salsa: A spoonful of your favorite fresh taco salsa or even just more of the jarred salsa used in the recipe can intensify the Mexican flavors and add extra moisture to your plate.
- Creamy Delights: A dollop of creamy homemade guacamole, extra sour cream, or plain Greek yogurt provides a wonderfully cooling and rich contrast that is always a hit.
- Crunchy Finish: Just before serving, for an amazing textural contrast, scatter some crushed tortilla chips or even a handful of Fritos over individual portions. This adds a satisfying crunch that makes every bite more exciting.
Perfect Side Dishes for Mexican Chicken Casserole
While the casserole is a meal in itself, these complementary side dishes will beautifully round out your Mexican-themed dinner, balancing its rich flavors:
- Mexican Street Corn Salad (Esquites): This smoky, creamy, and tangy salad is my absolute top recommendation for any Mexican dinner. Its fresh, vibrant flavors and textural variety provide a delightful contrast to the warm, cheesy casserole.
- Simple Green Salad with Tomatoes: A light, crisp green salad dressed with a bright vinaigrette offers a refreshing, acidic counterpoint. This cuts through the richness of the melted cheese and hearty filling, cleansing the palate.
- Tortilla Chips and Extra Dips: A bowl of crunchy tortilla chips served with additional salsa, guacamole, or queso is not only a fantastic side for scooping up any delicious bits of casserole but also doubles as a perfect appetizer to enjoy while your main dish finishes baking.
Mastering Your Mexican Chicken Casserole: Pro Tips & Expert Secrets
Achieving a consistently perfect and delicious Mexican chicken casserole is simple when you incorporate these key culinary insights. These final notes and secrets will ensure your dish turns out flawlessly every time, bursting with rich flavor and delightful texture:
- Bloom the Chili Powder for Deep Flavor: This is a crucial step! Cooking the chili powder with the chicken in hot oil for 2 to 3 minutes, before adding other liquid ingredients, allows the spices to “bloom.” This process awakens and intensifies their aromatic compounds, deepening their flavor significantly. If you simply stir raw chili powder into a cold mixture, it can taste flat and a bit dusty.
- Salt the Onion Early During Sautéing: Adding about 1/2 teaspoon of salt to the finely chopped onion as it sautés is more than just initial seasoning. The salt draws out moisture from the onion, helping it soften and caramelize faster, which in turn develops its natural sweetness. This foundational step builds a rich, complex flavor into the very base of your casserole from the first moment.
- Allow Sour Cream to Warm Up Slightly: Sour cream taken directly from the refrigerator can be quite stiff and may not blend smoothly into the other ingredients, potentially leading to dense, cool pockets in your filling. For a perfectly cohesive and creamy mixture, let your sour cream sit out at room temperature for about 10 minutes before you incorporate it. It will mix in much more easily and evenly.
- Taste and Adjust Salt Before Finalizing: The sodium content of jarred salsas can vary significantly from brand to brand. After you’ve combined all the chicken mixture ingredients (but before adding the cheese topping), take a small taste. This allows you to assess the current seasoning level. You may find you need a little less (or perhaps a touch more) of the remaining 1 1/2 teaspoons of kosher salt, depending on your chosen salsa and any other salty components in the mix.
- Don’t Skip the Cheese in the Filling: That one cup of shredded cheese mixed directly into the chicken mixture isn’t just for extra cheesiness; it serves a vital structural purpose. It acts as a binder, helping to hold the ingredients together and ensuring the interior remains wonderfully creamy and cohesive after baking. The two cups on top are, of course, for that glorious, golden, bubbling crust. Both layers are essential for different, important reasons.
- Perfect Tortilla Chip Topping Timing: If you’re adding a crunchy layer of crushed tortilla chips on top, timing is everything for maintaining crispness. Scatter the crushed chips over the top of the cheese only during the last 5 minutes of baking. Adding them any earlier will cause them to soften and lose their desired crunch under the melting cheese before the casserole is fully heated through.
Frequently Asked Questions About Mexican Chicken Casserole
Just skimming through for quick answers? Here are some of the most commonly asked questions about making and enjoying this delicious Mexican Chicken Casserole:
Can I make Mexican chicken casserole ahead of time?
Yes, making this Mexican chicken casserole ahead of time is a fantastic idea! You can assemble the entire casserole as directed, cover it tightly with foil, and refrigerate it for up to 24 hours. When you’re ready to bake, pull it from the fridge while your oven preheats, then bake as instructed. Remember that you might need to add an extra 10-15 minutes to the baking time since the casserole will be starting from a cold temperature.
Can I use uncooked chicken in this recipe?
Using raw chicken in this specific casserole recipe is not recommended for optimal results or food safety. The filling is quite dense, and raw chicken is unlikely to cook through evenly or completely within the relatively short 20 to 25-minute bake time. For convenience and guaranteed success, always use fully cooked, shredded chicken. Rotisserie chicken is the quickest option, but any pre-cooked chicken works perfectly in the mixture.
What can I use instead of sour cream?
Substituting sour cream in this casserole is quite easy, offering several excellent alternatives. Full-fat Greek yogurt is the closest swap, providing a similar creamy texture and tangy flavor, often with the added benefit of more protein. For an even richer, denser filling with a slightly different mouthfeel, softened cream cheese is another delicious option that blends beautifully.
Can I freeze Mexican chicken casserole?
Yes, this Mexican chicken casserole freezes exceptionally well, both before and after baking! To freeze before baking, assemble the casserole fully, cover it tightly with foil, and freeze for up to 3 months. Thaw it overnight in the fridge before baking. Baked leftovers also freeze very well in individual airtight containers for up to 3 months, making them perfect for convenient grab-and-reheat meals.
What is the best cheese for Mexican chicken casserole?
For this Mexican chicken casserole, a shredded Mexican blend or sharp cheddar cheese are excellent choices. Both melt wonderfully and their robust flavors stand up well to the bold chili powder and salsa. Monterey Jack is another fantastic option; it melts incredibly smoothly and offers a mild, creamy flavor that complements the filling beautifully. A blend of cheddar and Monterey Jack often provides the best of both texture and taste.
How long does Mexican chicken casserole last in the fridge?
This Mexican chicken casserole can be safely stored in an airtight container in the refrigerator for up to 4 days. It’s best to let it cool completely before covering and refrigerating. Many people find that the flavors actually deepen and improve overnight as the spices and salsa meld more thoroughly with the rice and chicken. You can reheat individual portions easily in the microwave or warm the entire baking dish, covered, in the oven.
Other Irresistible Easy Casseroles You’ll Love
There’s nothing quite like the comforting embrace of a hearty casserole, especially on a chilly evening or when you need a simple, satisfying meal that feeds a crowd. If you’ve enjoyed the ease and flavor of this Mexican Chicken Casserole, you’ll definitely want to explore these other fantastic, tested-and-true casserole recipes from my collection:
- Cheesy Chicken Enchiladas with White Sauce
- Hearty Chicken Broccoli Casserole
- Comforting Chicken Potato Casserole
- Classic Hamburger Casserole
- Simple American Chop Suey
- Delicious Cheeseburger Casserole
Don’t stop there! Dive into my full collection of yummy, tested-and-true casserole recipes for even more inspiration and effortless meal ideas!
Mexican Chicken Casserole

Ingredients
- 2 tbsp neutral oil
- 1 cup finely-chopped onion
- 2 tsp kosher salt divided
- 1 tbsp minced garlic
- 3 cups shredded rotisserie chicken
- 3 tbsp chili powder
- 2 cups cooked rice
- 1 15 oz can black beans, rinsed and drained
- 1 cup frozen corn
- 1 cup jarred salsa
- 1 cup sour cream or full-fat Greek yogurt
- 3 cups shredded Mexican blend or cheddar cheese divided
- Optional toppings: sliced avocado, fresh cilantro, sliced green onion, jalapeños, extra salsa, sour cream
Instructions
-
Preheat oven to 375°F (190°C). Lightly grease a 9×13-inch baking dish with cooking spray or oil, or line with parchment paper for easy cleanup.
-
Heat 2 tbsp oil in a Dutch oven or large skillet over medium heat. Add the finely chopped onion and 1/2 tsp kosher salt. Cook for 5 to 7 minutes, stirring occasionally, until the onion is soft and golden. Stir in the minced garlic and cook for 1 more minute until fragrant.
-
Add the shredded rotisserie chicken and 3 tbsp chili powder to the pan. Stir well to coat the chicken evenly in the spice. Cook for 2 to 3 minutes to warm the chicken through and allow the chili powder to bloom, intensifying its flavor. Turn off the heat.
-
Stir in the cooked rice, rinsed and drained black beans, frozen corn, jarred salsa, sour cream, the remaining 1 1/2 tsp kosher salt, and 1 cup of the shredded cheese. Mix until all ingredients are fully combined. If your skillet is too small, transfer the chicken mixture to a large bowl to combine everything.
-
Spread the prepared filling evenly into your greased 9×13-inch baking dish. Top the entire surface with the remaining 2 cups of shredded cheese in an even layer.
-
Bake for 20 to 25 minutes, or until the casserole is piping hot, bubbly around the edges, and the cheese on top is beautifully melted and golden.
-
Remove from oven and let the casserole rest for 5-10 minutes before scooping and serving. This allows it to firm up for cleaner portions. Garnish with your desired optional toppings and serve warm.
Notes
Chicken: Rotisserie chicken is the fastest option. Any cooked, shredded chicken works perfectly. Leftover baked chicken breasts or thighs are a great way to utilize what’s in your fridge.
Rice: Any cooked white or brown rice works. Ensure it has a little salt in it before mixing (unseasoned rice can make the filling taste bland). Our microwave rice recipe is a super-fast prep option.
Sour Cream: Full-fat sour cream provides the richest, creamiest texture. Full-fat Greek yogurt is a lighter, protein-rich swap that still delivers great tang and creaminess.
Storage: Store cooled leftovers in an airtight container in the fridge for up to 4 days. The flavors often deepen and improve overnight. Remember to keep fresh toppings (like avocado, cilantro, sour cream) stored separately for best quality.
Freezing: This casserole freezes well. Assemble the entire dish before baking, cover tightly, and freeze for up to 3 months. Thaw overnight in the fridge, then bake as directed (you may need to add a few extra minutes). Baked leftovers can also be portioned into individual airtight containers and frozen for up to 3 months.
Reheating: For oven reheating, cover with foil and bake at 350°F (175°C) for about 20 minutes, removing foil for the last 5 minutes to re-bubble the cheese. Individual portions reheat quickly in the microwave in 60-second bursts; cover loosely with a damp paper towel to prevent drying.
Nutrition
Calories: 473kcal |
Carbohydrates: 30g |
Protein: 18g |
Fat: 33g |
Saturated Fat: 15g |
Polyunsaturated Fat: 3g |
Monounsaturated Fat: 9g |
Trans Fat: 0.02g |
Cholesterol: 80mg |
Sodium: 1231mg |
Potassium: 316mg |
Fiber: 3g |
Sugar: 3g |
Vitamin A: 2004IU |
Vitamin C: 5mg |
Calcium: 473mg |
Iron: 1mg
Nutrition information is automatically calculated and should only be used as an approximation.