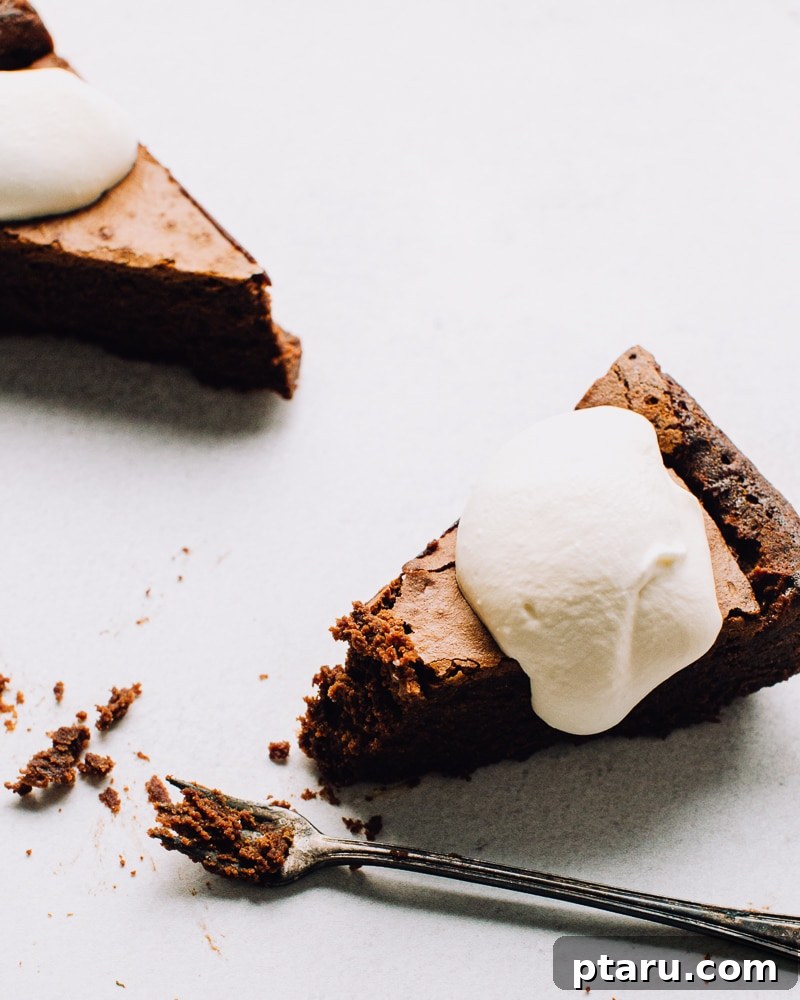
Indulge in the unparalleled richness of the perfect flourless chocolate cake. This extraordinary recipe promises a delightful experience with its signature crackly top, intensely fudgy interior reminiscent of a gourmet brownie, and a naturally gluten-free composition. It’s not just a dessert; it’s a testament to simple elegance and ridiculously delicious flavor, making it a must-try for any chocolate lover.
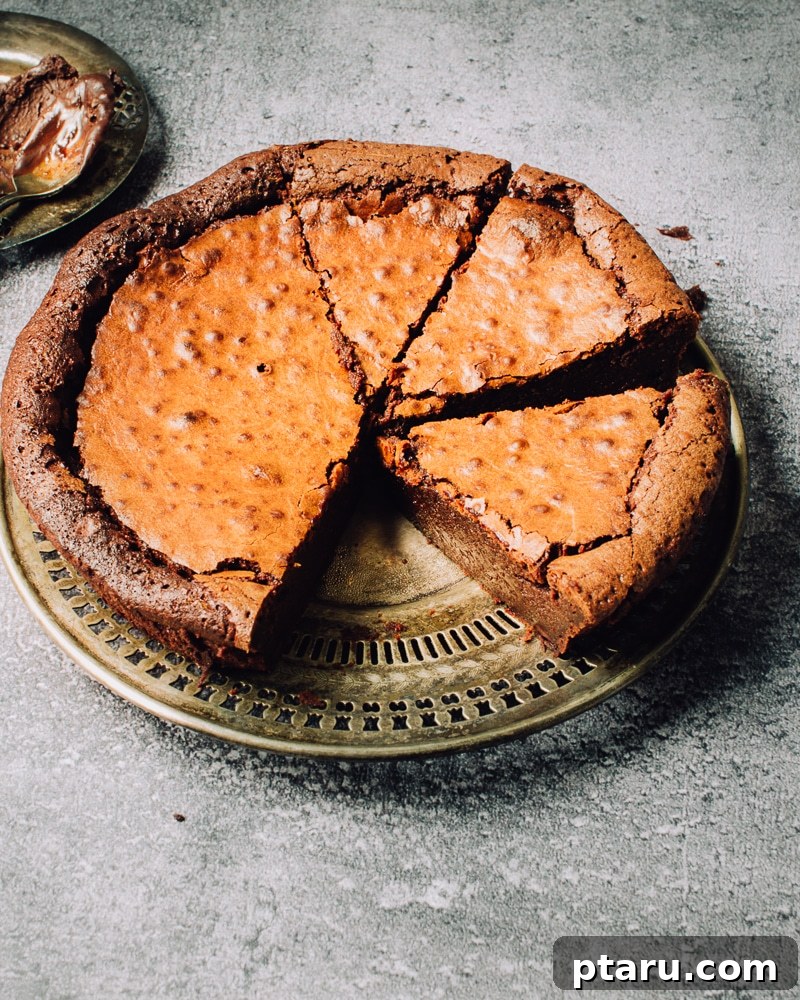
The Ultimate Guide to Baking a Flawless Flourless Chocolate Cake
Are you searching for a dessert that’s both incredibly rich and surprisingly simple to prepare? Look no further than this definitive flourless chocolate cake recipe. Often hailed as the holy grail of chocolate desserts, this cake manages to be decadent, sophisticated, and wonderfully accessible all at once. It requires only a handful of common ingredients and minimal equipment, proving that you don’t need a pastry chef’s arsenal to create something truly magnificent. If you have a mixing bowl and a spoon, you’re already halfway to creating this show-stopping dessert, effortlessly achieving a gourmet result in your own kitchen.
Beyond its ease, one of the most remarkable qualities of this cake is its naturally gluten-free nature. Without the need for any flour, it offers a safe and satisfying treat for those with gluten sensitivities or celiac disease, eliminating the stress of finding alternative flours or worrying about cross-contamination. This makes it an ideal choice when entertaining guests with diverse dietary needs, ensuring everyone can enjoy a slice of pure bliss without compromise. Its inherent simplicity and inclusive nature make it a versatile dessert for any occasion, from casual weeknight treats to elegant holiday feasts.
The Science Behind the Fudgy Perfection
Unlike traditional cakes that rely on baking powder or baking soda for lift, a flourless chocolate cake achieves its unique texture primarily through eggs. When baked, the egg proteins expand and capture air, causing the cake to puff up dramatically, much like a soufflé. This airy initial rise creates anticipation, but the true magic happens as the cake cools. Without the robust structural support of flour, the cake gently sinks back down, collapsing into itself. This natural deflation is not a flaw, but rather the secret to its wonderfully dense, rich, and incredibly fudgy texture. Each bite offers a melt-in-your-mouth experience that is deeply satisfying and intensely chocolatey, a hallmark of this refined dessert.
This distinct baking process and subsequent textural transformation give the flourless chocolate cake its signature brownie-like middle. It’s a delightful hybrid, embodying the depth of a rich chocolate truffle and the comforting chewiness of the most decadent brownie you’ve ever tasted, all presented in an elegant cake form. The exterior, meanwhile, develops a beautiful, delicate crackle, providing a delightful textural contrast to the soft, moist interior. This combination of textures, from the slightly crisp top to the intensely creamy core, is what truly sets a great flourless chocolate cake apart.
Serving Your Decadent Flourless Chocolate Cake
While some purists prefer their flourless chocolate cake served straight from the fridge for a firmer, almost candy-like bite, I find that allowing it to come to room temperature truly enhances its fudgy, melt-in-your-mouth quality. The subtle warmth allows the intricate chocolate flavors and delicate aroma to fully develop, offering a more profound and nuanced sensory experience. However you decide to serve it, one crucial step remains paramount: the cake must be thoroughly chilled after baking. This initial chilling period, ideally for at least four hours, is essential. It allows the cake to firm up completely, making it easily sliceable and preventing it from crumbling, and also helps to mellow out any lingering “eggy” flavor, leaving you with pure, unadulterated chocolate goodness.
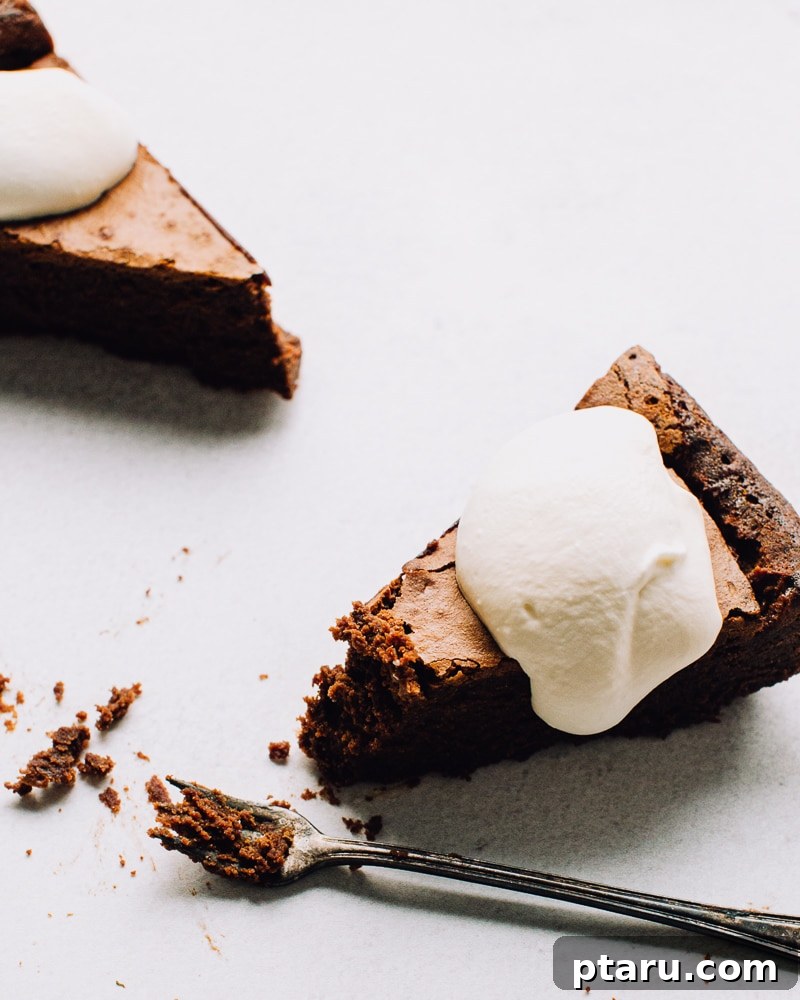
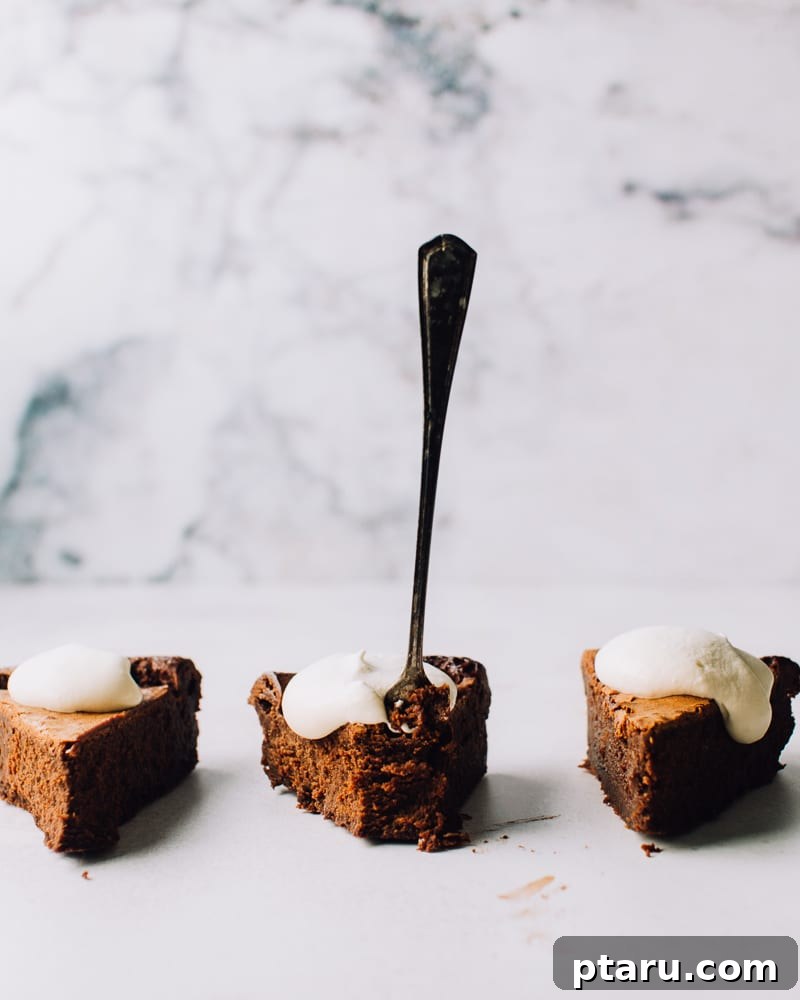
Once chilled and ready, the possibilities for garnishing are as endless as your imagination. A simple dusting of confectioners’ sugar or a sprinkle of high-quality cocoa powder provides an elegant, minimalist finish that speaks volumes. For those seeking extra indulgence, a generous dollop of freshly whipped cream adds a luscious, creamy contrast that beautifully complements the cake’s richness. Consider serving individual slices with fresh berries – vibrant raspberries or sweet strawberries are particularly complementary – or a scoop of premium vanilla bean ice cream. A drizzle of raspberry coulis, a light caramel sauce, or a sprinkle of toasted nuts can also elevate both the presentation and the flavor profile, making this flourless chocolate cake suitable for both casual gatherings and the most sophisticated dinner parties.
Essential Ingredients for Your Flourless Chocolate Cake
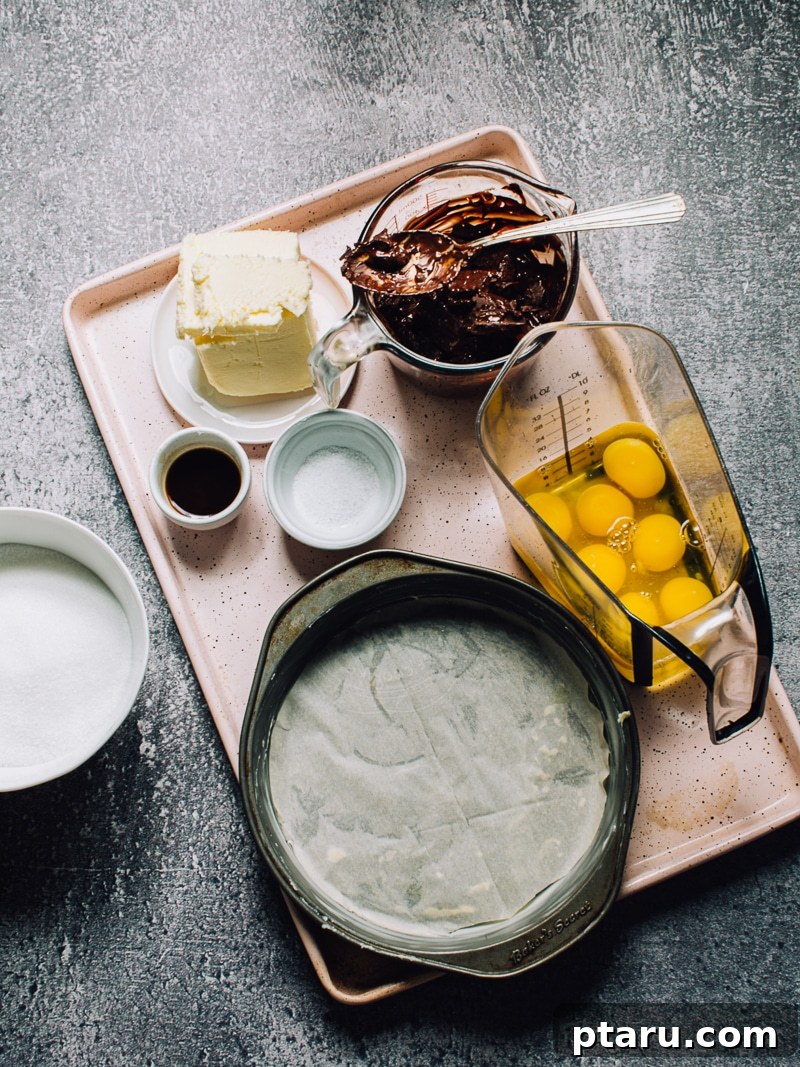
Creating this magnificent dessert relies on a few key, high-quality ingredients. Because there are so few components, each one plays a singularly vital role in the final flavor and texture. Choosing the best quality ingredients available will undoubtedly make a significant difference in the exquisite outcome of your cake, transforming it from good to truly exceptional.
- Chocolate: This is unequivocally the star of the show, so do not compromise on quality. Opt for a good-quality dark chocolate, preferably one with 60-70% cocoa solids. Bittersweet chocolate works beautifully, offering a deep, complex flavor that is intensely chocolatey without being overly sweet. High-quality chocolate melts more smoothly and contributes significantly to the cake’s desirable fudgy texture and rich aroma. Avoid standard chocolate chips if possible, as they often contain stabilizers that can prevent them from melting into the perfectly smooth consistency required for this recipe.
- Butter: Whether you opt for salted or unsalted butter, ensure it is fresh and of premium quality. Butter provides essential richness, moisture, and helps carry the profound chocolate flavor throughout every bite of the cake. If you choose salted butter, you might consider slightly reducing the amount of additional salt specified in the recipe. Unsalted butter generally offers more precise control over the overall salt content, which is often preferred in fine baking for consistent results.
- Sugar: Granulated sugar serves multiple critical purposes in this recipe beyond merely providing sweetness. It plays a crucial role in achieving that irresistible crackly, almost meringue-like top crust that is a characteristic and cherished feature of a great flourless chocolate cake. The sugar caramelizes slightly on the surface during the baking process, creating a delicate crispness that contrasts beautifully and delightfully with the soft, dense interior, adding another layer of textural complexity.
- Eggs: Eggs are the primary binder and the sole leavening agent in this unique flourless cake. They emulsify the batter, creating a cohesive mixture, and provide the necessary structure (albeit a temporary one that gracefully collapses, as previously discussed) and the initial impressive rise. Using large eggs that are at room temperature is highly recommended, as they incorporate more easily and smoothly into the batter, leading to a more consistent and fine texture in the finished cake.
- Salt: A mere pinch of salt is profoundly crucial in almost all chocolate desserts, and especially so here. It doesn’t just add flavor; it shrewdly balances the sweetness of the sugar and intensely rounds out the deep, sometimes slightly bitter, complex notes of the dark chocolate, making the overall flavor profile more complex, harmonious, and utterly captivating. Never be tempted to skip this vital ingredient!
- Vanilla Extract: Vanilla is a timeless and classic pairing with chocolate, acting as a natural flavor enhancer that deepens and highlights the chocolate’s inherent qualities without ever overpowering them. Use a good quality pure vanilla extract for the best and most authentic results. It imparts a subtle warmth and aromatic depth that elevates the entire cake, contributing to its overall sophisticated taste.
Step-by-Step Guide: Crafting Your Decadent Flourless Chocolate Cake
Despite its sophisticated appearance and intensely rich flavor, making a flourless chocolate cake is surprisingly straightforward and achievable for bakers of all skill levels. Follow these detailed steps for a guaranteed success, resulting in a show-stopping dessert that will impress everyone.
- Prepare Your Pan and Oven: Begin by preheating your oven to the specified temperature, typically 350ºF (175ºC). Achieving a consistent oven temperature before baking is crucial for even cooking. Next, prepare your cake pan diligently to ensure a perfect release. Generously grease a 9×2 inch round cake pan thoroughly with butter or a high-quality non-stick baking spray. Then, cut a circle of parchment paper to fit the bottom of the pan precisely and place it inside. This dual approach of greasing and lining is absolutely critical to prevent the delicate cake from sticking and guarantees effortless removal once baked.
- Melt Chocolate and Butter: Combine your precisely chopped quality dark chocolate and the butter in a large microwave-safe bowl. Heat on 50% power in the microwave for approximately two minutes. Remove the bowl and stir the mixture gently. Continue heating in short 30-second intervals at 50% power, stirring thoroughly between each interval, until the chocolate is approximately 80% melted. At this crucial point, remove it from the microwave and stir vigorously until both the chocolate and butter are completely smooth, glossy, and fully melted. This careful technique is vital for preventing the chocolate from overheating, which can cause it to “seize” and become grainy, instead of the smooth, luscious base you desire. As an alternative method, you can use a double boiler: place the heat-safe bowl containing the chocolate and butter over a pot of simmering water, ensuring the water does not make direct contact with the bottom of the bowl, and stir continuously until melted and perfectly smooth.
- Incorporate Wet Ingredients: Once your chocolate and butter mixture is perfectly smooth, immediately and vigorously stir in the granulated sugar until it is fully dissolved and thoroughly incorporated into the chocolate base. Next, gradually whisk in the large eggs, adding them about a quarter-cup at a time. It is imperative to ensure each egg addition is fully incorporated and emulsified into the chocolate mixture before adding the next splash; this gradual process helps create a homogenous, smooth, and stable batter. Finally, whisk in the pure vanilla extract and the kosher salt, mixing until everything is well combined and the batter is fragrant and consistent.
- Bake to Perfection: Using a rubber spatula, carefully scrape the rich, glossy batter into your meticulously prepared cake pan, ensuring an even distribution. Place the pan in the center of your preheated oven and bake for approximately 35 minutes. The cake is done when the top has visibly puffed up, appears dry to the touch, and showcases beautiful, characteristic cracks across its surface. Crucially, when you gently jiggle the pan, the very center of the cake should still retain a slight, enticing wobble. It is paramount not to overbake, as this can lead to a dry and crumbly cake; that slight wiggle in the middle is the key indicator for achieving the signature moist, intensely fudgy texture that this dessert is celebrated for.
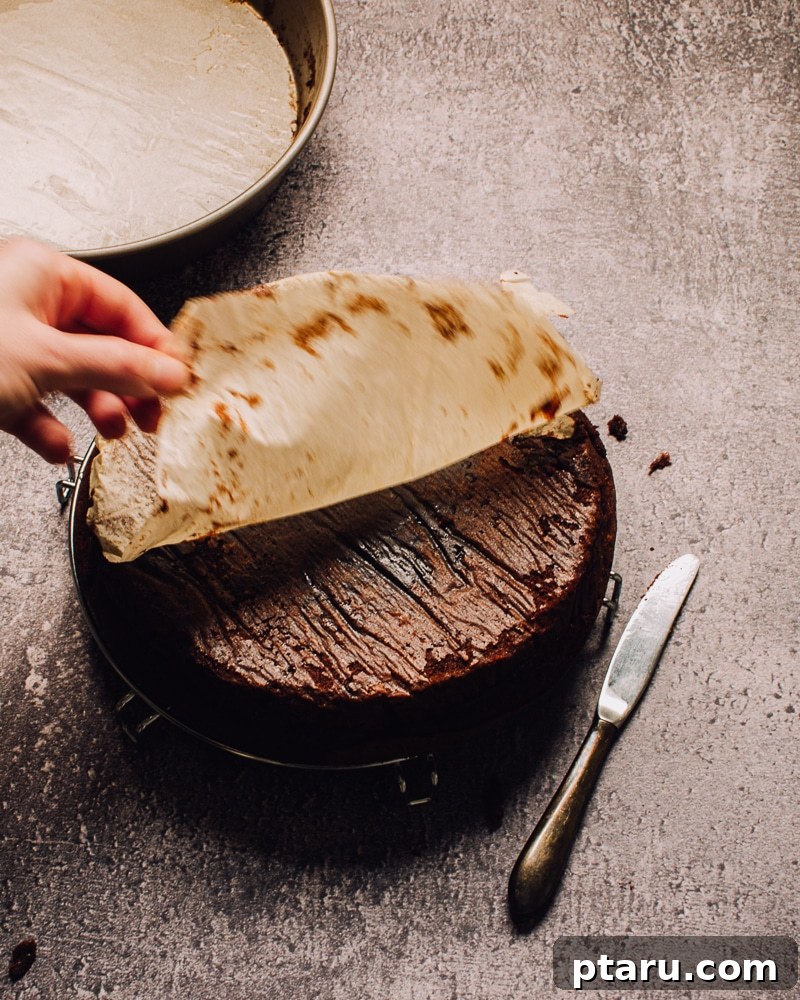
- Cool and Chill: Once baked, carefully remove the cake from the oven and place it on a wire rack to cool in its pan for about 20 minutes. During this cooling period, the cake will naturally deflate significantly – this is completely normal and an essential part of the process that gives it its dense, fudgy character. After cooling, carefully run a thin, sharp knife around the entire outside edge of the cake to gently loosen it from the pan sides. Then, place a wire rack directly on top of the cake in the pan. With a firm, confident grip, use both hands to flip the cake over onto the wire rack. The cake will now be top-down. Carefully peel off the parchment paper from what was the bottom of the cake. Now, place your desired serving plate directly on top of the inverted cake, and once again, confidently flip the cake over. It will now rest perfectly right-side-up on your serving plate, ready for its final transformation in the fridge. Transfer the cake immediately to the refrigerator and chill for a minimum of 4 hours, or ideally overnight, to allow it to firm up completely and for its deep, complex flavors to fully develop.
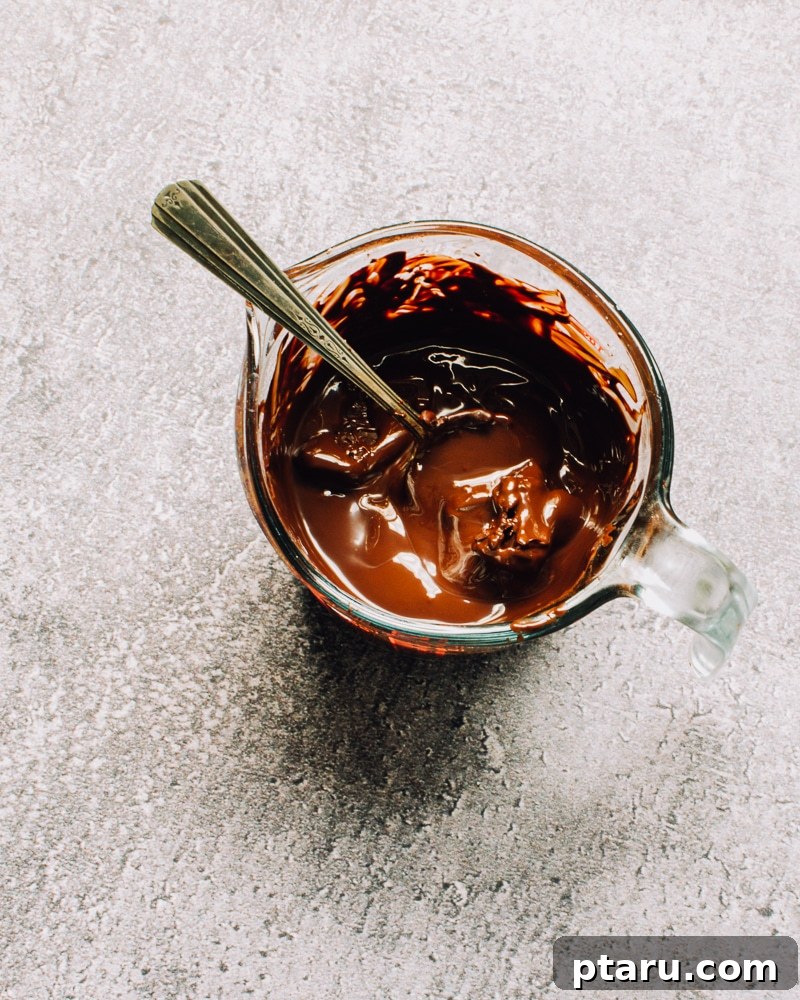
Mastering the Melt: A Critical Step for Smooth Chocolate
One of the most vital and often underestimated steps in preparing this flourless chocolate cake is melting the chocolate and butter correctly. Overheating chocolate can cause it to “seize,” transforming it into a grainy, dull, and unworkable mess rather than the smooth, luscious, and glossy base you absolutely need for this recipe. To deftly avoid this common and frustrating pitfall, always employ low heat. If you are using a microwave, always opt for 50% power and heat in very short bursts, typically 30 seconds at a time. The fundamental trick is to stop heating when the chocolate is visibly about 80% melted, as clearly shown in the accompanying image above.
Once it reaches this crucial stage, remove the bowl from the heat source (or microwave) and stir continuously and patiently. The residual heat retained within the already melted chocolate and butter will gently and effectively melt the remaining solid pieces, resulting in a perfectly smooth, silky, and glossy mixture. This meticulous technique ensures your chocolate remains beautifully creamy, which in turn contributes significantly to the superior texture and luxurious mouthfeel of your finished cake.
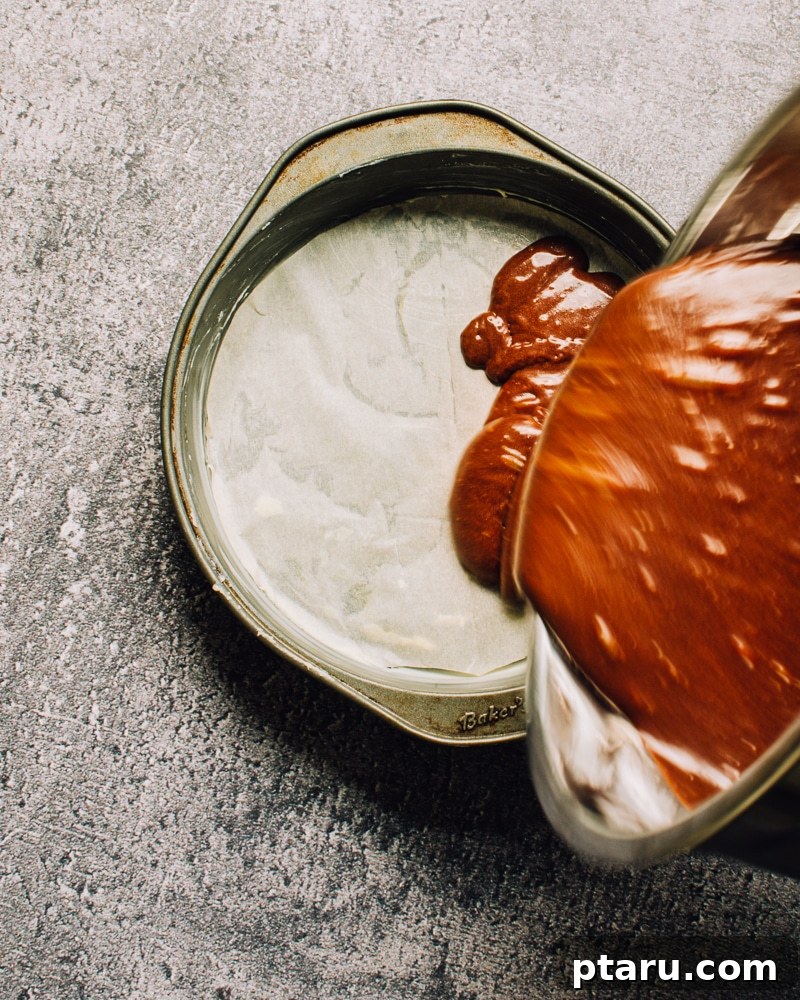
The Importance of Proper Pan Preparation
Given the exquisitely rich, dense, and delicate nature of flourless chocolate cake, it is absolutely imperative to properly prepare your baking pan to prevent any sticking whatsoever. Simply greasing the pan, while a good start, is often not enough to guarantee a clean release for such a dense dessert. For the best and most reliable results, you must always grease the pan generously with butter or cooking spray, and then, crucially, line the bottom with a precisely cut circle of parchment paper. The parchment paper creates an infallible non-stick barrier that ensures the cake releases cleanly and effortlessly, preserving its delicate structure and maintaining its beautiful, crackly top intact. This small, seemingly extra step is a fundamental precaution that will save you a considerable amount of frustration when it comes time to invert and proudly serve your magnificent masterpiece.
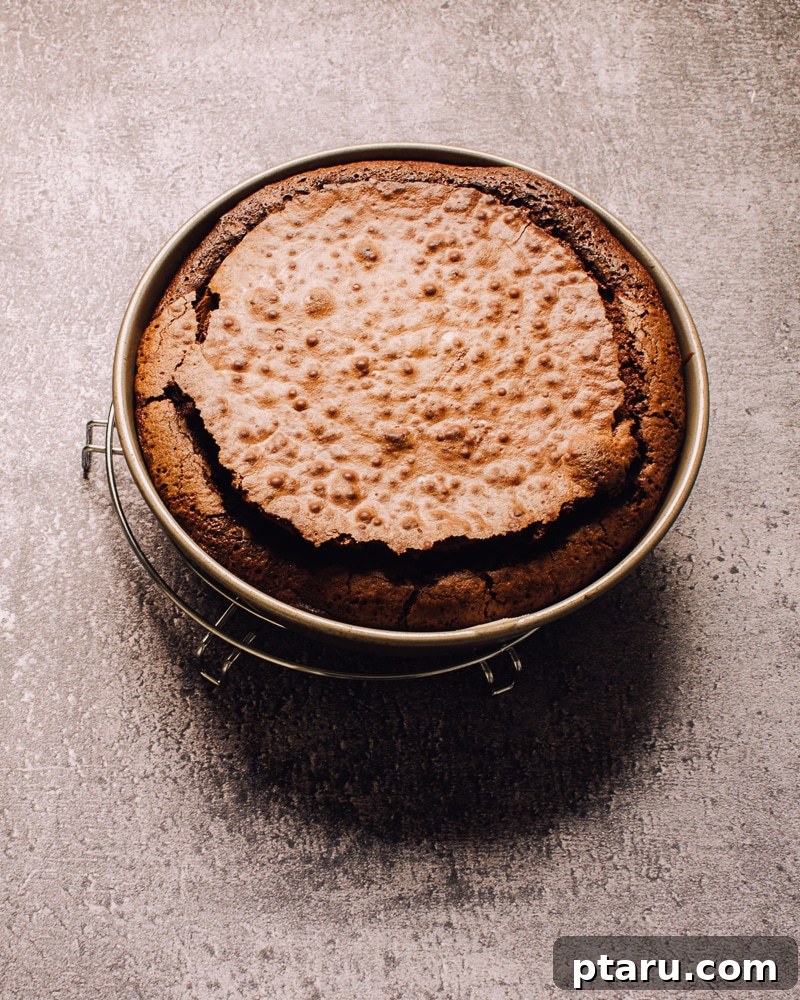
Achieving the Perfect Doneness: Knowing When Your Cake is Ready
Determining the exact moment your flourless chocolate cake is perfectly baked is a critical factor for achieving its signature fudgy, moist texture. Overbaking can tragically lead to a dry, crumbly, and less satisfying result, while underbaking will leave it too gooey and unset. Here’s precisely what to look for to ensure perfection:
- The Puff: In the oven, the cake will initially puff up quite significantly, much like a classic soufflé. This impressive rise is a good early indicator that the eggs are performing their essential role in the leavening process, incorporating air into the batter.
- Dry Surface: The very top surface of the cake should appear completely set and dry to the eye. There should be no visible liquid or wetness remaining on the surface, indicating that the top layer has baked through.
- Visible Cracks: Beautiful, characteristic cracks will gracefully form on the surface of the cake. These distinct cracks are a highly sought-after hallmark of a well-baked flourless chocolate cake and significantly contribute to its rustic elegance and visual appeal.
- The Gentle Jiggle: This is arguably the most important and reliable cue. When you gently jiggle the pan, the very center of the cake should still retain a slight, subtle, and enticing wobble. This particular “wiggle in the middle” signifies that the cake is just perfectly set on the edges but remains wonderfully moist, tender, and fudgy at its heart. It’s crucial to understand that the cake will continue to cook slightly from its residual heat within the hot pan as it cools down, and it will firm up completely during the essential chilling process in the refrigerator. Therefore, you must resist the tempting urge to bake until it feels completely firm; that slight jiggle is your ultimate ally for a truly moist, decadent, and unforgettable cake.
Cooling and Inverting: The Final Flourish for a Pristine Presentation
Once you’ve removed the perfectly baked cake from the oven and allowed it to cool in the pan for approximately 20 minutes, you will inevitably notice that it has deflated quite significantly. As previously mentioned, this natural deflation is entirely normal and an integral part of the process that bestows upon it its desired dense, fudgy character. To ensure a clean and impeccable release from the pan and a beautiful, unblemished presentation, first carefully run a thin, sharp knife around the entire outside edge of the cake, gently detaching it from the pan sides. Next, precisely place a wire rack directly on top of the cake in the pan. With a firm, unwavering, and confident grip, use both hands to swiftly flip the cake over onto the wire rack. The cake will now be resting top-down on the rack.
Carefully and slowly peel off the parchment paper from what was the bottom of the cake, revealing its smooth underside. Now, place your desired serving plate directly on top of the inverted cake, and once again, confidently flip the cake over. It will now rest perfectly right-side-up on your chosen serving plate, poised for its final and crucial transformation in the fridge. Transfer it immediately to the refrigerator to chill completely for a minimum of 4 hours. This extended chilling period is absolutely crucial for setting the cake’s delicate structure, intensely enhancing its deep, complex flavors, and ultimately allowing for clean, perfect, and elegant slices that will impress every guest.
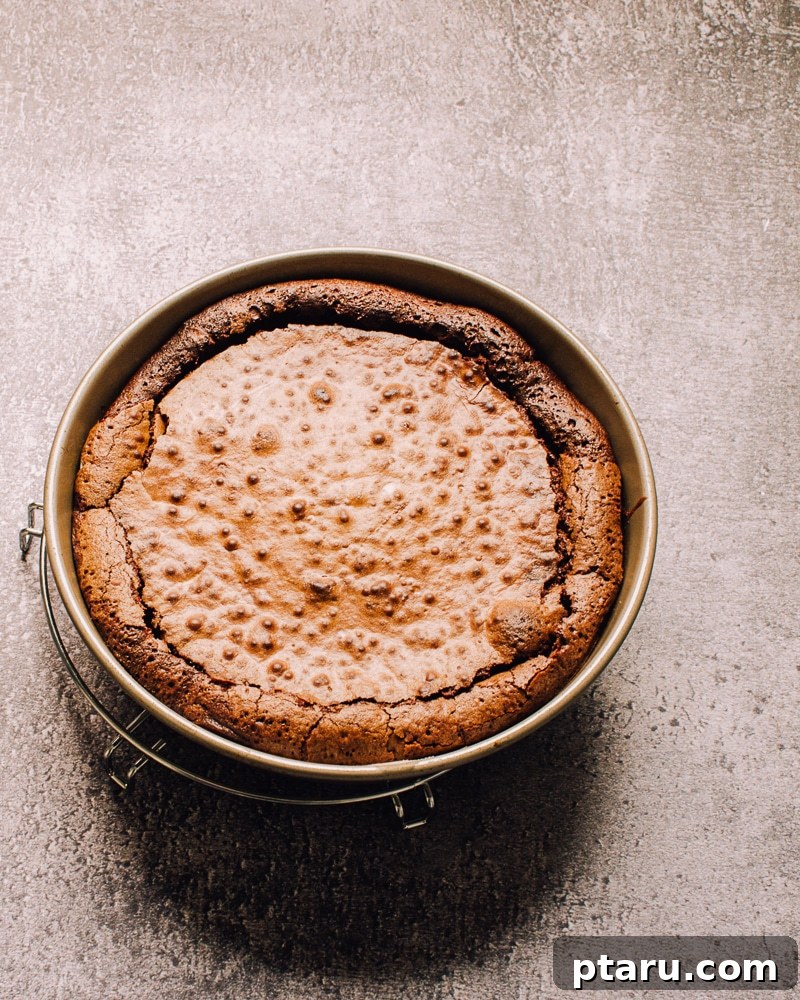
Flourless Chocolate Cake: A Naturally Gluten-Free Delight
Absolutely, yes! One of the greatest and most celebrated advantages of this flourless chocolate cake recipe is its inherent and completely natural gluten-free nature. Since it contains absolutely no wheat flour or any other gluten-containing ingredients, it stands as a fantastic and entirely safe option for anyone diligently following a gluten-free diet, whether due to celiac disease, gluten sensitivity, or simply a personal preference for avoiding gluten. This remarkable quality makes it an incredibly inclusive and thoughtful dessert choice for gatherings where diverse dietary restrictions might be a concern, ensuring that everyone can partake in the joyous indulgence.
When you are preparing this magnificent cake for someone with celiac disease or severe gluten intolerance, it is critically important to be extra mindful of potential cross-contamination. Always make it a practice to thoroughly double-check the label of your chosen chocolate to ensure it is explicitly certified gluten-free or explicitly produced in a dedicated gluten-free facility. Similarly, it is advisable to use fresh, unopened granulated sugar and cocoa powder that have not been scooped with measuring cups or spoons previously used with wheat flour or other gluten-containing ingredients. A few simple yet diligent precautions ensure that your flourless chocolate cake remains a truly safe, exquisitely delicious, and genuinely gluten-free gem for all to savor and enjoy without any worries.
Frequently Asked Questions About Flourless Chocolate Cake
Here are comprehensive answers to some common questions you might have about baking, storing, and enjoying this magnificent flourless chocolate cake dessert:
- Can I make this cake ahead of time? Absolutely! Flourless chocolate cake is an exceptional make-ahead dessert. Its rich flavor and fudgy texture often deepen and improve after a day or two of chilling in the refrigerator, making it an ideal choice for entertaining or meal prepping for special occasions. Just cover it loosely to prevent condensation and store it in the fridge.
- How long does flourless chocolate cake last? When stored properly in an airtight container in the refrigerator, this decadent cake can last for an impressive duration of up to 5-7 days, maintaining its delightful texture and flavor.
- Can I freeze flourless chocolate cake? Yes, you certainly can! To freeze, ensure the cake (either whole or sliced into individual portions) is thoroughly chilled. Wrap it tightly first in plastic wrap, then again in a layer of heavy-duty aluminum foil to prevent freezer burn. It can be safely frozen for up to 2-3 months. To serve, thaw it overnight in the refrigerator before bringing it to your desired serving temperature.
- What if my chocolate seizes during melting? If your chocolate becomes grainy, thick, or forms a solid mass during the melting process, it has likely overheated or unfortunately came into contact with even a tiny amount of water. Regrettably, seized chocolate is exceedingly difficult to salvage for baking recipes where a smooth consistency is paramount. It is generally best to discard it and start over with fresh chocolate and butter, paying meticulous attention to using low heat and scrupulously avoiding any moisture.
- Why did my cake crack so much on top? Cracks on the surface are not only perfectly normal but also highly desirable for this type of cake! They are a beautiful indicator of a proper bake and significantly contribute to its charming, rustic aesthetic. Rest assured, if your cake has many cracks, it’s a sign of success, not a flaw.
- Can I add other flavorings or variations? Definitely! This cake serves as a wonderful canvas for additional flavors. A touch of high-quality espresso powder (about 1 teaspoon) can subtly deepen and enhance the chocolate flavor without making it taste like coffee. A splash of orange liqueur (like Grand Marnier) or a hint of peppermint extract could also introduce interesting and festive variations to the classic recipe.
More Decadent Chocolate Recipes to Love
If you’ve truly fallen in love with the intense richness and deep flavors of this flourless chocolate cake, be sure to explore these other exquisite chocolate desserts that promise similar levels of indulgence and satisfaction:
- No-Bake Chocolate Tart with Oreo Crust: An incredibly easy yet impressively elegant tart that requires absolutely no oven time, making it perfect for warmer weather or when you need a quick, fuss-free dessert that still delivers on taste.
- Moist Chocolate Cake: For those who appreciate a classic, fluffy chocolate cake with a tender crumb and deep chocolate flavor, this recipe delivers supreme moistness and rich taste, a true crowd-pleaser for any occasion.
- Best Chocolate Cheesecake: A creamy, dreamy, and utterly luxurious chocolate cheesecake recipe that’s guaranteed to be a crowd-pleaser, offering a rich and decadent twist on a beloved classic dessert.
Print Recipe
Flourless Chocolate Cake
Jennifer Pallian BSc, RD
15
35
8
Ingredients
-
9 oz chopped dark chocolate - 8 oz unsalted butter
- 1 ½ cups granulated sugar
- 6 large eggs
- 1 tbsp vanilla extract
- ¾ tsp kosher salt
Instructions
-
Preheat oven to 350ºF (175°C). Grease a 9×2″ round cake pan thoroughly and line the bottom with parchment paper.
-
Place chopped dark chocolate and butter together in a large microwave-safe bowl. Microwave on 50% power for two minutes, then stir. Continue at 50% power in 30-second intervals until chocolate is about 80% melted. At this point, remove from microwave and stir vigorously to finish melting completely, ensuring a smooth, creamy mixture. Avoid overheating chocolate to prevent seizing.
(Alternatively, melt chocolate and butter together in a large heat-safe bowl placed over a pot of simmering water, ensuring the water doesn’t touch the bowl.)
-
Using a strong arm or whisk, stir in the granulated sugar completely until fully dissolved. Then, gradually whisk in the eggs, about a quarter-cup at a time, ensuring each addition is fully incorporated before adding more. Finally, whisk in the vanilla extract and kosher salt until well combined.
-
Use a rubber spatula to scrape the batter into the prepared cake pan. Bake for about 35 minutes, or until the top is cracked and appears dry, but the center still maintains a slight jiggle when the pan is gently shaken. Do not overbake. Place the cake on a wire rack and let it cool in the pan for 20 minutes. It will deflate during this time, which is normal. After 20 minutes, run a knife around the outside edge of the cake to loosen it. Place a wire rack on top of the cake, and using two hands, confidently flip the cake over so it’s top-down on the wire rack. Immediately peel off the parchment paper. Place your serving plate on top of the inverted cake, and flip it a second time so it’s right-side-up on the plate.
-
Refrigerate for at least 4 hours before serving to allow it to firm up completely and for flavors to develop. Dust with confectioners’ sugar or cocoa, or serve with whipped cream and berries.
Tried this recipe? Leave a comment!