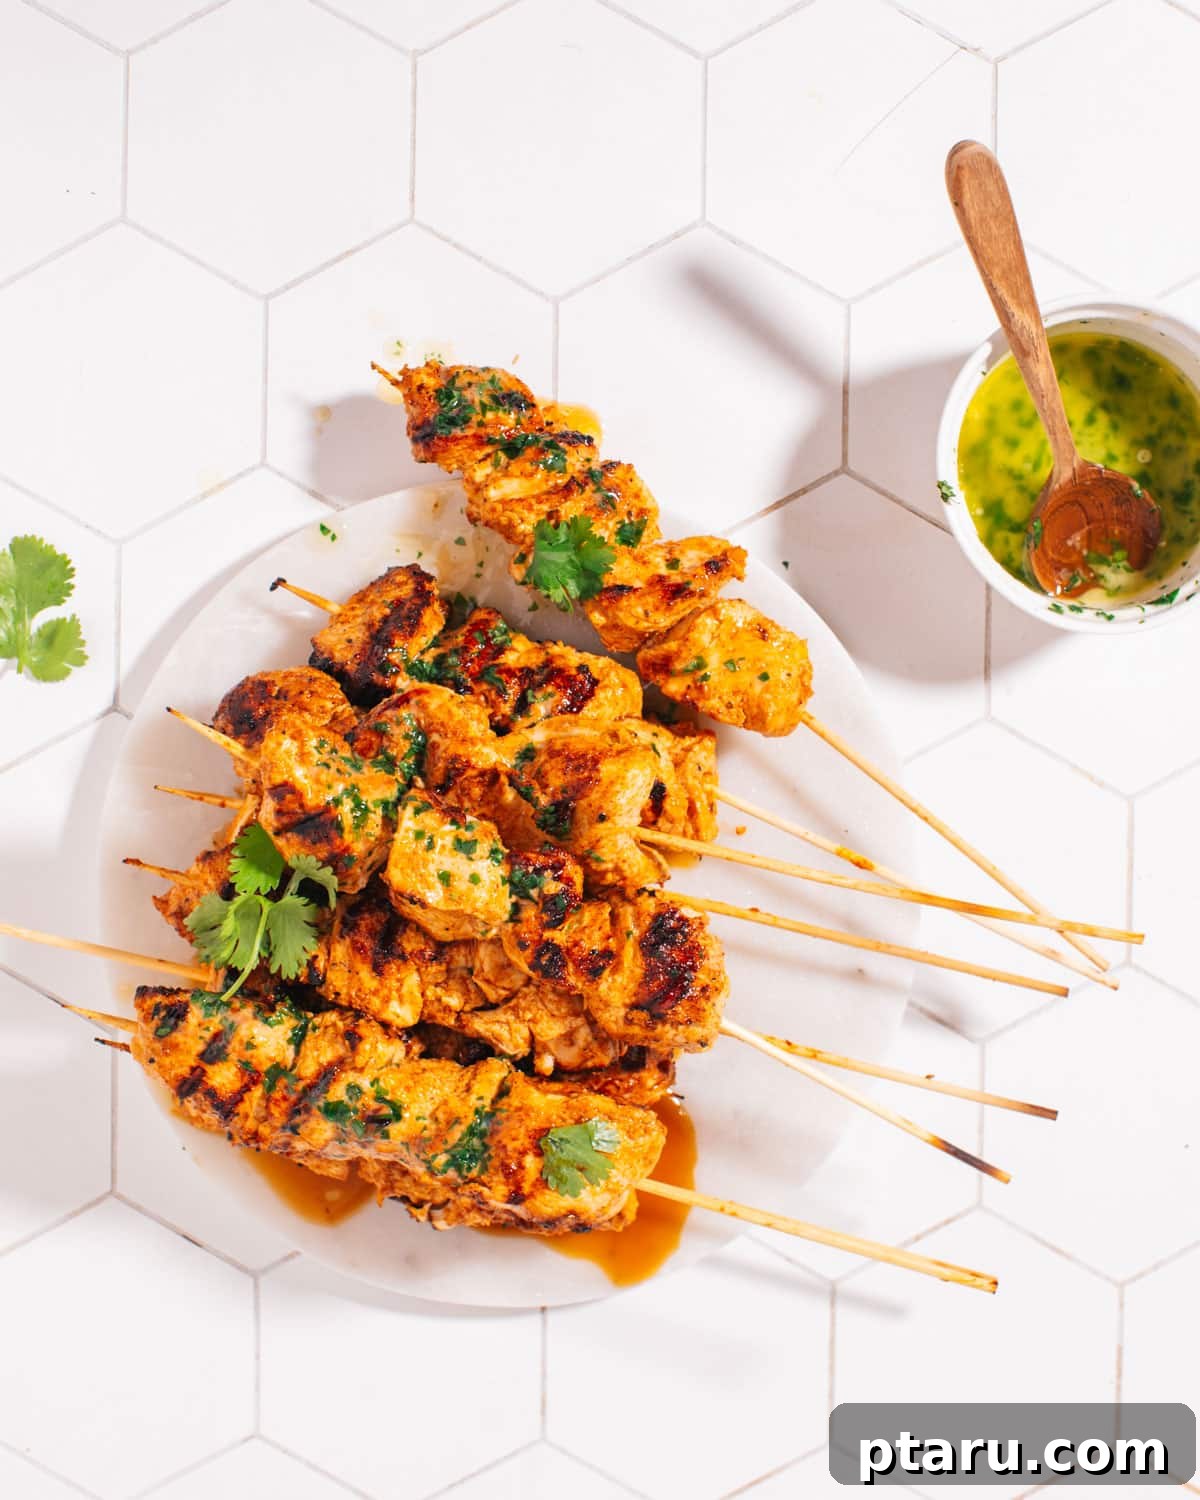
Prepare to delight your senses with this incredibly easy and authentic Chicken Tikka recipe. A cherished favorite in our half-Indian household, this dish features succulent, perfectly-spiced chunks of chicken, marinated to absorb deep, aromatic flavors, and then cooked to tender perfection. Forget takeout – this homemade version easily rivals your favorite Indian restaurant experience.
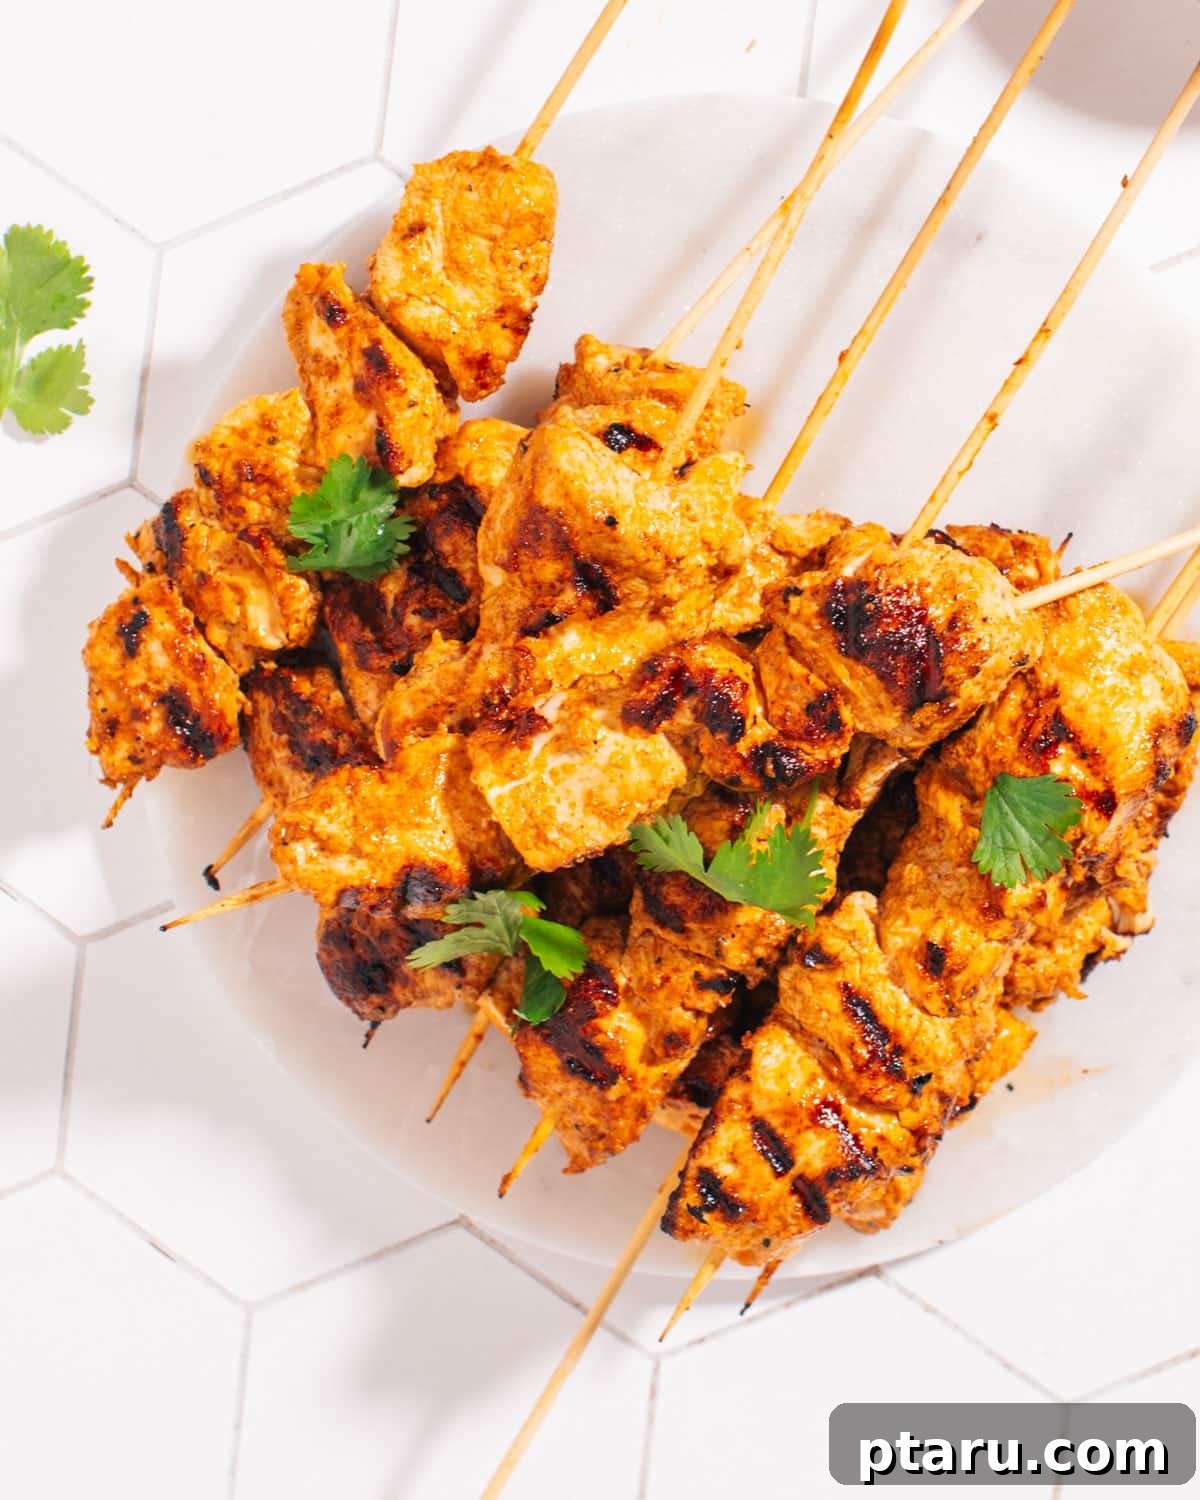
We’re talking about juicy, flavorful chicken skewers that burst with traditional Indian spices in every bite. Whether you prefer to make them on the grill for a smoky char, bake them in the oven for even tenderness, or crisp them up in an air fryer for a quick weeknight meal, this versatile recipe has you covered. It’s a fantastic choice for those seeking healthy chicken recipes that don’t compromise on taste.
Looking for more culinary inspiration? Explore other delightful options like my Thai Satay chicken skewers or delve into my collection of easy and flavorful Indian dinner ideas that are sure to impress.
Mastering Homemade Chicken Tikka: Your Ultimate Recipe Guide for Grill, Oven, or Air Fryer
Unleash the incredible flavors of India in your own kitchen with this comprehensive guide to making irresistible Chicken Tikka. From selecting the right ingredients to mastering the perfect cooking technique, we’ll walk you through everything you need to know to achieve restaurant-quality results every single time. This recipe is designed for ease without sacrificing authenticity, making it approachable for home cooks of all skill levels.
Essential Ingredients for the Best Chicken Tikka
Crafting authentic, deeply flavored Chicken Tikka begins with a thoughtful selection of fresh, aromatic ingredients. You’ll find that most of these staples are likely already residing in your pantry or are easily accessible, making this a wonderfully convenient dish to prepare any day of the week.
Key Components of Your Irresistible Tikka Marinade:
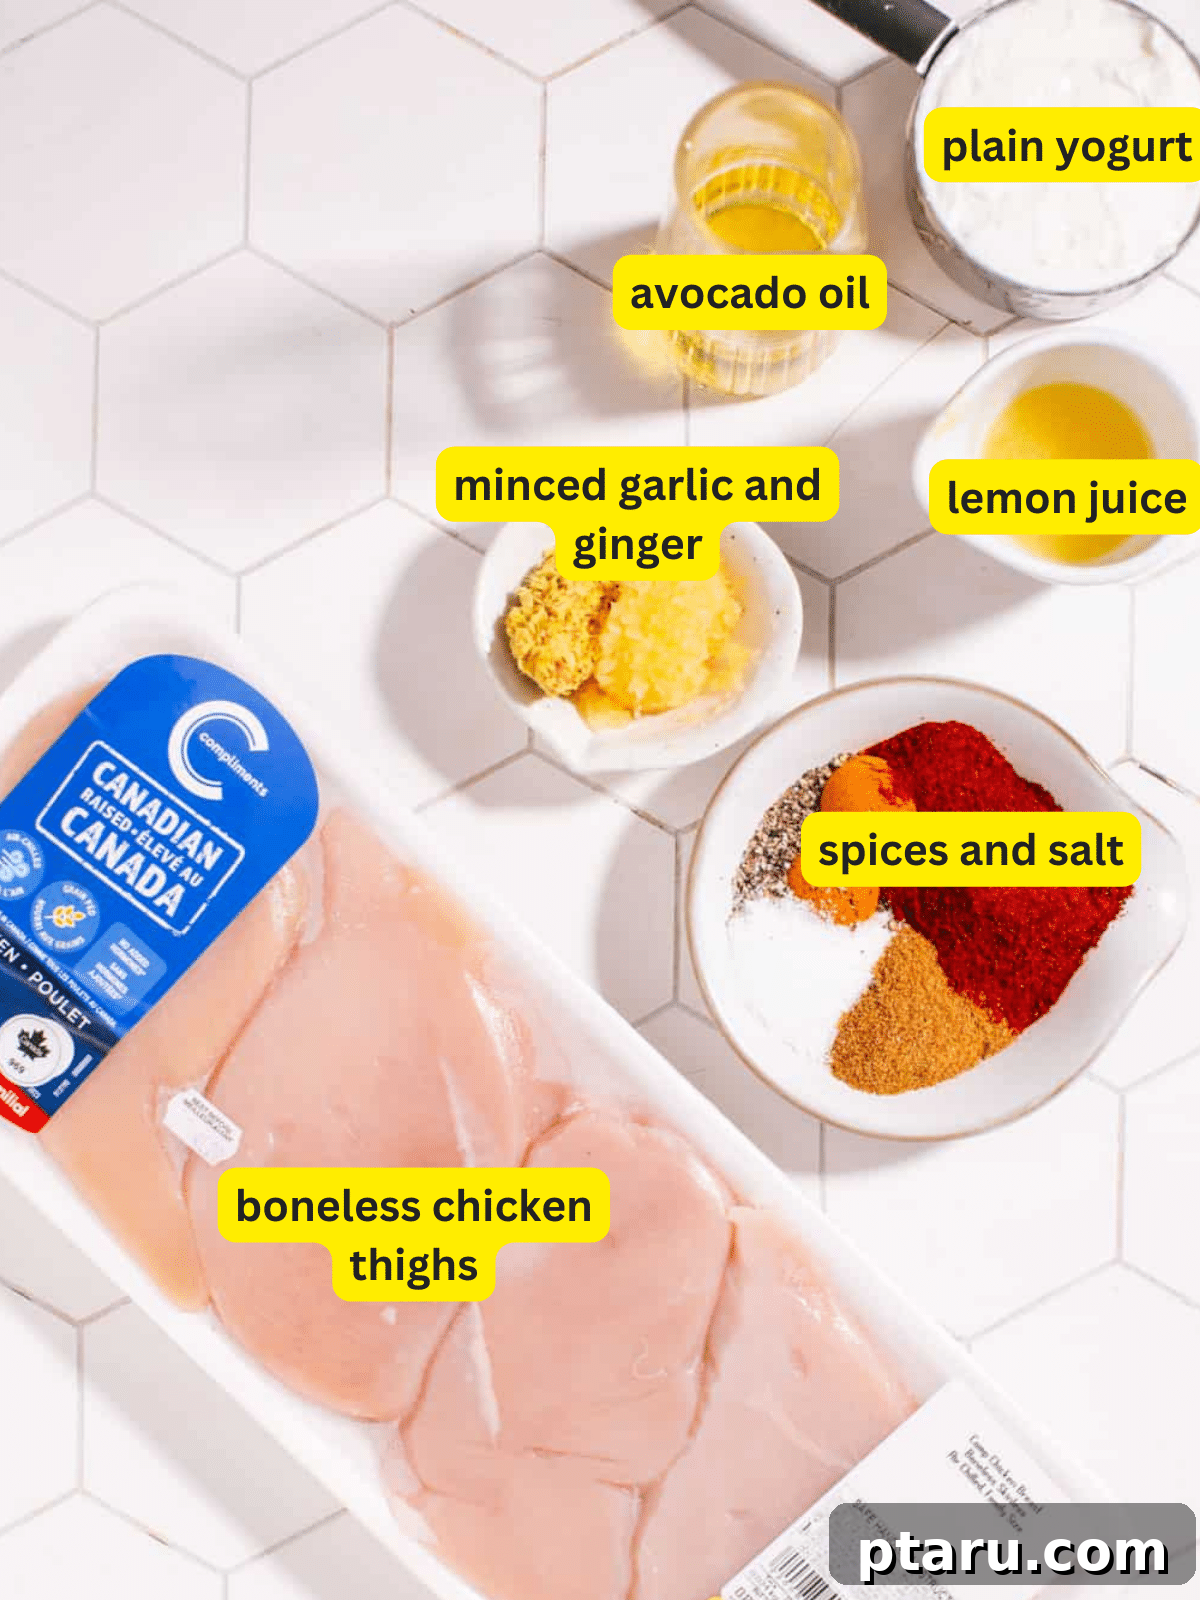
- Full-Fat Plain Yogurt: The cornerstone of our marinade, full-fat yogurt (especially thick Greek yogurt) provides both richness and essential acidity. Its lactic acid naturally tenderizes the chicken, allowing it to deeply absorb the spices, while its fat content ensures the chicken remains incredibly moist and juicy during cooking.
- Fresh Lemon Juice: A generous splash of fresh lemon juice not only brightens the entire flavor profile but also contributes to the tenderizing process. If you’re out of lemons, fresh lime juice makes for an excellent and zesty alternative.
- Avocado or Canola Oil: These neutral oils serve multiple purposes: they help evenly distribute the fat-soluble flavors of the spices throughout the marinade and contribute to a beautiful golden-brown crust on the chicken during cooking.
- Minced Fresh Garlic: For that pungent, aromatic foundation, freshly minced garlic cloves are non-negotiable. Avoid pre-minced or powdered garlic if possible, as fresh garlic delivers a much more vibrant and intense flavor.
- Finely Grated Fresh Ginger: The warm, subtly spicy, and earthy notes of fresh ginger are crucial for authentic Indian flavor. If fresh ginger is not readily available, a good quality bottled ginger paste can serve as a convenient and effective substitute.
- Paprika: This spice not only adds a mild sweetness but also contributes to the beautiful reddish hue of the finished chicken, along with a subtle, earthy peppery flavor.
- Ground Cumin Powder: Earthy, warm, and slightly pungent, cumin is a fundamental spice in Indian cuisine. It adds significant depth and a distinctive aroma that is integral to Chicken Tikka.
- Garam Masala: This iconic blend of Indian spices (typically featuring cinnamon, cardamom, cloves, and black pepper, among others) is the heart and soul of Chicken Tikka. It provides the dish’s complex, signature aromatic and flavorful profile.
- Cayenne Pepper: For that essential kick of heat! The amount can be easily adjusted to suit your personal spice preference, from mildly warm to delightfully fiery.
- Kosher Salt and Freshly Ground Black Pepper: These are not just basic seasonings; they are essential flavor enhancers that balance, amplify, and elevate all the other spices, bringing the entire dish into harmony.
- Boneless Chicken Breasts or Thighs: While boneless, skinless chicken breasts offer a lean protein option, we highly recommend using chicken thighs for Chicken Tikka. Thigh meat has a higher fat content, which guarantees a significantly juicier, more flavorful result that better retains moisture and spice during the cooking process. For optimal marination and even cooking, cut your chosen chicken into uniform 1.5-inch (approximately 4 cm) pieces.
Substitutions and Creative Variations for Your Tikka
This Chicken Tikka recipe is incredibly flexible, allowing for various dietary needs, ingredient availability, and flavor preferences. Don’t hesitate to get creative with it!
- Vegetable Tikka: For a deliciously wholesome vegetarian option, marinate an assortment of sturdy vegetables in the same yogurt-spice mixture. Excellent choices include vibrant bell peppers (red, yellow, orange), sweet onions, earthy mushrooms, tender zucchini, and cubes of paneer. Grill or bake these until tender and slightly charred for a flavorful meat-free meal. You could also try grilling my specially marinated paneer for an authentic Indian delight!
- Alternative Protein Swaps: The robust marinade works wonderfully with a variety of other proteins. Consider using firm tofu for a plant-based option, tender lamb cubes for a richer flavor, or even large shrimp for a quick-cooking seafood alternative. Remember to adjust your cooking times accordingly to prevent overcooking any delicate proteins.
- Customizing Spice Levels: The heat level of your Chicken Tikka is entirely in your hands. Easily customize it by increasing or decreasing the amount of cayenne pepper. For an extra layer of smoky heat and a vibrant red color, a pinch of Kashmiri chili powder is an excellent addition, known for its mild heat and rich hue.
- Adding Fresh Herbs: While cilantro is typically a garnish, a small amount of finely chopped mint leaves added to the marinade can introduce a refreshing, cooling note that beautifully complements the warm spices.
Continue Your Indian Culinary Journey: After mastering Chicken Tikka, dive deeper into the rich tapestry of Indian cuisine. Discover my comprehensive collection of authentic Indian curry recipes, perfect for expanding your repertoire, and learn how to make perfect Indian chai from scratch for a comforting beverage.
How to Make Chicken Tikka: An Easy Step-by-Step Guide
Creating mouth-watering, tender Chicken Tikka at home is simpler than you might imagine. Follow these straightforward, easy-to-understand steps, and you’ll soon be enjoying a dish that’s sure to impress everyone at your table.
Step 1: Prepare the Flavorful Marinade
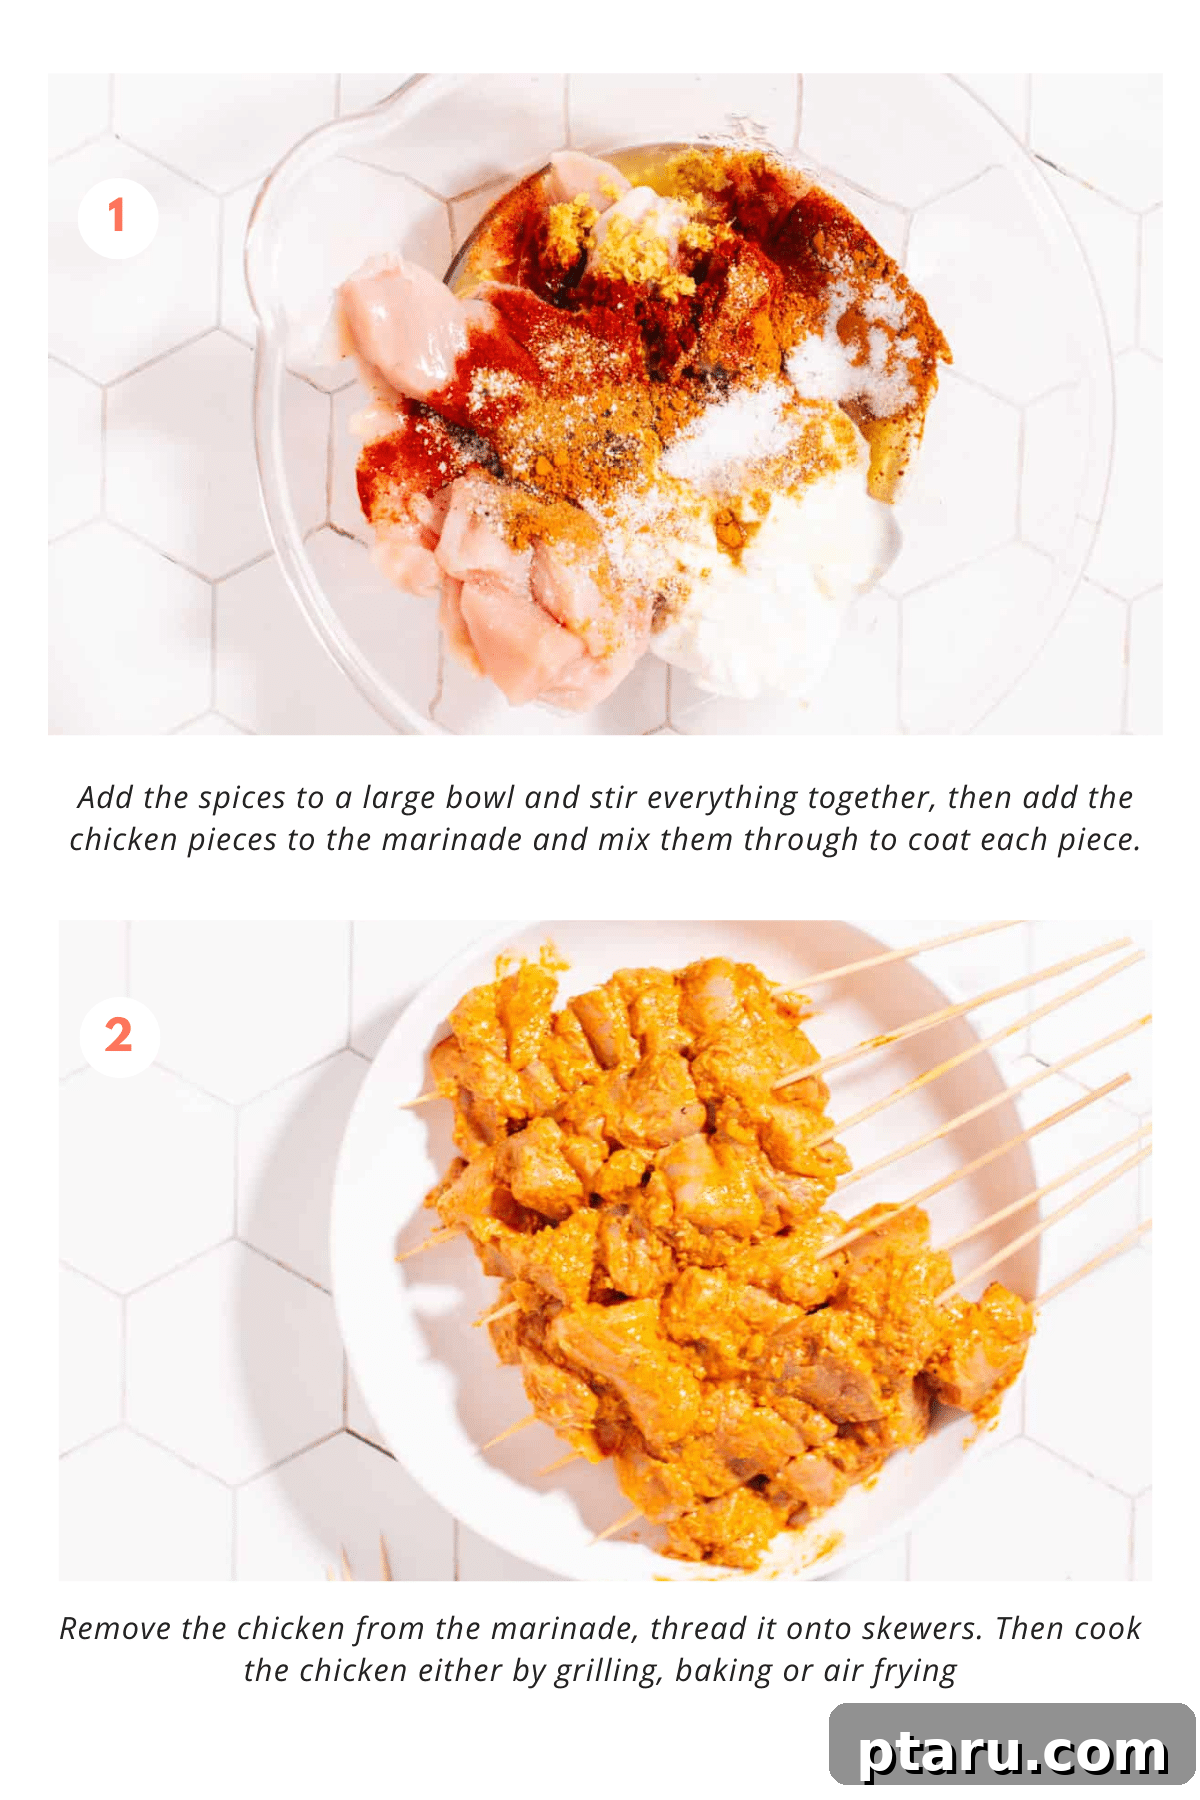
- In a spacious mixing bowl, combine the full-fat plain yogurt, fresh lemon juice, avocado or canola oil, freshly minced garlic, and finely grated fresh ginger. These liquid and aromatic ingredients form the creamy, fragrant base that will beautifully cling to your chicken.
- Next, meticulously add all your dry spices: paprika, ground cumin powder, kosher salt, freshly ground black pepper, the essential garam masala, and cayenne pepper (adjusted to your preferred level of heat).
- Stir all the ingredients together vigorously until they are thoroughly combined into a smooth, uniformly aromatic paste. Ensure there are absolutely no lumps of dry spices left; a well-mixed marinade is key to deeply flavored chicken.
Step 2: Marinate the Chicken for Maximum Flavor Infusion
- Add your prepared 1.5-inch chicken pieces (whether thighs or breasts) directly into the flavorful marinade in the bowl.
- Using your clean hands (wearing gloves is highly recommended to avoid staining and for hygienic reasons, especially when working with raw chicken), gently but firmly massage the marinade into every single piece of chicken. Ensure each chunk is completely and evenly coated. This hands-on action helps the marinade penetrate the meat fibers more effectively.
- Once thoroughly coated, cover the bowl tightly with plastic wrap or transfer the marinated chicken into a sturdy, sealable plastic bag. If using a bag, press out as much air as possible before sealing.
- Refrigerate the chicken for a minimum of 2 hours. However, for the absolute best flavor development, an incredibly tender texture, and truly restaurant-quality results, we highly recommend marinating the chicken overnight (ideally 8-12 hours). The longer the marination period, the more intense and complex the flavors will become.
- Pro Tip from a Food Scientist: If you find yourself short on time but still want deep flavor, a vacuum sealer can significantly accelerate the marination process. By creating a vacuum, it forces the marinade into the meat fibers in as little as 30 minutes!
Step 3: Skewer the Chicken Pieces
- Once the marination time is complete, remove the chicken from the refrigerator. If you plan to use wooden skewers, ensure you have soaked them in water for at least 30 minutes prior to prevent them from burning during the cooking process.
- Carefully thread the marinated chicken pieces onto your chosen skewers. Try not to pack them too tightly; leave a small space between each piece. This small gap is crucial as it allows for even cooking, better air circulation, and the development of desirable charring on all sides.
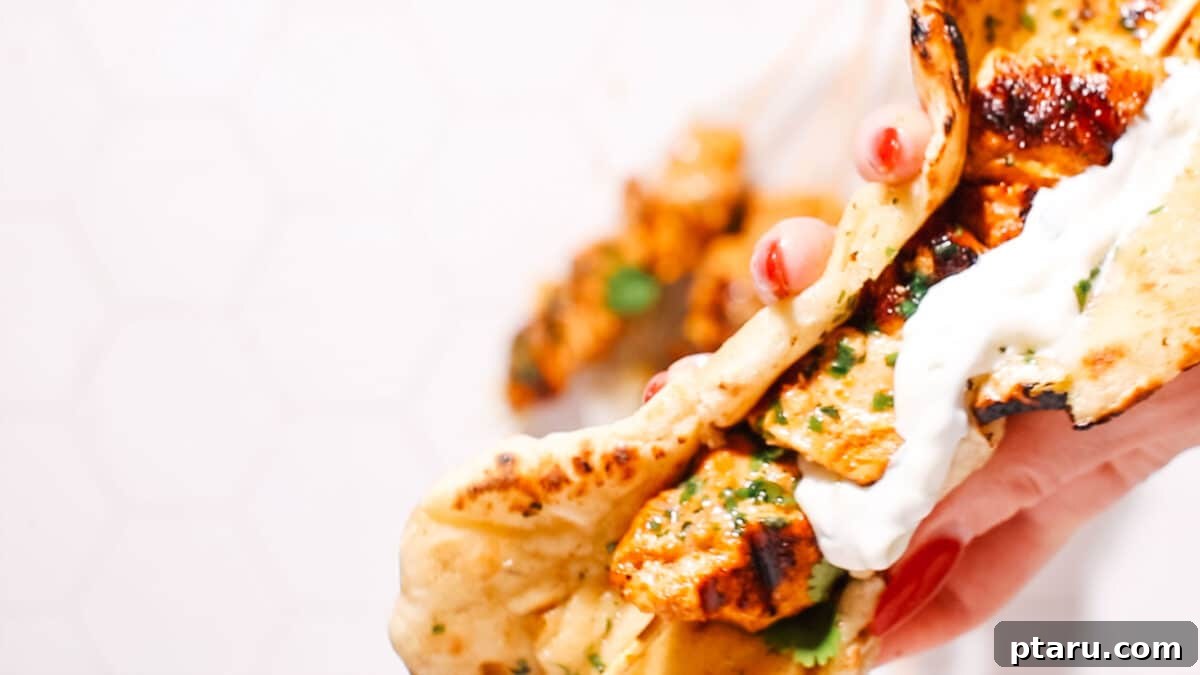
Step 4: Cook Your Chicken Tikka to Perfection (Choose Your Preferred Method)
The beauty of Chicken Tikka lies in its adaptability to various cooking methods. Regardless of your chosen technique, always ensure the internal temperature of the chicken reaches 165°F (75°C) to meet USDA safety guidelines. After cooking, a crucial step for maximum juiciness is to let the chicken rest for 5 minutes before serving.
Method 1: Grilling for Authentic Smoky Flavor and Char
- Preheat your outdoor grill to a medium-high heat setting (aim for approximately 400-450°F / 200-230°C). Lightly oil the grill grates to prevent the chicken from sticking.
- Carefully place the skewered chicken tikka kebabs directly onto the preheated grill grates.
- Cook for approximately 6-8 minutes in total. Make sure to turn them once halfway through to ensure even cooking and to develop beautiful, desirable char marks on all sides. These char marks contribute significantly to the authentic tandoori flavor, while the interior remains tender and juicy.
Method 2: Baking for Easy, Even Cooking and Tenderness
- Preheat your oven to 425°F (220°C). Line a sturdy baking sheet with parchment paper or aluminum foil for effortless cleanup.
- Arrange the chicken tikka kebabs in a single layer on the lined baking sheet, ensuring they are not overcrowded. This allows for even heat distribution and proper browning.
- Bake for 15-18 minutes, or until the chicken is thoroughly cooked through and exhibits a slight browning on the edges. For an even deeper color and a touch of crispness, you can briefly broil them for the last 1-2 minutes, watching very carefully to prevent burning.
Method 3: Air Frying for Quick & Crispy Results
- Preheat your air fryer to 400°F (200°C).
- Arrange the chicken pieces (you may need to remove them from skewers if they don’t fit) in a single layer in the air fryer basket. It’s vital to avoid overlapping the pieces to ensure even crisping and thorough cooking. You will likely need to cook in batches, depending on the size of your air fryer.
- Cook the chicken for 10-12 minutes, flipping the pieces halfway through. The chicken should emerge crispy and golden-brown on the outside and fully cooked and tender inside.
Next Culinary Adventure: After savoring this Chicken Tikka, don’t miss out on another Indian classic. Explore my Best Tandoori Chicken Recipe for a deeply flavorful, vibrant dish that’s perfect for your next Indian-themed meal.
Avoid These Common Mistakes for Perfect Chicken Tikka
As a food scientist and avid home cook, I’ve noticed a few recurring pitfalls that can prevent home cooks from achieving truly perfect Chicken Tikka. By consciously avoiding these classic mistakes, you’ll be well on your way to consistently producing a delicious, tender, and authentic dish:
- Insufficient Marinating Time: This is arguably the most crucial step for exceptional Chicken Tikka. Shortchanging the marination time will inevitably lead to chicken tikka that lacks deep, complex flavor and a desirable tender texture. The yogurt and acidic components in the marinade need adequate time to break down the chicken fibers and allow the aromatic spices to fully permeate the meat. Aim for a minimum of 2 to 4 hours, but for the absolute best results, plan to marinate your chicken overnight (8-12 hours) in the refrigerator. The difference in flavor intensity and melt-in-your-mouth tenderness will be truly remarkable.
- Overcooking the Chicken: Dry, rubbery chicken tikka is a common and disappointing outcome. While chicken thighs are more forgiving due to their higher fat content, even they can become tough if subjected to excessive heat for too long. Chicken breasts are particularly susceptible to drying out. The key is vigilance: monitor the cooking closely and remove the chicken from the heat as soon as it reaches an internal temperature of 165°F (75°C) when checked with a reliable meat thermometer. Do not rely solely on visual cues, as appearances can be deceiving.
- Not Resting the Chicken After Cooking: The temptation to immediately slice into those beautiful, hot chicken tikka pieces is incredibly strong, but it’s a critical step to resist! Resting the chicken for about 5 minutes after it comes off the heat allows the internal juices to redistribute evenly throughout the meat. This short, crucial period ensures a significantly juicier and more flavorful final product. Cutting into the chicken too soon will cause those precious, flavorful juices to run out onto your cutting board, leaving you with noticeably drier chicken.
- Overcrowding the Cooking Surface: Whether you’re grilling, baking, or air frying your chicken, overcrowding the pan, grill grates, or air fryer basket is a common error. This prevents proper searing and browning, instead causing the chicken to steam. Steamed chicken will lack those desirable browned and charred edges that are essential for developing complex flavors and appealing textures. Always cook in batches if necessary, ensuring ample space around each piece of chicken for optimal heat circulation and caramelization.
- Ignoring the Quality and Freshness of Spices: The success of your Chicken Tikka hinges heavily on the quality and freshness of your spices. Old, stale spices lose their potency, aroma, and vibrant flavor, leading to a bland dish. Make it a habit to regularly check your spice cabinet and replace any spices that have been sitting for too long. For an elevated experience, consider grinding fresh whole cumin seeds or cardamom pods just before use; the difference in aroma and taste is profound.
Make Ahead and Storage Tips for Chicken Tikka
Chicken Tikka is an excellent meal for advanced preparation or efficient meal prepping, making your weeknights easier. Here’s how to handle it for maximum convenience and to maintain its delicious freshness:
Storing Cooked Chicken Tikka:
- Store any leftover cooked chicken tikka in a clean, airtight container. Place it promptly in the refrigerator, where it will remain fresh and delicious for up to 3 to 4 days.
- To reheat, gently warm the chicken to avoid drying it out. You can use a microwave on a lower power setting, an oven preheated to a moderate temperature (around 300°F/150°C), or a stovetop over medium heat. A small splash of water or broth added during reheating can help maintain moisture and tenderness.
Storing Marinated, Uncooked Chicken:
- If you’ve prepared the marinade and coated the chicken but haven’t cooked it yet, you can safely store it in the refrigerator for up to 1 to 2 days. Ensure it’s kept in a tightly sealed airtight container or a robust, resealable plastic bag. This prevents any potential cross-contamination with other foods and maintains the chicken’s freshness and flavor integrity.
Freezing Chicken Tikka for Longer Storage:
Freezing is a fantastic option for extended storage, allowing you to enjoy homemade Chicken Tikka whenever a craving strikes. For optimal texture upon thawing, it’s generally best to freeze the chicken after it has been marinated but *before* cooking.
- For freezing marinated, uncooked chicken: To prevent the pieces from sticking together, first place the marinated chicken in a single layer on a parchment-lined baking sheet and freeze until they are completely solid. Once frozen, transfer the individual pieces to a freezer-safe container or a heavy-duty freezer bag, making sure to remove as much air as possible before sealing. This crucial step helps to prevent freezer burn.
- Marinated chicken can be frozen for up to 3 months without significant loss of quality.
- To cook from frozen: Always thaw the chicken completely in the refrigerator overnight before skewering and cooking it using your preferred method. Attempting to cook chicken tikka directly from frozen will result in uneven cooking and can negatively impact the final texture.
- While it is possible to freeze cooked chicken tikka, its texture might be slightly less desirable than if frozen raw due to the initial cooking process. If freezing cooked chicken, follow the same airtight container method and reheat gently once thawed.
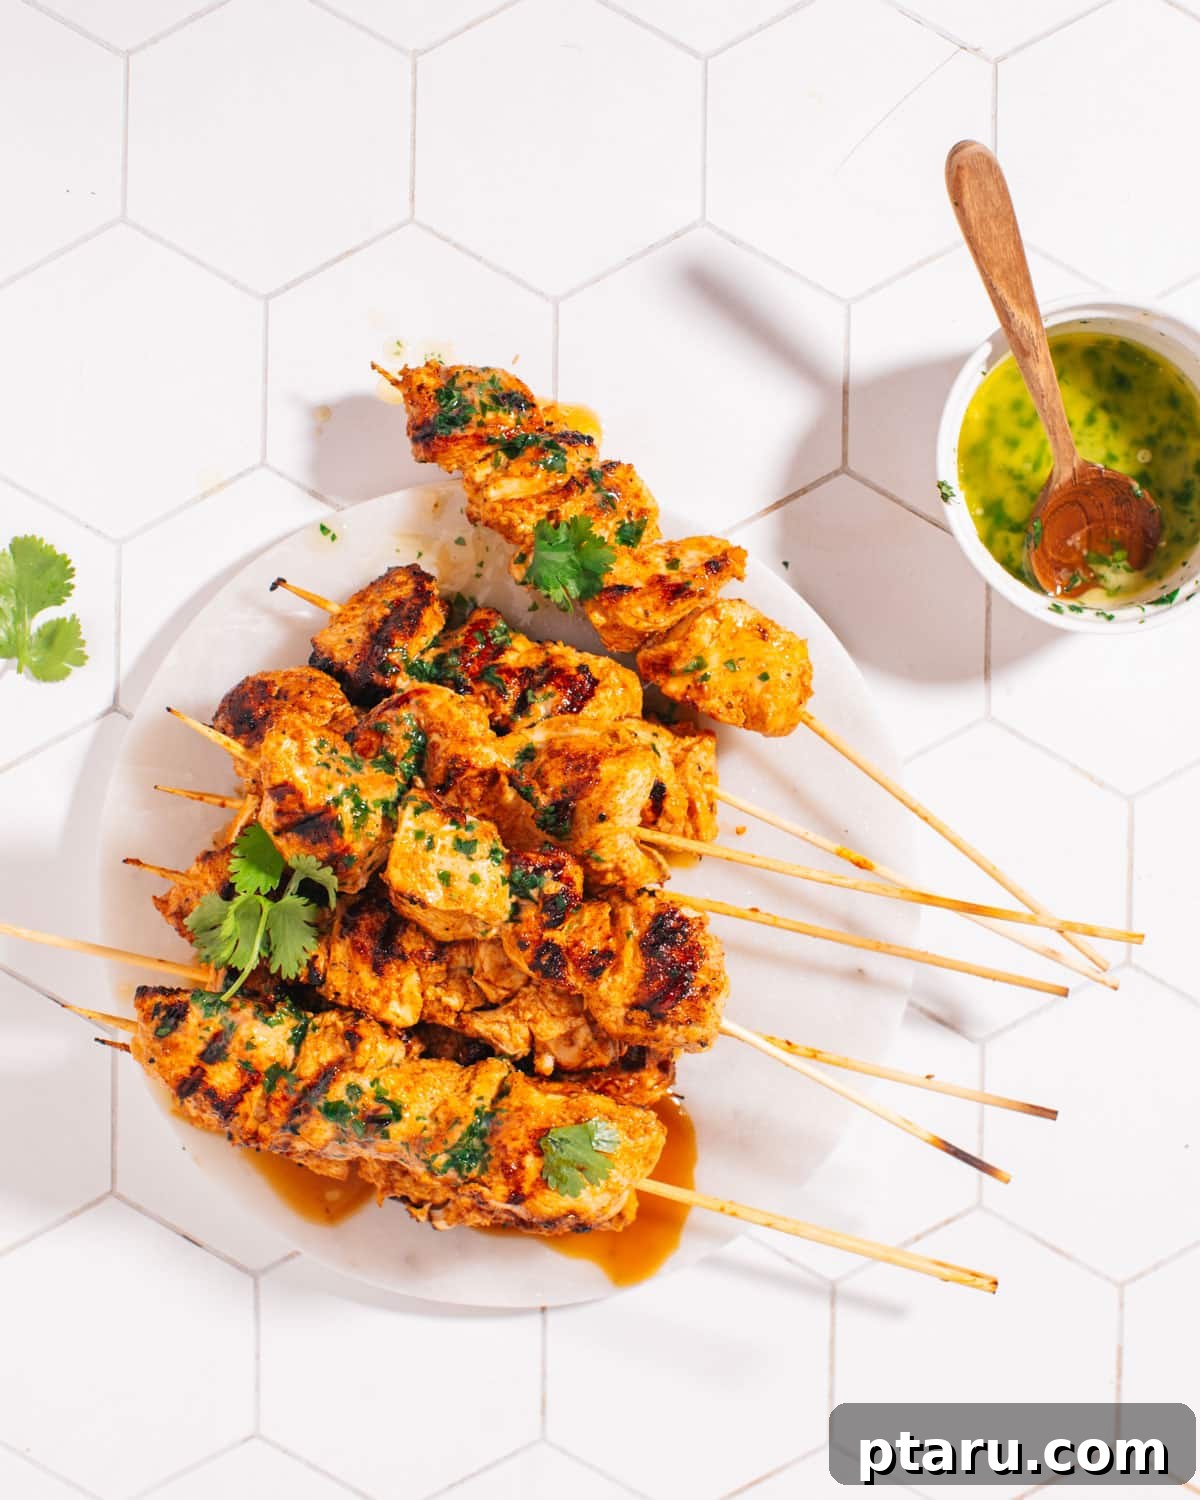
How to Serve Your Delicious Homemade Chicken Tikka
Chicken Tikka is a wonderfully versatile dish that pairs beautifully with a wide array of accompaniments, allowing you to create a truly complete and memorable Indian feast right at home. Here are some of our favorite ways to serve it, enhancing every bite:
- Garnish for Freshness and Aroma: Always finish your cooked Chicken Tikka with a generous squeeze of fresh lemon or lime juice. This brightens the rich flavors and adds a zesty tang. A liberal sprinkle of freshly chopped cilantro not only adds a beautiful pop of color but also a burst of herbaceous aroma that complements the spices perfectly.
- Classic Starchy Side Dishes:
- Fluffy Basmati Rice: A perennial classic pairing! A steaming bowl of fragrant basmati rice is the ideal canvas to soak up the delicious juices and flavors of the tikka. You’ll love my mother-in-law’s incredible (and incredibly easy) basmati rice recipe.
- Warm Indian Breads: No Indian meal feels complete without warm, fresh bread for scooping up every last bit of flavor. Serve your tikka with freshly baked garlic naan, soft and buttery homemade butter naan, or lighter flatbreads like roti or chapati.
- Refreshing Veggie Sides: To balance the richness and spice of the chicken, complement your meal with some vibrant and cooling vegetable dishes:
- Indian Coconut Green Beans (Poriyal): My Indian coconut green beans, often known as Poriyal, offer a delightful fresh, slightly sweet, and savory contrast that lightens the meal.
- Cool Yogurt Cucumber Salad (Raita): An essential component of any Indian spread, a cooling yogurt cucumber salad (Raita) is perfect for cutting through the spice and adding a refreshing, creamy element.
- Simple Green Salad: For a minimalist approach, a crisp green salad tossed with a light, tangy vinaigrette can also work wonderfully, providing a fresh palate cleanser.
- Flavorful Sauces and Dips: Elevate your meal further with complementary sauces that enhance the Chicken Tikka’s flavors:
- Homemade Indian Yogurt Sauce: My creamy Indian yogurt sauce is a must-try alongside the tikka, offering a cooling counterpoint to the spices.
- Vibrant Mint Chutney: A bright, refreshing mint chutney adds a zingy, herbaceous counterpoint that is incredibly satisfying.
- Sweet & Tangy Mango Chutney: For a delightful touch of sweet and tangy, a dollop of mango chutney is always a hit, adding another layer of complexity.
To truly complete your authentic Indian dining experience, consider pairing your meal with one of my go-to Indian drinks, such as a refreshing mango lassi, or indulge in one of my delightful Indian dessert recipes for a perfect ending to your culinary adventure!
FAQs About This Delicious Chicken Tikka Recipe
Still have questions about making the perfect Chicken Tikka? Here are answers to some of the most common queries we receive, designed to help you succeed in your kitchen:
Chicken Tikka refers specifically to marinated and grilled (or otherwise cooked) chunks of chicken. It’s typically served as an appetizer, a component of a larger meal, or on its own with various sides. Chicken Tikka Masala, on the other hand, is a distinct curry dish that incorporates those cooked Chicken Tikka pieces into a rich, creamy, and often slightly sweet tomato-based sauce. Essentially, Chicken Tikka is the flavorful grilled chicken component, while Tikka Masala is the luscious, saucy curry built around it.
Yes, you absolutely can use boneless, skinless chicken breasts if you prefer a leaner cut or have it on hand. However, it’s important to note that chicken breasts tend to dry out more quickly due to their lower fat content compared to thighs. If you opt for breast meat, be extra vigilant with your cooking times to prevent overcooking, and consider marinating for the full overnight period for maximum tenderness. Cutting them into uniform 1.5-inch pieces will also help in maintaining moisture and even cooking.
For optimal flavor penetration and effective tenderization, Chicken Tikka should ideally be marinated for at least 2 to 4 hours in the refrigerator. For the best, most authentic results, where the chicken becomes incredibly tender and infused with deep, complex flavors, marinating overnight (8-12 hours) is highly recommended. The longer the marination time, the more pronounced and rich the flavors will develop.
Yes, absolutely! This recipe is designed to be versatile. If you don’t have access to an outdoor grill, you can achieve fantastic results by baking the marinated chicken in an oven at 425°F (220°C) for approximately 15-18 minutes, or by using an air fryer at 400°F (200°C) for 10-12 minutes. You can also use a heavy-bottomed cast iron pan or stovetop grill pan to get some delicious char marks and a similar texture.
The inherent spice level of Chicken Tikka is quite adjustable, allowing you to tailor it to your palate. In most traditional recipes, it’s typically mildly to moderately spicy, deriving its warmth from a balanced blend of garam masala and a touch of cayenne pepper. You have complete control to increase or decrease the amount of cayenne pepper (or even add other chili powders like Kashmiri chili for color and mild heat) to perfectly match your personal preference for heat.
Yes, Chicken Tikka freezes beautifully! For the best quality and texture upon thawing and cooking, we highly recommend freezing the chicken pieces after they have been marinated but *before* they are cooked. Place the marinated chicken pieces in an airtight, freezer-safe container or a heavy-duty freezer bag, ensuring you remove as much air as possible to prevent freezer burn. It can be safely frozen for up to 3 months. Remember to thaw it completely in the refrigerator overnight before proceeding with your chosen cooking method.
More Indian Favorites from Our Kitchen
Inspired by my Indian husband Adarsh’s cherished family recipes, here are even more delightful Indian dishes to add to your must-make list. Dive into the rich, diverse, and incredibly flavorful world of authentic Indian cuisine with these tried-and-true favorites:
- Creamy Chicken Korma: A mild, incredibly rich, and fragrant chicken curry, often reserved for special occasions due to its luxurious texture and delicate spice balance.
- Classic Butter Chicken and Homemade Butter Paneer: Indulge in the universally loved, velvety smooth tomato-cream sauce, a true comfort food whether paired with tender chicken or soft paneer cheese.
- Indian Coconut Chicken Curry: A vibrant, South Indian-inspired curry, bursting with the natural sweetness of coconut milk and a harmonious blend of aromatic spices.
- Flaky Chicken Samosas and Unique Samosa Pie: Discover these crispy, savory triangular pastries filled with perfectly spiced chicken, or try a comforting, innovative pie adaptation. Clearly, we really adore samosas in all their glorious forms!
- Creamy Madras Lentils: The ultimate vegetarian comfort food, slow-cooked to perfection with warming spices, offering a hearty and deeply satisfying meal.
- Amma’s Special Masoor Dal and Hearty Indian Chickpea Curry (Chana Masala): Two essential vegetarian staples that are both incredibly nutritious, remarkably flavorful, and wonderfully comforting.
- Exquisite Malai Kofta: Indulge in these soft, rich cheese and potato dumplings, gently simmered in a creamy, subtly spiced gravy – a true restaurant-quality vegetarian delight.
Chicken Tikka Recipe Card: Grill, Oven, or Air Fryer
Experience the authentic taste of India with this easy homemade Chicken Tikka. Perfect for grilling, baking, or air frying, these tender, spiced chicken pieces are a crowd-pleaser.
Prep Time: 2 hours (minimum marination time) | Cook Time: 18 minutes | Total Time: 2 hours 18 minutes
Yields: 6 servings
Ingredients
- ¾ cup full-fat plain yogurt (Greek yogurt recommended)
- 3 tbsp fresh lemon juice
- 2 tbsp avocado or canola oil
- 1 tbsp minced fresh garlic (about 3-4 cloves)
- 1 tbsp finely grated fresh ginger
- 1 tbsp paprika
- 2 tsp ground cumin
- 2 tsp kosher salt
- 2 tsp garam masala
- ½ tsp cayenne pepper (adjust to your spice preference)
- ½ tsp freshly ground black pepper
- 2 lbs boneless chicken thighs or breasts, cut into 1 ½-inch pieces
Instructions
Part 1: Make the Marinade
- In a large mixing bowl, combine the full-fat plain yogurt, fresh lemon juice, avocado or canola oil, minced fresh garlic, and finely grated fresh ginger.
- To this wet mixture, add the dry spices: paprika, ground cumin, kosher salt, cayenne pepper, freshly ground black pepper, and garam masala.
- Stir all the ingredients together thoroughly until they are well combined into a smooth and aromatic paste. Ensure there are no lumps of spices.
Part 2: Marinate the Chicken
- Add the cut chicken pieces to the prepared marinade. Use your hands to massage the marinade into every piece of chicken, ensuring each chunk is evenly and completely coated.
- Cover the bowl tightly with plastic wrap or transfer the marinated chicken into a sturdy, sealable plastic bag, pressing out as much air as possible.
- Refrigerate for at least 2 hours. For the best possible flavor and tender texture, marinate the chicken overnight (8-12 hours).
Part 3: Cook the Chicken
- Once marinated, remove the chicken from the refrigerator. If using wooden skewers, ensure they have been soaked in water for at least 30 minutes. Thread the chicken pieces onto skewers, leaving a small gap between each piece for even cooking.
- Choose your preferred cooking method below. Always verify that the internal temperature of the chicken reaches 165°F (75°C) using a meat thermometer. Let the chicken rest for 5 minutes after cooking for maximum juiciness before serving.
- For Grilled Chicken Tikka: Preheat your grill to medium-high heat (400-450°F / 200-230°C). Place the skewers on the grill and cook for approximately 6-8 minutes, turning once halfway through, until the chicken is fully cooked with appealing char marks.
- For Baked Chicken Tikka: Preheat oven to 425°F (220°C). Arrange the chicken on a parchment-lined baking sheet in a single layer. Bake for 15-18 minutes, or until the chicken is cooked through and slightly browned.
- For Air Fryer Chicken Tikka: Preheat air fryer to 400°F (200°C). Arrange the chicken pieces in the basket without overlapping (cook in batches if necessary). Cook for 10-12 minutes, turning halfway, until crispy and fully cooked.
Notes
- For the juiciest, most tender chicken, it is crucial to let it rest for 5 minutes after cooking before slicing or serving.
- Garnish with fresh lemon/lime juice and chopped cilantro before serving for enhanced flavor.
Nutrition Information (Approximate per serving)
(Based on 6 servings using boneless chicken thighs and average ingredient values)
- Calories: 405 kcal
- Carbohydrates: 4g
- Protein: 26g
- Fat: 31g
- Saturated Fat: 8g
- Polyunsaturated Fat: 6g
- Monounsaturated Fat: 14g
- Trans Fat: 0.1g
- Cholesterol: 152mg
- Sodium: 909mg
- Potassium: 420mg
- Fiber: 1g
- Sugar: 2g
- Vitamin A: 803 IU
- Vitamin C: 4mg
- Calcium: 63mg
- Iron: 2mg
Nutrition information is automatically calculated based on the provided ingredients and cooking methods, and as such, should be used as an approximation only. Individual results may vary.