Unlock the secret to effortless baking with this incredible No-Roll Pie Crust recipe. Crafted with pure butter, this press-in dough delivers a wonderfully flaky, tender texture every single time. Forget the frustration of rolling out sticky dough and uneven edges – with just a few simple tricks, you’re on your way to sure-fire pie crust success.
Why You’ll Love This Easy Press-In Pie Crust Recipe
For many home bakers, the thought of making homemade pie crust can be daunting. Achieving that delicate balance of a tender, flaky, and flavorful dough often feels like an uphill battle. That’s precisely why this press-in pastry recipe is a game-changer. It’s designed to simplify the process without compromising on taste or texture, making it an essential addition to any baker’s repertoire.
This recipe is not only incredibly quick but also completely eliminates the most intimidating steps of traditional pie making. There’s no need for a rolling pin, no wrestling with clingy dough, and no fussing over intricate fluted edges. Instead, you simply press the dough directly into your pie pan, and voilà! This ingenious method means you can effortlessly prepare a pie, like a classic pumpkin pie, just moments before a major meal like Thanksgiving dinner, without any advanced planning whatsoever. It’s perfect for busy weeknights, holiday feasts, or whenever a craving for homemade pie strikes.
Beyond its unparalleled ease, this pie crust is a joy to work with and even more delightful to eat. It’s a fantastic confidence booster for baking novices and a reliable go-to for seasoned pros looking for a stress-free option. The rich, buttery flavor forms the perfect foundation for both sweet and savory fillings, elevating any pie to a new level of homemade goodness. Get ready to impress your family and friends with minimal effort!
Essential Ingredients for Your Perfect Pat-In-Pan Pie Crust
Crafting a truly fantastic no-roll pie crust begins with selecting the right ingredients. Each component plays a vital role in achieving that coveted flaky texture and rich flavor. Gather these pantry staples, and you’ll be well on your way to baking many delightful pies!
- All-Purpose Flour: This is the fundamental building block of your pie crust, providing the necessary structure and body. For those with dietary restrictions, a high-quality gluten-free all-purpose flour blend can be substituted successfully. The key is to use a light hand when mixing to prevent over-developing the gluten, which can lead to a tough crust.
- Salt: Far from being just a seasoning, salt is crucial for enhancing the overall flavor profile of your pie crust. It balances the sweetness of many pie fillings and brings out the inherent richness of the butter, ensuring every bite is perfectly seasoned and delicious.
- Unsalted Butter (preferably very cold): Butter is the star of this recipe, contributing rich flavor and the tender, flaky texture we all adore in a perfect pie crust. Using unsalted butter allows you to control the exact amount of salt in your recipe. It’s imperative that the butter is kept very cold and cut into small pieces. As these cold butter pieces melt during baking, they release steam, which creates distinct layers and pockets within the dough – the hallmark of a wonderfully flaky crust. This method produces a far superior taste and texture compared to shortening or melted butter recipes, which tend to yield a more crumbly or cookie-like crust rather than a truly flaky one.
- Ice Water: The temperature of your water is just as important as the butter. Ice water is essential for binding the dough together without activating too much gluten, which can make your crust tough and less tender. The cold temperature also helps to keep the butter pieces solid and intact until they hit the hot oven, maximizing the steam production for those desirable flaky layers. Ensure it’s genuinely ice-cold – sometimes adding a few ice cubes to a measuring cup of water and letting it sit for a minute or two is helpful.
Step-by-Step Guide: How to Make Easy No-Roll Pie Crust From Scratch
Whether you’re new to baking or simply seeking a faster, less complicated method, this guide will walk you through creating a pie crust that’s wonderfully flaky and robust enough to hold any filling. From a vibrant strawberry rhubarb pie to adorable savory muffin tin mini quiches, this crust is incredibly versatile.
- Prepare Your Ingredients: Precision is key in baking. Start by accurately measuring out your all-purpose flour and salt. Ensure your butter is well-chilled and cut into small, uniform cubes (about ½-inch pieces). Have a cup of ice water ready – the colder, the better!
- Combine Dry Ingredients: In a spacious mixing bowl, thoroughly whisk together the measured flour and salt. This step ensures an even distribution of salt throughout the crust, preventing pockets of blandness or over-seasoning.
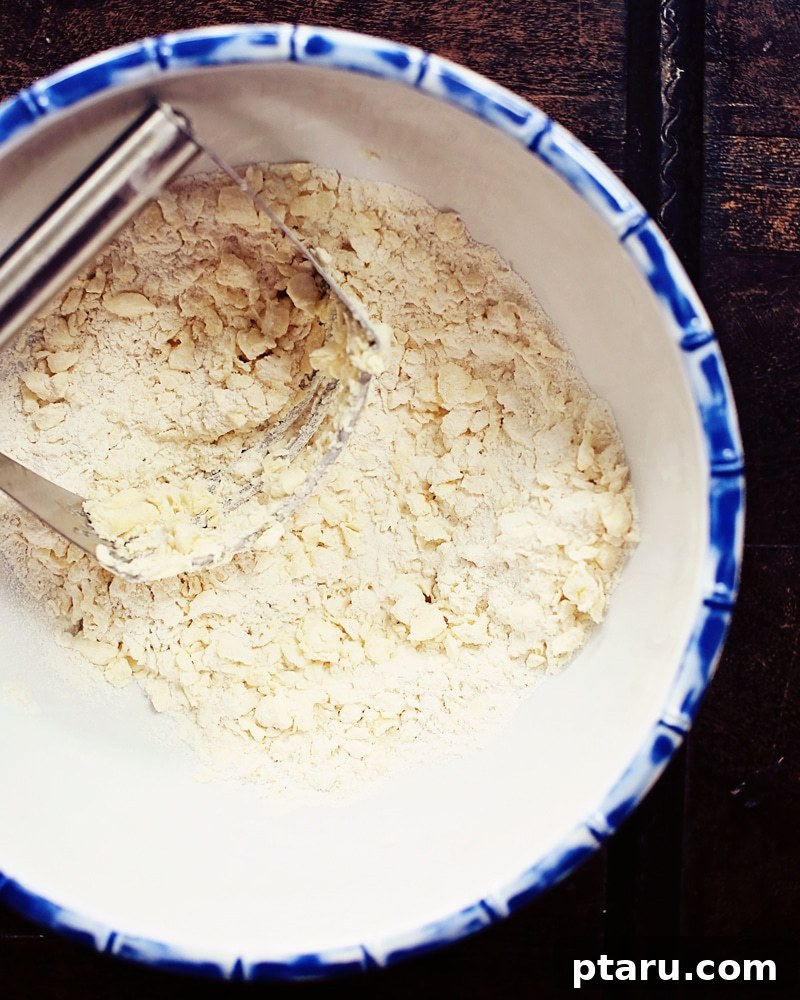
- Cut in the Cold Butter: Add the cold, cubed butter to the flour mixture. Using a pastry cutter, two knives, or even your fingertips (working quickly to minimize heat transfer), cut the butter into the flour. The goal is to achieve butter pieces that range in size from tiny lentils to small peas, not tiny crumbs. These varying sizes are crucial for creating distinct pockets of steam during baking, which results in the incredibly flaky layers. If you prefer, a food processor can be used for this step, pulsing briefly to achieve the desired butter size without overmixing.
- Add the Ice Water: Gradually sprinkle the ice water over the flour and butter mixture, starting with about 4 tablespoons and adding more as needed. Use a fork to gently toss and stir the ingredients until they are just combined. The dough will appear shaggy and somewhat crumbly, but this is exactly the right consistency. Avoid overmixing at this stage, as too much kneading will develop the gluten and lead to a tough crust.
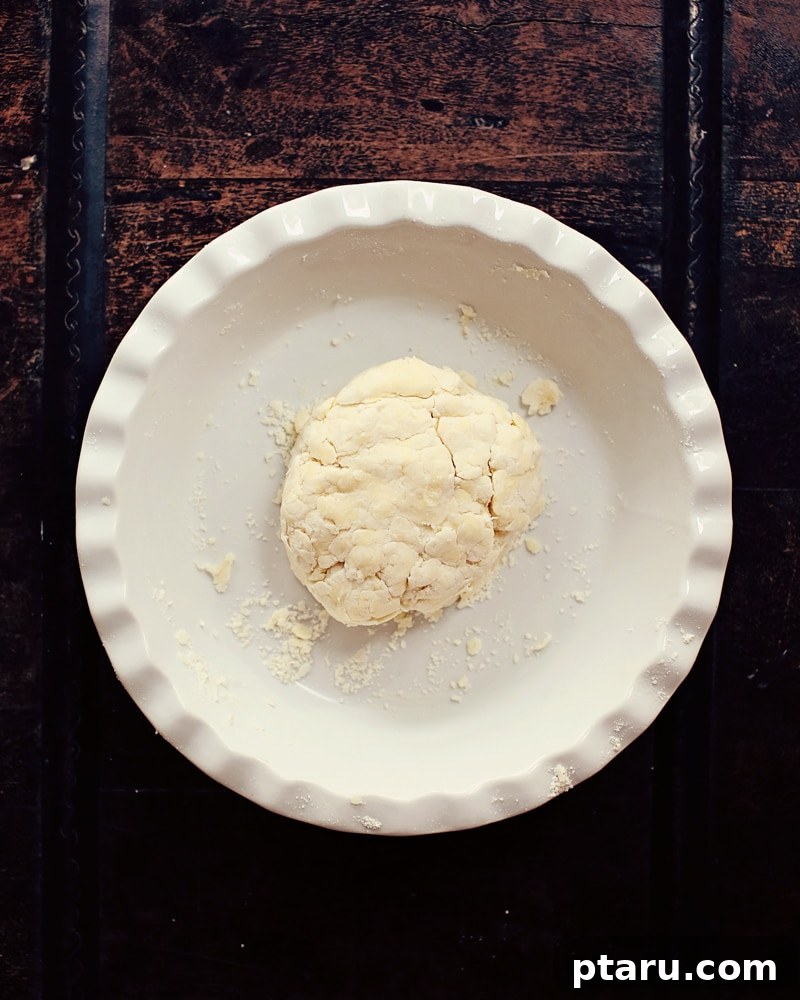
- Press the Dough into the Pie Dish: Carefully transfer the shaggy dough mixture into a 9-inch pie plate. Begin by gently pressing the dough into the bottom of the pan, then gradually work your way up the sides. Aim for a consistent, even thickness throughout the entire crust. Once shaped, cover the pie plate loosely with plastic wrap and refrigerate for at least 30 minutes. This chilling period is essential for allowing the butter to firm up again and the flour to fully hydrate, preventing shrinkage during baking.
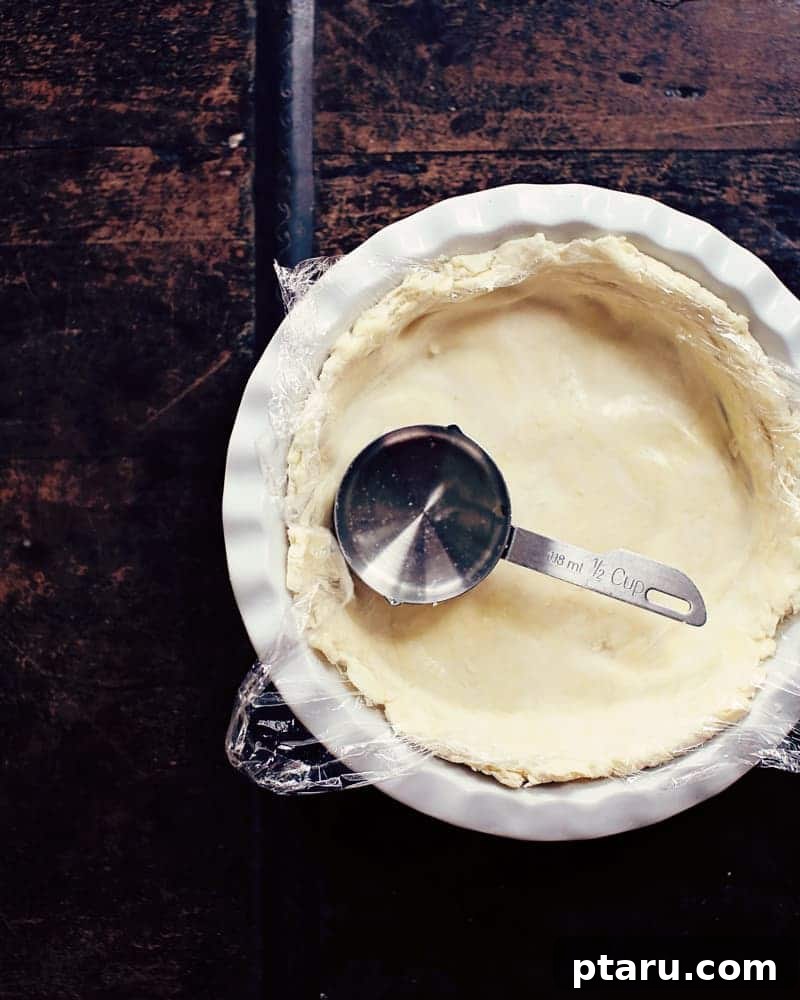
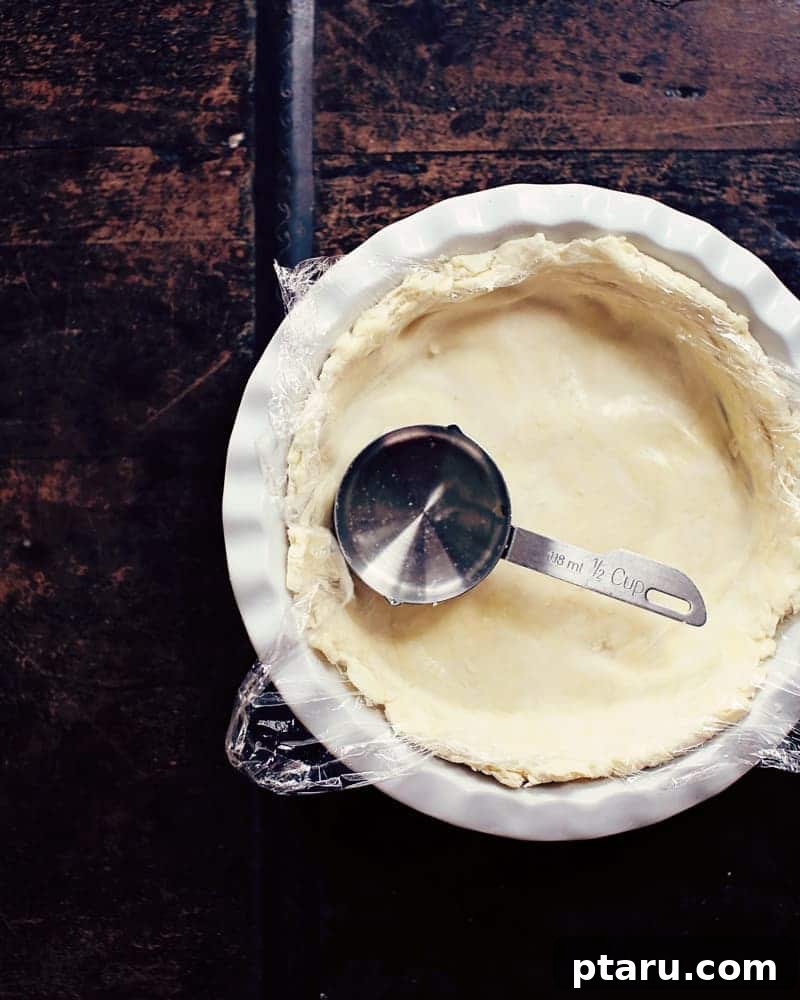
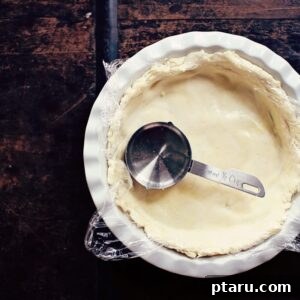
- Final Shaping and Freezing: After chilling, keep the plastic wrap loosely draped over the dough. Use a flat-bottomed measuring cup or a small glass to further press and smooth the pastry into the pie plate. Work from the center outwards, ensuring a uniform thickness and smooth finish. You can then use your fingers (still over the plastic wrap) to gently coax the pastry up the sides a bit more, creating a slightly taller edge if desired, though this crust is designed to be more rustic and not come over the rim. Remove the plastic wrap and freeze the formed crust for 10 minutes. This final quick freeze helps the butter remain very cold and prevents the crust from slumping during the initial stages of baking. Now your crust is ready to be filled and baked according to your specific pie recipe!
Remember, the magic of a flaky pie crust lies in those pockets of butter. When the butter pieces melt in the oven, they release steam, which pushes the dough upwards, creating beautiful, distinct layers. If your butter pieces are too small, you’ll end up with a more crumbly, buttery cookie-like crust rather than a truly flaky one. But don’t worry, even a slightly less flaky crust made with real butter will still be absolutely delicious!
Pro Tips for No-Fail No-Roll Pie Crust Success
Achieving the perfect no-roll pie crust is simpler than you think, especially when armed with these expert tips. No rolling pin is required for these homey, delicious results!
- Embrace Cold Ingredients: This is arguably the most crucial tip for a truly flaky pie crust. Ensure both your butter and water are as cold as possible. Cold butter creates those vital steam pockets that separate the dough into flaky layers as it melts in the hot oven. Ice water further helps maintain this low temperature, preventing the butter from softening too soon and minimizing gluten development, which can lead to a tough crust.
- Avoid Overworking the Dough: When you’re cutting in the butter and adding the ice water, work quickly and handle the dough minimally. Overmixing develops gluten, leading to a tough, chewy crust instead of a tender, flaky one. You want visible pieces of butter throughout the dough; don’t aim for a perfectly smooth, uniform mixture.
- Press Evenly for Uniform Baking: As you press the dough into your pie plate, strive for a consistent thickness across the bottom and up the sides. An uneven crust will bake inconsistently, with thin spots burning and thick spots remaining undercooked. The bottom of a dry measuring cup or a glass is an excellent tool for achieving an even, smooth surface.
- Chill and Freeze for Structure: Don’t skip the chilling and freezing steps! Refrigerating the dough allows the butter to re-solidify and the flour to fully hydrate, preventing the crust from shrinking excessively during baking. A short freeze just before baking provides an extra layer of insurance, helping the crust hold its shape and preventing the butter from melting out too quickly in the oven.
- Utilize Pie Weights for Blind Baking: If your pie recipe calls for pre-baking or “blind baking” the crust before adding the filling, always use pie weights. Line your crust with parchment paper and fill it with ceramic pie weights, dried beans, or even rice. This prevents the crust from puffing up and ensures a flat, even surface, especially critical for custard or no-bake pies.
- Bake Smart for a Crispy Bottom: To prevent a soggy bottom crust, which is a common pie problem, bake your pie in the bottom third of your oven. Start with a relatively high oven temperature initially (if your recipe allows) to shock the butter and set the crust quickly. Additionally, placing your pie plate on top of a preheated baking stone or a heavy baking sheet helps transfer heat directly to the bottom of the crust, ensuring it cooks thoroughly and becomes beautifully crisp.
This method yields a rustic, “homey” pie crust that naturally fits within the rim of your pie plate, perfect for a comforting, homemade aesthetic. If you’re aiming for elaborate, decorative fluting, a traditional rolled-out crust might be more suitable. But for ease, flavor, and reliability, this press-in butter pastry is truly unbeatable. Imagine it baked to golden perfection in a super-easy pumpkin pie, brimming with aromatic fall spices. Absolutely delightful!
No-Roll Pie Crust: Super Easy Press-In Butter Pastry
Jennifer Pallian BSc, RD
15 minutes
0 minutes (before filling)
40 minutes
55 minutes
1 (9-inch) pie crust (Servings: 8)
Ingredients
- 1 cup all-purpose flour
- ½ tsp kosher salt
- ½ cup cold unsalted butter cubed into ½-inch pieces
- 5-6 tbsp ice water as needed
Instructions
-
In a large bowl, whisk together the flour and salt until well combined. Add the cold, cubed butter to the flour mixture. Using a pastry cutter, two knives, or your fingertips, cut the butter into the flour until the pieces resemble small peas and lentils. Sprinkle 5 tablespoons of ice water over the mixture. Use a fork to gently toss and stir until the dough just comes together and appears shaggy. If the mixture is too dry, add an additional tablespoon of ice water, one teaspoon at a time, until it barely holds together.
-
Transfer the shaggy dough mixture into a 9-inch pie plate. Begin pressing the dough into a uniform disc shape across the bottom, then work your way up the sides of the dish, ensuring even thickness throughout. Cover the pie plate loosely with plastic wrap and refrigerate for a minimum of 30 minutes to allow the butter to firm up and the dough to hydrate.
-
After chilling, keep the plastic wrap loosely covering the dough. Use the flat bottom of a measuring cup or a glass to further press and smooth the pastry into the pie plate, especially around the edges, creating a neat finish. Remove the plastic wrap and place the pie plate in the freezer for 10 minutes. This quick freeze helps the crust hold its shape during baking. Now, your perfectly prepared no-roll pie crust is ready to be filled and baked according to your favorite pie recipe. Enjoy your homemade pie with ease!
Nutrition Information (per serving)
Calories: 161kcal | Carbohydrates: 12g | Protein: 2g | Fat: 12g | Saturated Fat: 7g | Polyunsaturated Fat: 1g | Monounsaturated Fat: 3g | Trans Fat: 0.5g | Cholesterol: 31mg | Sodium: 239mg | Potassium: 20mg | Fiber: 0.4g | Sugar: 0.1g | Vitamin A: 360IU | Calcium: 6mg | Iron: 1mg
*Nutrition information is an approximation calculated automatically and should be used as a general guide.
Tried this incredibly easy pie crust recipe?
Share your baking success and leave a comment below! We love hearing about your delicious creations.