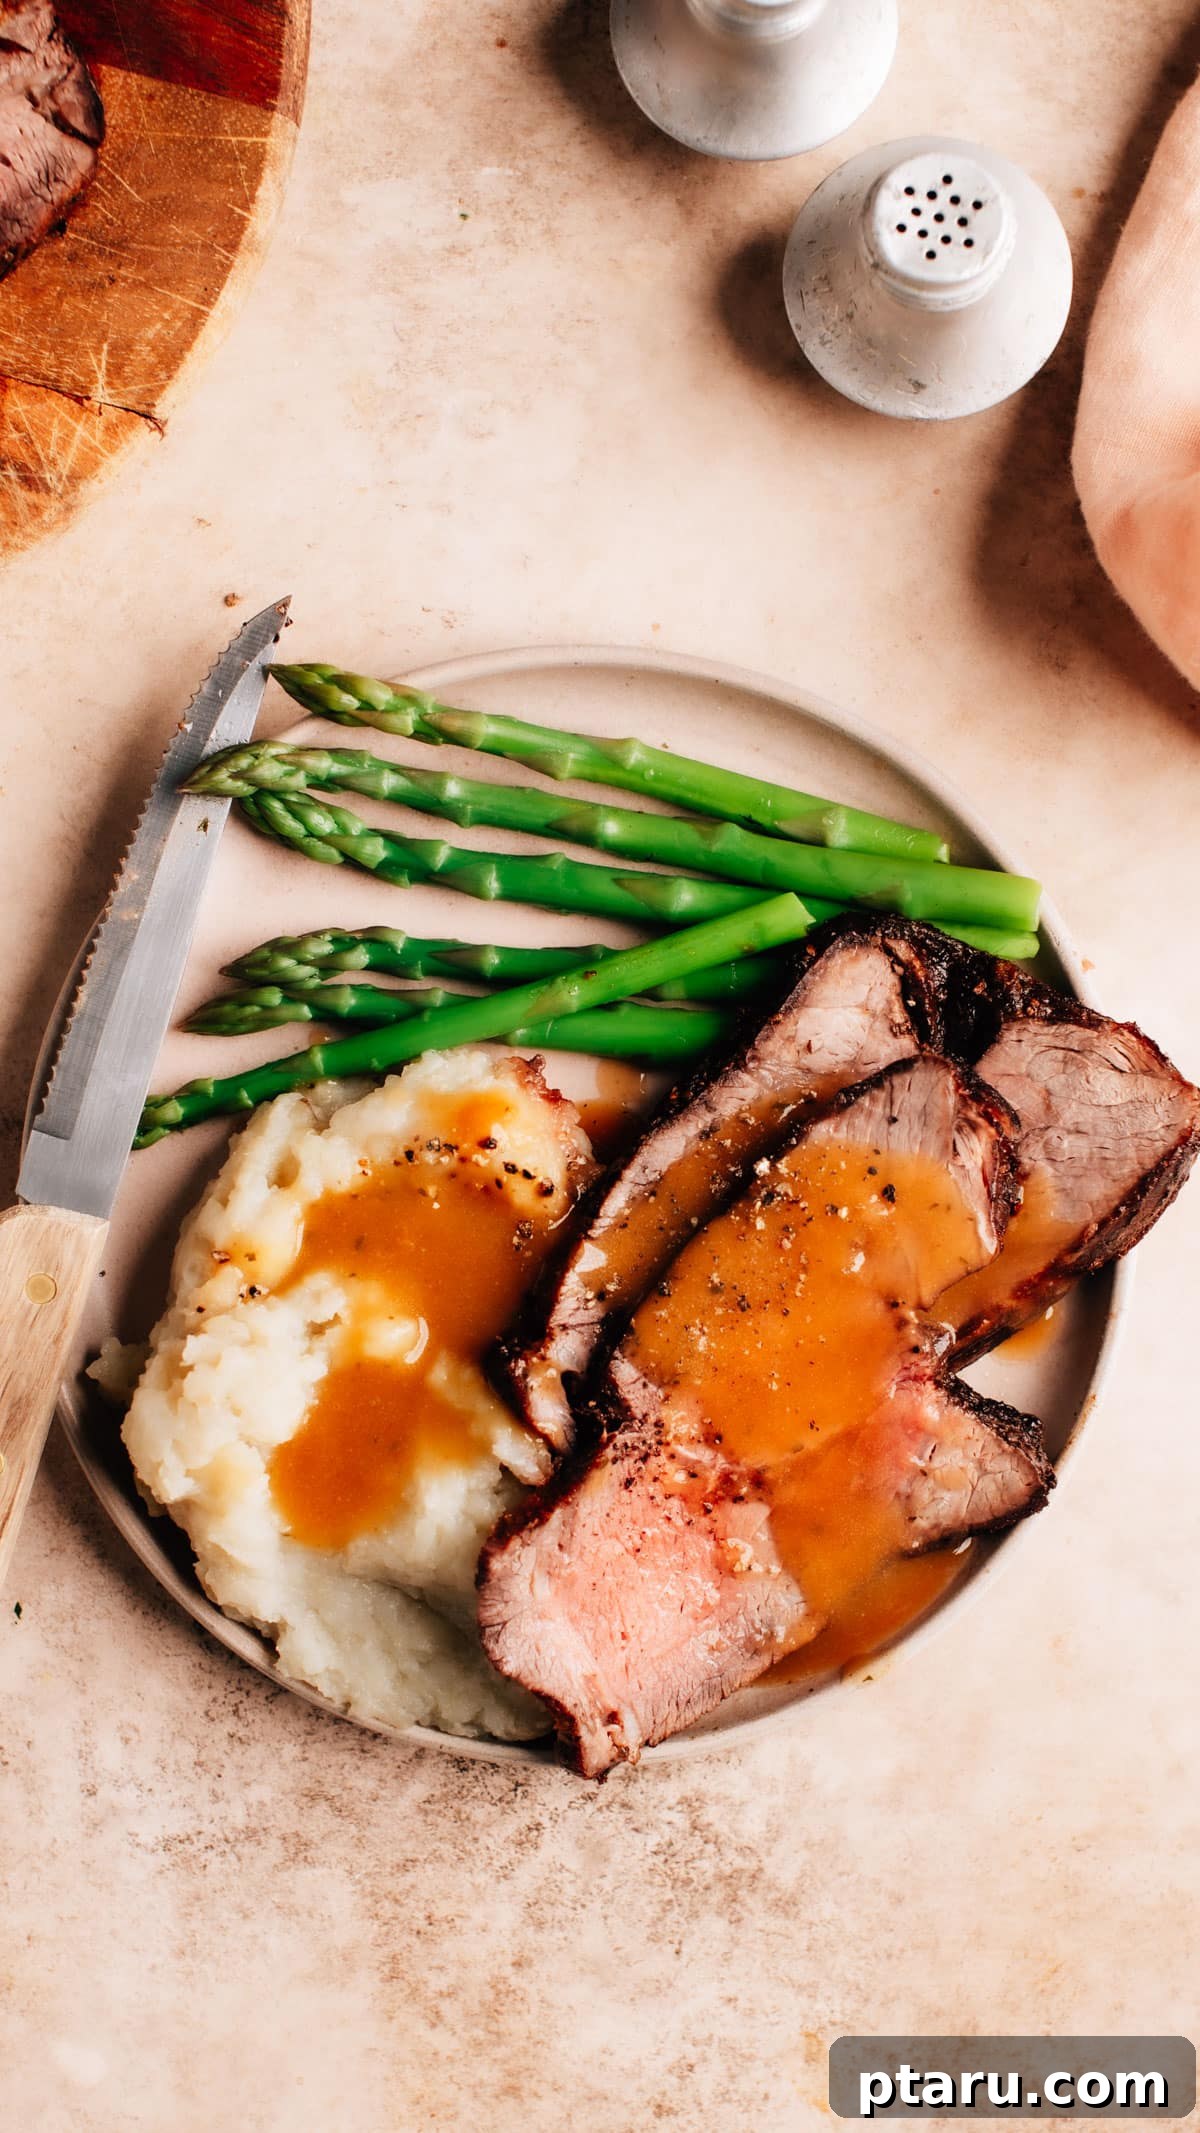
As a Food Scientist, I’ve mastered the art of creating the ultimate Air Fryer Roast Beef, and I’m thrilled to share my secrets with you. Prepare yourself for an unforgettable dining experience featuring succulent, incredibly juicy, and perfectly tender roast beef. Each slice boasts a beautifully seared, crispy crust, complemented by a rich, deeply flavorful, homemade gravy. This recipe is designed to deliver perfection on a plate, effortlessly.
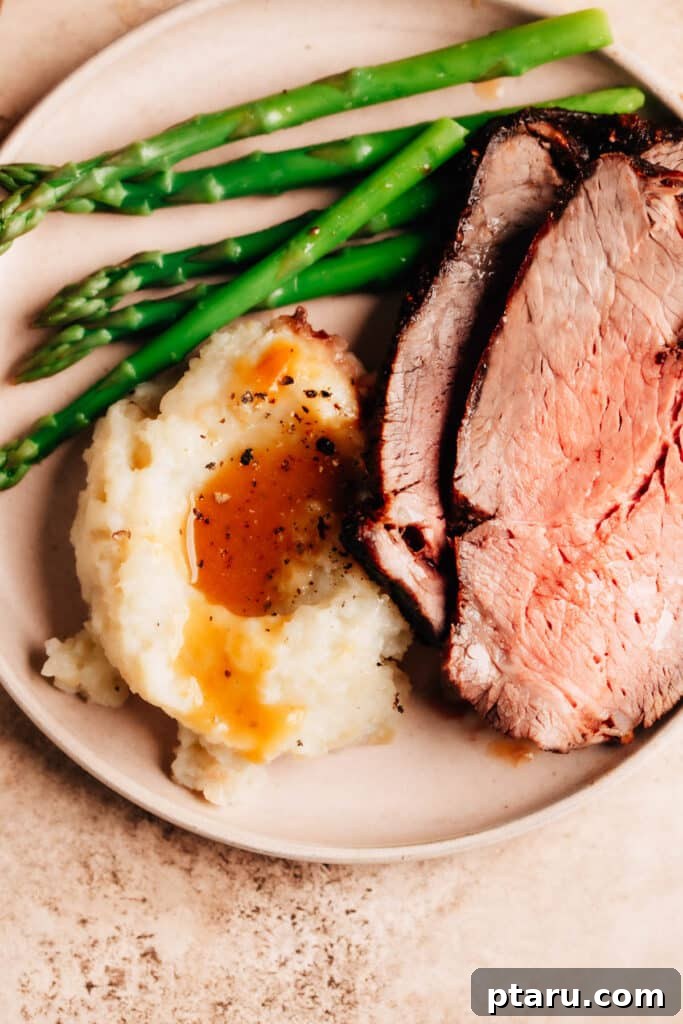
Discover the sheer simplicity and consistent success of this Air Fryer Roast Beef recipe. It’s remarkably easy and virtually foolproof, making it a fantastic choice for both novice and experienced cooks. Say goodbye to the hassle of scrubbing bulky pans, as this method is wonderfully low-mess. Beyond convenience, air frying significantly cuts down on traditional roasting time, while its consistent heat circulation ensures your roast cooks evenly and perfectly every single time. Enjoy quick, restaurant-quality results, without the stress!
A Food Scientist’s Secrets to Achieving the Best Air Fryer Roast Beef
Craving a roast beef that’s consistently juicy and succulent when prepared in your air fryer? Elevate your cooking with these indispensable tips, rooted in food science principles. These simple yet powerful techniques will transform your roast beef from good to absolutely extraordinary.
- Bring the Beef to Room Temperature for Even Cooking: This crucial first step ensures your roast cooks uniformly from edge to center. Allowing the beef to sit out for 30-60 minutes before placing it in the air fryer prevents the exterior from overcooking or burning before the interior reaches your desired doneness. A cold roast will create a wider “grey band” around the edges, while a room-temperature roast cooks more evenly, leading to a perfectly pink interior.
- Utilize a Reliable Meat Thermometer for Precision: Given that air fryers cook intensely and rapidly, monitoring the internal temperature is paramount. An instant-read meat thermometer is your best friend here. Remember, roast beef experiences “carryover cooking,” meaning its internal temperature will continue to rise by 10-15°F (or even more in a hot air fryer) after it’s removed from the heat. Therefore, always remove your roast when it’s 10-15°F *below* your target final temperature. For example, aim for 125°F for a perfect medium-rare after resting.
- Allow the Beef to Rest for Ultimate Juiciness: This step is non-negotiable for a truly tender and moist roast. After cooking, cover the beef loosely with foil and let it rest for a minimum of 10 minutes, or even up to 20 minutes for larger roasts. Resting allows the muscle fibers to relax and reabsorb the flavorful juices that have migrated to the center during cooking. Skipping this step means juices will escape onto your cutting board, leaving you with dry meat.
- Slice Against the Grain for Maximum Tenderness: Identifying the “grain” (the direction of the muscle fibers) is key to a tender bite. Always slice the beef thinly across these fibers. This action shortens the muscle fibers, making each slice significantly more tender and much easier to chew. Slicing with the grain results in long, tough fibers that are less pleasant to eat.
- Choose the Right Cut for Optimal Results: The cut of beef plays a significant role in the success of your air-fried roast. Opt for naturally tender cuts that cook well with high, dry heat. Top sirloin or beef tenderloin are excellent choices, promising juicy, melt-in-your-mouth results. Leaner cuts like eye of round can work beautifully but require extra vigilance to prevent overcooking and maintain their tenderness. We’ll delve deeper into specific cuts below.
- Understand Carryover Cooking in High Heat Environments: As mentioned, carryover cooking is more pronounced with higher cooking temperatures. Since air fryers operate at very high heat, anticipate a significant temperature increase (10-15°F) in your roast during the resting period. Always factor this into your removal temperature to avoid overcooking and ensure your beef reaches the perfect final doneness.
Keep reading to uncover the 5 common mistakes to avoid for perfectly cooked Air Fryer Roast Beef! 👇
Essential Air Fryer Roast Beef Ingredients
Crafting this incredible roast beef and gravy requires a surprisingly simple collection of ingredients. Here’s what you’ll need to gather to bring this delicious meal to life:
For the Roast Beef
- Beef Roast: A 1.5 to 2.5-pound roast works ideally for most air fryers. Remember to let your beef roast come to room temperature for even cooking and a superior sear. This is critical for preventing a tough exterior and undercooked interior.
- High Smoke Point Cooking Oil: Select an oil with a high smoke point, such as vegetable oil, canola oil, grapeseed oil, or sunflower oil. These oils can withstand the air fryer’s intense heat without burning, helping to create that coveted crispy, dark crust on the beef. Avoid lower smoke point oils like olive oil or avocado oil for this high-heat application.
- Kosher Salt: With its coarse texture, kosher salt adheres beautifully to the surface of the meat, drawing out moisture and creating a flavorful crust. It also seasons the beef more evenly than fine table salt.
- Freshly Ground Black Pepper: For a robust and aromatic flavor, freshly ground black pepper is unmatched. Its pungent notes complement the rich beefiness. Adjust the quantity to your personal taste preferences for a subtle kick or a more pronounced peppery flavor.
Feel free to customize your seasoning! Beyond salt and pepper, you can experiment with steak seasoning blends, or add up to 1 teaspoon each of garlic powder, smoked paprika, and onion powder for additional depth and aroma.
For the Rich Gravy
- Salted Butter: The foundation of a luxurious gravy, butter adds unparalleled richness and helps create the roux, which thickens the sauce. If using unsalted butter, you may need to adjust the salt content.
- Onion: Finely minced onion provides a foundational layer of savory, aromatic flavor that deepens the complexity of the gravy. It cooks down beautifully to nearly disappear into the sauce while contributing immense taste.
- Kosher Salt: Use sparingly and adjust to taste, keeping in mind the salted butter and the salt used to season the beef. Gravy can quickly become too salty, so season gradually.
- All-Purpose Flour: Essential for thickening the gravy, all-purpose flour combines with the melted butter to form a roux, which creates a smooth, luscious texture without lumps.
- High-Quality Beef Broth: This is the heart of your gravy, providing a rich, savory, and deep umami base. Opt for a good quality beef broth for the best flavor; it truly brings all the savory notes together.
- Fresh Rosemary: This woody, aromatic herb infuses the gravy with a pungent, earthy note that pairs wonderfully with beef. Alternatively, you can use other complementary herbs like fresh thyme, a pinch of dried parsley, or oregano.
- Whole Peppercorns: Simmering whole peppercorns gently infuses the gravy with a subtle yet distinct peppery warmth. You can adjust the quantity based on your desired level of spice and aroma.
- Heavy Whipping Cream: For an incredibly smooth, velvety, and luxurious gravy, heavy whipping cream is the perfect finishing touch. It adds a decadent richness and a beautiful creamy texture.
Essential Tools for Your Air Fryer Roast Beef
One of the many delights of this recipe is its minimal requirement for specialized tools. Here are the few essentials that will ensure your cooking process is smooth and successful:
- Air Fryer: The star of our show, enabling quick, crispy, and perfectly cooked roast beef with less oil and mess. Ensure your roast fits comfortably within the basket.
- Paper Towels: Crucial for thoroughly patting the beef dry, which is key to achieving a fantastic sear and crispy crust.
- Aluminum Foil: Used to loosely cover the roast beef during its resting period, helping to redistribute juices and keep the meat warm and moist. It can also be used to prevent the crust from darkening too much towards the end of cooking.
- Large Saucepan: Your go-to for preparing the delectable homemade gravy, allowing ample space for whisking and simmering.
- Fine-Meshed Sieve: An important tool for straining your gravy, ensuring a silky-smooth, lump-free texture by removing any solids like cooked onion bits or whole peppercorns.
- Instant-Read Meat Thermometer: Absolutely essential for accurately monitoring the internal temperature of your roast, guaranteeing perfect doneness and preventing overcooking.
With these simple tools and ingredients ready, you’re all set to create the perfect air fryer roast beef dish that will impress everyone at your table.
Choosing the Best Cuts of Beef for Air Frying
Air frying excels with beef cuts that are inherently tender and can handle rapid cooking at high temperatures without becoming dry or tough. The dry, circulating heat of an air fryer is ideal for cuts that don’t require extensive breakdown of connective tissue.
When selecting your roast for the air fryer, it’s crucial to choose a size that fits comfortably within your air fryer basket. Ensure there’s a little space around the roast for proper air circulation, which is vital for even cooking and achieving that desired crispy exterior. A roast weighing around 2-3 pounds is typically an ideal size for most home air fryers. For consistent results, remember to flip the roast halfway through the cooking time to expose all sides to the hot circulating air.
Here’s a detailed guide to the best options—and a few cuts you should approach with significant caution:
- Top Sirloin Roast: This is hands down one of the premier choices for air frying. It’s a lean cut, yet incredibly flavorful, and naturally more tender than many other round roasts. Its moderate size typically fits perfectly within an air fryer basket, and it cooks beautifully to a juicy medium or medium-rare, yielding tender slices every time. Look for good marbling for the best flavor and moisture.
- Eye of Round Roast: An economical choice that is usually very uniform in shape, which contributes to its ability to cook evenly in an air fryer. As it is a leaner cut, the most important aspect is to prevent overcooking at all costs. Overcooking an eye of round will quickly render it dry and tough. Aim for a medium-rare internal temperature. (P.s. For more inspiration, check out my extra tender and juicy Eye of Round Roast recipe for the oven!).
- Outside Round (Bottom Round or Rump Roast): This cut boasts a robust, beefy flavor that many adore. However, due to its lean nature and higher amount of connective tissue, it tends to be tougher than sirloin or tenderloin. It’s generally better suited for slow-cooking methods that allow ample time to break down those connective tissues, such as a Dutch oven pot roast. If you choose to use it in the air fryer, it’s absolutely essential to cook it rare to medium-rare (maximum) and slice it very thinly against the grain to maximize tenderness. For a more forgiving method for this cut, try my Instant Pot Roast Beef recipe instead!
- Beef Tenderloin: A truly exceptional option for air frying, prized for its unparalleled tenderness (it’s the cut from which filet mignon is derived!). It cooks incredibly quickly due to its low fat content and tender muscle structure, meaning it demands very close monitoring to prevent overcooking. Beef tenderloin is best enjoyed when served rare to medium, preserving its delicate texture and exquisite flavor.
Beef Cuts to Avoid in the Air Fryer
Not all beef cuts are created equal, especially when it comes to air frying. Tough, connective tissue-heavy cuts are fundamentally unsuitable for the air fryer’s quick, high-heat cooking method. Cuts like beefchuck roast or brisket need prolonged, slow cooking—often with moisture—to break down their abundant connective tissues and become tender. Attempting to air fry these cuts will inevitably lead to dry, chewy, and disappointing results. While these cuts are incredibly flavorful, they are best reserved for braising, stewing, or slow roasting. Additionally, always avoid trying to fit a beef joint that is too large into your air fryer, as it will obstruct airflow and lead to uneven cooking.
How to Make Air Fryer Roast Beef and Gravy: A Simple Guide
Prepare to create a truly dreamy, melt-in-your-mouth roast beef recipe in just about 40 minutes, with surprisingly little mess. These super simple steps will guide you to culinary success:
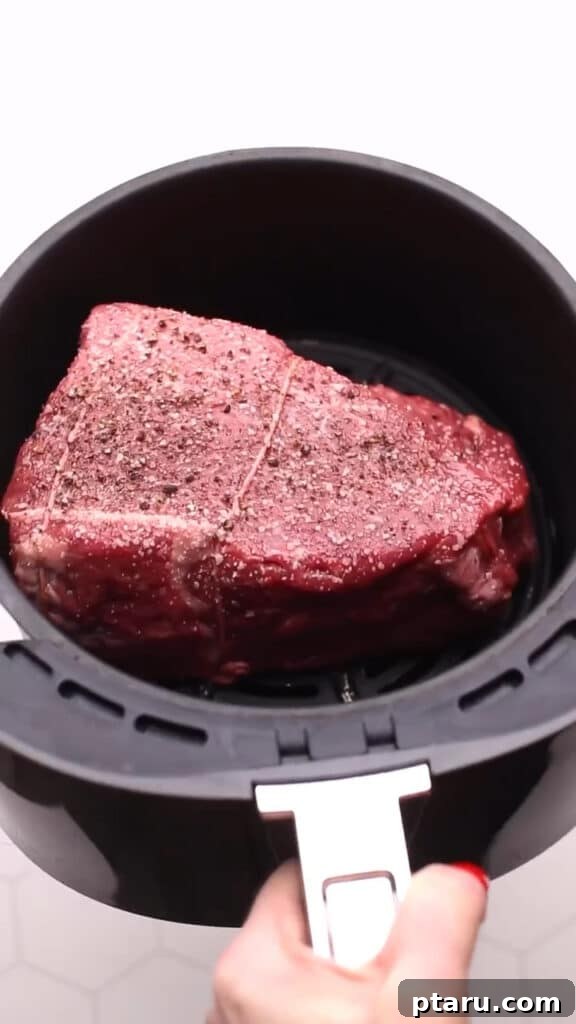
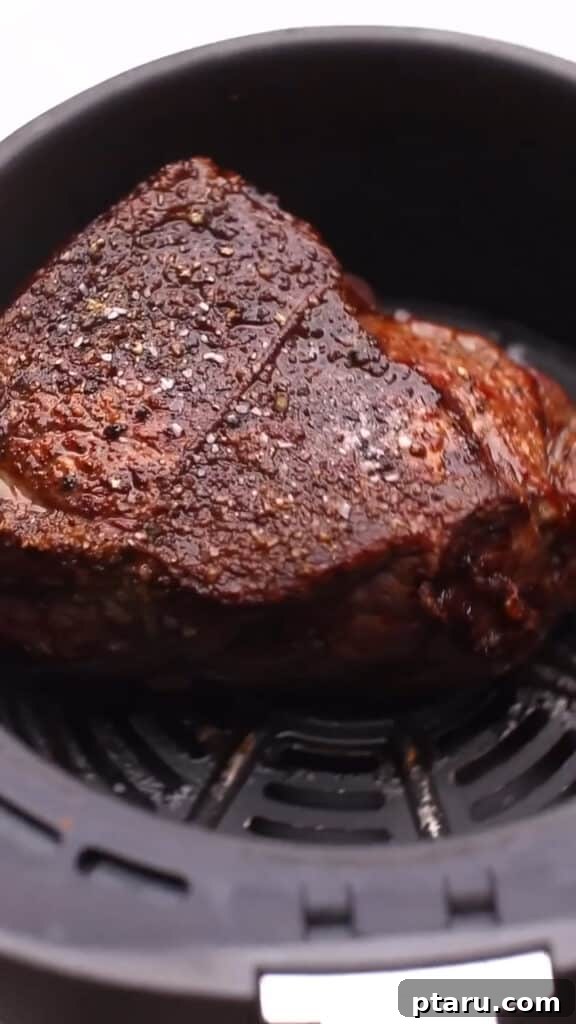
Step-by-Step Guide to Roasting the Beef
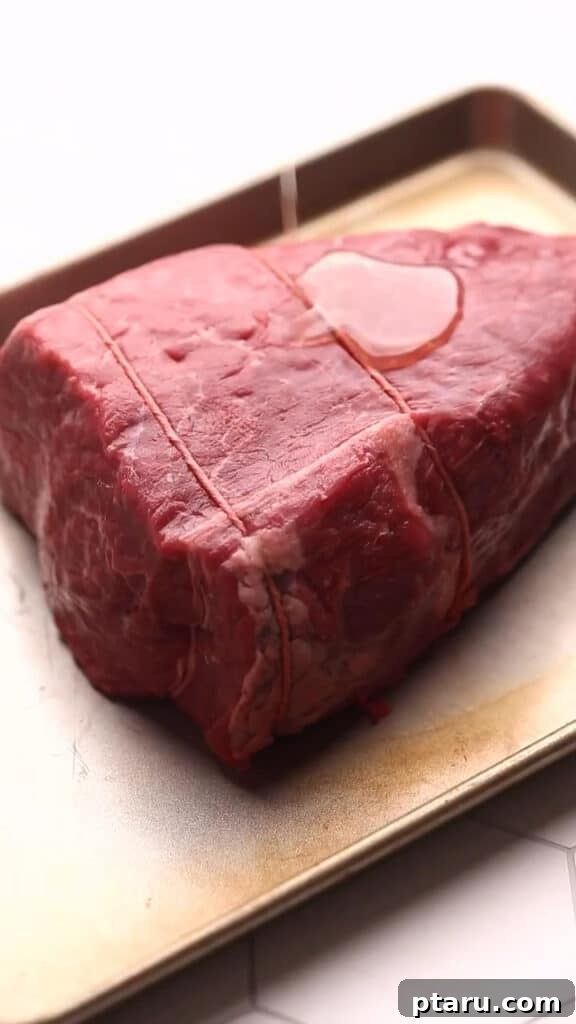
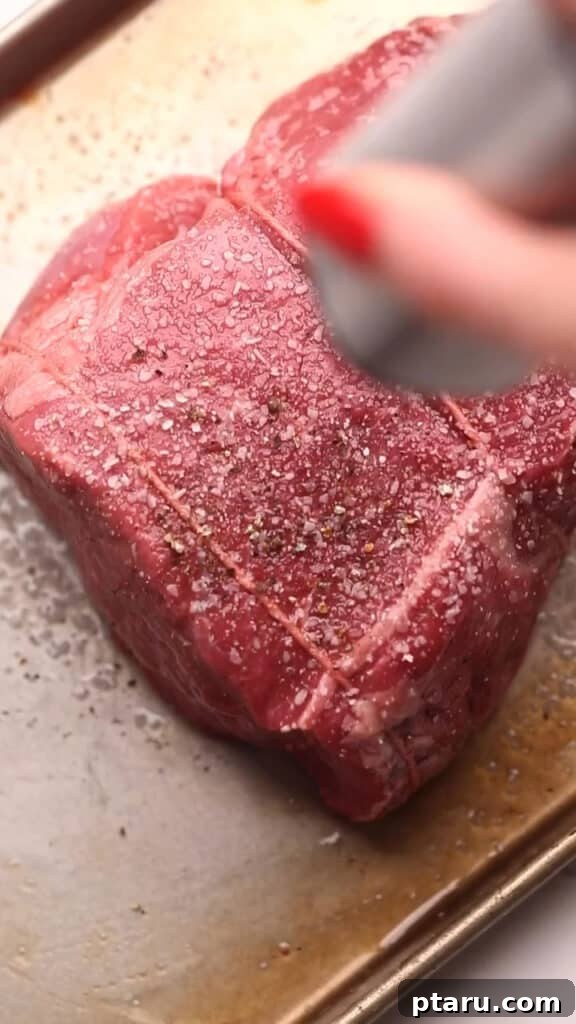
- Prepare the Roast: Begin by thoroughly patting your beef roast dry with paper towels. This crucial step removes surface moisture, which is essential for achieving a perfect, crispy sear. Next, rub the entire surface of the roast generously with cooking oil, followed by an even coating of kosher salt and freshly ground black pepper.
- Air Fry the Beef: Carefully transfer the seasoned beef to your preheated air fryer basket. Air fry at 360°F (180°C) for approximately 40 minutes, remembering to flip the roast halfway through the cooking time. Continue cooking until the internal temperature, measured with an instant-read meat thermometer inserted into the thickest part, reaches 125°F (52°C) for a perfect medium-rare.
- Prevent Over-Browning: Keep a close eye on the roast during the last 10 minutes of cooking. If you notice the exterior is browning or darkening too quickly to your preference, carefully use oven mitts to wrap the roast loosely in aluminum foil. This will protect the crust while allowing the interior to finish cooking to the desired temperature.
- Rest the Beef: Once the roast reaches the target internal temperature, remove it from the air fryer and let it rest, still wrapped loosely in foil, on a cutting board for at least 10-15 minutes. This resting period is vital for the juices to redistribute throughout the meat, ensuring every slice is incredibly tender and moist.
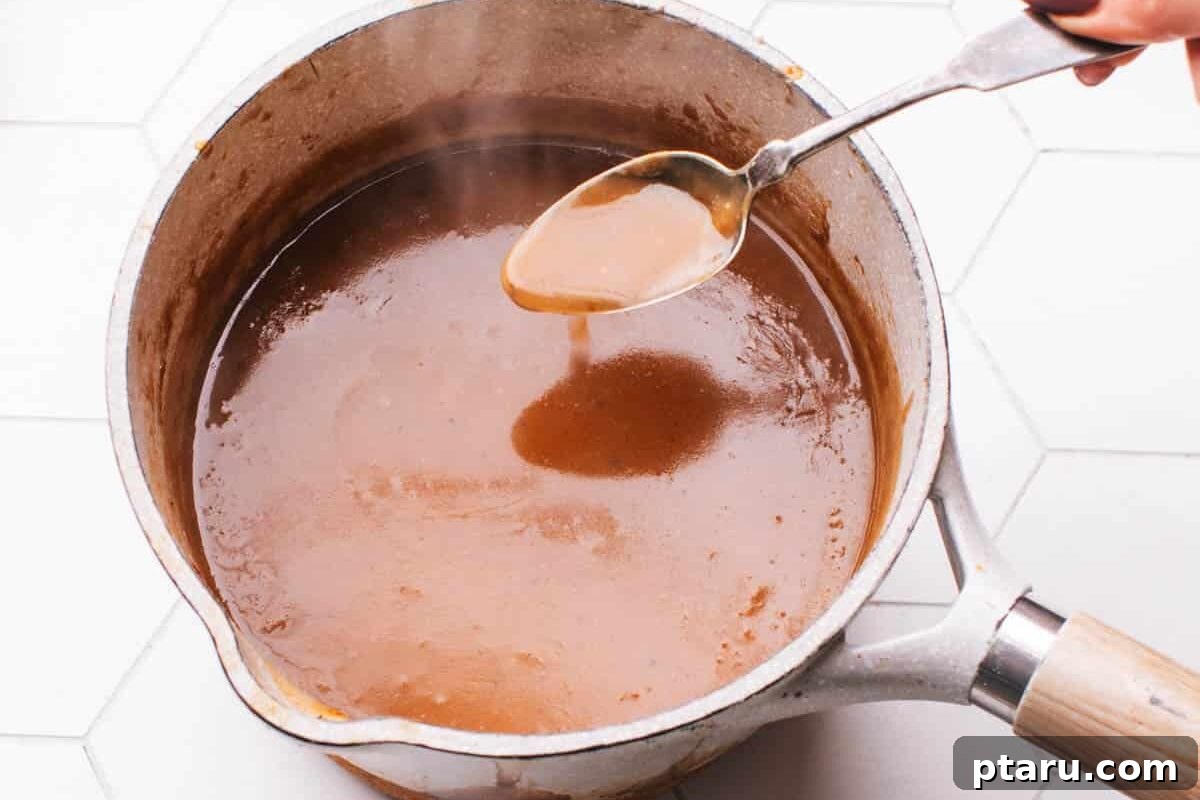
How to Create the Delicious Gravy
- Sauté the Onion Base: In a large saucepan, melt the salted butter over medium-high heat. Add the minced onion and ½ teaspoon of kosher salt, then cook, stirring occasionally, until the onion softens and becomes translucent, which typically takes about 5 minutes. This builds a flavorful base for your gravy.
- Develop the Roux: Stir in the all-purpose flour and continue to cook, stirring frequently, for 2-3 minutes. This process, known as making a roux, cooks out the raw flour taste and allows it to turn a light butterscotch color, providing both thickening power and a rich flavor.
- Whisk in Broth: Very carefully and slowly, whisk in the beef broth in a steady, thin stream. Be cautious as the mixture will bubble up quickly. Continue whisking vigorously to prevent lumps until the gravy is smooth and begins to thicken.
- Infuse Flavors: Stir in the fresh rosemary and whole peppercorns. Reduce the heat to low. Whisk in the heavy whipping cream and the remaining ½ teaspoon of kosher salt (or adjust to taste). Once the mixture thickens to your desired consistency, turn off the heat and cover the pan. Let the gravy stand for at least 1 hour to allow the herbs and peppercorns to deeply infuse their flavors.
- Strain and Serve: Just before serving, return the gravy to a simmer over low heat. Once warm, force the gravy through a fine-mesh sieve into a clean serving dish, discarding the cooked solids (onion, rosemary, peppercorns). This step ensures a velvety-smooth gravy.
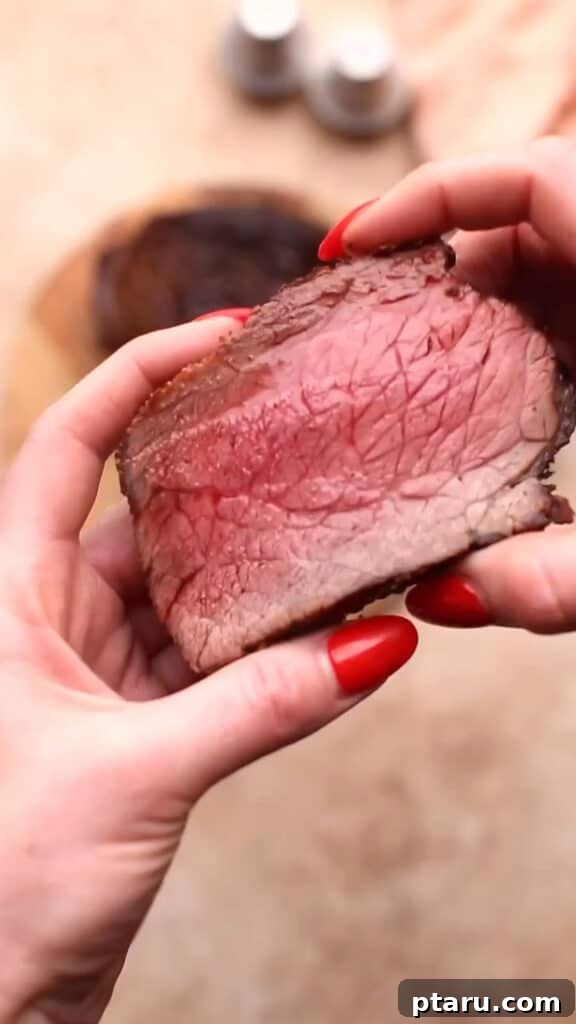
How to Serve Your Delicious Air Fryer Roast Beef
Now comes the most rewarding part: presenting and enjoying your perfectly cooked air fryer roast beef and its exquisite gravy. To complete this richly meaty and incredibly satisfying meal, here are my absolute favorite side dishes that complement the flavors beautifully:

- Creamy Mashed Potatoes: A timeless classic! My recipe for light, fluffy (and never gluey) mashed potatoes is the quintessential partner to this robust roast. For a delicious low-carb alternative, consider swapping in creamy cauliflower rice.
- Decadent Scalloped Potatoes: Elevate your potato game with this glorious accompaniment. My gluten-free scalloped potatoes recipe offers layers of tender potatoes bathed in a rich, creamy sauce. This combination is so utterly satisfying, you’ll happily drift into an afternoon nap afterward – totally worth it!
- Vibrant Green Beans: Simply steamed green beans offer a fresh, crisp counterpoint to the richness of the beef and gravy. For an indulgent upgrade, try my rich and dreamy green bean casserole with crispy onions, a true crowd-pleaser.
- Sweet Glazed Carrots: Steamed and lightly buttered baby carrots or honey-glazed carrots provide a touch of sweetness and a contrasting texture. They’re an easy-going side that adds color and essential nutrients to your plate.
- Crisp Dinner Rolls or Crusty Bread: Perfect for soaking up every last drop of that incredible gravy. A warm, crusty roll is a simple yet satisfying addition to any roast beef dinner.
Pair this hearty meal with a full-bodied red wine, such as a Cabernet Sauvignon or a Merlot, to enhance the beef’s rich flavors, or a refreshing iced tea for a non-alcoholic option.
Make Ahead and Storage Tips for Roast Beef and Gravy
While leftovers of this delicious air fryer roast beef are rare, if you do find yourself with some, you’ll be delighted to enjoy them again the next day or transform them into new meals!
- Storing Cooked Roast Beef: To maintain quality and safety, allow the cooked roast beef to cool completely to room temperature (within 2 hours) before refrigerating. You can store it as a whole piece or pre-slice it for easier reheating later. Place the roast beef in an airtight container or wrap it tightly in plastic wrap, then aluminum foil, to prevent drying out. It can be safely refrigerated for up to 3-4 days. For longer storage, tightly wrap individual portions and freeze for up to 2-3 months.
- Reheating Roast Beef Without Drying It Out:
- Oven Method: For larger pieces or slices, place the roast beef in an oven-safe dish with a splash of beef broth or water to keep it moist. Cover tightly with foil and reheat in a 250°F (120°C) oven for 20-30 minutes, or until warmed through.
- Stovetop Method: For individual slices, gently warm them in a skillet over medium-low heat with a little beef broth or gravy for 2-3 minutes per side, just until heated through.
- Microwave Method: For convenience, place slices in a microwave-safe dish with a tablespoon of broth. Cover and reheat on medium power in 30-second intervals, checking frequently, until warm. Avoid high power and long cook times, which can quickly dry out the meat.
The key to reheating is gentle, low heat and adding moisture to prevent the meat from becoming tough or dry.
- Storing and Reheating Gravy: Allow the gravy to cool completely before transferring it to an airtight container. Gravy can be refrigerated for 2-3 days. To reheat, gently warm it on the stove over low heat, stirring frequently. If it’s too thick, add a bit of water or extra beef broth, one tablespoon at a time, to achieve the desired consistency.
Don’t let any leftovers go to waste! Some of my favorite ways to repurpose leftover roast beef include making a comforting old-fashioned beef and vegetable soup, a hearty Dutch oven beef stew, or a savory beef pot pie. Delicious possibilities await!
5 Most Common Mistakes to Avoid When Making Air Fryer Roast Beef
Achieving succulent air fryer roast beef and rich gravy is easier than you think, but it’s important to be aware of common pitfalls. Here are the most frequent missteps and how to avoid them for a consistently perfect meal:
- Not Patting the Meat Dry Thoroughly: This is a critical error! Failing to pat the beef completely dry with paper towels before seasoning and placing it in the air fryer prevents the Maillard reaction (the browning process that creates deep flavor and a crispy crust). Excess moisture will steam the meat instead of searing it, resulting in a less flavorful, pale exterior. Always ensure the surface is as dry as possible for the best crust.
- Forgetting to Preheat the Air Fryer: Just like an oven, an air fryer needs to be preheated to its target temperature before adding food. The initial blast of hot circulating air from a preheated air fryer is crucial for immediately searing the outer layer of the beef. This quick sear locks in the meat’s natural juices, preventing them from escaping during cooking, and contributes to that desirable crispy texture. Skipping preheating leads to uneven cooking and a less effective sear.
- Using the Wrong Cut of Beef: Not all beef cuts are suitable for the high, dry heat of an air fryer. Choosing a tough cut with significant connective tissue, or one with minimal fat content that requires long, slow cooking, will result in a dry, chewy, and disappointing roast. Avoid cuts like chuck roast or brisket, which are far better suited for moist cooking methods such as braising (like in my shredded beef recipe) where connective tissues can slowly break down. Stick to the recommended tender cuts for air frying.
- Neglecting to Rest the Beef After Cooking: This mistake is perhaps the most common culprit behind dry roast beef. After the high heat of cooking, the muscle fibers in the beef are contracted, and the juices are concentrated in the center. Cutting into the roast immediately will cause all those precious juices to spill out onto your cutting board, leaving the meat dry and less flavorful. Allowing the beef to rest for at least 10-15 minutes, tented loosely with foil, gives the muscle fibers time to relax and reabsorb the juices, ensuring a tender, moist, and delicious result.
- Not Monitoring the Cooking Closely (Especially Internal Temperature): Air fryers cook quickly and efficiently, which means they can also overcook quickly. Relying solely on a timer without checking the internal temperature with an instant-read meat thermometer is a recipe for disaster. Overcooking, even by a few degrees, can turn a perfectly juicy roast into a dry and tough one. Begin checking the temperature a few minutes before the estimated cook time, and also keep an eye on the exterior browning to prevent it from burning. Precision is key to perfection!
FAQs About Air Fryer Roast Beef
Just skimming through? Here are some quick answers to the most commonly asked questions about making delicious air fryer roast beef.
Can I use a frozen beef roast in the air fryer?
For the best results, I strongly recommend thawing your beef roast completely before attempting to air fry it. Cooking from frozen can lead to uneven cooking, with the exterior burning before the interior reaches a safe or desired temperature. Thawing ensures more predictable and tender results.
How long should I preheat the air fryer for roast beef?
Preheating is a vital step for achieving a proper sear. I recommend preheating your air fryer for at least 5-7 minutes at the recommended cooking temperature (usually 360°F or 180°C). This ensures the cooking environment is hot and ready to create that desirable crispy crust and seal in the juices from the moment the beef enters the basket.
Can I marinate the beef for an extended period before air frying?
Yes, marinating the beef can greatly enhance its flavor and, in some cases, tenderness. Marinating overnight in the refrigerator (8-12 hours) is ideal for allowing flavors to penetrate the meat deeply. However, I’d suggest avoiding overly acidic marinades for extended periods (more than 4-6 hours), as strong acids can begin to “cook” or denature the meat’s proteins, potentially affecting its texture negatively.
What’s the best way to prevent the beef from drying out?
Preventing dry roast beef comes down to a few key practices: Always pat the beef dry before seasoning, choose a well-marbled cut, closely monitor the internal temperature with a meat thermometer (removing it before it reaches your final target temperature to account for carryover cooking), and, crucially, let the roast rest sufficiently after cooking. These combined steps are your best defense against dryness, ensuring a juicy result.
Can I cook multiple roasts at the same time in the air fryer?
It’s generally best to avoid overcrowding your air fryer basket. For optimal air circulation and even cooking, cook only one roast at a time, or ensure there’s ample space around each piece if cooking smaller items. Overcrowding reduces airflow, leading to steaming instead of crisping, and results in unevenly cooked meat. Cook roasts in batches if necessary.
How do I know when the roast beef is done to my liking?
The most accurate way to determine doneness is by using an instant-read meat thermometer. Insert it into the thickest part of the roast, avoiding bone or fat. Here are general temperature guidelines (remembering to remove the roast 10-15°F before these final targets due to carryover cooking): Rare (125-130°F / 52-54°C), Medium-Rare (130-135°F / 54-57°C), Medium (135-140°F / 57-60°C), Medium-Well (140-145°F / 60-63°C), Well-Done (150°F+ / 66°C+).
What can I substitute for heavy whipping cream in the gravy?
If you’re looking for a lighter option or don’t have heavy whipping cream, you can substitute it with whole milk or half-and-half. These alternatives will still add some creaminess, though the gravy might be slightly less rich and thick. Adjust the quantity as needed to achieve your desired consistency and taste.
Can I use an air fryer oven instead of a traditional basket-style air fryer?
Yes, an air fryer oven works beautifully for roast beef. The principles of cooking time, temperature, and preheating remain largely the same. Always refer to your specific air fryer oven’s manufacturer instructions for any particular temperature settings or cooking time adjustments, as models can vary.
Explore More Air Fryer Recipes
- Perfectly Seared Air Fryer Tuna Steak
- Air Fryer Frozen Salmon (Moist & Flaky Every Time!)
- The Juiciest Air Fryer Boneless Chicken Thighs
- Quick and Crispy Air Fryer Eggplant Recipe
- Delicious Air Fryer Turkey Burgers
- Master the Air Fryer Pizza + learn How to Reheat Pizza in Air Fryer
More Comforting Beef Recipes You’ll Love
- Indulgent Beef Pot Pie with a golden flaky crust
- Authentic Chili Con Carne Recipe with Ground Beef
- The Ultimate Traditional Beef Taco Recipe
- My secret for the Best Meatloaf Recipe Ever
- Discover the irresistible golden Roast Beef Crust on this beautiful roast
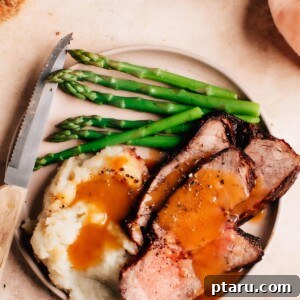
Air Fryer Roast Beef (Extra Juicy!)
Jennifer Pallian BSc, RD
10 minutes
40 minutes
50 minutes
4
Ingredients
- For the beef:
- 1 ½ lbs beef roast (room temperature)
- 1 tbsp cooking oil
- 2 ¼ tsp kosher salt
- ½ tsp black pepper
- For the gravy:
- 4 tbsp salted butter
- ¾ cup minced onion
- 1 tsp kosher salt (divided use)
- 4 tbsp all-purpose flour
- 2 cups beef broth
- 1 tbsp fresh rosemary (coarsely chopped)
- 1 tbsp whole peppercorns
- ½ cup heavy whipping cream
Instructions
-
Pat roast beef dry with paper towels. Rub all over with oil, salt, and pepper.
-
Transfer beef to air fryer and air fry at 360ºF (180°C) for about 40 minutes, flipping halfway through, until it reaches 125ºF (52°C) for medium-rare.
-
If the roast gets too dark in the last 10 minutes, use oven mitts to wrap it loosely in foil to finish cooking.
-
For the Gravy: Add the butter to a large saucepan and melt it over medium-high heat. Next, add the onion and ½ tsp salt and cook until soft, for about 5 minutes.
-
Stir in flour and cook, stirring frequently, until it turns butterscotch-colored. Very carefully whisk in the broth in a slow stream. Be careful; it will bubble up quickly.
-
Stir in the rosemary and peppercorns and turn the heat down to low. Whisk in cream and remaining ½ tsp salt. When the mixture thickens, turn off the heat and cover the pan. Let stand for 1 hour to infuse flavors.
-
Just before serving, return the gravy to a simmer over low heat. Force through a fine-mesh sieve into a serving dish, discarding the solids.
Notes
- I often use Outside Round Oven Beef Roast, also known as bottom round roast or rump roast.
- See the “Best Cuts of Beef for Air Fryer Roast Beef” section for other good choices.
- Always bring beef to room temperature before cooking for even results.
- Remember to thoroughly pat the beef dry before cooking it to achieve a crispy sear.
- Watch the temperature closely in the second half of cooking to avoid overcooking. Peek several times to ensure it isn’t getting too dark either; use foil if necessary.
- Rest the beef before slicing it for maximum juiciness and tenderness.
Nutrition
Nutrition information is an approximation per serving:
- Calories: 592 kcal
- Carbohydrates: 11g
- Protein: 36g
- Fat: 46g
- Saturated Fat: 23g
- Polyunsaturated Fat: 4g
- Monounsaturated Fat: 18g
- Trans Fat: 2g
- Cholesterol: 182mg
- Sodium: 2580mg
- Potassium: 747mg
- Fiber: 2g
- Sugar: 2g
- Vitamin A: 846 IU
- Vitamin C: 3mg
- Calcium: 86mg
- Iron: 4mg
Nutrition information is automatically calculated and should only be used as an approximation. Individual results may vary based on exact ingredients and preparation methods.