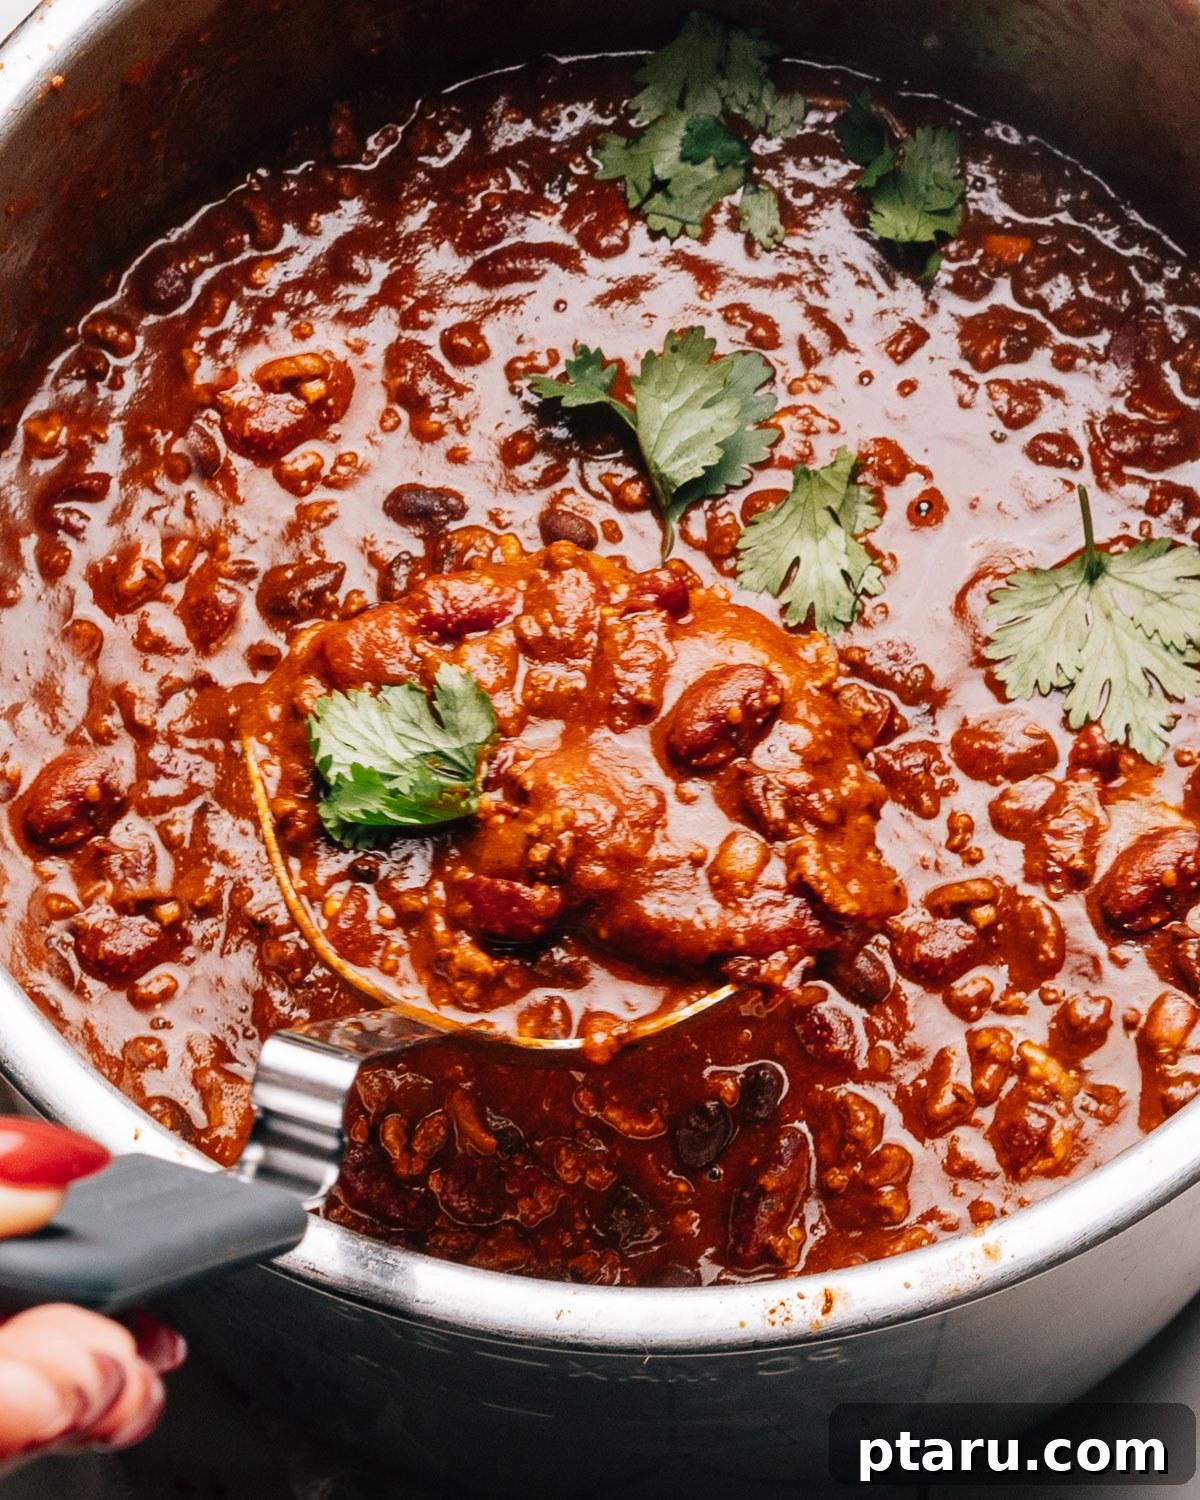
Embark on a culinary journey to create the ultimate Instant Pot Chili – a rich, thick, and incredibly satisfying dish featuring hearty ground beef and tender beans. This recipe is meticulously crafted to be weeknight-fast, delivering deep, slow-simmered flavors in a fraction of the time. What truly sets this recipe apart are the ingenious tricks implemented to prevent the dreaded “burn” warning, a common frustration for Instant Pot users, ensuring a smooth and successful cooking experience every time.

Chili holds a special place in the hearts of home cooks, standing out as one of the most beloved ground beef recipes. Its magic extends beyond the initial meal, transforming into even more flavorful leftovers that continuously improve throughout the week. Our Instant Pot rendition harnesses the power of pressure cooking to bring this comfort food classic to your table at an astonishing speed, making it an ideal choice for busy evenings without compromising on taste or texture.
The secret to achieving such profound flavor and preventing any culinary mishaps lies in a smart layering technique. This innovative approach allows the Instant Pot to develop the complex, rich notes typically associated with an all-day simmer, all while meticulously safeguarding against those unwelcome pressure cooker burn warnings. Prepare to be amazed by a chili that tastes like it cooked for hours, but was ready in under one!
Why This Instant Pot Chili Recipe Stands Out
Many Instant Pot chili recipes promise speed, but often fall short when it comes to depth of flavor or encounter the dreaded burn error. Our recipe addresses these common challenges head-on, ensuring a truly foolproof and deeply satisfying bowl of chili. Here’s why this recipe deserves a spot in your weekly rotation:
- No More Burn Warnings: Our signature layering method keeps acidic ingredients, like tomatoes, away from the bottom of the pot until pressure cooking, drastically reducing the risk of scorching and error messages.
- “All-Day Simmer” Flavor in Under an Hour: By perfectly browning the beef, blooming the spices, and deglazing the pot, we build foundational flavors that mimic hours of slow cooking, achieving a rich, complex chili profile quickly.
- Perfectly Thick & Hearty: This isn’t a watery chili. It’s designed to be robust and spoon-coating, packed with tender ground beef and a medley of beans.
- Effortless Weeknight Meal: With minimal hands-on time, you can have a nutritious, crowd-pleasing dinner on the table faster than ordering takeout.
- Amazing Leftovers: Like all great chilis, this one only gets better with age. It’s perfect for meal prepping and enjoying throughout the week.
Get ready to redefine your understanding of quick and delicious homemade chili with this revolutionary Instant Pot method!
Essential Ingredients for Your Perfect Instant Pot Chili
Crafting exceptional chili con carne starts with quality ingredients. This recipe relies on readily available pantry staples to create a monumental flavor that will tantalize your taste buds. Here’s a closer look at what goes into our beloved Instant Pot Chili:
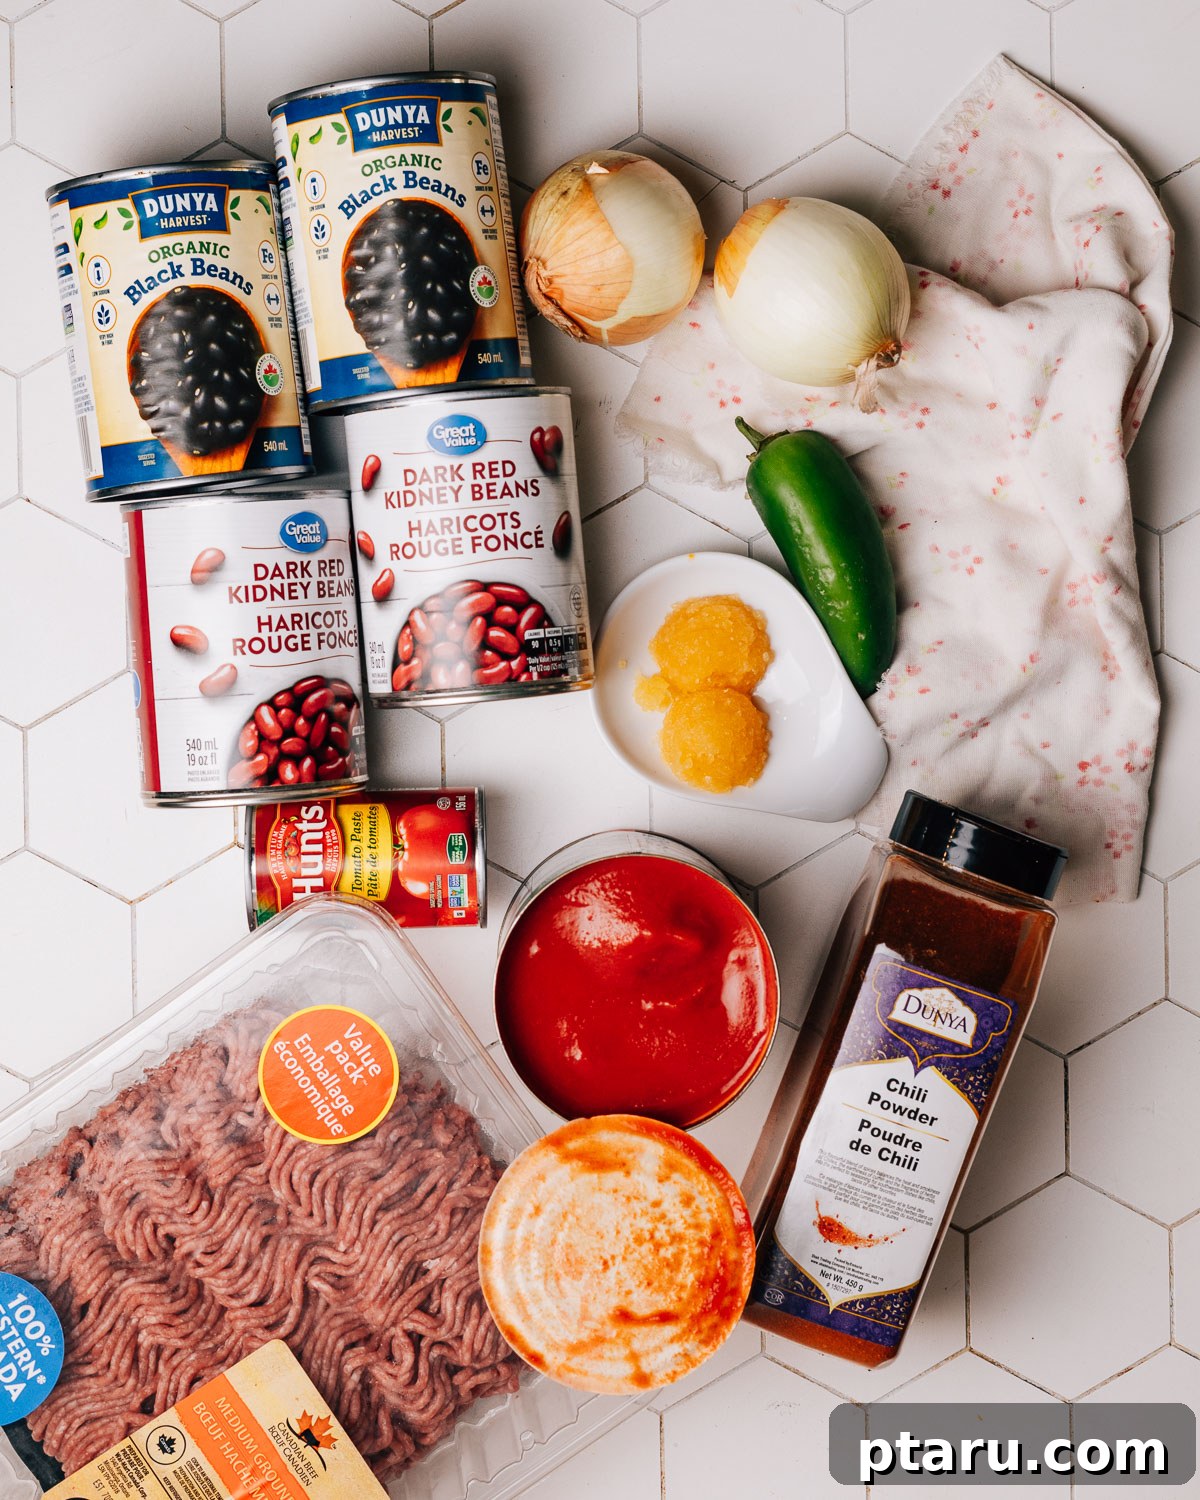
- Olive Oil: Essential for browning the beef and sautéing aromatics, imparting a subtle fruity note.
- Ground Beef: Opt for an 80/20 lean-to-fat ratio for the best flavor and texture. The fat renders during browning, contributing richness.
- Onion: Finely chopped onion creates a sweet and savory base. Yellow or white onions work wonderfully.
- Jalapeño: Adds a touch of vibrant heat and classic chili flavor. For less spice, remove the seeds and membranes; for more, leave them in or use an extra pepper.
- Garlic: Freshly minced garlic is non-negotiable for its aromatic depth, complementing the other bold flavors.
- Chili Powder: This is the backbone of your chili’s flavor profile. We specifically refer to a robust chili seasoning blend, which typically includes a harmonious mix of ground chiles, cumin, oregano, garlic powder, and sometimes onion powder. Ensure you’re not using pure ground red chile, which is much hotter.
- Kosher Salt: Vital for seasoning at different stages to enhance and balance all the flavors.
- Black Pepper: A foundational spice that adds a subtle bite and aroma.
- Water (or Beef Broth): While water works, high-quality beef broth can elevate the overall savory depth of your chili. Using boiling water can also help the Instant Pot come to pressure faster.
- Black Beans: These add a creamy texture and earthy flavor, making the chili more substantial.
- Kidney Beans: Known for their classic chili role, kidney beans provide a firm texture and mild, slightly sweet taste.
- Diced Tomatoes: A cornerstone of chili, diced tomatoes bring acidity and a chunky texture. We use them undrained to ensure enough liquid.
- Tomato Paste: The secret weapon for intense tomato flavor and a thicker consistency. Browning it lightly adds another layer of complexity.
You’ll find precise quantities for each ingredient detailed in the comprehensive recipe card below.
Variations and Substitutions for Your Instant Pot Chili
One of the joys of cooking chili is its versatility. Feel free to customize this Instant Pot Chili recipe to suit your preferences or to utilize ingredients you already have on hand. These small tweaks can significantly shift the flavor profile and make it uniquely yours:
- Adjusting Heat Level: If you crave more fiery chili, swap the jalapeño for a spicier serrano pepper, or add a pinch of cayenne pepper or a diced chipotle in adobo sauce for smoky heat. For a milder version, remove all seeds and membranes from the jalapeño, or omit it entirely.
- Exploring Different Types of Beans: Don’t limit yourself! Experiment with all kidney beans, pinto beans, cannellini beans, or a vibrant mix of several varieties. Each type brings its own texture and subtle flavor. Ensure they are always rinsed and drained.
- Alternative Meats: While ground beef is classic, this recipe adapts beautifully to other proteins.
- Ground Pork: For a richer, slightly sweeter chili, try ground pork. It browns similarly to beef and adds incredible depth.
- Ground Turkey: If you prefer a leaner option, ground turkey is an excellent substitute. Make sure to brown it well and perhaps add a bit more oil to prevent it from sticking. We even have a dedicated Instant Pot Turkey Chili recipe! For stovetop options, explore our white bean turkey chili or classic ground turkey chili.
- Pork Green Chili: If pork is your passion, you might also love our award-winning pork green chili recipe, which offers a completely different, vibrant flavor profile.
- Creamy Chili Options: For those who adore a luscious, creamy chili, consider these delicious alternatives:
- Our Cream Cheese Chicken Chili offers a wonderfully rich and tangy experience.
- Or try our Healthy White Chicken Chili for a lighter, yet equally satisfying creamy option.
- Adding Vegetables: Boost nutrition and texture by incorporating diced bell peppers (red, yellow, or green), corn, or zucchini during the sauté stage with the onions.
Don’t be afraid to make this recipe your own – it’s designed to be adaptable and delicious no matter how you tweak it!
Mastering Instant Pot Chili: An Easy Step-by-Step Guide
Creating this flavorful Instant Pot Chili is surprisingly straightforward, especially when you follow our key steps to ensure maximum flavor and a perfect, burn-free result. Let’s walk through each stage:
1. Preheat and Brown the Beef for Max Flavor
Begin by setting your Instant Pot to the “Sauté” function on “Normal” or “More.” Allow it to preheat for several minutes until it signals “Hot” or “On.” This ensures your pot is adequately hot for proper searing. Add the olive oil, and once it shimmers, carefully add the ground beef. Break up the beef a bit with a wooden spoon or spatula, then resist the urge to stir immediately. Let it sit undisturbed for 3-4 minutes to develop a deep, rich brown crust. This crucial browning step creates a foundational layer of savory flavor (the Maillard reaction) that is essential for a truly delicious chili, mimicking the complexity of a longer simmer.
2. Soften Aromatics and Bloom Spices: The Secret to Depth
Once the beef is beautifully browned, stir in the finely chopped onion, minced garlic, diced jalapeño, chili powder, a portion of the kosher salt, and black pepper. Continue to cook, stirring occasionally, for about 6 minutes, or until the onions have softened and become translucent. During this stage, the spices will “bloom” in the hot oil, releasing their full aromatic potential and creating a fragrant, toasty foundation that gives your chili that coveted “slow-simmered” taste in record time.
3. Add Liquid and Beans, Then Deglaze Thoroughly
Pour in the water (or beef broth). Add the rinsed and drained black beans and kidney beans along with the remaining kosher salt. Now comes a critical step to prevent burn warnings: deglazing. Using your wooden spoon or spatula, vigorously scrape the entire bottom of the Instant Pot until it is perfectly smooth, ensuring no browned bits (fond) remain stuck. Any fond left on the bottom can scorch during pressure cooking and trigger the “Burn” message. This step also incorporates all those delicious caramelized flavors back into the liquid.
4. Layer Tomatoes and Paste (Do Not Stir)
This is arguably the most important step for a burn-free Instant Pot Chili. Carefully pour the diced tomatoes over the top of the mixture, including their juices. Then, dollop the tomato paste evenly across the surface. The key here is: DO NOT STIR. The sugars in tomatoes and tomato paste are prone to scorching when in direct contact with the hot bottom of the pot under pressure. By layering them on top, away from the heating element, you prevent this issue, allowing for a perfectly cooked chili without interruptions.
5. Pressure Cook and Rest for Perfection
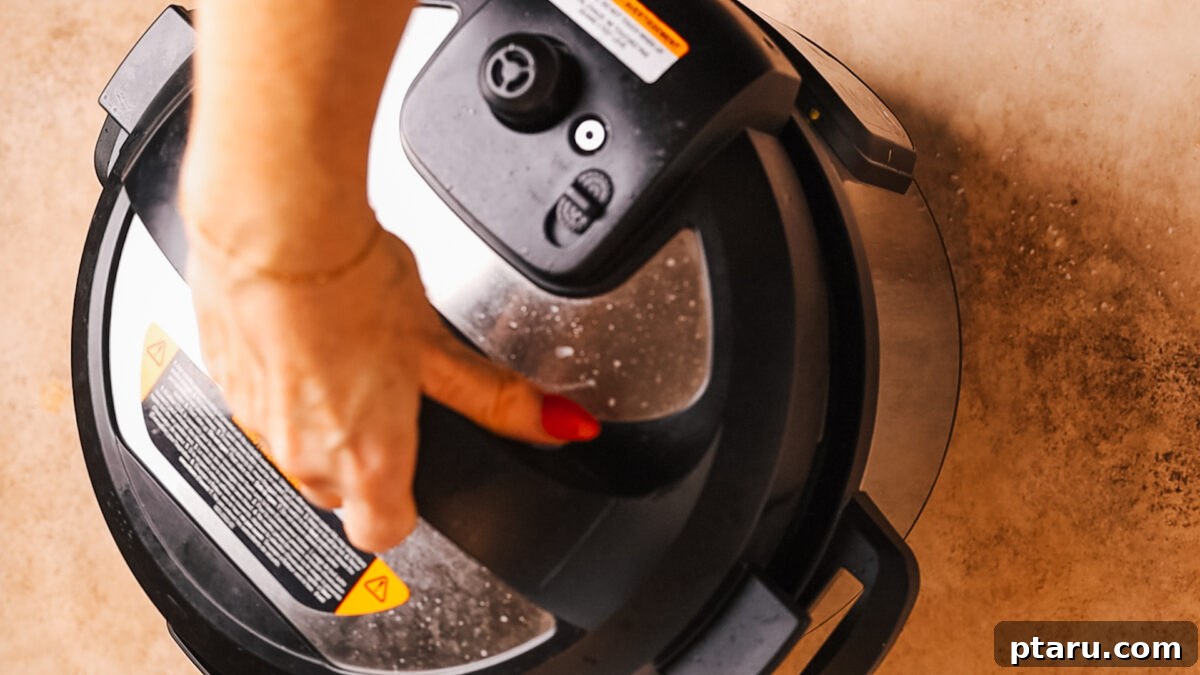
Securely lock the Instant Pot lid and set the steam release valve to the “Sealing” position. Select the “Manual” or “Pressure Cook” function and set the cooking time to “High Pressure” for 15 minutes. Once the cooking cycle is complete, allow the pressure to release naturally for 10 minutes. This “Natural Pressure Release” (NPR) helps the flavors meld and the meat tenderize further. After 10 minutes, carefully perform a Quick Release (QR) for any remaining pressure by turning the valve to “Venting.” Once the float valve drops, you can safely open the lid. Give the chili a good stir, taste, and adjust the salt or any other seasonings as needed. Serve hot with your favorite toppings.
No-Burn Trivet Setup (Optional, for Enhanced Flavor & Ultimate Prevention)
For an even richer flavor profile and absolute assurance against burn warnings, consider this alternative method: Brown your beef, aromatics, spices, and even the tomato paste in a traditional Dutch oven on the stovetop. This allows for deeper caramelization. Once complete, stir in the beans, diced tomatoes, and about two cups of the water. Then, in your Instant Pot, add 1 cup of boiling water to the inner pot, place a trivet inside, and line the trivet with crumpled parchment paper to act as a barrier. Carefully spoon the chili mixture from the Dutch oven on top of the parchment paper in the Instant Pot. Pressure cook as described above. This pot-in-pot method completely isolates the chili from the direct heat, guaranteeing no burns.
PS. If you appreciate perfectly tender pressure cooker meats, don’t miss our other fantastic recipes like Instant Pot Roast Beef, Instant Pot Steak, or our incredibly juicy Instant Pot Pulled Pork recipes.
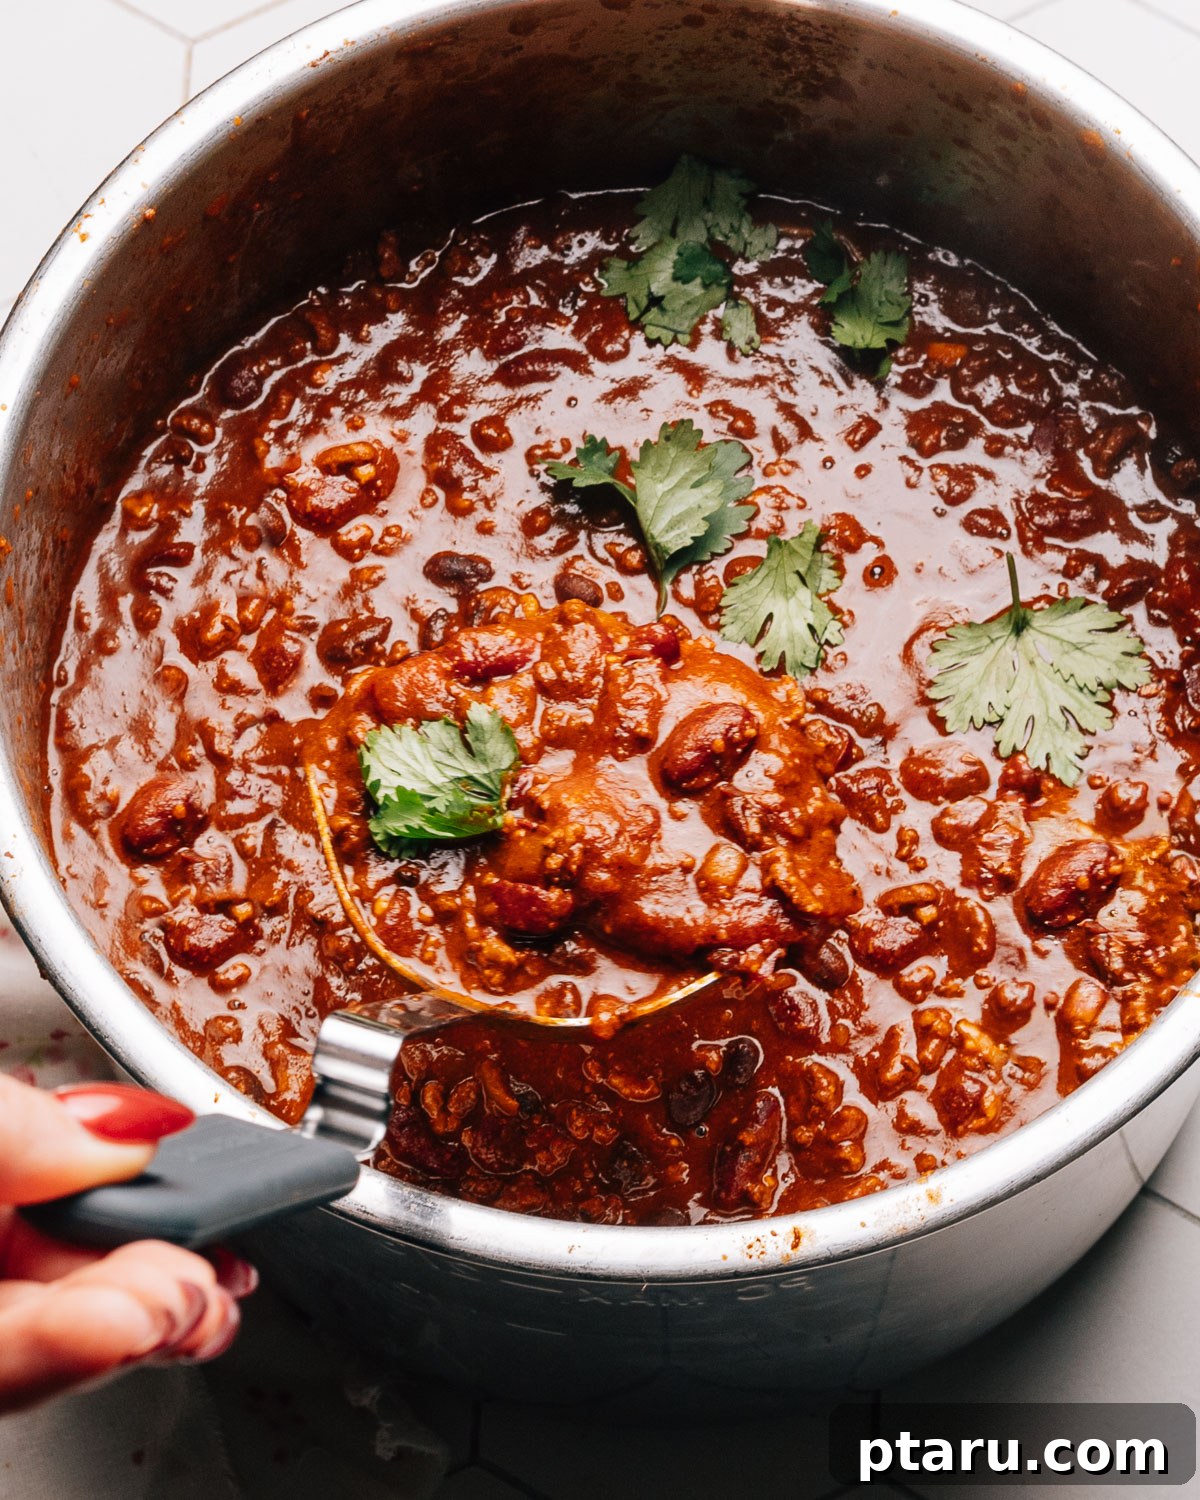
Troubleshooting: Avoiding Common Instant Pot Chili Mistakes
Even with the best intentions, certain missteps can hinder your Instant Pot Chili success. Here are the most frequent mistakes to watch out for, along with how to prevent them and ensure a perfect batch every time:
- Stirring in Tomatoes Before Pressure Cooking: This is the number one culprit for Instant Pot burn warnings. Tomatoes, especially tomato paste, contain high sugar content that can easily scorch when heated directly at the bottom of the pot under pressure.
Solution: Always layer diced tomatoes and tomato paste on top of the other ingredients without stirring them in. This keeps them away from the direct heat source until the pressure cooking process is underway, significantly reducing the risk of burning. - Skipping the Deglazing Step: After browning the beef and sautéing the aromatics, flavorful browned bits (fond) often stick to the bottom of the pot. If not removed, these can burn and trigger the “Burn” error.
Solution: After adding liquid (water or broth) and beans, use a sturdy wooden spoon or spatula to thoroughly scrape the bottom of the pot. Ensure every last bit of fond is loosened and incorporated into the liquid. The pot’s bottom should be perfectly smooth before you add the tomatoes. - Under-Blooming Spices: Spices like chili powder release their full flavor potential when briefly toasted in hot oil. Skipping this step means your chili might lack the depth and warmth it could otherwise achieve.
Solution: After browning the beef and adding the aromatics, stir in the chili powder and cook for about a minute or two until it becomes fragrant and “toasty.” This brief bloom activates the oils in the spices, contributing a rich, complex flavor reminiscent of a slow-simmered chili. - Stirring After Layering Tomatoes: Once the tomatoes and tomato paste are carefully layered on top, it’s tempting to give everything a quick mix. However, this defeats the purpose of the layering technique.
Solution: After adding the tomatoes and paste, resist the urge to stir. Leave the top tomato layer undisturbed. Trust the pressure cooker to distribute the flavors evenly during the cooking process. You can give it a good stir once the pressure cooking is complete and the lid is removed. - Not Using Enough Liquid: Insufficient liquid can lead to food sticking and potential burn warnings, as the Instant Pot needs enough liquid to generate steam and build pressure correctly.
Solution: Follow the recipe’s liquid recommendations closely. If you’re doubling the recipe, ensure you also increase the liquid proportionally, always respecting the Instant Pot’s maximum fill line.
By being mindful of these common pitfalls, you’ll consistently achieve perfectly cooked, flavorful Instant Pot Chili without any interruptions!
Make Ahead and Storage Tips for Instant Pot Chili
One of the many benefits of making a big batch of Instant Pot Chili is its excellent make-ahead potential. Cook once, and enjoy easy, flavorful meals all week long. Chili often tastes even better the next day as the flavors have more time to meld and deepen.
Storing Leftover Chili
- Fridge Life: Your delicious chili will keep beautifully in the refrigerator for up to 4 days. Store it in an airtight container to maintain freshness and prevent any odors from escaping or absorbing. You’ll notice the flavor often deepens and improves significantly by day two.
- Portion Smart: To simplify future meals, divide your leftover chili into single-serve containers. These are perfect for grab-and-heat lunches, making healthy eating convenient and quick during busy weekdays.
- Cool Down Safely: Before storing, allow the chili to cool down completely to room temperature (within 2 hours) to prevent bacterial growth and safely preserve its quality.
Freezing Your Instant Pot Chili
Chili freezes exceptionally well, making it a fantastic candidate for long-term meal prep.
- Freeze Flat: For efficient freezer storage, transfer cooled chili into freezer-safe zip-top bags. Lay them flat on a baking sheet to freeze, then stack them vertically to save space. Alternatively, use sturdy deli tubs or other freezer-safe containers, ensuring you leave about an inch of headspace to account for expansion during freezing.
- Label and Date: Always label your containers or bags with the date and contents. This ensures you’ll know exactly what you’re reaching for and when it was prepared.
- Best Window: For peak flavor and quality, enjoy your frozen chili within 3 months. While it will remain safe beyond this, the texture and taste might begin to diminish.
- Thaw Smart: The safest way to thaw frozen chili is overnight in the refrigerator. If you’re short on time, you can gently thaw it using the defrost setting in the microwave or by placing the sealed bag in a bowl of cold water, changing the water every 30 minutes until thawed.
Reheating Chili Con Carne
Reheating your chili is simple, whether it’s from the fridge or thawed from the freezer.
- Stovetop Method: Transfer the chili to a saucepan or Dutch oven. Reheat over medium-low heat, stirring often to prevent sticking and ensure even heating. If the chili has thickened considerably, add a splash of water or broth to reach your desired consistency.
- Microwave Method: For individual portions, transfer chili to a microwave-safe bowl. Cover loosely with a lid or microwave-safe plastic wrap to prevent splattering. Heat in short bursts (e.g., 60-90 seconds), stirring well between each interval until heated through.
- Refresh and Brighten: After reheating, always taste your chili. A squeeze of fresh lime juice, a pinch of salt, or a dash of hot sauce can work wonders to brighten and reinvigorate the flavors.
With these storage and reheating tips, you can enjoy the incredible flavors of your homemade Instant Pot Chili effortlessly throughout the week or month!
How to Serve This Chili Con Carne Recipe
A bowl of hot, hearty chili is a meal in itself, but the right toppings and side dishes can transform it into an unforgettable dining experience. We love serving our Instant Pot Chili hot, often accompanied by something creamy and something crunchy for contrasting textures and flavors. It’s wonderfully versatile – enjoy it in traditional bowls, piled high on baked potatoes, or spooned over fluffy rice.
Chili Toppings Galore!
The beauty of chili lies in its customizable toppings. Set up a “chili bar” to let everyone create their perfect bowl:
- Classic Cheeses: Abundant shredded cheddar cheese, Monterey Jack, or a Mexican blend.
- Cool & Creamy: A dollop of sour cream or Greek yogurt for a tangy counterpoint.
- Fresh & Vibrant: Finely chopped fresh cilantro, diced avocado or a scoop of guacamole, and bright lime wedges for squeezing.
- Aromatic & Spicy: Thinly sliced jalapeños (fresh or pickled) for a kick, or a generous portion of our sweet and tangy pickled red onion.
- Crunch Factor: Crushed tortilla chips, Fritos, or cornbread croutons add a satisfying textural contrast.
- Extra Richness: A sprinkle of crispy bacon bits or a drizzle of your favorite hot sauce.
Delectable Side Dishes for Chili
Complement your chili with these delightful side dishes to make it a complete and satisfying meal:
- Rice Varieties: Spoon your chili over fluffy Instant Pot Mexican rice for a flavor explosion, or keep it classic with simple basmati rice.
- Salsa & Crema: Add a burst of freshness with our vibrant taco salsa and a cooling drizzle of cilantro lime crema.
- Comforting Breads: Serve alongside a warm, buttery slice of cornbread casserole, or simple cornbread, to soak up all the delicious juices.
- Fresh Salads: Cut through the richness with a crisp, tangy coleslaw or a simple green salad with a lime vinaigrette.
- Unique Veggies: For an exciting crunch and sweetness, whip up some Mexican street corn off the cob (Esquites).
- Stuffed Potatoes: Elevate your leftovers! Spoon leftover chili onto fluffy microwave baked potatoes or perfectly cooked Instant Pot sweet potatoes. Top with sour cream, extra cheese, crumbled bacon, and fresh green onions for a hearty, satisfying dish.
However you choose to enjoy it, this Instant Pot Chili is guaranteed to be a hit!
How to Make the Best Chili Con Carne: Final Notes & Secrets
To truly unlock the full potential of your Instant Pot Chili and ensure it’s nothing short of spectacular, keep these expert tips and culinary secrets in mind. These final notes are the culmination of perfecting this recipe for an unforgettable chili experience:
- Always Bloom Your Spices: Don’t just dump the chili powder in. Briefly toast it in the hot oil with the aromatics for 1-2 minutes until fragrant. This vital step awakens the spices, intensifying their flavors and adding a complex depth that makes your chili taste slow-cooked.
- Master the Layering Technique: This is your ultimate weapon against the “Burn” warning. Remember to always add tomatoes and tomato paste on top of the other ingredients without stirring them in. Their sugars can scorch on the bottom of the pot, but kept on top, they’ll meld beautifully during pressure cooking.
- Salt in Stages for Balance: Seasoning isn’t a one-and-done step. Incorporate salt early when browning the beef and sautéing aromatics, and then taste and adjust the seasoning again at the very end after the chili has cooked. This ensures a perfectly balanced flavor profile.
- Embrace the Rest Period: The 10-minute natural pressure release (NPR) after cooking is not optional. This crucial resting period allows the meat to become even more tender, the flavors to meld beautifully, and the chili to slightly thicken naturally. Patience is key here.
- Brighten Late with Acidity: A squeeze of fresh lime juice or a tiny splash of apple cider vinegar (just a teaspoon or two) stirred in at the very end can dramatically brighten and lift all the flavors, making your chili taste incredibly fresh and vibrant. Don’t skip this small but impactful step!
- Thicken Wisely for Your Desired Consistency: If your chili isn’t as thick as you like after pressure cooking, there are easy fixes. Simply simmer it on the “Sauté” mode with the lid off for 5-10 minutes, stirring occasionally, until it reduces to your preferred consistency. Alternatively, stir in a spoonful of masa harina (corn flour) and cook for a few minutes until thickened. Remember, chili also thickens significantly as it cools and rests, especially on day two.
- Quality Ingredients Matter: While simple, using fresh, good-quality ingredients (like a flavorful chili powder blend and fresh garlic) makes a noticeable difference in the final taste of your chili.
By integrating these final notes and secrets into your cooking process, you’ll consistently create an Instant Pot Chili that is rich, flavorful, and truly exceptional – a true testament to the art of chili making!
Frequently Asked Questions (FAQs) About Instant Pot Chili
Absolutely! Avoiding the burn warning is a primary focus of this recipe. The key strategies include keeping tomatoes and tomato paste on the top layer without stirring them in, and thoroughly deglazing the pot after sautéing to remove any stuck-on bits. If your Instant Pot is particularly sensitive or you desire ultimate peace of mind, utilize the optional trivet with parchment paper method described in the instructions. This pot-in-pot technique completely separates the chili from the heating element, effectively eliminating any risk of scorching.
Yes, draining and rinsing the beans is highly recommended for optimal texture and seasoning. The liquid in canned beans can be starchy and affect the chili’s consistency, potentially making it thinner than desired. Rinsing also helps to remove excess sodium and improves the overall flavor profile, ensuring your chili is rich and thick, not starchy. If you prefer a looser chili, you can choose not to rinse, but be sure to adjust the salt content at the end accordingly.
Yes, ground turkey is an excellent and leaner substitute for ground beef in this recipe. When using turkey, ensure you still brown it thoroughly to develop flavor, and do not skip the crucial step of blooming the spices, as leaner meats can sometimes taste “flatter” without careful seasoning. You may also need a touch more oil for browning. Always taste and adjust salt and other seasonings at the end, as the fat content influences how flavors are perceived.
Thickening your chili is quite simple if you desire a heartier consistency. After pressure cooking, you can remove the lid and let the chili simmer on the “Sauté” mode for 5-10 minutes, stirring occasionally, until it reduces to your liking. Another effective trick is to stir in a tablespoon of masa harina (finely ground corn flour) and continue to cook briefly until it thickens. Adding an extra tablespoon of tomato paste at the end, dissolving it fully, can also contribute to a richer, thicker chili. Keep in mind that chili naturally thickens significantly as it cools and during refrigeration.
As written, this recipe yields a moderate spice level, suitable for most palates, with the jalapeño providing a pleasant warmth. To reduce the heat, simply remove all seeds and membranes from the jalapeño before chopping, or omit it entirely. For a spicier kick, you can add a second jalapeño, include a pinch of cayenne pepper, or incorporate a diced chipotle pepper in adobo sauce for a smoky, fiery flavor. Always taste and fine-tune carefully, adding small increments of spice until you reach your desired heat level.
Absolutely! This recipe can easily be adapted for a no-bean chili. To compensate for the volume and texture lost by omitting the beans, you can increase the ground beef by about half a pound, or add extra diced vegetables such as bell peppers or zucchini during the sauté stage for added body and texture. Ensure you adjust the water slightly downwards if the chili appears too thin. The crucial layering and deglazing steps remain the same for preventing burn warnings.
For this specific recipe volume, a 6-quart or 8-quart Instant Pot is ideal. These sizes provide ample space for browning the meat, accommodating all ingredients, and allowing sufficient headspace for steam to build efficiently, which helps prevent burn warnings. Smaller models (like 3-quart) may be prone to overfilling and can run hotter, increasing the likelihood of a burn error. A larger pot also makes the important stirring and layering steps much easier.
Browning tomato paste is a culinary secret that significantly deepens the flavor profile of your chili. As the tomato paste cooks and caramelizes in the hot pot, its natural sugars transform, resulting in a richer, less acidic, and more complex tomato flavor. If this step is skipped, the tomato notes can sometimes taste “raw” or one-dimensional. While we don’t brown it directly in the Instant Pot’s inner pot to avoid burn risks in this recipe, the optional Dutch oven pre-sauté method (or a similar technique) would allow for this ultimate flavor development.
Chili is an excellent meal prep candidate! In the refrigerator, stored in an airtight container, it will remain fresh and delicious for up to four days, often tasting even better on the second day. For longer storage, chili freezes exceptionally well for approximately three months. Ensure it’s cooled quickly, portioned into freezer-safe containers or bags, and clearly labeled with the date. When reheating from the freezer, thaw overnight in the fridge and gently reheat with a splash of water if needed. A final squeeze of fresh lime juice can revive its flavors beautifully.
If, despite your best efforts, the burn warning appears, don’t panic! Immediately turn off the Instant Pot and carefully perform a quick release of any remaining pressure. Once safe to open, remove the lid. Gently scrape the bottom of the pot clean, ensuring no bits are stuck. Add an additional ½ to 1 cup of water or broth, then rebuild your layers, making sure the tomatoes and tomato paste are definitely on top and unstirred. If you continue to experience burn warnings, especially with a sensitive pot, it’s advisable to switch to the pot-in-pot method using a trivet and parchment paper, as described in the “No-Burn Trivet Setup” section, for guaranteed success.
Other Delicious Mexican-Inspired Recipes You’ll Love
If you’ve fallen in love with the bold flavors of this Instant Pot Chili, you’re in for a treat! Explore more of our favorite Mexican-inspired dishes that are perfect for weeknights, entertaining, or simply satisfying a craving:
- Juicy Beef Fajitas: Sizzling steak fajitas packed with flavor, and absolutely divine when paired with our homemade Taco Salsa and creamy Baja Sauce!
- Almost-Authentic Mexican Ground Beef Tacos: A family-favorite recipe for classic ground beef tacos, plus smart ideas for what to do with leftover taco meat!
- Tender Shredded Beef Tacos: Succulent, slow-cooked shredded beef, perfect for filling soft tortillas with incredible depth of flavor.
- Flavorful Chicken Street Tacos: Learn how to make authentic-tasting chicken street tacos, seasoned perfectly with our signature Mexican chicken seasoning.
- Easy Instant Pot Mexican Rice: The perfect vibrant and flavorful side dish to accompany any of your favorite Mexican meals, made effortlessly in your pressure cooker.
Dive into these recipes and bring the vibrant tastes of Mexican cuisine to your kitchen!

Easy Instant Pot Chili (Foolproof Method!)
Jennifer Pallian BSc, RD
10 minutes
35 minutes
8
Ingredients
- 4 tbsp olive oil
- 2 lbs ground beef
- 3 cups finely-chopped onion about 2 medium
- 1 finely-chopped jalapeño
- 2 tbsp minced garlic about 6 cloves
- ¾ cup chili powder
- 3 tsp kosher salt divided use
- ½ tsp black pepper
- 3 cups boiling water
- 2 15- oz cans black beans rinsed and drained
- 2 15- oz cans kidney beans rinsed and drained
- 1 28- oz can diced tomato undrained
- 1 6- oz can tomato paste
Instructions
Saute the Base
-
Preheat the Instant Pot on sauté mode for several minutes until hot. Add oil, then once it’s shimmering, add the ground beef.
-
Break it up a little, then let it cook without stirring until deeply browned on the bottom, 3-4 minutes.
-
Stir in onion, garlic, jalapeño, chili powder, 1 tsp of salt and pepper and cook, stirring occasionally, until onions are softened, about 6 minutes.
-
Stir in the water, black beans, kidney beans and remaining 2 tsp salt. Scrape the bottom of the pot thoroughly to ensure it’s perfectly smooth.
Important Layering Step
-
Pour in diced tomatoes (plus their juices) and dollop the tomato paste across the surface. DO NOT STIR THEM IN.
(This layering technique is crucial to prevent the Instant Pot’s ‘Burn’ warning, as tomato sugars can scorch on the bottom.)
Pressure Cook & Serve
-
Lock the lid and set the valve to Sealing.
-
Select Manual or Pressure Cook on High for 15 minutes. When the timer ends, allow pressure to release naturally for 10 minutes, then quick release any remaining steam.
-
Open the lid, give the chili a good stir to incorporate all layers, taste, and adjust salt if needed. Enjoy hot with your favorite toppings!
Notes
- Once the tomato paste has darkened and stuck slightly to the bottom of the pot, stir in beans, diced tomatoes, and 2 cups of the water.
- Place a trivet inside the Instant Pot liner and add the remaining 1 cup of boiling water to the bottom. Add a layer of crumpled parchment paper on top of the trivet as a barrier, ensuring it comes up the sides of the liner.
- Carefully transfer the chili mixture from the Dutch oven into the Instant Pot liner on top of the parchment paper and pressure cook as directed in steps 6-8 above.
Recipe Tips:
- Using boiling water significantly reduces the time it takes for the Instant Pot to come up to high pressure. Start a kettle of water to boil while you begin the sautéing steps.
- For a Thicker Chili: If you prefer an even thicker chili immediately after pressure cooking, let it simmer uncovered for an additional 10 minutes on the “Sauté” mode, stirring occasionally to allow some liquid to evaporate. It also thickens up SIGNIFICANTLY on day 2, so consider making it a day in advance if you love extra thick chili.
- Chili Powder: Please ensure you are using a chili seasoning spice blend (which is a mix of various spices including ground chiles, cumin, oregano, etc.), and not pure ground red chile powder, which is typically much spicier and meant to be used in smaller quantities.
- Storage: Leftovers can be stored in an airtight container in the fridge for up to 4 days. For longer storage, freeze in airtight containers or freezer bags for up to 3 months.
Nutrition
Calories:
583
kcal
|
Carbohydrates:
45
g
|
Protein:
32
g
|
Fat:
34
g
|
Saturated Fat:
10
g
|
Polyunsaturated Fat:
3
g
|
Monounsaturated Fat:
16
g
|
Trans Fat:
1
g
|
Cholesterol:
81
mg
|
Sodium:
2053
mg
|
Potassium:
1635
mg
|
Fiber:
18
g
|
Sugar:
11
g
|
Vitamin A:
7193
IU
|
Vitamin C:
24
mg
|
Calcium:
196
mg
|
Iron:
10
mg
Nutrition information is automatically calculated, so should only be used as an approximation.