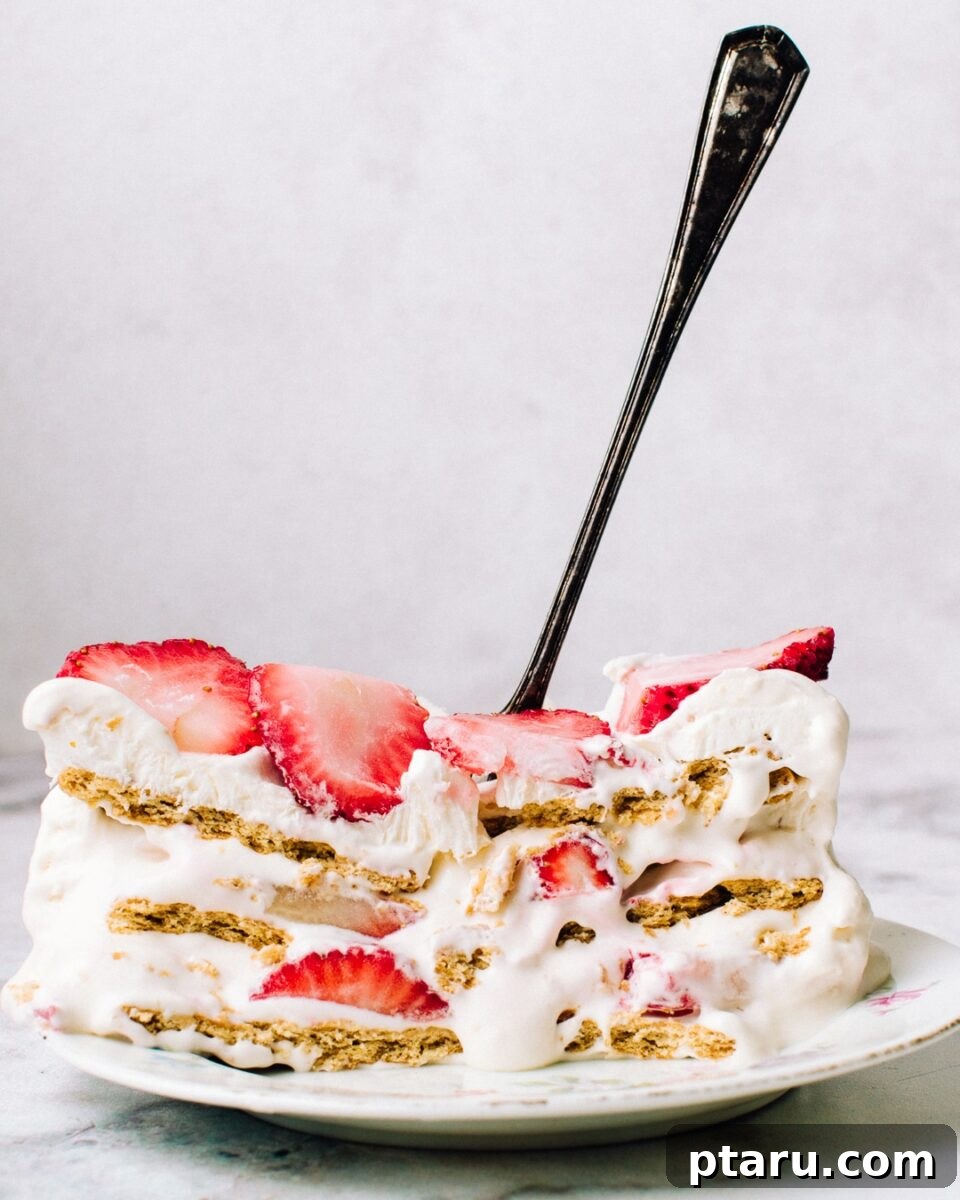
This Strawberry Icebox Cake is the quintessential easy, no-bake dessert that promises pure delight with minimal effort. Featuring luscious cream cheese filling nestled between layers of crispy graham crackers and vibrant fresh strawberries, this recipe comes together in just 6 ingredients and a mere 15 minutes of active preparation time. The magic happens as it chills: the fluffy cream cheese filling gently infuses with the sweet strawberry essence and the cozy flavor of graham crackers. The initial crunch of the crackers yields to a soft, melt-in-your-mouth texture, reminiscent of a delicate tiramisu. It’s truly a taste of summer in every heavenly bite!
For those seeking a straightforward yet impressive dessert, this strawberry refrigerator cake offers a brilliant alternative to more time-consuming baked treats. Forget the oven and the complexities of classic strawberry shortcake, rustic strawberry cobbler, or a fancy puff pastry strawberry tart. While those certainly have their charm (and these delicious strawberry brownies are always a must-try when you have the time!), this no-bake wonder is perfect for when you crave instant gratification and refreshing indulgence.
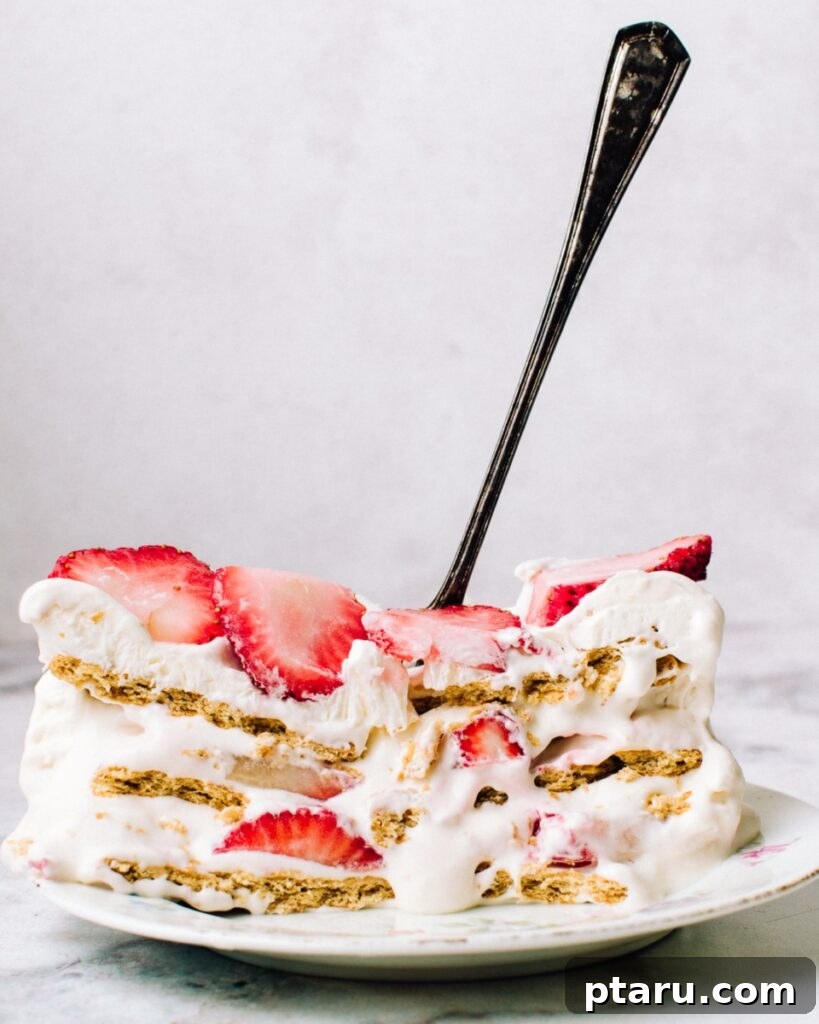
Strawberry Cream Cheese Icebox Cake – Your New Favorite No-Bake Strawberry Dessert
There are countless reasons to fall in love with this irresistible Strawberry Icebox Cake. Here are just a few compelling points that make it a standout dessert:
- Effortlessly Easy & No-Bake: This recipe is a dream come true for novice cooks and seasoned bakers alike. Requiring absolutely no baking, it’s the ultimate dessert for sweltering summer months when turning on the oven is unthinkable, or simply when your schedule is packed, and you need a quick yet elegant treat.
- Fresh, Balanced Flavors: Prepare for a symphony of tastes! The sweetness of ripe, juicy strawberries perfectly complements the tangy, airy whipped cream cheese filling. This cool, light, and wonderfully creamy cheesecake-like layer creates a refreshing contrast that makes every spoonful utterly delightful. It’s rich enough to satisfy but light enough not to feel heavy.
- A Guaranteed Crowd-Pleaser: This delightful dessert is a surefire hit at any gathering, from casual backyard barbecues to festive potlucks. Its vibrant appearance and delicious taste appeal to all ages, making it a perfect treat for families and friends. Kids especially adore its sweet, fruity layers, making it an ideal choice when fresh strawberry season is at its peak.
- Incredibly Versatile & Customizable: Don’t limit yourself to just strawberries! This recipe is wonderfully adaptable. You can easily swap out the fruit for raspberries, blueberries, or sliced peaches. Experiment with different toppings like toasted nuts or shredded coconut for added texture. You can even vary the cookie layers, using chocolate wafers or ladyfingers. It’s also easy to adjust for various dietary preferences, as we’ll explore in the variations section.
- A Taste of Nostalgia: For many, the icebox cake evokes cherished memories of childhood summers, filled with cool, refreshing treats enjoyed on warm afternoons. This dessert not only tastes fantastic but also brings a comforting wave of nostalgia, making it even more special.
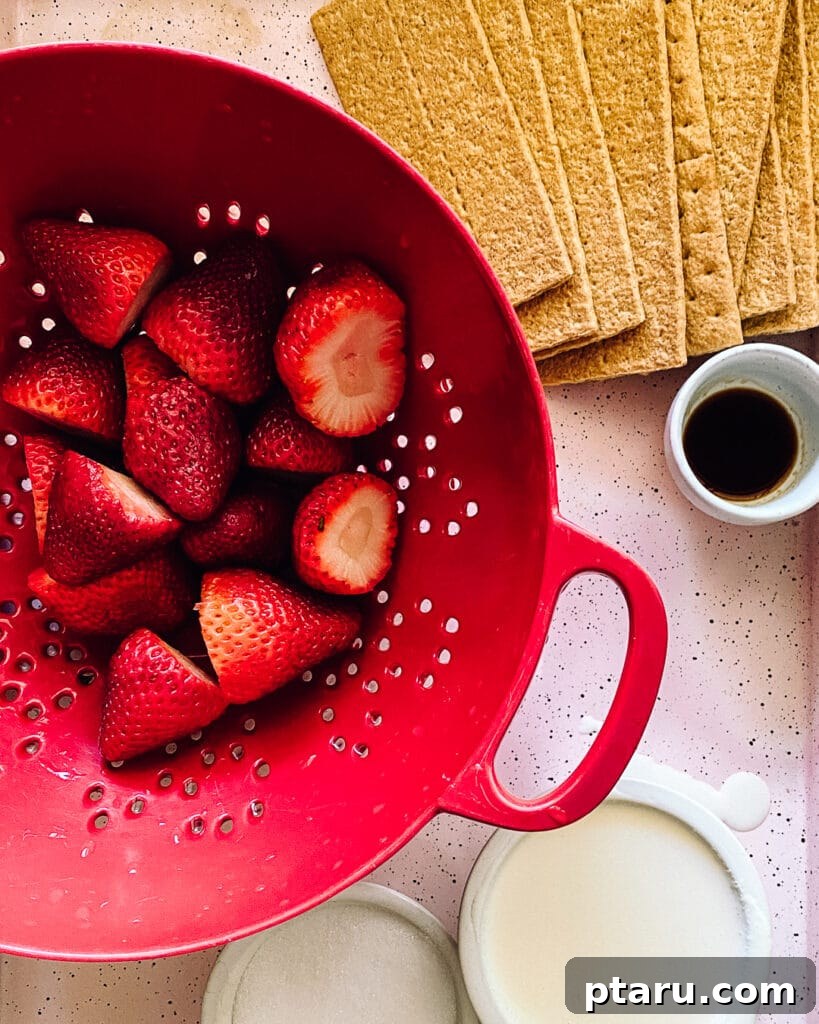
Gather Your Essential Ingredients for This No-Bake Strawberry Icebox Cake
Before you embark on creating this delightful Strawberry Refrigerator Cake with Cream Cheese, ensure you have these simple yet essential ingredients ready. Each component plays a crucial role in building the cake’s incredible flavor and texture:
- Cream Cheese: The heart of our creamy filling! Full-fat cream cheese adds a rich, tangy depth that balances the sweetness of the fruit and powdered sugar. When softened to room temperature, it whips up beautifully smooth, providing the perfect base for our no-bake cheesecake-like layers.
- Heavy Cream (Whipping Cream, 35% m.f.): This is what gives our filling its light, airy, and luxurious texture. When whipped, heavy cream transforms into a cloud-like confection, forming the backbone of this easy dessert. Ensure it’s very cold before whipping for the best results.
- Confectioners’ Sugar (Powdered Sugar): Fine confectioners’ sugar dissolves effortlessly into the cream and cream cheese, imparting a gentle sweetness without any grainy texture. It helps to stabilize the whipped cream and perfectly complements the tartness of the fresh strawberries.
- Vanilla Extract: A timeless dessert flavor, vanilla extract enhances all the other ingredients, adding a warm, aromatic note that harmonizes beautifully with the bright strawberries and creamy filling. Use a good quality pure vanilla extract for the best flavor.
- Graham Crackers: These humble crackers are the structural genius of the icebox cake! A single sleeve forms the sturdy yet tender layers of the cake. As they absorb moisture from the cream cheese filling, they soften to a cake-like consistency while still retaining a hint of their characteristic “toasty” flavor and light texture.
- Fresh Strawberries: The undisputed star of the show! For the most vibrant flavor and appealing appearance, choose ripe, in-season strawberries that are firm, bright red, and fragrant. Hulled and thinly sliced, they provide bursts of sweet and slightly tart freshness throughout every layer.
How to Make Strawberry Icebox Cake: Step-by-Step Directions for Preparing This Easy No-Bake Recipe
Creating this strawberry icebox cake is incredibly straightforward, more about assembly than intricate cooking. Don’t overthink the layering process – it’s a forgiving dessert that encourages you to go with the flow! Simply alternate spoonfuls of the whipped filling with graham crackers and thinly sliced strawberries in a standard loaf pan. You’ll begin with a layer of filling and graham crackers, and finish with a beautiful top layer of strawberries. This easy, repeatable recipe will quickly become a favorite throughout strawberry season.
- Prepare Your Pan: First, line a standard 9-inch loaf pan with parchment paper. Leave some overhang on the sides – this will create “slings” that make removing the chilled cake from the pan incredibly easy once it’s set.
- Whip the Cream: In a large bowl, using an electric hand mixer or a stand mixer fitted with the whisk attachment, beat the cold heavy cream on medium-high speed until soft peaks form. Transfer this whipped cream to a separate bowl and set aside.
- Create the Cream Cheese Filling: In the same (unwashed) mixer bowl, combine the softened cream cheese with the confectioners’ sugar and vanilla extract. Beat on medium speed until the mixture is completely smooth and well blended, with no lumps of cream cheese remaining.
- Fold in Whipped Cream: Gently fold half of the reserved whipped cream into the cream cheese mixture using a rubber spatula. Once mostly combined, carefully fold in the remaining whipped cream until everything is smoothly incorporated and the filling is light and airy. This two-step folding process helps maintain the volume of the whipped cream, ensuring a fluffy filling.
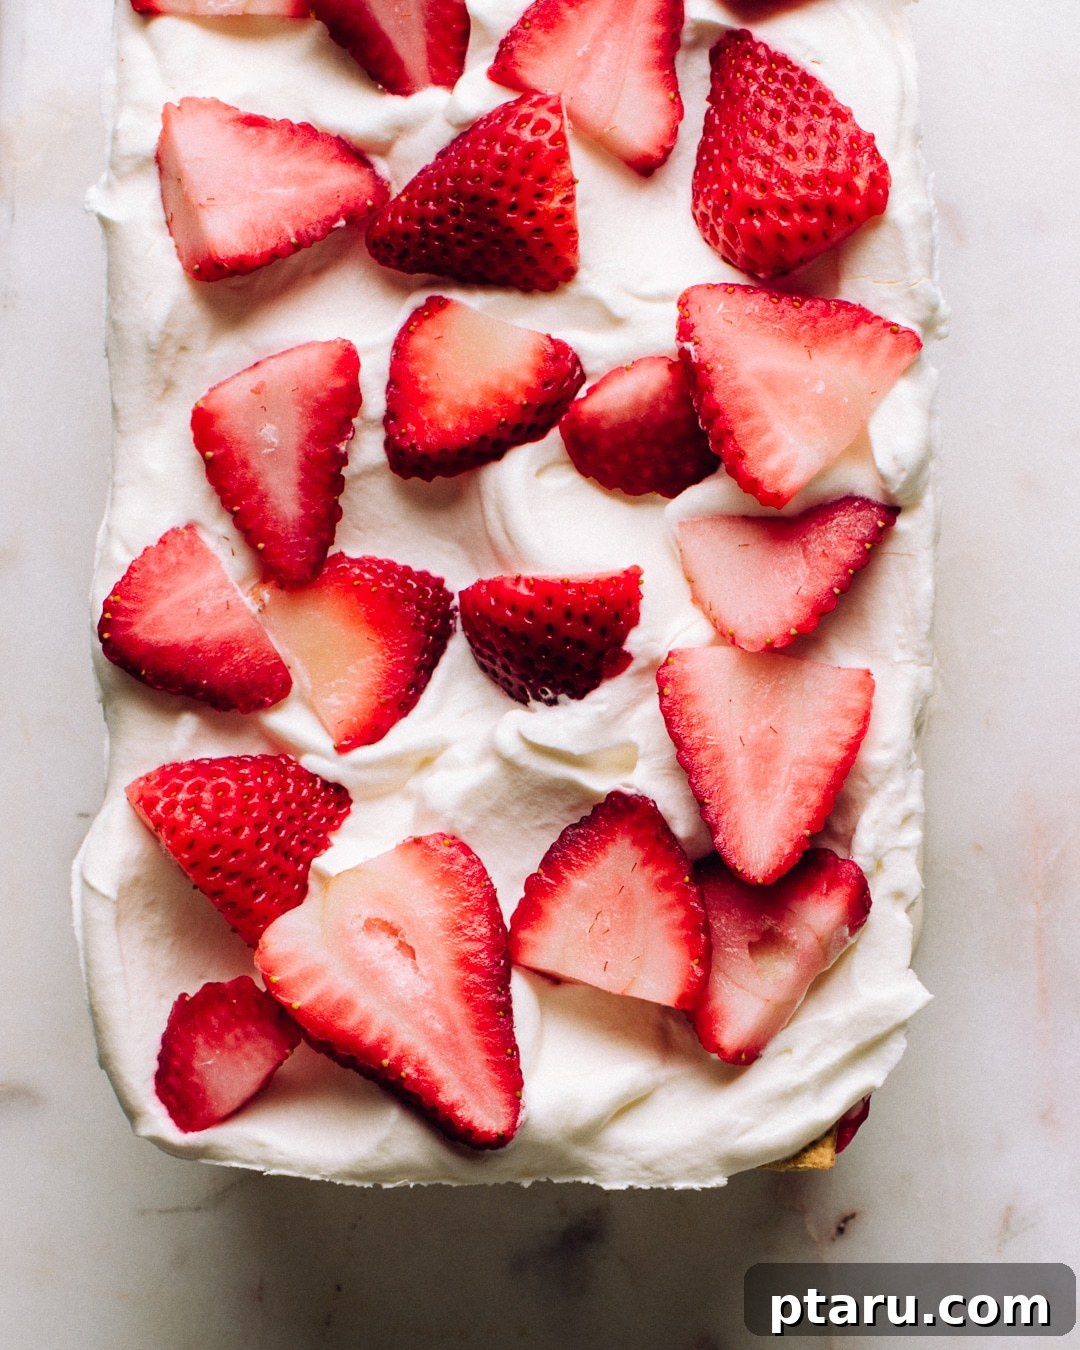
- Reserve Topping: Set aside about 1 cup of this glorious cream cheese filling, along with a handful of your prettiest, perfectly sliced strawberry pieces. These will be used for the final, decorative top layer of your cake.
- Begin Layering: Spread about 1/3 cup of the cream cheese filling evenly over the bottom of your prepared loaf pan. Next, arrange a layer of graham crackers over the filling, breaking them as needed to fit snugly and cover the entire bottom surface.
- Add More Filling and Strawberries: Spoon approximately 2/3 cup of the whipped cream cheese mixture over the graham cracker layer, spreading it evenly. Then, arrange a single layer of thinly sliced fresh strawberries over the cream.
- Repeat the Layers: Continue this layering process: another layer of graham crackers, followed by more whipped cream cheese filling, and then another layer of strawberries. Repeat one more time, aiming for three distinct layers of graham crackers and three layers of strawberries (including the top layer). Finish by spreading the reserved whipped cream cheese filling on top and arranging your most attractive strawberry slices for a beautiful presentation.
- Chill to Perfection: Cover the loaf pan with plastic wrap and refrigerate the cake for a minimum of 6 to 8 hours. For best results and the most tender, tiramisu-like texture, chilling overnight is ideal. This allows the graham crackers to fully soften, absorbing moisture and melding all the delicious flavors together.
- Serve: Once thoroughly chilled and set, use the parchment paper overhang to gently lift the cake out of the loaf pan. Carefully slice and serve your magnificent Strawberry Icebox Cake. There’s no need to struggle with trying to remove it perfectly; serving directly from the pan is perfectly acceptable and often easier!
Essential Tools for Crafting Your Perfect Strawberry Icebox Cake
You don’t need a professional chef’s arsenal to whip up this amazing Strawberry Icebox Cake. A few basic kitchen tools are all you’ll require to get started and create this impressive dessert with ease:
- A Loaf Pan: A standard 9-inch loaf pan is perfect for shaping your icebox cake. Its rectangular form makes for beautiful slices.
- Parchment Paper: Absolutely essential for a stress-free experience! Lining your loaf pan with parchment paper, allowing for an overhang on the sides, ensures that your beautifully set cake can be effortlessly lifted out for easy slicing and serving.
- A Large Mixing Bowl: You’ll need a spacious bowl to combine and whip your creamy ingredients without making a mess.
- Electric Hand Mixer (or Standing Mixer): To achieve that wonderfully light and fluffy whipped cream and smooth cream cheese filling, an electric mixer is a must-have. It makes quick work of whipping and blending, saving you time and arm strength.
- Measuring Cups and Spoons: Accuracy is key in baking (even no-bake recipes!). These ensure you have the precise amounts of each ingredient for the perfect balance of flavors and textures.
- A Spatula: A rubber or silicone spatula is ideal for scraping down the sides of your mixing bowl, folding in the whipped cream gently, and spreading the creamy layers evenly in the loaf pan.
- A Sharp Knife: For hulling and thinly slicing those fresh strawberries to perfection. Thin slices ensure they integrate beautifully into the cake layers and are easy to cut through when serving.
Make-Ahead and Storage Tips for Your Strawberry Icebox Cake
One of the many charms of the Strawberry Icebox Cake is its make-ahead convenience. Preparing it in advance not only saves you time on the day of serving but also allows the flavors to deepen and the textures to meld beautifully. Here are some invaluable tips to ensure your dessert stays fresh and delectable:
- Make It Ahead: This cake is an excellent candidate for advance preparation. You can assemble the entire cake up to 24 hours before you plan to serve it. In fact, making it the day before often enhances the flavors as they have ample time to meld together, and the graham crackers become perfectly soft, creating that coveted tiramisu-like texture. Simply cover it tightly with plastic wrap and refrigerate.
- Storing Leftovers: Should you be lucky enough to have any slices left (a rare occurrence with this cake!), store them promptly in an airtight container. Keep the container in the refrigerator, and the cake will remain fresh and delicious for up to three days. Beyond that, the graham crackers might become too soggy, losing some of their appeal.
- Freezing for Later Enjoyment: For an ultimate make-ahead solution or to preserve individual servings, you can freeze extra slices. Wrap each slice individually in plastic wrap, then place them in a freezer-safe bag or container. They will keep well in the freezer for up to one month. When a craving strikes, simply remove a slice and let it thaw at room temperature for about 10-15 minutes before enjoying. It’s an excellent way to have a delightful dessert on demand!
Creative Variations and Substitutions for Your Icebox Cake
While the classic Strawberry Icebox Cake is undeniably delicious, its versatility allows for endless creative twists. Feel free to experiment with these variations and substitutions to tailor the dessert to your taste, dietary needs, or what you have on hand:
- Switch Up the Fruit: Strawberries are fantastic, but don’t hesitate to explore other seasonal fruits. Juicy raspberries, sweet blueberries, thinly sliced pitted cherries, or delicate peach slices can create entirely new flavor profiles. A mixed berry icebox cake is always a winner!
- Add Some Crunch and Texture: For an extra layer of textural delight, consider sprinkling toasted shredded coconut or finely chopped nuts (like pecans, walnuts, or almonds) between the whipped cream cheese and fruit layers. You can also crush up a few extra graham crackers and sprinkle the crumbs on top for a rustic, inviting presentation.
- Explore Different Cookie Bases: While graham crackers are traditional, they are not your only option! For a more decadent dessert, substitute the graham crackers with chocolate wafer cookies (for a rich chocolate-strawberry experience), vanilla wafers, or even soft ladyfingers (which will lean even more into that tiramisu vibe).
- Make it Gluten-Free: Adapting this recipe for gluten-free diets is incredibly simple. Just swap out traditional graham crackers for readily available gluten-free graham cracker varieties. The rest of the ingredients are naturally gluten-free.
- Use a Shortcut with Cool Whip: If you’re short on time or a fan of 90s nostalgia, you can easily substitute store-bought Cool Whip for the heavy cream and confectioners’ sugar. Simply combine the softened cream cheese with vanilla, then fold in the Cool Whip. This creates an even quicker assembly process.
- Vegan Strawberry Icebox Cake: Catering to vegan guests or those with dairy sensitivities is entirely possible. Chill two 14-ounce cans of full-fat coconut milk in the refrigerator overnight. The next day, scoop out only the thick, solid cream from the top of the cans, leaving the liquid behind. Whip this solid coconut cream with a touch of powdered sugar and vanilla until fluffy, then proceed with the recipe as directed.
- Healthy Strawberry Icebox Cake: For a lighter version, you can replace up to 1 cup of the heavy cream with plain Greek-style yogurt. Be mindful that Greek yogurt won’t whip to the same volume as heavy cream, so you might use slightly less filling per layer. This substitution adds a delightful tang and boosts protein.
- Chocolate Strawberry Icebox Cake: Indulge your chocolate cravings by making a chocolate version! Substitute chocolate wafer cookies for the graham crackers. For an even richer chocolate experience, sift 1-2 tablespoons of unsweetened cocoa powder into the whipped cream cheese filling.
Frequently Asked Questions (FAQs) About Icebox Cakes
The charming term “icebox cake” dates back to the early 1900s, a period when refrigerators, often referred to as ‘iceboxes,’ were becoming a common household appliance. These no-bake desserts were ingeniously created to utilize the new cooling technology for making and storing treats that didn’t require baking, like this delightful Strawberry Icebox Cake with Cream Cheese. The cake is assembled with layers of cookies or crackers and a creamy filling, then chilled in the refrigerator, allowing the layers to meld and soften into a deliciously creamy and refreshing dessert.
Icebox cake goes by several other names, reflecting its no-bake nature and universal appeal. You might hear it called “refrigerator cake,” “fridge cake,” or simply “whip cream cake,” given its primary creamy component. Over the years, the dessert has also been known as “lolly cake” (particularly in New Zealand), “biscuit cake,” and even “lazy cake,” a testament to its delightful simplicity and minimal effort required. Regardless of the name, this refreshing, no-bake dessert remains a beloved treat perfect for any occasion.
More Delightful Strawberry Recipes to Explore
If you’ve enjoyed this no-bake strawberry wonder, you might love these other strawberry-centric recipes:
Strawberry Brownies
Strawberry Buttermilk Pie
Strawberry Cobbler
Strawberry-Rhubarb Yogurt Cake
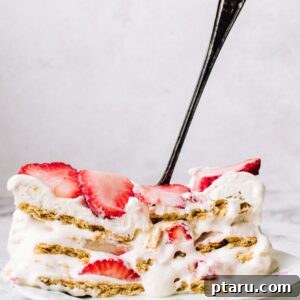
Strawberry Icebox Cake with Cream Cheese
Strawberry Icebox Cake with cream cheese: an easy no bake strawberry dessert recipe with fluffy cream filling layered with graham crackers.
Ingredients
- 2 cups heavy cream (whipping cream or 35% m.f.)
- 6 tbsp cream cheese softened to room temperature
- ½ cup confectioners’ sugar
- 1 ½ tsp vanilla extract
- 9 long graham crackers (one sleeve, or 5 oz by weight)
- 1 lb fresh strawberries hulled and sliced very thinly
Instructions
- Line a 9″ loaf pan with parchment paper, leaving an overhang on the sides for easy removal.
- In the bowl of a standing mixer with the whisk attachment, beat the cold whipping cream until soft peaks form. Scrape it into a separate bowl and set aside.
- Without washing the stand mixer bowl, beat the room temperature cream cheese with the confectioners’ sugar and vanilla extract until well blended and smooth.
- Beat in half of the whipped cream into the cream cheese mixture until combined. Then, using a rubber spatula, gently fold the rest of the whipped cream into the cream cheese mixture. This two-step process helps prevent collapsing the whipped cream and ensures a smooth, fluffy filling.
- Set aside 1 cup of the cream cheese filling and a handful of the prettiest strawberry slices for the top layer.
- Spread 1/3 cup of the cream cheese filling on the bottom of the loaf pan. Top with graham crackers to cover the bottom, breaking them as needed to fit.
- Top the graham crackers with about 2/3 cup of the whipped cream cheese mixture, followed by a handful of thinly sliced strawberries.
- Repeat the layers: another layer of graham crackers, more whipped cream cheese, and another layer of strawberries. Continue until you have three layers of graham crackers and three layers of strawberries (including the top). Finish by spreading the reserved whipped cream and arranging the pretty berries on top.
- Refrigerate the cake for at least 6-8 hours, or ideally overnight, until the crackers and strawberries have softened and the cake is beautifully set.
- Serve directly from the pan, or use the parchment paper overhang to gently lift the cake out before slicing.
Notes
- Slice the strawberries as thinly as possible. This makes them easier to cut through when you’re slicing the chilled cake and ensures an even texture.
- If you notice small lumps of cream cheese in your filling after mixing, you can gently warm the bottom of the mixing bowl with a hot cloth while continuing to mix. This will help the cream cheese loosen and blend smoothly.
Nutrition
Carbohydrates: 35g |
Protein: 5g |
Fat: 33g |
Saturated Fat: 20g |
Polyunsaturated Fat: 2g |
Monounsaturated Fat: 9g |
Cholesterol: 96mg |
Sodium: 176mg |
Potassium: 237mg |
Fiber: 2g |
Sugar: 11g |
Vitamin A: 1257IU |
Vitamin C: 45mg |
Calcium: 87mg |
Iron: 1mg
Nutrition information is automatically calculated, so should only be used as an approximation.
Tried this recipe? Share your thoughts in the comments below! We love hearing about your creations.