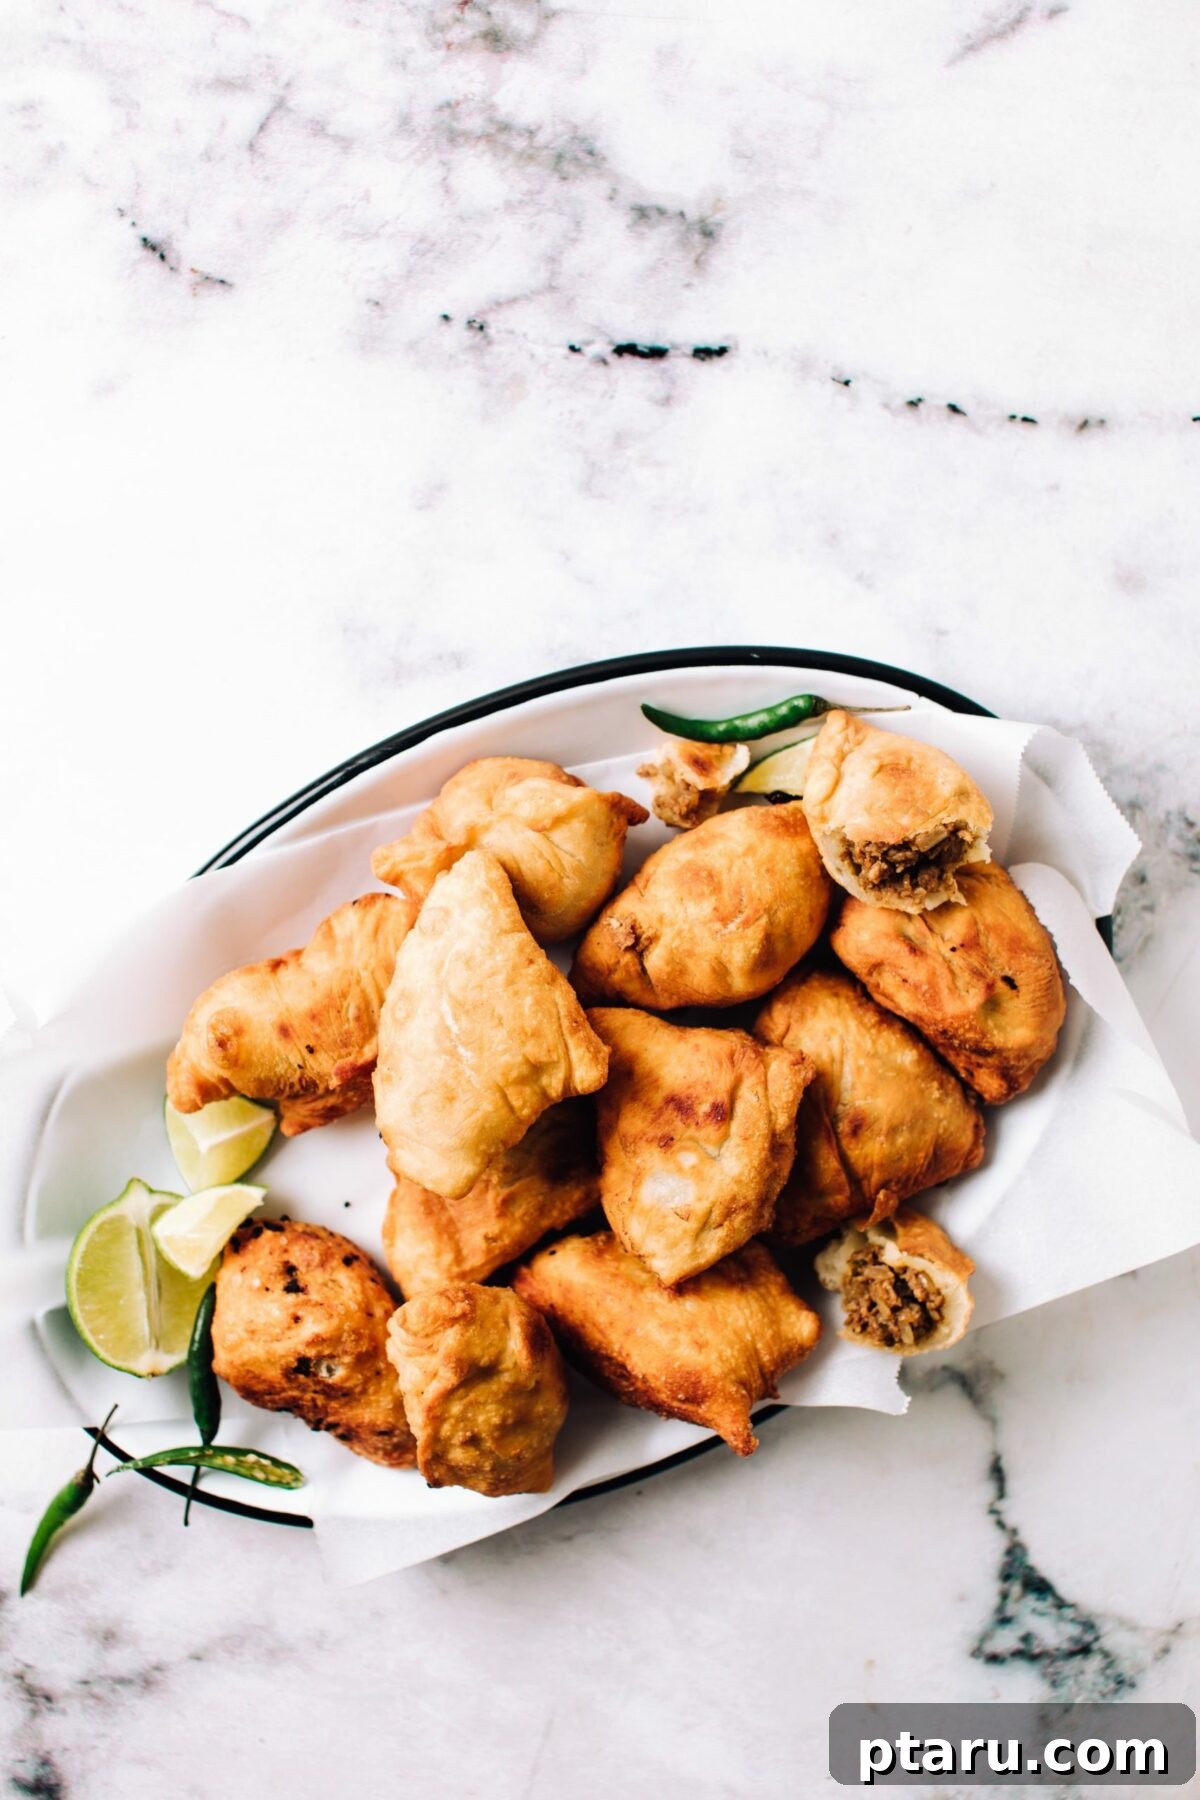
Embark on a culinary journey to create the most irresistibly delicious and easy chicken samosas right in your own kitchen! This recipe promises a perfectly crispy, golden crust encasing a deeply flavorful and aromatic spiced chicken filling that will transport your taste buds straight to India. Forget store-bought or restaurant versions – once you try these homemade delights, there’s no going back.
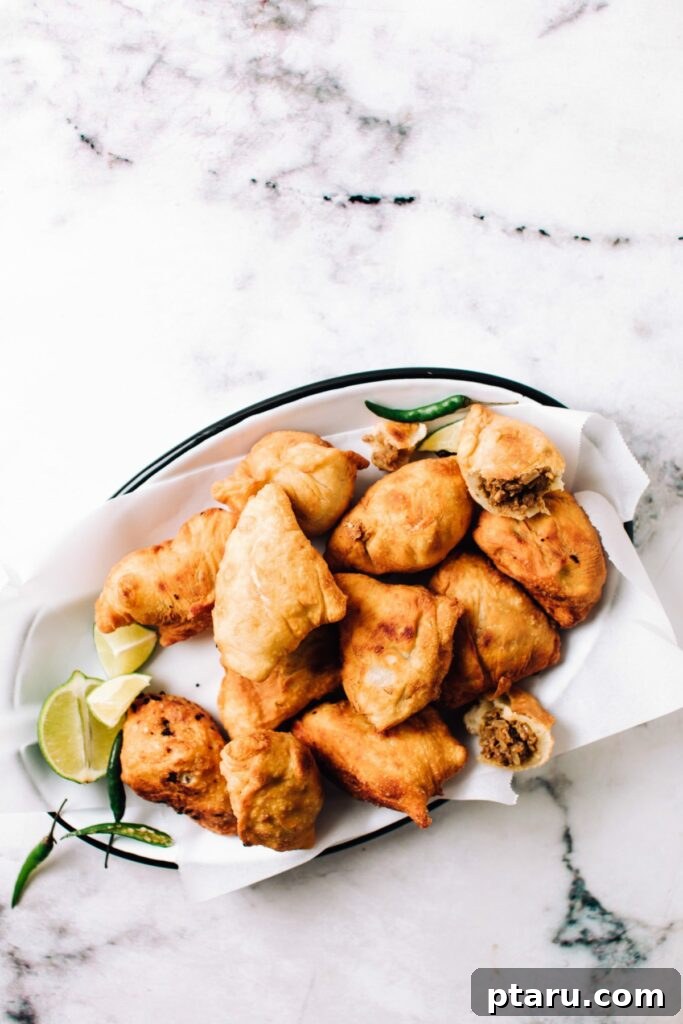
Imagine biting into a perfectly golden, flaky exterior that gives way to a succulent, warmly spiced minced chicken filling. This isn’t just a recipe; it’s an experience! My Indian husband, a connoisseur of authentic flavors, frequently declares these homemade chicken samosas to be superior to any he’s tasted from restaurants. The true testament to its simplicity and deliciousness came when a freelance videographer, making them for the first time, effortlessly crafted perfect samosas and echoed the same sentiment! Get ready to impress your family and friends with this incredible Indian snack.
These savory pastries are absolutely divine when served piping hot, perhaps alongside a steaming cup of Authentic Indian Chai for the ultimate comfort food experience.
Why You’ll Love This Easy Chicken Samosa Recipe
There are countless reasons why this easy chicken samosa recipe is destined to become a staple in your kitchen. From its incredibly rich flavor profile to its surprisingly straightforward preparation, these samosas offer a delightful culinary adventure:
- Unforgettable Flavor: The filling is a harmonious blend of aromatic spices, tender minced chicken, and fresh vegetables, creating a depth of flavor that is truly addictive. Each bite is a burst of authentic Indian taste.
- Perfectly Crispy Crust: Our simple dough recipe ensures a light, flaky, and golden-brown crust that shatters beautifully with every bite, providing the ideal contrast to the soft filling.
- Simplicity in Preparation: Don’t be intimidated by homemade samosas! This recipe breaks down the process into easy-to-follow steps, making it accessible for home cooks of all skill levels. You’ll be surprised how quickly you can master them.
- Crowd-Pleasing Appetizer: Samosas are universally loved and make for an excellent appetizer, snack, or even a light meal. They are perfect for parties, gatherings, or a cozy night in.
- Customizable to Your Liking: Whether you prefer more heat, different proteins, or even a vegetarian option, this recipe provides a versatile base for customization, ensuring it suits everyone’s preferences.
- Make-Ahead Friendly: Prepare the filling and dough in advance, or freeze uncooked samosas for a quick and convenient snack whenever cravings strike.
Here’s What You Need: Ingredients for Authentic Chicken Samosas
Crafting these delectable chicken samosas begins with a careful selection of fresh ingredients. Each component plays a vital role in achieving that perfect balance of flavor and texture. Let’s break down the essential items you’ll need for both the signature crispy dough and the mouth-watering spiced chicken filling.
Samosa Dough Ingredients: The Secret to a Golden Crust
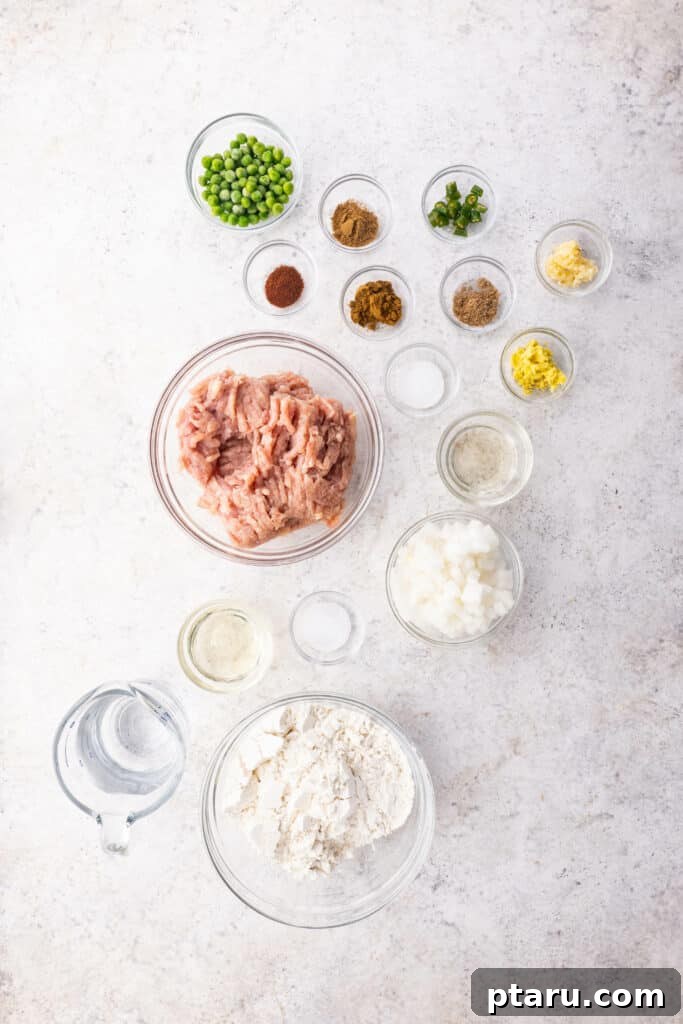
The dough is the foundation of any great samosa, providing the ideal crisp texture. Our simple recipe requires just a few basic ingredients:
- All-purpose flour: Often referred to as maida in India, this is crucial for the traditional samosa texture. Its low gluten content, when properly handled, contributes to a wonderfully flaky and tender crust that fries up golden brown.
- Salt: Essential for enhancing the flavor of the dough itself.
- Vegetable oil: Adding oil to the dough provides moisture, makes it pliable, and is key to achieving that signature crispiness when fried. It helps prevent the crust from becoming tough.
- Water: Used to bind the flour and oil, forming a firm yet workable dough. The amount may vary slightly depending on your flour and humidity.
Chicken Samosa Filling Ingredients: A Burst of Indian Spices
The heart of our samosa, this savory chicken filling is packed with aromatic spices and fresh ingredients. It’s a delightful medley that ensures every bite is bursting with flavor:
- Onion: Finely chopped, it forms the sweet and savory base of the filling, caramelizing to add depth.
- Ginger: Freshly grated ginger provides a pungent, warm, and slightly sweet undertone, characteristic of Indian cuisine.
- Garlic: Grated garlic adds an indispensable aromatic sharpness and depth of flavor.
- Salt: Balances all the flavors in the filling, making sure it’s seasoned perfectly.
- Minced chicken: Ground chicken breast or thigh works wonderfully. Chicken thigh offers a slightly richer flavor and juicier texture, while breast is leaner.
- Ground cumin: A fundamental spice in Indian cooking, offering an earthy and warm flavor.
- Coriander Powder: Adds a bright, citrusy, and slightly sweet note that complements the other spices beautifully.
- Chili powder: Provides a gentle heat and a vibrant red hue. Adjust to your preferred spice level.
- Garam masala: This fragrant blend of roasted and ground spices is the secret to an authentic Indian flavor profile, providing warmth and complexity. If unavailable, a good quality curry powder can be a suitable, though slightly different, substitute.
- Frozen green peas: Adds a touch of sweetness, vibrant color, and texture to the savory filling.
- Green chillies (optional): For those who love an extra kick of heat and fresh, pungent flavor. Feel free to add minced fresh cilantro as well for an herbaceous lift.
Variations and Substitutions to Suit Every Palate
One of the beauties of this homemade samosa recipe is its adaptability. Feel free to customize it to suit your preferences, dietary needs, or what you have on hand. Here are some popular ideas to inspire your culinary creativity:
- Vegetarian Samosas: If you’re looking for a meat-free option, simply omit the chicken and try my incredibly popular potato samosa recipe. The spiced potato filling is hearty, flavorful, and equally delicious.
- Gluten-Free Samosas: For those with gluten sensitivities, you can easily adapt the dough. Use a high-quality gluten-free all-purpose flour blend for the samosa dough, following the recipe instructions as closely as possible. Results may vary slightly in texture, but the flavor will still be fantastic.
- Different Protein Options: While chicken is excellent, you can certainly experiment with other ground meats. Ground turkey makes for a lighter alternative, or you could try my robust beef samosas for a richer flavor.
- Spice Level Adjustment: The chili powder and green chilies can be adjusted. Reduce or omit for a milder samosa, or increase for a bolder, spicier kick.
- Add More Vegetables: Feel free to incorporate other finely diced vegetables into the filling, such as carrots, bell peppers, or spinach, for added nutrients and texture.
The samosa filling is so incredibly tasty that I often prepare it on its own! It’s fantastic served simply with warm butter naan for a quick and satisfying dinner. During the holidays, I even use this versatile filling to stuff puff pastry, creating delightful shortcut samosa puffs that are always a hit.
Grab These Essential Tools for Samosa Making
Having the right kitchen tools makes the samosa-making process smooth and enjoyable. Before you begin, ensure you have these items on hand:
- Mixing bowl: A large mixing bowl is essential for combining the flour and other ingredients to prepare the samosa dough.
- Rolling pin: To roll out the dough thinly and evenly, a good rolling pin is indispensable.
- Frying pan (large skillet): You’ll need a spacious frying pan or skillet for cooking the chicken filling, allowing all the ingredients to sauté evenly.
- Pastry brush: A pastry brush is helpful for applying water to the edges of the dough to ensure a tight seal when forming the samosas.
- Deep fryer or heavy-bottomed pot: For frying the samosas to golden perfection, a deep fryer or a sturdy, heavy-bottomed pot (like a Dutch oven) is crucial for maintaining consistent oil temperature.
- Slotted spoon or spider: To safely remove the fried samosas from the hot oil.
- Paper towels: For draining excess oil from the fried samosas, keeping them deliciously crispy.
How To Make Chicken Samosas: A Step-by-Step Guide
Creating these incredible homemade chicken samosas might seem daunting, but by following these detailed steps, you’ll achieve perfect results every time. Let’s break down the process into three main stages: preparing the dough, cooking the filling, and expertly frying your samosas.
1. Master the Samosa Dough: The Foundation of Crispiness
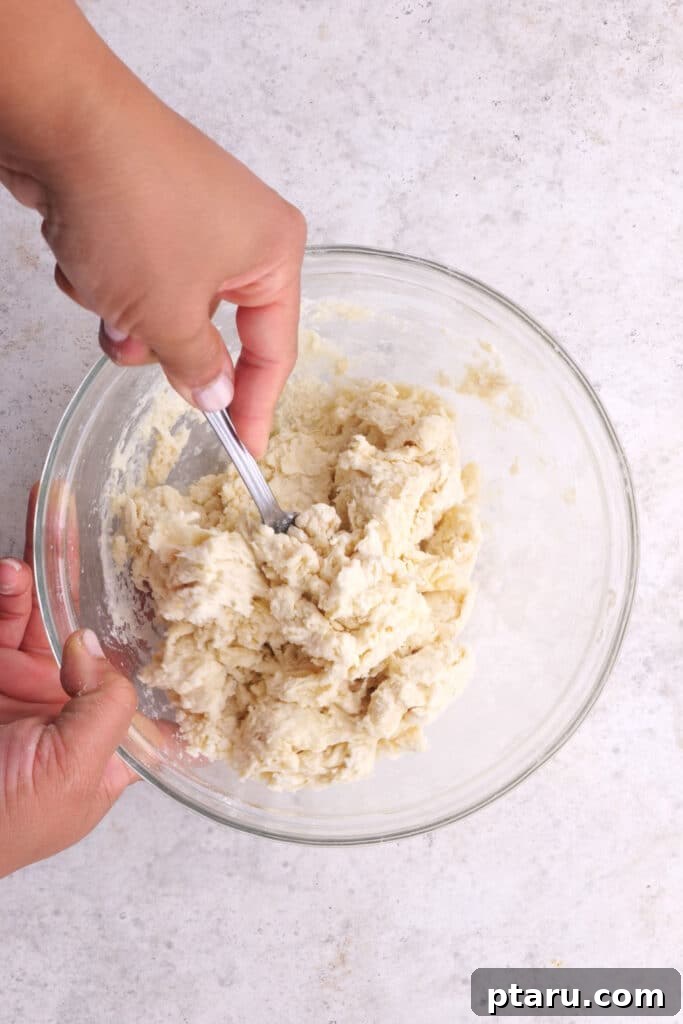
The samosa dough recipe is a simple yet crucial part of this dish. It’s a straightforward blend of flour, oil, and water, but proper resting and handling are key to its flaky texture.
- In a large mixing bowl, combine the all-purpose flour and salt. Mix well to ensure the salt is evenly distributed.
- Pour in the vegetable oil. Using your fingertips, rub the oil into the flour until the mixture resembles coarse breadcrumbs. This step, called “moyan,” is essential for creating a tender and flaky crust.
- Gradually add water, a little at a time, mixing until a firm but workable dough forms. Avoid adding too much water, as this can make the dough sticky.
- Once the dough comes together, gently knead it for about 5-7 minutes until it’s smooth and elastic.
- Form the dough into a ball, wrap it in a damp kitchen towel or plastic wrap, and let it rest at room temperature for at least 30 minutes. This resting period allows the gluten to relax, making the dough easier to roll and ensuring a tender crust.
- After resting, divide the dough into 6 equal portions, then roll each into a smooth ball on a lightly floured surface.
- Using a rolling pin, flatten each ball into a thin, oblong or oval shape, approximately 6-7 inches long. The thinner you roll the dough, the crispier your samosas will be!
- Carefully slice each oblong round down the middle lengthwise, creating two half-moon shapes.
- Take one half-moon in your hand. Lightly brush a small amount of water along the straight edge.
- Fold one corner of the straight edge over to meet the other corner, forming an open cone shape. Press the edges firmly to seal, ensuring no gaps.
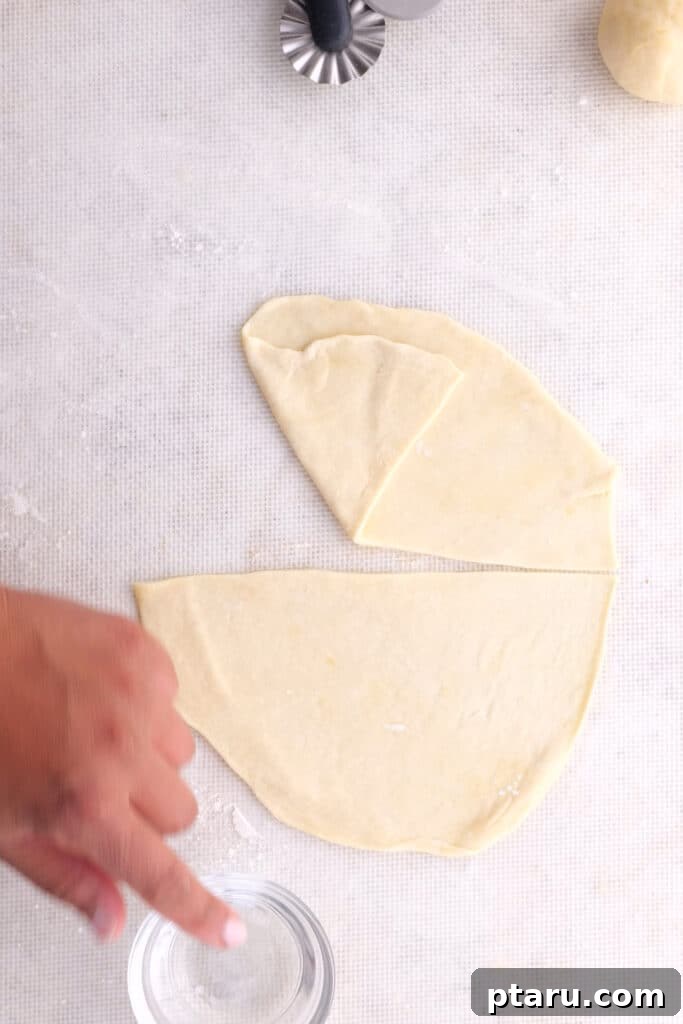
2. Craft the Flavorful Chicken Samosa Filling
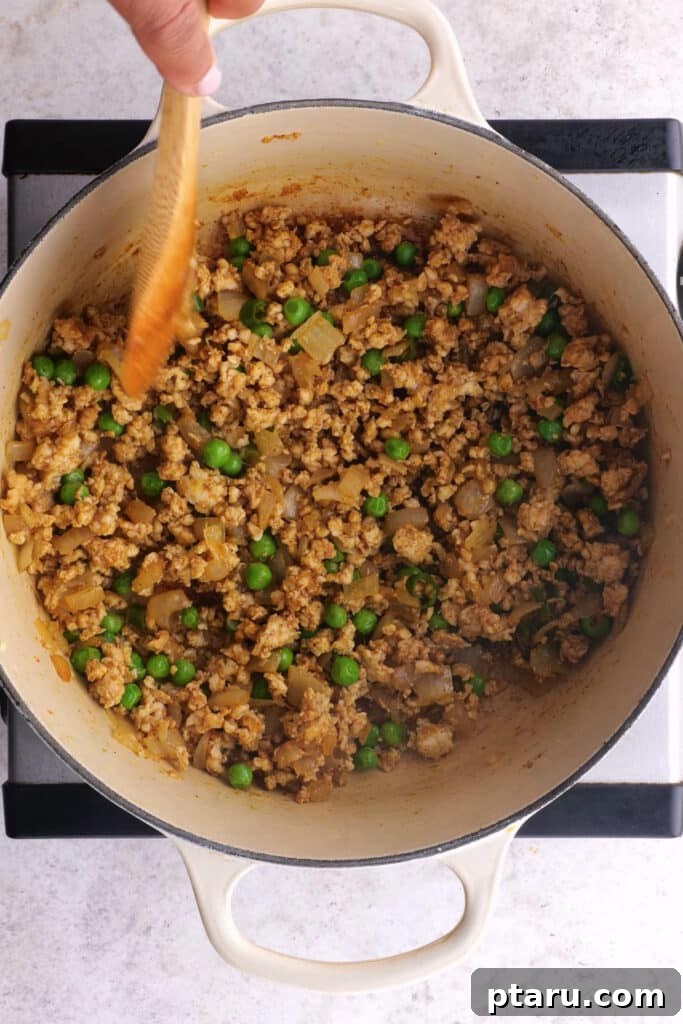
This savory and aromatic filling is what makes these spiced chicken samosas truly irresistible. Be warned: it’s so good, you’ll need 100% willpower to resist eating it directly from the pan!
- Heat 1 tablespoon of vegetable oil in a deep, heavy-bottomed saucepan or large skillet over medium-high heat.
- Add the finely chopped onion, grated ginger, grated garlic, and ½ teaspoon of salt. Sauté for about 2 minutes, stirring occasionally, until the onions soften and become translucent.
- Add the minced chicken to the pan, along with the remaining ½ teaspoon of salt, ground cumin, ground coriander, and chili powder. Break up the chicken with a spoon and cook for about 10 minutes, stirring occasionally, until the chicken is fully cooked through and no longer pink.
- Sprinkle the garam masala over the cooked chicken and stir well to combine.
- Add the frozen green peas to the mixture. Stir and cook for an additional 5 minutes, allowing the peas to heat through and meld with the spices.
- Taste the filling and adjust for salt or spices as needed. If you enjoy a bit of heat, now is the time to stir in the chopped green chillies.
- Once the filling is cooked, remove it from the heat and allow it to cool slightly before assembling the samosas. This prevents the filling from tearing the delicate dough.
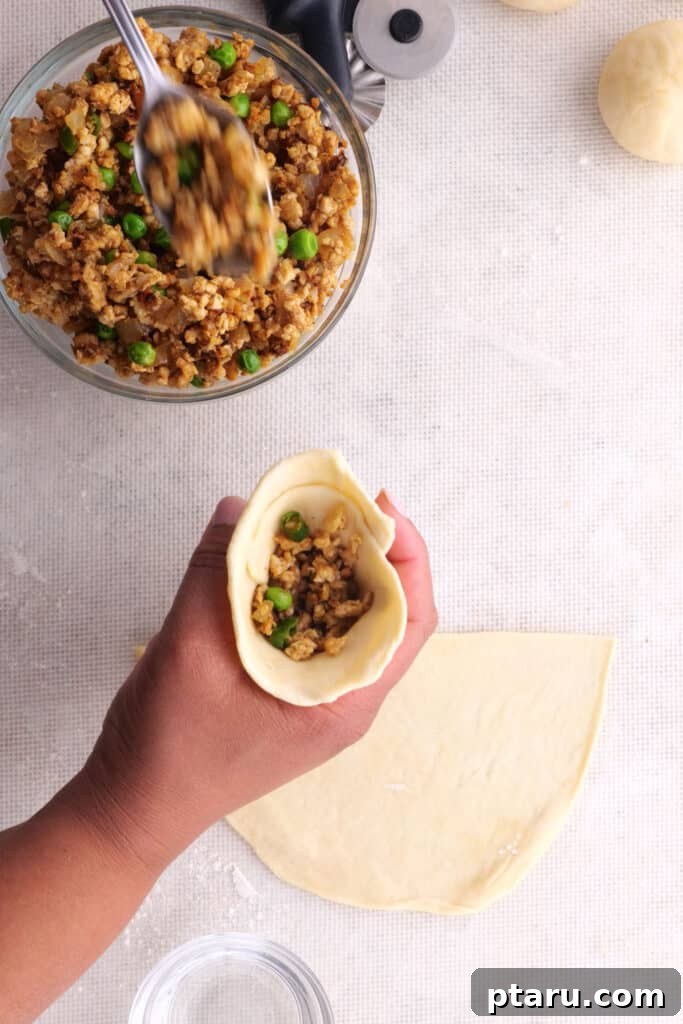
Now that your cones are ready and your filling is cooled, it’s time for assembly. Hold the prepared dough cone in one hand and spoon approximately 2 tablespoons of the delicious chicken filling into it. Be careful not to overfill, as this can lead to bursting during frying. Pinch the open edges firmly together to seal the samosa completely, forming a neat triangular shape. You can gently press the bottom onto a cutting board to create a flat base, helping the samosas stand upright. Repeat this process with the remaining dough and filling until all your samosas are shaped and ready for frying.
3. Fry The Samosas: For Ultimate Crispiness
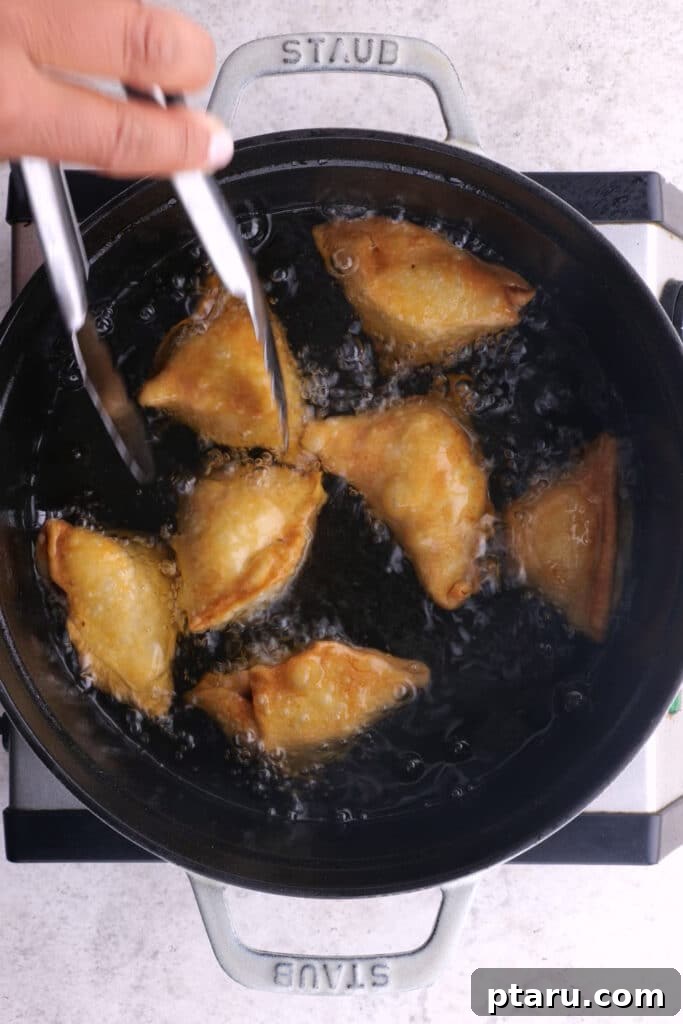
Deep frying can seem intimidating, but with a few simple guidelines, you’ll achieve perfectly golden and crispy samosas every time. Don’t run away – it’s easier than you think!
- Pour vegetable oil into a deep saucepan or Dutch oven to a depth of about 3 inches. This ensures the samosas are fully submerged and cook evenly.
- Place the pot over medium heat. It’s crucial to use a cooking thermometer to monitor the oil temperature accurately.
- Once the oil reaches approximately 200ºF (about 95ºC), carefully lower the samosas into the hot oil in batches. Do not overcrowd the pan, as this will drop the oil temperature too much and result in greasy samosas.
- Fry the samosas at this low temperature for about 15 minutes. This slow frying process allows the dough to cook through completely and develop its characteristic flaky texture without burning the exterior.
- After 15 minutes, increase the heat to high. Continue to cook for another 5 minutes at this hotter temperature, or until the samosas achieve a deep golden-brown color and become beautifully crispy.
- Using a slotted spoon or spider, carefully remove the fried samosas from the oil.
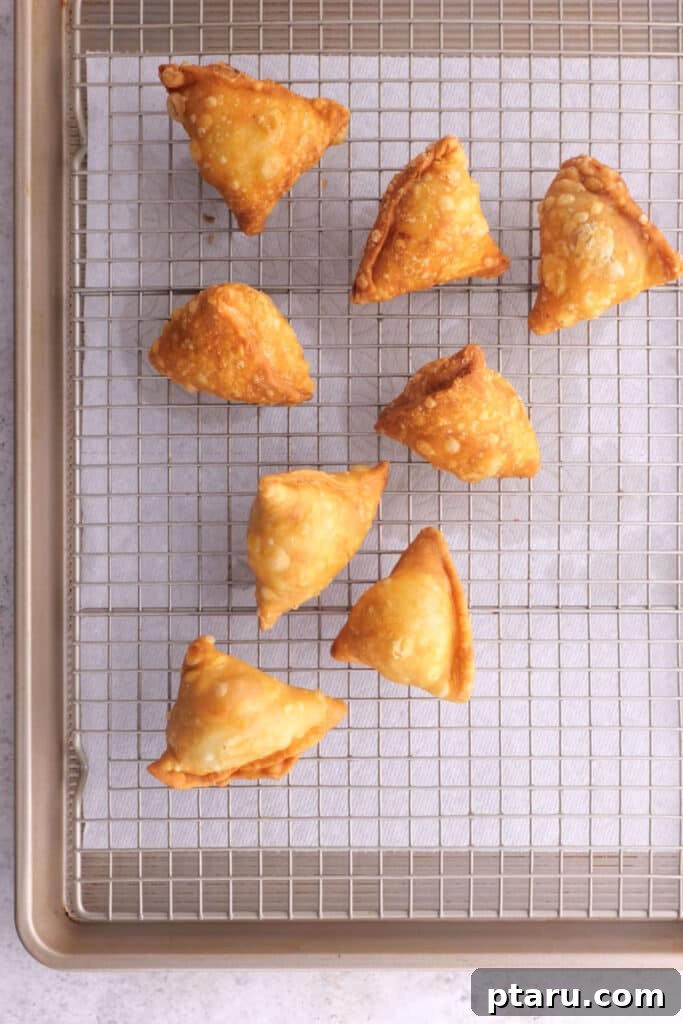
- Transfer them to a plate lined with paper towels to drain any excess oil. This step is essential for maintaining their crispiness.
- Serve hot and enjoy your perfectly fried crispy chicken samosas!
My 7 Expert Tips For Perfect Homemade Samosas
Frying homemade samosas can be a little tricky, but avoiding common pitfalls will ensure you achieve professional-level results. These expert tips are designed to help you create truly perfect samosas – crispy, flavorful, and cooked to perfection:
- Use a Large, Heavy Pot: Opt for a heavy-bottomed Dutch oven or a wok that is larger than you think you’ll need. This provides ample space for the oil to expand and bubble up safely, preventing spills. I typically fill my Dutch oven with oil to a depth of 3 inches for optimal frying.
- Invest in a Cooking Thermometer: This is arguably the most crucial tool for deep frying. An accurate cooking thermometer allows you to precisely control the oil temperature. Fry the samosas initially at a low temperature of 200ºF (95ºC) for about 15 minutes. This ensures the dough cooks thoroughly from the inside out without burning. Then, briefly increase the heat to get that desirable golden, crispy exterior.
- Roll the Dough Thinly: A common mistake is rolling the dough too thick. For a truly crispy and evenly cooked crust, the dough must be rolled very thinly. Thick dough will result in a chewy, dense, and often undercooked exterior, diminishing the authentic samosa experience.
- Avoid Overcrowding the Pan: Resist the urge to fry too many samosas at once. Overcrowding the hot oil drastically reduces its temperature, leading to greasy and soggy samosas that absorb too much oil. Fry in small batches, allowing enough space for each samosa to cook evenly and maintain the oil’s heat.
- Seal Edges Properly: A tight seal is paramount! Use a little water to thoroughly moisten the edges of your dough before pinching them together. Improper sealing is a common cause of the filling spilling out during frying, creating a mess and compromising the integrity of your samosa.
- Do Not Overfill: While it’s tempting to cram in as much delicious filling as possible, aim for about 2 tablespoons of filling per samosa. Overfilling puts stress on the dough, making the samosas prone to bursting open during frying, leading to an unevenly cooked product and a loss of that precious filling.
- Allow the Dough to Rest: Patience is a virtue in samosa making! After kneading, allow the dough to rest for at least 30 minutes, or even longer. This resting period is crucial for relaxing the gluten in the flour, making the dough much easier to roll out thinly and resulting in a wonderfully tender and flaky crust.
Make Ahead and Storage Tips for Chicken Samosas
These homemade chicken samosas are fantastic for meal prepping or preparing for a party. Knowing how to store them properly, both cooked and uncooked, ensures you can enjoy them fresh whenever you desire.
- Prepare Ahead: The filling and dough can both be made a day in advance. Store the cooked chicken filling in an airtight container in the refrigerator. Wrap the dough tightly in plastic wrap to prevent it from drying out and refrigerate it separately. Let the dough come to room temperature for about 15-20 minutes before rolling.
- Freeze Uncooked Samosas: This is a fantastic way to have fresh samosas ready on demand. After shaping the samosas but before frying, arrange them in a single layer on a baking sheet lined with parchment paper. Freeze until solid, typically 1-2 hours. Once frozen, transfer them to a freezer-safe bag or airtight container. They can be stored for up to 2-3 months. Fry them directly from frozen, adding a few extra minutes to the frying time at a lower temperature to ensure they cook through.
- Freeze Cooked Samosas: Allow fried samosas to cool completely. Arrange them in a single layer on a baking sheet and freeze until solid. Transfer to a freezer-safe bag or container. Reheat in an oven or air fryer for best results.
- Reheat Leftovers: To restore the crispiness of leftover fried samosas, avoid microwaving them, as this will make them soggy. Instead, reheat them in a preheated oven at 350°F (175°C) for 10-15 minutes, or in an air fryer at 325°F (160°C) for 5-8 minutes, until heated through and crispy.
How to Serve This Chicken Samosa Recipe
These crispy chicken samosas are incredibly versatile and perfect for any occasion. Serve them hot and fresh, and watch them disappear! They make a fantastic side dish, a delectable appetizer, or a satisfying snack on their own.
Elevate your samosa experience by pairing them with a flavorful dipping sauce. My personal favorites include cooling mint chutney, sweet and tangy mango chutney, or a vibrant tamarind sauce. Each offers a wonderful contrast to the savory, spiced filling.
For a lighter meal, you can also enjoy your samosas alongside a simple, refreshing green salad. No matter how you serve them, these homemade samosas are guaranteed to be a hit!
About These Chicken Samosas: A Taste of Eastern India
This exquisite chicken samosa recipe is lovingly adapted from Kankana Saxena’s wonderful recipe for Chicken Shingara, found in her BEAUTIFUL book, Taste of Eastern India. It’s a culinary tribute to regional Indian cooking.
For those unfamiliar, shingara is the beloved local variant of samosa in Kolkata and the wider Eastern India region. While similar in concept, shingara often feature a slightly thinner crust and a distinct spice blend compared to their North Indian counterparts. Kankana’s recipe captures the essence of this regional delicacy beautifully.
I’ve made slight tweaks to her original recipe to align with the ingredients readily available in my pantry – for instance, I don’t typically keep mustard oil or nigella seeds on hand. Yet, even with these minor adjustments, the results are consistently delicious and authentic, a testament to the robust flavors of Eastern Indian cuisine.
Frequently Asked Questions (FAQs)
Got questions about making homemade chicken samosas? Here are answers to some common inquiries that can help you perfect your batch:
- Can I bake these chicken samosas instead of frying? Yes, you can! For a healthier alternative, preheat your oven to 400°F (200°C). Lightly brush the shaped samosas with oil and bake for 20-25 minutes, flipping halfway, until golden brown and crispy. While baked samosas are delicious, they won’t achieve the exact same deep-fried crispiness. An air fryer is also an excellent option.
- How can I make the chicken samosas less spicy? To reduce the heat, simply decrease the amount of chili powder or omit the fresh green chilies entirely. You can also use a milder chili powder. Taste the filling before assembling to ensure it meets your preferred spice level.
- Can I use store-bought samosa wrappers or puff pastry? Absolutely! If you’re short on time, store-bought samosa wrappers or even puff pastry can be a great shortcut. Follow the instructions for shaping and filling, then bake or fry according to the wrapper’s recommendations (or use our frying tips). This is how I make my shortcut samosa puffs for holidays.
- What kind of oil is best for frying samosas? A neutral-flavored oil with a high smoke point is ideal for deep frying. Vegetable oil, canola oil, sunflower oil, or peanut oil are all excellent choices.
- Why are my samosas getting soggy? Sogginess can be caused by several factors: oil that isn’t hot enough (or drops too much in temperature from overcrowding), dough that is rolled too thick, or not draining them properly after frying. Make sure to follow our tips for oil temperature and avoiding overcrowding.
- Can I prepare the filling in advance? Yes, the chicken samosa filling can be made up to 2-3 days in advance and stored in an airtight container in the refrigerator. This can significantly cut down on prep time when you’re ready to assemble and fry.
Other Favorite Samosa and Indian Recipes
If you’ve fallen in love with these chicken samosas, you’ll surely enjoy exploring more of my diverse range of Indian recipes and other samosa variations. Each recipe is crafted to bring authentic flavors and joy to your kitchen.
- Samosa Variations:
- Beef Samosas: A hearty and flavorful alternative to chicken, perfect for meat lovers.
- Potato Samosas: The classic vegetarian option, packed with spiced potatoes and peas.
- Easy 3-Ingredient Samosa Dough Recipe: Simplify your prep with this foolproof dough.
- Easy Samosa Filling Recipe: A versatile base you can adapt for various proteins or vegetables.
- Samosa Pie: A creative and comforting twist on traditional samosas, great for family dinners.
- Shortcut Samosas with Puff Pastry: Quick and delicious samosas using store-bought puff pastry.
- Lamb Vindaloo or Pork Vindaloo Curry: Bold, spicy, and tangy Goan classics.
- Adarsh’s Chicken 65: A vibrant, spicy, and deep-fried chicken appetizer.
- Saag Paneer Curry: Creamy spinach and cheese curry, a vegetarian delight.
- The recipe for chicken korma: Adarsh says it’s the best I’ve ever made – rich, creamy, and mildly spiced.
- Amma’s delicious recipe for Masoor Dal: A comforting and healthy red lentil stew.
- This delicious Butter Paneer Masala recipe: A rich and creamy tomato-based curry with paneer.
- This Butter Chicken Sauce is incredible: The base for the famous, creamy butter chicken.
- Madras Lentils: One of my favorite vegetarian comfort food dinners, rich and hearty.
- Malai Kofta: Creamy, melt-in-your-mouth vegetable and paneer dumplings in a rich sauce.
You’ll also love many of these other super tasty fan-favorite Indian recipes, too! Here are a few other picks that my Indian husband loves and are not to be missed:
Chicken Samosa Recipe Card
An unbelievably delicious recipe for homemade chicken samosas. The crispy, golden exterior breaks into shards, giving way to the tastiest warmly-spiced minced chicken filling.

- Prep Time: 30 minutes
- Cook Time: 15 minutes
- Total Time: 45 minutes
- Servings: 12 samosas
- By: Jennifer Pallian BSc, RD
Ingredients
For the Samosa Dough:
- 1 ½ cups all-purpose flour
- ½ tsp salt
- 2 tbsp vegetable oil
- ¾ cup plus 1 tbsp water
For the Chicken Filling:
- 1 tbsp vegetable oil
- 1 medium onion, finely chopped
- 1 tbsp grated ginger
- 1 tsp grated garlic
- 1 tsp salt, divided
- 8 oz minced chicken (ground chicken breast or thigh)
- ½ tsp ground cumin
- ½ tsp ground coriander
- ¼ tsp chili powder
- 1 tsp garam masala
- ¼ cup frozen green peas
- 2 green chillies, chopped (optional)
Instructions
Make the Dough
- Combine flour and salt in a large mixing bowl. Stir in 2 tablespoons of oil, rubbing it into the flour until crumbly.
- Add water, little by little, to form a firm but workable dough. Knead gently for 5-7 minutes until smooth. Form the dough into a ball and wrap it in a damp kitchen towel or plastic wrap to rest at room temperature for 30 minutes.
Make the Filling
- Heat 1 tablespoon of oil in a deep, heavy-bottomed saucepan over medium-high heat. Add the onion, ginger, garlic, and ½ tsp salt and stir. Cook for 2 minutes or until the onion softens.
- Add the ground chicken, remaining ½ tsp salt, cumin, coriander, and chili powder. Cook for 10 minutes, stirring occasionally, until the chicken is fully cooked.
- Sprinkle with garam masala and add frozen peas. Stir and cook for 5 more minutes.
- Taste for salt and add more if needed. Add chopped chillies if using (the filling will be mild without them). Let the filling cool slightly.
Assemble the Samosas
- Divide the rested dough into 6 equal portions, then roll each into a smooth ball on a well-floured surface.
- Roll each ball into a thin, oblong shape (about 6-7 inches long). Use a knife to slice each oblong in half lengthwise to make a half-moon.
- Take one half-moon in your hand. Brush some water on the straight edges. Fold the edges to form an open cone shape, pressing firmly to seal.
- Hold the cone and fill with about 2 tbsp of the cooled chicken filling. Pinch the open end to seal completely. Gently press the bottom onto a cutting board to form a flat base. Finish shaping the remaining samosas.
Fry Samosas
- Pour vegetable oil into a deep saucepan or Dutch oven to a depth of 3 inches over medium heat. Use a cooking thermometer to monitor the temperature.
- Once the oil reaches about 200ºF (95ºC), carefully place the samosas in batches (do not overcrowd). Fry for 15 minutes until golden.
- Increase the heat to high and cook for another 5 minutes at a hotter temperature until the samosas are deep golden brown and crispy.
- Remove with a slotted spoon and place on paper towels to drain excess oil. Serve hot.
Notes
- Recipe adapted slightly and shared with permission from Kankana Saxena’s Taste of Eastern India.
- Storage: Freeze unbaked samosas on a baking sheet until solid, then transfer to a freezer bag. Reheat fried samosas in an oven or air fryer to retain crispiness; avoid microwaving.
Nutrition (Approximation per serving)
- Calories: 118kcal
- Carbohydrates: 13g
- Protein: 5g
- Fat: 6g
- Saturated Fat: 1g
- Polyunsaturated Fat: 2g
- Monounsaturated Fat: 2g
- Trans Fat: 0.04g
- Cholesterol: 16mg
- Sodium: 329mg
- Potassium: 126mg
- Fiber: 2g
- Sugar: 1g
- Vitamin A: 37IU
- Vitamin C: 3mg
- Calcium: 17mg
- Iron: 1mg
Nutrition information is automatically calculated and should only be used as an approximation.