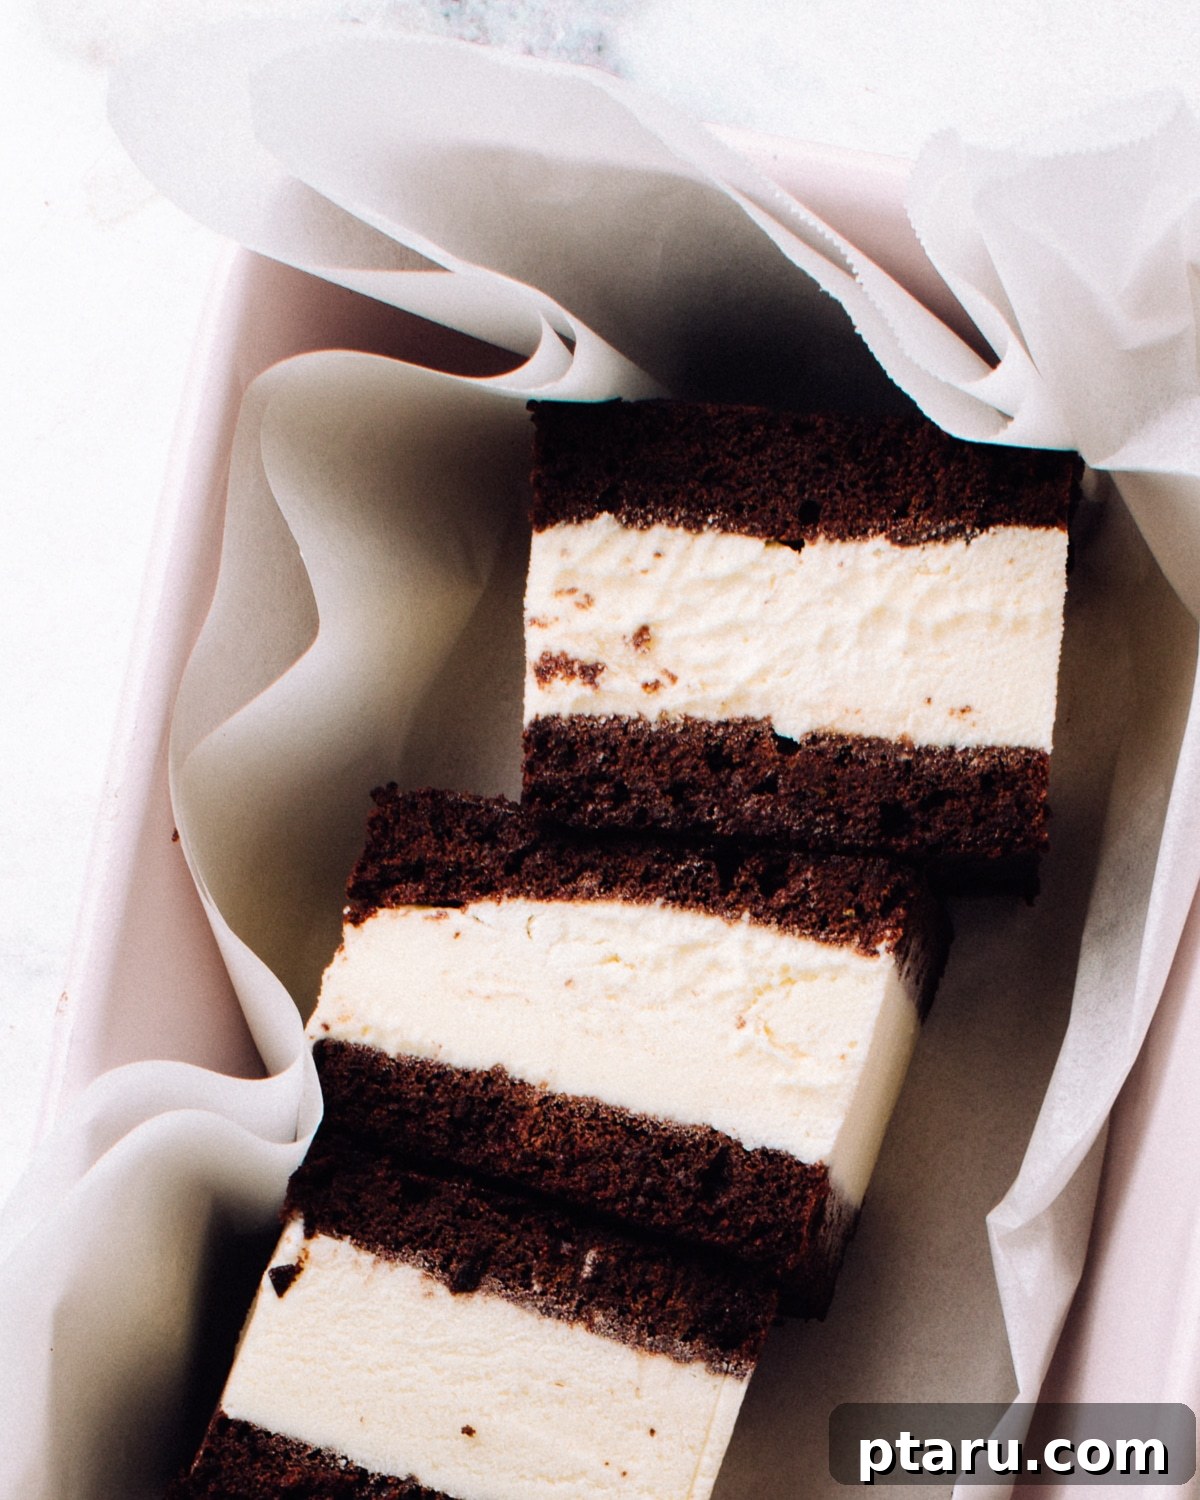
Get ready to indulge in the ultimate summer treat with our favorite **homemade ice cream sandwich wafers** recipe. This recipe promises a truly unforgettable experience, thanks to its soft, chewy, and irresistibly brownie-like texture, perfectly complemented by a deep, rich chocolate flavor. Forget about store-bought versions; once you taste these from-scratch delights, there’s no going back.
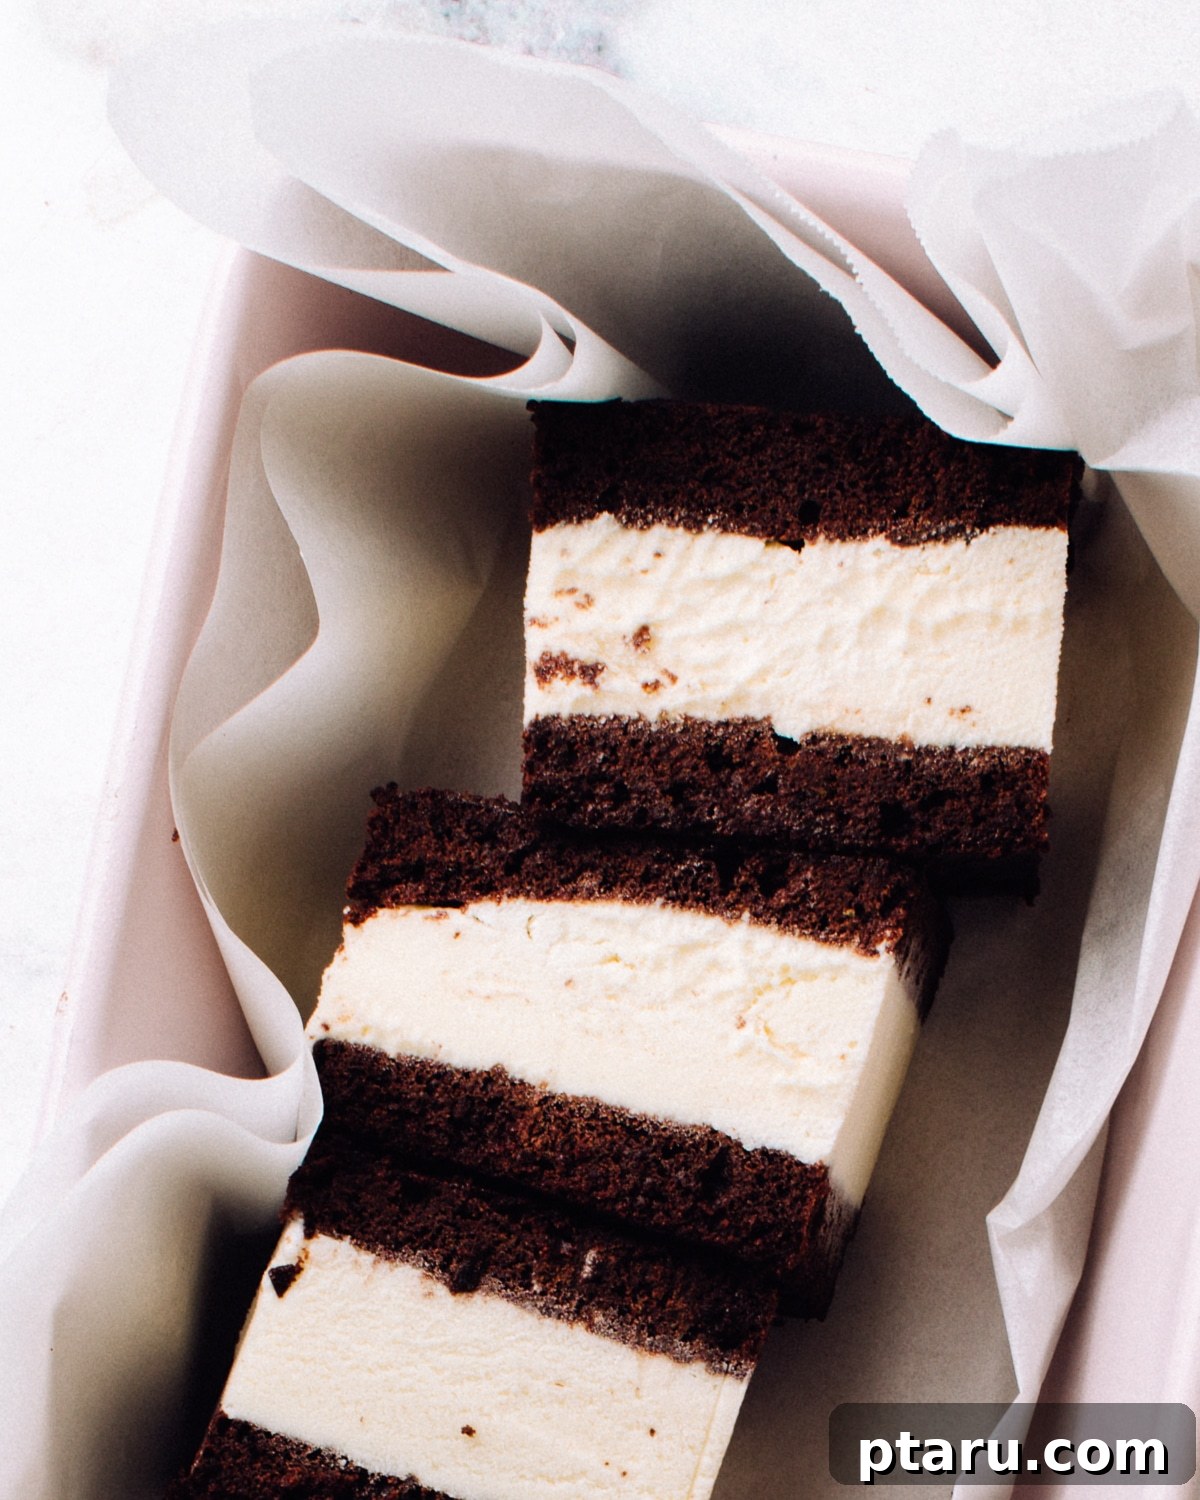
Why You’ll Love This Ultimate Ice Cream Sandwich Wafer Recipe
Making your own ice cream sandwiches from scratch is not just a culinary adventure; it’s a game-changer. Our recipe elevates this classic treat, starting with the very best fudgy homemade chocolate wafers. These aren’t just any cookies; their texture is a delightful cross between a soft, tender whoopie pie cookie and a rich, decadent brownie, making them the perfect embrace for creamy ice cream.
Beyond the incredible flavor and texture of the wafers, you’ll also appreciate our foolproof techniques for filling and assembling these frozen masterpieces. We’ve simplified the process, ensuring that even first-time makers can achieve beautifully crafted, perfectly portioned ice cream sandwiches with ease and confidence. Prepare to impress your family and friends with these irresistible homemade treats!
What Makes a Perfect Ice Cream Sandwich?
At its core, an ice cream sandwich is a delightful combination of two soft cookies hugging a generous layer of ice cream. But to truly achieve perfection, both components must harmonize. The cookies should be tender enough to bite through without crumbling or shattering, offering a satisfying chew that complements the smooth, creamy ice cream. Our chocolate wafers are specifically designed to provide that ideal balance—fudgy, intensely chocolatey, and yielding without being flimsy.
When it comes to crafting these delightful desserts at home, there are generally two primary approaches:
- Individual Chocolate Ice Cream Wafers: This traditional method involves baking a batch of individual cookies and then pairing them up to form sandwiches. While it yields charmingly rustic results, it can be more time-consuming to bake and match individual cookies.
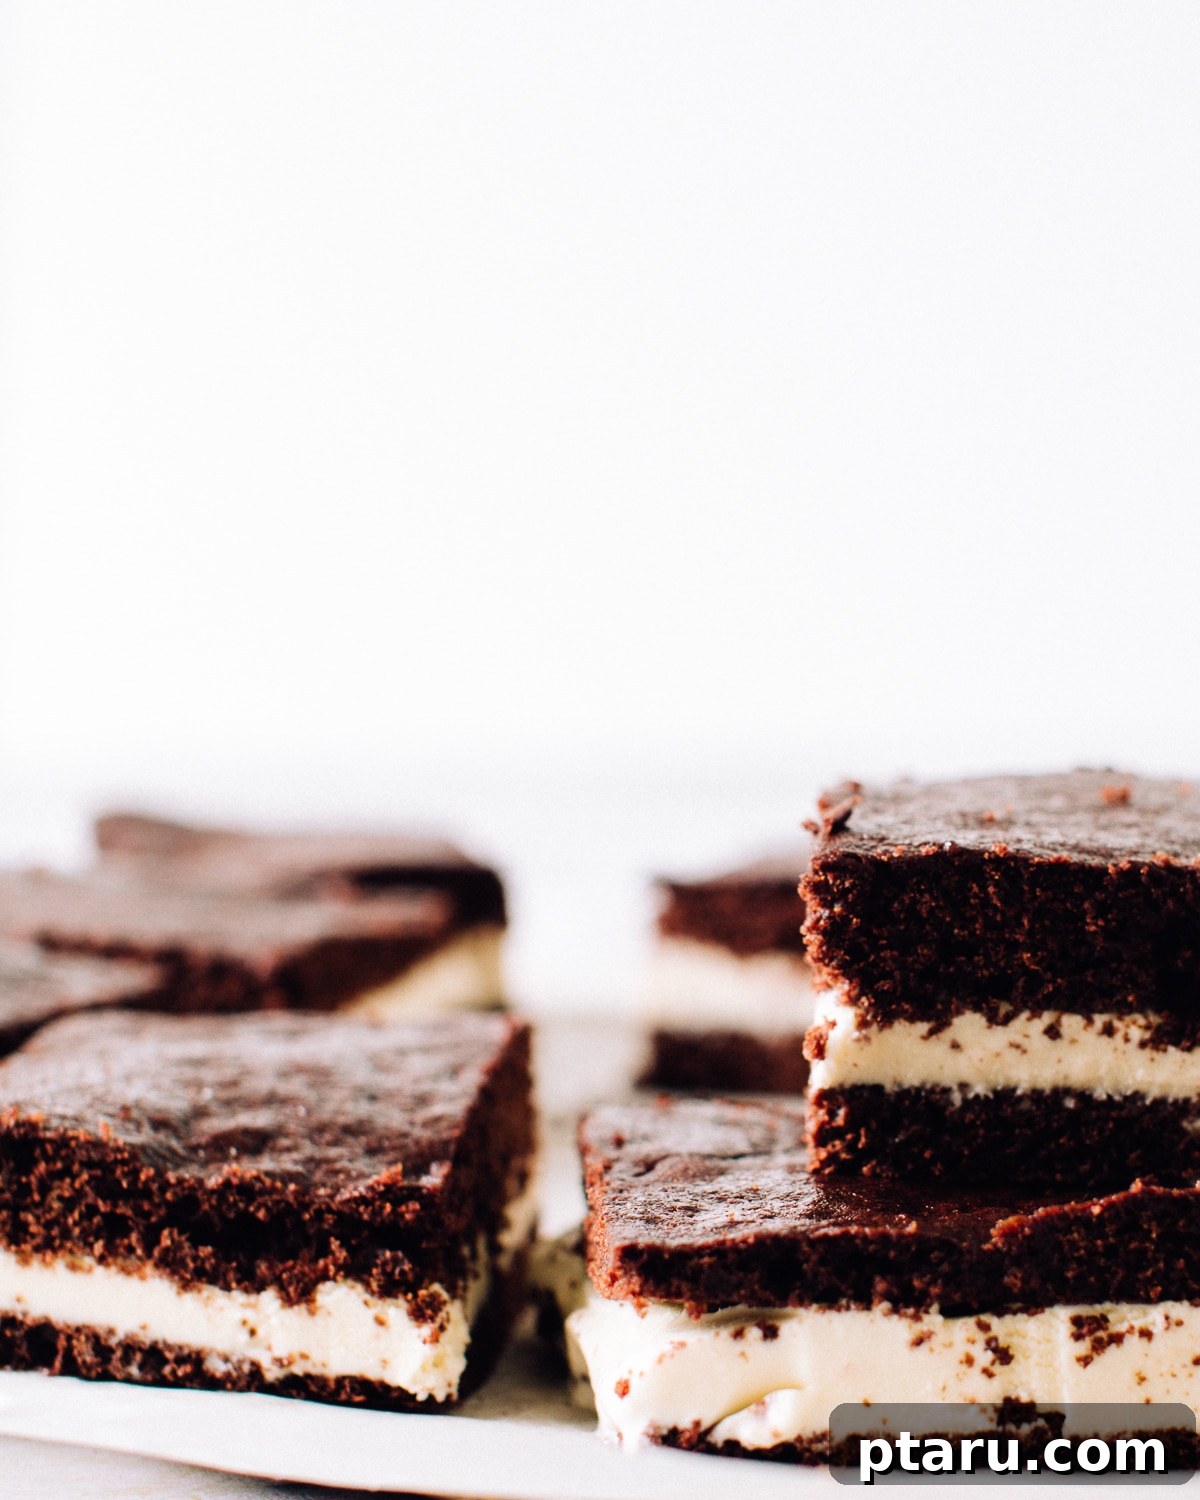
- Giant Cookie Slab (Our Preferred Method): For efficiency and pristine presentation, we highly recommend baking one large, thin sheet of cookie dough. This innovative approach allows you to assemble one giant ice cream sandwich, which is then effortlessly sliced into uniform, perfect rectangles. This method not only saves time but also ensures every sandwich has a clean, professional look, making it ideal for gatherings or meal prepping.
The key to success lies in the balance: a rich, tender cookie that holds its shape, combined with your favorite ice cream, all brought together with a few clever tricks to ensure a seamless process.
How to Make Delicious Homemade Ice Cream Sandwiches
Crafting this iconic summer dessert from scratch is incredibly rewarding. Here’s a simplified overview of the steps involved, designed to guide you through the process of creating your own perfect ice cream sandwiches:
- Prepare the Batter: Begin by mixing your rich chocolate cookie batter, ensuring all ingredients are well combined for that signature fudgy texture.
- Spread the Dough: Spoon the prepared batter onto a parchment-lined baking sheet. Utilize a spatula, warmed in hot water and lightly oiled, to meticulously smooth the batter into an even, thin layer across the pan. This technique is crucial for achieving consistent wafer thickness.
- Bake and Cool: Bake the cookie slab until it’s just set, maintaining a soft, cake-like texture. Once cooled slightly, slice the large cookie slab into two even pieces while still in the pan, then transfer them to the freezer to firm up.
- Assemble the Sandwich: Once the cookie slabs are firm, take one half and spread a layer of slightly softened ice cream evenly over its surface. Carefully top with the remaining cookie slab. Return the entire assembled unit to the freezer until thoroughly firm.
- Slice and Store: When the giant sandwich is firm enough to handle, use a hot knife to slice it into individual portions. Wrap each sandwich in wax paper or parchment paper and store them in freezer-safe bags. This ensures they remain fresh and delicious for weeks, ready to be enjoyed whenever a craving strikes.
Top Tips for Effortless Ice Cream Sandwich Creation
While homemade ice cream sandwiches might seem daunting, many common “pain points” can be easily overcome with a few clever tricks. These aren’t difficult recipes, but knowing the right techniques makes the entire process incredibly smooth and enjoyable, turning potential frustrations into effortless steps.
Ingenious Tricks for Handling Your Ice Cream Sandwich Wafer Batter
Working with sticky cookie batter can sometimes be a challenge, but these two simple hacks will make spreading your wafer batter incredibly easy and mess-free:
- Warm Your Spatula: Briefly run your metal spatula under hot water. The warmth will help prevent the batter from sticking and allow for smoother spreading.
- Grease the Spatula: After warming, quickly dry the spatula, then lightly spray it with non-stick cooking spray or wipe it with a paper towel dipped in neutral-tasting oil. This creates a non-stick surface, allowing the spatula to glide through the thick batter “like a hot knife on butter.” Repeat this warming and greasing process as many times as necessary to ensure the batter is spread perfectly evenly across your baking pan.
These simple steps ensure an even layer of cookie dough, which is fundamental for uniform baking and beautifully flat wafers.
Tricks for Handling the Delicate Chocolate Wafers
The key to a perfect ice cream sandwich is a soft, fudgy cookie that doesn’t crack when you bite into it. Our recipe ensures the cookie base is baked to be soft and slightly underdone, achieving that coveted rich, fudgy texture. However, this tenderness means the wafers can be delicate and prone to breaking during handling. Here’s a crucial trick to manage them effortlessly:
- Freeze for Firmness: Once your cookie slab has cooled to room temperature, immediately pop the entire slab (still on its parchment-lined baking pan) into the freezer.
- Easy Assembly: After about 30 minutes to an hour, the wafer will be firm enough to easily lift off the parchment paper and handle without any breakage. This pre-freezing step makes assembly a breeze, allowing you to build your ice cream sandwiches confidently.
This simple freezing technique prevents any frustration and ensures your beautiful chocolate wafers remain intact, ready to be filled with your favorite ice cream.
Expert Tricks for Filling Chocolate Cookie Wafers with Ice Cream
One of the most common challenges in making homemade ice cream sandwiches is achieving the perfect ice cream consistency for spreading. If the ice cream is too soft, it melts and runs everywhere, creating a messy situation. If it’s too firm, it’s nearly impossible to spread evenly without tearing the delicate wafers. But don’t worry, we’ve cracked the code to solve this common problem!
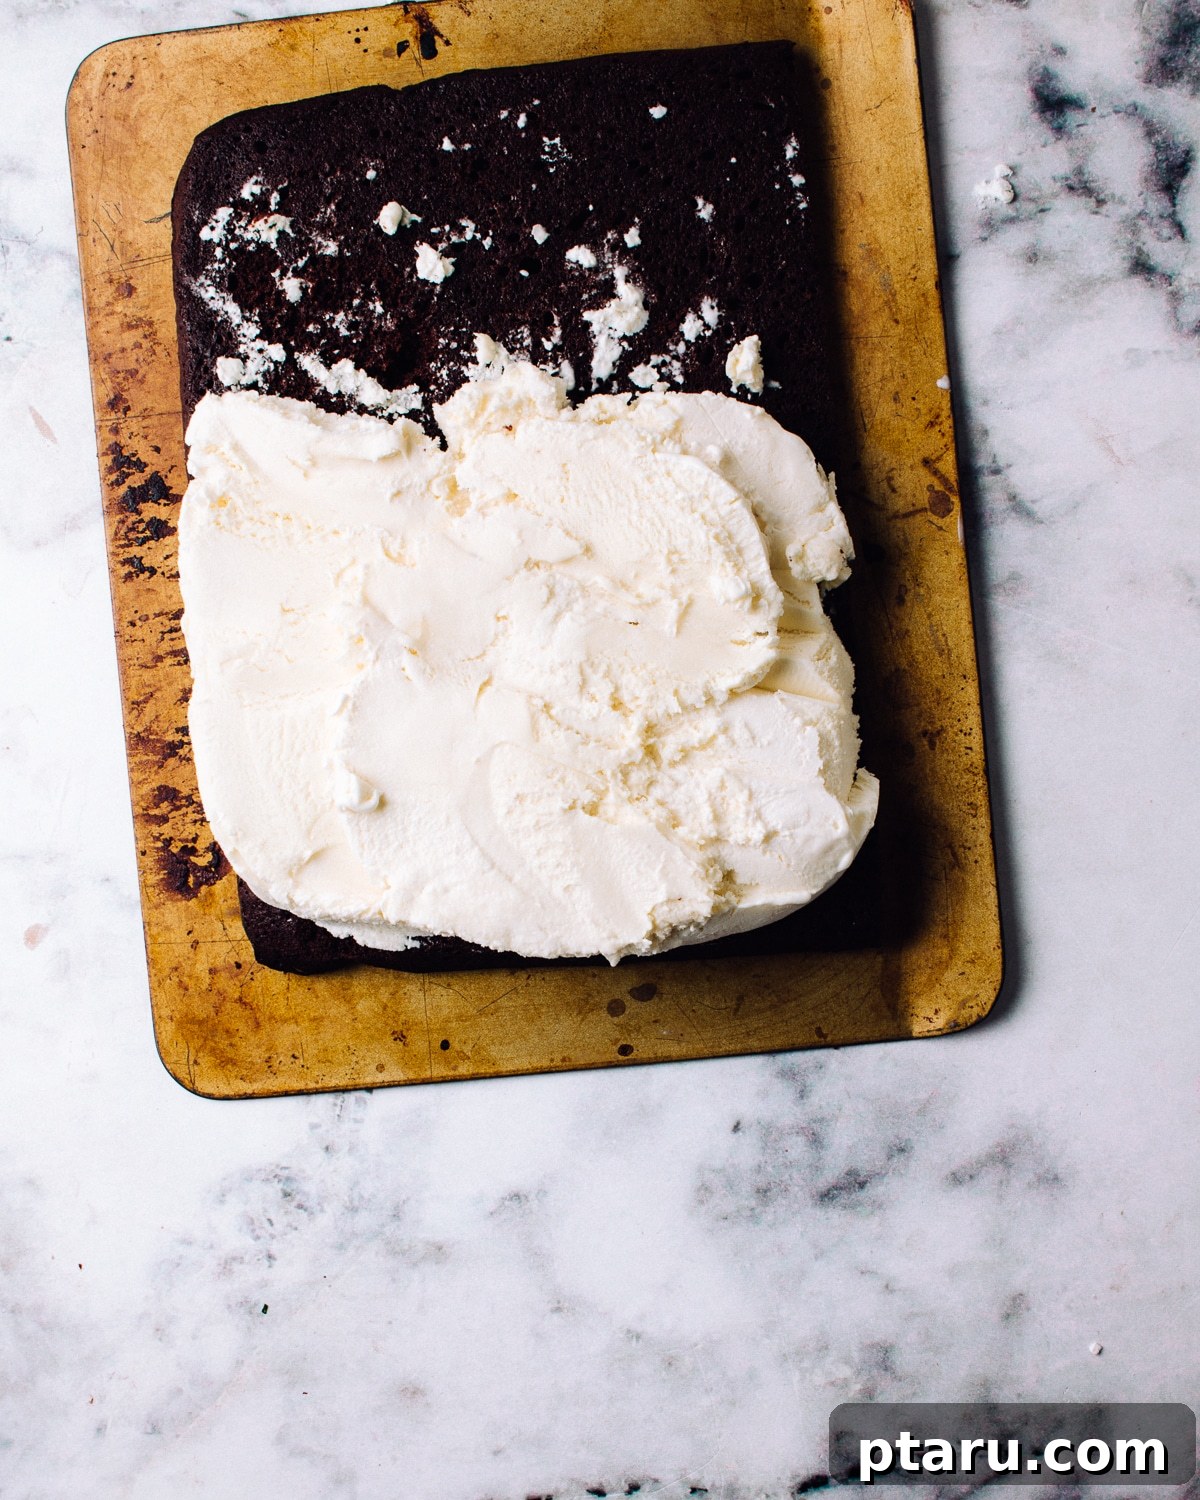
- Slice Hard-Frozen Ice Cream: The easiest and cleanest method we’ve discovered is to simply cut open the ice cream container and slice the hard-frozen ice cream into slabs. This works particularly well with cardboard containers, but can also be managed with plastic ones using a sturdy knife.
- Position and Smooth: Carefully position these pre-sliced ice cream slabs over one half of your frozen cookie base. Then, using the same cleaned and warmed spatula you used for spreading the batter (re-warm it under hot water if needed), gently smooth the ice cream evenly across the wafer. This technique provides much more control than scooping and spreading very soft ice cream, ensuring a uniform and tidy filling.
By using slightly softened but still firm ice cream slabs, you maintain structural integrity and achieve a clean, even layer of ice cream every time.
Precision Tricks for Cutting Your Ice Cream Sandwiches
Once your giant ice cream sandwich slab is assembled and fully frozen, the final step is to cut it into neat, individual portions. This can be tricky with frozen components, but a simple technique will ensure clean, sharp cuts every time:
- Hot Knife Technique: To effortlessly slice through the frozen ice cream and cookie, dip your sharp knife into hot water before each cut. The heat from the knife will create a clean path, preventing the wafers from crumbling and the ice cream from cracking unevenly. Wipe the knife clean and re-dip in hot water as needed for each slice.
- Patience is Key: If at any point the ice cream starts to melt too quickly or becomes too soft to handle, simply pop the entire slab back into the freezer for 10-15 minutes to firm up again. It’s better to take a short break than to rush and end up with a messy sandwich.
Think of hot water and the freezer as your essential cooking tools here – they work in tandem to create perfect, individual ice cream sandwiches with minimal fuss!
Storage and Serving Suggestions
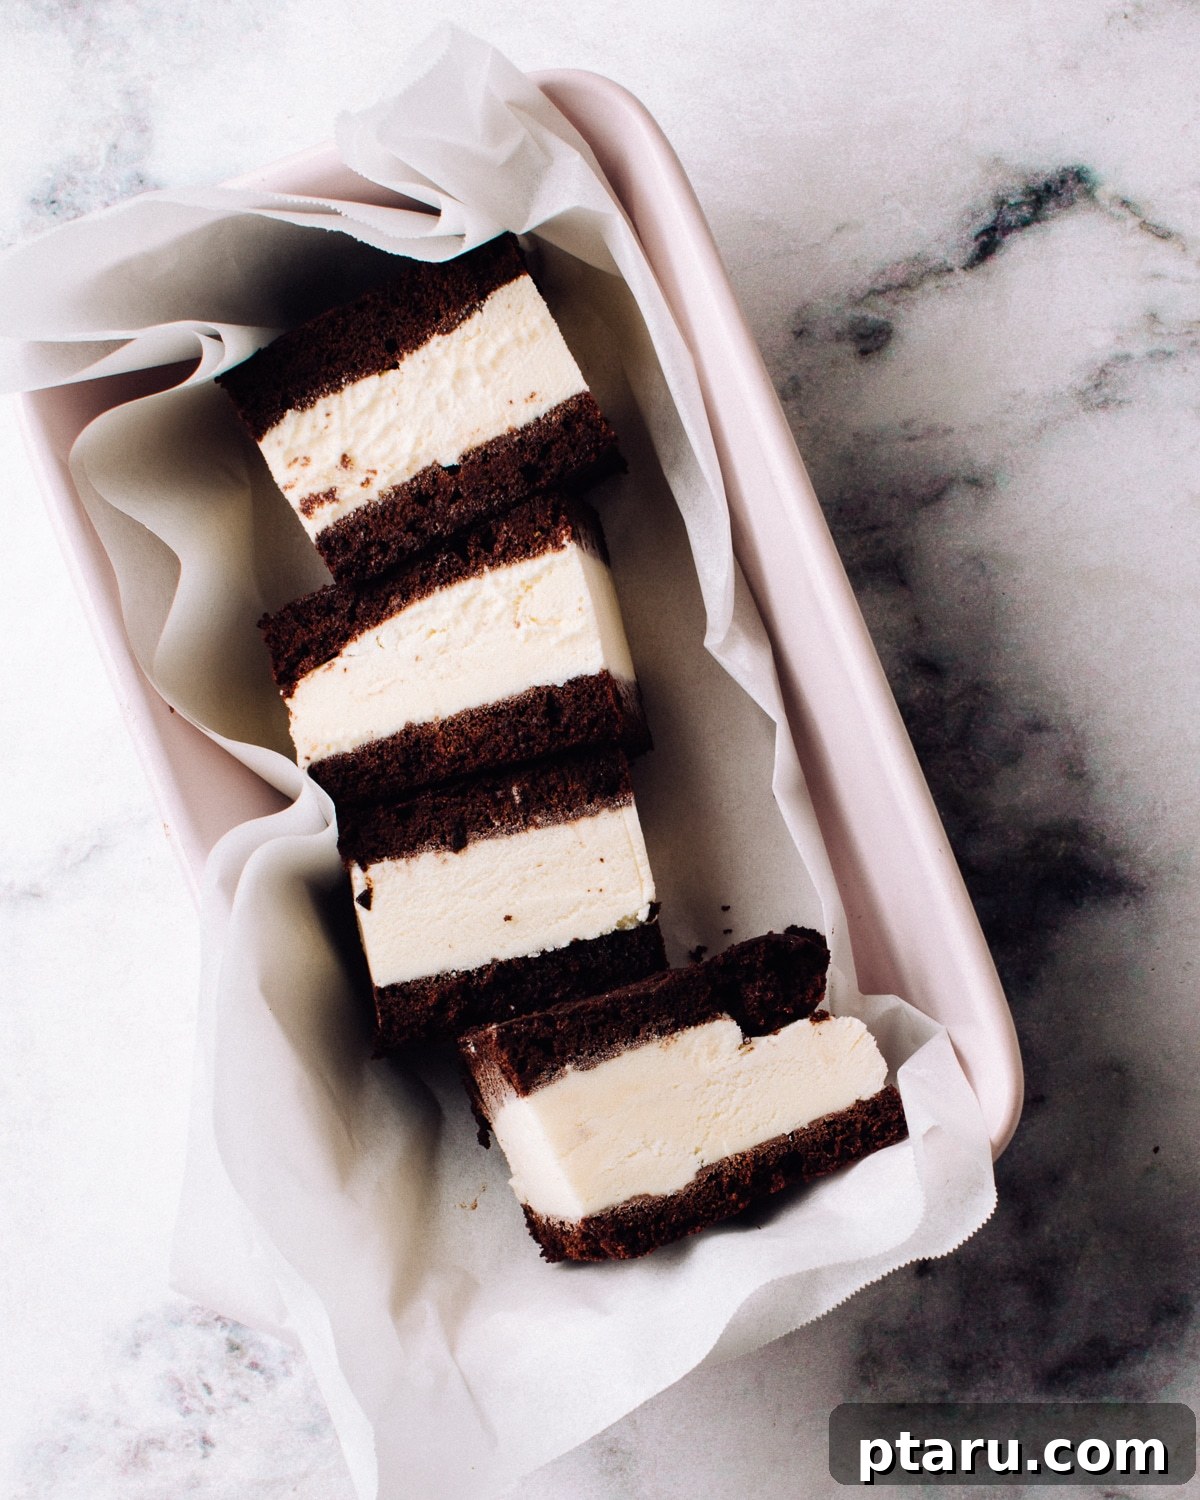
Once your homemade ice cream sandwiches are perfectly cut, proper storage is key to maintaining their deliciousness and preventing freezer burn. Individually wrapping each sandwich is crucial. You can use plastic wrap, wax paper, or even parchment paper tied with kitchen string for a charming presentation. Once wrapped, store them in an airtight freezer bag or container. They will keep beautifully in the freezer for up to a month, allowing you to enjoy a homemade treat whenever the craving strikes.
When serving, you can enjoy them straight from the freezer for a firm bite, or let them sit at room temperature for a minute or two to achieve a slightly softer, chewier texture. These ice cream sandwiches are perfect for summer barbecues, birthday parties, or simply as a delightful indulgence on a warm evening.
Variations and Customization
While classic vanilla ice cream is always a winner with these rich chocolate wafers, don’t hesitate to get creative with your fillings! Here are a few ideas to inspire you:
- Different Ice Cream Flavors: Try mint chocolate chip, strawberry, coffee, salted caramel, or even a swirl of two flavors for a gourmet twist.
- Mix-Ins and Coatings: Roll the edges of your finished sandwiches in sprinkles, mini chocolate chips, chopped nuts, or even shredded coconut for extra texture and flavor.
- Espresso Boost: For an adult-friendly treat, add a teaspoon of instant espresso powder to the cookie batter for a deeper, more sophisticated chocolate flavor.
- Spice It Up: A pinch of cayenne pepper in the cookie batter can add a subtle, intriguing warmth that complements the chocolate beautifully.
The beauty of homemade treats is the ability to tailor them exactly to your preferences. Experiment and find your perfect combination!
Frequently Asked Questions (FAQs)
Can I make the cookie wafers ahead of time?
Absolutely! The chocolate cookie wafers can be baked, cooled, and frozen on their own for up to a month. This is a great time-saver if you want to prepare components in advance. Just be sure to wrap them tightly to prevent freezer burn.
What kind of cocoa powder should I use?
For a deep, rich chocolate flavor and dark color, we recommend using unsweetened natural cocoa powder or Dutch-processed cocoa powder. Dutch-processed cocoa will yield a darker, less acidic wafer, while natural cocoa will have a slightly tangier chocolate flavor.
My cookie batter is very thick, is that normal?
Yes, the batter for these wafers is intentionally thick and sticky. This consistency is what helps create the dense, chewy, brownie-like texture. Don’t be alarmed; just follow our tips for warming and greasing your spatula to spread it smoothly.
How do I prevent the ice cream from melting too quickly during assembly?
Working quickly is key! Ensure your cookie slabs are well-frozen before starting. Have your ice cream ready (sliced into slabs as suggested in our tips). If you feel the ice cream softening too much, don’t hesitate to pop the whole assembly back into the freezer for a few minutes to re-firm before continuing.
Can I use gluten-free flour?
While this recipe hasn’t been specifically tested with gluten-free flour, you might have success with a 1:1 gluten-free baking blend that contains xanthan gum. Results may vary in terms of texture, so be prepared for some experimentation.
More Delightful Summer Dessert Recipes
If you’re craving more refreshing treats for the warmer months, be sure to explore these other popular dessert recipes:
- Frozen Lemon Mousse Bars
- Healthy Homemade Fudgesicles
- Cherry Cheesecake Popsicles
- Fudgy Mint Ice Cream Sandwiches
Classic Homemade Ice Cream Sandwiches
By: Jennifer Pallian BSc, RD
The absolute best ice cream sandwich recipe you’ll find – featuring a soft, chewy, brownie-like chocolate cookie base perfectly paired with creamy vanilla ice cream. This recipe achieves the ideal filling-to-cookie ratio, making it one of our favorite homemade dessert recipes for summer enjoyment.
Recipe Details
- Prep Time: 20 minutes
- Cook Time: 7 minutes
- Freezing Time: Approximately 1 hour
- Total Time: 1 hour 27 minutes
- Servings: 12 sandwiches
Ingredients
- 7.9 oz (1 3/4 cup) all-purpose flour
- 1 cup granulated sugar
- ¾ cup unsweetened cocoa powder
- ½ tsp baking soda
- ¼ tsp salt
- 1 large egg
- 1 cup buttermilk
- ½ cup canola or other neutral-ttasting oil
- 1 tsp vanilla extract
- 2 pints (1 liter or 4 cups) vanilla ice cream
Instructions
- Preheat oven to 350ºF (175°C). Line an 18×13″ (half-sheet pan) with parchment paper, leaving an overhang on the sides for easy lifting.
- In a large bowl, whisk together the dry ingredients: flour, sugar, cocoa powder, baking soda, and salt. In a separate large bowl, whisk the egg, then whisk in the buttermilk, oil, and vanilla extract. Scrape the wet egg mixture into the dry flour mixture and gently fold together until no dry flour remains. Be careful not to overmix the batter.
- Dollop spoonfuls of the thick cookie mixture onto the prepared baking pan. Use a metal spatula to smooth the batter evenly over the entire pan, pushing it right to the edges. This batter is thick and sticky, so you’ll need a trick: run your spatula under hot water, dry it off quickly, then spray it with nonstick spray or lightly grease it with oil on a paper towel. Anytime the batter starts to cling to the spatula, repeat the hot water and greasing procedure. You’ll likely need to do this several times to achieve an even layer.
- Bake for 7 minutes, or until the cookie slab is just set but still looks a bit shiny in spots. This ensures a soft, fudgy texture. Cool the baked slab to room temperature. While still in the pan, carefully slice the slab in half lengthwise. Transfer the entire pan (with the two cookie halves) to the freezer until firm, about 30 minutes.
- Once the cookie slabs are firm, place one half of the frozen cookie slab pretty-side down on your work surface. Scoop the ice cream over top. For easier handling and a neater finish, we recommend cutting open the ice cream carton with scissors and then slicing the hard ice cream into even slabs. Position these slabs over the bottom cookie. Use a knife or the same metal spatula to firmly press the ice cream down, creating an even layer that completely covers the bottom cookie. Place the second cookie slab, pretty side up, on top. Transfer the whole assembled sandwich back to the freezer until the ice cream is very solid again, at least 2-3 hours or preferably overnight.
- When the large ice cream sandwich slab is thoroughly frozen, use a sharp knife dipped in hot water to slice it into equal-sized individual ice cream sandwiches. For the best presentation, wipe the knife clean and re-dip in hot water before each cut. Freeze the individual sandwiches in a single layer on a baking sheet until hard. Once firm, you can wrap them individually in plastic wrap or parchment paper (tied with kitchen string for a nice touch) and store them in an airtight container or freezer bag for up to a month.
Nutrition Information
Nutrition information is automatically calculated and should only be used as an approximation. Per serving (1 sandwich):
- Calories: 398 kcal
- Carbohydrates: 52g
- Protein: 7g
- Fat: 21g
- Saturated Fat: 7g
- Polyunsaturated Fat: 3g
- Monounsaturated Fat: 9g
- Trans Fat: 0.04g
- Cholesterol: 51mg
- Sodium: 185mg
- Potassium: 273mg
- Fiber: 4g
- Sugar: 35g
- Vitamin A: 385 IU
- Vitamin C: 0.5mg
- Calcium: 145mg
- Iron: 2mg
Disclaimer: Nutritional values are estimates and may vary based on specific ingredients and preparation methods.
Tried this recipe?
We’d love to hear your thoughts! Leave a comment below and share your experience making these classic homemade ice cream sandwiches.
Share your feedback!