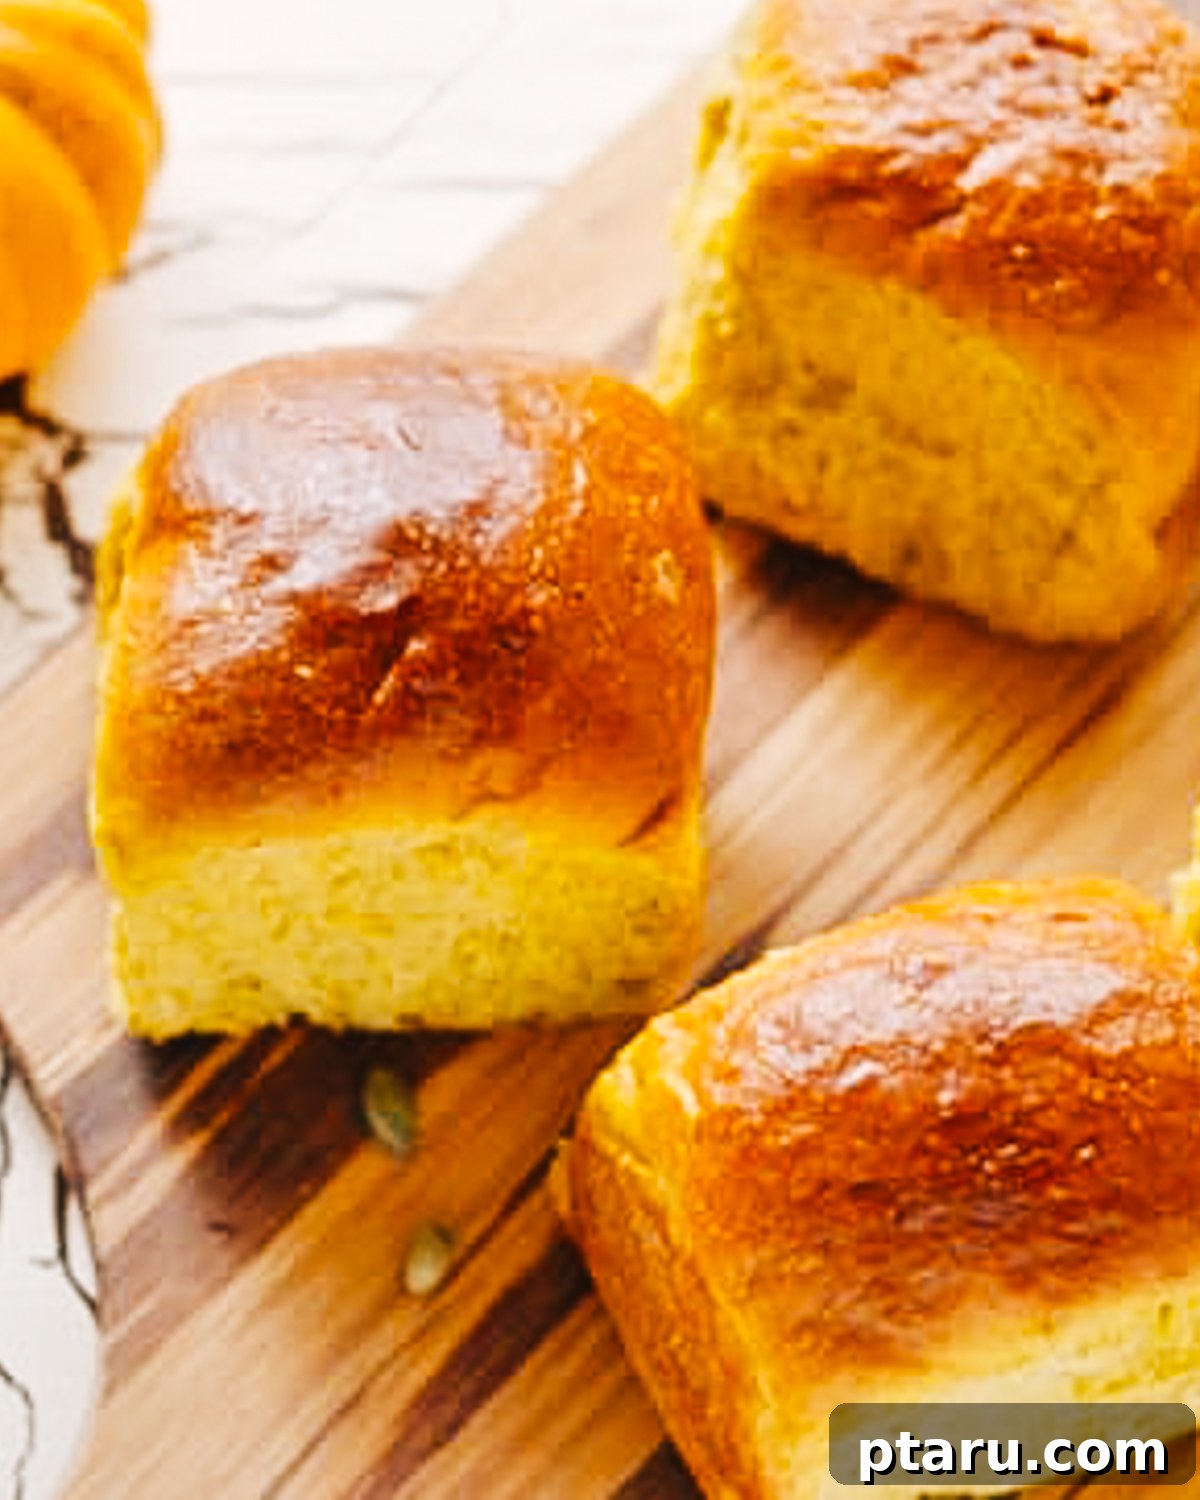
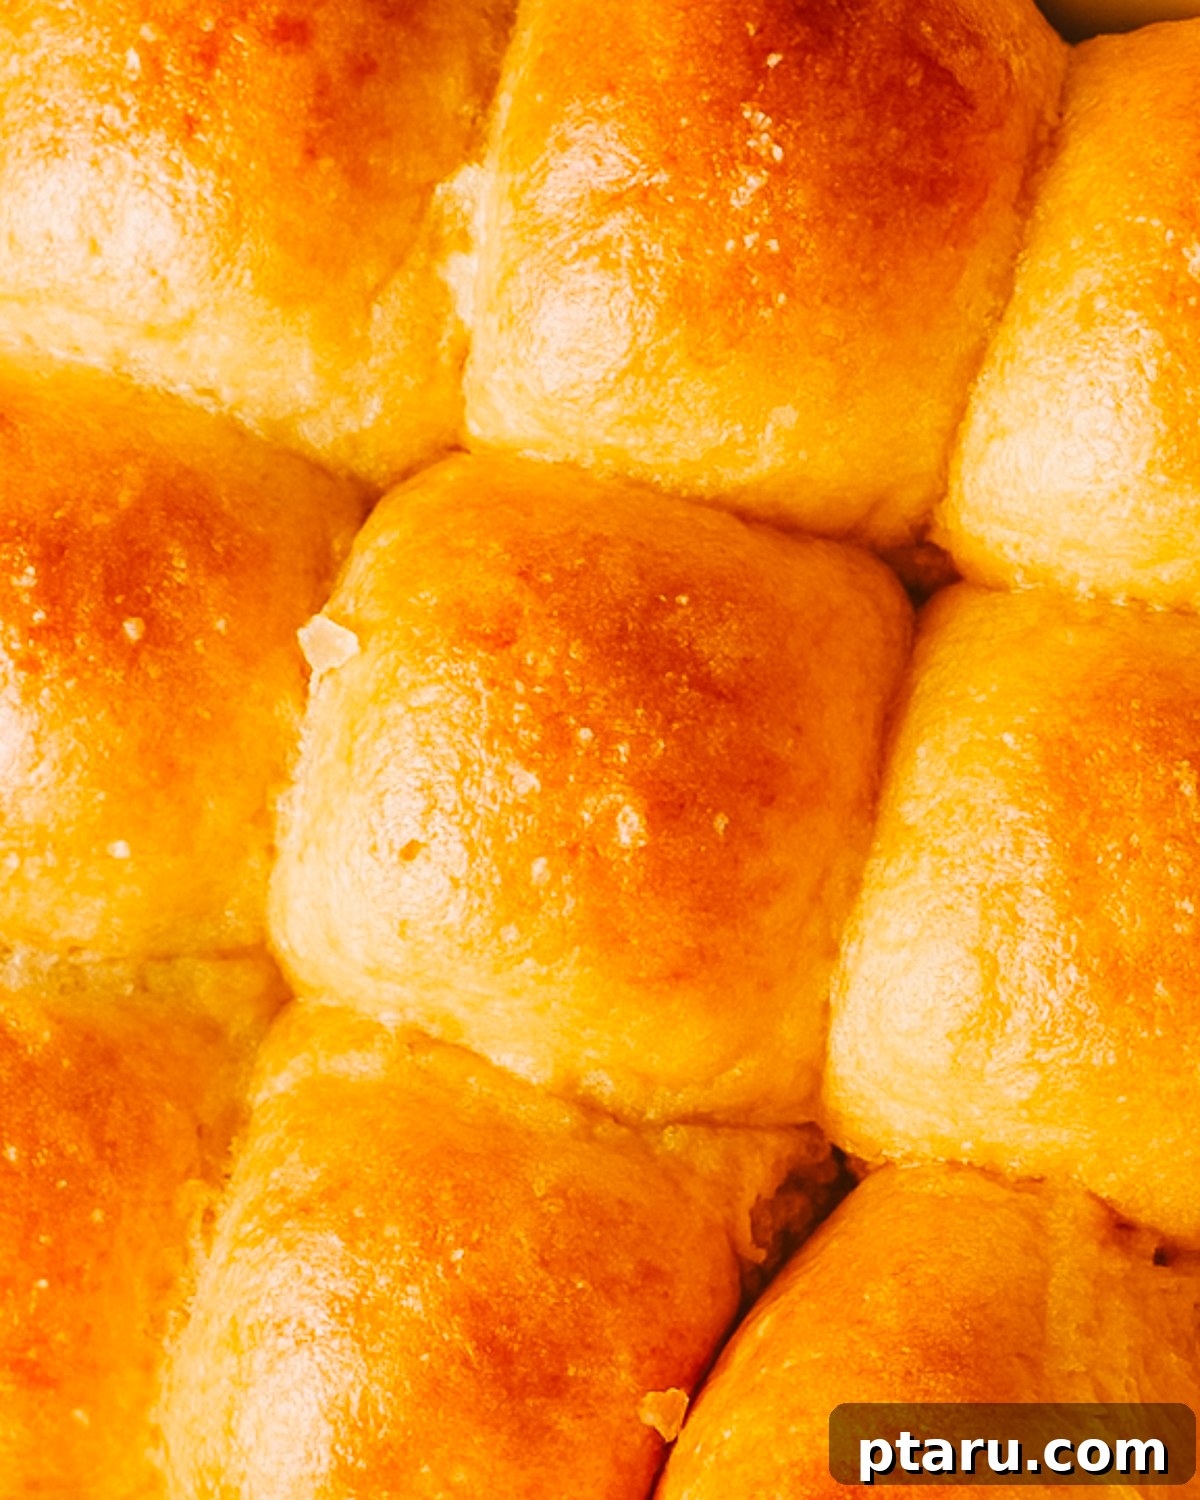
Indulge in the irresistible charm of soft, fluffy Pumpkin Dinner Rolls, bursting with cozy pumpkin flavor and a hint of warm, inviting spices. These delightful rolls are the quintessential addition to any holiday dinner, offering a comforting embrace to your Thanksgiving feast, Halloween spread, or simply elevating any cherished fall meal. Prepare to captivate your taste buds and impress your guests with this perfected recipe for truly unforgettable bread.
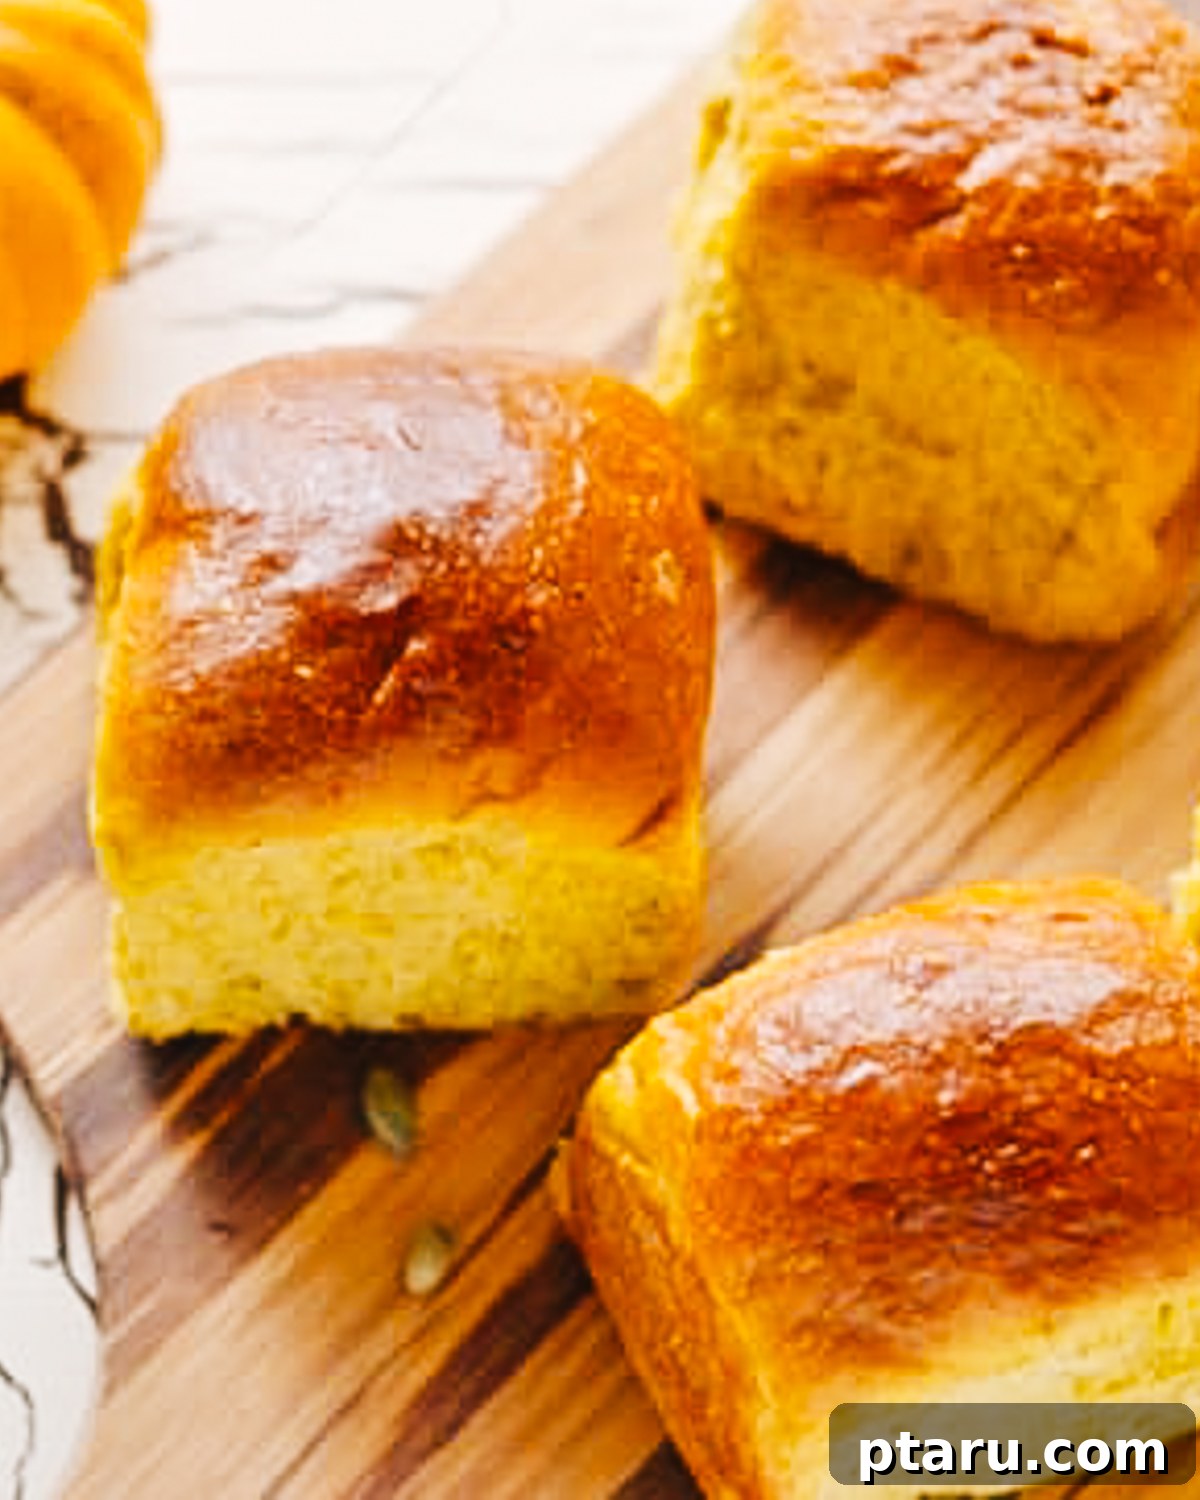
Perfect Pumpkin Dinner Rolls: Your Essential Guide for Fall Baking
There’s a special kind of magic that autumn brings, and for many, it revolves around the warm, comforting flavors of pumpkin and spice. Our recipe for pumpkin dinner rolls captures this essence perfectly, delivering a bread that’s not just a side dish, but a star in its own right. Imagine biting into a roll that’s incredibly soft, with a delicate crumb and a subtle sweetness that beautifully complements the rich earthiness of pumpkin, all brought together by a whisper of cinnamon, nutmeg, and cloves. This isn’t just baking; it’s an experience that evokes warmth, comfort, and the joy of the season. Forget bland store-bought options; these homemade pumpkin rolls are a game-changer.
Why You’ll Adore These Soft & Fluffy Pumpkin Dinner Rolls
- Holiday-Time Perfection: These rolls are truly designed for celebration. Whether it’s the centerpiece of your Thanksgiving bread basket, a delightful addition to your Halloween potluck, or a comforting companion for any autumn gathering, they fit right in. Their festive color and warming spices make them an instant seasonal favorite that guests will rave about.
- Unparalleled Softness and Flavor: Our carefully crafted recipe guarantees an ultra-soft and irresistibly fluffy texture that melts in your mouth. Beyond the texture, the rolls boast an authentic, rich pumpkin flavor, balanced with just the right amount of sweetness and a fragrant blend of classic fall spices, avoiding any overly sweet or artificial taste often found in other pumpkin baked goods.
- Conveniently Prepare in Advance: Hosting a big dinner can be stressful, but these rolls make it easier. You can prepare and shape them the day before and let them slowly rise in the refrigerator, allowing for a more relaxed approach to your meal preparation. This make-ahead flexibility is a true game-changer for busy cooks and holiday entertainers.
- Excellent for Freezing: Don’t let any leftovers go to waste! These pumpkin dinner rolls freeze exceptionally well, both baked and unbaked. This means you can enjoy their deliciousness long after the initial bake, making them perfect for future meals or unexpected guests throughout the fall and winter seasons.
- Beyond the Dinner Table: While sensational with dinner, these rolls truly shine the next day. They make arguably the best turkey sandwiches or pair wonderfully with a hearty turkey soup, transforming your holiday leftovers into something truly spectacular. Consider making a double batch – you won’t regret having extra for delicious post-holiday meals!
Essential Ingredients for Irresistible Pumpkin Dinner Rolls
Crafting the perfect pumpkin dinner roll begins with selecting high-quality ingredients. Each component plays a vital role in achieving that signature fluffy texture, rich comforting flavor, and beautiful golden hue. Here’s a detailed look at what you’ll need and why each element is crucial for baking success:
- Granulated Sugar: A small but mighty ingredient, granulated sugar isn’t just for sweetness. It acts as essential food for your active dry yeast, helping it to bloom and create the airy structure we desire in our rolls. It also contributes a subtle, balanced sweetness, ensuring the rolls aren’t savory but gently flavored. Rest assured, these won’t be as sweet as my pumpkin bread or Moist Pumpkin Muffins, maintaining their identity as a versatile dinner roll.
- Warm Milk: The liquid base for our dough, warm milk serves multiple purposes. It provides necessary moisture for proper dough development, adds richness and tenderness to the final product, and, most importantly, creates the ideal environment for yeast activation. Ensure it’s warm (ideally around 105-115°F or 40-46°C) but never hot, as excessively hot milk will kill the yeast, preventing your dough from rising properly.
- Active Dry Yeast: This is the leavening powerhouse that gives our rolls their light, airy, and wonderfully fluffy texture. When activated with warm milk and sugar, yeast metabolizes the sugars and produces carbon dioxide gas, which causes the dough to rise and develop its characteristic open crumb structure. Using fresh, active yeast is paramount for a successful rise.
- All-Purpose Flour: This versatile flour provides the structural foundation for our rolls. Its balanced protein content allows for good gluten development when kneaded, resulting in rolls that are soft yet sturdy enough to hold their shape without being overly chewy. While many brands work well, using a reliable brand like Rogers all-purpose flour can ensure consistent results.
- Brown Sugar: Beyond simple sweetness, brown sugar brings a deeper, more complex flavor profile thanks to its molasses content. This subtle caramel note beautifully complements the warm spices and earthy pumpkin, adding richness and depth without overwhelming the delicate autumn flavors. It also contributes to the moistness of the rolls.
- Ground Cloves and Nutmeg: These warm, aromatic spices are quintessential fall flavors and are critical for defining the pumpkin roll experience. They add a subtle depth, complexity, and inviting warmth that elevates the natural pumpkin taste, making each bite incredibly cozy and memorable. The combination is a classic for a reason!
- Melted Butter: Butter is crucial for adding unparalleled richness, incredible moisture, and a classic buttery flavor that makes these rolls so appealing. It contributes significantly to the tender crumb, a beautiful golden crust, and overall flavor. Ensure it’s melted and slightly cooled before adding to the dough to avoid cooking the egg or negatively impacting the yeast.
- Olive Oil: A touch of olive oil contributes to the dough’s overall tenderness and flexibility, helping to keep the rolls soft over time. It also adds a slight savory nuance that subtly balances the sweetness from the sugars and pumpkin, creating a well-rounded flavor profile.
- Egg: The egg serves multiple critical functions. It acts as a binder, helping to emulsify ingredients and create a cohesive, manageable dough. It also enriches the dough, contributing to a more tender crumb, a softer texture, and a slightly richer internal color. Additionally, an egg yolk is used for the glaze, which provides that beautiful golden-brown, shiny finish to the baked rolls.
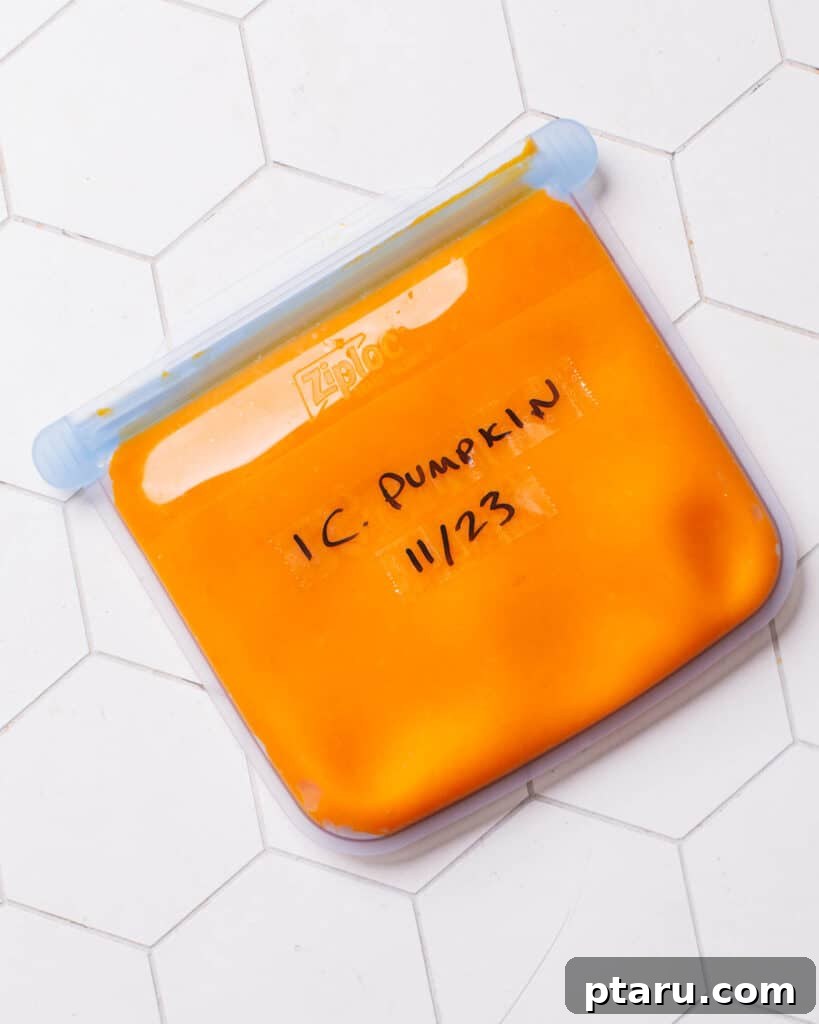
- Pumpkin Puree: The undeniable star ingredient! Using 100% pure pumpkin puree (it’s crucial to avoid pie filling, which is often sweetened and spiced) is vital for authentic flavor. It infuses the rolls with natural sweetness, incredible moisture, and a stunning golden-orange hue. Its moisture content helps keep the rolls from drying out, while its earthy flavor is unmistakably autumn.
Creative Variations and Smart Substitutions for Your Pumpkin Rolls
While the classic pumpkin dinner roll recipe is a masterpiece on its own, don’t hesitate to experiment! These handy swaps and additions can personalize your rolls to perfectly suit your taste, dietary preferences, or the specific meal you’re serving.
- Whole Wheat Wonders for a Heartier Bite: For a delightful boost of fiber and a more robust, rustic texture, consider swapping out half of the all-purpose flour for whole wheat flour. Keep in mind that whole wheat flour produces a slightly denser roll due to its higher fiber content, so they won’t be quite as ultra-soft and fluffy as the original recipe. However, the added nutritional value and earthy flavor are well worth it for many, offering a wholesome twist.
- Sweet Potato Swirl for a Different Flavor Profile: No pumpkin on hand, or simply looking for a different autumnal twist? You can easily make these rolls with pureed Instant Pot sweet potatoes! Sweet potato puree offers a similar moisture and sweetness to pumpkin, but with a slightly different earthy and subtly sweeter note. If you’re a fan of sweet potatoes, you might also enjoy my Sweet Potato Cupcakes for another delightful and comforting treat.
- Maple Glaze for a Sweet Dessert-Like Touch: Transform your dinner rolls into an enchanting dessert-like treat by drizzling them with a simple maple glaze after baking. To make this irresistible glaze, whisk together powdered sugar, a couple of tablespoons of pure maple syrup, and a small amount of milk (start with 1 tablespoon and add more drop by drop) until smooth and pourable. This adds an extra layer of sweetness and a beautiful, glossy shine, perfect for a brunch spread or a unique dessert offering.
- Herb-Infused Savory Rolls: Introduce a sophisticated savory element that pairs wonderfully with rich stews, roasted meats, and gravies by mixing in finely chopped fresh herbs. Rosemary, thyme, and sage are fantastic choices, especially during the fall and winter seasons. About 1-2 tablespoons of fresh herbs, or 1-2 teaspoons of dried herbs, added to the dough during the initial mixing stage will infuse a lovely aromatic quality. These herb-infused rolls are particularly exceptional when served alongside a warm bowl of soup, adding a gourmet touch.
- Amp Up the Spices for an Aromatic Burst: If you’re a fan of bold, warm flavors, elevate the spice profile of your rolls to an even more aromatic level. Consider adding an extra teaspoon or two of a good quality pumpkin pie spice blend, or individually increasing the amounts of ground cinnamon, ginger, or allspice in the dough. This creates an even more intensely flavored pumpkin roll that truly embodies the vibrant spirit of autumn and holiday baking.
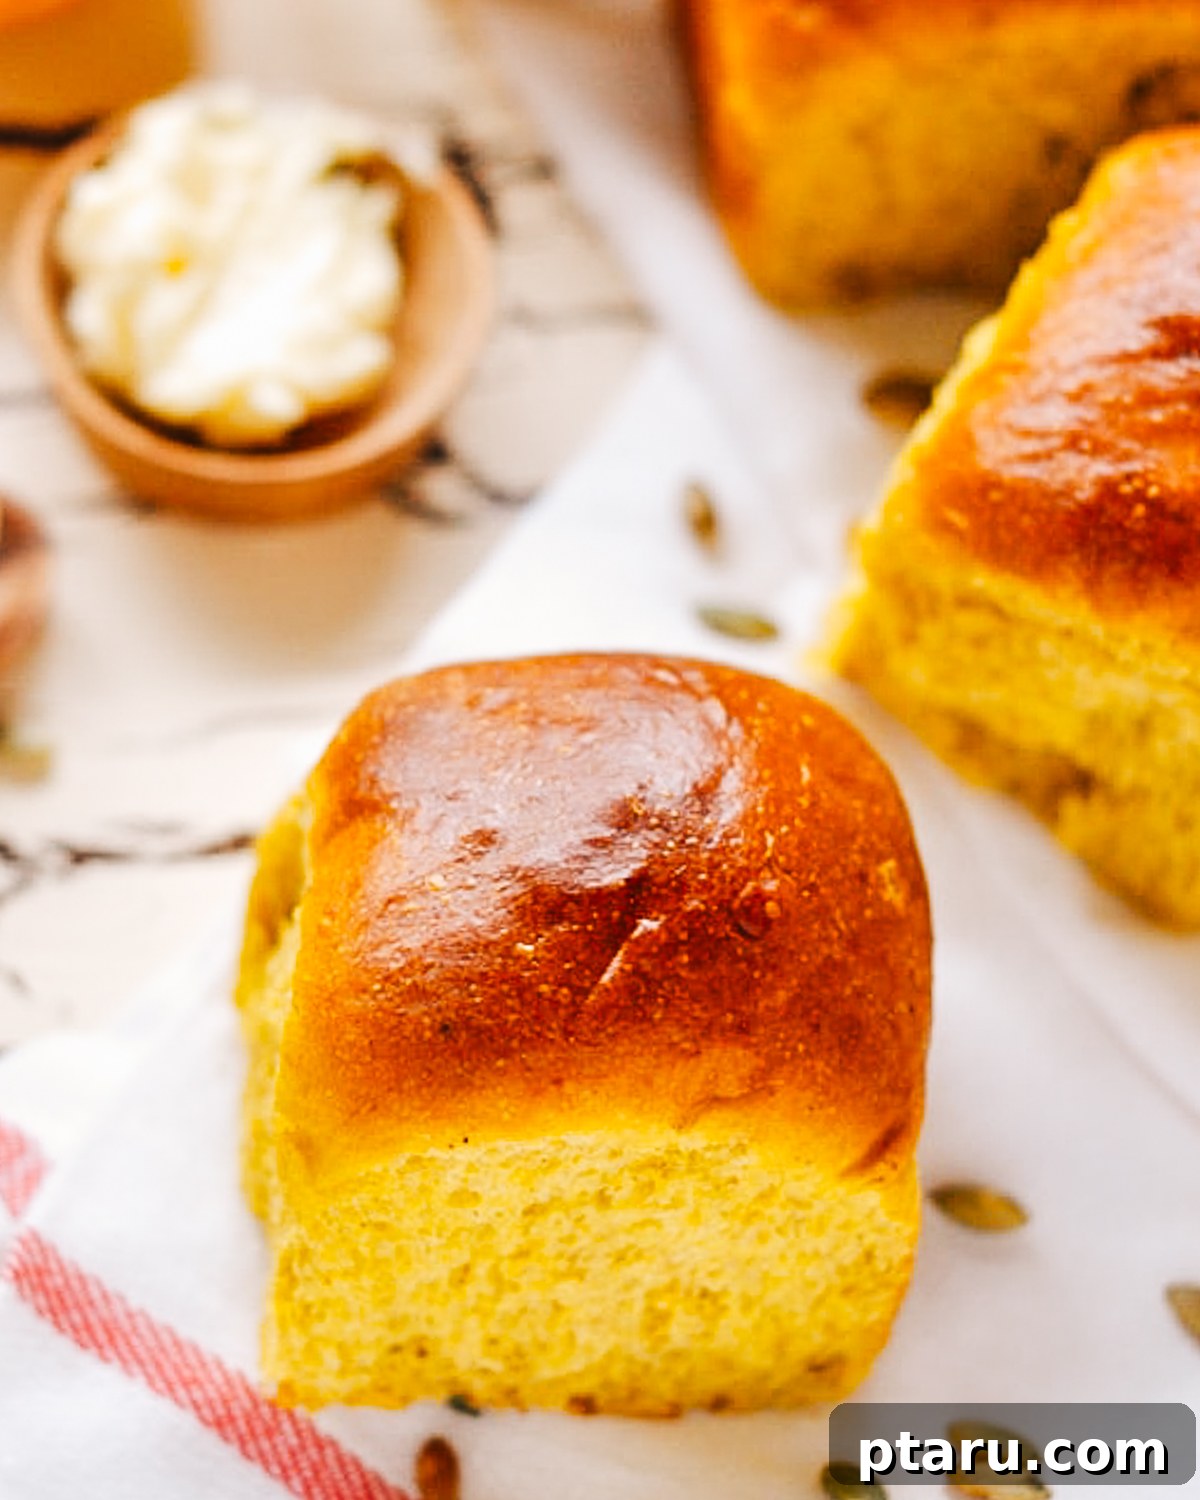
- Seed-Topped for Texture and Crunch: Add a delightful textural contrast and extra visual appeal by sprinkling various seeds on top of the rolls just before baking. Sesame seeds, crunchy sunflower seeds, or even roasted pumpkin seeds (often called pepitas) are excellent choices. Not only do they add a pleasant crunch, but they also bring a subtle nutty flavor that beautifully complements the sweet and earthy pumpkin. A light brush of egg wash will help the seeds adhere securely during baking.
Essential Tools for Effortless Baking Success
You don’t need a professional kitchen or specialized equipment to bake these incredible pumpkin dinner rolls. Just a few basic tools will ensure your baking process is smooth, efficient, and enjoyable, leading to perfectly crafted rolls every time.
- Mixing Bowls: You’ll need at least two: one large bowl for combining dry and wet ingredients and mixing the dough initially, and another lightly greased bowl for the first rise of the dough. If you have a stand mixer, its spacious bowl can double as your primary mixing and kneading vessel, significantly reducing manual effort and speeding up the process.
- Baking Pan or Sheet: A standard 9×13-inch baking pan is ideal for baking a batch of 16 rolls. This size allows them to proof and bake closely together, resulting in soft, pillowy sides. Alternatively, a large baking sheet (or two smaller ones) can be used if you prefer rolls with slightly crispier edges. Always ensure your chosen pan is adequately greased to prevent any sticking.
- Measuring Cups and Spoons: Accuracy is paramount in baking, especially when working with yeast. Good quality measuring cups (for dry and liquid ingredients) and spoons are indispensable for precise ingredient amounts, ensuring consistent and successful results every time.
- Whisk or Fork: Essential for thoroughly combining your dry ingredients, breaking up any clumps, and ensuring an even distribution of spices and sugar. Also used for beating the egg for the egg wash.
- Rubber Spatula or Sturdy Wooden Spoon: Highly useful for initially mixing the dough until it comes together before you transfer it for kneading. It helps scrape down the sides of the bowl and ensures all ingredients are incorporated.
- Clean Kitchen Towel or Plastic Wrap: Absolutely essential for covering the dough during its rising periods. This prevents the surface of the dough from drying out and forming a crust, which can inhibit a proper rise.
- Pastry Brush: This small tool is key for applying the egg wash evenly to the tops of the rolls just before baking. It ensures a beautiful, uniform golden sheen and enhances the visual appeal of your finished product.
- Optional: Stand Mixer with Dough Hook: While not strictly necessary (the recipe can be made by hand), a stand mixer significantly simplifies the kneading process, especially for sticky doughs. It ensures thorough kneading with minimal effort.
- Optional: Kitchen Thermometer: A thermometer is invaluable for accurately checking the temperature of your warm milk for yeast activation (105-115°F is ideal) and for verifying the internal temperature of the baked rolls (190°F indicates doneness).
How to Make Pumpkin Dinner Rolls: A Detailed Step-by-Step Guide
Creating these delightful pumpkin rolls is a rewarding and relatively straightforward process. Just take it one step at a time, paying attention to the details, and you’ll have a batch of perfectly baked, fragrant rolls ready to enjoy with your loved ones.
Step 1: Prepare and Activate the Yeast
Begin by ensuring your yeast is active and ready to work its magic. In a small bowl or a liquid measuring cup, dissolve 1 teaspoon of granulated sugar into ¾ cup of warm milk. The milk should feel comfortably warm to the touch, like a baby’s bath (ideally between 105-115°F or 40-46°C). Sprinkle 2¼ teaspoons of active dry yeast evenly over the surface of the milk. Stir gently once or twice, then let the mixture sit undisturbed for about 10 minutes. You’ll know your yeast is active and healthy when it becomes frothy and bubbly on the surface; this effervescence indicates the yeast is alive and successfully producing carbon dioxide, ready to make your dough rise beautifully.
Step 2: Craft the Pumpkin-Infused Dough
In a large mixing bowl (or the bowl of your stand mixer fitted with a dough hook), combine all your dry ingredients: 7-8 cups of all-purpose flour, ⅓ cup of packed brown sugar, 2½ teaspoons of salt, ½ teaspoon of ground cloves, and 1 teaspoon of ground nutmeg. Whisk these dry ingredients together thoroughly to ensure an even distribution of flavor and leavening. Next, pour in your activated yeast mixture, 2 cups of pure pumpkin puree, ½ cup of melted butter (ensure it’s cooled slightly to avoid cooking the egg or harming the yeast), ¼ cup of olive oil, and 1 lightly beaten egg. Stir with a sturdy wooden spoon or use your stand mixer on low speed until all ingredients are well incorporated and a shaggy, somewhat sticky dough forms. Once combined, transfer the dough to a lightly floured surface and knead for approximately 8-10 minutes. The goal is a smooth, elastic, and slightly tacky dough that springs back when gently pressed. Resist the urge to add too much extra flour during kneading, as this can make the rolls tough.
Step 3: First Rise for Optimal Flavor and Texture Development
Lightly grease a clean large bowl with a little olive oil or neutral cooking spray. Place the kneaded dough into the prepared bowl, turning it once or twice to ensure it’s completely coated in oil. This prevents the dough from sticking to the bowl and from drying out on its surface. Cover the bowl tightly with a clean kitchen towel or plastic wrap. Find a warm, draft-free spot in your kitchen (a slightly warmed oven turned off with the light on, or a sunny windowsill, can provide an ideal environment). Allow the dough to rise until it has visibly doubled in size, which typically takes about 1 hour, though this can vary depending on your room temperature and the vigor of your yeast. This first rise is crucial for developing much of the flavor and establishing the airy texture of your rolls.
Step 4: Shape the Rolls with Care and Precision
Once the dough has completed its first rise, gently punch it down to release the accumulated gases. Turn the dough out onto a lightly floured surface. Divide the dough into 16 equal pieces. A good method is to cut the dough in half, then each half in half, and so on, until you have 16 roughly equal portions. For beautifully shaped rolls, cup each piece of dough in your hand and gently roll it against your countertop, applying light pressure, until a smooth, taut ball forms. The key is to create surface tension. Arrange the shaped dough balls on a greased baking sheet or in a greased 9″x13″x2″ baking pan. If using a pan, they can be placed fairly close together; this encourages them to bake into soft, pull-apart rolls with tender sides.
Step 5: Second Rise for Ultimate Fluffiness
Cover the shaped rolls again with a clean kitchen towel or plastic wrap. Let them rise in a warm, draft-free place for another 45 minutes to 1 hour, or until they have nearly doubled in size once more. This second rise is absolutely crucial for developing an even lighter and fluffier texture in the baked rolls. During this stage, be very gentle with the rolls to avoid deflating them; a light, airy touch is best.
Step 6: Prepare the Golden Egg Wash
While your rolls are undergoing their second rise, preheat your oven to 350°F (175°C). In a small bowl, whisk together 1 egg yolk with 1 tablespoon of water until well combined. This mixture creates an egg wash that, when brushed over the rolls, will give them a gorgeous golden-brown, shiny, and slightly crisp crust during baking. Gently brush this mixture evenly over the tops of each risen roll just before they go into the oven.
Step 7: Bake to Golden Perfection
Carefully transfer the baking pan or sheet of egg-washed rolls to the preheated oven. Bake them in the center of the oven for approximately 18-22 minutes, or until they are beautifully golden brown on top and cooked through. To confirm doneness, an instant-read thermometer inserted into the center of a roll should register 190°F (88°C). If you don’t have a thermometer, you can tap the bottom of a baked roll; it should sound hollow. Once baked, remove them promptly from the oven and let them cool slightly on a wire rack for a few minutes before serving warm with your favorite accompaniments. Enjoy the fruits of your labor!
Avoid These 5 Common Mistakes for Flawless Pumpkin Dinner Rolls
As a food scientist, I’ve observed that even experienced bakers can encounter hiccups, especially when working with yeast. Understanding common pitfalls can save you time, effort, and ensure your pumpkin rolls are nothing short of perfect. Here are some classic issues when making dinner rolls and how to expertly avoid them:
-
Using Milk That’s Too Hot for the Yeast: This is perhaps the most frequent pitfall in yeast baking. Yeast is a living organism, and just like us, it’s highly sensitive to extreme temperatures. If your milk is excessively hot (above 120°F or 49°C), it will kill the yeast, rendering it inactive. An inactive yeast means your dough won’t rise properly, resulting in dense, heavy, and brick-like rolls. Solution: Always aim for milk that is warm to the touch, resembling a baby’s bathwater (ideally 105-115°F or 40-46°C). Using a reliable kitchen thermometer for accuracy is the best way to guarantee perfect yeast activation and a magnificent rise.
-
Not Allowing the Dough to Rise Long Enough: Patience truly is a virtue in bread making! Rushing or significantly shortening the prescribed rising times will prevent the gluten from fully relaxing and the yeast from adequately producing carbon dioxide gas. The inevitable consequence? Dense, heavy, and less flavorful rolls with a tight crumb. Solution: Always allow the dough to rise until it visibly doubles in size, which can take the full suggested time or even longer, depending on the ambient room temperature and humidity. A warm, draft-free spot is crucial for optimal rising. Don’t be afraid to give it an extra 15-30 minutes if it hasn’t quite doubled yet.
-
Overloading on Flour: It’s a common temptation to keep adding flour if your dough feels sticky, but too much flour is the arch-nemesis of tender rolls. Excess flour leads to a stiff, dry dough that bakes into tough, crumbly rolls with a dry mouthfeel. Solution: Stick closely to the recipe’s specified flour range. The dough should feel slightly tacky to the touch, not dry or stiff. When kneading, use minimal additional flour, dusting your surface lightly and incorporating it gradually only as needed to prevent excessive sticking, rather than trying to make the dough completely non-sticky.
-
Skipping the Egg Wash: The egg wash might seem like an optional cosmetic step, but it plays a significant role in both the final appearance and even subtle flavor of your rolls. Forgetting to brush the rolls with an egg wash before baking will result in a dull, pale, and visually unappetizing crust. Solution: Don’t skip this simple step! A basic whisked egg yolk with a tablespoon of water creates a beautiful, glossy sheen and promotes a rich, golden-brown crust, significantly enhancing both the visual appeal and adding a slight richness to the exterior texture of your rolls.
-
Overbaking the Rolls: Just a few minutes too long in the oven can swiftly transform soft, fluffy rolls into dry, crumbly disappointments. Overbaking removes too much internal moisture, sacrificing that desirable tender and moist interior. Solution: Keep a very close eye on your rolls during the final baking stage. They are typically done when they achieve a lovely golden-brown color on top and an instant-read thermometer inserted into the center of a roll registers 190ºF (88°C). If you don’t have a thermometer, you can tap the bottom of a roll; it should sound hollow. Remove them promptly from the oven once these indicators are met to preserve their internal moisture and ensure maximum tenderness.
Make-Ahead Tips for Stress-Free Pumpkin Roll Baking
Preparing these delicious pumpkin dinner rolls ahead of time is a fantastic way to ease your holiday or party preparations, allowing you more time to enjoy your guests and less time in the kitchen. Flexibility is key when entertaining!
- Overnight Refrigeration (Shaped Dough): After you’ve completed the shaping of your rolls (Step 4 in the instructions), arrange them in your greased baking pan or on a baking sheet. Instead of allowing them to rise for the second time at room temperature, cover them tightly with plastic wrap, ensuring no air can dry out the dough. Place the covered rolls in the refrigerator overnight, or for up to 24 hours. The cold temperature will significantly slow down the yeast activity, allowing for a slow, flavorful proof.
- Baking After Refrigeration: When you’re ready to bake, remove the rolls from the refrigerator. Keep them covered and allow them to come to room temperature and complete their second rise. This “proof” can take approximately 45 minutes to 1.5 hours, depending on how cold they were and your room’s warmth. Once they have visibly doubled in size and feel light, proceed with the egg wash and baking instructions as usual. This method ensures you have freshly baked, warm rolls without the last-minute rush, perfect for holiday mornings or dinner parties.
- Freezing Unbaked Rolls for Long-Term Storage: For even longer make-ahead options, you can freeze the shaped, unbaked rolls. After shaping each roll, place them on a baking sheet lined with parchment paper, ensuring they are not touching. Freeze until completely solid (about 2-3 hours). Once frozen, transfer the solid rolls to a freezer-safe bag or airtight container, and store for up to 2-3 weeks. When ready to bake, transfer the frozen rolls directly to a greased baking sheet or pan, cover, and let them thaw and rise in a warm place until doubled (this will take longer than a typical second rise, around 3-5 hours). Then, proceed with the egg wash and baking.
Storage and Reheating for Lasting Freshness
To ensure your delicious pumpkin dinner rolls remain soft, moist, and flavorful for as long as possible, proper storage and reheating techniques are essential. Here’s how to keep them fresh, whether for a few days or for enjoying weeks later.
- Room Temperature Storage for Short Term: Once your baked rolls have cooled completely to room temperature, transfer them to an airtight container or a large, resealable freezer-safe bag. They will stay wonderfully fresh and soft at room temperature for 2-3 days. It’s important to avoid refrigerating baked rolls, as the cold air can accelerate staling, causing them to dry out and become firm more quickly than at room temperature.
- Freezing Baked Rolls for Long Term: For longer storage, freezing is your best option. After the rolls have completely cooled, place them in a single layer in a freezer-safe bag or an airtight container, removing as much air as possible. They can be frozen for up to 2 months without significant loss of quality, flavor, or texture. Be sure to label and date your container for easy tracking.
- Effortless Reheating Instructions: To reheat baked rolls, whether they are at room temperature or straight from the freezer, wrap them loosely in aluminum foil. Place the foil-wrapped rolls into a preheated oven at 325ºF (160°C). If reheating from room temperature, they will typically be warm, soft, and ready to serve in about 10 minutes. If reheating from frozen, allow approximately 30 minutes, or until they are heated through and soft to the touch. The aluminum foil helps to trap moisture around the rolls, preventing them from drying out in the oven and restoring their tender texture. For a quick individual reheat, a microwave can be used for 15-30 seconds, but be careful not to overcook, which can make them rubbery.
Delicious Ways to Serve Your Pumpkin Dinner Rolls
These versatile pumpkin dinner rolls are fantastic on their own, offering a delightful treat with their subtle sweetness and warm spices. However, they truly shine when paired with other delicious dishes, elevating any meal from ordinary to extraordinary. Here are some of our favorite ways to enjoy them:
- The Ultimate Leftover Turkey Sandwich: This is a must-try tradition! Split a warm pumpkin roll, slather it generously with creamy mayonnaise and a spread of tangy mustard. Then, pile it high with savory leftover cold roast turkey. The combination of the soft, slightly sweet roll with the rich, savory turkey is absolutely divine – a true post-holiday delight!
- Classic Butter Pairings: For a simple yet exquisitely comforting experience, serve them warm with a knob of good quality salted or unsalted butter. For an extra festive and flavorful touch, whip up some homemade honey butter, or mix a pinch of pumpkin pie spice into softened butter for an aromatic spread.
- Perfect Soup Companions: These tender rolls are the ideal accompaniment to a comforting bowl of soup on a chilly day. Their soft texture is wonderful for soaking up rich broths and hearty ingredients. Try them alongside my hearty Ground Turkey Soup, the rustic and satisfying Old Fashioned Vegetable Beef Soup recipe, or a warming and flavorful Lentil Soup with Ham.
- Hearty Main Course Enhancements: Elevate your main courses with these flavorful and substantial rolls. They are exceptionally delicious when served with rich, slow-cooked meats such as Pork Loin in Crockpot, or my tender and succulent Pork Shoulder Crockpot recipe, creating a truly cozy and memorable fall dinner spread.
- Versatile with Roasted Meats: Don’t limit them to just pork! These rolls are also a fantastic and complementary addition to various beef dishes. Pair them with a melt-in-your-mouth tender Eye of Round Roast, a comforting Dutch Oven Pot Roast, or crispy-edged Air Fryer Roast Beef. Their subtle sweetness provides a wonderful contrast to savory meats.
- Mini Sandwich Sliders or Appetizers: Their perfect size and delightful flavor make them an excellent base for meatloaf sandwich sliders or any small savory filling. They’re ideal for appetizers, a casual buffet, or even a sophisticated party spread.
Frequently Asked Questions About Pumpkin Dinner Rolls
Here are some of the most common questions about making pumpkin dinner rolls, ensuring you have all the information and confidence you need for a successful and delicious bake:
- Can I use fresh or homemade pumpkin puree instead of canned puree?
- Absolutely! Using fresh pumpkin puree will often yield an even more vibrant, natural flavor. If you’re opting for homemade, ensure you cook and thoroughly puree the pumpkin until it’s very smooth and consistent. It’s also crucial to drain any excess water from homemade puree (by letting it sit in a fine-mesh sieve for 30 minutes or gently pressing it with paper towels) to avoid adding too much moisture to your dough, which could make it too sticky and potentially result in a soggy final product.
- What if I don’t have ground cloves or nutmeg? Are there good substitutes?
- While ground cloves and nutmeg contribute beautifully to the classic fall flavor profile of these rolls, you can certainly substitute them if you don’t have them on hand. Other warm spices like ground cinnamon, allspice, or ginger are excellent alternatives, either used individually or in combination. You could also opt for a pre-made pumpkin pie spice blend to simplify things and still achieve that beloved autumnal taste.
- How do I know when the dough has risen enough during the proofing stages?
- A reliable indicator that your dough has risen adequately is when it has roughly doubled in size. To perform a simple “poke test,” gently press two fingers (or one, lightly floured) about ½ inch deep into the dough. If the indentation remains and doesn’t spring back quickly, the dough has risen sufficiently and is ready for the next step. If it springs back immediately, it needs a bit more time to proof and relax.
- Can I make these pumpkin dinner rolls gluten-free?
- Yes, it is possible to adapt this recipe for a gluten-free diet, but it requires specific considerations. You’ll need to use a high-quality gluten-free all-purpose flour blend that contains xanthan gum or a similar binding agent to help with structure, as gluten-free flours lack the natural elasticity of wheat flour. Be aware that gluten-free dough tends to be a bit more fragile and possibly stickier, so handle it with extra care during kneading and shaping. You may also need slightly less liquid, so add the wet ingredients gradually until the desired dough consistency is achieved.
- Why are my pumpkin rolls dense and not fluffy after baking?
- Several factors can contribute to dense rolls. The most common reasons include inactive yeast (due to using liquid that’s too hot or too cold, or using expired yeast), not allowing the dough to rise for a sufficient amount of time during both proofing stages, or adding too much flour during the initial mixing or subsequent kneading stages. Ensure your yeast is fresh, your rising environment is consistently warm and draft-free, and you’re not over-flouring the dough. A dense roll ultimately means the yeast couldn’t produce enough gas to create that airy internal structure.
- Can I freeze the dough before baking for later use?
- Yes, you absolutely can freeze the dough before baking for added convenience. After you have shaped the individual rolls (following Step 4 in the instructions), arrange them on a baking sheet and freeze until they are completely solid. Once frozen, transfer the solid rolls to a freezer-safe bag or an airtight container, ensuring they are well-sealed. When you’re ready to bake, place the frozen rolls directly on a greased baking sheet or pan, cover them, and let them thaw and rise in a warm place until doubled in size. This thawing and rising process will take considerably longer than a typical second rise (around 3-5 hours). Once fully risen, proceed with the egg wash and baking as usual.
Other Irresistible Pumpkin Recipes You’ll Love This Season
Once you’ve mastered these incredible pumpkin dinner rolls, you’ll undoubtedly be ready to dive deeper into the wonderful world of pumpkin baking and cooking. The versatility of pumpkin means there’s a delicious recipe for every craving. Here are some of my other favorite recipes to make when the leaves begin to change and the air turns crisp, perfect for celebrating the flavors of autumn:
- Super Easy Pumpkin Pie: No fall feast, especially Thanksgiving, is truly complete without a classic, creamy pumpkin pie. This recipe makes it incredibly simple to create a perfectly spiced, smooth, and utterly delicious pie that will be the undisputed highlight of your dessert table.
- Moist Pumpkin Zucchini Muffins: This is a brilliant and surprisingly delicious way to sneak in some vegetables while enjoying a delectable treat! These muffins stay incredibly moist and flavorful for days, making them perfect for a wholesome breakfast, a satisfying snack, or a welcome addition to lunchboxes.
- Soft Spiced Pumpkin Cookies (No Butter!): These delectable cookies are a true revelation in fall baking. Incredibly soft, perfectly spiced with warm autumn flavors, and surprisingly made without butter, they are seriously the best fall treat for sharing with friends and family (or, let’s be honest, keeping all to yourself!).
- Cozy Pumpkin, Ginger and Rice Soup: Warm up from the inside out with this comforting and aromatic soup. It’s a fantastic, elegant starter for a fall dinner party or a light and incredibly satisfying lunch, expertly blending the natural sweetness of pumpkin with the invigorating zing of fresh ginger and the heartiness of rice.
- Creamy Pumpkin Pasta Sauce with Crispy Sage: Transform your favorite pasta into a gourmet fall meal with this rich, velvety, and utterly irresistible pumpkin pasta sauce. The addition of crispy fried sage leaves adds an elegant touch and a burst of herbaceous flavor that perfectly complements the creamy pumpkin.
Pumpkin Dinner Rolls Recipe Card
Ingredients
- 1 tsp granulated sugar
- ¾ cup warm milk (105-115°F / 40-46°C)
- 2 ¼ tsp active dry yeast
- 7 – 8 cups all-purpose flour
- ⅓ cup packed brown sugar
- 2 ½ tsp salt
- ½ tsp ground cloves
- 1 tsp ground nutmeg
- ½ cup melted butter, slightly cooled
- ¼ cup olive oil
- 1 large egg, lightly beaten
- 2 cups pumpkin puree (100% pure, not pie filling)
- 1 large egg yolk + 1 tbsp water (for egg wash)
Instructions
Activate Yeast
- Dissolve 1 tsp granulated sugar in the warm milk. Sprinkle active dry yeast over top and let stand for 10 minutes, until frothy.
Make Dough
- In a large bowl, stir together the all-purpose flour, brown sugar, salt, ground cloves, and ground nutmeg. Add the frothy yeast mixture, pumpkin puree, melted butter, olive oil, and lightly beaten egg. Stir with a sturdy spoon or use a stand mixer with a dough hook until all ingredients are well combined and a shaggy dough forms.
- Transfer the dough to a lightly floured surface and knead until it is smooth and elastic, approximately 8-10 minutes. Place the kneaded dough in a lightly oiled bowl, turning it once to coat completely. Cover the bowl with a clean kitchen towel or plastic wrap and let it rise in a warm, draft-free place until it has doubled in size, about 1 hour.
Shape Rolls
- Gently punch down the risen dough to release the air. Turn it out onto a lightly floured surface. Divide the dough into 16 equal pieces and roll each piece into a smooth ball. Arrange the shaped dough balls in a greased 9×13-inch baking pan or on a greased baking sheet. Cover the rolls again with a clean towel or plastic wrap and let them rise in a warm place until doubled in size, about 45–60 minutes.
Bake
- While the rolls are rising for the second time, preheat your oven to 350ºF (175°C). In a small bowl, whisk the egg yolk with 1 tablespoon of water to create an egg wash. Gently brush this mixture over the tops of the risen rolls.
- Bake in the preheated oven for 18–22 minutes, or until the rolls are beautifully golden brown on top and an instant-read thermometer inserted into the center of a roll registers 190ºF (88°C).
- Remove from oven and let cool slightly on a wire rack before serving warm.
Notes
I often like to top the rolls with a sprinkle of flaky sea salt as soon as they come out of the oven for an extra touch of flavor and a slight textural contrast.
No instant-read thermometer? Rolls are typically done when they are deeply golden brown on top and sound hollow when gently tapped on the bottom.
Store cooled, baked rolls in an airtight container at room temperature for up to 2-3 days. For best results, do not refrigerate baked rolls as this can dry them out prematurely.
To reheat baked rolls, wrap them in aluminum foil and place in a 325ºF (160°C) oven for about 10 minutes (if from room temperature) or 30 minutes (if frozen). This helps restore their warmth and tenderness without drying them out.
Nutrition Information (per serving)
- Calories: 130 kcal
- Carbohydrates: 9 g
- Protein: 2 g
- Fat: 10 g
- Saturated Fat: 5 g
- Polyunsaturated Fat: 1 g
- Monounsaturated Fat: 4 g
- Trans Fat: 0.2 g
- Cholesterol: 39 mg
- Sodium: 422 mg
- Potassium: 100 mg
- Fiber: 1 g
- Sugar: 6 g
- Vitamin A: 5065 IU
- Vitamin C: 1 mg
- Calcium: 32 mg
- Iron: 1 mg
Nutrition information is automatically calculated and should only be used as an approximation. Values can vary based on specific ingredients, portion sizes, and preparation methods.