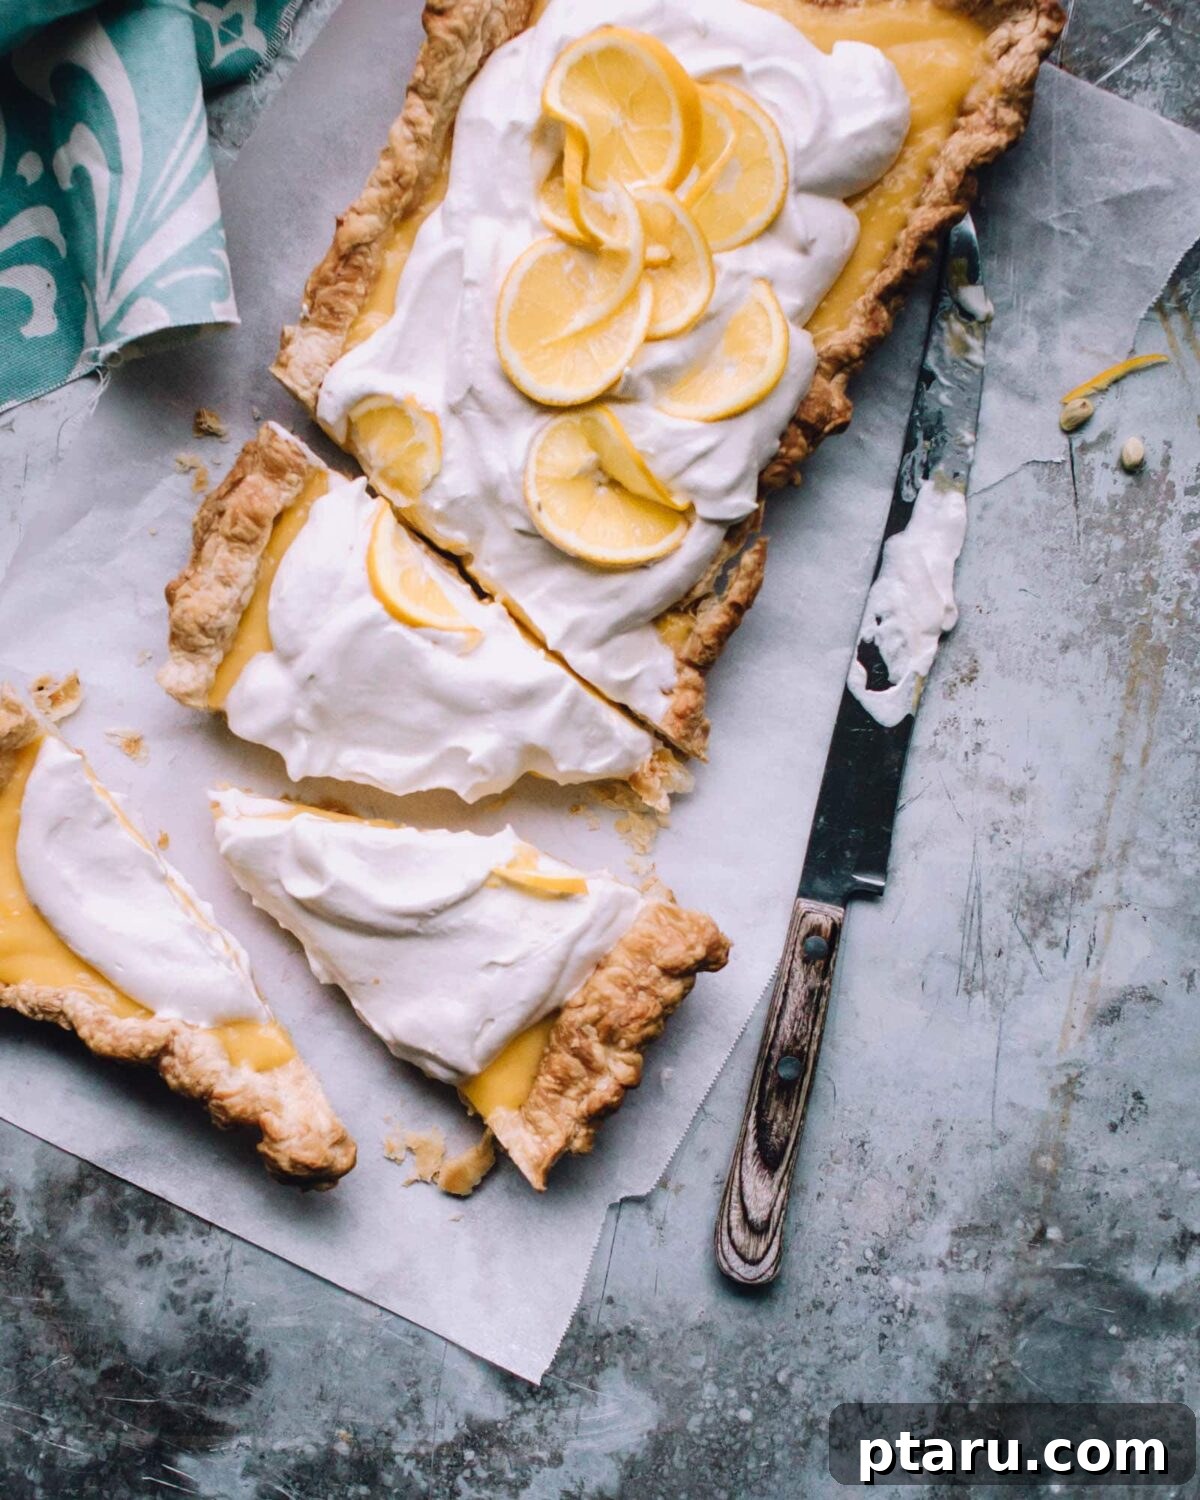
Indulge in a dessert that’s both effortlessly elegant and incredibly delicious with this **easy lemon tart recipe**. Imagine a perfectly golden, flaky crust cradling a vibrant, silky-smooth lemon filling – a delightful balance of sweet and tangy that invigorates the senses. What makes this recipe truly special is its incredible simplicity; it can be whipped up in no time, transforming humble frozen puff pastry and a few fresh ingredients into a show-stopping creation. Whether you’re hosting a dinner party, preparing a brunch, or simply craving a bright, refreshing treat, this lemon tart is your answer to a fuss-free, yet utterly impressive, dessert experience.
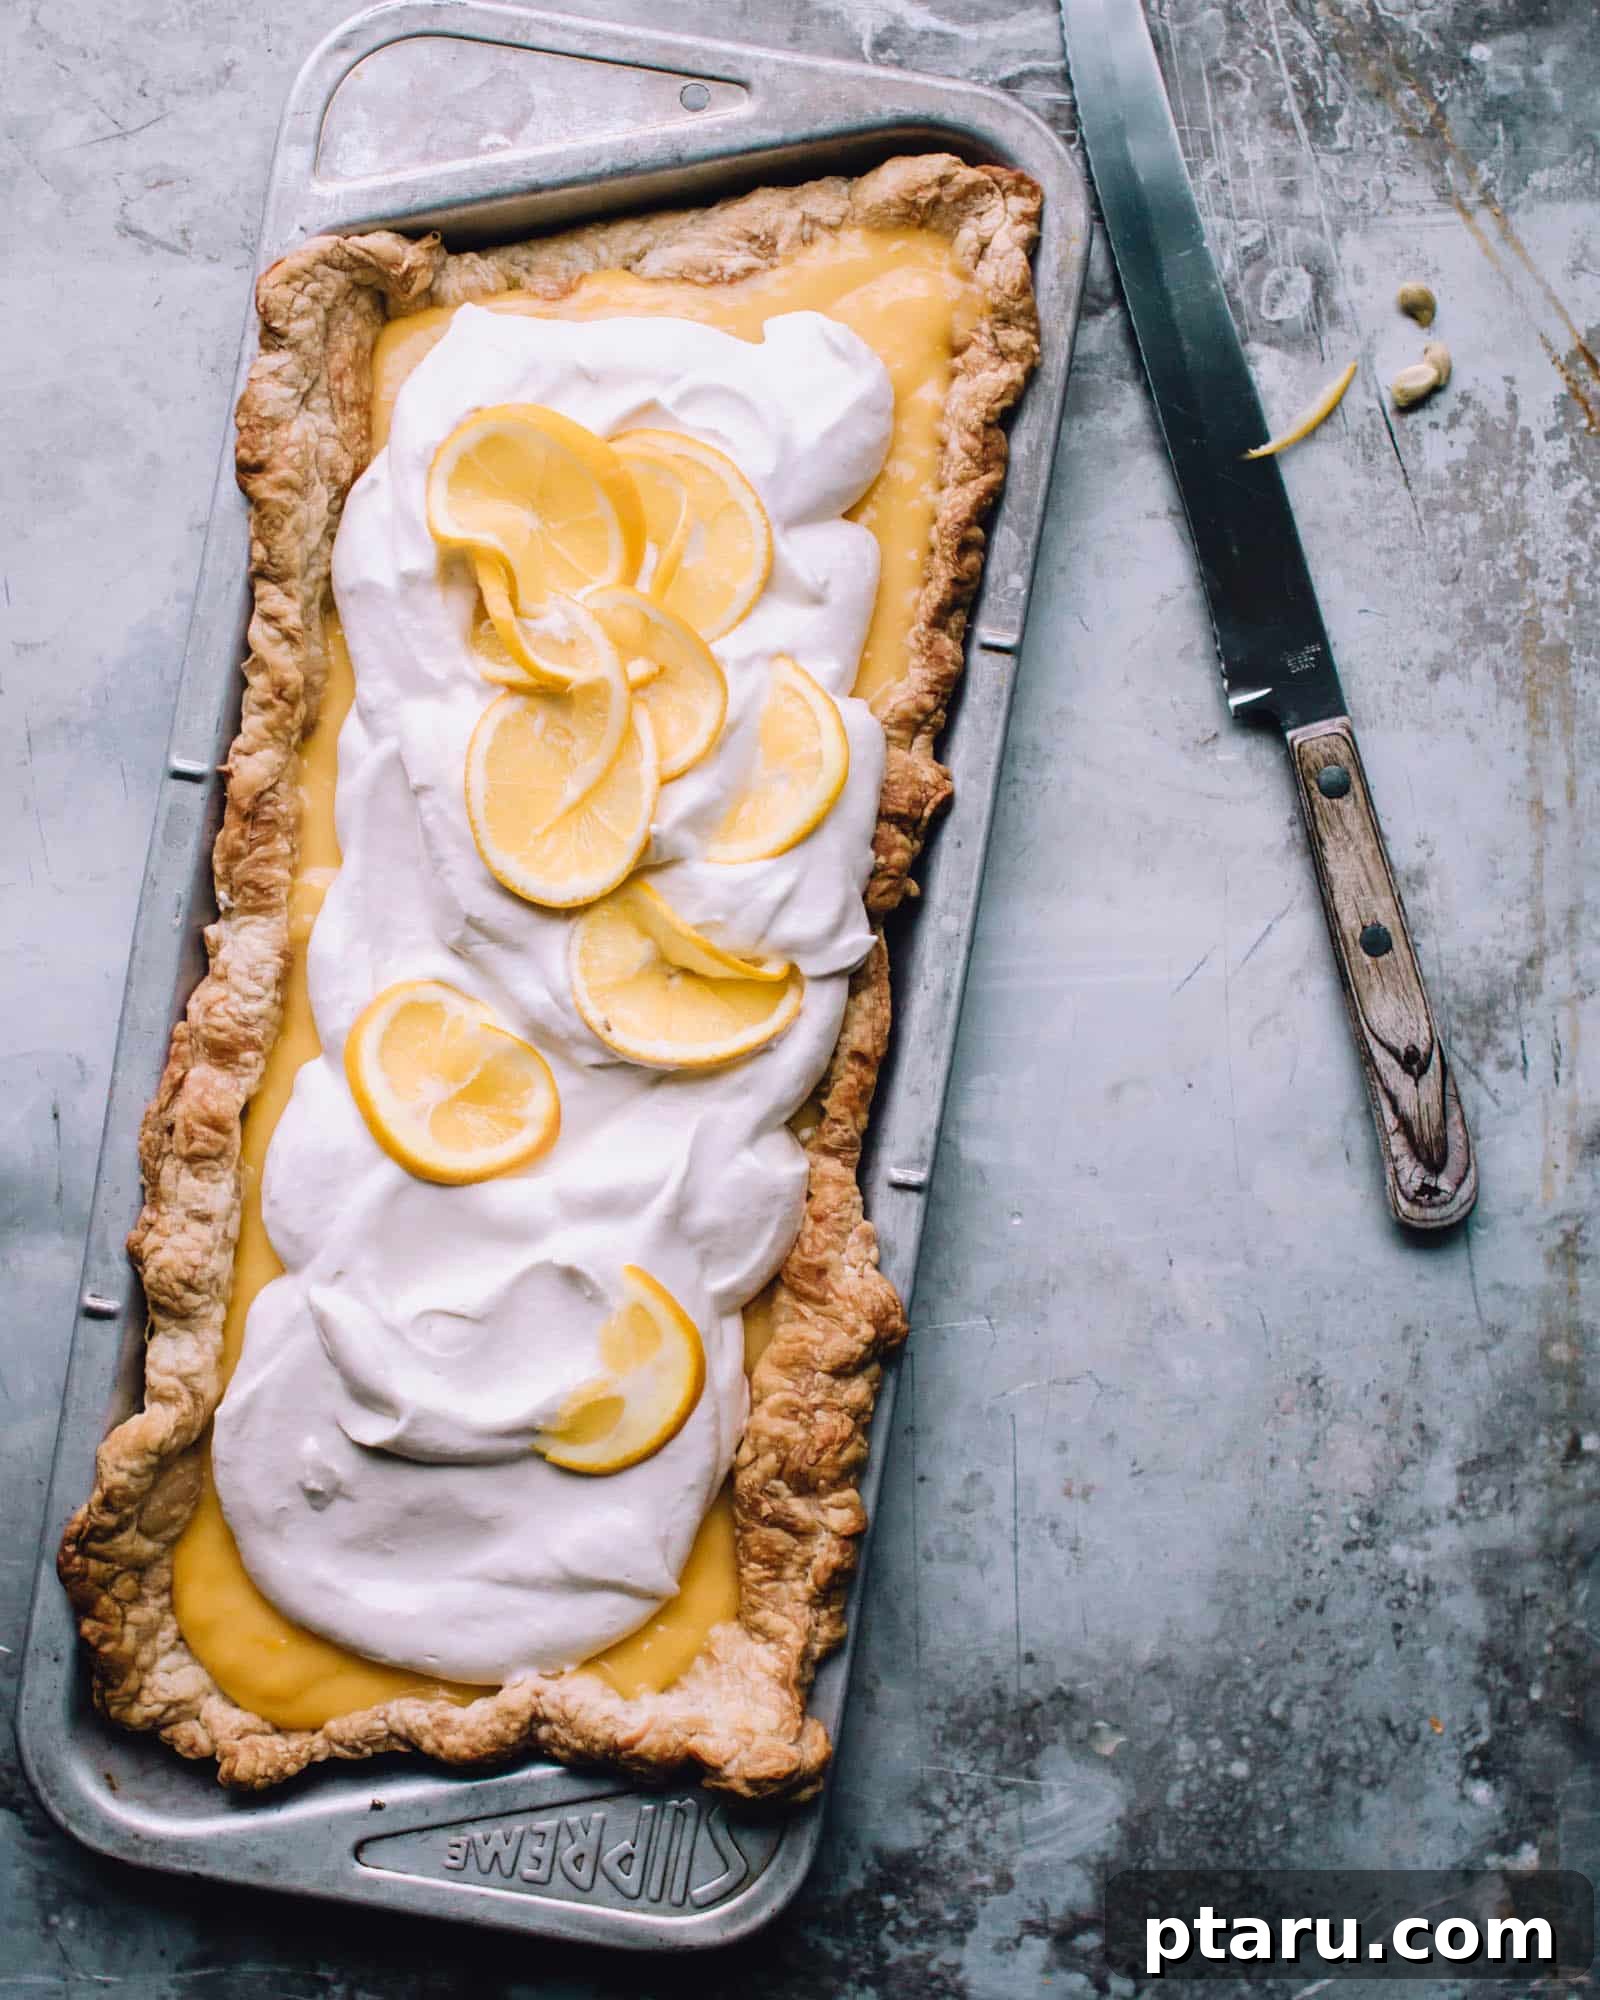
Why This Easy Lemon Tart Will Become Your Go-To Dessert
This isn’t just another lemon tart recipe; it’s a culinary revelation designed for both novice bakers and seasoned enthusiasts. Here’s why you’ll fall head over heels for this delightful dessert:
- Effortless Elegance: Forget complicated homemade tart crusts. This **easy lemon tart** leverages the convenience of frozen puff pastry, delivering a perfectly flaky and buttery base with minimal effort. It looks sophisticated, but the process is surprisingly simple, making it perfect for last-minute entertaining or a weeknight treat.
- A Symphony of Flavors and Textures: Prepare for a taste sensation! The tart’s filling boasts an exquisitely light, creamy texture and a bright, fresh lemon flavor that dances on your palate. It’s perfectly balanced between zesty tartness and subtle sweetness, creating an irresistible dessert that’s wonderfully refreshing.
- Incredibly Versatile: While homemade lemon curd elevates this tart to new heights, don’t hesitate to use quality store-bought lemon curd if time is of the essence – it will still be fantastic! This recipe is also incredibly adaptable. Consider pairing it with a light, pillowy meringue for a classic lemon meringue pie vibe, or a generous dollop of freshly whipped cream. For a seasonal twist, imagine substituting the lemon curd with rhubarb curd when those first ruby stalks appear – the vibrant pink hue would be absolutely stunning!
- A Universal Crowd-Pleaser: Lemon desserts consistently rank among the most beloved treats, and this tart is no exception. Its vibrant flavor and charmingly rustic appearance make it a guaranteed hit at dinner parties, brunches, potlucks, or simply as a comforting indulgence. Everyone loves the harmonious blend of fresh citrus and sweet creaminess encased in a crispy, golden shell. (If you adore lemon desserts, you absolutely must try my frozen lemon mousse bars – they are truly divine!).
- Beyond the Basic Lemon: While this recipe champions the classic lemon, the core technique allows for experimentation. Explore other citrus options like lime or orange, or even infused curds with a hint of lavender or ginger for a unique twist. The possibilities are endless!
Essential Ingredients for Your Perfect Lemon Tart
Creating this magnificent lemon tart requires only a handful of readily available ingredients. Each component plays a crucial role in achieving that signature bright flavor and silky texture.
- Frozen Puff Pastry Dough: This is your secret weapon for an easy and impressive crust. It provides the ideal flaky, buttery structure for the tart, saving you the time and effort of making a homemade shortbread or traditional tart crust from scratch. Just ensure it’s properly thawed before use for the best results. (Though, if you’re ever inclined, feel free to explore my easy No-Roll Pie Crust recipe for future endeavors.)
- Fresh Lemon Juice: The heart of your lemon tart. Always opt for freshly squeezed lemon juice – its bright, natural acidity is paramount for balancing the sweetness and delivering that characteristic zesty punch. Avoid bottled juices, as they often lack the vibrant flavor.
- Finely Grated Lemon Zest: Don’t skip this! Lemon zest is where most of the lemon’s essential oils and intense aromatic flavor reside. Finely grating it ensures an even distribution of citrus essence throughout the creamy filling, adding a depth that juice alone cannot provide.
- Granulated Sugar: Provides the necessary sweetness to balance the tartness of the lemon. It contributes to the smooth texture of the curd and helps achieve that delightful sweet-tart equilibrium in every bite.
- Coarse Salt: A small but mighty ingredient. A pinch of coarse salt enhances all the other flavors, particularly cutting through the sweetness of the sugar and brightening the lemon, making the tart taste more complex and well-rounded.
- Large Eggs: The binding and thickening agent for your luscious lemon filling. We love that this recipe simplifies things by using whole eggs, eliminating the need to separate yolks and whites, while still yielding a rich, firm, and creamy curd.
- Cold Unsalted Butter: Incorporating cold, cubed unsalted butter at the end of the cooking process is key. It melts into the hot curd, contributing a luxurious richness, creamy mouthfeel, and a beautiful sheen that elevates the entire dessert.
- Whipped Cream (for Serving): A classic and delightful accompaniment. Light, airy whipped cream provides a lovely contrast in both texture and flavor, adding a touch of indulgence that complements the tart’s zesty profile beautifully.
- Thinly Sliced Lemon (for Garnishing): Optional but highly recommended for a truly impressive presentation. Delicate lemon slices add a refreshing visual appeal and hint at the bright flavors within, making your tart look as good as it tastes.

Crafting Your Delightful Easy Lemon Tart: Step-by-Step Guide
Making this tart is a straightforward process, divided into two main parts: preparing the crust and creating the creamy lemon filling. Follow these steps for a perfectly delicious result.
How to Blind Bake the Tart Shell
Blind baking is a crucial step for tarts with wet fillings, as it prevents the crust from becoming soggy and ensures a crisp, golden base.
- Preheat Oven: Begin by preheating your oven to 400ºF (200ºC). This ensures the oven is at the correct temperature for even baking.
- Prepare Pastry: Carefully unroll your thawed sheet of puff pastry. Gently place it into your pie or tart pan, pressing it lightly into the corners and up the sides. If your pan is rectangular, simply trim the pastry to fit, leaving a slight overhang.
- Prick the Base: Using a fork, generously prick the bottom of the pastry shell multiple times. This crucial step creates small vents that allow steam to escape during baking, preventing the pastry from puffing up excessively and creating large air pockets.
- Weight and Bake: Line the pastry with a piece of parchment paper or aluminum foil, ensuring it covers the bottom and sides. Fill the lined shell with pie weights, dry rice, or dried beans. These weights hold the pastry down, preventing shrinkage and ensuring it retains its shape. Bake for approximately 20 minutes, or until the edges are golden brown and the base appears dry and slightly firm. Carefully remove the weights and parchment, and continue to bake for another 5-10 minutes if the bottom needs more browning.
How to Make the Silky Lemon Tart Filling
This lemon curd filling is surprisingly simple to make, yielding a smooth and richly flavored cream that perfectly complements the flaky crust.
- Combine Lemon Mixture: In a medium-sized saucepan, whisk together the fresh lemon juice, finely grated lemon zest, granulated sugar, and coarse salt. Place the saucepan over medium heat, stirring constantly until the mixture is steaming hot and all the sugar has completely dissolved. Do not let it boil vigorously at this stage.
- Temper the Eggs: In a separate heatproof spouted measuring cup or bowl, thoroughly whisk the large eggs. This step is vital to prevent the eggs from scrambling when they meet the hot lemon mixture. Very slowly, in a thin stream, pour about ½ cup of the hot lemon mixture into the whisked eggs while continuously whisking the eggs. This gradual addition raises the temperature of the eggs gently, or “tempers” them.
- Finish the Curd: Now, slowly pour the tempered egg mixture back into the saucepan with the remaining hot lemon mixture, still whisking continuously. Continue to cook the lemon curd over medium-low heat, stirring constantly with a spoon or whisk, until it thickens enough to coat the back of a spoon. If you run your finger across the spoon and it leaves a clear path, your curd is ready. For precision, a thermometer should read around 170ºF (77ºC). It’s important not to let the mixture come to a rolling boil, as this can cause the eggs to curdle.
- Add Butter: Remove the saucepan from the heat. Whisk in the cold, cubed unsalted butter until it is completely melted and incorporated, creating a rich, glossy, and smooth curd. If, by chance, your curd appears slightly lumpy or curdled, simply press it through a fine-mesh sieve into the baked crust for a perfectly smooth result.
- Assemble and Chill: Carefully pour the warm lemon filling into your already-baked and cooled tart crust. Gently spread it evenly. Refrigerate the tart for at least 1 hour, or until the filling is fully set and firm to the touch. This chilling time is essential for the tart to firm up and slice beautifully.
Expert Tips for a Flawless Lemon Tart
Achieving a bakery-worthy lemon tart is simple with these additional tips:
- Thaw Puff Pastry Correctly: Allow the puff pastry to thaw in the refrigerator overnight or at room temperature for about 30-40 minutes. It should be pliable but still cold enough to handle without becoming sticky. Over-thawed pastry can be difficult to work with.
- Use a Mandoline for Garnish: For perfectly uniform and delicate lemon slices for garnishing, a mandoline slicer is incredibly useful. Always exercise caution when using one.
- Don’t Overcook the Curd: Overcooking the lemon curd can lead to a grainy texture. Watch for the “coat the back of a spoon” test or use a thermometer to hit 170ºF (77ºC) precisely.
- Temperature Matters for Eggs: The tempering process is critical. Pouring the hot lemon mixture into the eggs *very slowly* while continuously whisking prevents the eggs from cooking too quickly and scrambling, ensuring a silky-smooth custard.
- Cool Completely: Ensure the blind-baked crust cools slightly before adding the hot filling, and that the tart is thoroughly chilled before serving. This ensures the filling sets properly and makes for clean slices.
Frequently Asked Questions About Lemon Tarts
Your tart is perfectly set when the filling is firm around the edges, but still has a slight, gentle wobble in the very center when you carefully shake the pan. It typically requires at least an hour of refrigeration, but sometimes up to two hours, for the filling to fully set and achieve that ideal consistency.
If your lemon tart filling didn’t set, it’s usually due to one of two reasons: either it wasn’t cooked long enough on the stovetop, or it wasn’t refrigerated for a sufficient amount of time. Ensure that when you’re cooking the curd, it reaches the “coat the back of a spoon” consistency (or 170ºF/77ºC) and then allow it ample time to chill in the refrigerator until completely firm.
Yes, absolutely! Tarts with wet fillings, such as this lemon tart or quiches, require blind baking the pastry shell. Blind baking refers to pre-baking the pie crust on its own, without the filling, to partially cook it and prevent it from becoming soggy once the moist filling is added. It’s a non-negotiable step for a crisp crust.
Blind baking serves two primary purposes for tarts with wet fillings. First, it prevents the filling from seeping into the pastry dough and turning it into a soggy mess, ensuring a crisp base. Second, it helps the crust achieve a beautiful golden-brown color and a desirable, flaky texture that wouldn’t be possible if it baked simultaneously with a wet filling.
No, it is not recommended to leave a lemon tart out overnight. Due to the egg and butter content in the filling, lemon tarts are perishable and should be stored in the refrigerator. Leaving it at room temperature for an extended period could cause the filling to spoil and become unsafe to eat. Always refrigerate promptly after serving.
Absolutely! This recipe adapts beautifully to mini tart shells. Simply cut your puff pastry into smaller circles to fit your mini tart pans, blind bake them as directed (adjusting bake time if necessary), and fill with the lemon curd. Mini tarts are excellent for individual servings or party appetizers.
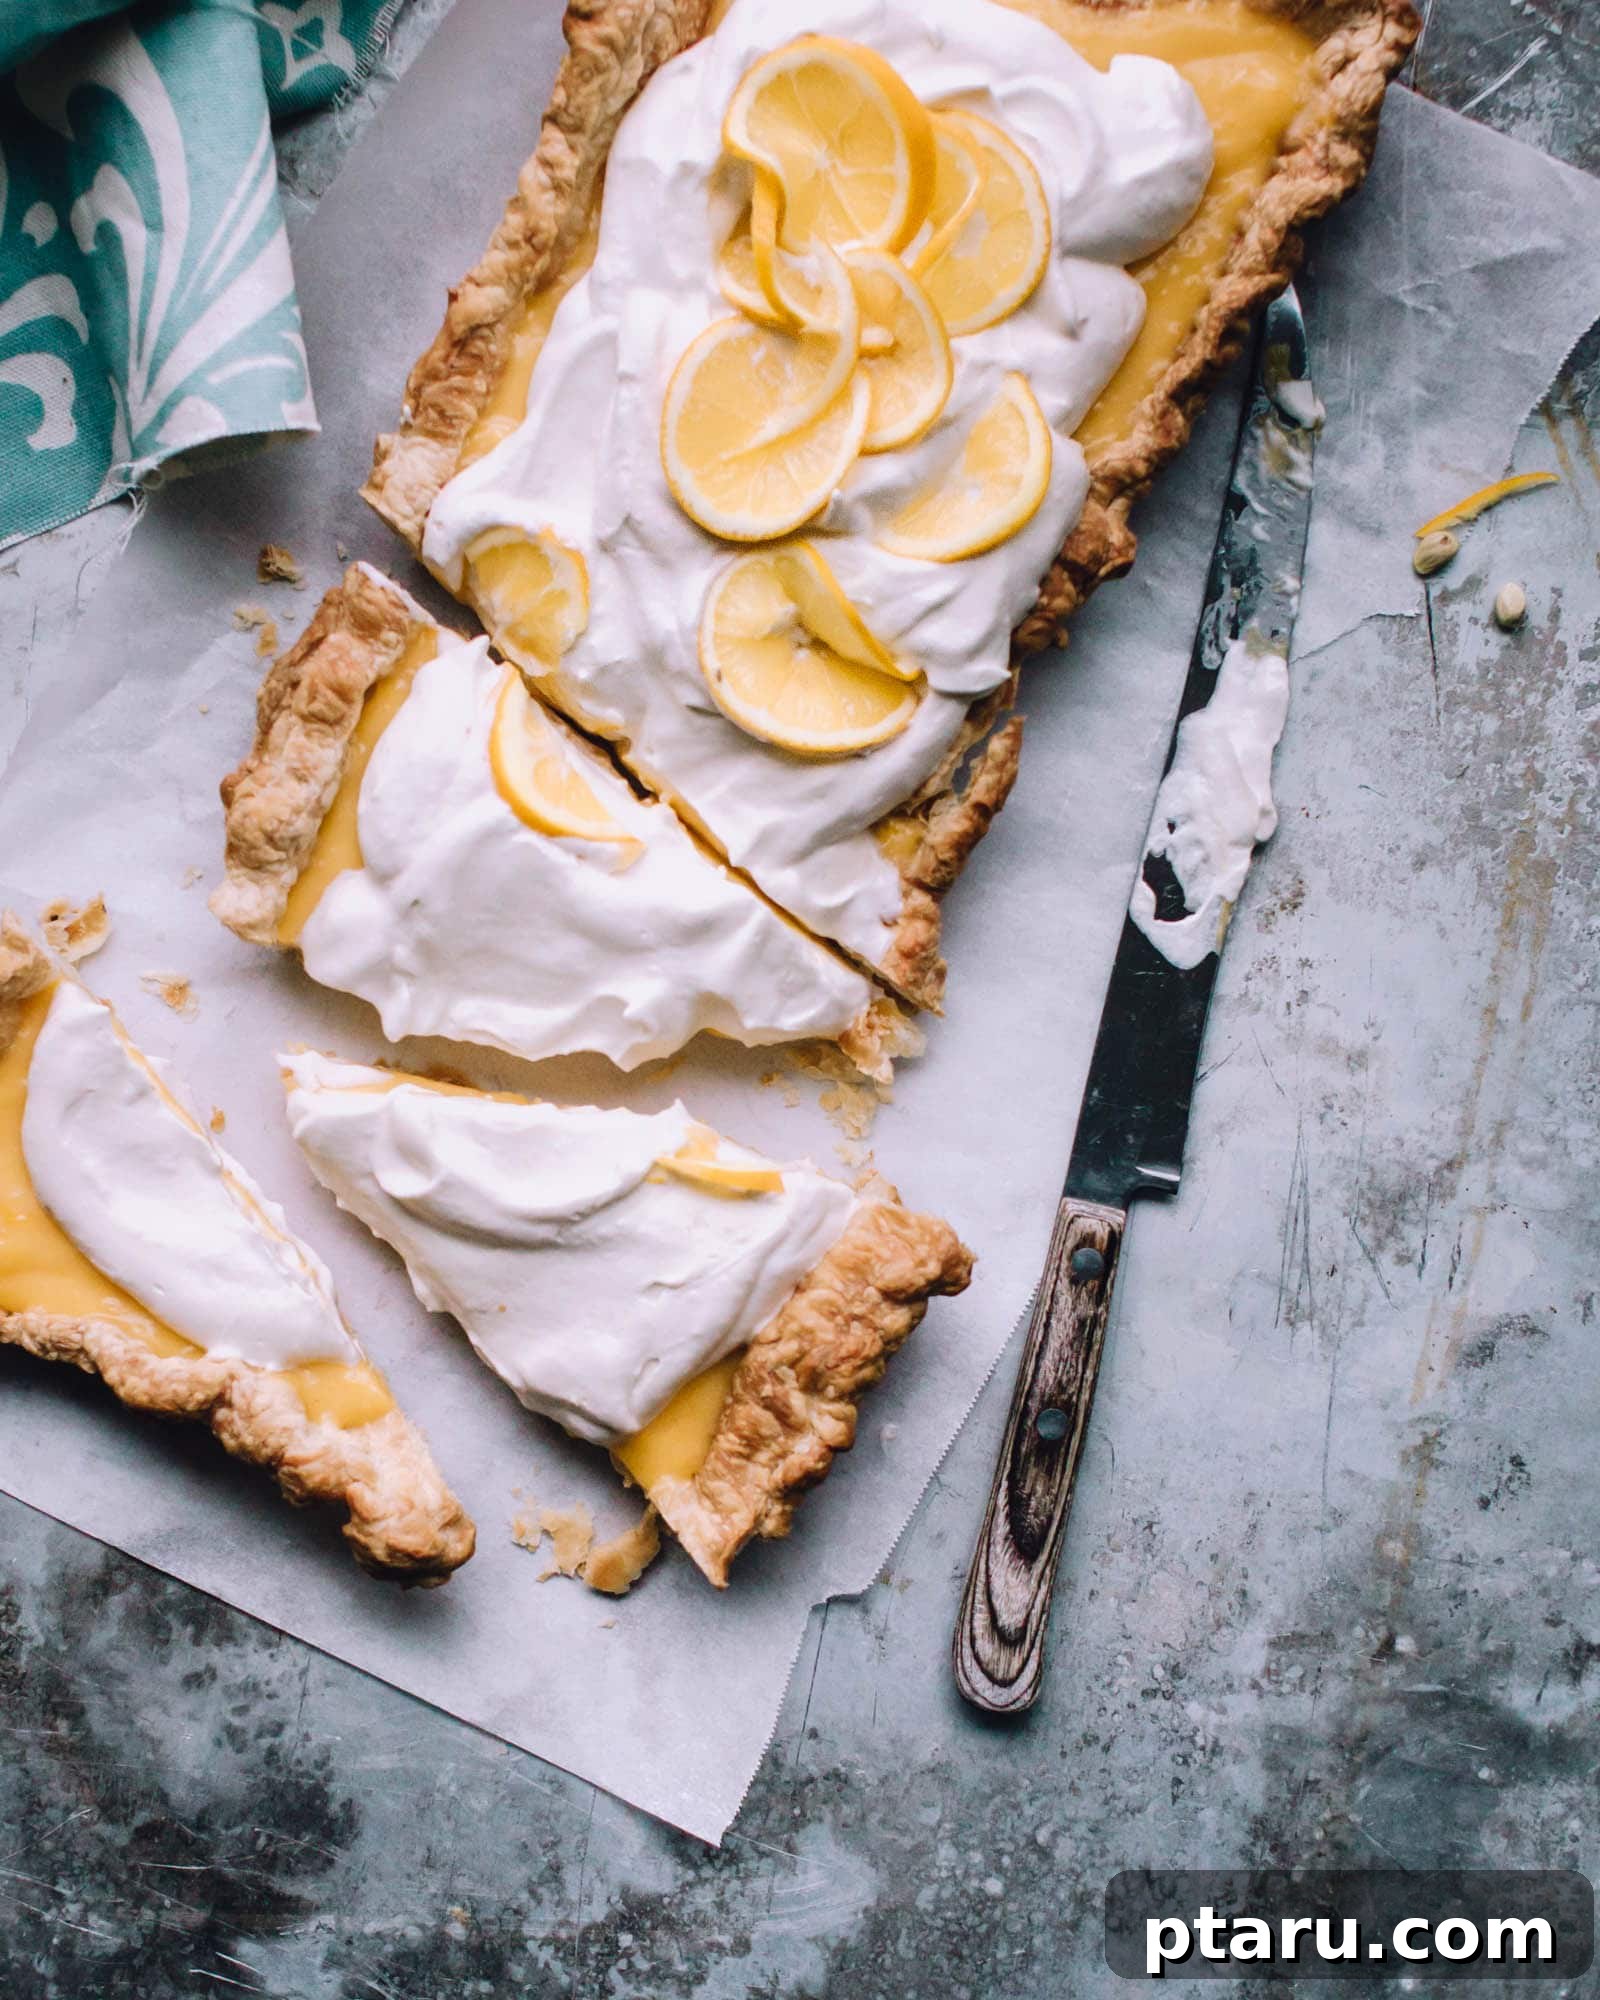
Serving Suggestions & Perfect Pairings
Once your exquisite lemon tart filling is perfectly set, it’s time for the grand presentation and enjoyment! The beauty of this tart lies in its versatility in serving. You can:
- Garnish for Elegance: For a picture-perfect presentation, adorn each slice with a generous dollop of freshly whipped cream. For an extra touch of sophistication, arrange a few thinly sliced lemon rounds (use a mandoline for precision!) or fresh berries like raspberries or blueberries around or on top of the whipped cream. A light dusting of powdered sugar also adds a lovely finish.
- Temperature Preference: This lemon tart is delightful served cold, straight from the refrigerator, offering a wonderfully refreshing contrast to its rich flavor. However, it’s equally enjoyable served at room temperature, allowing the buttery notes of the pastry and the full complexity of the lemon curd to shine through.
- Pairing Perfection: Serve this tart as a vibrant dessert after a hearty meal, or as a bright addition to a brunch spread. It pairs beautifully with a cup of strong black coffee, a delicate Earl Grey tea, or a glass of chilled sparkling wine or prosecco.
Make Ahead & Storage Tips for Your Lemon Tart
Planning ahead makes entertaining a breeze, and this lemon tart is a fantastic make-ahead dessert. However, understanding how to store it properly is key to maintaining its deliciousness.
- Make Ahead: You can prepare this lemon tart up to a day in advance. Once the filling is set, cover the tart loosely with plastic wrap or aluminum foil and refrigerate until you’re ready to serve. This allows the flavors to meld beautifully.
- Storage: Store any leftover lemon tart slices in an airtight container in the refrigerator for up to four days. While the flavors will remain fantastic, keep in mind that the puff pastry crust might lose some of its initial crispness and become slightly softer the longer it is refrigerated. This is a natural process as the starches in the crust begin to stale more quickly in colder temperatures.
- Freezing: Freezing a baked lemon tart is generally not recommended, especially with a puff pastry crust, as the texture can become soggy upon thawing. However, you can freeze leftover lemon curd in an airtight container for up to 2 weeks for future use.
Additional Tips & Insights
- One large lemon typically yields around 2 to 3 tablespoons of fresh lemon juice, plus plenty of zest. It’s always a good idea to buy an extra lemon or two for garnishing, ensuring you have enough for those beautiful thin slices.
- This recipe works perfectly in a standard 9-inch round pie pan or a rectangular tart pan. If using a rectangular pan, simply trim your puff pastry to fit, ensuring a slight overhang for a rustic look.
- If you find yourself with any excess lemon curd after filling your tart (which can happen depending on the size of your pan and the lemons used), don’t let it go to waste! Refrigerate the leftovers in a sealed container for up to 2 weeks. It’s absolutely divine spread on toast, scones, or croissants, stirred into yogurt or chia pudding, drizzled over ice cream, or simply enjoyed straight-up with a spoon!
- For me, baking this tart brings back cherished memories. I often use my great aunt’s rectangular tart pan – a true treasure that usually sits on my counter filled with utensils. It makes me smile to think she served many homemade pies in this scratched-up old tin, even though I mostly remember her for her Christmas sweets. It’s a wonderful reminder that food, especially a classic like this, connects us through generations.

Easy Lemon Tart Recipe
Jennifer Pallian BSc, RD
10 minutes
20 minutes
30 minutes
8
Ingredients
- 1 sheet frozen puff pastry thawed
- ½ cup fresh lemon juice
- 2 teaspoons finely grated fresh lemon zest
- ½ cup granulated sugar
- ⅛ tsp coarse salt
- 3 large eggs
- 6 tbsp cold, unsalted butter cut in cubes
- Whipped cream to serve
- Thinly sliced lemon to serve, optional
Instructions
-
Preheat oven to 400ºF (200ºC). Roll out the puff pastry to fit your pie or tart pan, leaving a slight overhang if desired. Prick the bottom several times with a fork to prevent bubbling. Cover the pastry with a piece of parchment paper (or aluminum foil) and fill with pie weights (or dry rice/beans). Bake the crust for about 20 minutes, or until nicely golden brown and dried out. Carefully remove the weights and parchment.
-
Meanwhile, in a medium saucepan over medium heat, whisk together the fresh lemon juice, lemon zest, granulated sugar, and coarse salt. Cook until the mixture is steaming hot and all the sugar is completely dissolved. Avoid boiling rapidly.
-
In a heatproof spouted measuring cup or bowl, whisk the eggs thoroughly. To temper the eggs and prevent curdling, very slowly drizzle about ½ cup of the hot lemon mixture into the whisked eggs while constantly whisking. Then, slowly pour the tempered egg mixture back into the saucepan with the remaining lemon mixture, continuing to whisk gently. Cook the lemon curd, stirring constantly, until it thickens enough to coat the back of a spoon (or reaches 170ºF/77ºC on a thermometer). It should not come to a full boil. Whisk in the cold, cubed butter until completely melted and smooth. If any lumps occur, strain the curd through a fine-mesh sieve.
-
Scrape the warm lemon curd into the cooled, blind-baked crust. Refrigerate for at least 1 hour, or until the filling is fully set and firm. Once chilled, top with whipped cream and thinly sliced lemon, then serve.
Notes
- Use a 9-inch round pie pan or a rectangular tart pan. If using a rectangular pan, trim your puff pastry to fit accordingly.
- One large lemon typically yields around 2 to 3 tablespoons of lemon juice. Purchase extra for garnishing, and use a mandoline or a sharp knife to carefully cut thin, elegant slices.
- If you have any excess lemon curd, refrigerate it in a sealed container for up to 2 weeks. It’s delicious on toast, scones, yogurt, chia pudding, or ice cream.
Nutrition Information
Calories: 321kcal
|
Carbohydrates: 28g
|
Protein: 4g
|
Fat: 22g
|
Saturated Fat: 9g
|
Polyunsaturated Fat: 2g
|
Monounsaturated Fat: 9g
|
Trans Fat: 0.4g
|
Cholesterol: 84mg
|
Sodium: 137mg
|
Potassium: 62mg
|
Fiber: 1g
|
Sugar: 13g
|
Vitamin A: 356IU
|
Vitamin C: 7mg
|
Calcium: 16mg
|
Iron: 1mg
Nutrition information is automatically calculated, so should only be used as an approximation.
Tried this recipe? Leave a comment!