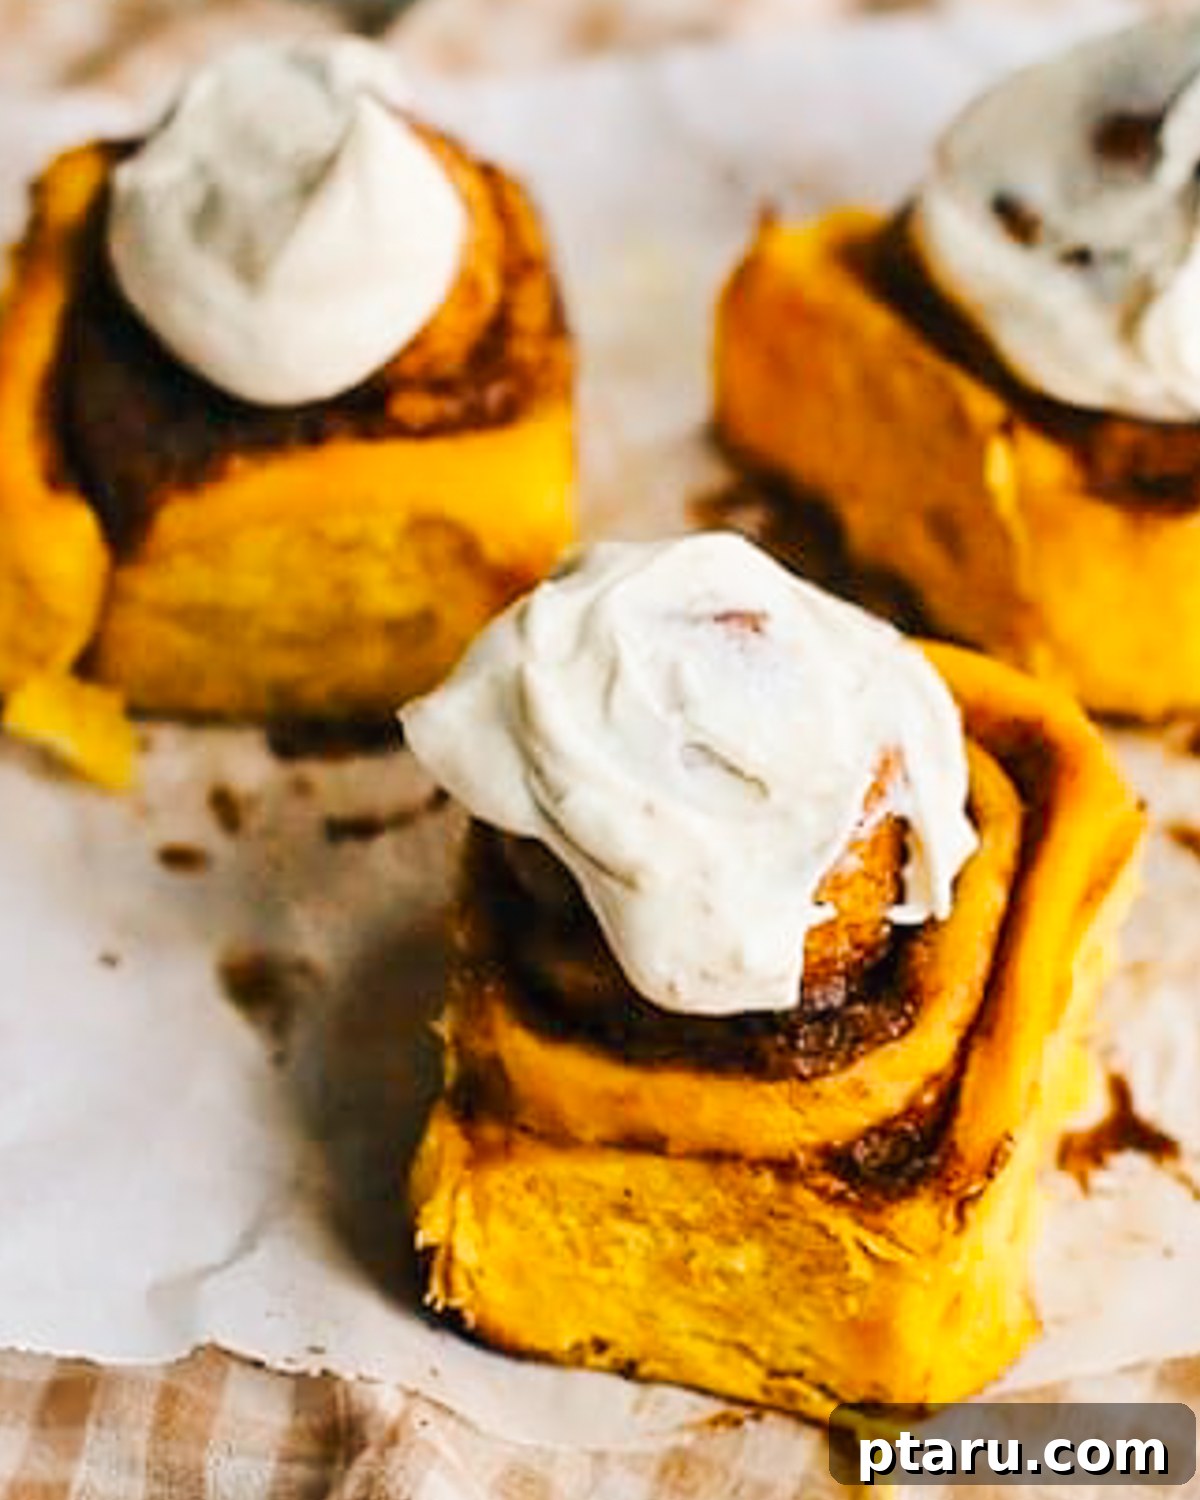
Homemade Pumpkin Cinnamon Rolls: A Cozy Fall Indulgence
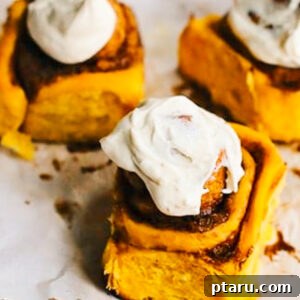
As autumn leaves begin to turn and a crispness fills the air, there’s nothing quite as comforting and inviting as the aroma of freshly baked cinnamon rolls. Elevating this classic treat to seasonal perfection, these Pumpkin Cinnamon Rolls are more than just a breakfast pastry; they are a celebration of fall. Each roll boasts an incredibly soft and tender texture, infused with a harmonious blend of warm, aromatic spices. The secret ingredient, pure pumpkin puree, not only lends a beautiful golden hue and subtle flavor but also acts as a natural moisturizer, ensuring the dough remains delightfully moist and fluffy long after baking. To crown this masterpiece, a generous swirl of tangy, homemade cream cheese frosting melts into every crevice, creating an irresistible, gooey topping that defines cozy, autumnal bliss. Get ready to transform your kitchen into a haven of sweet, spiced comfort with this ultimate pumpkin cinnamon roll recipe.
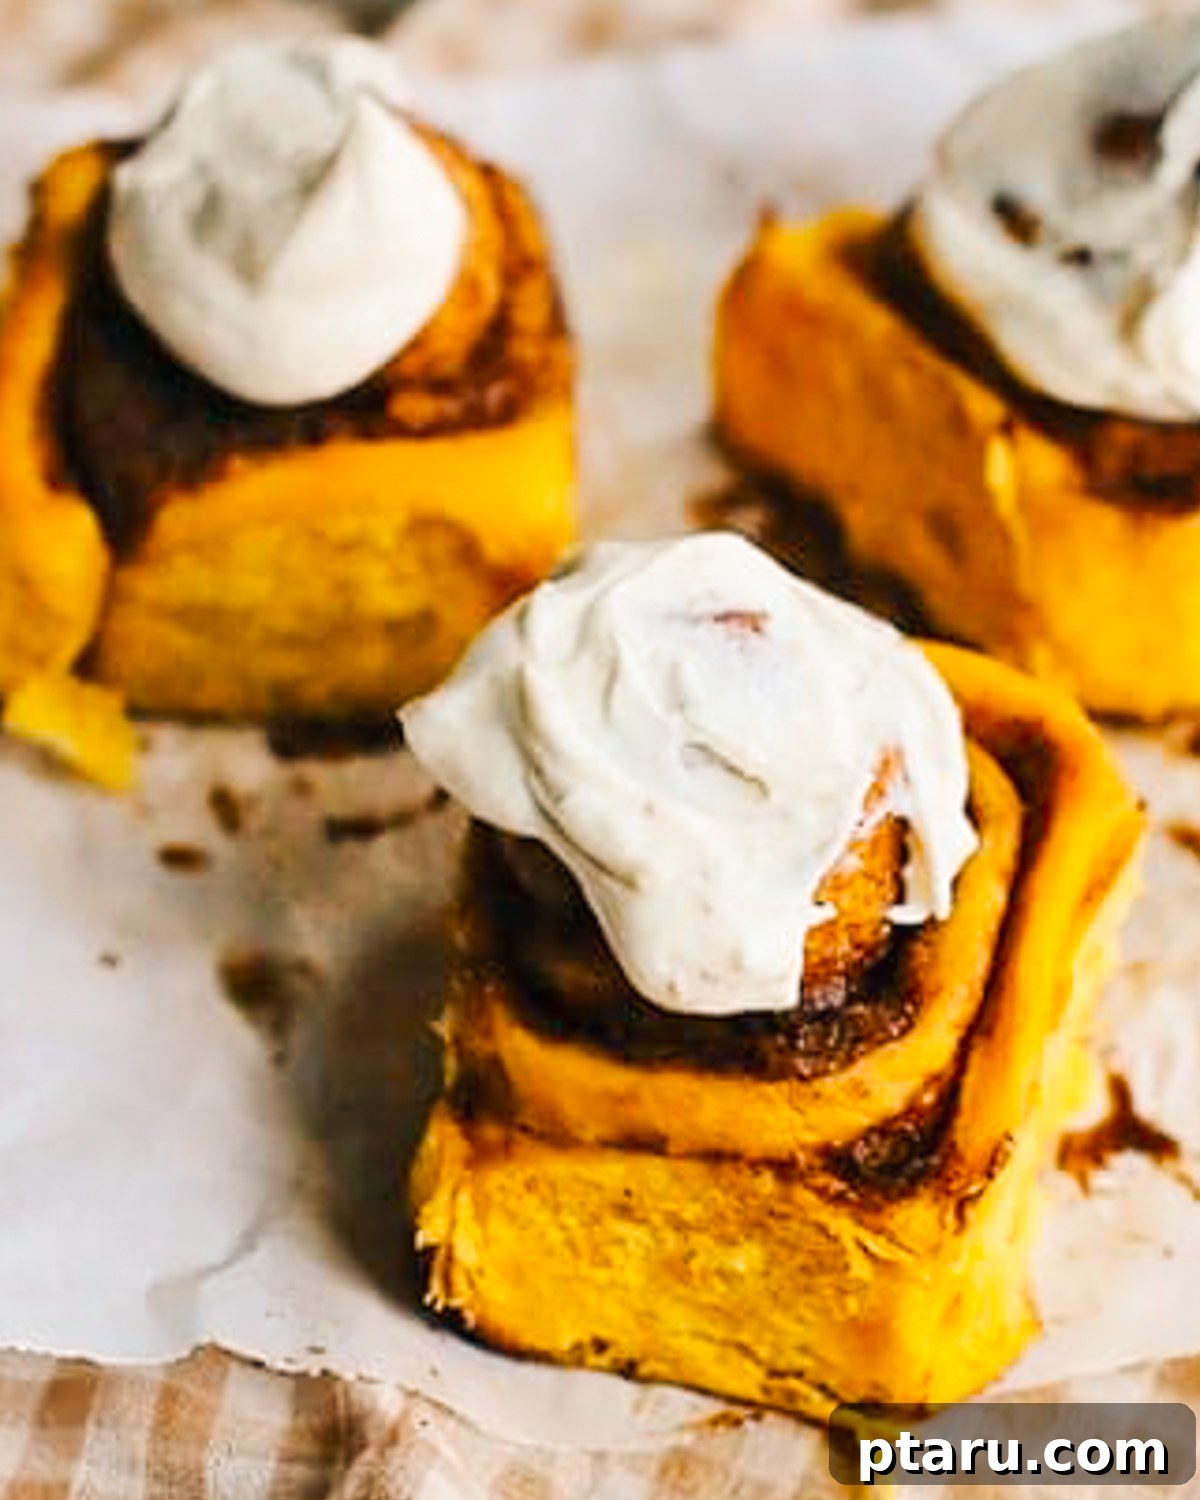
The Magic Behind Our Perfect Pumpkin Cinnamon Rolls
This isn’t just another cinnamon roll recipe; it’s meticulously crafted to ensure every bite is a delightful experience. Here’s why our pumpkin cinnamon rolls consistently turn out soft, flavorful, and utterly irresistible:
- Pumpkin’s Moisturizing Power: The inclusion of real pumpkin puree is a game-changer for the dough. Beyond its mild, earthy flavor and beautiful color, pumpkin acts as a natural humectant, keeping the dough incredibly soft and tender. This means your cinnamon rolls will stay moist and fresh for significantly longer than traditional rolls, reminiscent of the exceptional texture found in our famous pumpkin bread. No more dry, crumbly rolls!
- Balanced and Aromatic Spice Blend: Our filling features a carefully chosen blend of classic autumnal spices—cinnamon, ginger, nutmeg, and cloves. This combination is designed to be warm and inviting without overpowering the subtle pumpkin flavor. The spices melt harmoniously into the swirls of the dough during baking, ensuring a burst of balanced, cozy flavor in every layer.
- The Dreamy Cream Cheese Frosting: A generous slather of our homemade cream cheese frosting is the perfect finishing touch. Its delightful tanginess cuts through the sweetness of the rolls and the richness of the filling, creating a perfectly balanced flavor profile. When spread over warm rolls, the frosting melts slightly, creating a luscious glaze that seeps into every spiral, adding an unparalleled creaminess and moisture. This creates that iconic, gooey texture everyone loves, while the rolls impressively maintain their shape and integrity.
Essential Ingredients for Your Homemade Pumpkin Rolls
Creating these soft, fluffy pumpkin cinnamon rolls, reminiscent of the beloved flavors in a homemade pumpkin pie, begins with a selection of fresh, quality ingredients. Each component plays a crucial role in developing the rich flavor and exquisite texture of these autumnal treats:
- Warm Milk: This is the crucial first step for activating your yeast. Ensure it’s comfortably warm (between 105-115°F or 40-46°C)—too hot will kill the yeast, too cold won’t awaken it.
- Active Dry Yeast: The leavening agent responsible for giving your rolls their light, airy, and fluffy texture. Always check the expiration date to ensure it’s fresh and active.
- Granulated Sugar: Not only sweetens the dough but also provides necessary nourishment for the yeast, promoting a strong and consistent rise.
- Butter: Adds a rich, indulgent flavor and contributes significantly to the dough’s tender crumb. Using melted and cooled butter ensures it disperses evenly without affecting yeast activity.
- Eggs: Provide essential structure, richness, and moisture to the dough, helping to create a beautifully pliable and elastic texture without making the rolls tough. Using room temperature eggs helps them incorporate more smoothly.
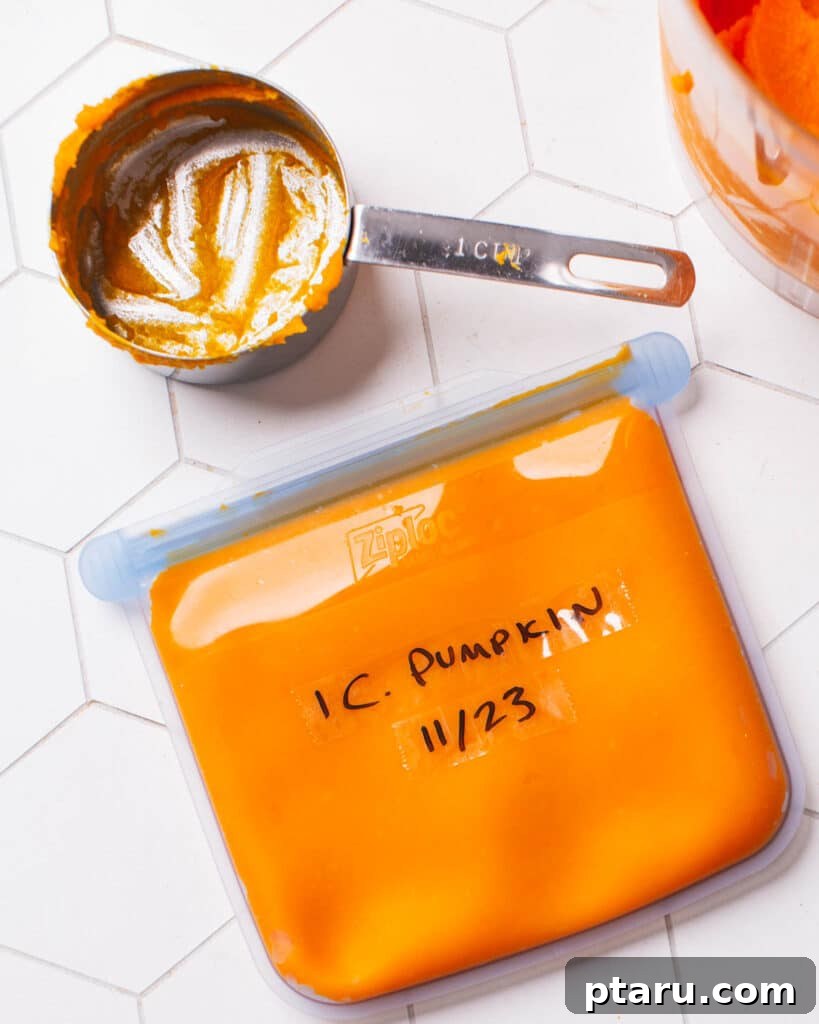
- Pumpkin Puree: The star of these rolls! Use 100% pure pumpkin puree, not pumpkin pie filling (which contains added sugars and spices). It enriches the dough with flavor, color, and most importantly, incredible moisture. If you have any leftover puree, it’s perfect for my pumpkin dump cake or delightful pumpkin chocolate chip cookies!
- All-Purpose Flour: Forms the fundamental structure of your dough. Accurate measurement is key; too much flour can lead to dense, dry rolls.
- Brown Sugar (for filling): Offers a deep, molasses-rich sweetness and adds moisture to the spiced filling, creating that irresistible gooey center.
- Spices (Cinnamon, Ginger, Nutmeg, Cloves): This classic autumn quartet delivers the signature warm and cozy “pumpkin spice” flavor. Freshly ground spices will yield the most potent and aromatic results.
- Cream Cheese (for frosting): The base for our decadent, tangy frosting. Ensure it’s softened to room temperature for a smooth, lump-free consistency.
You’ll find the full, precise measurements for all ingredients conveniently listed in the detailed recipe card at the bottom of this page.
Delightful Variations and Smart Substitutions
While the classic pumpkin cinnamon roll recipe is a masterpiece on its own, feel free to customize it to your preferences with these creative variations:
- Maple Cream Cheese Frosting: For an extra layer of autumnal flavor, substitute half of the milk (or buttermilk) in the frosting with pure maple syrup. This adds a beautiful depth of flavor that complements the pumpkin perfectly.
- Enhanced Spice Blend: If you adore a robust spice profile, consider adding a pinch of ground cardamom or allspice to the filling mixture alongside the other spices. These additions will create a more complex and aromatic experience.
- Brown Butter Filling: Elevate the richness of your filling by browning the butter before mixing it with the brown sugar and spices. Melt the butter in a saucepan over medium heat, stirring occasionally, until it turns a light amber color and smells nutty. Let it cool slightly before spreading. This technique imparts a wonderful, toasted flavor.
- Nutty Texture: For a delightful crunch, sprinkle a handful of finely chopped pecans or walnuts over the buttered dough before adding the spiced brown sugar and rolling it up.
- Ginger Glaze: Instead of cream cheese frosting, create a simple ginger glaze by whisking powdered sugar with a small amount of milk and a touch of ground ginger. This offers a lighter, yet equally flavorful, topping.
Essential Tools for Baking Success
Having the right tools can make the baking process significantly smoother and more enjoyable. Here’s what you’ll need to make these incredible pumpkin cinnamon rolls:
- Stand Mixer with Dough Hook: This is highly recommended for effortlessly kneading the dough to the perfect smooth, elastic consistency. While you can knead by hand, a mixer saves time and effort.
- Rolling Pin: Essential for rolling out the dough into an even rectangle, crucial for achieving uniform spirals.
- Two 9×13 Inch Baking Pans: This recipe yields a generous 18 rolls, requiring two standard 9×13-inch pans to allow adequate space for the rolls to rise and bake evenly without crowding.
- Instant-Read Thermometer: Your secret weapon for perfectly soft, never-dry cinnamon rolls. Use it to check the internal temperature, ensuring rolls are cooked through but removed before they become overbaked (aim for 190°F / 88°C).
- Large Mixing Bowls: For proofing the yeast and allowing the dough to rise comfortably.
- Plastic Wrap or Clean Kitchen Towel: To cover the dough during its resting and rising periods, preventing it from drying out.
- Sharp Knife or Dental Floss: For cleanly slicing the rolled dough into individual rolls.
Step-by-Step Guide: Crafting Your Perfect Pumpkin Cinnamon Rolls
Follow these detailed instructions carefully to achieve beautifully soft rolls with perfectly even spirals and a smooth, irresistible cream cheese frosting. Patience and attention to detail will reward you with truly exceptional results.
Step 1: Activate the Yeast and Prepare the Dough Base
Begin by combining ¾ cup of warm milk and 1 teaspoon of granulated sugar in the bowl of your stand mixer. The milk should be between 105-115°F (40-46°C)—it should feel like warm bathwater, not hot. Sprinkle the active dry yeast evenly over the surface of the milk. Let this mixture sit for 5-10 minutes. During this time, the yeast will “bloom,” creating a frothy, foamy layer on top, which indicates it’s active and ready to work its magic. Meanwhile, in a separate medium bowl, whisk together ¼ cup of melted and cooled butter, the remaining ½ cup of granulated sugar, 3 room temperature eggs, and 1 cup of pumpkin puree until thoroughly combined and smooth. Having all ingredients at the right temperature helps them integrate perfectly.
Step 2: Mix and Knead the Dough to Perfection
Once your yeast mixture is beautifully frothy, attach the paddle attachment to your stand mixer. Add 2 cups of the all-purpose flour to the yeast mixture and beat on low speed until just combined. Next, gradually pour in the pumpkin mixture, continuing to beat until all the ingredients are well incorporated and a thick, uniform batter forms. Switch to the dough hook attachment. With the mixer on its lowest speed, begin adding the remaining 4 cups of all-purpose flour, one cup at a time. Allow each addition to be fully incorporated before adding the next. Continue mixing until the dough comes together, forming a cohesive ball that pulls away from the sides of the bowl. It should still feel slightly sticky to the touch at the bottom of the bowl; resist the urge to add too much extra flour. Let the mixer continue to knead the dough on low speed for approximately 5 minutes until it becomes smooth, elastic, and yields slightly when pressed. This kneading process is vital for developing the gluten structure that gives cinnamon rolls their characteristic chewiness and elasticity.
Step 3: First Rise for a Light, Airy Dough
Lightly grease a large, clean mixing bowl with a neutral oil (such as vegetable or canola oil). Carefully transfer the kneaded dough to this bowl, turning it over once to ensure it’s completely coated with a thin layer of oil. This prevents the dough from drying out and sticking. Cover the bowl securely with plastic wrap or a clean, damp kitchen towel. Place the bowl in a warm, draft-free location in your kitchen. An ideal spot might be a slightly warm oven (turned off, of course!) with the door ajar, or simply on your countertop if your kitchen is naturally warm. Allow the dough to rise until it has visibly doubled in volume and appears light and airy, which typically takes about 1½ hours. The exact timing can vary based on your room’s temperature and humidity. To test if it’s ready, gently poke the dough with a floured finger; if the indentation slowly springs back, it’s sufficiently risen.
Step 4: Craft the Filling and Shape the Rolls
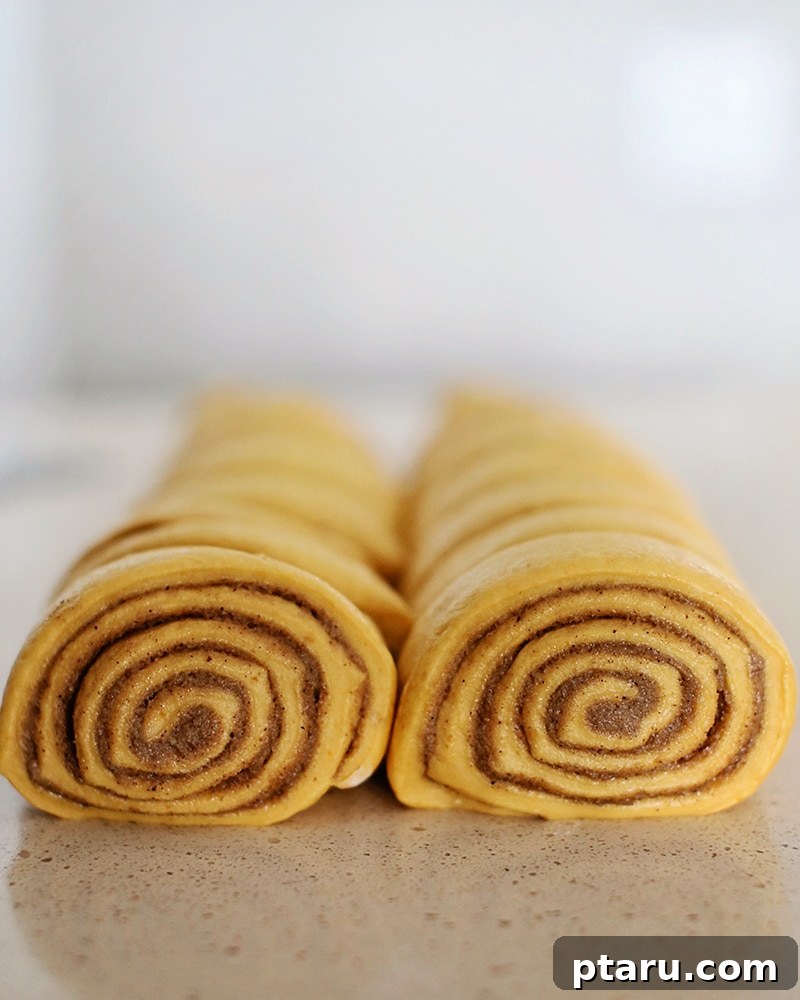
Once the dough has completed its first rise, gently punch it down to release the accumulated air. Turn the dough out onto a lightly floured work surface. Using your rolling pin, roll the dough into a large rectangle, aiming for dimensions of approximately 18×24 inches and about ⅛ inch thick. Strive for an even thickness across the entire surface to ensure uniform spirals. For the irresistible filling, spread 1 cup of softened butter evenly over the entire surface of the rolled-out dough, extending almost to the edges. In a small bowl, combine 1¼ cup brown sugar, 1½ tablespoons ground cinnamon, 1 teaspoon ground ginger, ½ teaspoon ground nutmeg, and ¼ teaspoon ground cloves. Sprinkle this fragrant spiced brown sugar mixture generously and evenly over the buttered dough, gently pressing it down to adhere. Starting from the long edge closest to you, carefully and tightly roll the dough away from you, much like a jelly roll, to form a snug log. Use a very sharp knife or unflavored dental floss to cut the log into 18 even pieces. A helpful trick is to cut the log in half, then each half in half, and then each quarter into four and a half rolls.
Step 5: Second Rise and Oven Preparation
Lightly grease two 9×13-inch baking pans. Arrange the freshly cut cinnamon rolls in the prepared pans, leaving a small amount of space between each roll to allow for expansion during the second rise and baking. You should have 9 rolls in each pan. Cover the pans with clean dish towels or plastic wrap and return them to a warm, draft-free location for their second rise. Let them rise until they appear visibly puffy and have nearly doubled in size, a process that typically takes another 60 to 90 minutes. This second rise contributes to the rolls’ ultimate lightness and tenderness. During the last 15-20 minutes of the second rise, preheat your oven to 350°F (175°C).
Step 6: Bake to Golden-Brown Perfection
Before placing them in the oven, you can optionally brush the tops of the rolls with a little extra milk. This simple step helps them achieve a beautiful, rich golden-brown color during baking. Carefully place the pans into your preheated oven and bake for 20 to 25 minutes. The rolls should turn a lovely golden brown on top, but the true key to their incredible softness is to avoid overbaking. For pinpoint accuracy and the ultimate tender crumb, use an instant-read thermometer to check the internal temperature of a center roll. Remove them from the oven as soon as they reach approximately 190°F (88°C). They will continue to cook slightly from residual heat (carryover cooking) once out of the oven. Overbaking, even by a few minutes, is the most common cause of dry, tough cinnamon rolls.
Step 7: Frost with Dreamy Cream Cheese Icing
While the rolls are still wonderfully warm (but not piping hot, which would make the frosting too runny), prepare the luscious cream cheese frosting. In the bowl of your stand mixer (or using a hand mixer), combine 4 ounces of softened cream cheese, ¼ cup of softened butter, 1 cup of confectioners’ sugar, and ½ teaspoon of vanilla extract. Beat these ingredients together on medium speed until the mixture is light, incredibly fluffy, and completely smooth, ensuring no lumps of cream cheese remain. Gradually add 4-6 tablespoons of buttermilk (or regular milk), one tablespoon at a time, beating after each addition, until you achieve your desired consistency. The frosting should be thick enough to cling to the rolls but soft and spreadable. Generously spread the warm frosting over the warm pumpkin cinnamon rolls. The residual heat from the rolls will cause the frosting to melt ever so slightly, creating an unbelievably decadent, gooey glaze that seeps into every delightful spiral. The combination of creamy, tangy cream cheese and warm pumpkin spice is pure bliss! If you cherish this flavor pairing, you’ll also absolutely adore my pumpkin cheesecake bars.
Mastering Pumpkin Cinnamon Rolls: Common Pitfalls and Solutions
Even the most seasoned bakers can encounter a few common challenges when making cinnamon rolls. Understanding these potential pitfalls and knowing how to prevent them will ensure your pumpkin rolls turn out perfectly soft, flavorful, and beautiful every single time:
- Adding Too Much Flour: This is arguably the most common culprit behind dense, dry, and heavy yeast breads and rolls. Over-flouring stiffens the dough, hindering its ability to rise and creating a crumbly texture.
Solution: Measure your flour accurately. If possible, weigh it using a kitchen scale (1 cup of all-purpose flour is typically 120-125 grams). When adding flour by volume, spoon it into your measuring cup and level it off. When mixing, add flour gradually until the dough just pulls away from the sides of the bowl. The dough should still feel slightly tacky, but not overly sticky. Resist the temptation to add more flour just because it feels sticky; a slightly sticky dough is often a perfectly hydrated dough.
- Using Milk That Is Too Hot or Too Cold for Yeast: Yeast is a sensitive, living organism. If your milk is too hot (above 120°F / 49°C), it will kill the yeast, rendering it inactive and preventing any rise. Conversely, if the milk is too cold (below 100°F / 38°C), the yeast won’t activate efficiently, leading to a sluggish or failed rise.
Solution: Always use an instant-read thermometer to verify the milk temperature. Aim for 105-115°F (40-46°C). This temperature range feels pleasantly warm to the touch, like lukewarm bathwater, and is ideal for yeast activation without harming it.
- Not Allowing Enough Time for Rising (Proofing): Rushing the rising process—both the first and second proofing—will result in underdeveloped, dense, and heavy rolls. The yeast needs time to ferment and produce carbon dioxide gas, which creates the airy pockets in the dough.
Solution: Be patient and observant. Rising times are approximate and depend heavily on your kitchen’s ambient temperature. Look for visual cues: the dough should genuinely double in volume and feel light and puffy. If your kitchen is cool, find a warmer spot (like a turned-off oven with the light on) or simply extend the rising time until the dough reaches the correct volume.
- Overbaking the Rolls: Leaving cinnamon rolls in the oven for too long is a surefire way to end up with dry, tough, and crumbly centers. The goal is a perfectly moist and tender interior.
Solution: Do not rely solely on visual cues. The most accurate way to ensure perfect softness is to use an instant-read thermometer. Remove the rolls from the oven when their internal temperature reaches approximately 190°F (88°C). They will continue to cook slightly from residual heat once removed. A light golden-brown exterior is a good visual indicator, but the thermometer guarantees that perfect, tender crumb.
- Unevenly Spreading the Filling: If the softened butter and spiced brown sugar mixture aren’t spread consistently across the dough, some rolls might end up with dry patches, or an uneven distribution of flavor.
Solution: Ensure your butter for the filling is truly softened to room temperature so it spreads easily and smoothly. Use an offset spatula or the back of a spoon to create an even layer over the rolled-out dough. Then, sprinkle the brown sugar and spice mixture uniformly over the butter, gently pressing it down to adhere.
- Not Rolling the Dough Tightly Enough: A loose roll will cause the cinnamon rolls to unravel or lose their beautiful spiral shape during baking, leading to a less appealing presentation and texture.
Solution: When rolling the dough into a log after spreading the filling, start from the long edge closest to you and roll it up tightly and evenly. Apply gentle, consistent pressure as you go to create a snug log, which will result in those desirable, well-defined spirals.
By keeping these expert tips in mind, you’ll be well on your way to baking a batch of flawless, bakery-worthy pumpkin cinnamon rolls every single time!
Make-Ahead & Storage Solutions for Your Pumpkin Cinnamon Rolls
These homemade pumpkin cinnamon rolls are absolutely irresistible fresh from the oven, but their deliciousness can be enjoyed over several days, and they’re also excellent for preparing in advance. Here’s how to manage them:
Make-Ahead Instructions (Overnight Option)
- One of the most convenient aspects of this recipe is its make-ahead potential, perfect for serving fresh-baked rolls on a busy morning or holiday. Assemble the rolls completely through the shaping step (Step 4), arranging them snugly in your greased 9×13-inch baking pans. Instead of proceeding with the second rise at room temperature, cover the pans tightly with plastic wrap and refrigerate them overnight, or for up to 18 hours.
- When you’re ready to bake, remove the rolls from the refrigerator at least 1-2 hours before you plan to bake. Let them come to room temperature and complete their second rise in a warm spot until they are visibly puffy. This process might take slightly longer than the standard 60-90 minutes since they are starting cold. Once they have adequately risen, preheat your oven and bake as directed in the recipe. This method yields wonderfully fresh, soft, and warm rolls with minimal morning effort.
Storing Leftover Baked Rolls
- If by some miracle you have any leftover frosted rolls, store them covered tightly with plastic wrap or in an airtight container at room temperature for up to two days. For extended freshness, particularly in warmer climates, or if you prefer them chilled, refrigeration is advisable for up to 4-5 days.
- To reheat, place individual rolls in the microwave for 15-30 seconds until warmed through and softened. Alternatively, warm a pan of rolls in a preheated oven at 275°F (135°C) for 10-15 minutes, until heated through and soft again.
Freezing Instructions (Baked & Unbaked)
- Freezing Baked Rolls: For longer storage, it’s best to freeze baked but unfrosted rolls. Allow the rolls to cool completely after baking. Then, wrap each roll individually in plastic wrap and place them in a freezer-safe airtight bag or container. They can be frozen for up to 1-2 months. To serve, thaw them at room temperature or gently warm them in a low oven. Once warmed, spread them with freshly prepared, room-temperature cream cheese frosting for the best texture and flavor.
- Freezing Unbaked Rolls: You can also freeze the shaped, unbaked rolls. After slicing the dough into individual rolls and arranging them in greased baking pans, place the pans in the freezer uncovered until the rolls are solid (this usually takes about 2-3 hours). Once solid, transfer the frozen rolls to freezer-safe bags or containers, ensuring they are tightly sealed to prevent freezer burn. Freeze for up to 2-3 weeks. To bake from frozen, transfer the desired number of frozen rolls to a greased baking pan, cover tightly, and thaw overnight in the refrigerator. The next morning, allow them to come to room temperature and rise in a warm spot until puffy (this may take 2-4 hours, depending on your kitchen’s warmth), then bake as directed.
Perfect Pairings & Serving Suggestions for Your Pumpkin Delights
These homemade pumpkin cinnamon rolls are a magnificent treat on their own, but they truly shine when served in thoughtful ways that enhance their cozy, autumnal character. Here are some ideas to elevate your pumpkin roll experience:
The most classic and arguably the best way to enjoy these rolls is served warm, fresh from the oven, allowing that luscious cream cheese frosting to melt decadently into every curve and crevice. Pair them with a freshly brewed cup of robust coffee for a quintessential morning indulgence, or for an even cozier, spiced experience, accompany them with my authentic chai tea recipe. The warm spices in the chai will beautifully echo the flavors in the rolls.
While the rich, tangy cream cheese frosting is, of course, the quintessential topping for these rolls, offering a delightful balance to their sweetness, you can certainly simplify if you prefer. A simple dusting of confectioners’ sugar provides a subtle sweetness and an elegant finish, allowing the inherent pumpkin and spice flavors to take center stage without the added richness. Another idea is a light maple glaze for an alternative sweetness.
These versatile rolls are ideal for a variety of occasions:
- Weekend Breakfasts & Brunches: Impress your family and guests with a decadent, homemade autumnal breakfast spread. They are perfect alongside fresh fruit and a protein.
- Holiday Gatherings: A festive and highly anticipated addition to Thanksgiving morning, Christmas brunch, or any fall-themed celebration.
- Afternoon Treat: A perfect pick-me-up to enjoy with a warm beverage like tea or cider on a crisp autumn afternoon.
- Comforting Dessert: Serve a smaller portion as a rich, comforting dessert after a hearty fall meal.
- Hostess Gift: A pan of these beautifully baked rolls makes a thoughtful and much-appreciated gift for friends, neighbors, or hosts.
If you’re a devoted fan of soft pumpkin dessert recipes and crave more autumnal baking, be sure to also try my equally delightful soft pumpkin cookies. They offer a similar comforting spice profile in a different, chewy format, perfect for any time of day!
Frequently Asked Questions About Homemade Pumpkin Cinnamon Rolls
Can I make these pumpkin cinnamon rolls ahead of time?
Yes, absolutely! This recipe is fantastic for making ahead. You can assemble the rolls completely through the shaping stage, place them in your baking pans, cover them tightly with plastic wrap, and refrigerate them overnight (up to 18 hours). The next morning, remove them from the refrigerator, let them come to room temperature, and allow them to complete their second rise in a warm spot until visibly puffy before baking as directed. This method ensures you have fresh-baked rolls with minimal morning effort.
Do I need a stand mixer to make this recipe?
While a stand mixer with a dough hook attachment makes the kneading process significantly easier, faster, and more efficient, it is not strictly necessary. You can certainly knead the dough by hand on a lightly floured surface until it becomes smooth and elastic. This typically takes about 10-15 minutes of continuous kneading, providing a good arm workout!
How can I ensure my cinnamon rolls stay soft and moist?
Several key factors contribute to exceptionally soft and moist rolls. First, be careful not to add too much flour to the dough; it should remain slightly tacky to the touch. Second, avoid overbaking at all costs. Use an instant-read thermometer to remove the rolls from the oven when they reach an internal temperature of approximately 190°F (88°C). Finally, generously frosting them while they are still warm allows the frosting to melt slightly, creating a moist, flavorful, and gooey topping that locks in moisture.
What kind of pumpkin puree should I use for this recipe?
It is crucial to use 100% pure pumpkin puree, not pumpkin pie filling. Pumpkin pie filling contains added sugars, spices, and sometimes other ingredients that will alter the flavor, sweetness, and consistency of your rolls. Always check the label carefully and look for cans labeled “100% Pure Pumpkin” or simply “Pumpkin Puree” with no other ingredients.
Can I use homemade pumpkin puree instead of canned?
Yes, absolutely! Homemade pumpkin puree can be used with excellent results, provided it has a similar consistency to canned pumpkin puree—meaning it shouldn’t be too watery. If your homemade puree is very thin, you might need to cook it down slightly to reduce its moisture content, or be prepared to adjust the amount of flour in the dough slightly to achieve the correct consistency.
How do I store leftover pumpkin cinnamon rolls?
Store any leftover frosted rolls in an airtight container at room temperature for up to 2 days for optimal freshness. If you live in a warm climate or wish to store them longer, refrigerate them for up to 4-5 days. To enjoy them warm again, microwave individual rolls for 15-30 seconds or warm a pan of rolls in a 275°F (135°C) oven for 10-15 minutes until soft and heated through.
Print Recipe
Pumpkin Cinnamon Rolls (with Cream Cheese Frosting)
By: Jennifer Pallian BSc, RD
Pumpkin Cinnamon Rolls are soft, tender, and filled with warm spices. The pumpkin puree keeps the dough moist, and the cream cheese frosting melts into every swirl for a cozy, fall treat.
Ingredients
For the Rolls:
- ¾ cup warm milk (105-115°F / 40-46°C, plus more milk for brushing on the dough)
- 2 ¼ tsp active dry yeast
- ½ cup + 1 tsp granulated sugar
- ¼ cup butter, melted and cooled
- 3 eggs, room temperature
- 1 cup pumpkin puree (not pumpkin pie filling)
- 6 cups all-purpose flour, divided
- Oil for bowl
For the Filling:
- 1 cup butter, softened
- 1 ¼ cup brown sugar
- 1 ½ tbsp ground cinnamon
- 1 tsp ground ginger
- ½ tsp ground nutmeg
- ¼ tsp ground cloves
For the Cream Cheese Frosting:
- 4 ounces (½ cup) cream cheese, room temperature
- ¼ cup butter, softened
- 1 cup confectioners’ sugar
- ½ tsp vanilla extract
- 4-6 tbsp buttermilk or milk
Instructions
- In the bowl of a stand mixer, combine ¾ cup warm milk and 1 tsp granulated sugar. Sprinkle with 2¼ tsp active dry yeast and let stand for 10 minutes until frothy.
- Meanwhile, in a medium bowl, whisk together ¼ cup melted and cooled butter, the remaining ½ cup granulated sugar, 3 room temperature eggs, and 1 cup pumpkin puree until well combined.
- Using the paddle attachment of your stand mixer, beat 2 cups of the all-purpose flour into the frothy yeast mixture until combined. Then, beat in the pumpkin mixture until well incorporated.
- Switch to the dough hook attachment. On the lowest mixer speed, add the remaining 4 cups of all-purpose flour one cup at a time until the dough forms a ball that pulls away from the sides of the bowl but still sticks slightly to the bottom. Adjust flour as needed.
- Let the mixer continue to knead the dough on low speed until it is smooth and elastic, about 5 minutes. Transfer the dough to an oiled bowl, turning to coat completely with oil. Cover with plastic wrap and let rise in a warm place until doubled in volume, approximately 1½ hours.
- Turn the risen dough onto a lightly floured surface and roll it out into a large rectangle, about 1/8″ thick (roughly 18×24 inches).
- For the Filling: Spread 1 cup softened butter evenly over the surface of the dough. In a small bowl, combine 1¼ cup brown sugar, 1½ tbsp ground cinnamon, 1 tsp ground ginger, ½ tsp ground nutmeg, and ¼ tsp ground cloves. Sprinkle this spiced brown sugar mixture evenly over the butter.
- Starting with the long edge closest to you, gently and tightly roll the dough, jelly-roll style, to form a log.
- Cut the log into 18 even pieces using a sharp knife or unflavored dental floss.
- Arrange the cut rolls in two greased 9×13-inch baking dishes, leaving some space between each. Cover with a clean dish towel or plastic wrap and place in a warm spot to rise again until doubled in volume, another 60-90 minutes.
- Preheat your oven to 350°F (175°C) during the last 15-20 minutes of the second rise.
- Optionally, brush the tops of the rolls with a little milk for a deeper golden crust. Bake at 350°F for 20-25 minutes, until golden brown but still soft. For ideal softness, remove from the oven when the internal temperature of a center roll reaches 190°F (88°C).
- For the Cream Cheese Frosting: In the bowl of your stand mixer (or using a hand mixer), combine 4 ounces softened cream cheese, ¼ cup softened butter, 1 cup confectioners’ sugar, and ½ tsp vanilla extract. Beat until light and fluffy. Gradually add 4-6 tbsp buttermilk or milk, one tablespoon at a time, until the desired smooth and spreadable consistency is reached.
- Generously spread the cream cheese frosting over the warm pumpkin cinnamon rolls, allowing it to melt slightly into the spirals. Serve immediately and enjoy!
Tried this recipe? We’d love to hear about it! Leave a comment below and share your experience!