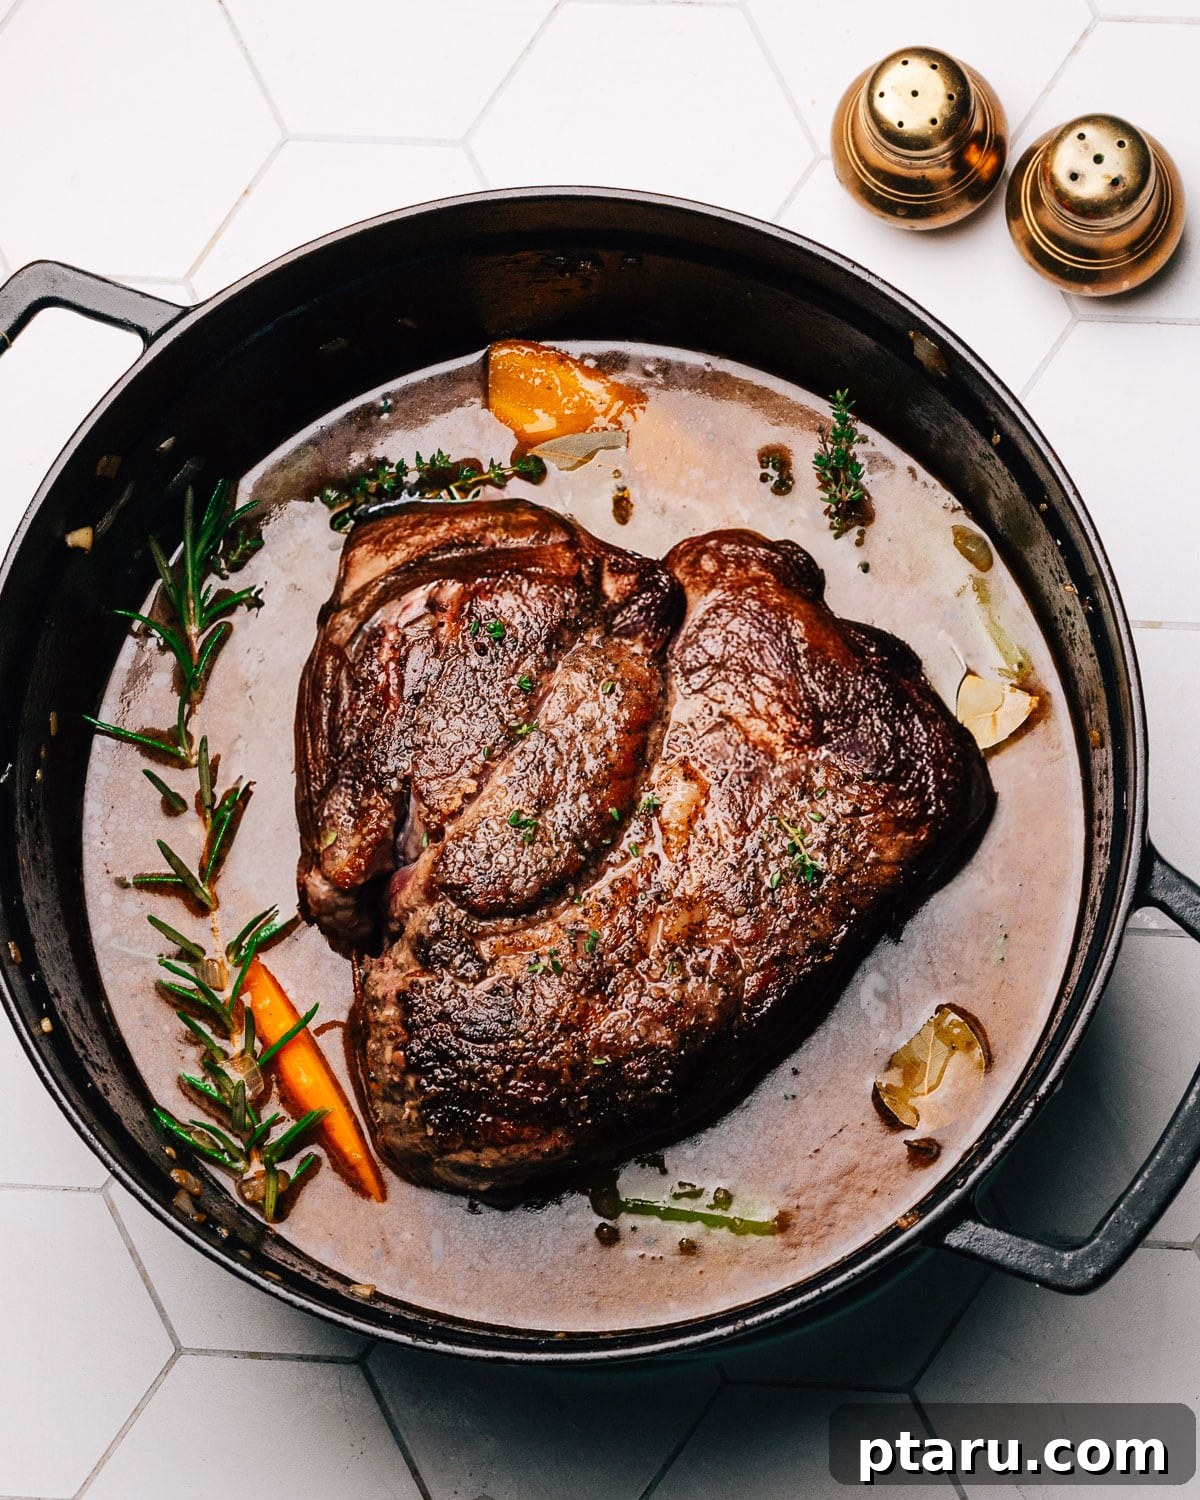
Prepare to create the ultimate comfort food with this incredibly easy, slow-braised Beef Chuck Roast. This recipe delivers a deeply flavorful, fall-apart tender beef complemented by a luxurious, silky brown gravy that will have everyone asking for seconds. It’s a culinary masterpiece that simplifies hearty home cooking.
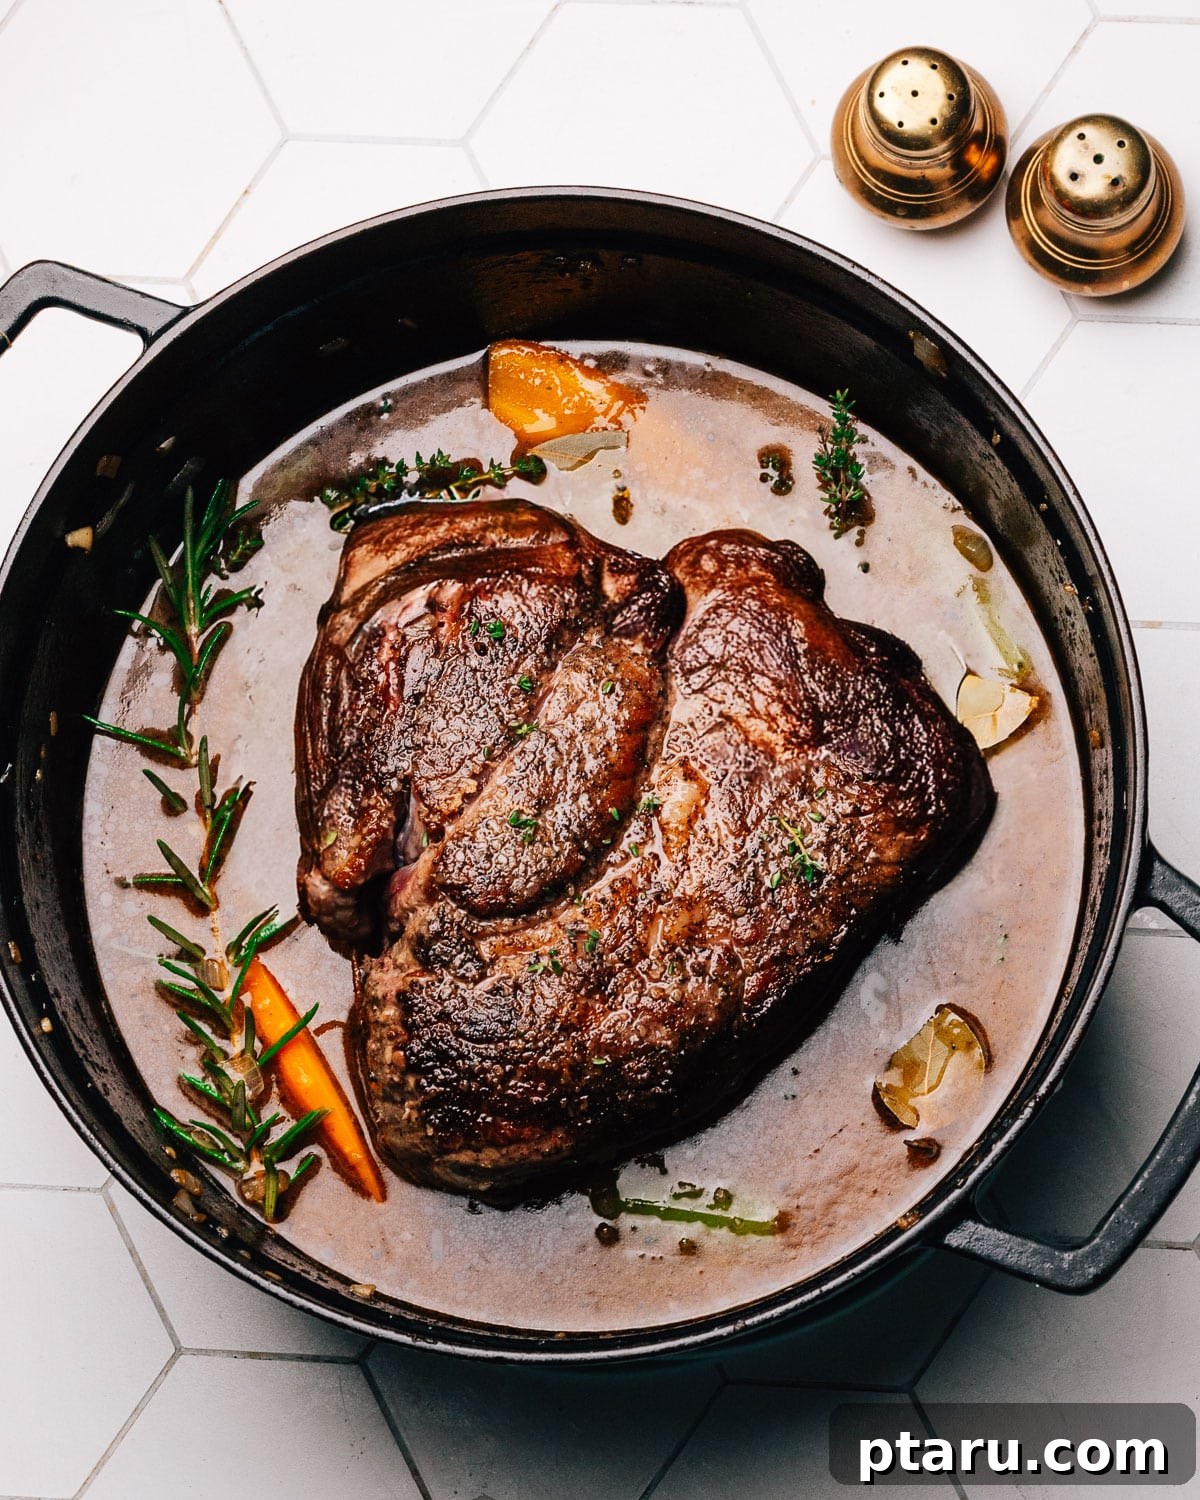
This effortless Beef Chuck Roast recipe is designed for maximum flavor with minimal fuss. It’s oven-braised low and slow, allowing the robust flavors of onions, carrots, and aromatic herbs to infuse the beef, resulting in a smooth, glossy gravy that defines cozy, simple perfection. Whether you’re a seasoned chef or a beginner, this guide will walk you through every step to achieve a truly unforgettable meal.
Essential Beef Chuck Roast Ingredients for Deep Flavor
The secret to an exceptional beef chuck roast lies in selecting quality ingredients that work in harmony to build layers of flavor. Each component plays a crucial role in transforming a simple cut of meat into a tender, succulent masterpiece.
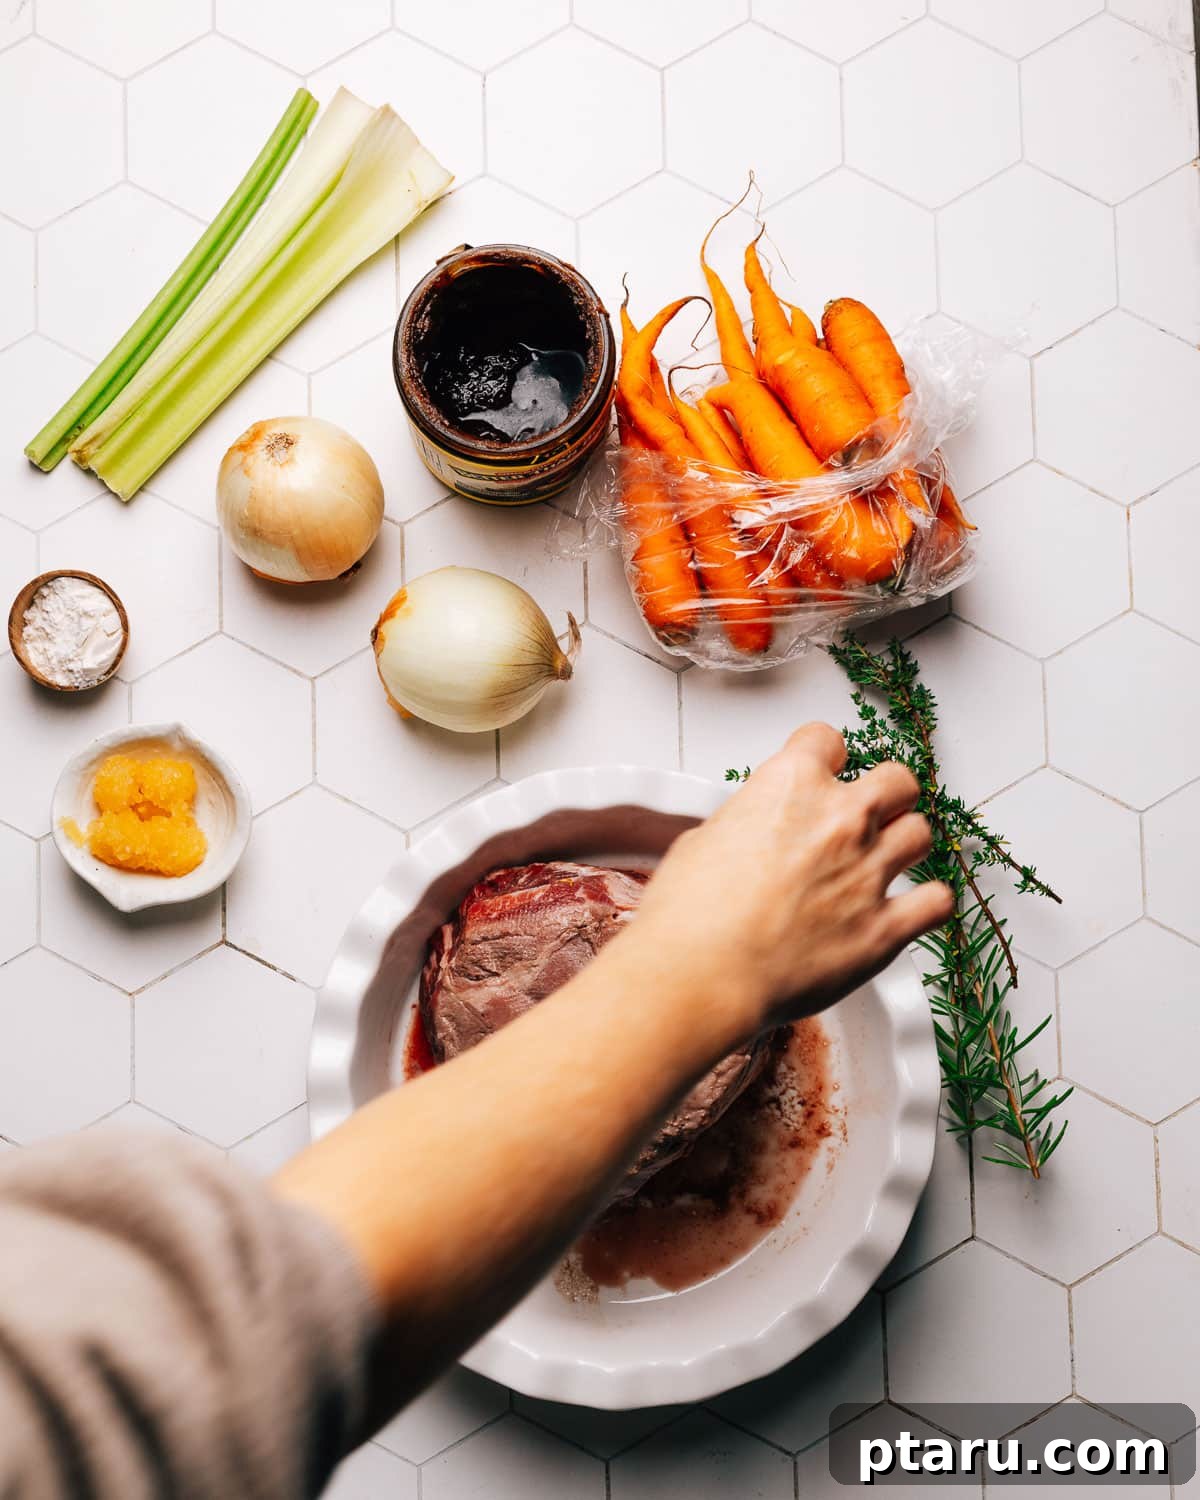
- Beef chuck roast: This collagen-rich cut from the shoulder is ideal for slow braising. As it cooks over time, the connective tissue breaks down, rendering the meat incredibly meltingly tender and flavorful. Look for a roast with good marbling for the best results.
- Olive oil: Used for searing the beef, olive oil helps create a beautiful brown crust, locking in juices and developing a foundational layer of flavor known as the Maillard reaction.
- Butter: Adds a rich, buttery depth and helps caramelize the aromatic vegetables, contributing to the gravy’s luxurious texture and taste.
- Onions, carrots & celery: This classic trio, often called mirepoix, forms the aromatic base of the braising liquid. They slowly release their sweet and savory flavors, creating a complex background for the beef. For a more comprehensive pot roast experience complete with potatoes and wine, consider exploring our Dutch Oven Pot Roast recipe.
- Garlic: Pungent and aromatic, garlic elevates the savory notes of the dish, adding an indispensable layer of flavor to the braising liquid.
- All-purpose flour: Essential for creating a roux, which thickens the braising liquid into a smooth, glossy, and irresistible gravy.
- Beef stock or broth: The primary liquid for braising, beef stock infuses the meat with its rich essence. For convenience and concentrated flavor, I highly recommend using a high-quality concentrate like Better than Bouillon, making gravy preparation a breeze.
- Thyme, rosemary & bay leaves: These robust herbs impart a classic, earthy fragrance and taste that perfectly complements beef, creating an authentic pot roast aroma.
- Soy sauce: A subtle yet powerful ingredient, soy sauce provides a significant umami boost, deepening the savory profile of the dish without imparting a distinct “soy” flavor. It’s a secret weapon for a richer, more complex gravy.
You’ll find the precise quantities for each ingredient in the detailed recipe card at the conclusion of this article.
Flavorful Variations and Smart Substitutions
This beef chuck roast recipe is wonderfully versatile, allowing you to customize it to your personal preferences or what you have on hand. A few smart swaps can easily tailor the roast to your taste and dietary needs, ensuring a perfect meal every time.
- Alternative cuts of meat: While chuck roast is our top recommendation, you can successfully use other beef cuts for braising. Excellent alternatives include blade roast, shoulder roast, or even beef brisket. The key is to select cuts that are well-marbled and contain connective tissue, as these will become beautifully tender when cooked with long, moist heat.
- Note that leaner roasts, such as an eye of round roast, tend to be drier and less forgiving in slow-cook methods. These cuts are generally better suited for high-heat, shorter cooking times, like an air fryer roast beef recipe, to maintain moisture.
- Worcestershire sauce instead of soy: For a different flavor profile, substitute soy sauce with Worcestershire sauce. It offers a sweeter, tangier taste with a more subtle umami, adding a classic savory depth that is slightly different but equally delicious.
- Infusing with red wine: To add a sophisticated layer of flavor, replace 1 cup of beef broth with dry red wine (such as Cabernet Sauvignon or Merlot). Add the wine to the pot after cooking the aromatics and flour, scraping up any browned bits from the bottom of the pot to deglaze it before adding the rest of the broth. This adds a wonderful complexity to the gravy.
- Diverse root vegetables: Feel free to experiment with other root vegetables. Swap in parsnips or turnips for some or all of the carrots to introduce new earthy notes and textures to your braise. Sweet potatoes or rutabagas can also be excellent additions.
- Gluten-free gravy option: If you need a gluten-free gravy, simply omit the all-purpose flour. Instead, create a cornstarch slurry (mix 1-2 tablespoons of cornstarch with an equal amount of cold water) and stir it into the simmering gravy at the end until it reaches your desired thickness. This technique is similar to how I prepare gravy in my Instant Pot Steak recipe.
- Mexican-inspired chuck roast: For a delightful twist with a spicier kick, transform this chuck roast into a Mexican-style shredded beef. My shredded beef recipe offers a fantastic blueprint, adaptable for either oven or crockpot preparation, perfect for tacos, burritos, or enchiladas.
Essential Tools for Success
Having the right kitchen tools can make all the difference in achieving the perfect beef chuck roast. Here are a couple of key items that will simplify your cooking process and enhance your results:
- Heavy Dutch oven with lid: This is arguably the most crucial piece of equipment for braising. A heavy-bottomed Dutch oven, ideally a 5.5 to 6-quart size, provides even heat distribution and retains moisture, creating the ideal environment for slow, tender cooking. Its tight-fitting lid prevents evaporation, ensuring your roast stays juicy.
- Blender or stick blender: For that incredibly smooth, restaurant-quality gravy, a blending tool is indispensable. A standard blender works perfectly for processing the strained pan juices and cooked aromatics into a velvety consistency. For ultimate convenience, I personally love my cordless stick blender, which allows you to blend right in the pot, minimizing cleanup.
For those times when you need a delicious roast beef dinner on a tighter schedule, consider trying my Instant Pot Roast Beef recipe, which offers a quicker alternative without sacrificing flavor!
How to Make Tender Beef Chuck Roast with Silky Gravy: A Simple Step-by-Step Guide
Creating this deeply satisfying beef chuck roast with its rich gravy is simpler than you might imagine. The method involves a few key stages: searing the meat to build flavor, creating an aromatic base, gently braising to achieve ultimate tenderness, and finally, blending the flavorful pan juices into a glossy, smooth gravy. Follow these steps precisely to achieve a restaurant-quality meal right in your own kitchen.
Step 1: Brown the Roast for Deep Flavor
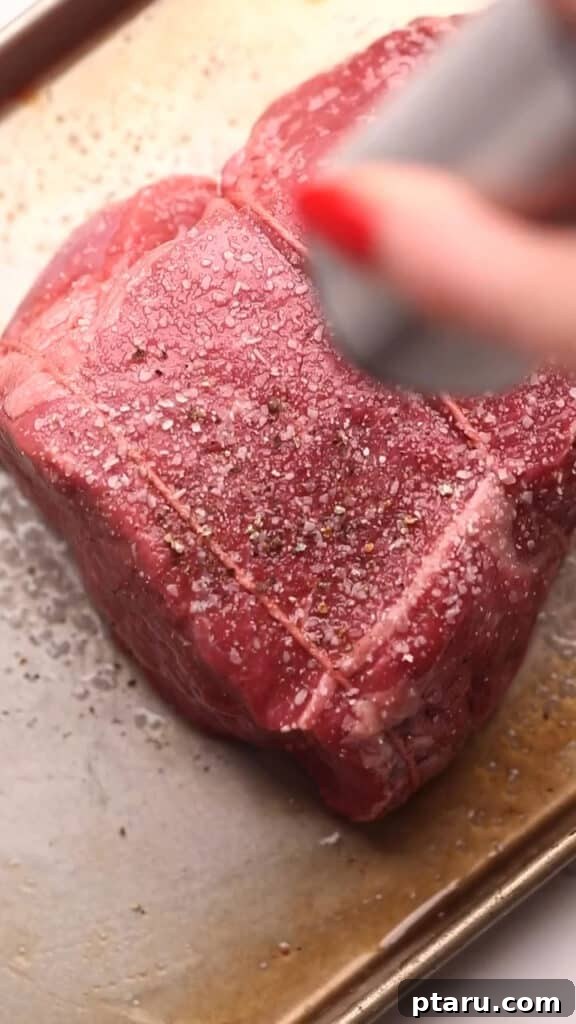
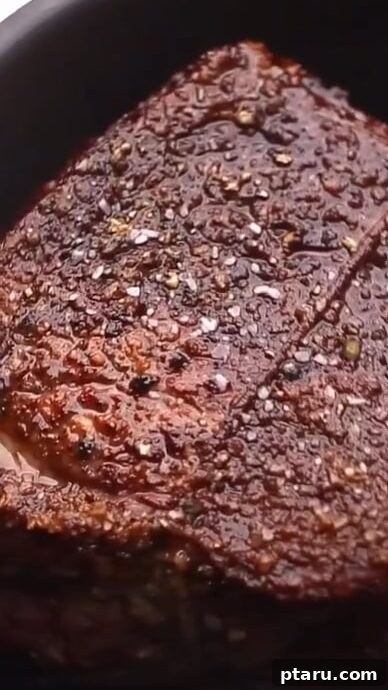
Begin by thoroughly patting your beef chuck roast dry with paper towels. This crucial step ensures a deep, even sear. Season the roast generously on all sides with kosher salt and black pepper. Heat olive oil in a heavy Dutch oven over medium-high heat until shimmering. Carefully place the seasoned beef into the hot oil and sear until a rich, dark brown crust forms on all sides, typically 4-5 minutes per side. This browning process is vital, as it builds the foundational savory flavor that will permeate the entire dish and carry through to your gravy. Once browned, transfer the roast to a plate and set aside.
Step 2: Build the Aromatic Flavor Base
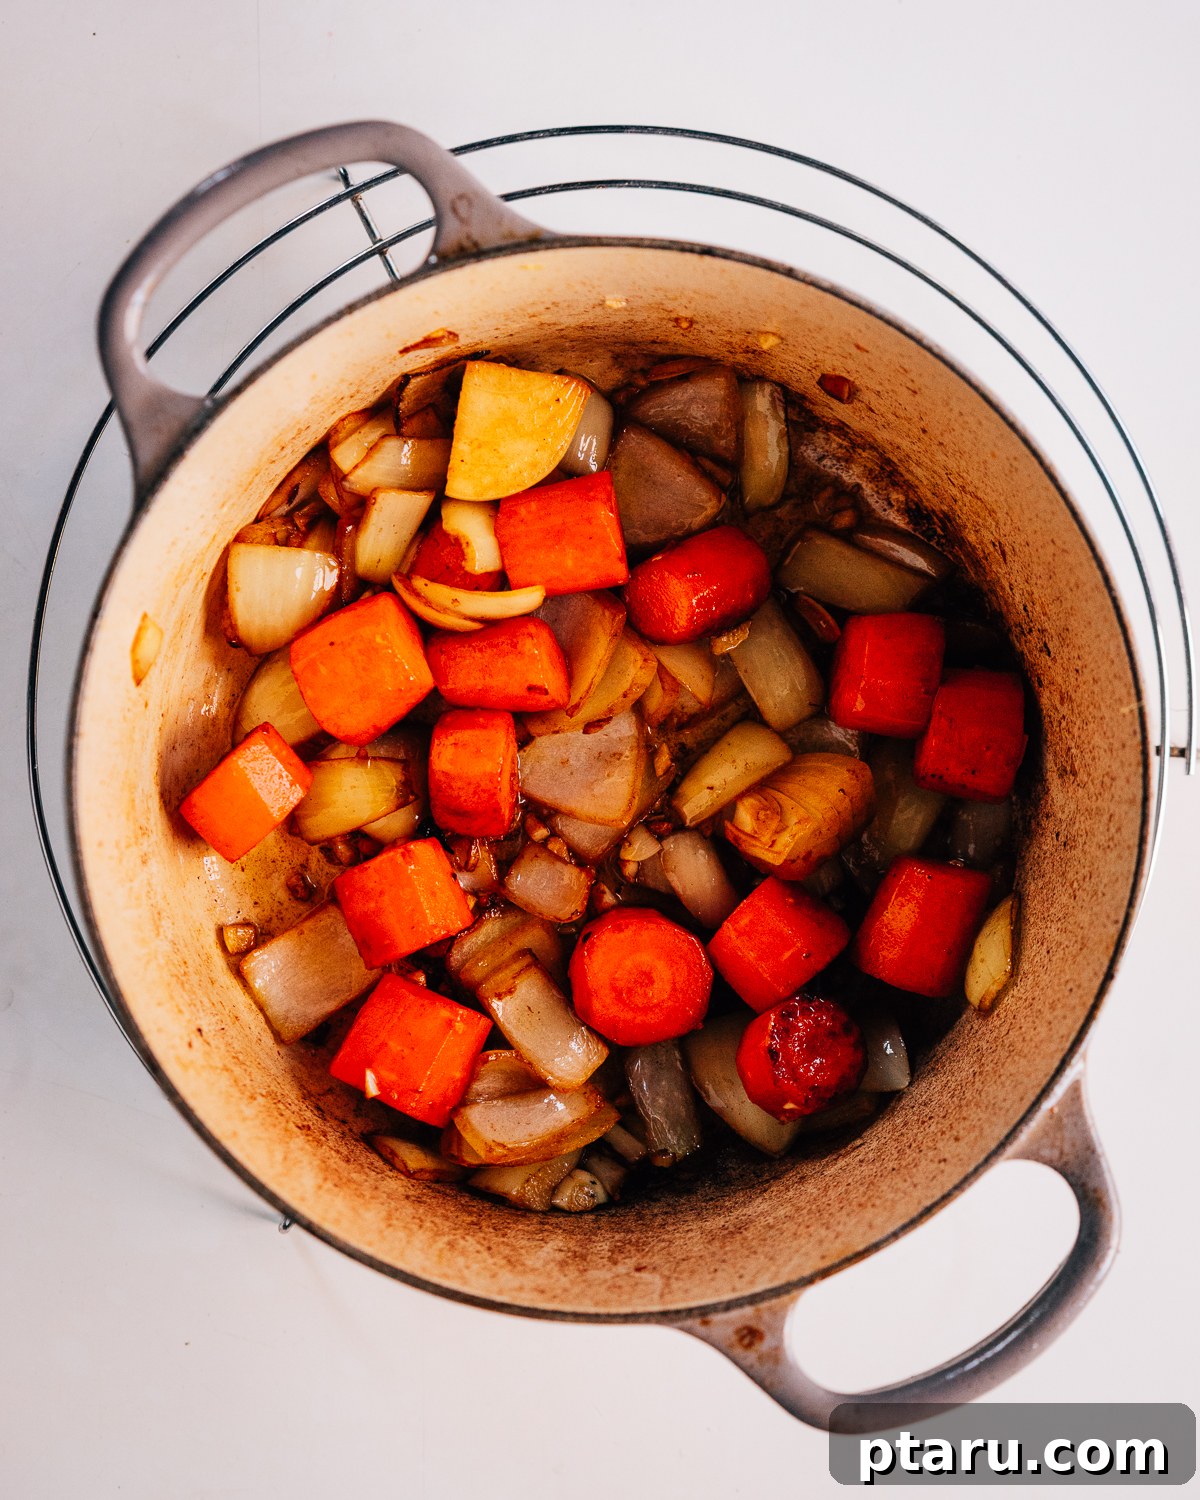
Reduce the heat to medium. Add butter to the same Dutch oven, allowing it to melt. Add the sliced onions, chunky carrots, and celery. Sauté these aromatic vegetables, stirring occasionally, until they soften and turn a beautiful golden color, which usually takes 6-8 minutes. This caramelization adds a natural sweetness and depth. Stir in the minced garlic and cook for another minute until fragrant. Sprinkle the all-purpose flour over the vegetables and stir continuously for about a minute. This step cooks out the raw flour taste and creates a roux, which will thicken your gravy.
Step 3: Deglaze the Pot and Begin Braising
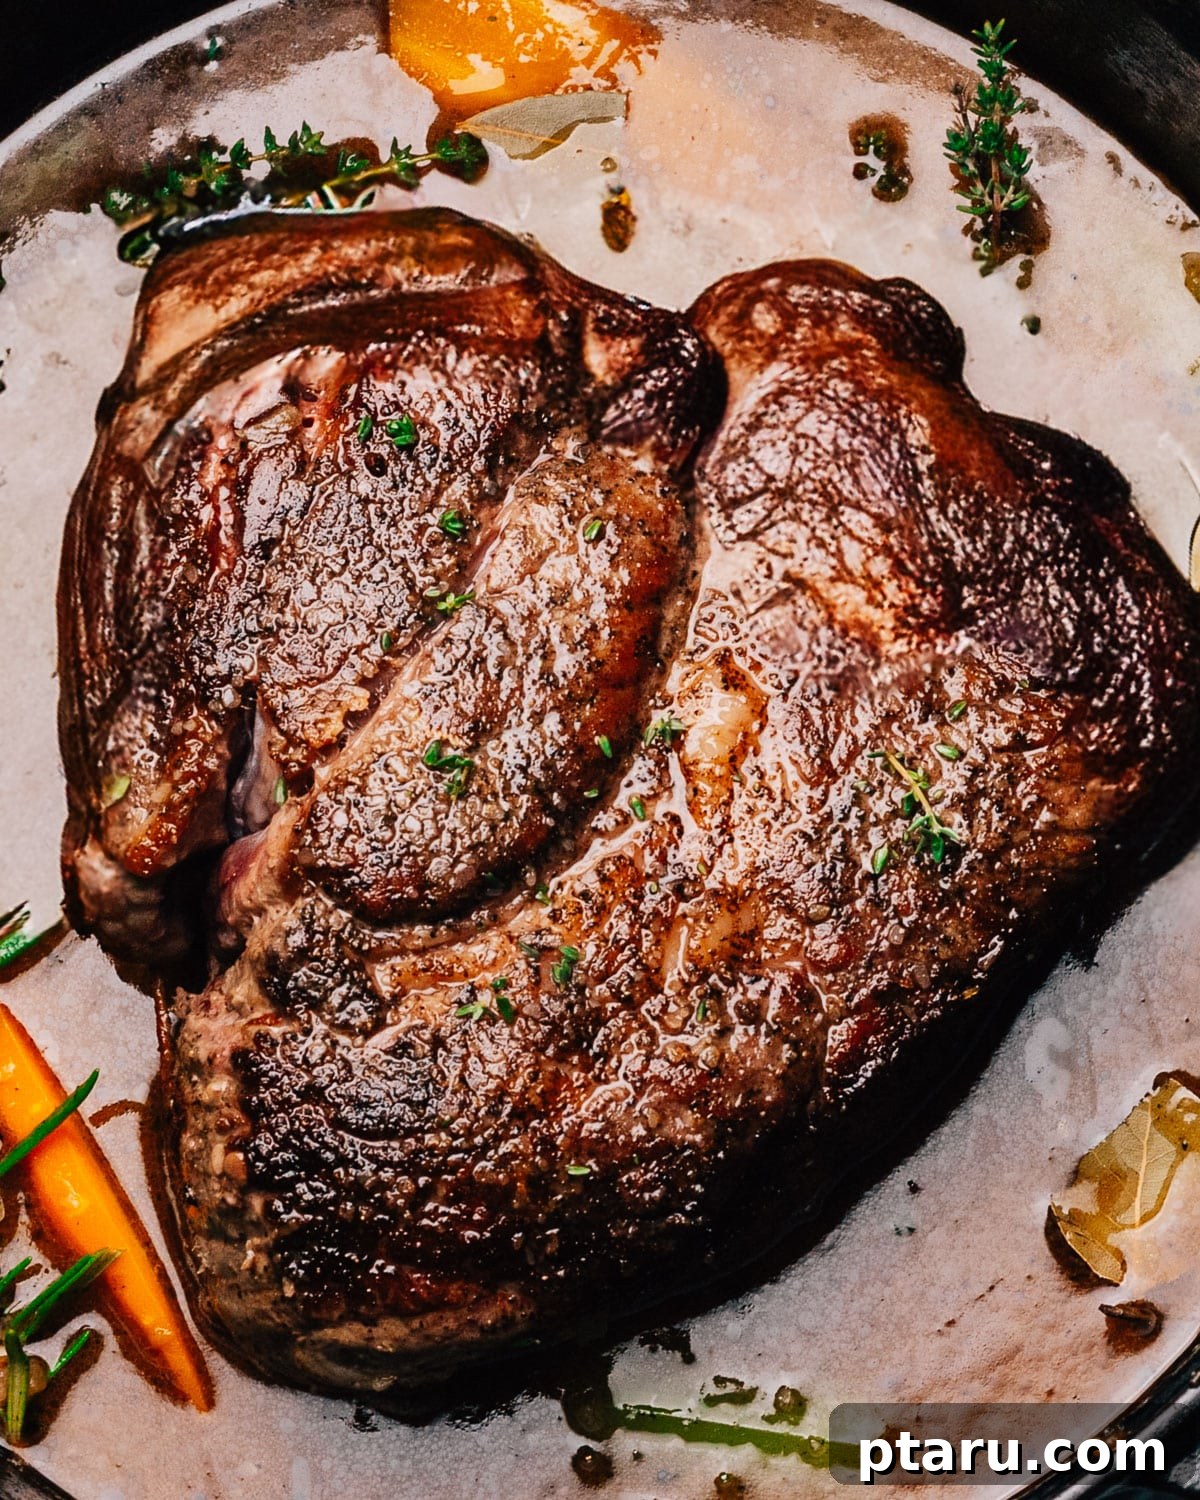
Carefully pour the beef broth or stock into the Dutch oven. Immediately scrape the bottom of the pot with a wooden spoon, dislodging all the flavorful browned bits (fond) that have accumulated. These bits are packed with concentrated flavor and are essential for a rich gravy. Stir in the fresh sprigs of thyme, rosemary, bay leaves, and the soy sauce, which adds a crucial umami depth. Return the seared beef chuck roast to the pot, along with any accumulated juices from the plate. Bring the liquid to a gentle simmer on the stovetop.
Step 4: Slow Oven Braising for Ultimate Tenderness
Once the liquid is simmering, cover the Dutch oven tightly with its lid. Transfer the pot to a preheated oven set to 325°F (160°C). Allow the roast to braise slowly for 2½ to 3 hours, or until it is incredibly tender. For even cooking and consistent moisture, make sure to flip the roast halfway through the cooking time (approximately 1½ hours in). This ensures both sides benefit from the moist heat and turn silky soft. Always check the tenderness with a fork rather than relying solely on the clock; the beef should easily shred apart when it’s perfectly done.
Step 5: Craft the Silky Brown Gravy
Once the beef is fork-tender, carefully remove the Dutch oven from the oven. Transfer the succulent roast and softened vegetables to a warm serving platter and tent them loosely with aluminum foil to keep them warm and allow the juices to redistribute. Discard the spent herb sprigs and bay leaves from the braising liquid. For an exceptionally smooth, professional-quality gravy, use a fine-mesh strainer to strain the remaining liquid and cooked vegetables into a separate bowl, pressing on the solids to extract all their flavor. Then, using an immersion blender (or transferring to a regular blender), blend the strained sauce until it is completely smooth and velvety. Return the blended gravy to the Dutch oven and simmer on the stovetop over medium-high heat for a few minutes, stirring constantly, until it thickens to your desired consistency. Taste the gravy and adjust the seasoning with another splash of soy sauce (or more salt) and freshly ground black pepper as needed. This meticulous step ensures your gravy is as rich and flavorful as the beef itself.
Avoid These 5 Common Mistakes for a Perfect Beef Chuck Roast with Gravy
Even seasoned cooks can sometimes fall into common traps when preparing beef chuck roast. Being aware of these frequent missteps will help you avoid them, ensuring your roast and gravy turn out perfectly every time:
- Skipping the sear: Many home cooks underestimate the power of a good sear. Failing to deeply brown the beef before braising means you’re missing out on the crucial Maillard reaction, which develops deep, savory flavors. Without this caramelization, your gravy will lack that rich, complex base and your beef won’t have the same depth of taste. Always take the time to achieve a dark, crusty exterior on all sides.
- Braising at too high a temperature: Overly aggressive braising heat is a common culprit for tough, dry meat. While slow cooking is key, a roaring boil will cause the muscle fibers to seize up, resulting in chewy beef and a reduced, overly concentrated sauce. Maintain a gentle simmer throughout the oven braising process; the liquid should barely bubble, indicating a low and slow cook.
- Constantly lifting the lid: Curiosity can be detrimental to a good roast! Each time you lift the lid of your Dutch oven, you release precious steam and significantly drop the oven’s internal temperature. This interrupts the consistent low-and-slow cooking environment essential for breaking down tough connective tissues, extending cooking time, and potentially drying out the meat. Trust the process and keep the lid on tight.
- Under-salting a larger roast: Beef chuck roast is a substantial cut of meat, and it requires adequate seasoning to bring out its best flavor. Under-salting, especially for larger roasts, is a common mistake that leads to a flat, uninspired taste. Remember that seasoning needs to penetrate beyond the surface. For roasts larger than 3 pounds, consider adding an additional ½ teaspoon of kosher salt per extra pound to ensure a perfectly seasoned, flavorful result.
- Rushing the cook and slicing too early: Patience is a virtue when it comes to braising. Ending the cooking process too soon and attempting to slice the roast before it has reached true fork-tenderness will result in tough, stringy meat. The connective tissues need ample time to completely break down. Always test the meat with a fork – it should easily pull apart or shred with minimal effort, indicating it’s ready to be removed from the heat and rested before serving.
Make Ahead and Storage for Ultimate Convenience
One of the many benefits of a delicious beef chuck roast is that it tastes even better the next day, making it an excellent meal prep option. Cook once and enjoy easy, flavorful leftovers all week long.
Storing Leftovers Safely
- Cool in gravy: For the most succulent and juicy leftovers, always store your sliced or shredded beef submerged in its rich gravy. The gravy acts as a protective layer, preventing the meat from drying out and infusing it with even more flavor.
- Fridge timing: Properly stored in airtight containers, your beef chuck roast and gravy will keep beautifully in the refrigerator for 3 to 4 days. Ensure it cools completely before refrigerating.
- Meal prep tip: For quick and convenient lunches or dinners, portion the cooled beef and gravy into individual single-serve containers. This makes grabbing a hearty meal incredibly easy.
Freezing for Future Meals
- Freeze in sauce: To preserve the best texture and flavor, always freeze the beef and gravy together. The gravy helps protect the meat from freezer burn and maintains its moisture.
- Label smart: Don’t forget to label your freezer containers with the date and contents (e.g., “Beef Chuck Roast & Gravy – Jan 15th – serve with mash”). This helps you keep track of freshness and reminds you of perfect pairings. The roast will maintain quality for up to 3 months.
- Thaw safely: For best results and food safety, always defrost frozen beef chuck roast overnight in the refrigerator. Avoid thawing at room temperature.
Reheating Beef Chuck Roast with Gravy
- Stovetop method: The stovetop is an excellent way to reheat your roast. Transfer the beef and gravy to a saucepan and simmer gently over low to medium heat, stirring occasionally. Add a splash of water or extra beef broth if the gravy appears too thick or reduced. Heat until warmed through.
- Oven method: For a larger portion or if you prefer oven reheating, place the beef and gravy in an oven-safe dish, cover it tightly with foil, and warm it in a 300°F (150°C) oven until hot, typically 15 to 25 minutes, depending on the amount.
- Microwave method: For individual servings, the microwave is a quick option. Use short bursts (30-60 seconds) and stir between intervals to ensure even heating and prevent dry spots.
How to Serve This Irresistible Beef Chuck Roast Recipe
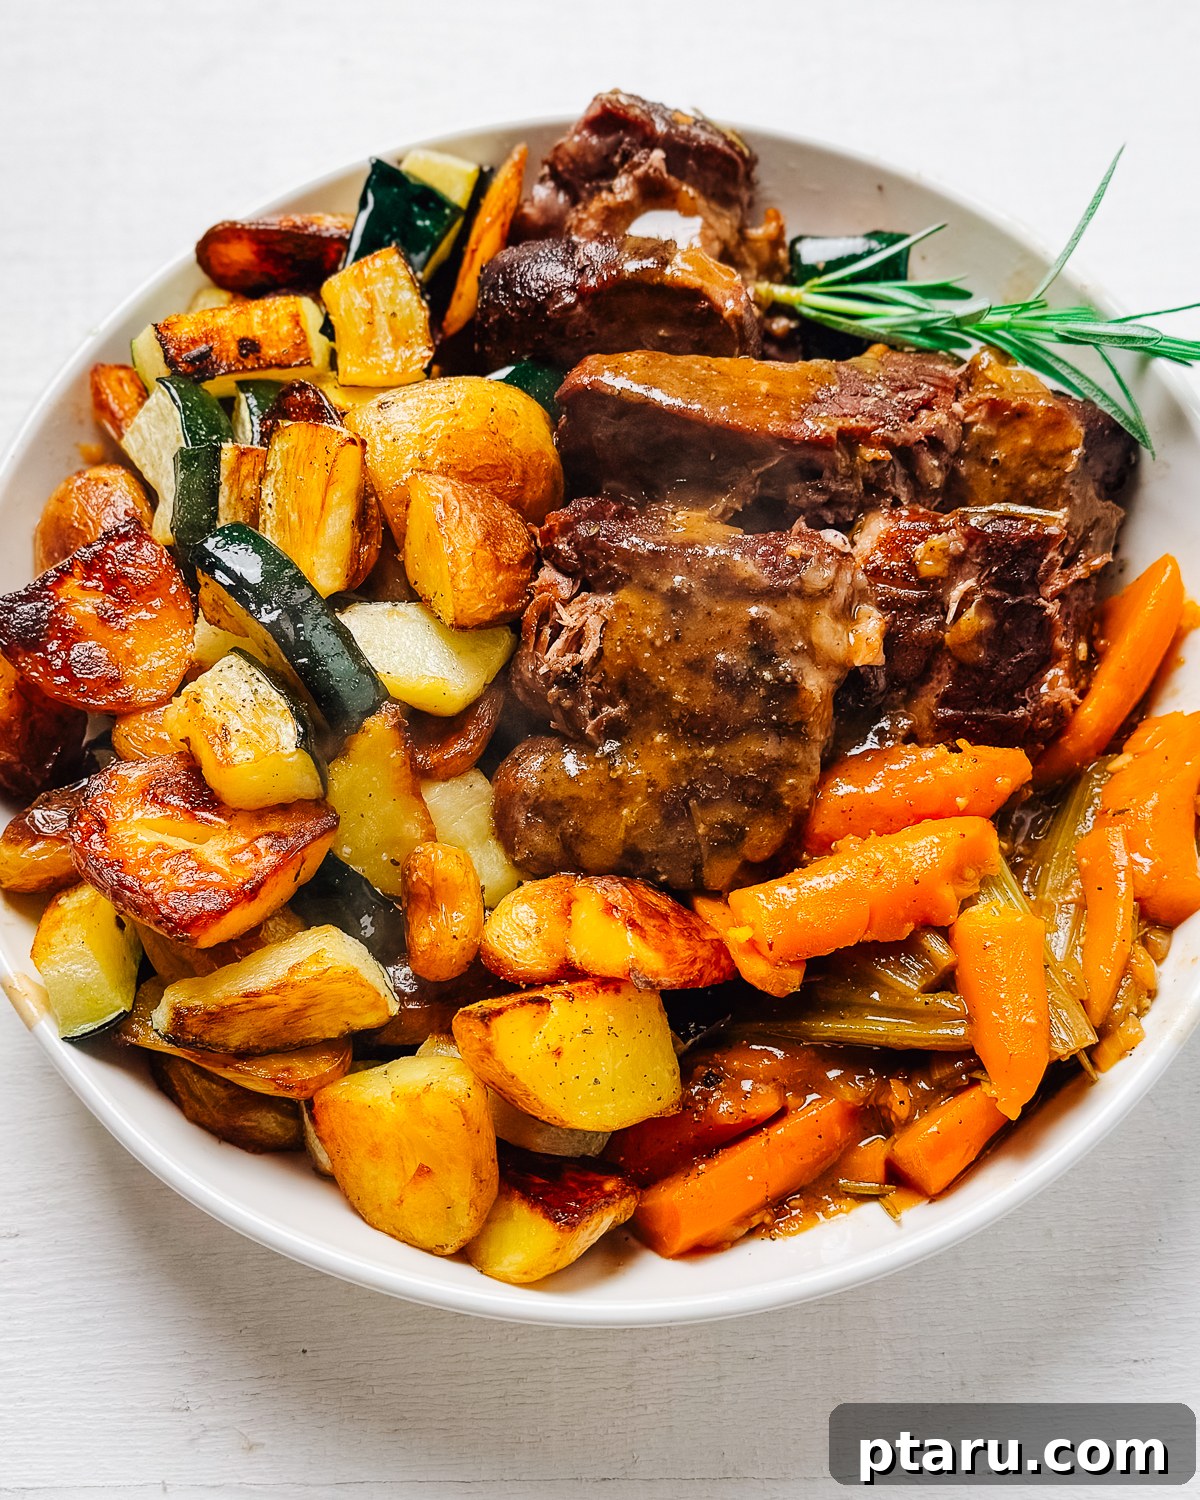
This beef chuck roast is a showstopper on its own, but it truly shines when served with classic comforting sides. I personally love it generously piled onto a plate alongside creamy roasted or mashed potatoes, ensuring there’s plenty of that rich, glossy gravy to spoon over everything. You can serve the beef in rustic chunks, elegant slices, or shredded for a more casual presentation – it’s delicious any way you cut it!
Perfect Side Dishes for Beef Chuck Roast
- Creamy potatoes: No pot roast is complete without potatoes! Spoon the luscious gravy generously over them. Try my ultimate Gordon Ramsay mashed potatoes for a truly decadent side, simple microwave baked potatoes for speed and ease, or the rich and cheesy gluten-free au gratin potatoes for a special touch.
- Crispy green vegetables: Balance the richness of the beef with a vibrant, crispy vegetable side. Opt for flavorful air fryer broccoli, quick air fryer zucchini, or the unexpectedly delicious air fryer eggplant for a delightful textural contrast.
- Fresh green salad: For a lighter, refreshing counterpoint, round out the meal with a crisp green salad dressed with a bright vinaigrette. Our homemade Italian dressing recipe is a perfect choice, adding a zesty tang.
- Artisan bread for mopping gravy: Don’t let a single drop of that incredible gravy go to waste! Serve with a crusty loaf of bread or, for an extra treat, my recipe for quick garlic bread from scratch, perfect for soaking up every last bit of savory goodness.
How to Make the Absolute Best Beef Chuck Roast: Final Notes & Expert Secrets
Unlock the full potential of your beef chuck roast and elevate it from great to extraordinary with these essential tips and tricks. These “secrets” are the culmination of perfecting this classic dish, ensuring a truly unforgettable experience:
- Salt by weight, not just sight: Proper seasoning is paramount for a large cut of meat. Beyond the initial seasoning, remember to add approximately ½ teaspoon of kosher salt per extra pound if your roast is larger than 3 lbs. This ensures the salt penetrates deep into the meat, yielding perfectly seasoned bites throughout, not just on the surface.
- Master heat control for tenderness: The difference between tough and meltingly tender beef lies in precise heat control. A gentle, consistent simmer during braising is key. Avoid high heat or vigorous boiling, which can tighten the meat fibers. A slow, steady heat allows the connective tissues to gradually break down, resulting in that coveted fall-apart texture.
- Brown well for unparalleled flavor: Do not rush the searing step! Achieving a deep, dark brown crust on all sides of your chuck roast is non-negotiable. This caramelization (the Maillard reaction) creates thousands of flavor compounds that form the bedrock of the entire dish. It’s this deep sear that makes the gravy taste like it has been cooking all day, even if the actual active cooking time is much shorter.
- Blend the sauce for silky gravy: While chunky gravy has its charm, a smooth, glossy gravy truly elevates this dish. Straining the braising liquid to remove large solids, then blending it (with some of the softened vegetables if desired) transforms humble pan juices into a luxurious, restaurant-quality sauce. This step adds a refined touch that is often overlooked.
- Rest the roast before serving: Just like a steak, resting the beef chuck roast after cooking is crucial. Allow it to rest, tented with foil, for at least ten minutes on a cutting board or platter before slicing or shredding. This allows the internal juices, which have been pushed to the center during cooking, to redistribute throughout the meat, ensuring every bite is moist and flavorful. It also results in cleaner, more appealing slices.
- The umami bump: The addition of soy sauce is a subtle yet powerful secret ingredient. It doesn’t make the dish taste like soy sauce; instead, it provides a concentrated burst of savory umami that deepens the overall flavor profile of the beef and gravy, making it taste richer and more complex without being identifiable.
More Comforting Beef Dinner Recipes You’ll Adore
If you’ve enjoyed the rich flavors of this beef chuck roast, you’re in for a treat! Explore these other comforting and utterly delicious beef recipes that are sure to become new family favorites:
- Old-Fashioned Salisbury Steak: A true classic, this dish is a must-try for any beef and gravy enthusiast. It’s pure nostalgia on a plate, offering tender Salisbury steak patties smothered in a savory mushroom gravy.
- The Best Meatloaf Ever: Prepare to be amazed by this moist, incredibly flavorful, and downright irresistible meatloaf. It redefines what meatloaf can be, with a perfect texture and savory glaze.
- Hearty Beef Vegetable Soup: This robust soup is packed with tender chunks of beef and a colorful medley of vegetables, simmered in a rich broth. It’s the ultimate comfort food, especially perfect for chilly days.
- Dutch Oven Beef Stew: A timeless classic, our beef stew features tender beef and root vegetables slow-cooked in a rich, savory gravy, all made conveniently in one pot. This recipe, along with other boneless beef recipe favorites, highlights the versatility and deliciousness of beef.
Recipe Details: Easy Beef Chuck Roast with Brown Gravy
Indulge in this melt-in-your-mouth Beef Chuck Roast, featuring a rich, flavorful gravy and incredibly simple preparation steps. This recipe is designed to be your go-to cozy dinner, perfect for making on repeat throughout the year.
By: Jennifer Pallian BSc, RD
Summary: Melt-in-your-mouth Beef Chuck Roast with tasty, rich gravy, and simple steps. This chuck roast is the cozy dinner you’ll make on repeat.
- Prep Time: 20 minutes
- Cook Time: 3 hours
- Servings: 8
Ingredients
To season and sear beef:
- 3 lb beef chuck roast (also known as bottom blade roast)
- 2 tsp kosher salt
- 1 tsp black pepper
- 2 tbsp olive oil
For the braising liquid:
- 2 tbsp butter
- 2 medium onions, thickly sliced
- 3 carrots, cut into chunks
- 3 celery stalks, cut into chunks
- 5 garlic cloves, smashed (or 5 tsp minced)
- 2 tbsp all-purpose flour
- 3 cups beef broth or stock
- 2 sprigs fresh thyme (or 1 tsp dried)
- 2 sprigs rosemary (or 1 tsp dried)
- 2 bay leaves
- 1 tbsp soy sauce (plus more to taste)
Instructions
- Brown the Roast: Pat the beef roast thoroughly dry with paper towels. Season generously on all sides with 2 tsp kosher salt and 1 tsp black pepper. Heat 2 tbsp olive oil in a heavy Dutch oven over medium-high heat until shimmering. Carefully place the beef in the hot oil and sear until deeply browned on all sides, about 4-5 minutes per side. This step is crucial for developing deep flavor. Transfer the browned roast to a plate and set aside.
- Build the Flavor Base: Reduce the heat to medium. Add 2 tbsp butter to the Dutch oven and allow it to melt. Add the thickly sliced onions, chunky carrots, and celery. Sauté the vegetables, stirring occasionally, until they soften and turn golden brown, approximately 6-8 minutes. Stir in the 5 smashed garlic cloves and cook for another minute until fragrant. Sprinkle 2 tbsp all-purpose flour over the vegetables and stir continuously for 1 minute to cook out the raw flour taste and create a roux.
- Deglaze and Simmer: Pour 3 cups of beef broth into the Dutch oven. Using a wooden spoon, scrape up all the flavorful browned bits (fond) from the bottom of the pot; these bits are essential for a rich gravy. Stir in the fresh thyme sprigs, rosemary sprigs, bay leaves, and 1 tbsp soy sauce. Return the seared beef roast to the pot, along with any juices accumulated on the plate. Bring the liquid to a gentle simmer on the stovetop.
- Oven Braise: Once simmering, cover the Dutch oven tightly with its lid. Transfer the pot to a preheated oven set to 325°F (160°C). Allow the roast to braise for 2½ to 3 hours, or until it is incredibly tender. At the halfway point (about 1½ hours in), carefully flip the roast to ensure both sides cook evenly and become silky soft. Always check the tenderness with a fork; the beef should easily shred when perfectly done, rather than relying solely on the clock.
- Make the Brown Gravy: When the roast is tender, carefully remove the Dutch oven from the oven. Transfer the cooked roast and softened vegetables to a warm serving platter and tent loosely with foil to keep warm. Discard the herb sprigs and bay leaves from the braising liquid. For a smoother, professional-quality gravy, use a fine-mesh strainer to strain the remaining pan juices and vegetables into a separate bowl, pressing on the solids to extract all liquid. Using an immersion blender (or carefully transferring to a regular blender), blend the strained sauce until it is completely smooth and velvety. Return the blended gravy to the Dutch oven and simmer on the stovetop over medium-high heat for a few minutes, stirring constantly, until it thickens to your desired consistency. Taste the gravy and adjust seasoning with another splash of soy sauce (or more salt) and freshly ground black pepper as needed.
Notes
- The soy sauce is a fantastic secret ingredient; it deepens the savory flavor of the gravy without being detectable as “soy.” If preferred, you can substitute it with Worcestershire sauce, which offers a slightly sweeter, tangier profile with subtle umami.
- For a complete meal in one pot, large chunks of potatoes can be added to the Dutch oven during the last 45–60 minutes of cooking, allowing them to soften and absorb the rich flavors.
- Leftovers are fantastic! They keep well for 3–4 days when stored in an airtight container in the fridge, or they can be frozen for up to 3 months for convenient future meals.
- Larger size roast? If your beef chuck roast is larger than 3 lbs, adjust the seasoning and cooking time:
- In Step 1, add an additional ½ tsp kosher salt per extra pound of roast beyond 3 lbs.
- Add approximately 30–40 minutes of braising time per extra pound beyond 3–4 lbs.
Nutrition Information (Approximate)
Calories: 695kcal | Carbohydrates: 7g | Protein: 66g | Fat: 45g | Saturated Fat: 19g | Polyunsaturated Fat: 4g | Monounsaturated Fat: 23g | Trans Fat: 2g | Cholesterol: 240mg | Sodium: 1021mg | Potassium: 1256mg | Fiber: 1g | Sugar: 2g | Vitamin A: 3975IU | Vitamin C: 4mg | Calcium: 80mg | Iron: 7mg
Nutrition information is automatically calculated and should only be used as an approximation.
Tried this recipe? Share your experience!
We’d love to hear how your Beef Chuck Roast turned out. Leave a comment below with your feedback, tips, or any creative variations you tried!