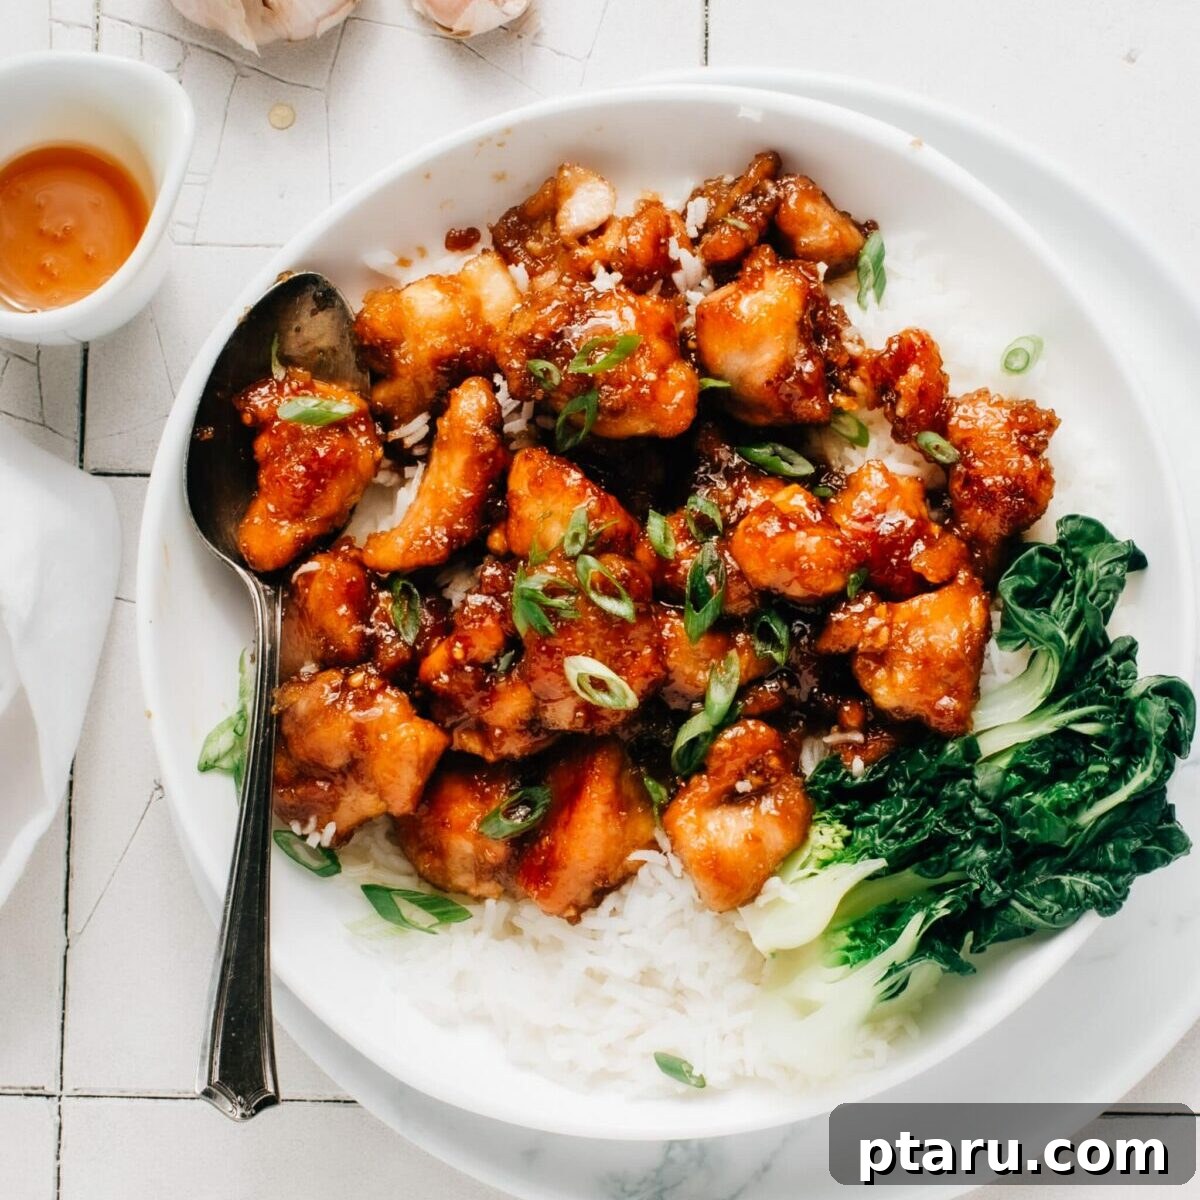
My Healthier Honey Garlic Chicken recipe has quickly become a new family favorite in our household. Imagine golden, tender bites of chicken, beautifully coated in a sticky, glossy honey-garlic sauce that’s both savory and sweet. It’s incredibly satisfying, and the best part? There’s absolutely no deep-frying involved. I’ve genuinely never seen the kids gobble up their dinner so fast!
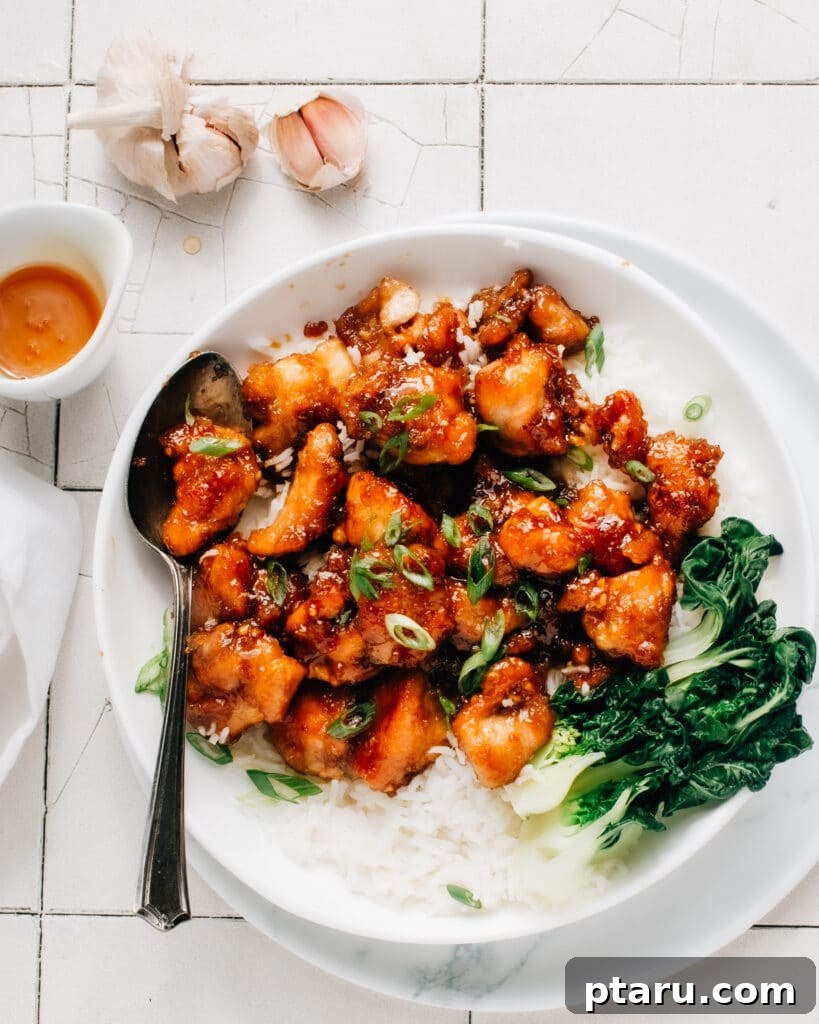
Healthier Honey Garlic Chicken: The Ultimate Easy & Quick Weeknight Meal
Are you constantly searching for quick, delicious, and satisfying dinner ideas that don’t involve a mountain of dishes or hours in the kitchen? This Healthier Honey Garlic Chicken recipe is precisely what you need. It captures all the irresistible flavors of your favorite takeout honey garlic chicken, transforming it into a lightened-up, homemade version that’s perfect for even the busiest weeknights. Forget the heavy oils and lengthy preparation; our approach focuses on simplicity, speed, and vibrant flavor, making it a standout dish that your entire family will adore. Get ready to impress with minimal effort!
Why This Healthier Honey Garlic Chicken Will Become a Staple
Many of us crave the comforting taste of honey garlic chicken, but often shy away from making it at home due to the perceived complexity or the unhealthiness of traditional deep-frying methods. This recipe eliminates those concerns entirely. We’ve developed a streamlined process that ensures juicy, golden chicken with that signature sticky glaze, all achieved in a single pan and without a single drop of deep-fry oil. By opting for pan-frying and a clever cornstarch coating, we deliver a delightful crispness and perfectly cooked chicken, making it a truly healthier alternative. This dish isn’t just lighter; it’s faster and more convenient, proving that wholesome home cooking can easily rival your favorite restaurant dishes.
Essential Ingredients for Your Healthy Honey Garlic Chicken
The magic of this honey garlic chicken lies in its straightforward ingredient list. You’ll find most of these items are already pantry staples, meaning you can whip up this fantastic meal almost any night without a special trip to the grocery store. Each ingredient plays a crucial role in building the layers of flavor and achieving that desirable texture. Let’s delve into what makes our simple lineup so effective:
- Chicken Thighs: The Foundation of Flavor and Juiciness
For this particular recipe, boneless, skinless chicken thighs are the star. They are incredibly forgiving and naturally more flavorful and juicy than chicken breasts, making them ideal for quick cooking. Thighs are less prone to drying out, ensuring tender, succulent bites every time, even if your timing isn’t absolutely perfect. Their inherent richness also complements the sweet and savory honey garlic sauce beautifully. If chicken breasts are your preference, you can certainly use them; just be sure to cut them into even, bite-sized pieces and cook them precisely to 165°F (74°C) internal temperature to maintain their moisture. - Cornstarch: The Secret to Crispness and a Silky Sauce
Cornstarch is a multi-tasking hero in this recipe. First, coating the chicken pieces in cornstarch before pan-frying is key to creating a beautifully browned and subtly crispy exterior without deep-frying. It provides a dry surface that allows the chicken to achieve that desirable golden crust while also locking in its natural juices. Second, any cornstarch clinging to the chicken, along with a little extra, acts as the perfect thickening agent for the sauce. It transforms the liquid ingredients into that wonderfully glossy, sticky, and cohesive glaze that defines authentic honey garlic chicken. - The Quick & Flavorful 4-Ingredient Honey Garlic Sauce
The heart of this dish is a surprisingly simple yet incredibly potent sauce, crafted from just a handful of pantry powerhouses:- Soy Sauce: This provides the essential umami, depth, and savory notes that are characteristic of Asian-inspired dishes. For optimal flavor and seasoning balance, it’s crucial to use regular soy sauce, not low-sodium. If low-sodium is all you have on hand, you might want to increase the kosher salt slightly, as mentioned below.
- Chicken Broth: Adding chicken broth introduces more savory liquid and depth to the sauce, helping it to reduce into a rich glaze. Again, using regular chicken broth is recommended for the best flavor profile.
- Honey: The natural sweetness of honey is vital, providing the “honey” in honey garlic chicken and contributing significantly to the sauce’s sticky, glossy texture. Feel free to adjust the amount slightly to match your preferred level of sweetness.
- Garlic: Freshly minced garlic is non-negotiable here. It infuses the sauce with its pungent, aromatic flavor, which mellows beautifully as it cooks, creating the perfect “garlic” component.
This balanced combination ensures a sauce that’s both sweet and savory, perfectly complementing the chicken.
- Avocado Oil (or other high smoke point oil): Essential for getting that perfect, even sear on the chicken pieces without burning. Avocado oil is great for its neutral flavor and high smoke point, but grapeseed, canola, or vegetable oil also work well.
- Kosher Salt: A dash of kosher salt tossed with the chicken and cornstarch ensures the chicken itself is seasoned before it even meets the sauce, enhancing its natural flavors. If using low-sodium soy sauce or broth, an extra ¼ to ½ teaspoon can be added here.
- Green Onions: Sliced green onions are not just a garnish; they add a fresh, mild oniony bite and a beautiful pop of color that brightens the entire dish upon serving.
How to Master Your One-Pan Healthier Honey Garlic Chicken
One of the greatest advantages of this recipe is its one-pan efficiency. Not only does this method make cleanup a breeze, but it also ensures that all the incredible flavors meld together perfectly. My version lightens up the dish and minimizes your workload, proving that amazing flavor doesn’t require complex steps or multiple dirty pots. Follow these detailed steps to create a truly spectacular meal in record time:
- Step 1: Prepare and Sear the Chicken to Golden Perfection
Start by cutting your boneless, skinless chicken thighs into uniform, bite-sized pieces, roughly 1-inch cubes. This ensures even cooking. In a medium bowl, combine the chicken pieces with the cornstarch and kosher salt, tossing until every piece is thoroughly and evenly coated. This coating is paramount for achieving that desirable golden crust. Heat the avocado oil (or your preferred high smoke point oil) in a large, heavy-bottomed skillet or wok over medium-high heat until it shimmers and just begins to smoke. Carefully add the chicken pieces to the hot pan in a single layer, ensuring not to overcrowd the skillet. Cook the chicken, undisturbed, for about 4-5 minutes, allowing a deep golden-brown crust to form on the bottom. Resist the urge to move the chicken too early! Flip each piece and cook for another 2-3 minutes on the other side. At this stage, don’t worry about cooking the chicken through completely; it will finish cooking perfectly in the sauce. - Step 2: Whisk the Sauce & Sauté the Garlic
While your chicken is searing, take a moment to prepare your quick honey garlic sauce. In a small bowl, whisk together the honey, regular chicken broth, and regular soy sauce until well combined. Set this aside. Once your chicken pieces are beautifully browned on both sides, push them to one side of the skillet, creating a clear space in the center. Add the minced garlic to this empty part of the pan and sauté for about 1-2 minutes, stirring constantly, until it becomes wonderfully fragrant and slightly softened. Cooking the garlic separately in the hot oil ensures it gets direct heat and develops its sweet, aromatic profile fully, preventing any harsh raw garlic taste in the final dish. - Step 3: Combine Ingredients and Create the Sticky Glaze
Now for the magic moment! Pour the whisked honey-garlic sauce mixture directly into the pan, around the chicken and over the sautéed garlic. Stir everything together immediately, ensuring the chicken is thoroughly coated. At first, the sauce will appear quite thin and liquidy – a common “awkward stage” that might make you wonder if it will ever thicken. But patience is key! As the sauce comes to a gentle simmer and the cornstarch from the chicken activates with the heat, you’ll notice it gradually begin to thicken. Continue to simmer for 2-3 minutes, stirring occasionally, until the sauce reduces and transforms into a beautiful, glossy, and sticky glaze that lovingly clings to every piece of chicken. Use a meat thermometer to ensure the chicken reaches an internal temperature of 165ºF (74°C) for food safety. Finally, sprinkle generously with freshly sliced green onions just before serving for a burst of fresh flavor and color.
Pro Tip for an Extra Crispy Honey Garlic Chicken Crust:
For those who prioritize maximum crispiness and don’t mind an extra plate to wash, here’s a technique to take your honey garlic chicken to the next level: After you’ve completed the initial browning of the chicken pieces in Step 1 and they’ve developed a deep golden crust, transfer them to a clean plate and set aside. Then, proceed with cooking the garlic and preparing the sauce in the empty skillet as directed in Step 2. Allow the sauce to simmer and reduce on its own until it reaches your desired glossy and sticky consistency. Once the sauce is perfect, return the browned chicken pieces to the pan and gently toss to coat them in the luscious glaze. This method helps to preserve the chicken’s initial crispy texture, offering an even more delightful contrast with the rich, sweet, and savory sauce. It’s your culinary adventure – choose the path that best suits your craving!
Perfect Pairings: What to Serve with Honey Garlic Chicken
This versatile healthier honey garlic chicken pairs beautifully with a wide array of sides, allowing you to create a complete and satisfying meal with ease. For a classic and comforting combination, serve it alongside a bed of fluffy steamed jasmine rice, brown rice, or even quinoa to soak up every last drop of that incredible sauce. If you’re in the mood for noodles, it’s fantastic with quick-cooking ramen, lo mein noodles, or light vermicelli. To add essential nutrients and freshness, consider complementing your dish with steamed or stir-fried vegetables like crisp broccoli florets, vibrant bok choy, tender green beans, or snap peas. A sprinkle of toasted sesame seeds and extra sliced green onions makes for an appealing and flavorful finish.
Customize Your Honey Garlic Chicken Experience
One of the true joys of home cooking is the ability to adapt recipes to your personal taste and dietary needs. This honey garlic chicken recipe is wonderfully flexible and invites customization:
- Amp Up the Heat: If you enjoy a little kick, add a pinch of red pepper flakes to the sauce as it simmers, or drizzle a touch of sriracha over your finished dish.
- Make it Gluten-Free: Easily convert this recipe by substituting regular soy sauce with a high-quality tamari. Ensure your chicken broth is also gluten-free.
- Boost the Veggies: For a more complete meal, incorporate quick-cooking vegetables like thinly sliced bell peppers, snow peas, or shredded carrots during the last few minutes of the sauce simmering. They’ll absorb the delicious glaze and add extra crunch and nutrition.
- Adjust Sweetness: The amount of honey can be slightly increased or decreased based on your preference for a sweeter or more savory sauce. Taste and adjust as you go!
- Add Ginger: For an extra layer of aromatic complexity, add about 1 teaspoon of freshly grated ginger along with the minced garlic.
- Different Proteins: While chicken thighs are recommended, you could also experiment with shrimp or even firm tofu for a vegetarian option, adjusting cooking times accordingly.
More Quick & Easy Asian-Style Takeout Recipes You’ll Love
If you’ve enjoyed the simplicity and incredible flavor of this healthier honey garlic chicken, then you’re undoubtedly going to love exploring these other fantastic Asian-inspired recipes. They’re all designed for quick preparation at home, allowing you to recreate your favorite takeout meals without the wait or the added expense. Expand your culinary repertoire with these proven winners:
- Classic Chow Mein Noodles
- Savory Chicken and Broccoli Stir-Fry
- Authentic Pad Woon Sen (Thai Glass Noodle Stir-Fry)
- Spicy Gochujang Chicken
- Flavorful Hunan Shrimp
- Quick Thai Basil Pork Stir-Fry
- Comforting Chili Oil Ramen
- Sweet and Tangy Orange Chicken
- Honey Garlic Chicken (because it’s just that good!)
- The Ultimate Spicy Ramen Recipe
- The Viral Sushi Bake Sensation
Watch the video below to see a step-by-step guide on how to make this incredibly easy and healthier honey garlic chicken!
Print Recipe
Healthier Honey Garlic Chicken
Jennifer Pallian BSc, RD
10 minutes
20 minutes
4
Ingredients
- 1 lb chicken thighs cut into bite-sized pieces
- 4 tbsp cornstarch
- ⅓ tsp kosher salt
- 3 tbsp avocado oil or other high smoke point oil
- 4 tbsp honey
- ⅓ cup chicken broth (regular, not low-sodium)
- 2 tbsp soy sauce (regular, not low-sodium)
- 1 tbsp minced garlic
- 2 green onions sliced, for garnish
Instructions
-
Toss chicken pieces with cornstarch and salt to evenly coat. Heat oil in a large skillet over medium-high heat until shimmering hot. Add chicken in a single layer and cook, undisturbed, until deeply golden on the bottom (approx. 4-5 minutes). Flip and cook another 2-3 minutes (the chicken will finish cooking in the sauce).
-
Meanwhile, whisk together honey, chicken broth, and soy sauce in a small bowl and set aside.
-
Push chicken to one side of the skillet. Cook minced garlic in the empty part of the skillet until fragrant and soft, about 1-2 minutes. Pour in the honey mixture and stir through with the chicken to coat everything. Let the sauce come to a simmer and thicken for 2-3 minutes more, stirring occasionally. The sauce should become glossy and sticky, and the chicken should reach an internal temperature of 165ºF (74°C). Top with fresh green onions before serving.
Notes
- For optimal flavor, ensure you use regular soy sauce and chicken broth, not low-sodium versions, as the final dish might otherwise taste bland. If low-sodium ingredients are all you have, consider mixing about ¾ tsp of extra kosher salt with the cornstarch before tossing the chicken.
- For an even crispier crust: After browning the chicken (Step 1), transfer it to a plate. Proceed with cooking the garlic and reducing the sauce separately until it thickens. Then, return the browned chicken to the pan and toss to coat. This technique helps maintain the chicken’s initial crispiness, though it may result in an extra plate to wash.
Nutrition
Carbohydrates: 27g |
Protein: 20g |
Fat: 29g |
Saturated Fat: 6g |
Polyunsaturated Fat: 5g |
Monounsaturated Fat: 15g |
Trans Fat: 0.1g |
Cholesterol: 112mg |
Sodium: 860mg |
Potassium: 291mg |
Fiber: 0.4g |
Sugar: 18g |
Vitamin A: 149IU |
Vitamin C: 2mg |
Calcium: 21mg |
Iron: 1mg
Nutrition information is automatically calculated and should be used as an approximation only.
Tried this recipe? Share your experience!
We’d love to hear how your Healthier Honey Garlic Chicken turned out. Leave a comment below with your feedback and any delicious modifications you made!
We sincerely hope that this Healthier Honey Garlic Chicken recipe becomes a cherished staple in your home cooking repertoire. It truly embodies the perfect balance of quick preparation, readily available ingredients, and unforgettable flavors, proving that wholesome, delicious meals don’t have to be complicated. Whether you’re seeking a speedy weeknight dinner solution or a guaranteed crowd-pleaser for your next family gathering, this dish delivers every single time. Enjoy the golden, sticky, and utterly delicious perfection!