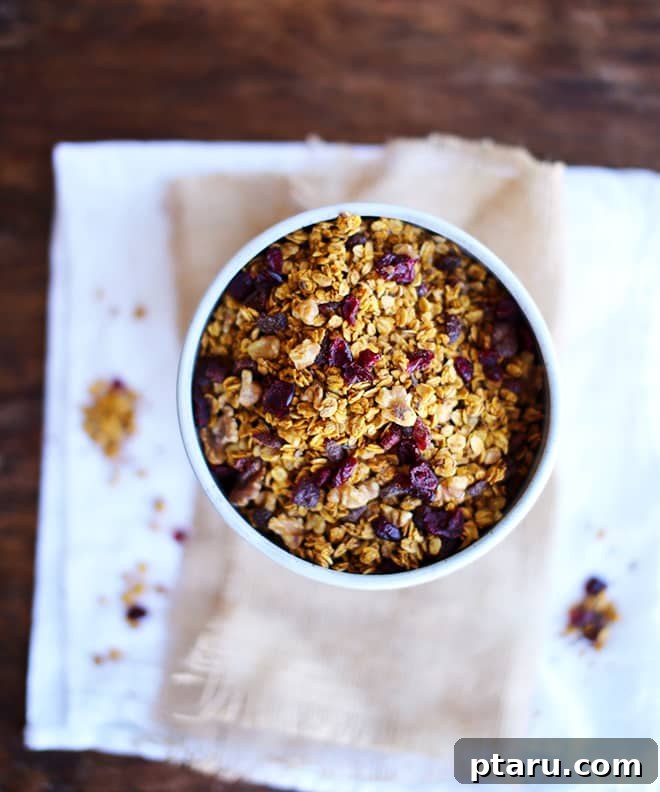
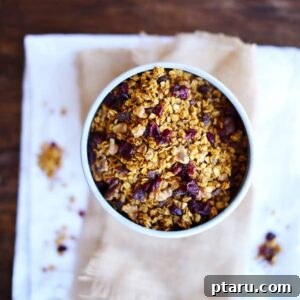
Pumpkin Granola with real pumpkin, warm spices, and plenty of crunch. It’s big-batch friendly, perfect over yogurt or with milk, and freezer-ready for fresh mornings on repeat.
Homemade Pumpkin Granola: Your Ultimate Guide to a Crunchy & Flavorful Fall Breakfast
As the crisp autumn air settles in and the leaves transform into a vibrant tapestry of reds and golds, there’s a unique comfort in bringing the essence of fall into your kitchen. Our homemade Pumpkin Granola recipe captures this seasonal magic perfectly. Far from your average store-bought cereal, this recipe delivers an unparalleled crunch, rich, authentic pumpkin flavor, and the wholesome satisfaction that only a carefully crafted breakfast can provide. Imagine waking up to a bowl of golden-brown granola, infused with warm spices and hearty oats, ready to kickstart your day.
This recipe isn’t just a seasonal delight; it’s a testament to the simple pleasure of homemade goodness. It’s incredibly easy to prepare, making it ideal for busy individuals or families looking for healthy breakfast options. Plus, it’s wonderfully versatile—serve it over creamy yogurt, with a splash of your favorite milk, or simply enjoy it as a wholesome snack straight from the jar. Designed to be big-batch friendly and freezer-ready, you can whip up a large quantity and enjoy fresh, delicious pumpkin granola for weeks to come. Say goodbye to artificial flavors and excessive sugars, and say hello to a truly nourishing and delicious start to your day.
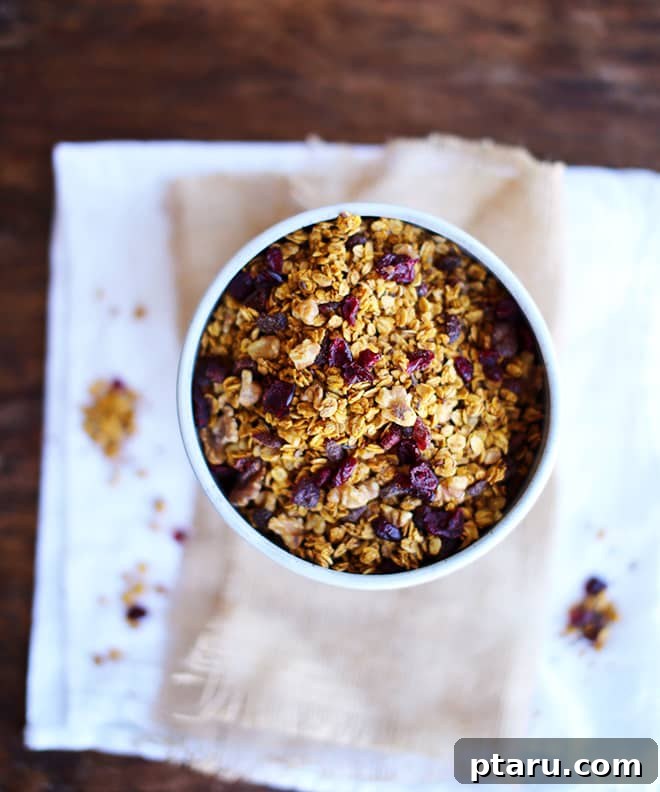
Why Choose Homemade Pumpkin Granola Over Store-Bought?
In a world overflowing with convenience foods, choosing to make your own pumpkin granola might seem like an extra step, but the benefits are truly transformative. Beyond the sheer joy of creating something delicious from scratch, homemade granola offers distinct advantages over its commercial counterparts. Firstly, you gain complete control over the ingredients. This means no hidden artificial flavors, no excessive amounts of refined sugars, and no unhealthy hydrogenated oils. You decide what goes into your body, making this a genuinely healthy and transparent option for you and your family.
Our recipe uses real pumpkin puree, delivering an authentic flavor and natural nutritional boost that many “pumpkin spice” labeled products often lack. The aroma that fills your home as this granola bakes is an experience in itself—a warm, inviting scent of cinnamon, ginger, and toasted oats that instantly evokes the cozy spirit of autumn. Furthermore, making granola in big batches is incredibly cost-effective. It’s a smart way to stock your pantry with a nutritious breakfast staple, saving you money in the long run compared to constantly buying premium granolas from the store. It’s also a perfect meal-prep item, ensuring you have a quick and easy breakfast or snack ready for those busy mornings.
Gather Your Essentials: Ingredients & Tools for Perfect Granola
One of the beauties of this homemade pumpkin granola recipe is that it relies on readily available pantry staples. You won’t need to hunt for obscure ingredients; everything you need can likely be found at your local grocery store. The result is a simple, wholesome, and incredibly flavorful granola that tastes like it came from a gourmet bakery. Below, we’ll dive into each component, explaining its role and offering tips for the best results. Exact quantities are provided in the comprehensive recipe card further down.
Essential Pumpkin Granola Ingredients for Flavor and Crunch
- Pumpkin Puree: The heart of this recipe! Be sure to use 100% pure pumpkin puree, not pumpkin pie filling, which contains added sugars and spices. Pure pumpkin offers natural sweetness, a lovely moisture content, and a vibrant color, contributing to both the flavor and the texture of the granola.
- Ground Cinnamon and Ground Ginger: These warming spices are the cornerstone of that beloved fall flavor profile. They infuse the granola with a comforting aroma and a delightful zing. For an even deeper spice blend, consider adding a pinch of ground nutmeg, allspice, or a tiny touch of ground cloves.
- Vegetable Oil: A neutral-flavored oil such as vegetable, canola, or grapeseed oil is essential for achieving optimal crispiness and binding the ingredients together. If you enjoy a subtle tropical note, melted coconut oil can also be a great choice.
- Brown Sugar and Maple Syrup: This dynamic duo provides a balanced sweetness and a rich, complex flavor. Brown sugar adds a hint of molasses, while pure maple syrup brings its distinct autumnal sweetness and plays a crucial role in forming those desirable crunchy clusters as it bakes and cools.
- Vanilla Extract: A touch of pure vanilla extract elevates all the other flavors, adding a layer of warmth and sophistication to the overall taste profile.
- Salt: A crucial ingredient that often goes overlooked! Salt doesn’t just make the granola taste “salty”; it enhances and balances the sweetness of the sugars and spices, preventing the granola from tasting flat and bringing out its full potential.
- Old-Fashioned Large-Flake Oats: These are the star of your granola base. It’s vital to use old-fashioned (rolled) oats rather than quick or instant oats. Large-flake oats retain their shape, offer a satisfying chewy-crisp texture, and are essential for forming sturdy clusters. Quick oats tend to break down and become mushy.
- Natural Almonds: Unsalted, natural almonds (whole, sliced, or roughly chopped) contribute a wonderful nutty flavor, healthy fats, and a satisfying crunch. They toast beautifully alongside the oats, intensifying their flavor.
- Flaxseeds: A nutritional powerhouse! Whole or ground flaxseeds add a boost of omega-3 fatty acids, dietary fiber, and a subtle nutty undertone. They also aid in the binding process, helping to create cohesive clusters.
- Dried Sweetened Cranberries: These vibrant, tart berries are added after baking to maintain their plump, chewy texture and provide a delightful contrast to the sweet, spiced granola. They also add a pop of color that makes the granola visually appealing.
Essential Tools for a Smooth Granola-Making Experience
You don’t need a professional chef’s kitchen to make exceptional homemade granola. A few basic kitchen tools are all you’ll require:
- Two Large Rimmed Baking Sheets: Using two sheets is crucial for success. It prevents overcrowding, allowing the granola to spread in a thin, even layer. This promotes proper air circulation, which is key to achieving uniformly crispy granola rather than a steamed, soggy mess.
- Large Mixing Bowl and Whisk: A spacious bowl is essential for comfortably combining all the ingredients without spills. A whisk ensures the wet pumpkin base is thoroughly mixed and smooth.
- Sturdy Spatula or Wooden Spoon: Ideal for stirring the thick granola mixture and spreading it evenly on the baking sheets.
- Airtight Containers (Glass Jars or Freezer Bags): Crucial for proper storage. These will keep your granola fresh, crunchy, and protected from moisture for an extended period, whether at room temperature or in the freezer.
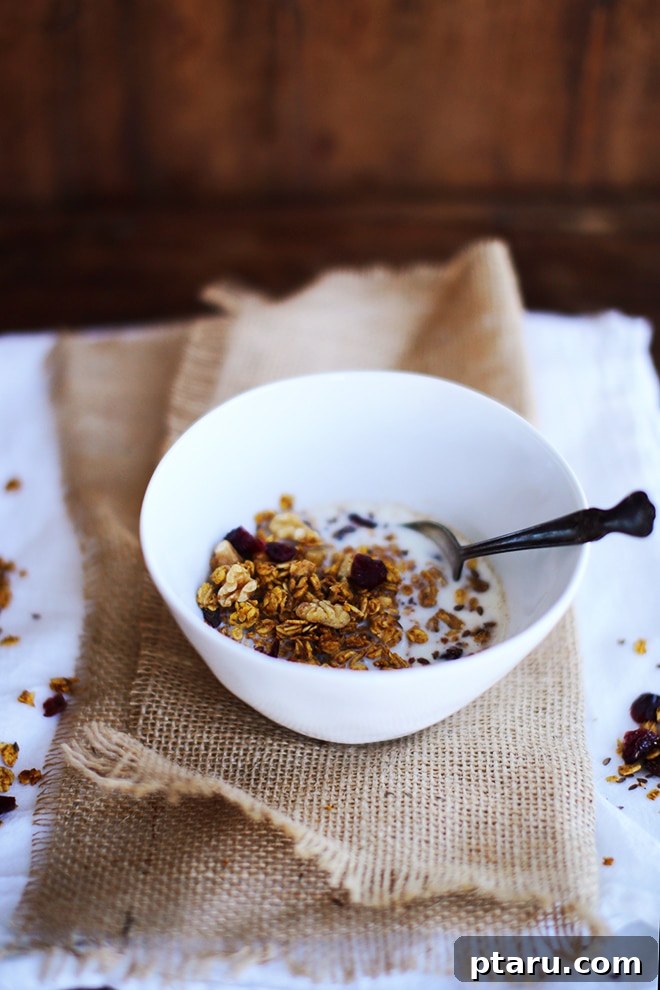
How to Make Perfect Pumpkin Granola: An Easy Step-by-Step Guide
Creating your own batch of delicious pumpkin granola is a rewarding process that’s simpler than you might think. Follow these straightforward steps to achieve a perfectly crunchy, flavorful, and clumpy granola every time. The key lies in careful mixing, a patient bake, and proper cooling.
Step 1: Prepare the Aromatic Pumpkin Base
Begin by preheating your oven to 325°F (160°C). This lower temperature is essential for a slow, even bake that ensures crispness without burning. In your large mixing bowl, combine the pumpkin puree, ground cinnamon, ground ginger, vegetable oil, brown sugar, maple syrup, vanilla extract, and salt. Use a whisk to vigorously combine these ingredients until the mixture is completely smooth, uniform in color, and has a lovely glossy sheen. This well-blended wet base is crucial for evenly coating your dry ingredients and distributing all those wonderful fall flavors throughout the granola.
Step 2: Combine Dry Ingredients with the Pumpkin Mixture
Now, it’s time to bring everything together. Add the old-fashioned large-flake oats, natural almonds, and flaxseeds to the bowl containing your spiced pumpkin mixture. Using a sturdy spatula, a large spoon, or even your clean hands (gloves recommended for easier cleanup), stir everything thoroughly. The goal here is to ensure that every single oat, nut, and seed is completely and evenly coated with the pumpkin mixture. You’ll notice the mixture start to become quite sticky and form small clumps as you mix – this is exactly what you want, as these initial clumps will grow into larger, satisfying clusters during baking.
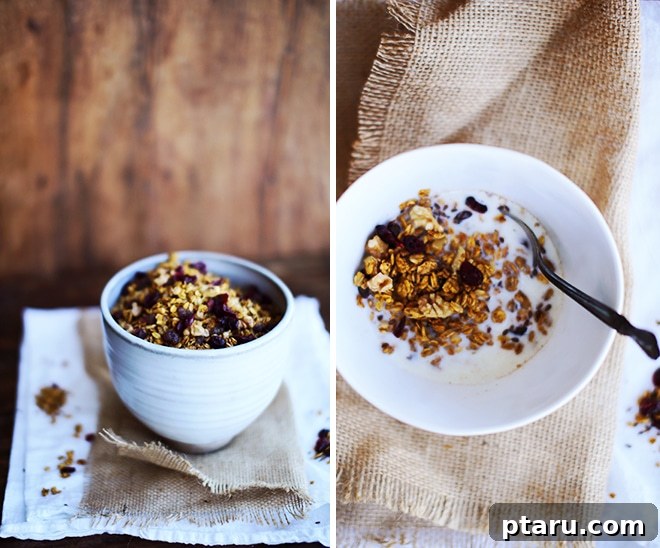
Step 3: Bake Low and Stir Occasionally for Optimal Crispness
Once your granola mixture is ready, divide it evenly between the two large rimmed baking sheets. Spread the mixture out into a thin, single layer on each sheet. Avoid piling it too high, as overcrowding can trap moisture and lead to soggy granola. Place both baking sheets in your preheated oven and bake for approximately 45–60 minutes. The “low and slow” baking method at 325°F is paramount for slowly dehydrating the oats and achieving that signature crispy texture. During baking, stir the granola a few times – typically every 15-20 minutes. This ensures even browning and helps prevent any part of the granola from burning while the rest remains undercooked. The granola is done when it feels dry to the touch, and the almonds are visibly golden brown and toasted, emitting a fragrant, nutty aroma.
Step 4: Cool Completely and Incorporate Cranberries
This final step is perhaps the most important for achieving large, satisfying granola clumps, and it requires patience. Once baked, remove the baking sheets from the oven and, crucially, resist the urge to stir the granola. Allow it to cool completely and undisturbed on the baking sheets. As the granola cools, the sugars in the pumpkin mixture will harden, binding the oats, nuts, and seeds together into those coveted clusters. This cooling process can take anywhere from 1 to 2 hours, or even longer depending on your kitchen’s temperature and humidity. Once fully cooled and firm, transfer the granola to a large bowl and gently stir in the dried sweetened cranberries. Adding the cranberries after baking ensures they remain plump, chewy, and don’t become hard, shriveled, or burnt in the oven. Your homemade pumpkin granola is now ready to be transferred into airtight containers for storage.
The Secret to Success: Why This Pumpkin Granola Recipe Works So Well
Every element of this pumpkin granola recipe is intentionally designed to deliver maximum flavor, optimal crunch, and lasting freshness. Understanding the ‘why’ behind each technique will empower you to consistently create perfect batches.
- Real Pumpkin for Authentic Depth: Our recipe champions real pumpkin puree over mere “pumpkin spice” flavoring. This isn’t just about taste; it’s about depth. Real pumpkin provides a natural moisture that helps bind the granola, a beautiful autumnal color, and a nuanced, earthy sweetness. When slowly baked, this moisture evaporates, contributing to the ultimate crispness while leaving behind a rich, authentic flavor that powdered spices alone cannot achieve.
- The “Low-and-Slow” Baking Method: This technique, baking at 325°F (160°C) for an extended period, is the single most critical factor for achieving truly crispy, perfectly dehydrated oats and nuts. Higher temperatures might brown the outside quickly but leave the inside soft or soggy. The gentle, consistent heat allows the moisture to gradually escape from every ingredient, ensuring a uniform, brittle crunch without the risk of burning the delicate sugars and nuts. It’s the patience that yields perfection.
- Unaltered Cooling for Superior Clumps: Once the granola comes out of the oven, the temptation to dig in or stir it can be strong. However, allowing the granola to cool completely and undisturbed on the baking sheets is absolutely vital for forming those desirable, large, satisfying clumps. As the granola cools, the sticky sugar-and-oil mixture hardens, creating strong bonds that fuse the oats, nuts, and seeds together. Disturbing it too early breaks these fragile bonds, resulting in a looser, more crumbly granola. Let it cool; your patience will be rewarded with amazing clusters!
- Adding Dried Fruit Post-Bake: Dried cranberries (or any other dried fruit) are incorporated only after the granola has fully cooled. This strategic timing is key to maintaining their optimal texture and flavor. If added before baking, dried fruits tend to become overly hard, shriveled, and sometimes even burnt due to prolonged exposure to oven heat. Adding them at the end ensures they remain plump, chewy, and vibrant, providing a delightful textural and tart flavor contrast to the sweet, crunchy granola.
Customize Your Granola: Endless Variations & Creative Serving Ideas
One of the most exciting aspects of making homemade granola is the freedom to customize it to your heart’s content. This pumpkin granola recipe provides a robust and delicious foundation, but it’s also incredibly adaptable. Don’t be afraid to experiment with different additions and serving styles to keep your breakfast routine exciting and tailored to your preferences.
Granola Swap-Ins, Additions, and Flavor Boosters
- Diverse Nuts & Seeds: While natural almonds and flaxseeds offer a fantastic base, the world of nuts and seeds is your oyster! Experiment with chopped pecans, walnuts, cashews, or pumpkin seeds (pepitas) for varying flavors and textures. Sunflower seeds, chia seeds, or even a mix of several types can boost nutrition and add interesting crunch. Toasting these before adding to the wet mixture can sometimes enhance their flavor further.
- Adjusting Sweetness: If you prefer your granola on the sweeter side, consider adding an extra tablespoon or two of maple syrup or brown sugar to the wet mixture before baking. For those who prefer a less sweet option, you can slightly reduce the amount of brown sugar or maple syrup, keeping in mind that the dried cranberries also contribute to the overall sweetness. Taste the wet mixture before adding oats to gauge the sweetness level.
- Elevating the Spice Profile: Deepen the warm spice notes by introducing a pinch of ground nutmeg, allspice, or even a tiny amount of ground cloves alongside the cinnamon and ginger. A dash of cardamom can also add an exotic, fragrant twist that complements the pumpkin beautifully.
- Beyond Cranberries: While dried cranberries are a classic choice, explore other dried fruits for different textures and flavors. Chopped dried apricots, golden raisins, chopped dates, dried cherries, or even finely diced dried figs can all make excellent additions. Remember to always stir these in after the granola has cooled to maintain their soft, chewy consistency.
- A Chocolate Lover’s Dream: For an indulgent treat, stir in some chocolate chips, mini chocolate chips, or even chopped chocolate chunks after the granola has completely cooled. The residual warmth might cause them to melt slightly, creating delicious pockets of chocolate throughout.
- Toasted Coconut Flakes: Add unsweetened shredded or flaked coconut during the last 10-15 minutes of baking. This allows the coconut to toast lightly, adding a wonderful aroma and a subtle tropical dimension to your pumpkin granola.
Creative Serving Suggestions to Enjoy Your Granola
This homemade pumpkin granola is incredibly versatile and can be enjoyed in countless ways, not just for breakfast. Here are some ideas to inspire you:
- The Classic Breakfast: Serve it generously with your favorite milk – whether it’s dairy milk, almond milk, oat milk, or soy milk – for a hearty, satisfying, and crunchy start to your day.
- Yogurt Parfaits: Create stunning and nutritious parfaits by layering your pumpkin granola with Greek yogurt (plain or vanilla), fresh seasonal fruit like sliced apples, pears, bananas, or berries, and a drizzle of honey or extra maple syrup.
- Smoothie Bowl Topper: Elevate your morning smoothie or smoothie bowl by sprinkling a handful of granola on top. It adds a delightful textural contrast and an extra boost of flavor.
- Decadent Dessert Topping: Use it as a crunchy topping for baked apples, a scoop of vanilla ice cream, pumpkin pie, fruit crisps, or even a batch of muffins before baking for added texture.
- Wholesome On-the-Go Snack: Portion out small bags for an energizing and healthy snack to take to work, school, or on your next outdoor adventure. It’s much more satisfying than processed snack bars.
- Custom Trail Mix Base: Combine your pumpkin granola with other favorite trail mix components like extra nuts, seeds, pretzels, or even some dark chocolate pieces for a personalized, powerful snack mix.
Make Ahead and Storage Tips for Long-Lasting Freshness
One of the most practical benefits of making homemade granola, especially in a big batch, is its excellent shelf life when stored correctly. Our pumpkin granola recipe is designed to stay fresh and crunchy, making it a perfect meal-prep item to enjoy throughout the week and beyond.
- Room Temperature Storage: Once your pumpkin granola has completely cooled (this is crucial for maintaining crispness), transfer it to an airtight container. Glass jars with tight-fitting lids, sealed plastic containers, or even heavy-duty Ziploc bags are excellent choices. Stored properly at room temperature, away from direct sunlight and humidity, your granola will remain delightfully fresh and crunchy for approximately 1 week. Always ensure the container is truly airtight to prevent moisture absorption, which can lead to sogginess.
- Freezing for Extended Freshness: For longer storage, this granola freezes exceptionally well without losing its texture or flavor. Place the cooled granola in freezer-safe airtight containers or heavy-duty freezer bags, pressing out as much air as possible before sealing. It can be stored in the freezer for up to 2 months. The best part? You don’t even need to thaw it! Enjoy it straight from the freezer for an extra-crisp bite, or let it sit at room temperature for a few minutes if you prefer it slightly softer. Freezing is a fantastic strategy to always have homemade goodness on hand for those busy weeks.
- Reviving Less-Than-Crispy Granola: If, for any reason, your granola starts to lose some of its crunch (perhaps due to high humidity), don’t despair! You can easily revive it. Simply spread the granola in a single layer on a baking sheet and bake it at a low temperature, around 250°F (120°C), for 10-15 minutes. Let it cool completely afterwards, and it should crisp right back up to its former glory.
Troubleshooting Common Granola Issues
While making granola is generally straightforward, sometimes little issues can arise. Here’s how to diagnose and fix common problems:
- My Granola is Soggy or Chewy: This is the most common issue. It usually means the granola didn’t bake long enough, or the oven temperature wasn’t accurate (too low for too short a time). Ensure your oven is calibrated correctly and bake until the granola is truly dry to the touch and the nuts are golden. Also, ensure you are using two baking sheets to avoid overcrowding, which can cause the granola to steam instead of bake.
- The Edges of My Granola are Burning: This often happens if the oven is too hot or if the granola isn’t stirred frequently enough. Check your oven temperature with an oven thermometer. Stir the granola every 15-20 minutes to ensure even baking. If the edges are browning too quickly, gently push them towards the center and increase stirring frequency.
- My Granola Didn’t Form Clumps: This is almost always due to stirring the granola before it has completely cooled. The sugars need time to harden and create bonds. Resist the urge to stir once it comes out of the oven! Let it cool fully and undisturbed on the baking sheet for at least 1-2 hours.
- My Granola is Too Sweet/Not Sweet Enough: Taste the wet mixture before adding the oats to gauge the sweetness. You can adjust the brown sugar or maple syrup by a tablespoon or two based on your preference. Remember, dried fruits also add sweetness.
- The Dried Fruit is Hard/Burnt: This occurs if you added the dried fruit before baking. Always add dried fruit after the granola has cooled completely to keep them plump and chewy.
Easy Homemade Pumpkin Granola Recipe
Jennifer Pallian BSc, RD
Craft this delicious and healthy homemade Pumpkin Granola with real pumpkin puree and a blend of warm spices. Enjoy crunchy clusters, perfect for a wholesome breakfast or a delightful snack, easily made in a big batch and freezer-friendly.
10 minutes
45–60 minutes
16 servings
Print Recipe
Ingredients
- 1 cup pumpkin puree (100% pure, not pie filling)
- 1 ½ tbsp ground cinnamon
- 2 tsp ground ginger
- ⅓ cup vegetable oil (or melted coconut oil)
- ½ cup brown sugar (packed)
- ⅓ cup maple syrup (pure)
- 1 tsp vanilla extract
- 1 tsp salt
- 5 cups old-fashioned large-flake oats
- 2 cups natural almonds (whole, sliced, or chopped)
- ¼ cup flaxseeds (whole or ground)
- 2 cups dried sweetened cranberries (added after baking)
Instructions
- Preheat your oven to 325°F (160°C). In a large mixing bowl, whisk together the pumpkin puree, ground cinnamon, ground ginger, vegetable oil, brown sugar, maple syrup, vanilla extract, and salt until the mixture is smooth and slightly glossy.
- Add the old-fashioned large-flake oats, natural almonds, and flaxseeds to the wet mixture. Stir thoroughly with a sturdy spatula until all the dry ingredients are evenly coated and the mixture begins to form small clumps.
- Divide the granola mixture evenly between two large rimmed baking sheets, spreading it into a single, thin layer. Ensure the pans are not overcrowded to allow for proper air circulation.
- Bake for 45–60 minutes, stirring occasionally (every 15-20 minutes), until the granola is dry to the touch, golden brown, and the almonds are toasted. Keep a close eye on it during the last 15 minutes to prevent burning.
- Remove the baking sheets from the oven and let the granola cool completely and undisturbed on the sheets. This crucial step is essential for the granola to form large, crispy clusters. Cooling can take 1-2 hours.
- Once fully cooled, transfer the granola to a large bowl and gently stir in the dried sweetened cranberries.
- Store your homemade pumpkin granola in airtight containers at room temperature for up to 1 week, or freeze it for up to 2 months for optimal freshness and crunch.
Nutrition Information (per serving, approximately)
Calories: 340kcal | Carbohydrates: 44g | Protein: 8g | Fat: 17g | Saturated Fat: 2g | Polyunsaturated Fat: 6g | Monounsaturated Fat: 8g | Trans Fat: 0.03g | Sodium: 152mg | Potassium: 303mg | Fiber: 7g | Sugar: 20g | Vitamin A: 2420IU | Vitamin C: 1mg | Calcium: 88mg | Iron: 2mg
Nutrition information is automatically calculated and should be considered an approximation. Actual values may vary based on specific brands and exact ingredient measurements.
Final Thoughts on Your Homemade Pumpkin Granola Journey
Embarking on the journey of making your own pumpkin granola is a delightful and deeply rewarding experience. From the moment the warm, spicy aroma of cinnamon and ginger fills your kitchen to the satisfying crunch of each perfectly baked cluster, you’ll appreciate the difference that fresh, wholesome ingredients make. This recipe is more than just a delicious breakfast item; it’s an invitation to savor the comforting flavors of autumn, to personalize your meals, and to embrace a healthier, more flavorful lifestyle.
Whether you’re a seasoned baker or new to the world of homemade goodies, our easy-to-follow guide ensures success. You’ve now mastered the art of creating crispy, flavorful pumpkin granola, packed with nourishing oats, crunchy nuts, and sweet-tart cranberries. This versatile treat is ready to brighten your mornings, fuel your busy days, and provide a wholesome snack whenever hunger strikes. So, go ahead – grab your mixing bowl, embrace the cozy spirit of fall, and create a batch of this irresistible pumpkin granola. It’s truly a taste of homemade perfection, ready to become a cherished staple in your kitchen.