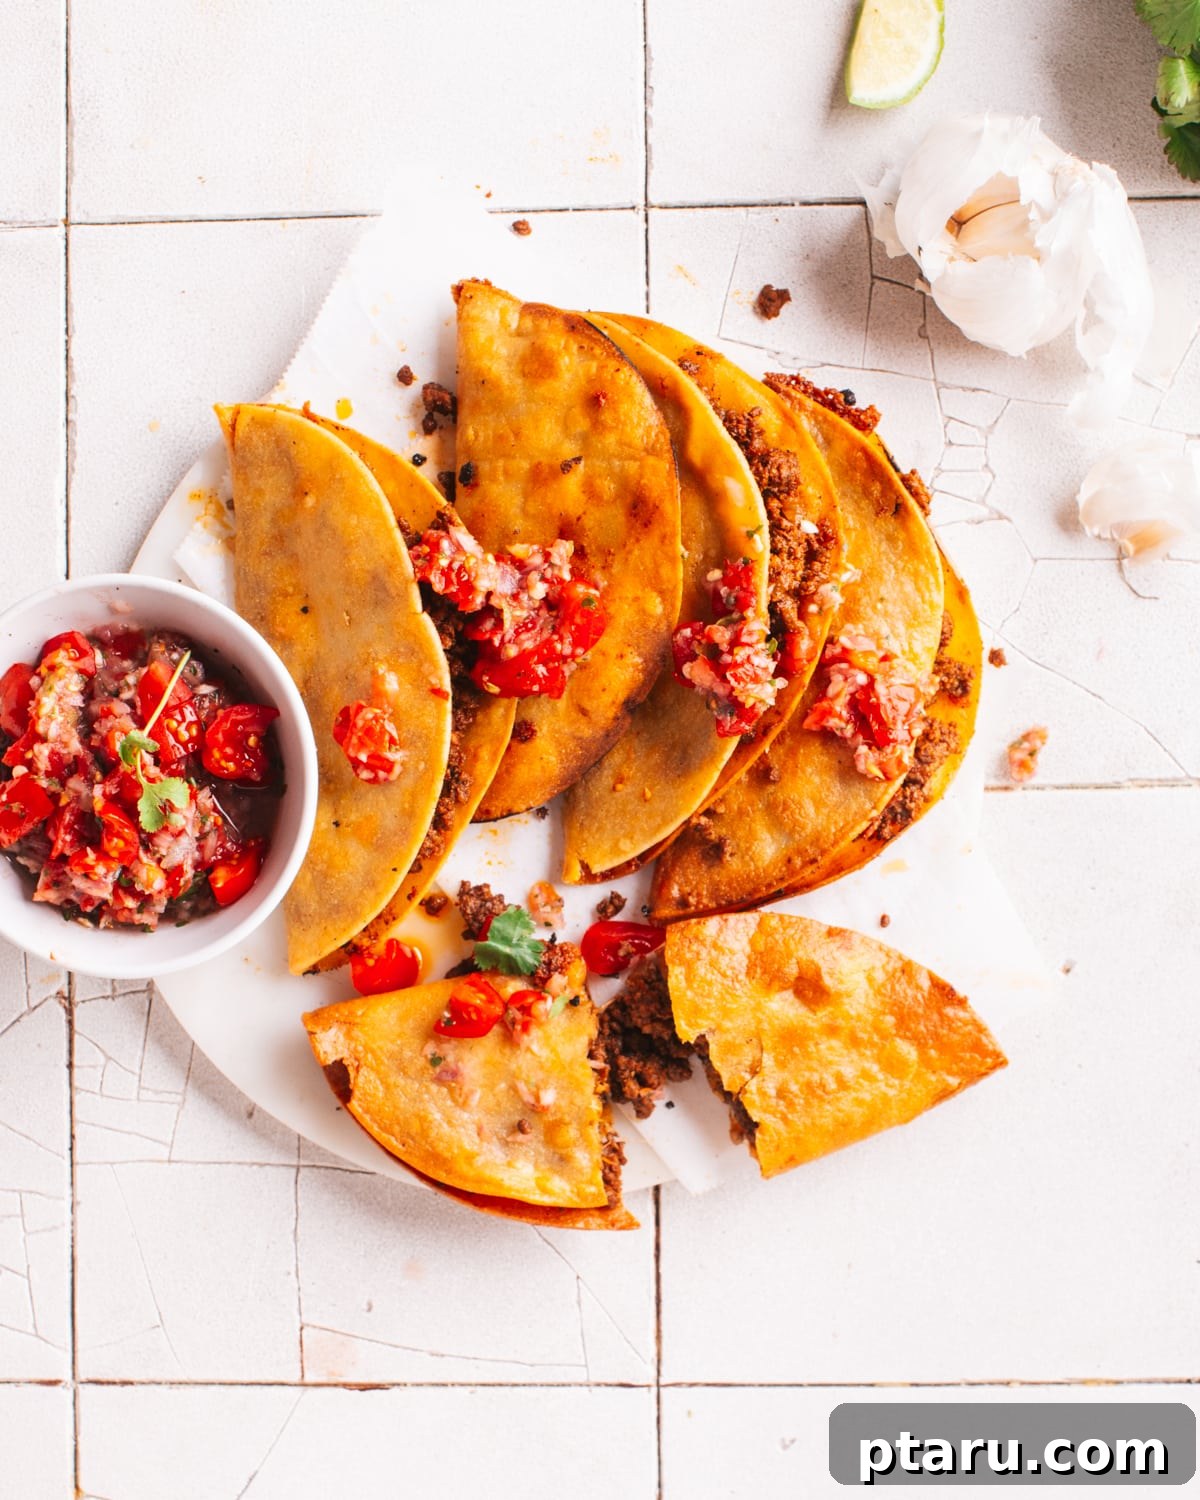
There’s nothing quite like the irresistible appeal of meaty, flavor-packed, and perfectly crispy fried tacos. Forget soggy shells or bland fillings – with this straightforward recipe, you’ll be able to create restaurant-quality crunchy tacos right in your own kitchen. This guide reveals the simple trick to achieving that golden, hot, and satisfying crunch that elevates taco night from ordinary to extraordinary!
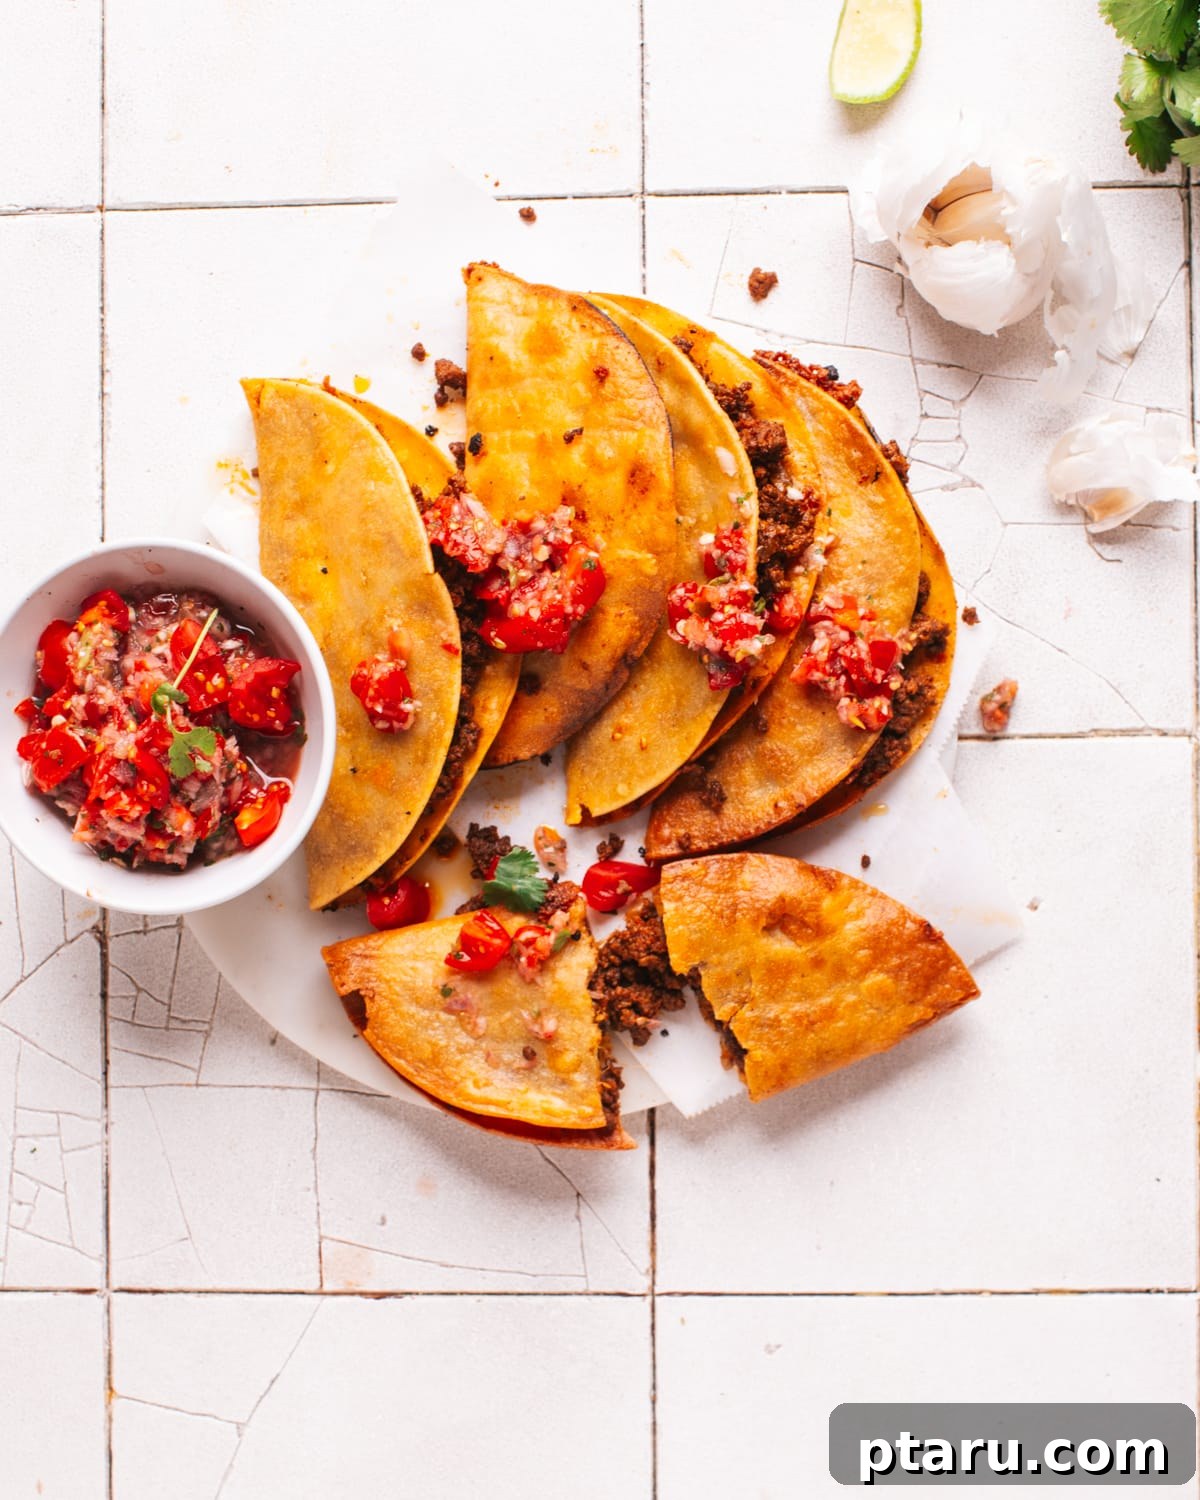
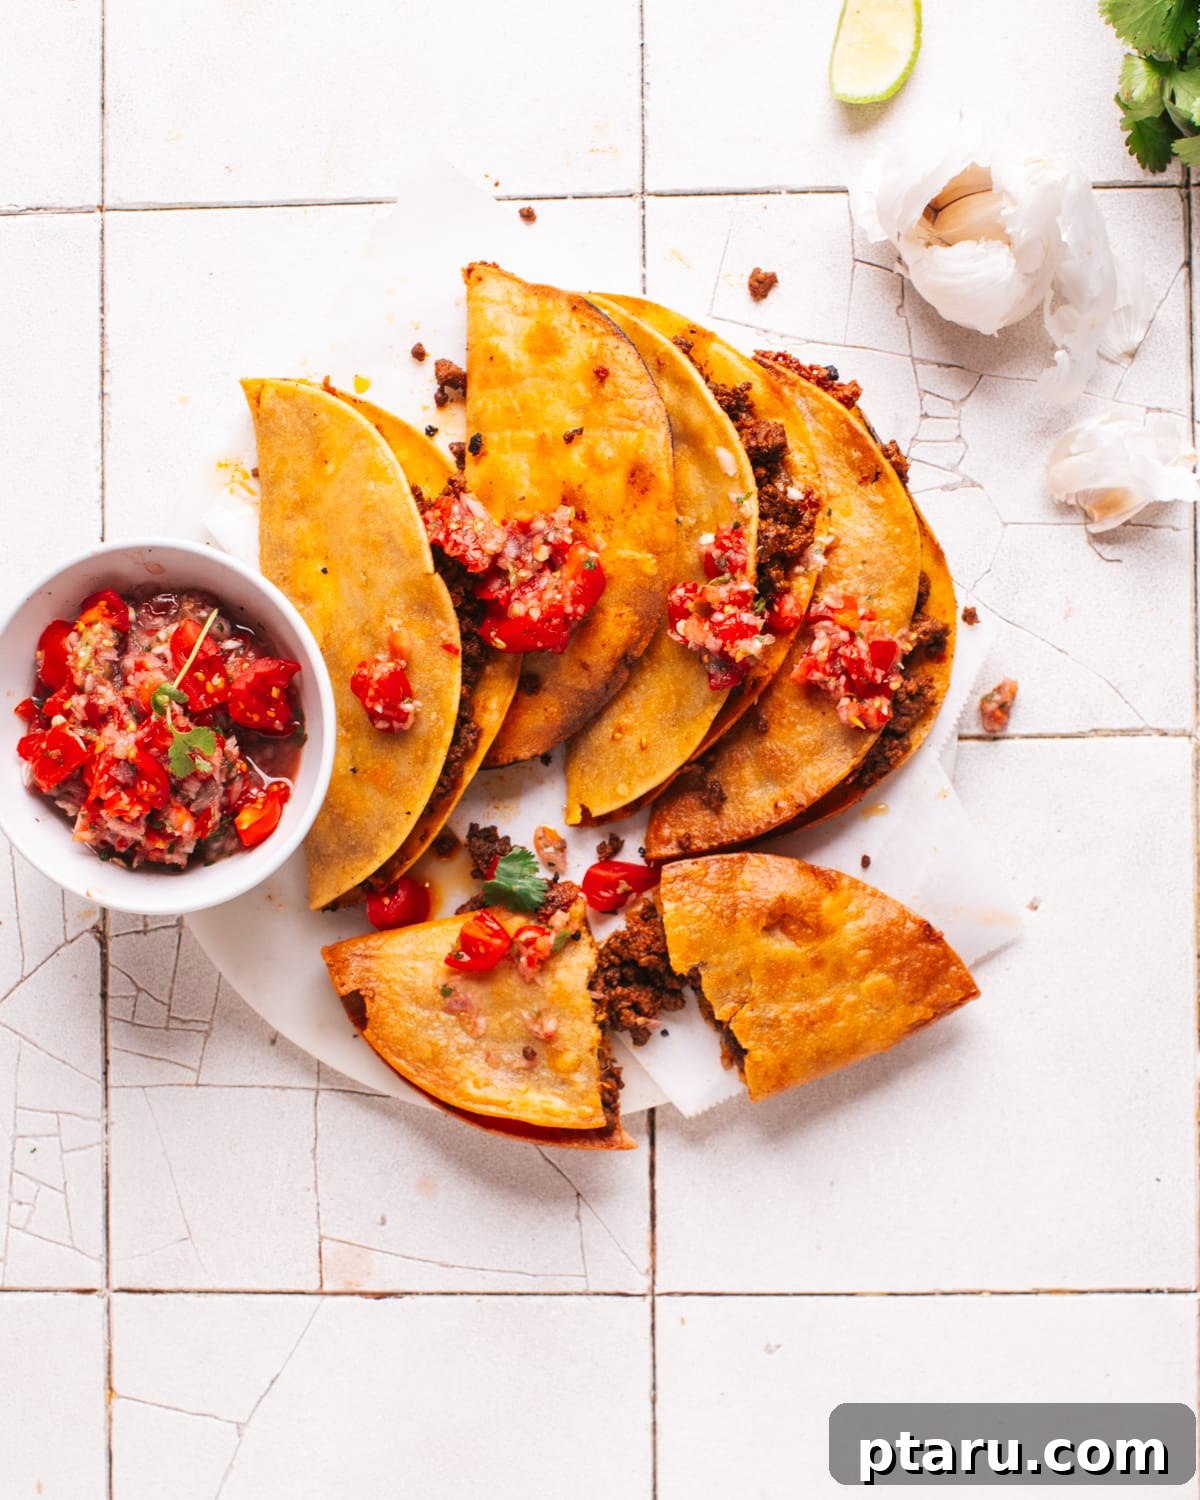
These delectable crispy fried tacos are a fantastic choice for any occasion – whether it’s a quick weekday lunch, an exciting game night, or a delightful weekend treat. Each taco is generously filled with perfectly seasoned ground beef and a generous sprinkle of melting cheese, then fried until it reaches a beautiful golden perfection. The result is a satisfying crunch with every bite, followed by a burst of savory flavor.
To complete your meal, serve these incredibly crunchy tacos with a vibrant array of fresh toppings. Think crisp shredded lettuce, juicy diced tomatoes, cool sour cream, fiery jalapeño slices, and a fragrant sprinkle of fresh cilantro. These additions not only enhance the visual appeal but also add layers of flavor and texture, ensuring a truly delicious and satisfying culinary experience.
Craft the Best Crispy Tacos You’ve Ever Tasted
It’s time to permanently ditch those mediocre, pre-packaged store-bought crispy shells! Seriously, once you master this simple method, you’ll never look back. This easy technique will empower you to create hot, crunchy tacos that rival any restaurant dish. The secret lies in a few key steps that transform humble ingredients into a spectacular meal.
Here’s the simple breakdown to achieving taco perfection:
- Choose the Right Tortillas: Opt for fresh flour tortillas or tender corn tortillas. They provide a superior flavor and texture compared to the rigid hard taco shells many of us grew up with during 90s taco nights. While those nostalgic shells hold a special place, these fresh tortillas offer an unparalleled crispiness when fried.
- Perfectly Fill Your Tacos: Add your delicious taco filling and cheese, being mindful not to overfill them. Proper filling ensures the tacos cook evenly and don’t burst during the frying process.
- The Crisping Magic: This is arguably the BEST PART. Transforming those soft tortillas into incredibly crispy shells is where the real magic happens. We’ll show you exactly how to get that perfect golden crunch.
Once your tacos are gloriously crispy, you can gently open them up a little – just enough – to add your favorite fresh toppings like crisp lettuce, ripe tomatoes, creamy avocado, or whatever else makes your taco dreams come true. This method guarantees a taco that’s crunchy on the outside and wonderfully flavorful on the inside.
3 Proven Methods to Achieve Perfectly Crispy Tacos
When it comes to getting that coveted crispy texture, you have several excellent options, allowing you to choose the method that best suits your kitchen setup, dietary preferences, or time constraints. Each technique offers a slightly different result, but all deliver delicious, crunchy tacos.
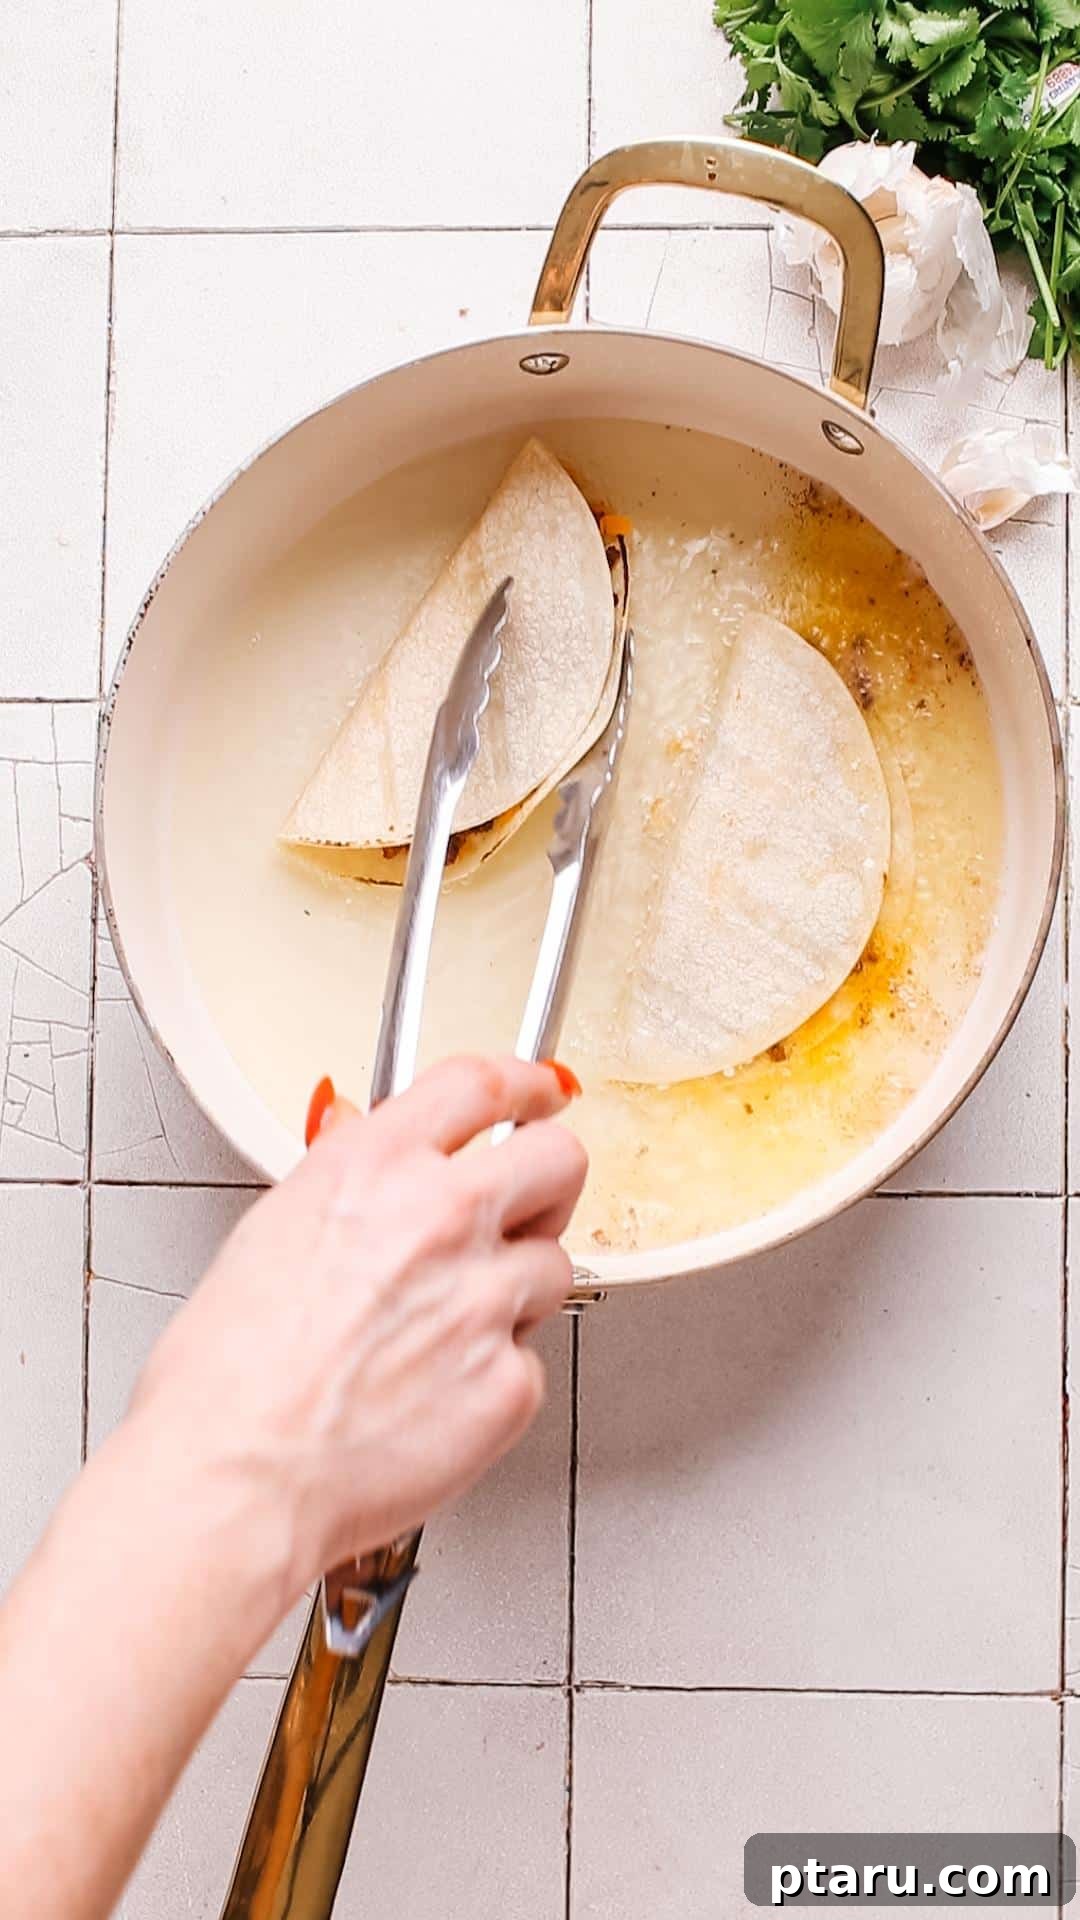
- Classic Pan-Frying for Maximum Flavor: For the ultimate, restaurant-quality deliciousness, pan-frying your tacos in hot oil is the way to go. This method creates a deep golden-brown crust and an intensely satisfying crunch. The oil not only crisps the tortilla but also enhances the overall flavor, making each bite incredibly rich and indulgent. This is often the preferred method for its superior texture and taste, though it requires a bit more active attention.
- Baking for a Lighter, Large-Batch Option: If you’re looking for a healthier alternative or need to prepare a large batch of crispy tacos simultaneously, baking is an excellent choice. Simply brush or spray your filled tacos with a light coating of oil and bake them until golden and crisp. While not as intensely crunchy as pan-fried versions, baked tacos still offer a satisfying crispiness with significantly less oil, making them a great option for family meals or entertaining.
- Air Frying for Quick and Crispy Results: For those seeking speed and convenience without sacrificing crispiness, air frying is a fantastic modern method. Similar to baking, you’ll brush or spray your tacos with oil before placing them in the air fryer basket. This technique uses circulating hot air to achieve a quick and even crisp. You’ll need to work in batches, flipping the tacos once to ensure both sides are beautifully golden, but the results are remarkably crispy and fast.
Experiment with each method to discover which “fried” taco preparation you like best! Each offers unique benefits, ensuring you can enjoy crispy tacos no matter your preference.
Avoid These Common Mistakes for Perfect Fried Tacos
Making crispy fried tacos is relatively simple, but a few common pitfalls can hinder your journey to taco perfection. By being aware of these mistakes and how to avoid them, you’ll ensure your tacos are consistently delicious and crunchy.
- Overfilling the Tacos: This is one of the most frequent errors. While it’s tempting to pack your tacos with a generous amount of savory meat mixture, overfilling can lead to several problems. Too much filling puts stress on the tortilla, causing it to tear or burst open during frying. This not only creates a messy situation but also prevents the taco from sealing properly and crisping evenly. Aim to leave enough room for the filling to expand slightly and for the tortilla to fold and seal securely. Remember, you can always add more toppings after frying!
- Using Cold or Stiff Tortillas: Working with tortillas straight from the refrigerator or at room temperature can make them brittle and prone to breaking when folded. Cold tortillas lack the pliability needed for a clean, tight fold, often resulting in cracks and an inability to hold the filling. Always warm your tortillas slightly before filling and folding them. This makes them supple and much easier to work with, ensuring they remain intact during the assembly and frying process.
- Incorrect Oil Temperature: The temperature of your frying oil is paramount for achieving that ideal crispy texture. Frying tacos in oil that isn’t hot enough will result in a greasy, soggy taco rather than a light and crunchy one, as the tortilla absorbs too much oil before it can crisp up. Conversely, oil that is too hot can burn the tortillas quickly on the outside while leaving the inside filling cold or insufficiently heated. The optimal frying temperature is around 350°F (175°C). Using a deep-fry thermometer is highly recommended to monitor and maintain this crucial temperature.
- Crowding the Frying Pan: It’s easy to want to cook all your tacos at once, especially when hungry, but crowding the pan is a mistake. Adding too many tacos at once significantly drops the oil temperature, leading back to the problem of soggy, greasy tacos. It also makes it harder to flip them evenly. Always fry your tacos in batches, allowing enough space between each one for the oil temperature to remain consistent and for the tacos to cook evenly and achieve maximum crispiness.
Essential Fried Taco Ingredients
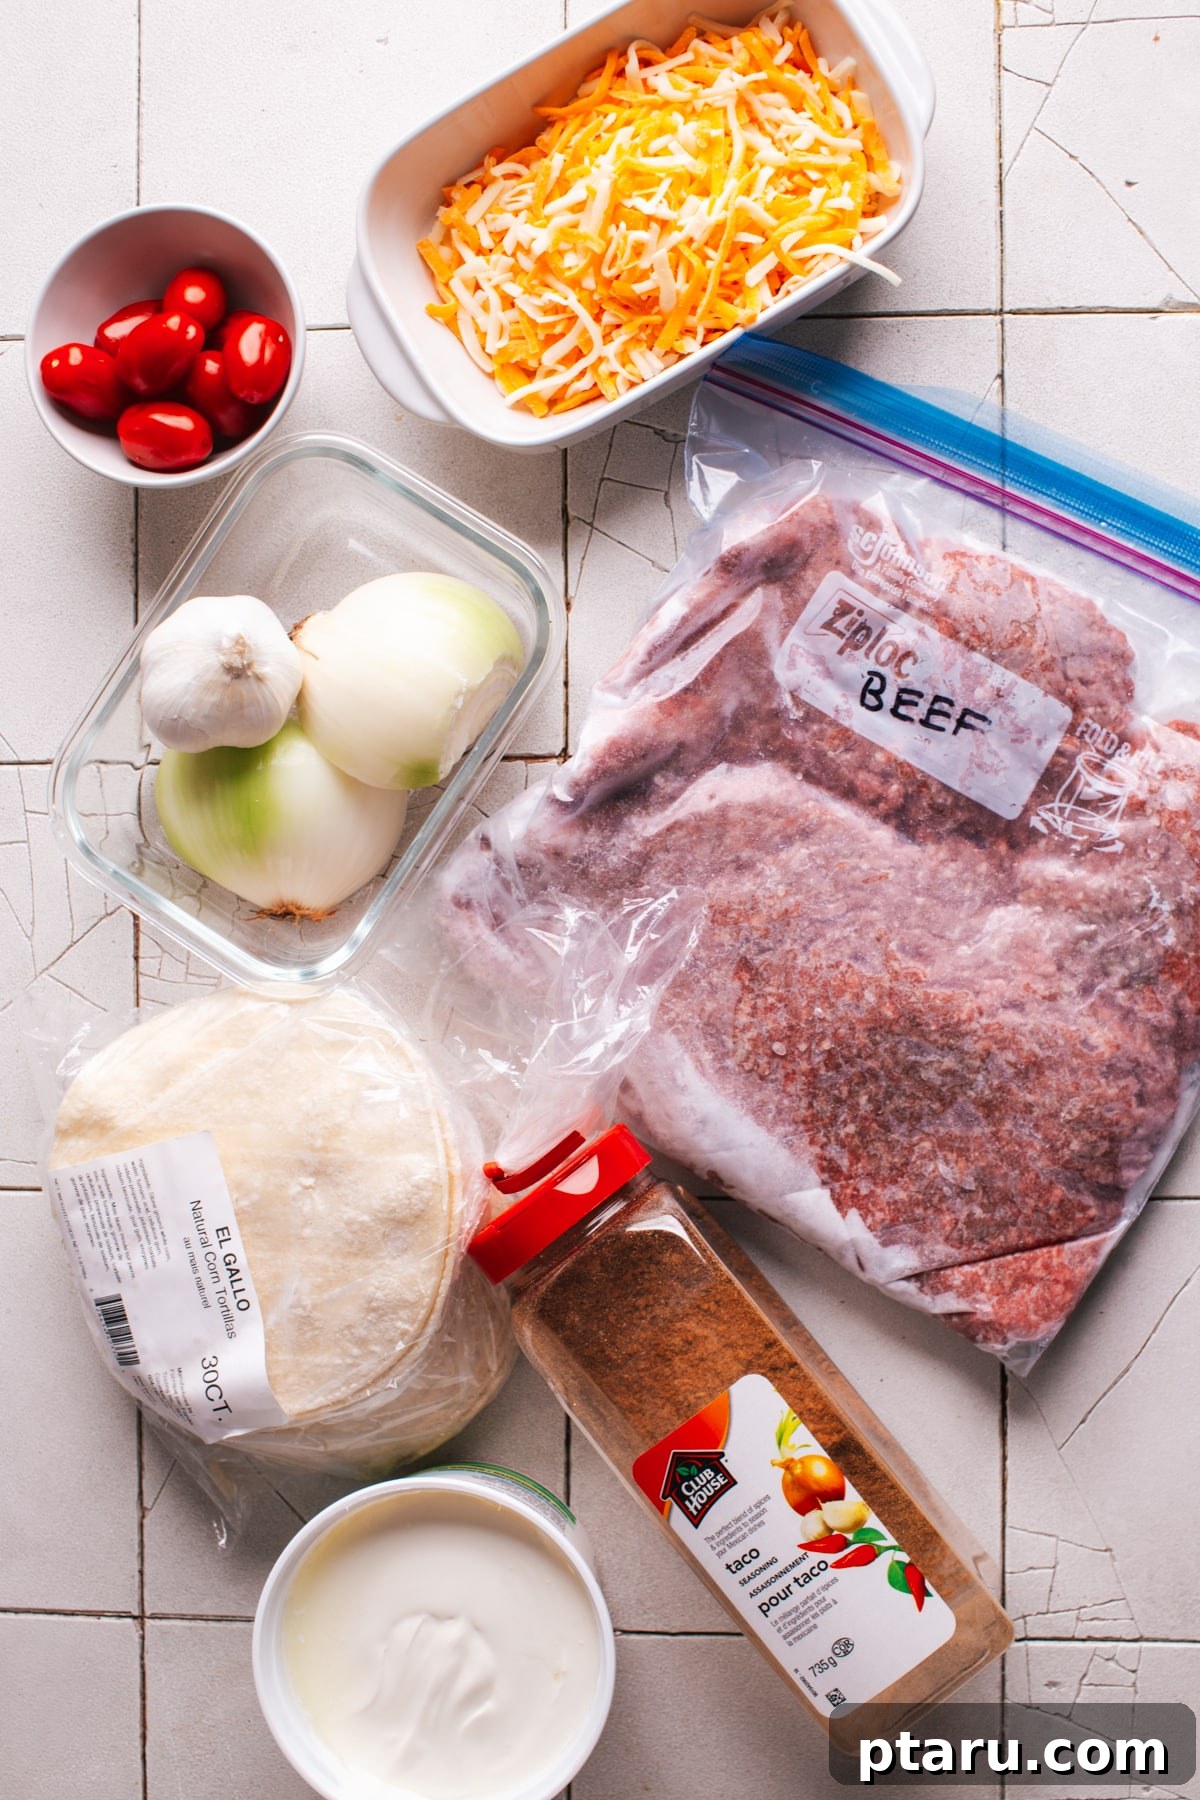
Gathering the right ingredients is the first step toward crafting these incredible fried tacos. Here’s a detailed look at what you’ll need to create a truly memorable meal:
- Cooking Oil for Sautéing and Frying: For the initial sautéing of your aromatics, a couple of tablespoons of vegetable oil, canola oil, or olive oil will suffice. For frying the tacos, it’s crucial to choose a high smoke point oil like vegetable oil, canola oil, or peanut oil. Ensure you have enough oil to submerge at least half of the taco or create a generous layer for pan-frying, ensuring even crisping.
- Onion: One medium onion, finely chopped, forms the flavorful base of your beef filling, adding a subtle sweetness and aromatic depth.
- Minced Garlic: A tablespoon of minced garlic infuses the ground beef with an essential savory aroma, elevating the overall taste profile.
- Ground Beef: One pound of lean ground beef is the hearty foundation of these tacos. You can also experiment with ground turkey or chicken for a lighter alternative.
- Taco Seasoning: Three tablespoons of your favorite taco seasoning blend (or one standard packet) will provide the authentic, zesty flavor. For an even fresher taste, consider using my homemade version found in my original ground beef tacos recipe.
- Small Flour or Corn Tortillas: You’ll need approximately 16 small tortillas (5.5 to 6 inches). Both flour and corn tortillas work wonderfully, each offering a slightly different texture and flavor when fried. Corn tortillas tend to be more traditional and develop a profound crispness, while flour tortillas offer a softer, chewier interior with a crispy exterior.
- Grated Cheese: About two cups of grated cheese are perfect for melting into the taco filling. A sharp cheddar cheese provides a robust flavor, while a Mexican blend cheese offers a nuanced, melty texture that complements the other ingredients beautifully.
- Optional Toppings for Customization: The beauty of tacos lies in their versatility. Load them up with a vibrant array of toppings to suit every preference:
- Crisp shredded lettuce for freshness and crunch.
- Diced ripe tomatoes for juicy sweetness.
- Cool and creamy sour cream to balance the spice.
- Zesty jalapeño slices for a kick of heat.
- Fragrant fresh cilantro for an herbaceous finish.
- Homemade taco salsa for a burst of tangy flavor.
- Rich and creamy easy guacamole from scratch for an added layer of indulgence.
With these ingredients at hand, you’re well on your way to assembling truly epic crispy fried tacos!
How to Make Fried Tacos: A Step-by-Step Guide to Crispy Perfection
Crafting these ultimate crispy fried tacos is a rewarding process. Follow these detailed steps to ensure every taco comes out perfectly seasoned, deliciously filled, and wonderfully crisp.
Step 1: Prepare the Flavorful Beef Filling
- Begin by heating two tablespoons of oil in a large skillet over medium-high heat. Once the oil shimmers, add the finely chopped onion. Sauté the onion, stirring occasionally, until it becomes translucent and tender, usually about 3-5 minutes. This step draws out the onion’s natural sweetness, laying a great flavor foundation.
- Next, add the minced garlic to the skillet. Cook for another minute or so, stirring constantly, until the garlic becomes fragrant. Be careful not to burn the garlic, as it can turn bitter quickly.
- Add the ground beef to the skillet. Break it up with a wooden spoon or spatula as it cooks. Sprinkle in the taco seasoning evenly over the beef. Continue to cook, stirring and breaking up the meat, until no longer pink and fully browned. Drain any excess fat from the skillet to prevent greasy tacos. This ensures a leaner, more flavorful filling.
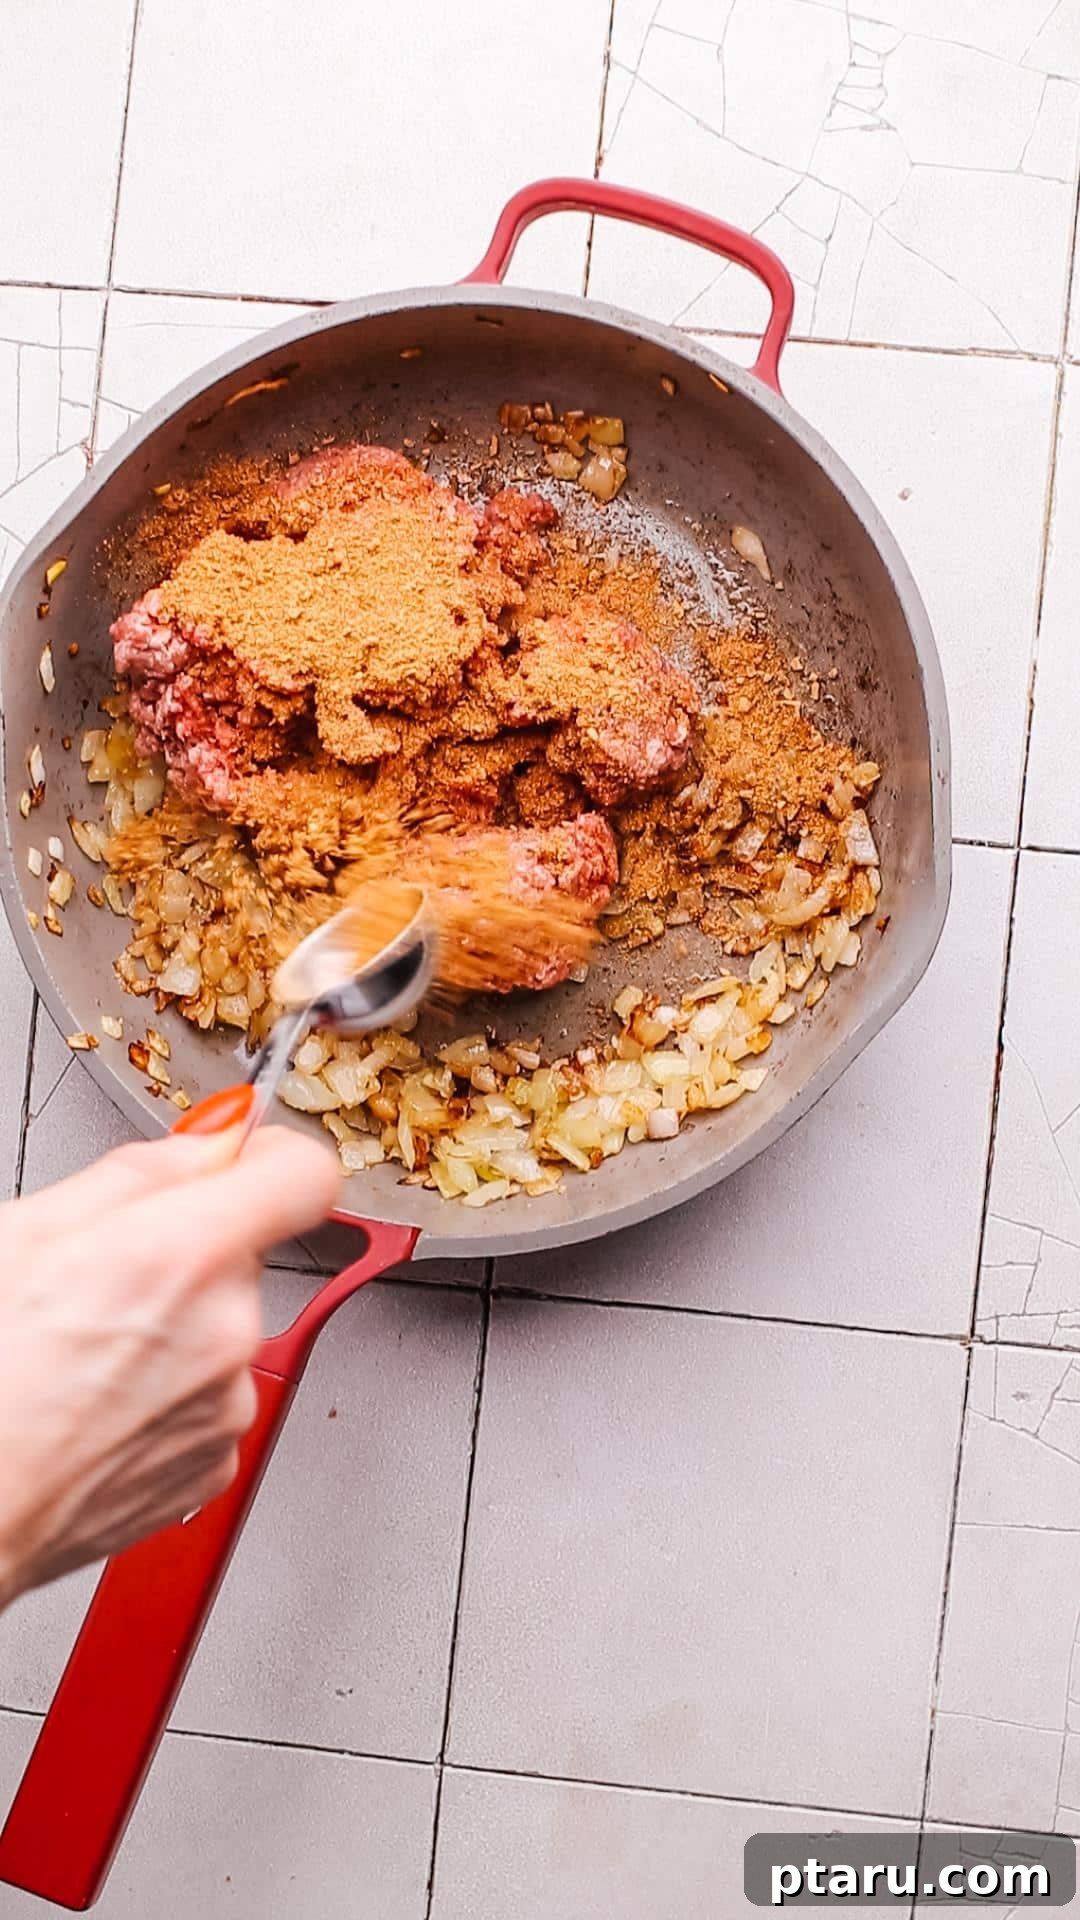
Step 2: Gently Prep Your Tortillas for Folding
Properly preparing your tortillas is crucial to prevent them from tearing during assembly. This step ensures they are pliable and ready to be filled and folded without a hitch.
- To make the tortillas soft and pliable, heat each tortilla individually in a dry skillet over medium heat. Cook for approximately 20-30 seconds on each side, or until they become soft, warm, and flexible. This process helps them bend without cracking.
- Alternatively, for a quicker method, you can wrap a stack of tortillas in a damp paper towel or cloth and microwave them for about 30 seconds. This generates steam, making them warm and supple.
Step 3: Assemble Your Delicious Tacos
With your filling ready and tortillas prepped, it’s time to assemble your tacos. Precision here ensures a perfectly sealed taco that’s ready for frying.
- Lay each warmed tortilla out flat on a clean surface. Spoon a modest amount (about 1-2 tablespoons for small tortillas) of the beef mixture onto one half of the tortilla, leaving a slight border.
- Generously sprinkle grated cheese over the beef filling. The cheese will melt during frying, helping to bind the filling together.
- Carefully fold the tortilla in half over the filling, pressing gently to seal the edges. Don’t overstuff, as this will prevent proper sealing and can lead to the taco bursting during frying. If the tacos struggle to stay closed, you can gently place a baking sheet or another plate on top of a few assembled tacos to help them hold their shape as you continue filling the others.
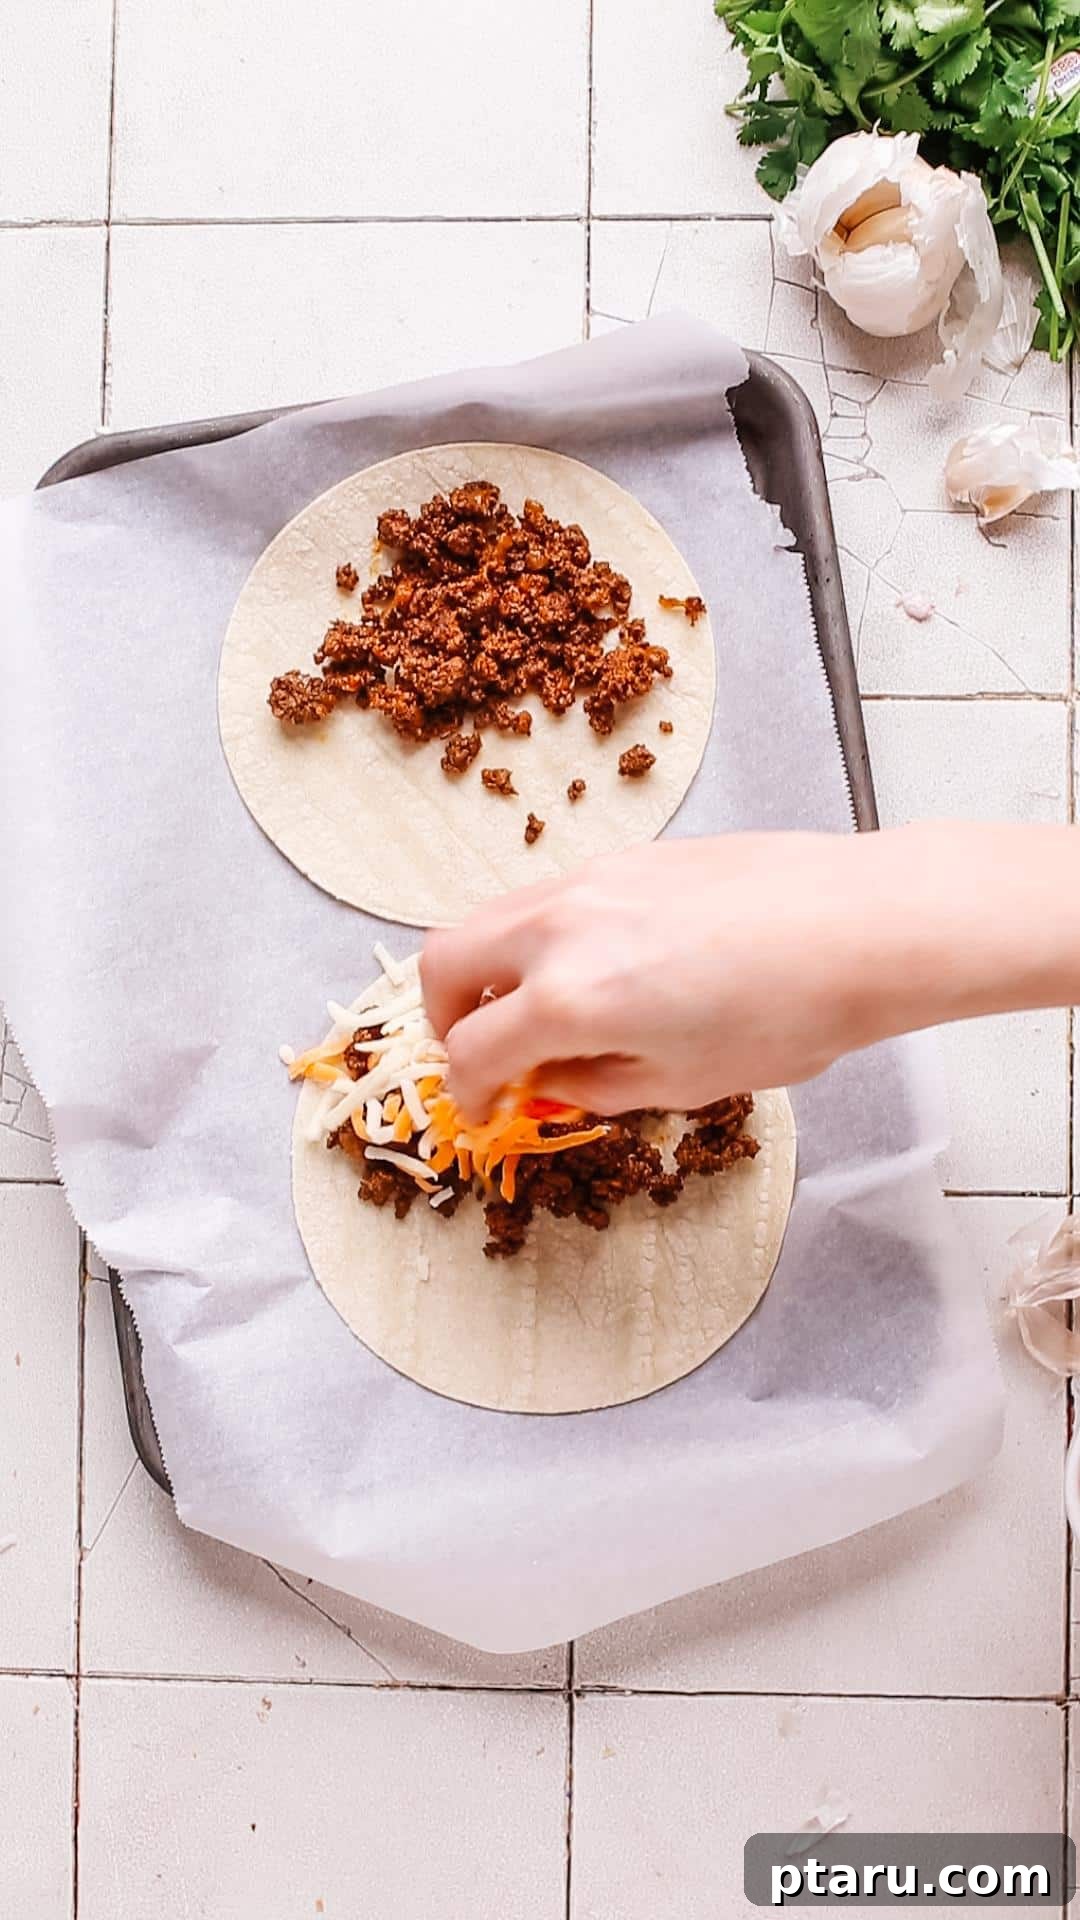
Step 4: The Art of Frying Your Tacos to Golden Perfection
This is where your tacos transform into crispy delights. Proper oil temperature and careful technique are key to achieving that desirable golden-brown exterior.
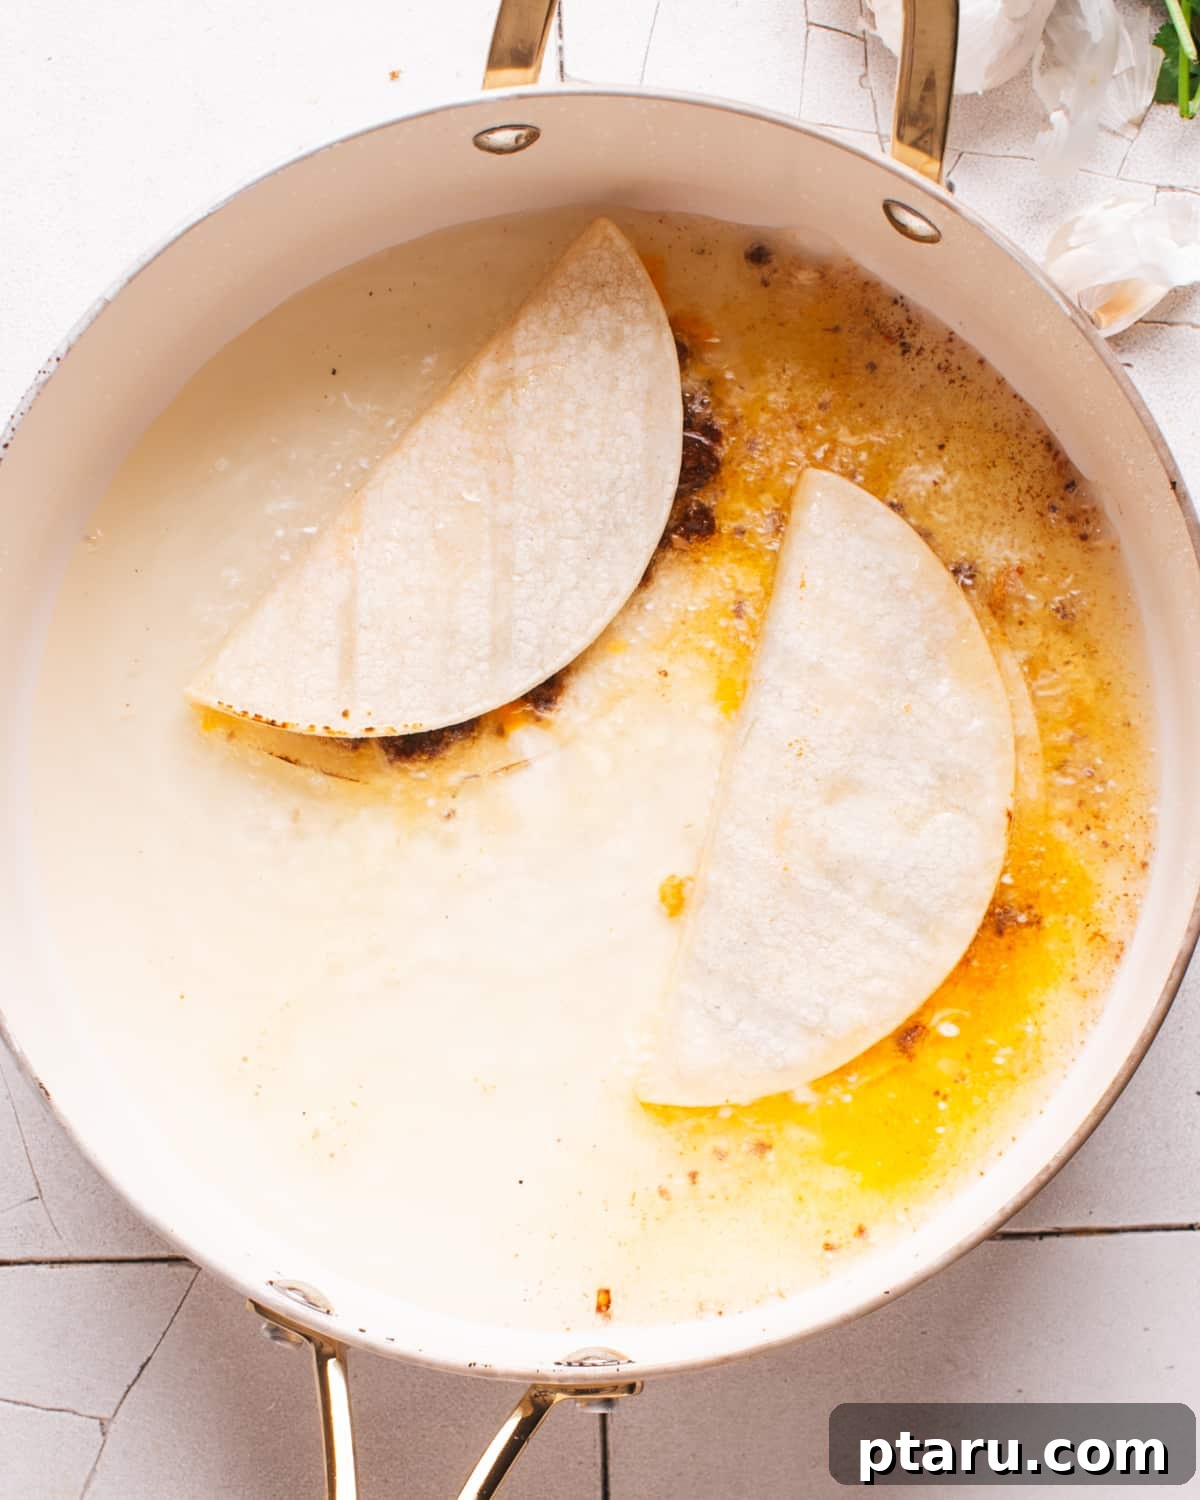
Add enough oil to generously coat the bottom of a large frying pan, creating a layer of about 1/2 to 1 inch deep. Heat the oil over medium heat. You want the oil to be hot enough to crisp the tortillas quickly without making them greasy.
- Check the Oil Temperature: Once the oil is shimmering hot (ideally around 350°F or 175°C), perform a quick test. Use tongs to carefully touch a small piece of extra tortilla or a corner of one of your filled tacos into the hot oil. If it immediately sizzles and bubbles vigorously, your oil is ready. If it just sits there without much activity, the oil needs to heat up more. If it smokes excessively, it’s too hot and should be lowered slightly.
- Carefully Place Tacos: Using tongs, gently place a few assembled tacos into the hot oil. Avoid overcrowding the pan; work in batches to maintain the oil temperature and ensure even cooking. Leave enough space around each taco.
- Fry Until Golden and Crispy: Fry each side of the taco until it achieves a beautiful golden-brown color and a crisp texture. This usually takes about 1-2 minutes per side. As you flip the tacos, use tongs in one hand to gently pinch closed the open side of the tacos. This helps keep the filling securely inside and allows the edges to crisp up nicely. A spatula in the other hand can assist with the flip if needed.
Once fried to perfection, remove the tacos from the pan using tongs. Allow any excess oil to drain by placing them on a plate lined with paper towels. This crucial step prevents them from becoming soggy and ensures maximum crispiness.
How to Bake “Fried Tacos” for a Lighter Crisp
If you prefer a lighter option or need to prepare a larger batch of tacos simultaneously, baking is an excellent alternative to traditional frying. You’ll still achieve a satisfying crisp, just with less oil.
- Preheat Oven: Begin by preheating your oven to 400°F (200°C). This ensures the oven is at the correct temperature for even cooking and crisping.
- Brush or Spray with Oil: Lightly brush or spray both sides of each assembled taco with a high-smoke point oil (like vegetable or canola oil). This thin layer of oil is essential for helping the tortillas crisp up beautifully in the oven.
- Arrange on Baking Sheet: Place the oiled tacos in a single layer on a baking sheet lined with parchment paper. Make sure they are not touching each other, allowing hot air to circulate freely around each taco for even crisping.
- Initial Bake: Bake in the preheated oven for 10-12 minutes. During this time, the tortillas will start to dry out and firm up.
- Flip Halfway: Carefully flip each taco halfway through the baking time (after about 5-6 minutes). This ensures that both sides get equal exposure to the heat, leading to a consistently golden brown and crispy exterior.
- Finish Baking: Continue baking for an additional 5-7 minutes, or until the tacos are beautifully golden brown and delightfully crispy to your liking. Keep a close eye on them to prevent burning.
If you enjoy this method, you’ll definitely want to explore my recipe for Crispy Baked Chicken Tacos for another delicious oven-baked option!
Effortless Crisp: How to Air Fry Tacos
The air fryer offers a fantastic, quick, and efficient way to achieve perfectly crispy tacos with minimal oil. It’s an excellent choice for smaller batches and a healthier alternative to deep-frying.
- Preheat Air Fryer: Preheat your air fryer to 375°F (190°C). Allow it to heat up for a few minutes to ensure it reaches the desired temperature for optimal crisping.
- Brush or Spray with Oil: Lightly brush or spray both sides of each assembled taco with oil. This helps them achieve a golden color and prevents them from drying out too much.
- Arrange in Air Fryer Basket: Place a few tacos in the air fryer basket in a single layer. It’s crucial not to overcrowd the basket, as air circulation is key to even cooking and crisping. You’ll likely need to work in batches of 2-3 tacos, depending on the size of your air fryer appliance.
- Air Fry Initial Time: Air fry the tacos for 5-6 minutes. During this initial phase, the tortillas will begin to crisp up and become firm.
- Flip Carefully: Halfway through the cooking time (after about 2.5-3 minutes), carefully open the air fryer and flip each taco using tongs. This ensures both sides of the taco get evenly exposed to the circulating hot air, resulting in a uniform crispness.
- Finish Cooking: Continue air frying for an additional 3-6 minutes, or until the tacos are wonderfully golden brown and crispy to your preference. Keep an eye on them, as air fryer cooking times can vary.
How to Serve Your Irresistible Fried Tacos
Once your tacos are perfectly fried and drained, the final step is to assemble them with your favorite fresh toppings. Be mindful that the tacos will be hot and crispy, so handle them gently.
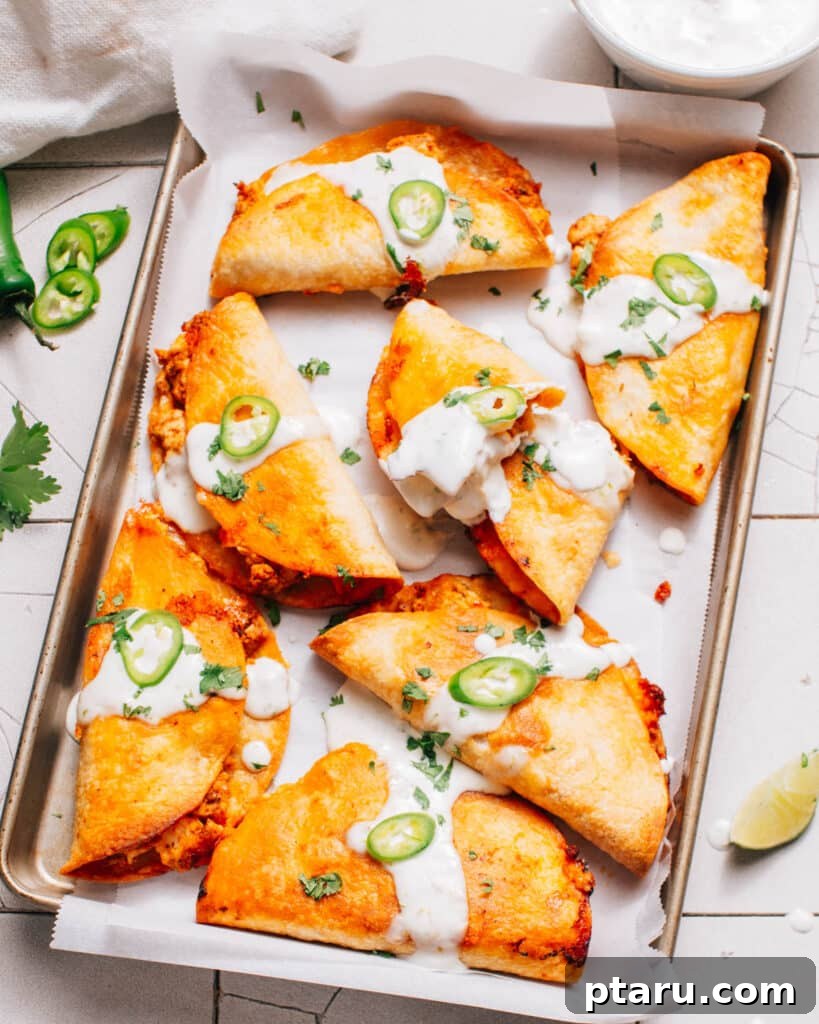
Carefully open each taco slightly, creating a pocket for your fillings. Generously stuff them with crisp shredded lettuce, juicy diced tomatoes, and any other delicious fillings you’ve selected. The contrast between the hot, crispy shell and the cool, fresh toppings is what makes these tacos truly special.
Serve your ultimate crispy fried tacos immediately with an inviting spread of sides: creamy sour cream, vibrant salsa (like my homemade taco salsa), zesty jalapeño slices for an extra kick, and a garnish of fresh cilantro. For an added indulgence, a dollop of fresh guacamole pairs wonderfully. Enjoy the satisfying crunch and explosion of flavors!
Plan Ahead: Tips for Preparing Fried Tacos in Advance
While fried tacos are undoubtedly at their best when served fresh and piping hot, you can certainly streamline your meal preparation by getting a head start on the filling and components. This makes assembling and frying a breeze when mealtime rolls around.
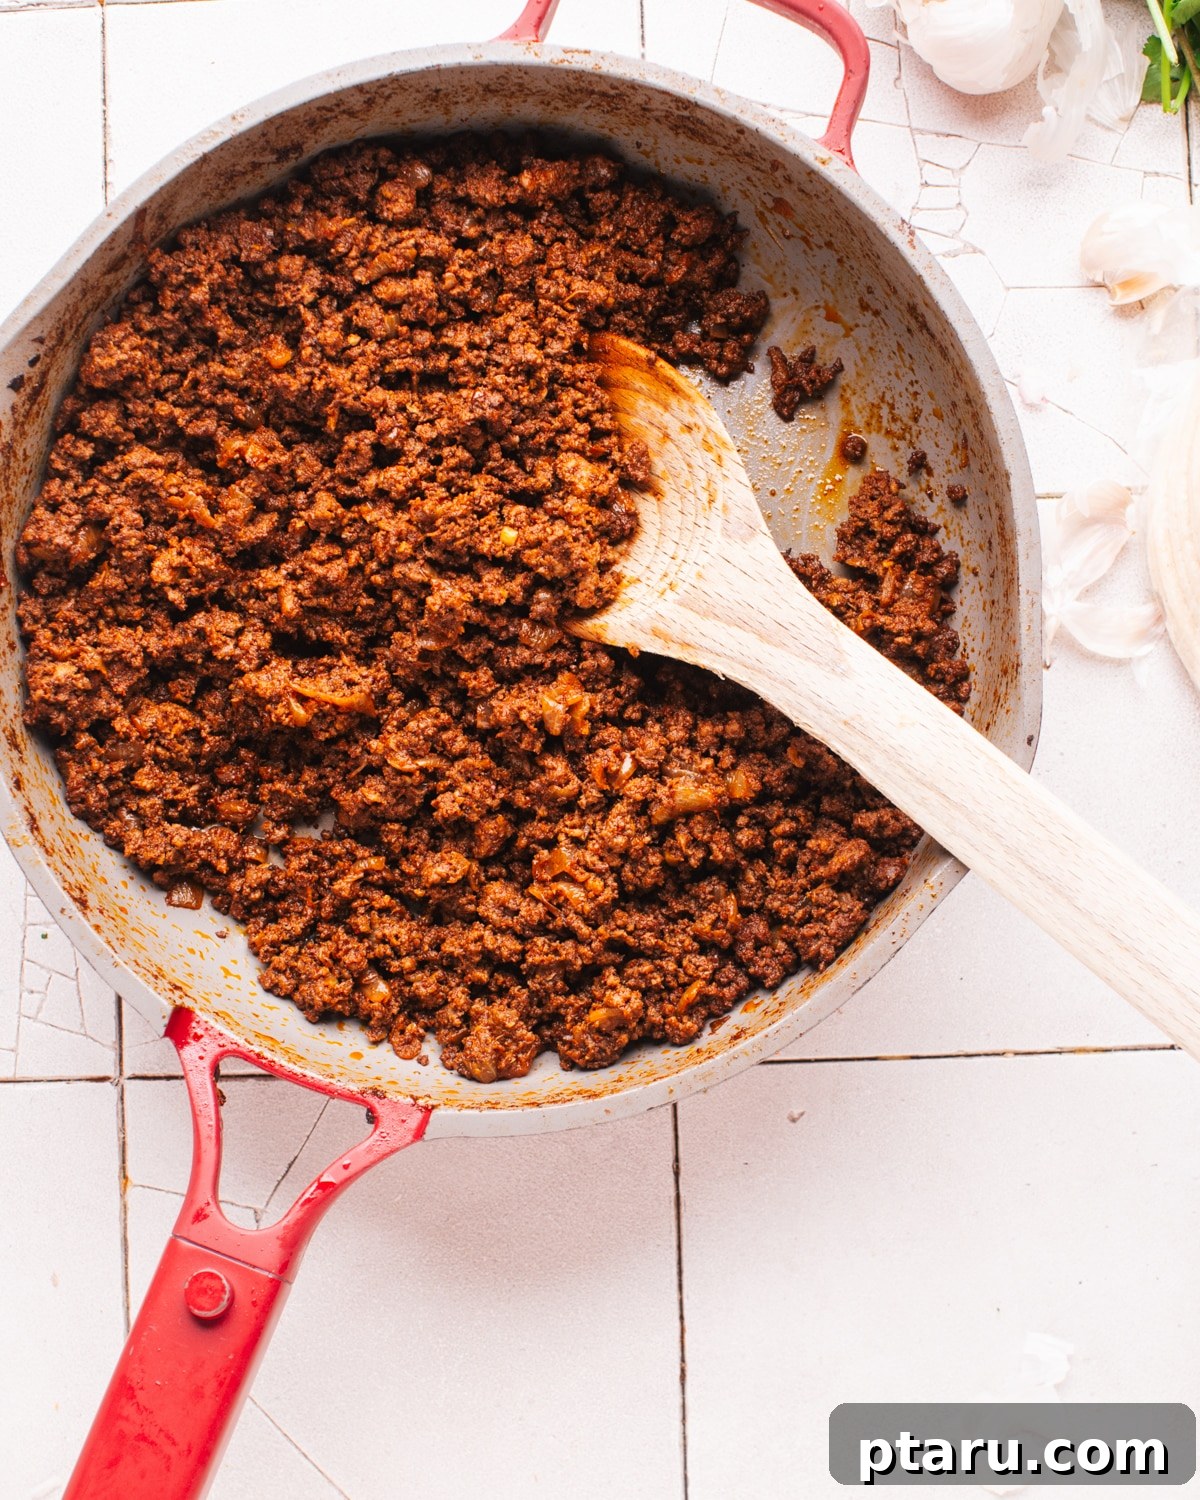
Efficient Meal Prep: One of the biggest time-savers is preparing a large batch of taco filling in advance. It’s incredibly versatile, and I have a bajillion ways to use leftover taco filling, so it never goes to waste!
Here are some specific tips for making components ahead of time:
- Prepare the Taco Filling: Cook the ground beef with onion, garlic, and seasoning as directed in the recipe. Once cooked, allow the filling to cool completely before transferring it to an airtight container or bowl. Store it in the refrigerator for up to 2-3 days. When you’re ready to make tacos, simply reheat the filling in a skillet over medium heat until it’s warmed through. This ensures a quick assembly process on taco night.
- Prep Your Toppings: Chop all your fresh toppings, such as lettuce, tomatoes, cilantro, and any other desired additions, well in advance. Store each topping separately in airtight containers or resealable bags in the refrigerator. This not only saves time but also keeps your toppings fresh. The key is to only add these fresh fillings to the tacos right before serving to maintain their crispness and vibrancy.
Keeping Fried Tacos Warm Before Serving
Once fried, tacos are best enjoyed immediately to savor their optimal crispiness. However, if you’re frying in batches or need to keep them warm for a short period:
- It is generally not recommended to fully assemble and fry the tacos far ahead of time, as this can cause them to lose their crispness and become soggy. The fresh toppings can also make the shells soft.
- You can keep freshly fried tacos warm for a brief period in a very low oven, around 160°F (70°C). Place them on a wire rack set over a baking sheet to allow air to circulate, which helps maintain some crispness. Limit this warming time to about 30 minutes. Any hotter or longer, and you risk making the tortillas hard and brittle.

Storage for Leftover Fried Tacos
While fried tacos are indeed best consumed fresh and crispy, you might occasionally have leftovers. If you do:
Store any leftover fried tacos in an airtight container in the refrigerator for up to 2 days. Be aware that they will likely lose some of their initial crispiness upon refrigeration.
To reheat and restore some crispness, place the leftover tacos on a baking sheet. Reheat them in a preheated oven at 350°F (175°C) for 5-10 minutes, or until they are thoroughly heated through and have regained some of their desired crispiness. Avoid microwaving, as this will make them soft.
Expert Tips and Science-Backed Secrets for Ultimate Tacos
To truly master this fried taco recipe and consistently achieve outstanding results, keep these professional tips and scientific insights in mind:
- Maintain Consistent Oil Temperature: This cannot be stressed enough. Consistent oil temperature is the single most critical factor for achieving uniformly crispy (not greasy) tacos. Fluctuations in temperature lead to uneven cooking and oil absorption. Invest in a deep-fry thermometer and use it! Aim to maintain the oil around 350°F (175°C). If the temperature drops too low (e.g., after adding a batch of tacos), allow it to recover before adding more. If it gets too high, temporarily reduce the heat or remove the pan from the burner briefly.
- The “Pin Them Shut” Trick for Easy Filling: If you find your freshly warmed, pliable tortillas are still a bit springy and won’t stay neatly folded with the filling inside, there’s a simple trick. After filling and folding a few tacos, place them on a flat surface (like a cutting board). Then, gently place a heavier baking sheet or a sturdy plate on top of them. This acts as a gentle weight, “pinning them shut” while you continue to assemble the rest of your tacos. By the time you’re ready to fry, they will have “learned” their folded shape, making them much easier to handle.
- Don’t Overload the Tortilla: This relates back to preventing mistakes, but it’s worth reiterating. For a standard small tortilla (5 ½ – 6 inches), no more than 1.5 to 2 tablespoons of taco meat is ideal. Exceeding this amount significantly increases the risk of the filling spilling out into the hot oil, creating a mess and potentially burning. It’s much better to keep any extra meat warm on the side and add it to the tacos after they’ve been fried and are ready for toppings.
- The Right Tortilla Matters: While both flour and corn tortillas can be fried, corn tortillas historically offer a superior crispness when fried due to their lower moisture content and different starch structure. For the crispiest results, especially for traditional fried tacos, corn tortillas are often preferred. If using flour tortillas, ensure they are thin and not overly soft before frying.
FAQs About Delicious Fried Tacos
Just whizzing through this article? Here are some key takeaways and frequently asked questions to ensure you’re a fried taco expert!
Fried tacos, often referred to as crispy tacos or hard-shell tacos, are a beloved variety of taco where the tortilla is filled with savory ingredients like seasoned meat and cheese, then fried until it becomes wonderfully crispy. After frying, they are typically garnished with fresh toppings such as lettuce and salsa.
The primary distinction lies in their preparation and resulting texture. Fried tacos feature a characteristic crispy outer shell, which is achieved by frying the filled tortilla in hot oil. In contrast, “regular” tacos commonly use soft tortillas (either corn or flour) that are typically warmed but not fried, resulting in a softer, more pliable texture.
Absolutely! Baking is an excellent alternative if you prefer less oil or want to prepare a larger quantity at once. Simply arrange the filled tacos on a baking sheet after lightly coating them with oil, then bake in a preheated oven until they turn golden brown and crispy.
The beauty of fried tacos is the endless array of toppings! Popular choices include shredded lettuce, diced tomatoes, finely chopped onions, grated cheese, various salsas (mild to spicy), creamy guacamole, cool sour cream, and a drizzle of hot sauce for an extra kick. Fresh cilantro is also a classic, fragrant addition.
While fried tacos are undoubtedly best enjoyed immediately for maximum crispness, you can certainly prepare key components ahead of time. The seasoned ground beef filling and all your fresh toppings can be prepped and stored separately in the refrigerator for a few days, making assembly and quick frying much faster when you’re ready to serve.
Whether fried tacos are gluten-free depends entirely on the type of tortillas and seasonings used. If you opt for corn tortillas, which are naturally gluten-free, your tacos can be gluten-free. However, if you use flour tortillas or a taco seasoning blend that contains wheat starch or other gluten-containing ingredients, then the tacos would not be gluten-free. Always check ingredient labels if gluten-free is a requirement.
Other Fan Favorite Mexican Recipes You’ll Love
If you adore flavor-packed Mexican cuisine as much as we do, you simply MUST try these other super-popular and delicious dishes:
- Baja Fish Tacos: Featuring crisp battered fish, topped with easy quick-pickled red onion, drizzled with creamy Baja sauce, and served with a refreshing cabbage slaw for fish tacos.
- Classic Cheese Quesadillas: A simple yet utterly satisfying dish, perfect for a quick snack or light meal.
- Elotes Salad (Mexican Street Corn Salad): All the incredible flavors of grilled Mexican street corn, deconstructed into a vibrant and delicious salad.
- Instant Pot Mexican Rice: Fluffy, flavorful, and incredibly easy to make, this rice is the perfect side dish for any Mexican feast.
- Authentic Chicken Street Tacos: Simple, flavorful marinated chicken served in small tortillas with fresh toppings – just like you’d find from a street vendor.
- Spicy Fish Tacos with Cabbage Slaw and Lime Crema: A fiery and fresh take on fish tacos, balanced with a cooling lime crema and crunchy slaw.
The Ultimate Crispy Fried Tacos (Quick, Easy Recipe!)
Jennifer Pallian BSc, RD
15 minutes
30 minutes
45 minutes
6
Ingredients
- 2 tbsp oil (for sautéing)
- 1 medium onion finely chopped
- 1 tbsp minced garlic
- 1 lb ground beef
- 3 tablespoons taco seasoning or 1 packet
- 16 small corn tortillas (or flour tortillas)
- 2 cups grated cheddar cheese or Mexican blend cheese
- Oil for frying (vegetable, canola, or peanut oil)
- Optional toppings, like shredded lettuce, diced tomato, sour cream, jalapeno, and salsa.
Instructions
Beef Filling:
-
Heat 2 tbsp oil in a skillet over medium heat. Add onion and sauté until translucent (3-5 minutes). Add minced garlic and sauté for another minute until fragrant.
-
Add the ground beef and taco seasoning. Break apart the beef as it cooks. Cook until no longer pink, then drain any excess fat.
Prep Tortillas:
-
To make tortillas pliable, heat each in a dry skillet over medium heat for 20-30 seconds per side, or until soft. Alternatively, wrap in a damp cloth and microwave for 30 seconds.
Assemble Tacos:
-
Lay out each tortilla. Place 1-2 spoonfuls of beef mixture on one side, and sprinkle with cheese. Fold the tortilla in half over the filling, pressing gently to seal.
Fry Tacos:
-
Generously coat the bottom of a frying pan with oil (about 1/2 to 1 inch deep) and heat over medium heat until shimmering (around 350°F / 175°C). Test with a small piece of tortilla; it should sizzle immediately.
-
Carefully place a few tacos in the pan, avoiding overcrowding.
-
Fry each side until golden brown and crispy, about 1-2 minutes per side. Use tongs to pinch the open side closed as you flip.
-
Remove tacos using tongs and let them drain on a plate lined with paper towels to absorb excess oil.
Serve:
-
Open each taco slightly (carefully, as they’ll be hot and crispy) and stuff with shredded lettuce, diced tomato, and/or any other preferred fresh fillings. Serve immediately with sour cream, salsa, and jalapeños.
Recipe Notes
Do not add more than 2 tablespoons of taco meat per small (5 ½ – 6”) tortilla, or the filling may spill out during frying. Keep extra meat hot on the side to add after frying.
Nutrition Information (per serving)
Carbohydrates: 40g |
Protein: 28g |
Fat: 39g |
Saturated Fat: 16g |
Polyunsaturated Fat: 3g |
Monounsaturated Fat: 14g |
Trans Fat: 1g |
Cholesterol: 103mg |
Sodium: 730mg |
Potassium: 635mg |
Fiber: 6g |
Sugar: 5g |
Vitamin A: 1201IU |
Vitamin C: 12mg |
Calcium: 383mg |
Iron: 3mg
Nutrition information is automatically calculated and should only be used as an approximation.
Tried this recipe? Leave a comment!