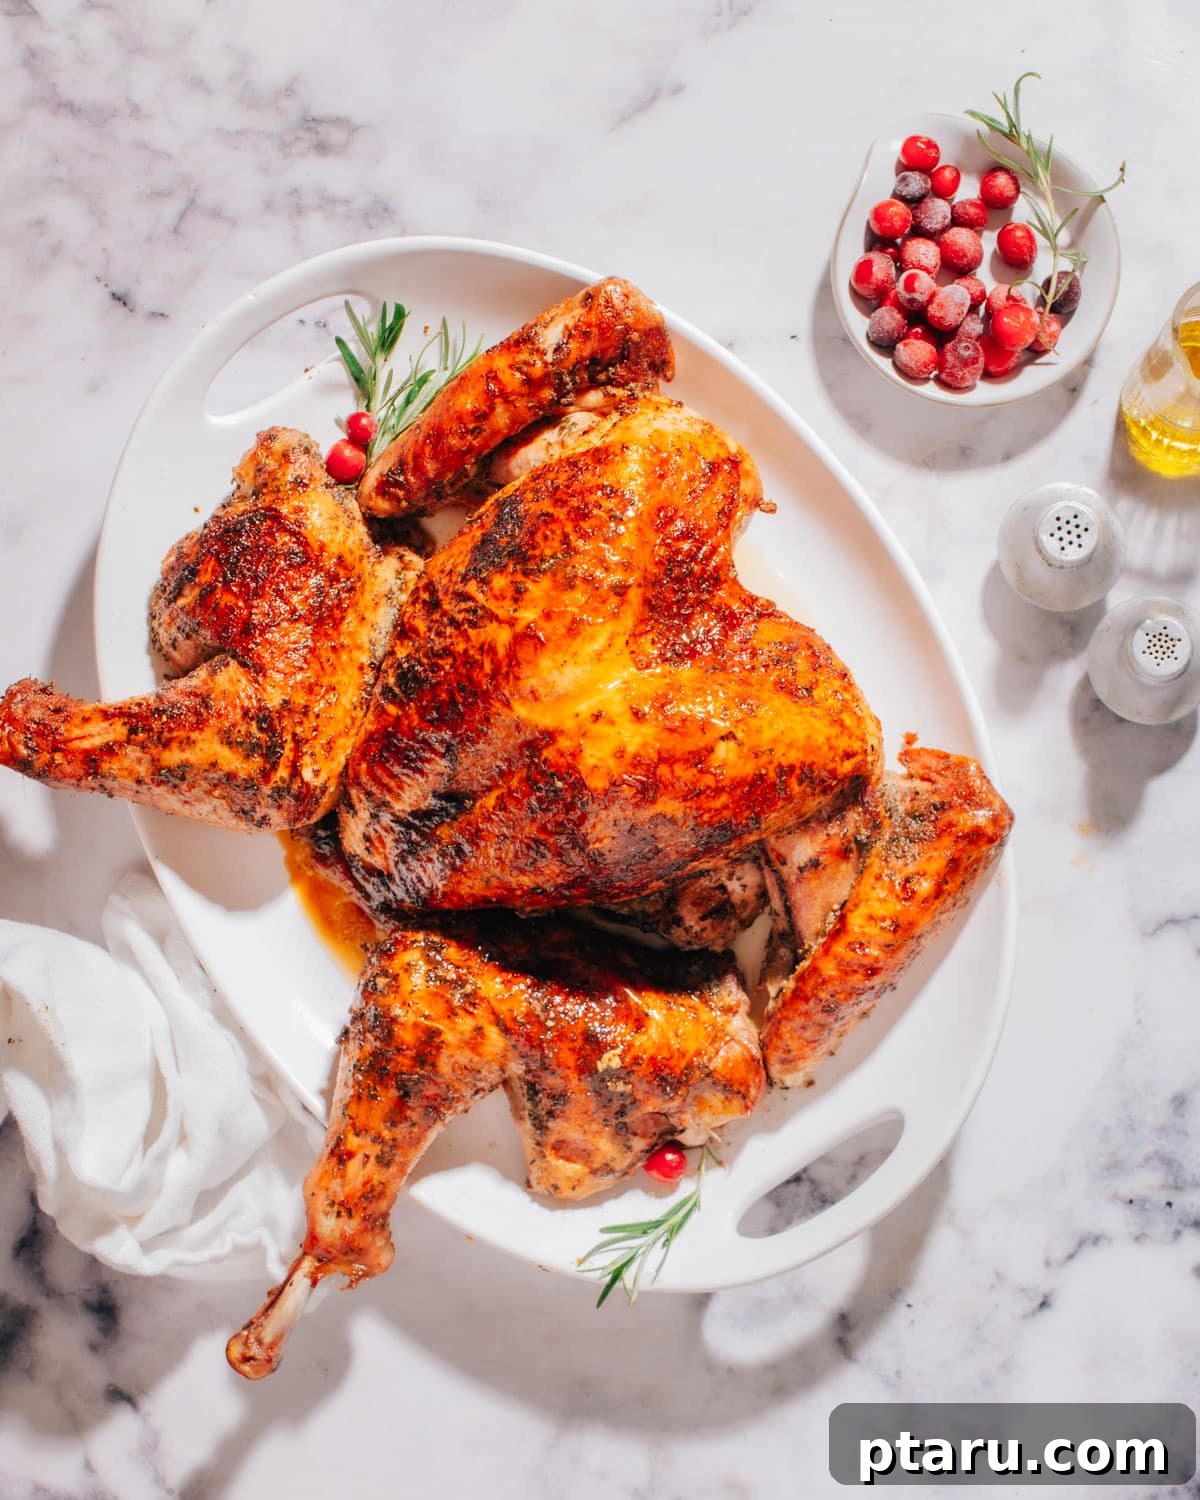
Spatchcock Turkey, also known as butterflied turkey, stands out as the ultimate method for achieving an exceptionally juicy bird with irresistibly crispy skin from every angle—not just the top. This clever cooking technique dramatically slashes roasting time while guaranteeing that both delicate white meat and rich dark meat reach delicious perfection without any part drying out. Whether you’re preparing for a holiday feast or a special family dinner, spatchcocking promises a stress-free experience and a show-stopping result.
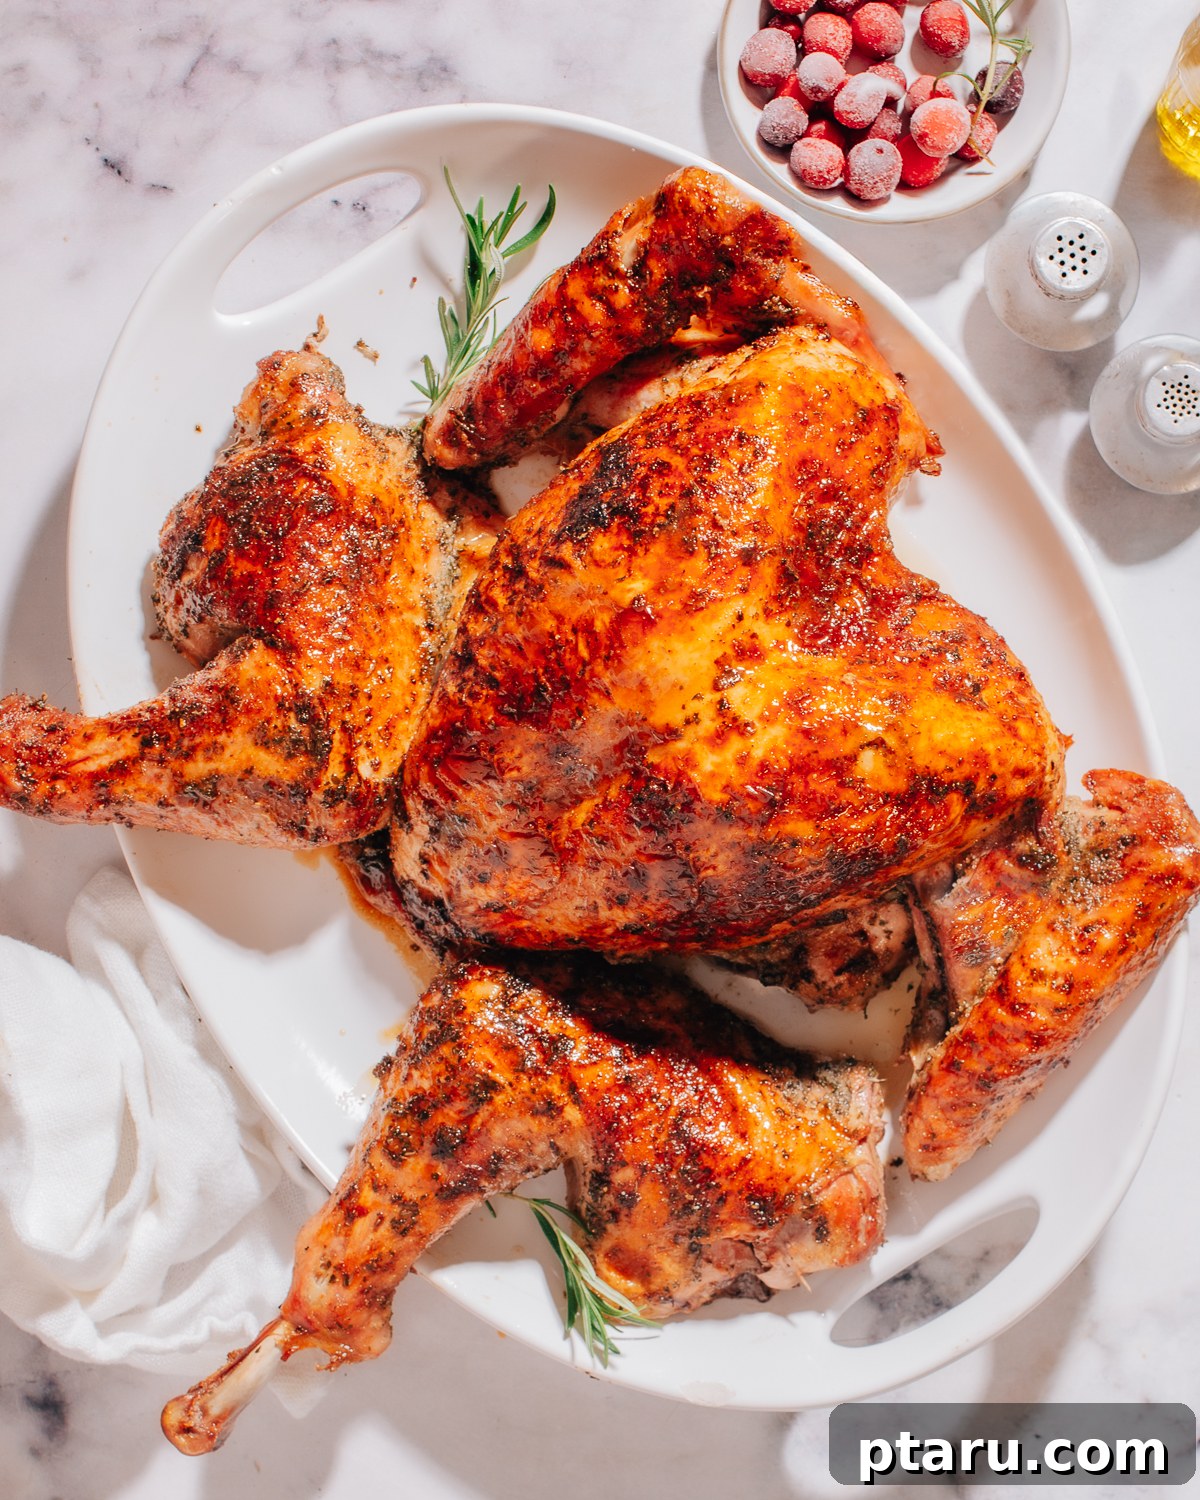
The Culinary Science Behind Spatchcocking Turkey
Spatchcocking, or butterflying, a turkey involves removing its backbone to allow the bird to lie completely flat. This seemingly simple alteration profoundly impacts the cooking process, leveraging fundamental principles of heat transfer to deliver superior results. When a turkey lies flat, its entire surface area is exposed more uniformly to the oven’s heat, fundamentally changing how it roasts.
- Even Heat Distribution: In a traditional roast turkey, the breast, being higher, cooks faster than the thighs and legs. This often leads to dry breast meat while waiting for the dark meat to reach its ideal temperature. By flattening the turkey, the breast and thigh areas are on a more even plane, allowing heat to penetrate both white and dark meat at a comparable rate. This ensures that both parts achieve optimal doneness simultaneously, eliminating the need to overcook one section to perfectly cook another.
- Superior Crisping: With a flattened bird, the skin is fully exposed to the dry, circulating heat of the oven. This maximized exposure allows for consistent moisture evaporation and browning across the entire surface, resulting in an incredibly shatter-crisp skin that’s evenly golden brown, rather than just on the top or exposed sections.
- Dramatic Reduction in Cook Time: A traditional whole turkey, with its dense, irregular shape, takes considerably longer to cook as heat struggles to reach its center. A spatchcocked turkey, being flatter and more spread out, allows hot air to circulate more efficiently around it, significantly reducing the overall roasting time. This means less time in the oven and more time enjoying your meal, a particularly welcome benefit during busy holiday preparations.
- Enhanced Flavor Penetration: The flattened structure also makes it easier to apply seasonings more thoroughly and evenly, ensuring that every bite is bursting with flavor. The increased surface area for seasoning, combined with the consistent cooking, contributes to a more flavorful and aromatic final dish.
Understanding these scientific advantages highlights why spatchcocking isn’t just a trend, but a smart culinary technique for anyone seeking a flawlessly cooked turkey.
Essential Ingredients for a Perfect Spatchcock Turkey
Crafting a juicy, evenly cooked spatchcock turkey begins with selecting the right ingredients. Here’s a detailed look at what you’ll need to create a truly memorable meal:
- Whole Turkey (Thawed Completely): The cornerstone of your feast. Ensure your turkey is fully thawed before spatchcocking and roasting. This is critical for achieving even cooking and a beautifully deep brown crust. A partially frozen bird will cook erratically, leading to unevenly cooked meat. (For those curious about traditional methods, here’s how to cook a turkey the traditional way.)
- Avocado Oil: This is our oil of choice due to its high smoke point, which is essential for the higher-heat roasting method used in spatchcocking. It helps the skin crisp beautifully and effectively carries the flavor of the spices. Any neutral, high-heat oil can be used as a substitute, but avoid butter for initial application as its lower smoke point makes it prone to burning at high temperatures, potentially scorching the skin before the turkey is cooked through.
- Kosher Salt: More than just a seasoning, kosher salt plays a crucial role in drawing surface moisture from the turkey, which is vital for developing that coveted shatter-crisp skin. It also thoroughly seasons the meat from the outside in, enhancing overall flavor.
- Onion Powder: Provides a robust, savory foundation to the seasoning blend. Unlike fresh onion, onion powder won’t scorch or burn at high roasting temperatures, ensuring a consistent and delicious flavor.
- Dried Parsley: Adds a fresh, herbaceous lift to the turkey. Dried parsley maintains its vibrant flavor and color even through the high heat of the oven, contributing to a well-rounded aromatic profile.
- Garlic Powder: Delivers a reliable and evenly distributed garlic flavor throughout the bird. It’s an excellent alternative to fresh garlic, which can burn easily during high-temperature roasting.
- Dried Thyme: A classic poultry herb, dried thyme blooms wonderfully in the oil and heat, infusing the turkey with a deep, earthy, and aromatic complexity that complements its rich flavor.
- Black Pepper: Provides a gentle heat and a pungent aroma. Freshly cracked black pepper is always recommended for the best flavor, adding a subtle bite that balances the other spices.
Exact quantities for each ingredient are provided in the comprehensive recipe card located at the bottom of this article.
Variations and Flavor Enhancements
Feel free to customize the seasoning to perfectly match your menu or personal taste preferences:
- Late-Stage Butter Baste: While we avoid butter for initial searing due to its lower smoke point, you can certainly incorporate its rich flavor. For a buttery finish, brush melted butter onto the turkey skin during the final 30 minutes of cooking. This technique adds incredible richness without risking early burning.
- Dry Brine for Ultimate Juiciness: For an even more flavorful and moist turkey, consider a dry brine. Generously salt the bird 12 to 24 hours in advance and refrigerate it uncovered. Before applying oil and spices, ensure the turkey is thoroughly patted dry and adjust the amount of added salt accordingly. This method penetrates the meat deeply and helps achieve an even crispier skin.
- Herb Paste Under the Skin: For an intense burst of fresh herb flavor, create a paste by mixing avocado oil with finely minced fresh parsley, thyme, and garlic. Gently loosen the skin over the breast and thighs, then rub this aromatic paste directly onto the meat before roasting. This infuses the turkey with incredible flavor and moisture.
Essential Tools for Spatchcocking Success
Having the right equipment makes the spatchcocking process much faster, safer, and more enjoyable:
- Strong Kitchen Shears or Poultry Shears: These are indispensable for cleanly and easily removing the turkey’s backbone. While a sharp chef’s knife can work, shears offer greater control and safety.
- Large, Rimmed Baking Sheet: A shallow-rimmed baking sheet is ideal as it allows hot air to circulate freely around the flattened turkey, promoting even cooking and crisping. Ensure it’s large enough to accommodate the entire bird spread out flat.
- Instant-Read Thermometer: Your most crucial tool for ensuring perfect doneness without any guesswork. It confirms when your turkey has reached the safe and juicy internal temperature of 165°F (74°C) in both the thickest part of the breast and thigh.
- Paper Towels: Absolutely essential for thoroughly drying the turkey’s skin before seasoning. Removing excess moisture is key to achieving that desirable shatter-crisp texture.
- Small Bowl and Pastry Brush: For mixing your spice rub and applying it evenly over the entire turkey, including into every nook and cranny.
- Aluminum Foil: Useful for tenting any areas that might be browning too quickly during roasting and for loosely covering the turkey during its crucial resting period after cooking.
How to Make Spatchcock Turkey: A Simple Step-by-Step Guide
Preparing a spatchcock turkey is remarkably straightforward. It involves a quick cut, a simple spice rub, and high-heat roasting. The result is consistently even cooking, maximum juiciness, and gloriously crisp skin, every single time. Follow these steps for an effortlessly perfect turkey.
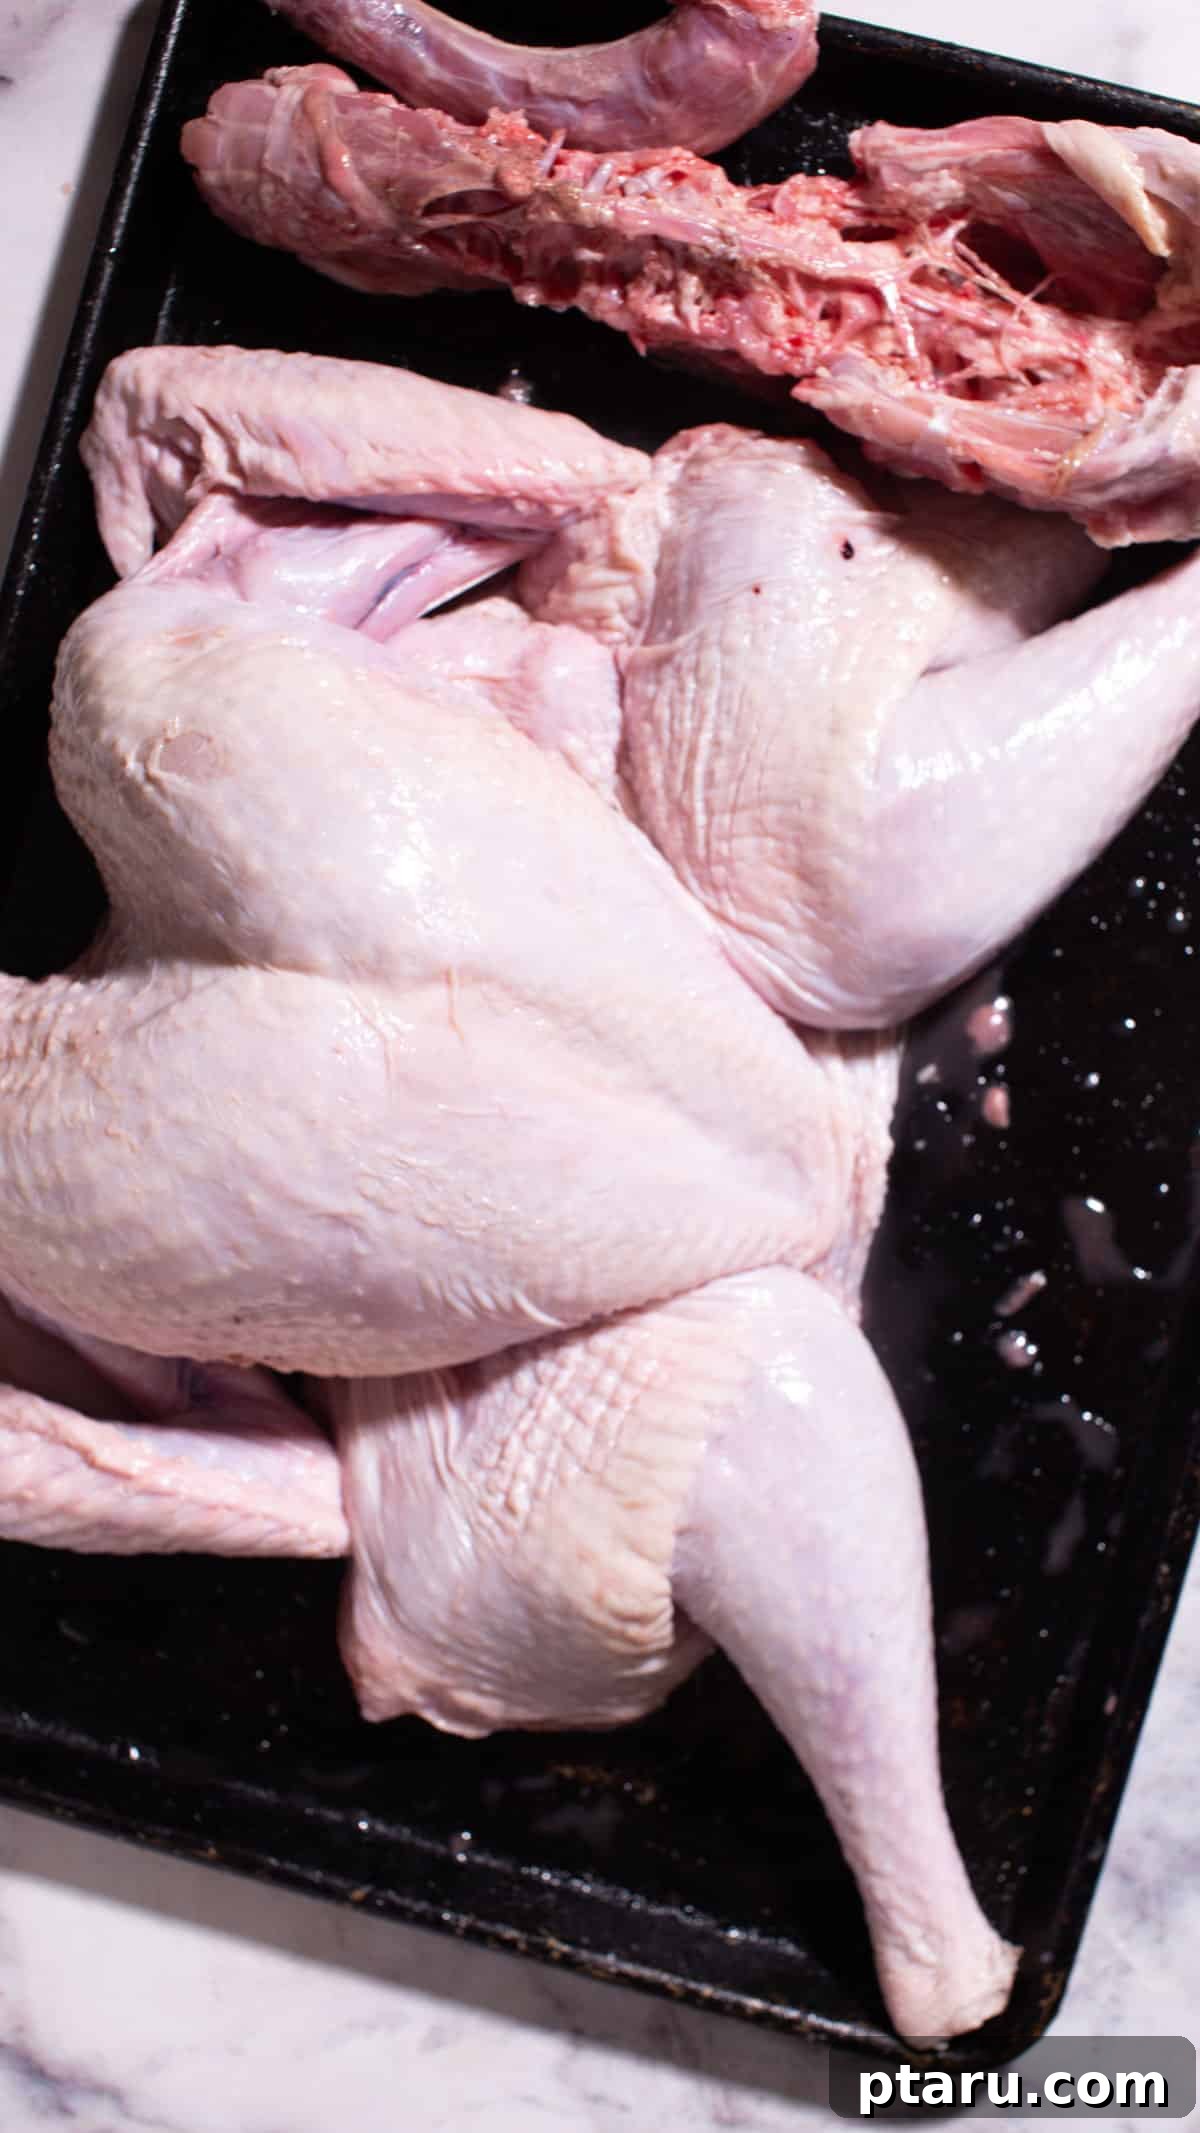
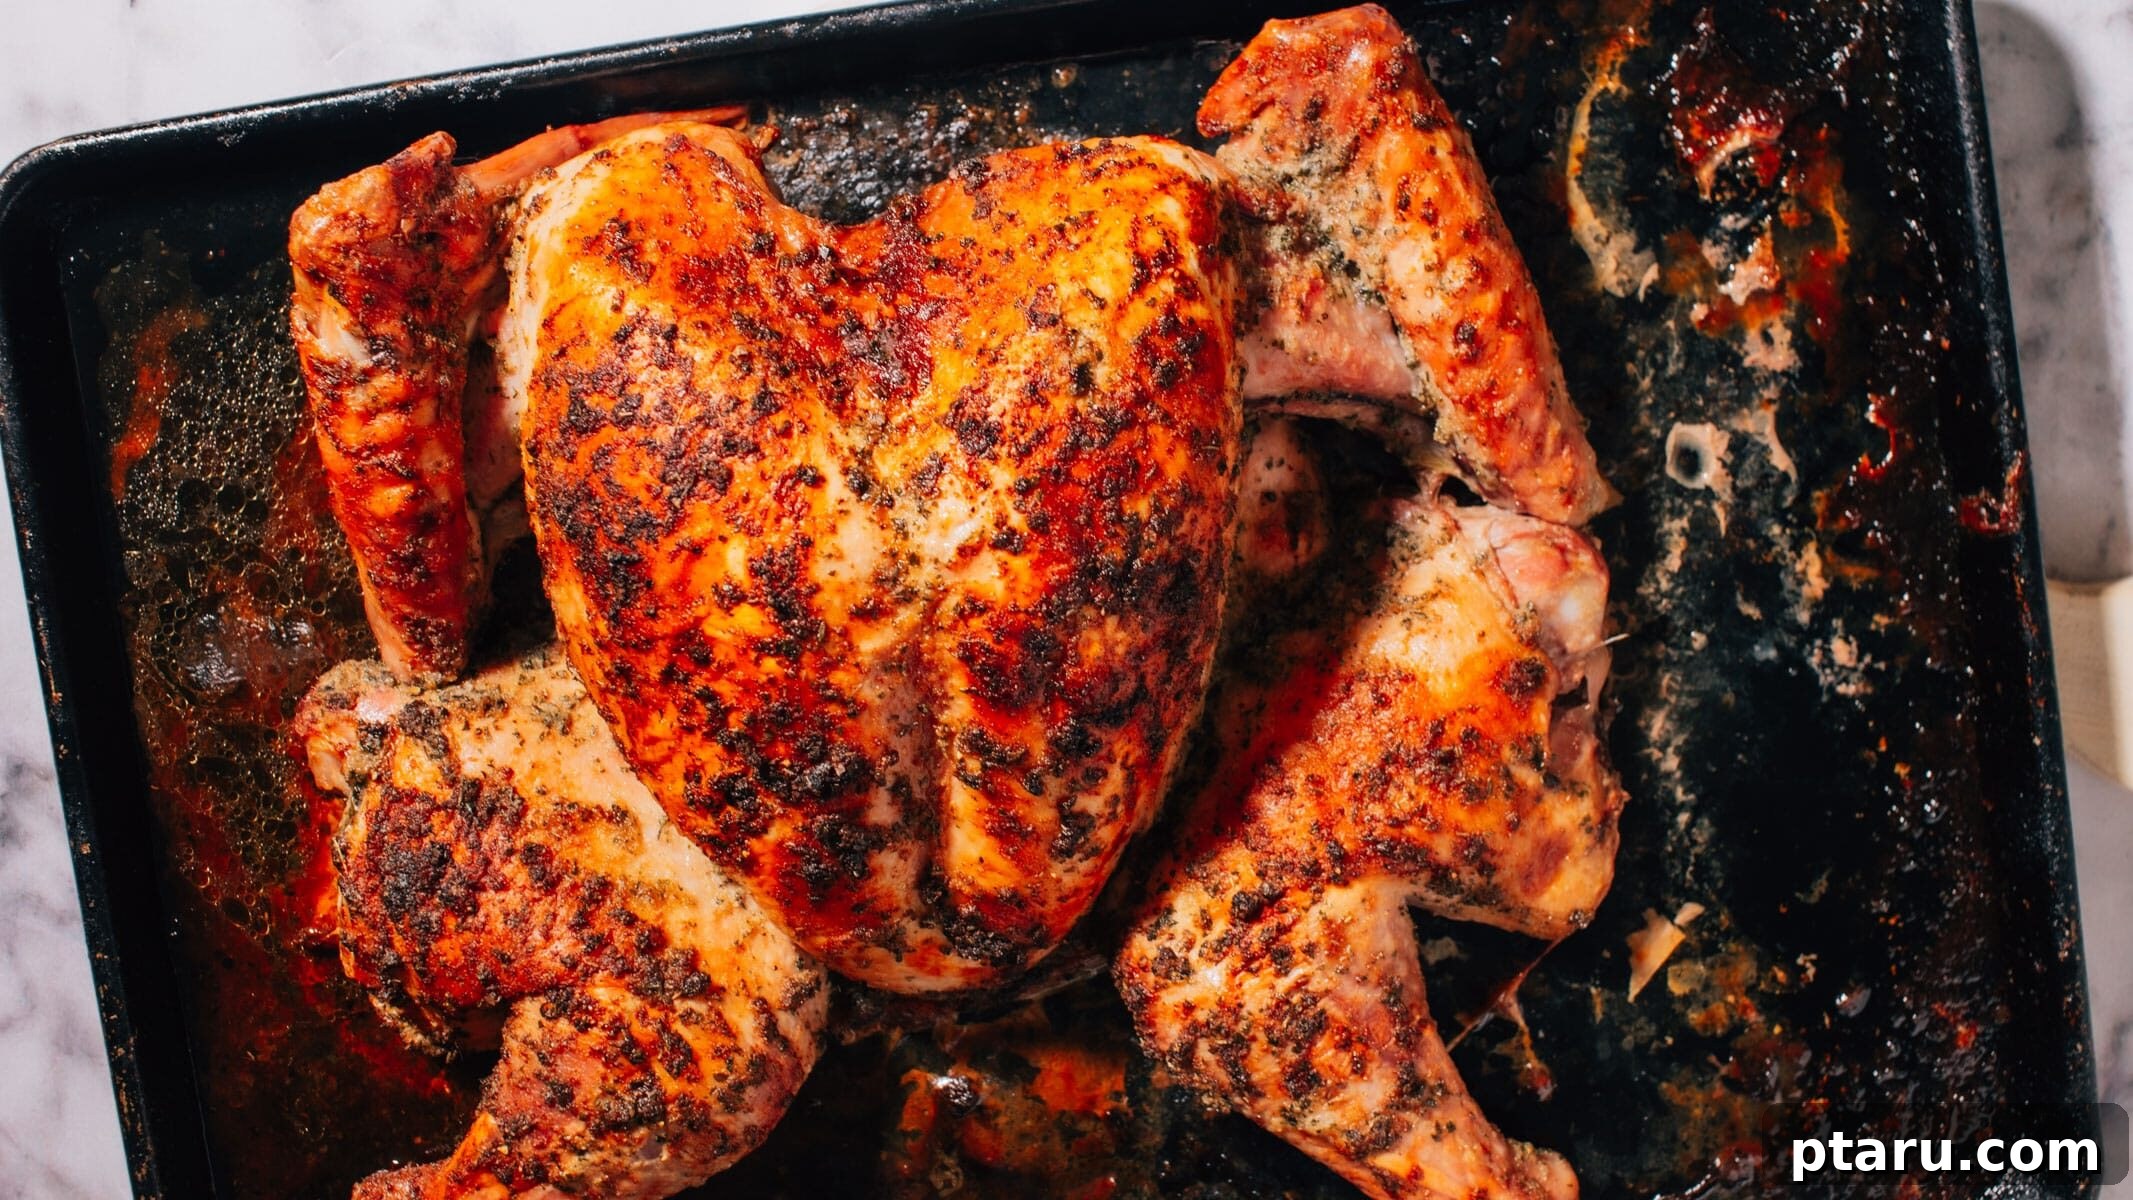
1. Spatchcock the Turkey with Precision
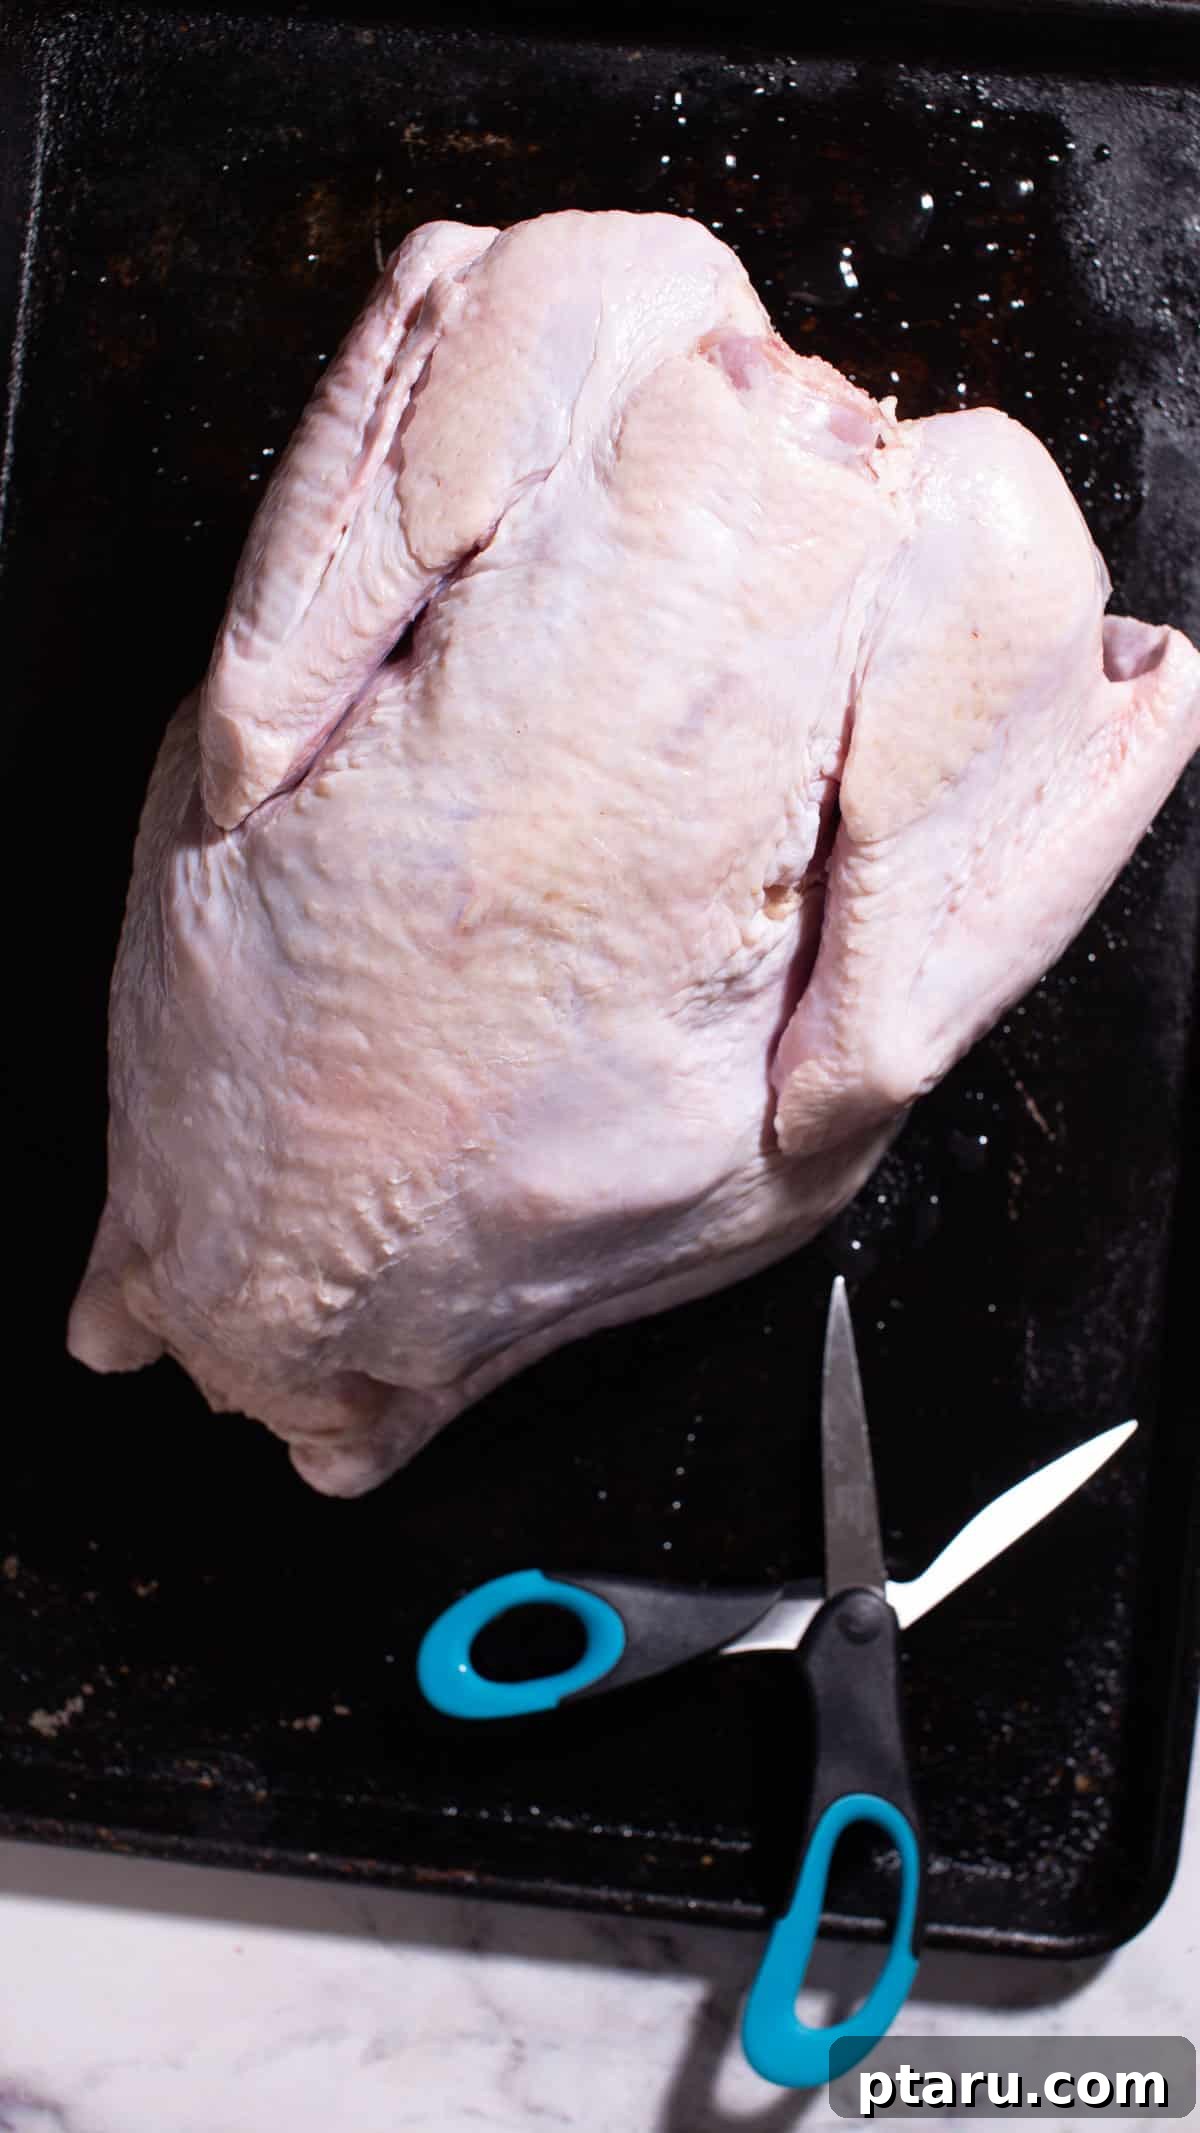
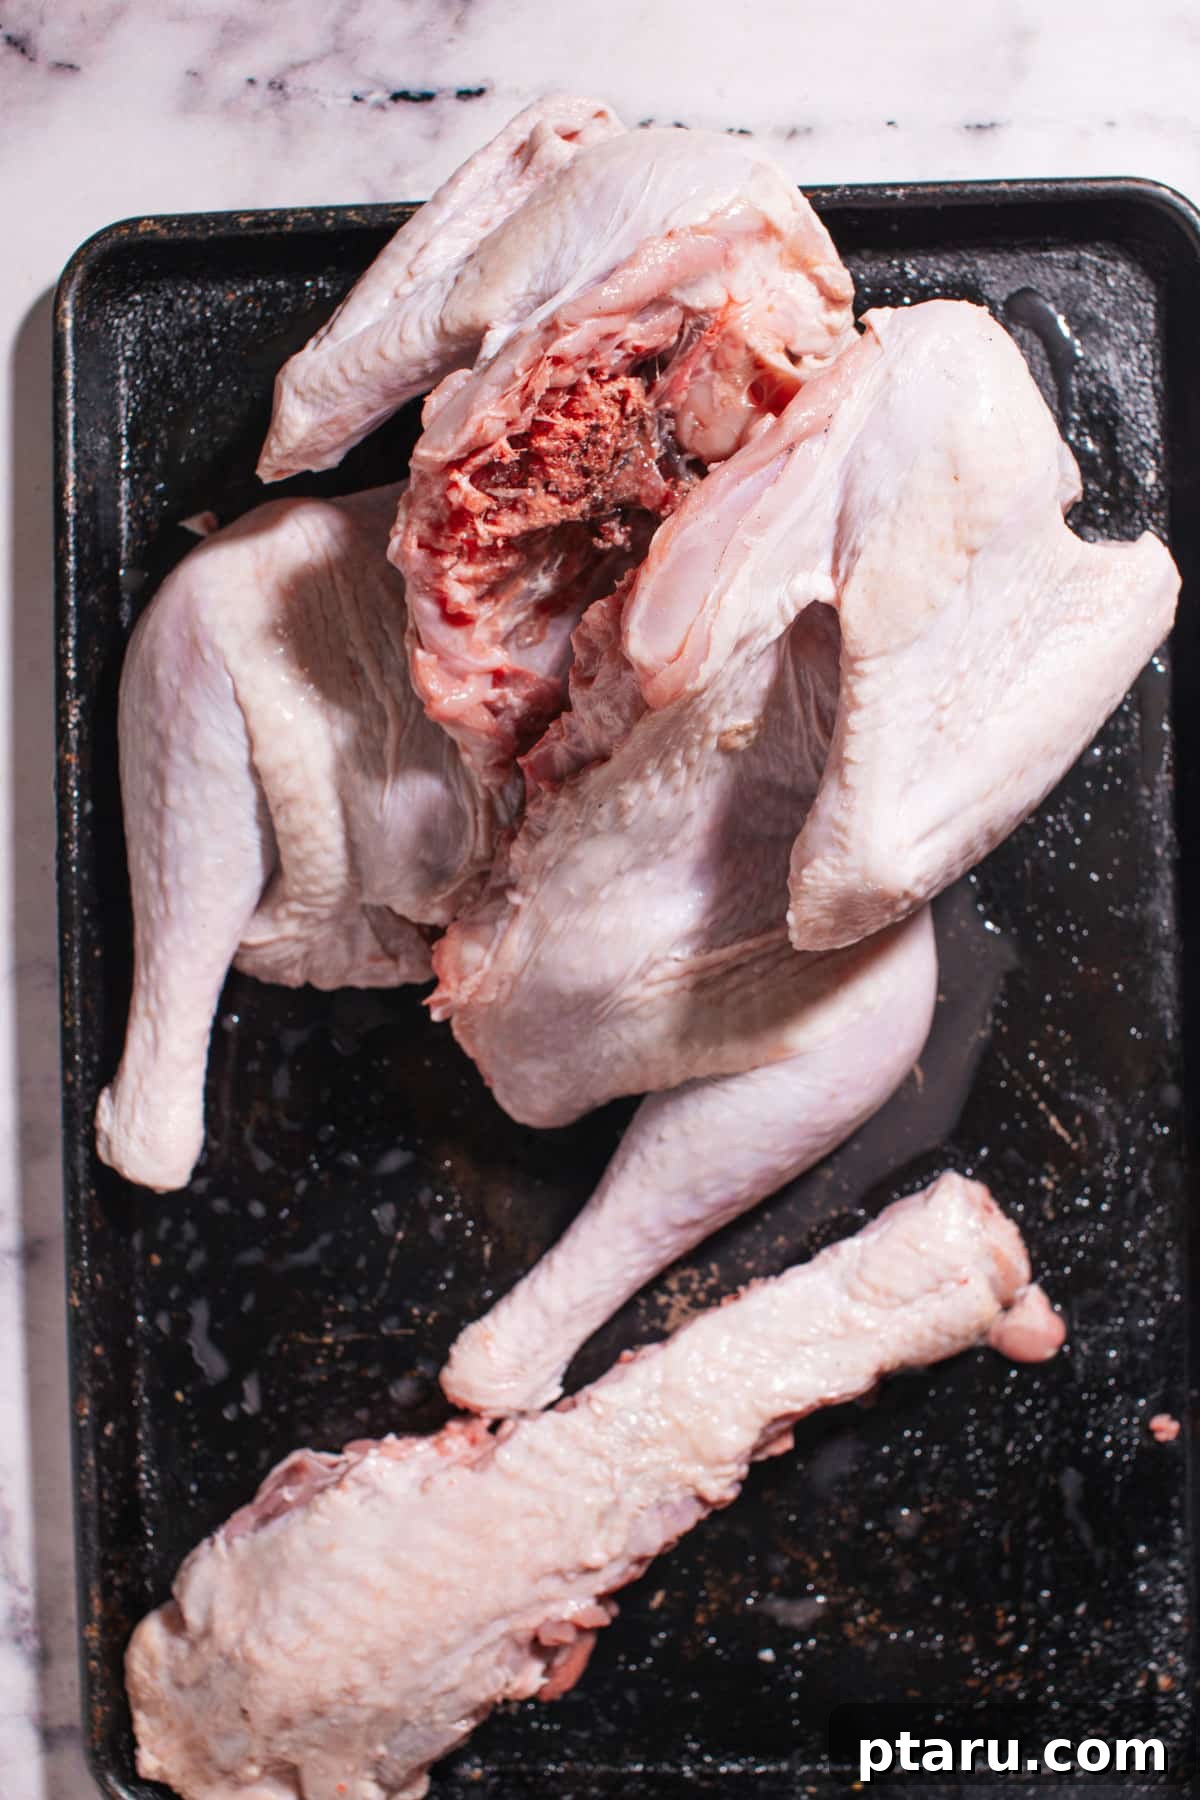
Begin by removing the turkey from its packaging and thoroughly patting it dry with paper towels—inside and out. Place the turkey breast-side down on a sturdy cutting board. Using strong kitchen shears or poultry shears (they make this step significantly easier), carefully cut along both sides of the backbone, from the tail to the neck. Once both cuts are made, remove the backbone entirely. You can save the backbone, neck, and giblets to make a flavorful stock or gravy later.
Flip the turkey breast-side up. Using the heel of your hand, press down firmly on the breastbone until you hear a crack and the bird lies completely flat. This ensures even cooking. For larger birds, you might need to apply significant pressure. A useful trick: I find it easiest to do this on the floor, placing the bird (on a baking sheet for hygiene) on a damp towel to prevent slipping, allowing me to use my full body weight for leverage.
2. Season and Arrange for Optimal Roasting
In a small bowl, combine your avocado oil, kosher salt, onion powder, dried parsley, garlic powder, dried thyme, and black pepper. Mix thoroughly to create an aromatic rub. Using your hands or a pastry brush, generously apply this mixture all over the turkey. Make sure to work the seasoning into every seam, crevice, and even gently under any loose skin over the breast and thighs for maximum flavor. This detailed application ensures the seasoning penetrates the meat and contributes to the crispy skin.
Transfer the seasoned turkey, skin-side up, to a large, shallow-rimmed baking sheet. Lining the baking sheet with aluminum foil and greasing it well beforehand will prevent sticking and make cleanup a breeze. To prevent the delicate wing tips from burning during the high-heat roast, tuck them neatly underneath the turkey’s breast.
PRO TIP: Don’t discard the giblets, neck, and backbone! Arrange them on the baking sheet alongside the turkey. As the turkey roasts, these pieces will brown in the flavorful dripping fat, creating an incredibly rich foundation for a delicious Turkey Giblet Gravy.
3. Roast Hot, Monitor Temperature, and Ensure Doneness
Preheat your oven to a high temperature of 450°F (230°C) with a rack positioned in the center. Roast the spatchcocked turkey in this hot oven until an instant-read thermometer inserted into the thickest part of both the breast and the thigh registers 165°F (74°C). This typically takes about 1½ to 2 hours for an 11 to 13 lb turkey, but actual cooking time will vary based on your oven calibration and the specific size of your bird. Begin checking the temperature early to avoid overcooking.
If you notice the breast skin browning too quickly before the internal temperature is reached, loosely tent that area with aluminum foil. Remove the foil for the last 15-20 minutes of roasting to allow the skin to crisp up perfectly. Achieving that precise 165°F in both areas is the key to juicy perfection.
4. Rest and Carve for Maximum Juiciness
Once the turkey reaches 165°F, carefully remove it from the oven and transfer it to a clean cutting board. It is absolutely essential to let the turkey rest for at least 30 minutes (and up to 45 minutes for larger birds). Resist the urge to carve immediately! Resting allows the muscle fibers to relax and reabsorb the juices, ensuring every slice is incredibly moist and flavorful. Skipping this step will result in a dry turkey as all the delicious juices will simply run out onto your board.
After resting, carve the turkey by first removing the leg quarters (thighs and drumsticks). Separate the drumsticks from the thighs. Next, slice the breast meat against the grain into even pieces. Arrange the carved turkey beautifully on a platter. Spoon any accumulated pan juices over the meat for extra flavor and moisture, or use the drippings to make a decadent gravy.
Avoiding Common Pitfalls: 4 Mistakes to Steer Clear Of When Making Spatchcock Turkey
While spatchcocking simplifies turkey roasting, a few common errors can prevent you from achieving the best results. Being aware of these pitfalls will help you ensure a perfectly cooked bird every time:
- Cooking a Half-Thawed Bird: This is a critical mistake that leads to highly unpredictable cooking times and uneven doneness. A turkey that is still partially frozen will have cold spots that cook much slower than the thawed areas, resulting in some parts being undercooked while others are overcooked and dry. Always ensure your whole turkey is completely thawed before you begin the spatchcocking process. Plan ahead for thawing time, which can take several days in the refrigerator depending on the turkey’s size.
- Failing to Dry the Skin Thoroughly: Moisture is the enemy of crispy skin. If the turkey skin isn’t thoroughly patted dry with paper towels before seasoning and roasting, the energy from the oven’s heat will first be used to evaporate this surface moisture rather than browning and crisping the skin. This leads to rubbery skin instead of the desired shatter-crisp texture. Take the extra five minutes to meticulously dry every inch of the turkey’s skin.
- Guessing Doneness Instead of Using a Thermometer: Relying on visual cues or estimated cooking times is a recipe for disaster when it comes to turkey, especially with the faster cooking nature of spatchcocking. Overcooking is the quickest way to dry, unappetizing meat. An instant-read thermometer is your best friend. Insert it into the thickest parts of both the breast and the thigh, ensuring it doesn’t touch any bone, and roast until both areas register 165°F (74°C). This precise measurement guarantees safe consumption and maximum juiciness.
- Carving the Turkey Too Soon: Patience is a virtue, particularly after roasting your turkey. Carving immediately after removing the bird from the oven causes all the precious juices, which have migrated to the center during cooking, to run out onto your cutting board. This leaves you with dry meat. Allow the turkey to rest, loosely tented with foil, for a minimum of 20-30 minutes (longer for larger birds). This crucial resting period allows the juices to redistribute back into the meat fibers, resulting in wonderfully moist, flavorful slices.
Make-Ahead Tips and Storage Solutions
Strategic preparation can significantly ease the burden of holiday cooking or large dinner parties, ensuring a calmer and more enjoyable experience. Here’s how to plan ahead and manage your leftovers.
Making Ahead
- Dry Brine: As mentioned, you can dry brine your turkey 12-24 hours in advance. This not only enhances flavor and moisture but also allows you to complete a significant prep step the day before roasting.
- Prepare the Spice Rub: Mix all your dry spices in a small airtight container a few days before you plan to roast. On cooking day, simply combine with the oil.
- Clear Oven Space: Since spatchcock turkey cooks much faster, you’ll free up oven space sooner for your side dishes, making your meal timing more efficient.
Storing Leftovers Effectively
- Refrigeration: Once the turkey has cooled completely, promptly carve it into smaller pieces or slices. Store the leftover turkey in an airtight container in the refrigerator for up to 3-4 days. For added moisture, consider saving some of the pan drippings or a little chicken/turkey broth to store with the meat.
- Keeping it Juicy: When refrigerating, place a tablespoon or two of saved pan drippings or broth with the turkey slices. This will help maintain their moisture content and flavor when reheating.
Freezing for Long-Term Storage
- Freezing Sliced Turkey: For longer storage, slice the cooked turkey into individual portions. Wrap each portion tightly in plastic wrap, then place them in freezer-safe bags or containers with a bit of broth to prevent freezer burn and maintain juiciness. Label with the date. Freeze for up to 2-3 months.
- Gentle Thawing: For best texture and flavor, thaw frozen turkey overnight in the refrigerator. Avoid thawing at room temperature, which can promote bacterial growth.
Reheating Spatchcock Turkey for Best Results
Reheating turkey can be tricky, often leading to dry meat. Use these gentle methods to retain moisture and flavor:
- Oven Reheating: The best method for keeping turkey moist. Place slices in an oven-safe dish with a splash of chicken or turkey broth. Cover tightly with aluminum foil and reheat at 300°F (150°C) until just warmed through, typically 15-20 minutes.
- Stovetop Skillet: For smaller portions, warm slices in a covered skillet over low heat with a spoonful of stock or pan drippings. The lid helps trap steam, keeping the meat moist.
- Microwave (Use with Caution): If speed is essential, place turkey slices on a microwave-safe plate with a damp paper towel over them. Reheat in short bursts (30-60 seconds) at 50% power, checking frequently to prevent overheating and drying out.
Serving Spatchcock Turkey: Presentation and Perfect Pairings
Once carved, your beautifully roasted spatchcock turkey is ready to be the star of your meal. Arrange the tender, juicy slices and crispy skin on a generous platter, creating an inviting centerpiece. Be sure to pass plenty of homemade gravy, your favorite vegetables, and an array of comforting side dishes. Spatchcock turkey pairs wonderfully with both traditional holiday fare and everyday sides. Explore all of my Thanksgiving recipes here for more inspiration!
Complementary Side Dishes
Elevate your spatchcock turkey experience with these delicious and easy-to-make accompaniments:
- Creamy Mashed Potatoes: The ultimate classic pairing, providing a velvety base perfect for soaking up rich pan drippings and gravy.
- Sweet Glazed Carrots: A simple yet delicious stovetop recipe that adds a touch of natural sweetness and vibrant color to your plate.
- Make-Ahead Turkey Gravy: A silky, rich, and reliably delicious gravy that can be prepared in advance, freeing up time on the big day.
- Turkey Stuffing with Apples: Featuring savory celery, onions, and herbs, with the delightful addition of crisp apples and a perfectly golden-brown top.
- Roasted Brussels Sprouts with Maple Bacon: Perfectly caramelized Brussels sprouts, enhanced with the irresistible flavors of sweet maple syrup and savory bacon.
- Super Easy Pumpkin Pie: The quintessential autumnal dessert, offering a classic and comforting finish to any turkey meal.
Frequently Asked Questions About Spatchcocking Turkey
For those new to the spatchcock method or looking for quick answers, here are some commonly asked questions about preparing spatchcock turkey:
Spatchcocking a turkey involves removing its backbone and then flattening the bird before roasting. This technique allows the turkey to cook more quickly and evenly because both white and dark meat are exposed to heat simultaneously, reaching perfect doneness together. An added benefit is an impeccably crisp skin across the entire bird.
The primary advantages are significantly reduced cooking time (often by an hour or more compared to a whole bird), incredibly juicy and evenly cooked meat (no more dry breast meat!), and skin that is uniformly crispy and golden brown from edge to edge. It’s also easier to carve due to its flat profile.
There are very few downsides to spatchcocking. The main difference is the presentation; a spatchcocked turkey lies flat rather than standing upright, which some might find less traditional as a centerpiece. Additionally, you cannot stuff a spatchcocked turkey directly in the cavity, though you can place aromatics under the skin or around the bird. For most home cooks, the benefits of speed, even cooking, and crisp skin far outweigh these minor considerations.
Absolutely, spatchcocking a turkey is unequivocally worth the minimal extra effort. It’s arguably the simplest and most effective way to guarantee uniformly cooked, moist meat and beautifully golden, crisp skin without resorting to complex brining or constant pan rotation. The flattened bird significantly shortens cook time, freeing up valuable oven space for side dishes and providing greater control over the final temperature and texture. If flavor and texture are your top priorities, spatchcocking is the superior method.
Smaller to medium-sized turkeys (around 10-15 lbs) are generally easiest to spatchcock and manage on a standard baking sheet. Larger birds (18-20+ lbs) can still be spatchcocked, but they may require a very large roasting pan or even two baking sheets to accommodate their spread-out size.
The common spatchcocking mistakes include forgetting to thoroughly dry the turkey’s skin (leading to rubbery skin), making uneven cuts when removing the backbone (which can hinder flattening), or overcooking the turkey because it cooks much faster than a traditional whole bird. Always use an instant-read thermometer and allow adequate resting time.
The “better” method depends on your priorities. Whole roasting offers a classic, majestic presentation but is typically slower and can lead to uneven cooking, with breast meat often drying out. Spatchcocking excels in speed, ensuring consistently juicy meat, and guaranteeing crispy skin. If flavor, texture, and efficiency matter more than a tall centerpiece, spatchcocking is the undeniable winner.
The cooking time for a spatchcock turkey largely depends on its size and your oven’s specific heat. At a high temperature of 450°F (230°C), an 11 to 13 lb spatchcock turkey typically takes approximately 1½ to 2 hours to reach the internal temperature of 165°F (74°C).
Yes, dry brining a spatchcock turkey works exceptionally well. Simply sprinkle kosher salt evenly over the entire turkey 12 to 24 hours before cooking and refrigerate it uncovered. This allows the salt to penetrate deeply, seasoning the meat from within and further aiding in achieving a wonderfully crisp skin during roasting. Remember to pat it very dry before applying oil and spices.
A spatchcock turkey is fully cooked and safe to eat when an instant-read thermometer inserted into the thickest part of both the breast (without touching bone) and the thigh registers an internal temperature of 165°F (74°C). Always check both white and dark meat for accuracy.
Pin
Easy Spatchcock Turkey
Jennifer Pallian BSc, RD
20 minutes
2 hours
12
Ingredients
- 6 tbsp avocado oil
- 3 tbsp kosher salt
- 1 tbsp onion powder
- 2 tsp dried parsley
- 1 tsp garlic powder
- 1 tsp dried thyme
- ½ tsp black pepper
- 11 to 13 lb whole turkey fully thawed
Instructions
-
Position a rack in the center of the oven and preheat to 450°F. Line a large, rimmed baking sheet with aluminum foil and oil it well.
Prep Seasoning
-
Stir the avocado oil with kosher salt, onion powder, dried parsley, garlic powder, dried thyme, and black pepper in a small bowl.
Spatchcock the Turkey
-
Place the turkey breast-side down on a cutting board anchored with a damp towel.Use kitchen shears to cut along both sides of the backbone and remove it.Flip, and press firmly to flatten so the turkey lies evenly.
Season Turkey
-
Rub the seasoned oil mixture all over the turkey, working it into every seam and under any loose skin.
Roast Spatchcocked Turkey
-
Transfer the turkey skin-side up to the oiled, foil-lined baking sheet. Tuck the wing tips underneath to prevent burning.
-
Roast until an instant-read thermometer inserted into the thickest part of both breast and thigh reads 165°F, about 1½ to 2 hours, tenting with foil if areas darken early.
-
Transfer the turkey to a cutting board and rest 30 minutes before carving. This is essential for juicy turkey – do not skip it!
Notes
Oil vs butter: Oil tolerates 450°F better; brush melted butter on at the end if you like.
Leftovers: Refrigerate up to 4 days or freeze sliced up to 2 months. Reheat gently with a splash of broth to keep slices juicy.
Nutrition
Carbohydrates: 1g |
Protein: 64g |
Fat: 24g |
Saturated Fat: 5g |
Polyunsaturated Fat: 5g |
Monounsaturated Fat: 10g |
Trans Fat: 0.2g |
Cholesterol: 213mg |
Sodium: 2075mg |
Potassium: 673mg |
Fiber: 0.2g |
Sugar: 0.2g |
Vitamin A: 169IU |
Vitamin C: 0.2mg |
Calcium: 38mg |
Iron: 3mg
Nutrition information is automatically calculated, so should only be used as an approximation.
Tried this recipe? Leave a comment!