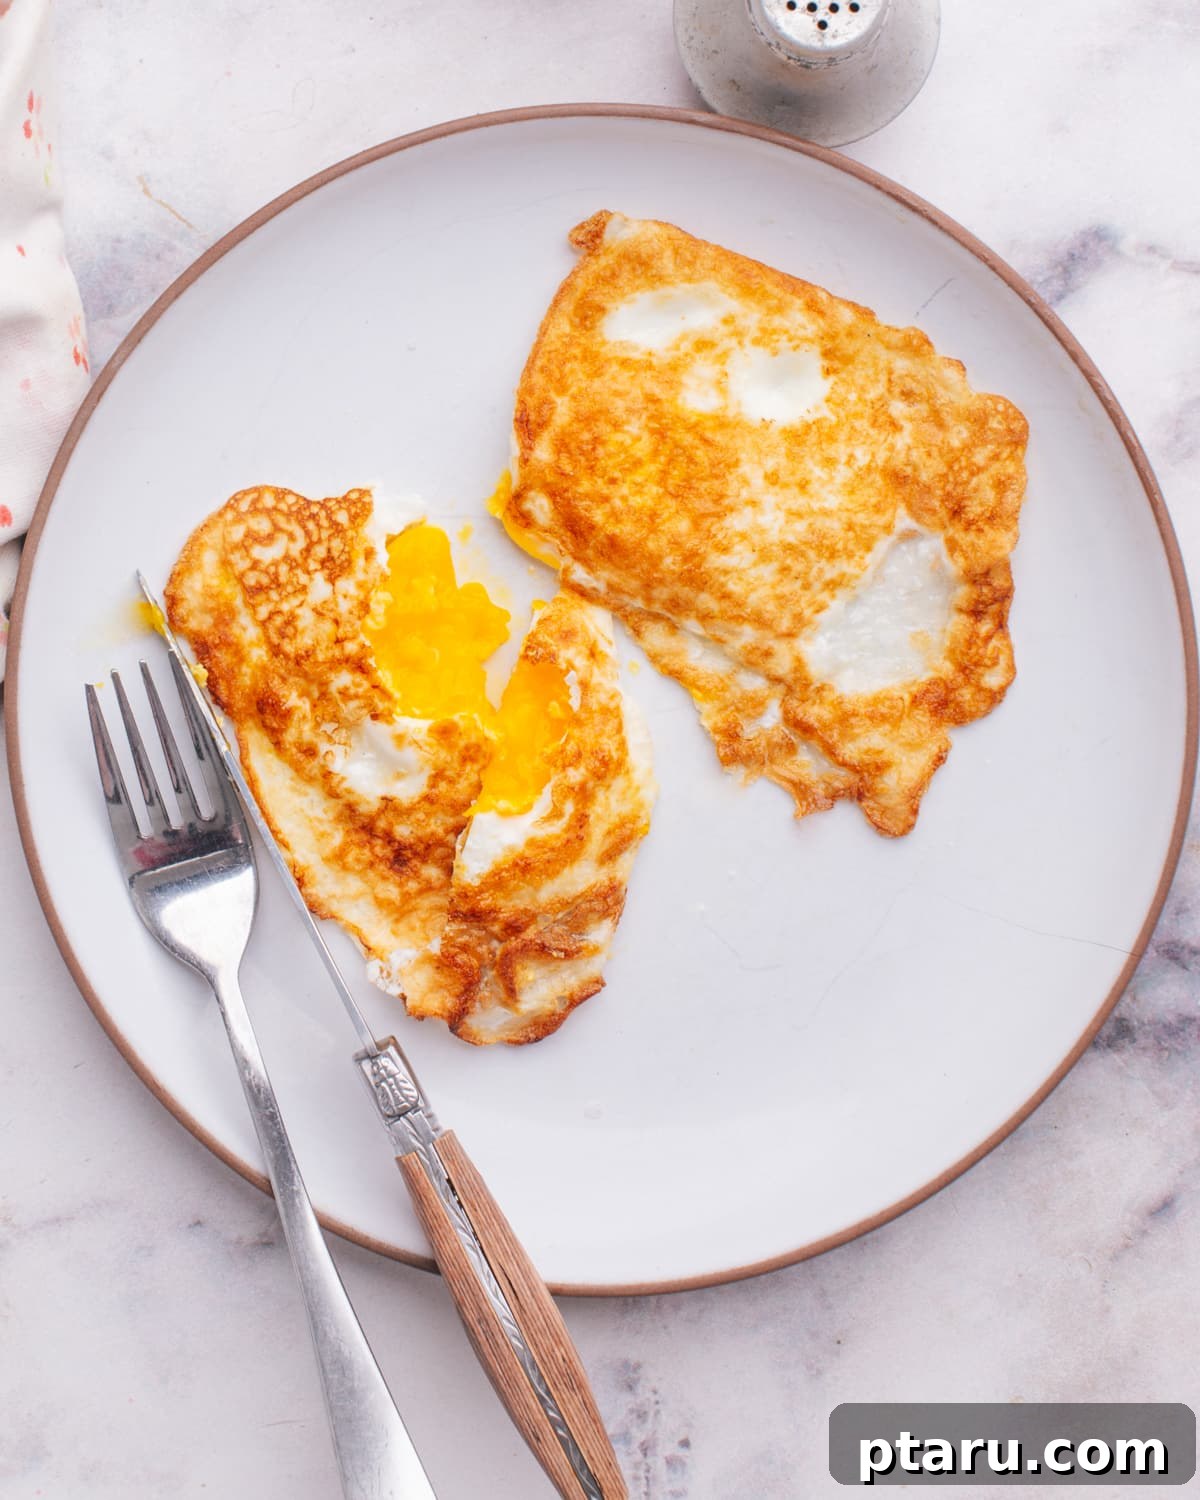
Eggs over medium are celebrated for their ideal balance: perfectly set whites and a delightfully rich, partially runny yolk. This guide, drawing on food science principles, unveils the definitive method for achieving this golden standard consistently. Whether you’re a breakfast enthusiast or an aspiring home chef, mastering the art of over medium eggs will undoubtedly elevate your culinary skills and morning routine.
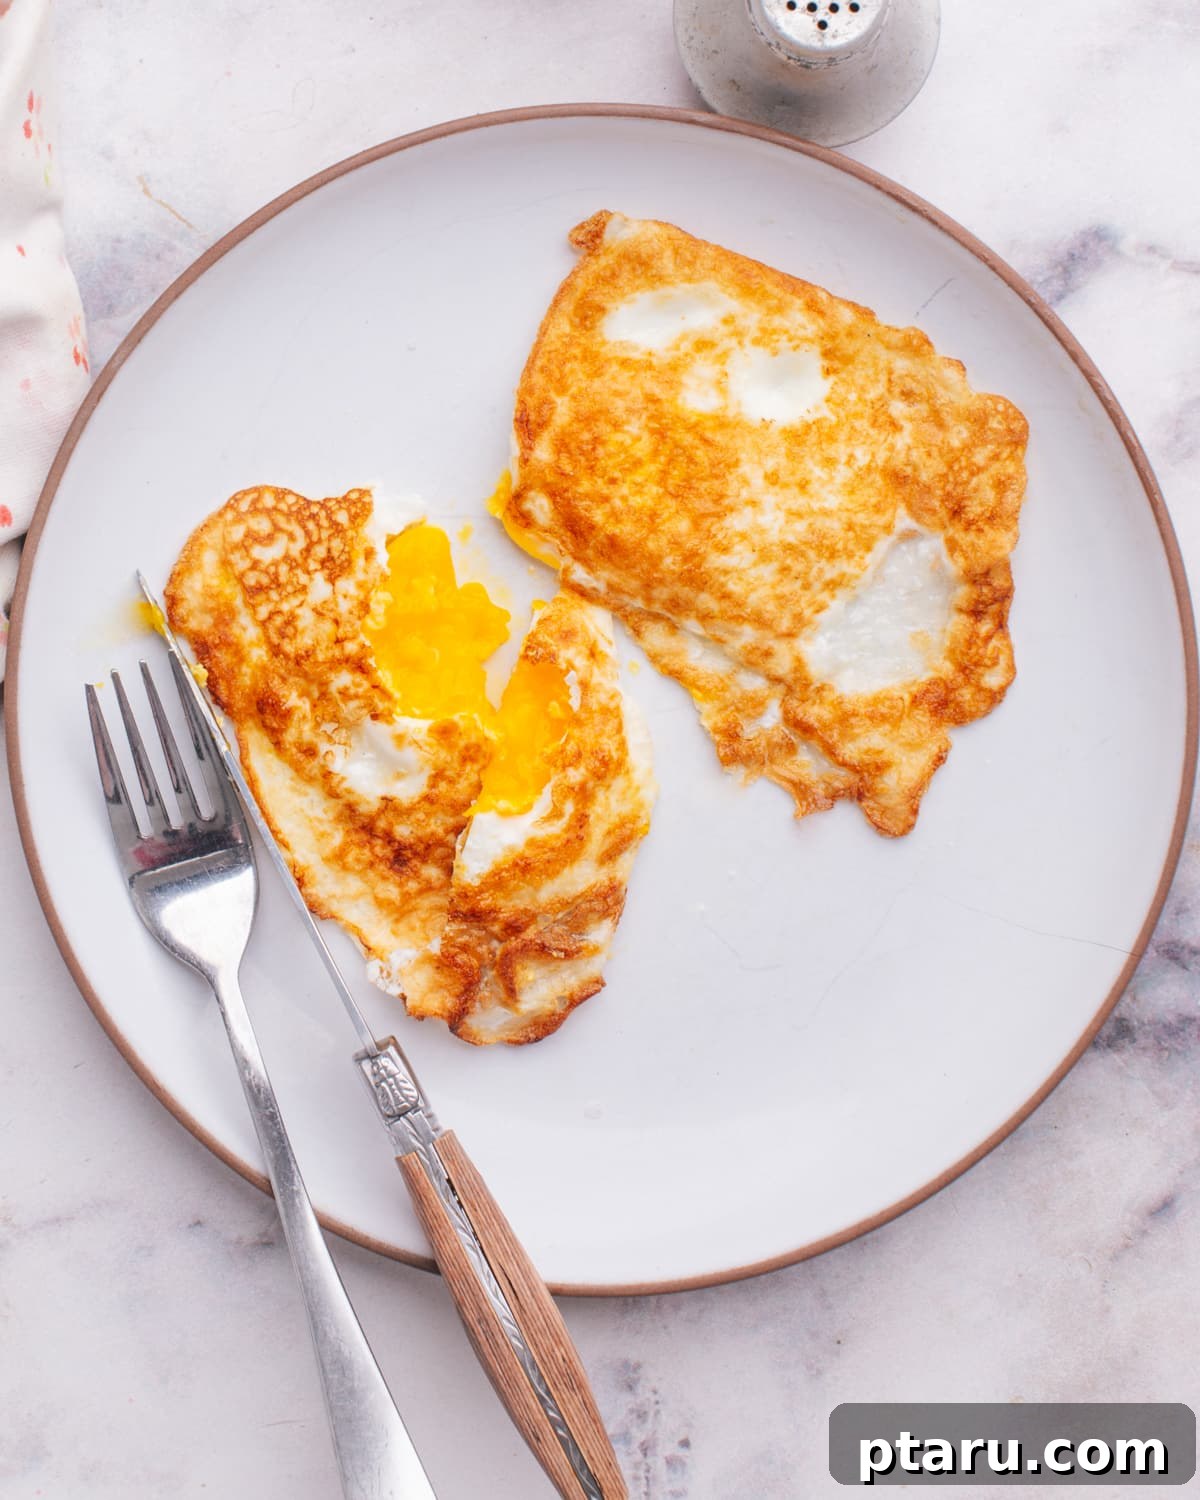
What Are Over Medium Fried Eggs?
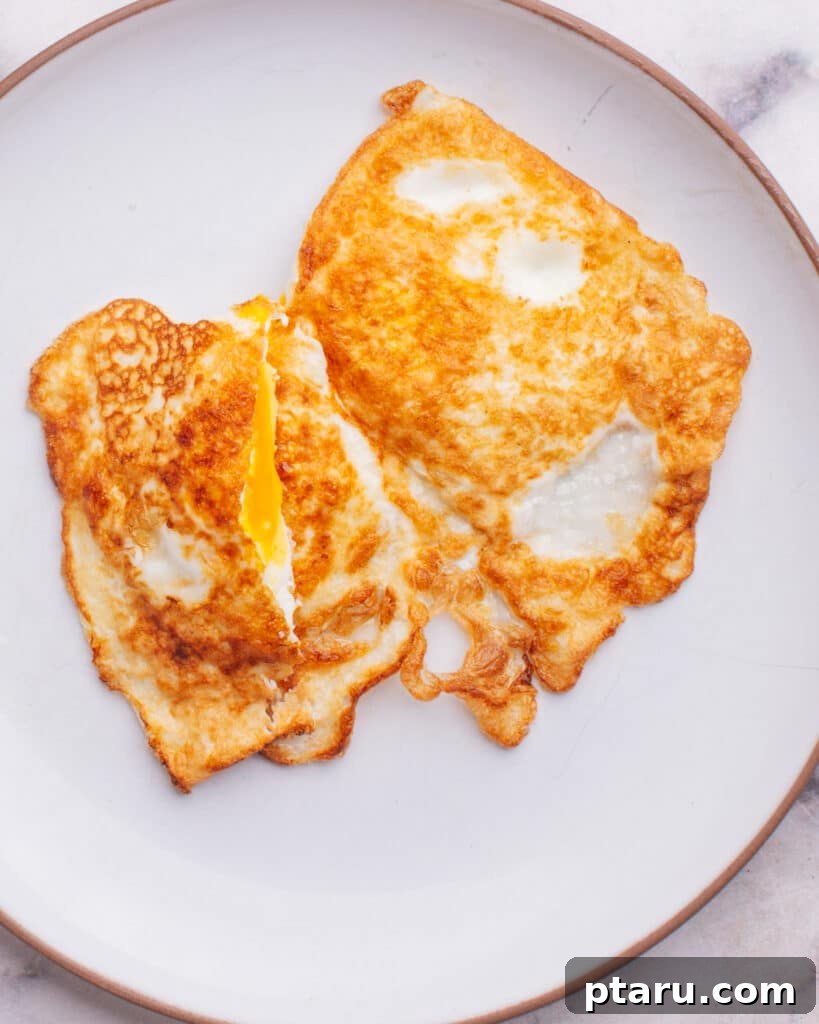
An over medium fried egg is a culinary delight characterized by its fully cooked, firm egg whites and a rich egg yolk that is partially cooked, offering a creamy, slightly runny center. Unlike a sunny-side-up egg which is cooked only on one side, an over medium egg is gently flipped in the pan or skillet, ensuring both sides of the white are cooked through, while carefully preserving the coveted semi-liquid state of the yolk. The term “over medium” precisely refers to this specific doneness level of the yolk – a sweet spot that’s neither entirely liquid nor completely solid, offering a luxurious texture that enriches any meal.
These versatile eggs are a breakfast classic, simple to prepare, and incredibly adaptable, serving as a perfect standalone dish or a flavorful addition to countless recipes. The partial runniness of the yolk provides a natural sauce that can coat toast, vegetables, or even proteins, adding depth and richness to every bite. Understanding the nuances of heat control and timing is paramount to achieving this delicate balance, transforming a simple ingredient into a gourmet experience.
Eggs Over Medium vs. Other Fried Egg Styles: A Culinary Comparison
The world of fried eggs offers a spectrum of textures, primarily differing in the doneness of the yolk and how they are cooked. Understanding these distinctions is key to ordering or preparing your preferred egg style. While all fried eggs begin similarly, the flipping and cooking duration define their final state.
Sunny Side Up Eggs: The Unbroken Yolk
Sunny side up eggs are cooked exclusively on one side, typically until the egg white is fully set and opaque, but the yolk remains completely liquid and vibrant on top. The defining characteristic is that the egg is never flipped, leaving the yolk exposed and glistening, resembling a bright yellow sun. This method results in a delicate white and a freely flowing yolk, perfect for dipping toast.
Over Easy Eggs: The Barely Set Yolk
Similar to over medium eggs, over easy eggs are flipped. However, they are cooked for a very short duration on the second side—just long enough for the thin film of white over the yolk to barely set. This leaves the yolk intensely runny, often spilling out at the slightest touch. The whites are fully cooked, but the yolk maintains an almost entirely liquid consistency, making it a favorite for those who love a rich, flowing yolk.
Over Hard Eggs: The Fully Cooked Yolk
At the opposite end of the spectrum are over hard eggs, where both the whites and the yolk are cooked completely through. The egg is flipped and cooked until the yolk is firm, losing all its liquid qualities. This style is often preferred by those who dislike runny yolks or for dishes where a firm egg structure is desired, such as in sandwiches where a firm yolk prevents messiness.
The Over Medium Sweet Spot
Eggs over medium strike a perfect balance. They are flipped like over easy and over hard eggs, but the cooking time on the second side is carefully controlled to achieve a partially set yolk. The whites are firm and fully cooked, yet the yolk maintains a creamy, slightly runny consistency without being entirely liquid. This middle-ground appeals to many as it offers the richness of a runny yolk with a more substantial, less messy texture. The main difference lies in the level of yolk doneness achieved through precise cooking and timing after the flip.
Next Reading: Over Easy vs Medium Eggs: A Food Scientist’s Deep Dive
Why This Method Works: The Science Behind Perfect Eggs
Achieving consistently perfect eggs over medium isn’t just about following steps; it’s about understanding the principles that make those steps effective. As a food scientist, I emphasize that success lies in control and precision. Here’s why this refined method guarantees ideal results every time:
- Precision Timing: The Key to Yolk Doneness
The most critical aspect of eggs over medium is the yolk’s consistency. Egg whites coagulate (set) at a lower temperature (around 145-150°F or 63-65°C) than egg yolks, which begin to thicken around 158°F (70°C). Our precise timing ensures the whites fully set before the yolk completely solidifies. This controlled cooking window allows the inner part of the yolk to retain its desired molten, creamy texture while the outer layer firms up, creating that distinctive partially runny consistency without turning into a liquid mess or a dry disc. - The “Touch Test”: A Foolproof Doneness Indicator
One of the greatest challenges in cooking eggs to a specific doneness is knowing when they’re truly ready without cutting them open. This method incorporates a tried-and-true tactile test, developed through extensive experimentation, that allows you to assess the yolk’s internal state with a gentle touch. This eliminates guesswork and provides immediate feedback, helping you pull the eggs off the heat at precisely the right moment for that perfect over medium result. We’ll delve into this in detail later. - Controlled Heat Management: Preventing Overcooking and Sticking
Maintaining consistent and moderate heat throughout the entire cooking process is fundamental. From the initial preheating of the pan to the actual frying, controlled heat prevents the whites from burning or becoming rubbery, and crucially, allows the yolk to cook gradually without solidifying too quickly. High heat can lead to uneven cooking, tough whites, and an overcooked yolk, or even sticking. By utilizing medium heat, we ensure even cooking, a beautifully cooked white, and a perfectly creamy yolk every single time.
Essential Ingredients for Flawless Over Medium Eggs
Crafting the perfect over medium egg requires minimal ingredients, yet the quality of each plays a significant role in the final flavor and texture. Here’s what you’ll need to gather for my basic recipe, along with insights into making the best choices:
High-Quality Ingredients
- Oil or Butter (or a Combination): The fat you choose is crucial for flavor and preventing sticking. I recommend a high-smoke-point oil such as sunflower, avocado, grapeseed, or light olive oil for frying, as these can withstand medium heat without burning, contributing to beautifully crispy edges. Butter adds a rich, nutty flavor, but it has a lower smoke point; combining it with a little oil can mitigate burning while retaining its desirable taste. Approximately 1 tablespoon is sufficient per two eggs.
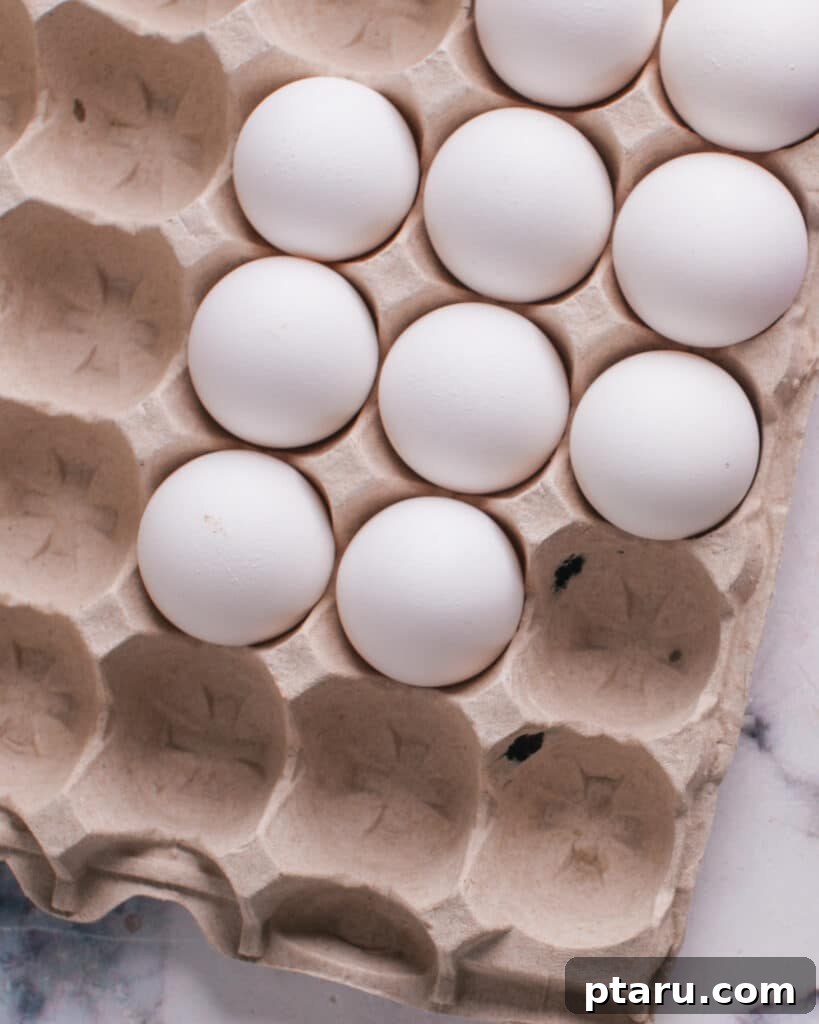
- Fresh Eggs: The fresher the eggs, the better the results. Fresh eggs typically have firm, thick whites that hold their shape well and vibrant, domed yolks that are less likely to break. As eggs age, their whites thin out, and yolks become flatter and more fragile. While any type of egg—brown, white, free-range, organic—will work, prioritize freshness. A simple test for freshness is to place an egg in a bowl of water: fresh eggs sink and lie flat, while older eggs tend to float or stand on end.
- Salt and Black Pepper: Seasoning is not merely an option; it’s essential for enhancing the natural flavors of the egg. Fine table salt disperses evenly, but Kosher salt or sea salt also work wonderfully. Freshly ground black pepper adds a pungent aroma and a subtle kick. Seasoning immediately after cracking and again lightly after flipping ensures flavor throughout the egg.
Creative Variations and Flavor Enhancements
While a perfectly cooked over medium egg is delightful on its own, it also serves as an excellent canvas for various flavors. Don’t hesitate to experiment with these ideas to customize your egg experience:
- Aromatic Herbs and Spices: Elevate your eggs with a sprinkle of fresh or dried herbs. Finely chopped fresh parsley, chives, dill, or cilantro add brightness and aroma. For a more adventurous palate, try a dash of paprika, cayenne pepper for a gentle heat, smoked paprika for depth, or a pinch of garlic powder. “Everything Bagel” seasoning is also a popular choice for its savory crunch.
- Indulgent Cheeses: Incorporate cheese for an extra layer of flavor and creaminess. As the eggs finish cooking or immediately after removing them from the pan, sprinkle grated or crumbled cheese over the hot eggs. The residual heat will melt it beautifully. Classic choices include sharp cheddar, creamy goat cheese, tangy feta, or salty Parmesan. A sprinkle of Monterey Jack or a smoky provolone can also transform the dish.
- Zesty Sauces and Condiments: A well-chosen sauce can completely transform the profile of your over medium eggs. Top them with a chunky tomato salsa for a Tex-Mex twist, a dash of your favorite hot sauce for a spicy kick, vibrant pesto for herbaceous notes, rich hollandaise sauce for a classic brunch feel, or fresh chimichurri for a bright, garlicky flavor.
- Luxurious Truffle Oil: For an exquisite touch, drizzle a few drops of high-quality truffle oil over your finished eggs. Its earthy, aromatic notes will instantly elevate your simple fried egg to a gourmet delight, perfect for a special breakfast or brunch.
Essential Tools for Success
You don’t need a professional kitchen to make perfect over medium eggs. Just a couple of key tools will ensure a smooth cooking process:
- Quality Skillet or Frying Pan: A good pan is crucial for preventing sticking and ensuring even cooking.
- Non-Stick Frying Pan: Highly recommended for beginners, as its surface ensures eggs release easily, making flipping effortless and reducing the risk of breakage.
- Cast Iron Skillet: A favorite among experienced cooks for its superior heat retention and ability to create beautifully crispy edges. It requires proper seasoning and careful heat management, but the results are exceptional.
- Flexible Spatula: A thin, flexible spatula is essential for gently sliding under the egg whites without tearing them and for executing a clean flip without breaking the delicate yolk. Silicone or thin metal spatulas are ideal.
Detailed Guide to Cooking Fats
The fat you choose for cooking plays a significant role in the flavor, texture, and crispness of your fried eggs. Consider these popular options:
- Oils (Olive, Avocado, Vegetable, Canola, Coconut):
- Pros: Oils create a distinct crispy edge on the egg whites and impart a subtle richness. They are excellent if you’re avoiding dairy or prefer a neutral flavor that lets the egg shine. High-smoke-point oils like avocado or grapeseed are particularly good for medium-high heat.
- Considerations: Choose a neutral-flavored oil if you don’t want to overpower the egg. Extra virgin olive oil can be used, but its lower smoke point means it should be kept to a slightly lower heat.
- Butter:
- Pros: Butter is renowned for adding a rich, creamy, and undeniably delicious flavor to eggs. It creates a luxurious texture, especially when it browns slightly (beurre noisette) and imparts a nutty aroma.
- Considerations: Butter has a lower smoke point compared to many oils, so it’s prone to burning if the heat is too high. To prevent this, cook at a true medium heat, or combine butter with a small amount of high-smoke-point oil to raise the overall smoke point of the cooking fat.
- Ghee (Clarified Butter):
- Pros: Ghee is butter with the milk solids and water removed, giving it a significantly higher smoke point than regular butter. This means you get the fantastic buttery flavor without the risk of burning, making it a robust option for frying.
- Considerations: Offers a slightly nuttier, more intense butter flavor due to the caramelization of milk solids during its creation.
- Bacon Fat:
- Pros: For an intensely savory and smoky flavor, cooking eggs in leftover bacon fat is an unparalleled choice. It infuses the eggs with a depth of flavor that complements many breakfast dishes.
- Considerations: Bacon fat is highly flavorful and rich. It’s best used when you want a pronounced savory element. Like butter, keep an eye on the heat to prevent it from burning.
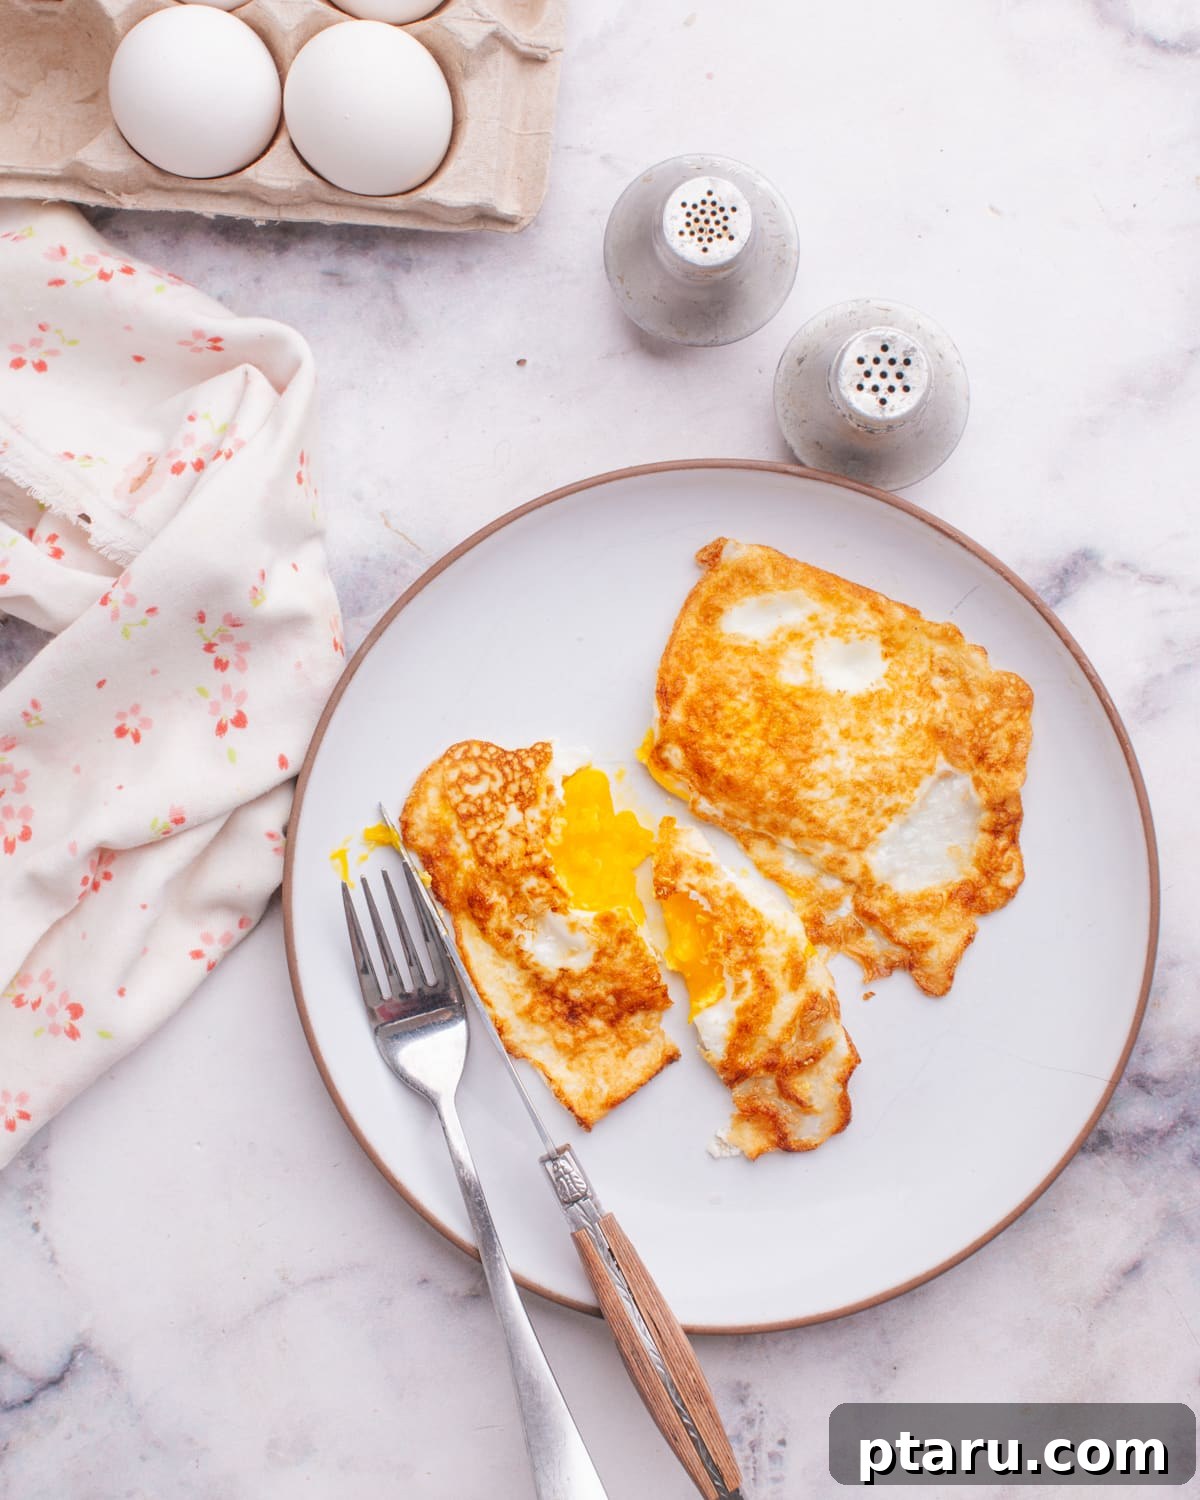
How to Cook Eggs Over Medium: A Food Scientist’s Easy Guide
Are you ready to create perfectly cooked over medium eggs with gloriously runny yolks and firm whites? Follow this precise, step-by-step guide to achieve consistent excellence every single time.
Step 1: Preheat the Pan and Add the Eggs
Success begins with proper preheating. Place your chosen non-stick skillet or cast iron pan over medium heat. Add 1 tablespoon of your preferred oil or butter (or a mix). Allow it to preheat for approximately 2-3 minutes for a non-stick pan, or 5 minutes for a cast iron skillet. The fat should be shimmering slightly, indicating it’s hot enough. This crucial step prevents the eggs from sticking to the pan and ensures crispy edges.
Gently crack the eggs directly into the hot pan. Be mindful not to break the yolks, as an intact yolk is fundamental to the over medium experience. Give each egg sufficient space in the pan to cook evenly without overcrowding.
Step 2: Season and Cook the First Side
Immediately after cracking the eggs into the pan, season them generously with salt and freshly ground black pepper. This allows the seasoning to adhere well and penetrate the whites as they cook.
Allow the eggs to cook undisturbed for about 2 to 3 minutes. During this initial phase, the egg whites should begin to set and turn opaque. The edges might become slightly crispy and golden brown, which is a desirable characteristic. Ensure the heat is not too high, otherwise, the whites will cook too quickly and become tough, or the bottom will burn before the top is ready for flipping.
Step 3: The Gentle Flip and Second Side Cook
Once the whites are mostly set but the yolk still appears very runny, it’s time for the flip. Using a thin, flexible spatula, carefully slide it completely underneath each egg, ensuring you support the entire white and yolk structure. With a swift yet gentle motion, flip the egg over. This maneuver requires confidence to prevent yolk breakage.
After flipping, cook the eggs for an additional 1 to 2 minutes. This is where the magic happens for the “over medium” doneness. The goal is to set the remaining liquid white and partially cook the yolk without making it fully firm. The exact timing will depend on your stove’s heat, pan type, and personal preference for yolk runniness. Keep a close watch.
Step 4: Test for Doneness and Serve
The yolks should still be slightly runny in the center, exhibiting a creamy, thickened consistency, while the whites are fully cooked and firm. Use the “Touch Test” described below to confirm doneness without piercing the yolk.
Once they reach your desired doneness, promptly remove the eggs from the pan using your spatula. Place them directly onto your serving plate. It’s vital to serve over medium eggs immediately, as their residual heat will continue to cook them, potentially turning that perfect runny yolk into an overcooked one if left to sit too long in the pan or on a warm plate.
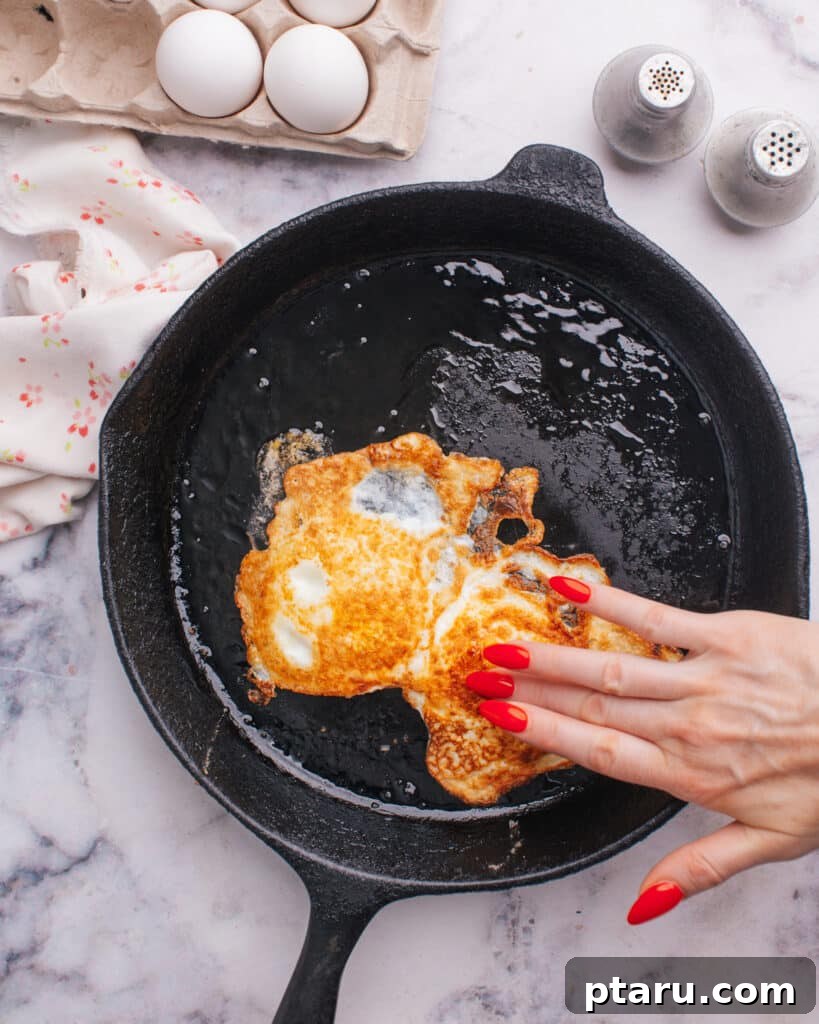
Pro Tips For Testing Doneness in Eggs: The Food Scientist’s Touch Test
One of the most valuable techniques for consistently achieving your desired fried egg doneness is the “Touch Test.” This method allows you to assess the yolk’s internal consistency without cutting it open, preserving its integrity and presentation. Here’s how a food scientist uses tactile cues to gauge perfection:
To perform the touch test, gently press on the domed yolk part of the egg (after it has been flipped) with a clean finger or the back of your spatula. The resistance and firmness you feel will tell you exactly what stage the egg is at:
- Over Easy Stage (Very Runny Yolk): If the yolk area feels very soft and yields significantly to light pressure, almost like pressing the fleshy part of your cheek, it’s at the over easy stage. This means the yolk is still largely liquid and will be super runny when broken.
- Over Medium Stage (Partially Runny, Creamy Yolk): When the yolk offers a slight resistance and feels gently yielding—similar to pressing the soft, fleshy part of your palm just below your thumb when your hand is relaxed—then it’s perfectly over medium. This indicates that the yolk has thickened to a creamy, partially runny consistency, maintaining some flow without being entirely liquid. This is the sweet spot we are aiming for!
- Over Hard Stage (Fully Cooked Yolk): If the yolk feels very firm and offers strong resistance, comparable to pressing your forehead or the same part of your palm when your hand is outstretched and rigid, then the egg is cooked over hard. At this point, the yolk is completely solid with no runniness.
Practicing this test a few times will quickly tune your tactile senses to recognize each stage. It’s an invaluable skill that ensures you never overcook or undercook your fried eggs again, delivering perfect results consistently.
Make Ahead and Storage Considerations for Over Medium Eggs
While the allure of a freshly cooked over medium egg, with its warm, runny yolk, is undeniable, sometimes you might need to prepare them ahead of time or store leftovers. However, it’s important to understand the compromises involved:
Serve Fresh for Optimal Experience: For the ultimate over medium egg experience, I strongly recommend cooking them fresh and serving them immediately. The delicate balance of a partially runny yolk and firm whites is at its peak right off the pan. Eggs continue to cook from their own residual heat as they sit, and maintaining that perfect level of doneness achieved during cooking is nearly impossible unless they are consumed without delay.
Storing Cooked Eggs: If you must store them, the goal is to cool them down as quickly as possible to halt the cooking process. Transfer the cooked eggs to an airtight container and refrigerate them promptly. They can be stored safely in the refrigerator for up to two days. Beyond this, the quality, especially the yolk’s texture, will significantly diminish.
Reheating Stored Eggs: Reheating eggs over medium without overcooking the yolk is tricky but possible with care.
- Skillet Method: Gently reheat them in a non-stick skillet over very low heat for a minute or two, just until warmed through. You can add a tiny splash of water and cover the pan briefly to create some steam, which helps heat them without drying out.
- Microwave Method: For convenience, you can microwave them on low power in short bursts (15-30 seconds), checking frequently. Be extremely cautious, as the microwave can quickly turn a runny yolk solid.
Regardless of the reheating method, expect the yolk to firm up slightly compared to its fresh state. While not quite the same as fresh, properly reheated eggs can still be a convenient and tasty meal component.
How to Serve Eggs Over Medium: Versatile Culinary Pairings
The beauty of a perfectly cooked over medium egg lies not only in its delightful texture but also in its incredible versatility. The rich, creamy yolk acts as a natural sauce, making these eggs a perfect companion for a wide array of dishes, from classic breakfast staples to innovative lunch and dinner options. Explore these delicious ways to incorporate your expertly fried eggs into any meal:
- Elevated Avocado Toast: A timeless favorite. Place your over medium eggs atop toasted artisan bread generously spread with mashed or sliced avocado. Enhance this dish with a sprinkle of red pepper flakes, everything bagel seasoning, fresh microgreens, or a drizzle of balsamic glaze for added complexity. A dollop of fresh salsa or a few pickled onions can also provide a delightful tangy contrast.
- Hearty Breakfast or Brunch Sandwiches: Transform your morning sandwich into a gourmet experience. Layer over medium eggs with crispy bacon, savory sausage patties, melted cheese (cheddar, Swiss, or pepper jack work well), and fresh greens or tomato slices between warm English muffins, toasted bagels, or brioche buns. The runny yolk will moisten the entire sandwich, adding lusciousness.
- Decadent Savory Waffles: Move beyond sweet waffles and embrace a savory canvas. Try my ham and cheese waffle recipe as a sturdy base. A perfectly over medium egg on top, perhaps with a sprinkle of chives and a dash of hot sauce, creates an unforgettable brunch dish that’s both comforting and elegant.
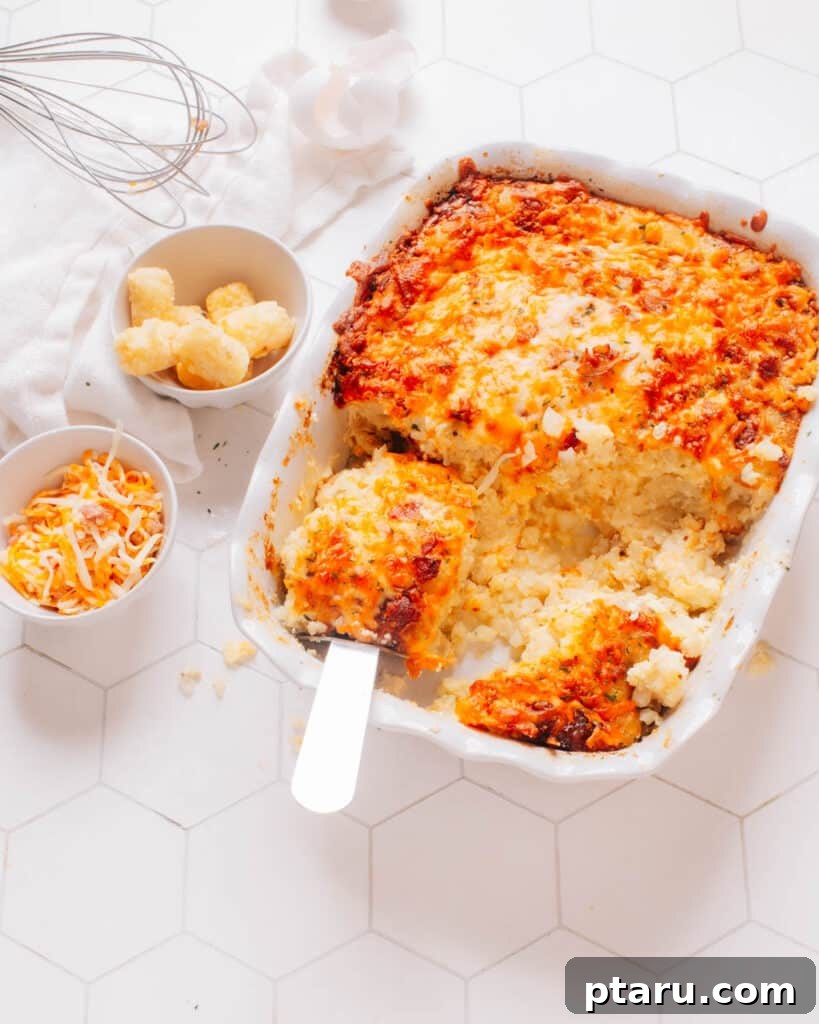
- Classic Hash Browns Reinvented: Pair your over medium eggs with a mound of crispy hash browns. This classic combination is immensely satisfying. Take it up a notch by adding sautéed bell peppers, onions, or mushrooms to your hash, and then crown it with the eggs. For an extra special treat, serve it with my savory Tater Tot Breakfast Casserole, where the runny yolk can seep into the crispy tater tots.
- Gourmet Burger Topping: Elevate your burger game by adding a fried over medium egg. The rich yolk, when broken, mixes with the burger juices and condiments, creating an incredibly flavorful and juicy bite. It’s particularly fantastic with my umami-loaded mushroom burgers with Swiss cheese, adding an extra layer of richness and indulgence.
- Elegant Smoked Salmon Platter: For a sophisticated breakfast or brunch, serve over medium eggs alongside thin slices of smoked salmon on a toasted bagel or crusty bread. Complement with a smear of cream cheese, briny capers, thinly sliced red onion, and fresh dill. The combination of the creamy yolk, salty salmon, and fresh aromatics is truly exquisite.
- Over Grains or Legumes: For a healthier, protein-packed meal, serve your over medium eggs atop a bowl of warm quinoa, farro, lentils, or black beans. Add some roasted vegetables, a drizzle of olive oil, and a squeeze of lemon for a complete and satisfying dish.
5 Common Mistakes When Making Eggs Over Medium & How to Avoid Them
Achieving the perfect over medium egg is a skill that comes with practice, and avoiding common pitfalls can significantly accelerate your journey to mastery. Here are five frequent mistakes and how to prevent them:
- Overcooking the Yolk: This is arguably the most common mistake, resulting in a firm, chalky yolk instead of the desired creamy, slightly runny center.
- How to Avoid: The key is precise timing and heat control, especially after flipping. Cook for a shorter duration on the second side (1-2 minutes). Most importantly, utilize the “Touch Test” (described above) to accurately gauge the yolk’s consistency without breaking it. Remove the eggs from the heat the moment they reach the “over medium” feel.
- Undercooking the White: Leaving the egg white raw, slimy, or too runny around the yolk or edges is an unpleasant experience and can pose food safety concerns.
- How to Avoid: Ensure the pan is adequately preheated and the initial cooking phase (before flipping) is long enough (2-3 minutes) for the whites to fully set and turn opaque. The edges should be firm and, ideally, slightly crispy. Don’t rush the first side, and make sure the entire white, especially around the yolk, is no longer translucent before flipping.
- Not Using Enough Fat: Insufficient cooking fat can lead to eggs sticking to the pan, resulting in tears, breakage, and a messy presentation, particularly when attempting to flip.
- How to Avoid: Always use at least 1 tablespoon of oil or butter per two eggs. Ensure the fat evenly coats the entire bottom surface of the pan. The eggs should sizzle gently when added, indicating enough fat and proper heat. If you’re using an older non-stick pan or cast iron, a little extra fat acts as insurance.
- Using Excessive High Heat: Cooking eggs over too high a heat can cause the whites to brown or burn quickly, become tough and rubbery, while the yolk either remains too raw or cooks unevenly, solidifying on the outside but still liquid inside.
- How to Avoid: Always cook over consistent medium heat. This allows for even cooking of the whites and gradual warming of the yolk. High heat accelerates cooking externally but doesn’t allow for the precise internal doneness required for over medium. A gentle sizzle is good; furious bubbling and smoking fat are not.
- Improper Pan Preheating: Whether it’s not preheating enough or preheating at the wrong temperature, improper pan preparation can cause sticking and uneven cooking.
- How to Avoid: Always preheat your pan thoroughly with the fat in it. For non-stick, 2-3 minutes on medium heat until the fat shimmers is ideal. For cast iron, which retains heat better, 5 minutes might be needed. Proper preheating creates an immediate crust on the egg, preventing sticking, especially important for older non-stick surfaces or cast iron. A well-preheated pan is half the battle won.
By consciously avoiding these common errors and paying close attention to your timing and heat control, you can consistently master the art of making perfect eggs over medium, complete with that irresistible creamy yolk and fully cooked white.
FAQs About Eggs Over Medium
Here are some frequently asked questions about cooking and enjoying eggs over medium, summarizing the key takeaways from this comprehensive guide:
What is the difference between eggs over easy, over medium, and over hard?
The primary distinction lies in the doneness of the yolk after the egg has been flipped. Over easy eggs have whites that are just set, with a yolk that is still entirely liquid and very runny. Over medium eggs feature fully cooked whites and a yolk that is partially cooked, resulting in a creamy, slightly runny center. Over hard eggs are cooked until both the whites and the yolk are completely firm and solid, with no liquid consistency whatsoever.
How do you achieve the perfect balance between runny yolks and cooked whites?
Achieving this perfect balance requires precise heat control and timing. Cook the eggs over consistent medium heat, allowing the whites to set fully on the first side (about 2-3 minutes). Once flipped, cook for a shorter duration on the second side (1-2 minutes) to gently warm the yolk without solidifying it completely. The “Touch Test” is invaluable here for gauging the internal doneness of the yolk.
What are the best practices for flipping eggs over medium without breaking the yolk?
The key to a successful flip without breaking the yolk is using the right tool and technique. First, ensure the egg whites are fully set and firm enough to hold their shape before attempting to flip. Use a thin, flexible spatula that can slide easily and completely underneath the entire egg. Execute the flip quickly and smoothly, minimizing the time the egg is airborne and reducing the chance of the yolk tearing or bursting upon impact with the pan.
How can I tell if eggs are fresh before cooking them over medium?
Fresh eggs are essential for the best flavor and texture, particularly for over medium eggs where yolk integrity matters. A simple freshness test is the “float test”: gently place an egg in a bowl of cold water. Fresh eggs will sink to the bottom and lie flat on their side. As eggs age, a small air cell inside expands, causing older eggs to stand upright on the bottom or even float to the surface. Eggs that float should generally be discarded.
Next Reading: Guide to Cooking Eggs: How to Poach, Scramble + Fry Perfectly
Other Egg Recipes You’ll Love
If you’ve enjoyed mastering eggs over medium, you’ll love exploring these other fan-favorite egg recipes:
- 23+ Delicious Breakfast Recipes with Sausage and Eggs
- How to Boil Eggs in the Microwave: A Quick & Foolproof Method
- Egg Whites vs. Yolk: Understanding Their Nutritional Differences and Uses
- Easy Poached Egg in Microwave: Perfect Poaching in Minutes
- Mini Quiche Recipe: Ideal for Kids’ Meal Prep & Snacks
Eggs Over Medium (Perfect Every Time!)
Jennifer Pallian BSc, RD
2
minutes
3
minutes
1
Ingredients
- 1 tbsp oil or butter
- 2 eggs
- Salt to taste
- Pepper to taste
Instructions
Preheat Pan
-
Heat the oil or butter in a non-stick skillet over medium heat for 2-3 minutes until shimmering hot. This ensures the eggs do not stick.
Cook the Eggs
-
Crack the eggs into the pan, taking care not to break the yolks.
-
Season generously with salt and pepper.
-
Cook for about 2 minutes until the whites begin to set and turn opaque. With a thin spatula, gently slide beneath the egg and flip it carefully. Cook for another 1-2 minutes.
Check Doneness
-
The yolks should be slightly runny and creamy in the center, and the whites fully cooked.
-
To verify doneness without cutting the egg, gently press on the yolk with a clean finger or spatula. When it’s over medium, it will feel slightly soft, similar to the fleshy part of your palm below your thumb when your hand is relaxed.
Serve Immediately
-
Remove from the pan and serve immediately. Eggs will continue to cook from residual heat if left to sit.
Notes
Adjust the cooking time as needed, based on your specific stove, pan type, and desired yolk consistency. A little practice helps achieve perfection.
For an enhanced flavor and aesthetic, consider sprinkling fresh chopped herbs (like chives or parsley) over the eggs just before serving.
These versatile eggs pair wonderfully with a variety of breakfast sides such as crispy toast, creamy avocado, savory bacon, or hash browns.
Nutrition
Carbohydrates: 1g |
Protein: 11g |
Fat: 22g |
Saturated Fat: 4g |
Polyunsaturated Fat: 6g |
Monounsaturated Fat: 12g |
Trans Fat: 0.1g |
Cholesterol: 327mg |
Sodium: 125mg |
Potassium: 121mg |
Sugar: 0.3g |
Vitamin A: 475IU |
Calcium: 49mg |
Iron: 2mg
Nutrition information is automatically calculated, so should only be used as an approximation.
Tried this recipe? Leave a comment!