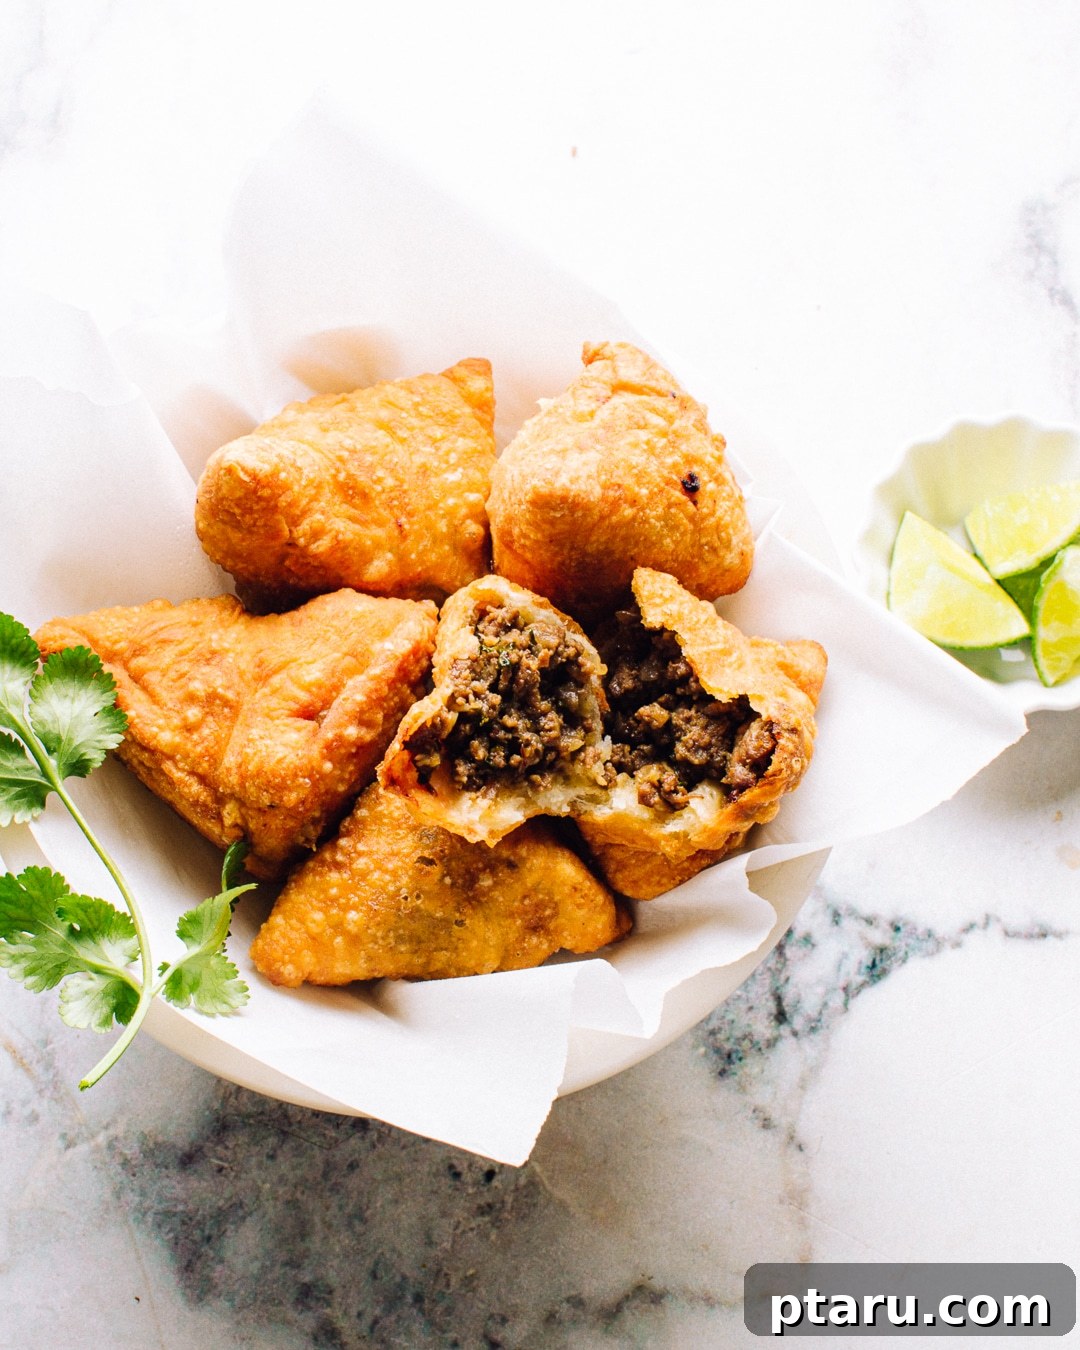
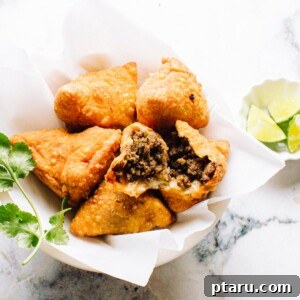
Embark on a culinary journey to create the most **exquisitely crispy beef samosas** you’ve ever tasted. Imagine a perfectly golden-brown exterior, shattering delicately to reveal a richly spiced, warmly fragrant minced beef filling within. This isn’t just a recipe; it’s an invitation to experience the joy of crafting an authentic and utterly delightful Indian-inspired appetizer right in your own kitchen.
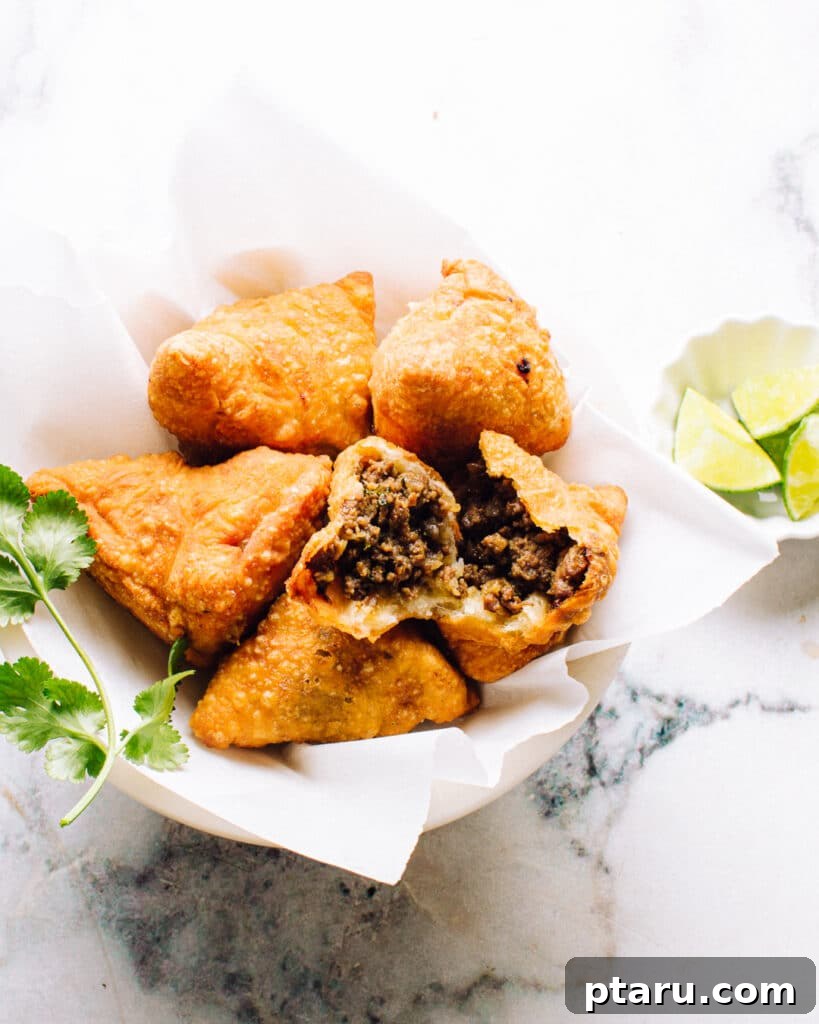
While the thought of making samosas from scratch might seem daunting, rest assured, it’s far simpler than you might imagine. This comprehensive, step-by-step guide will demystify the process, empowering you to fold, fill, and fry your way to samosa perfection. Our savory ground beef filling, infused with an aromatic blend of traditional spices, is nestled within a tender, flaky pastry, then fried to achieve that coveted golden crispness. Prepare for an unforgettable eating experience that will have everyone asking for more!
Why These Homemade Beef Samosas Will Become Your Favorite
Get ready to fall head over heels for this incredible beef samosas recipe. Here are just a few compelling reasons why it deserves a spot in your culinary repertoire:
- Endless Customization Potential: This recipe serves as a fantastic foundation, offering boundless opportunities for personalization. Feel free to adjust spice levels to your preference, incorporate additional finely diced vegetables like carrots or potatoes, or even experiment with different ground meats for a fresh take. It’s a versatile blueprint for your culinary creativity.
- The Ultimate Party Food & Appetizer: These homemade beef samosas are guaranteed to be a crowd-pleaser at any gathering. Their convenient, handheld size and universally appealing flavors make them ideal for serving as an appetizer, a delicious party snack, or even as a unique main course alongside a refreshing salad or chutney.
- Remarkably Freezer-Friendly: Prepare a generous batch of these delightful samosas and freeze them for future enjoyment. They are perfect for meal prepping, allowing you to have a quick, tasty snack or a satisfying component for dinner ready whenever a craving strikes. Simply reheat from frozen for maximum convenience without compromising on flavor or texture.
- Authentic & Rich Flavor Profile: We’ve carefully crafted a spice blend that delivers an authentic, deep, and satisfying flavor often found in traditional Indian and South Asian cuisine. The combination of ginger, garlic, cumin, coriander, and garam masala creates a symphony of aromas that elevates the ground beef filling from simple to sensational.
- A Fun and Rewarding Culinary Project: Making samosas from scratch is not only incredibly rewarding but also a genuinely enjoyable process. From kneading the dough to artfully shaping the pastry, each step offers a hands-on experience that connects you with the food you create. It’s a wonderful activity to share with family and friends!
Essential Ingredients and Tools for Perfect Samosas
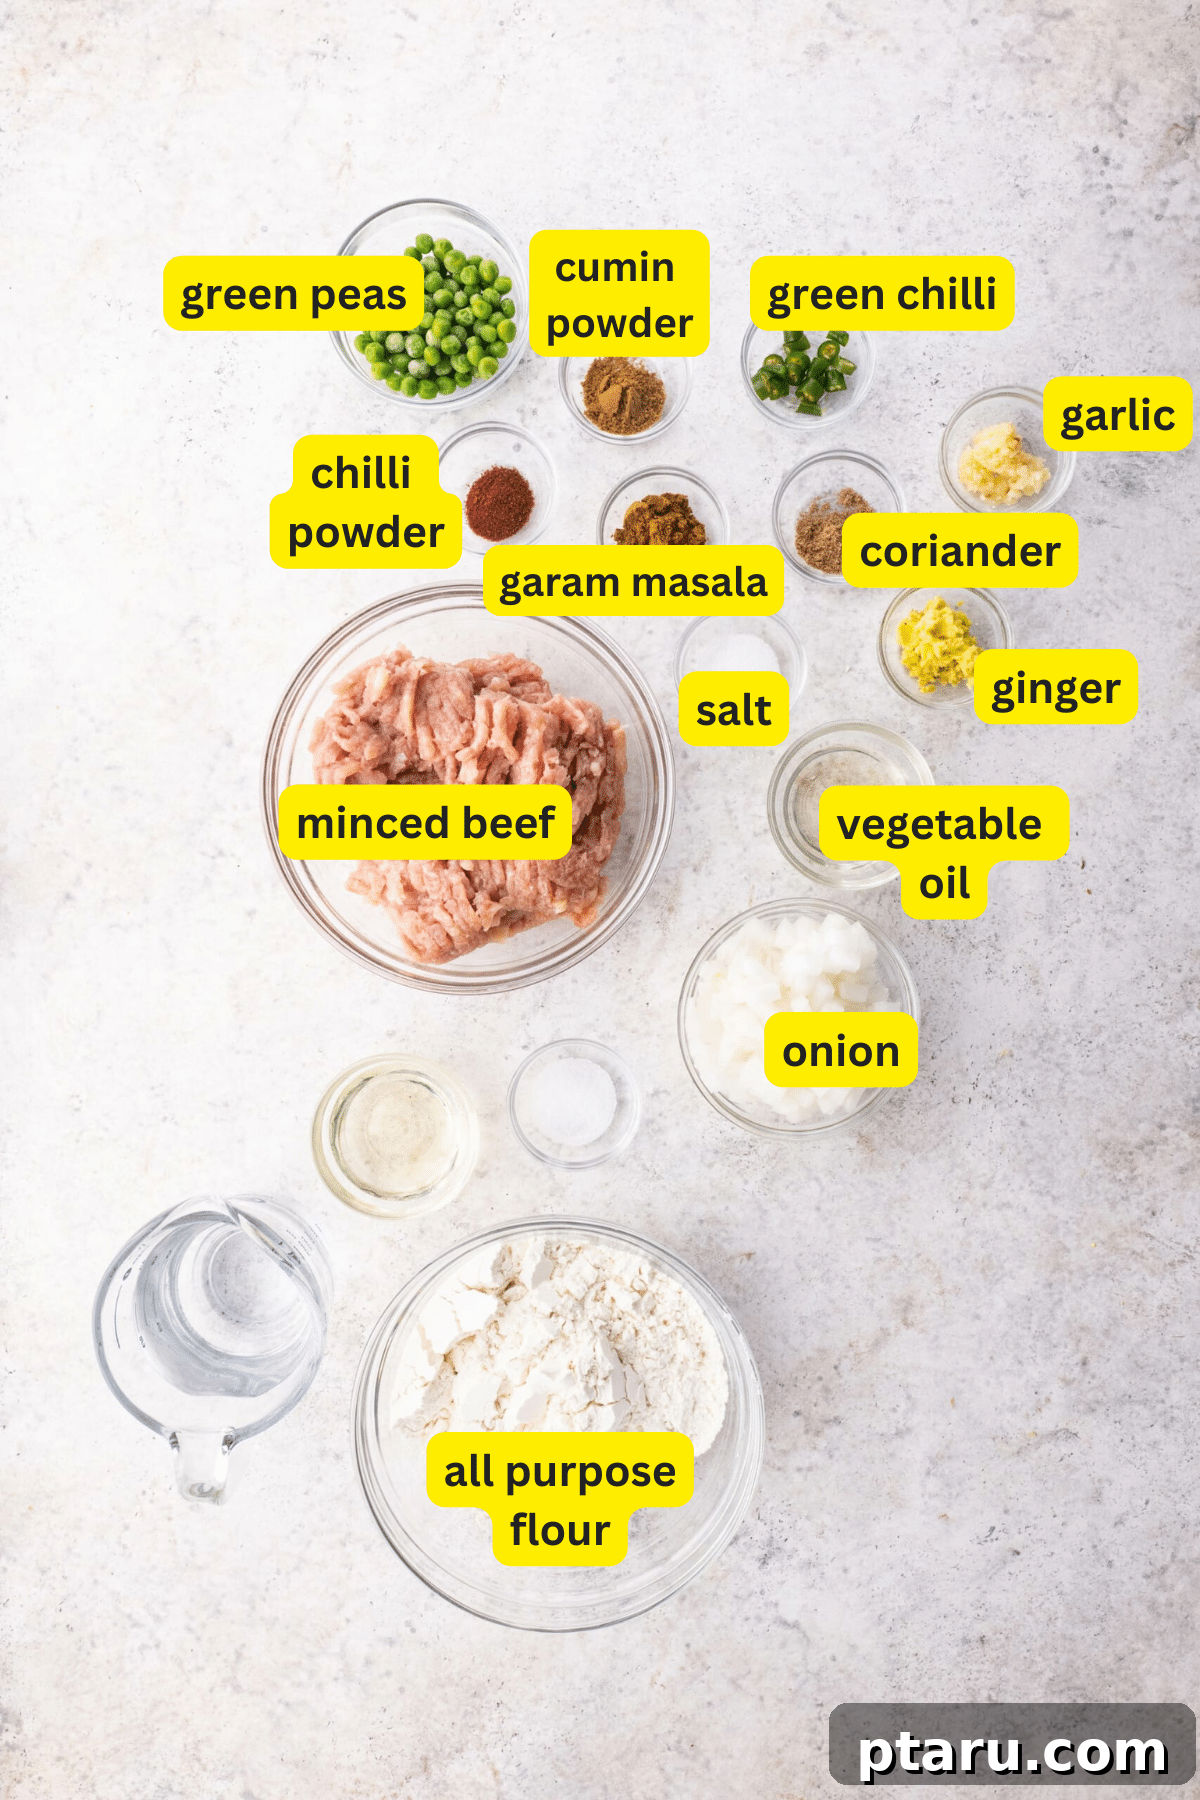
Gathering your ingredients and tools beforehand will make the samosa-making process smooth and enjoyable. While the list might appear extensive, you likely have many of these staples in your pantry already. For precise quantities, please refer to the detailed recipe card below.
Key Ingredients for Flavorful Beef Samosas
For the Crispy Dough:
- All-Purpose Flour: This forms the structural backbone of our samosa pastry, providing the ideal texture that becomes wonderfully crispy when fried. Using good quality flour is key for a pliable dough.
- Salt: Essential for seasoning the dough itself, ensuring every bite of your samosa, from crust to filling, is seasoned to perfection. Don’t underestimate its importance for flavor.
- Vegetable Oil: Incorporated into the dough, oil adds richness, contributes to the flakiness, and helps bind the ingredients, making the dough easier to handle and more tender once cooked.
- Water: The liquid component that brings the dough together, allowing it to form a cohesive, elastic texture perfect for rolling thin.
For the Aromatic Beef Filling:
- Vegetable Oil: For sautéing the aromatics and browning the beef, ensuring a flavorful base for the filling.
- Onion: Finely chopped, it provides a sweet and savory base, caramelizing beautifully to add depth to the filling.
- Fresh Ginger: Grated ginger adds a pungent, warm, and slightly spicy aroma that is characteristic of authentic samosa fillings.
- Fresh Garlic: Grated garlic complements the ginger and other spices, contributing an indispensable savory punch to the overall flavor profile.
- Minced Beef: Opt for lean, high-quality ground beef for the best texture and flavor. Leaner cuts prevent the filling from becoming overly greasy. Ground lamb is also an excellent, traditional alternative for a richer taste.
- Ground Cumin: A fundamental spice, cumin imparts an earthy, warm, and slightly nutty flavor, crucial for an authentic samosa taste.
- Ground Coriander: This spice offers a delicate, citrusy, and slightly sweet note that beautifully balances the richness of the beef and other robust spices.
- Chili Powder: Adds a kick of heat and a vibrant red hue to the filling. Adjust the amount or omit entirely based on your preferred spice level.
- Garam Masala: This staple Indian spice blend is the secret to a rich, complex, and well-rounded flavor. It’s typically added towards the end of cooking to preserve its delicate aromas.
- Frozen Green Peas: Don’t skip these! They add wonderful pops of sweetness, texture, and a touch of fresh vegetable goodness, making the filling more complete and visually appealing.
- Green Chillies: (Optional) For those who enjoy an extra layer of fiery heat, chopped green chillies can be added to the filling. Handle with care!
Substitutions and Creative Variations for Your Samosas
This recipe is incredibly adaptable, allowing you to tailor it to dietary needs, personal preferences, or whatever ingredients you have on hand. Don’t be afraid to get creative!
- Alternative Meats: Instead of minced beef, you can easily substitute with ground chicken, turkey, or lamb. Each will impart a slightly different flavor profile, all equally delicious. For a pescatarian option, finely flaked cooked fish can also be used.
- Vegetarian Samosas: To make a delightful vegetarian version, simply omit the beef and increase the quantity of vegetables. Excellent additions include finely diced potatoes, carrots, mushrooms, paneer (Indian cheese), or lentils. Ensure the vegetables are cooked until tender but not mushy, and the filling is not too wet.
- Adjusting the Spice Level: Easily control the heat by increasing or decreasing the amount of chili powder and green chilies. For more nuanced flavors, consider adding a pinch of ground cardamom, turmeric for color and earthy notes, or a touch of cinnamon. A dash of lemon or lime juice at the end can also brighten the flavors.
- Vegan Samosas: For a completely vegan-friendly option, replace the minced beef with a plant-based ground meat substitute, crumbled firm tofu, or a hearty mixture of mashed chickpeas and vegetables. Ensure you use vegetable oil exclusively for both the dough and filling, avoiding any dairy-based products.
- Gluten-Free Option: To make gluten-free samosas, use a good quality gluten-free all-purpose flour blend for the dough. Look for blends designed for pastry or bread-making for the best results. Always verify that all other ingredients are certified gluten-free.
- Time-Saving Pastry Wrappers: If you’re short on time or prefer not to make the dough from scratch, store-bought spring roll wrappers, filo pastry, or even puff pastry can be used. Follow the package instructions for cooking, though frying or baking times may vary.
- Baked or Air-Fried Samosas: For a lighter alternative to deep-frying, you can bake or air-fry your samosas. Brush them generously with oil before baking at 375°F (190°C) until golden and crispy (typically 20-30 minutes), or air-fry at 350°F (175°C) for 15-20 minutes, flipping halfway.
Essential Kitchen Tools to Grab
- Large Mixing Bowl: For combining and kneading the dough ingredients efficiently.
- Heavy-Bottomed Pot or Skillet: A large, sturdy pot or deep skillet for cooking the ground beef filling evenly and preventing scorching.
- Rolling Pin: Indispensable for flattening the dough into thin, uniform sheets, crucial for a crispy pastry.
- Deep Pot or Dutch Oven: Necessary for safely deep-frying the samosas. If you have a deep-fat fryer, that works perfectly too.
- Slotted Spoon or Spider: For carefully removing the fried samosas from the hot oil.
- Cutting Board and Sharp Knife: For finely chopping onions, ginger, garlic, and green chillies.
- Measuring Cups and Spoons: For accurate ingredient proportions, ensuring consistent results every time.
- Kitchen Towel: To cover the resting dough, keeping it moist and pliable.
- Wire Rack with Paper Towels: For draining excess oil from the fried samosas, ensuring they stay crispy.
- Kitchen Thermometer (Optional but Recommended): For precise oil temperature control during frying, crucial for perfectly cooked samosas.
How to Make Perfect Beef Samosas: A Step-by-Step Guide
Follow these straightforward steps to create your own batch of irresistibly crispy, homemade beef samosas. Precision and a little patience will yield fantastic results!
Step 1: Prepare the Samosa Dough
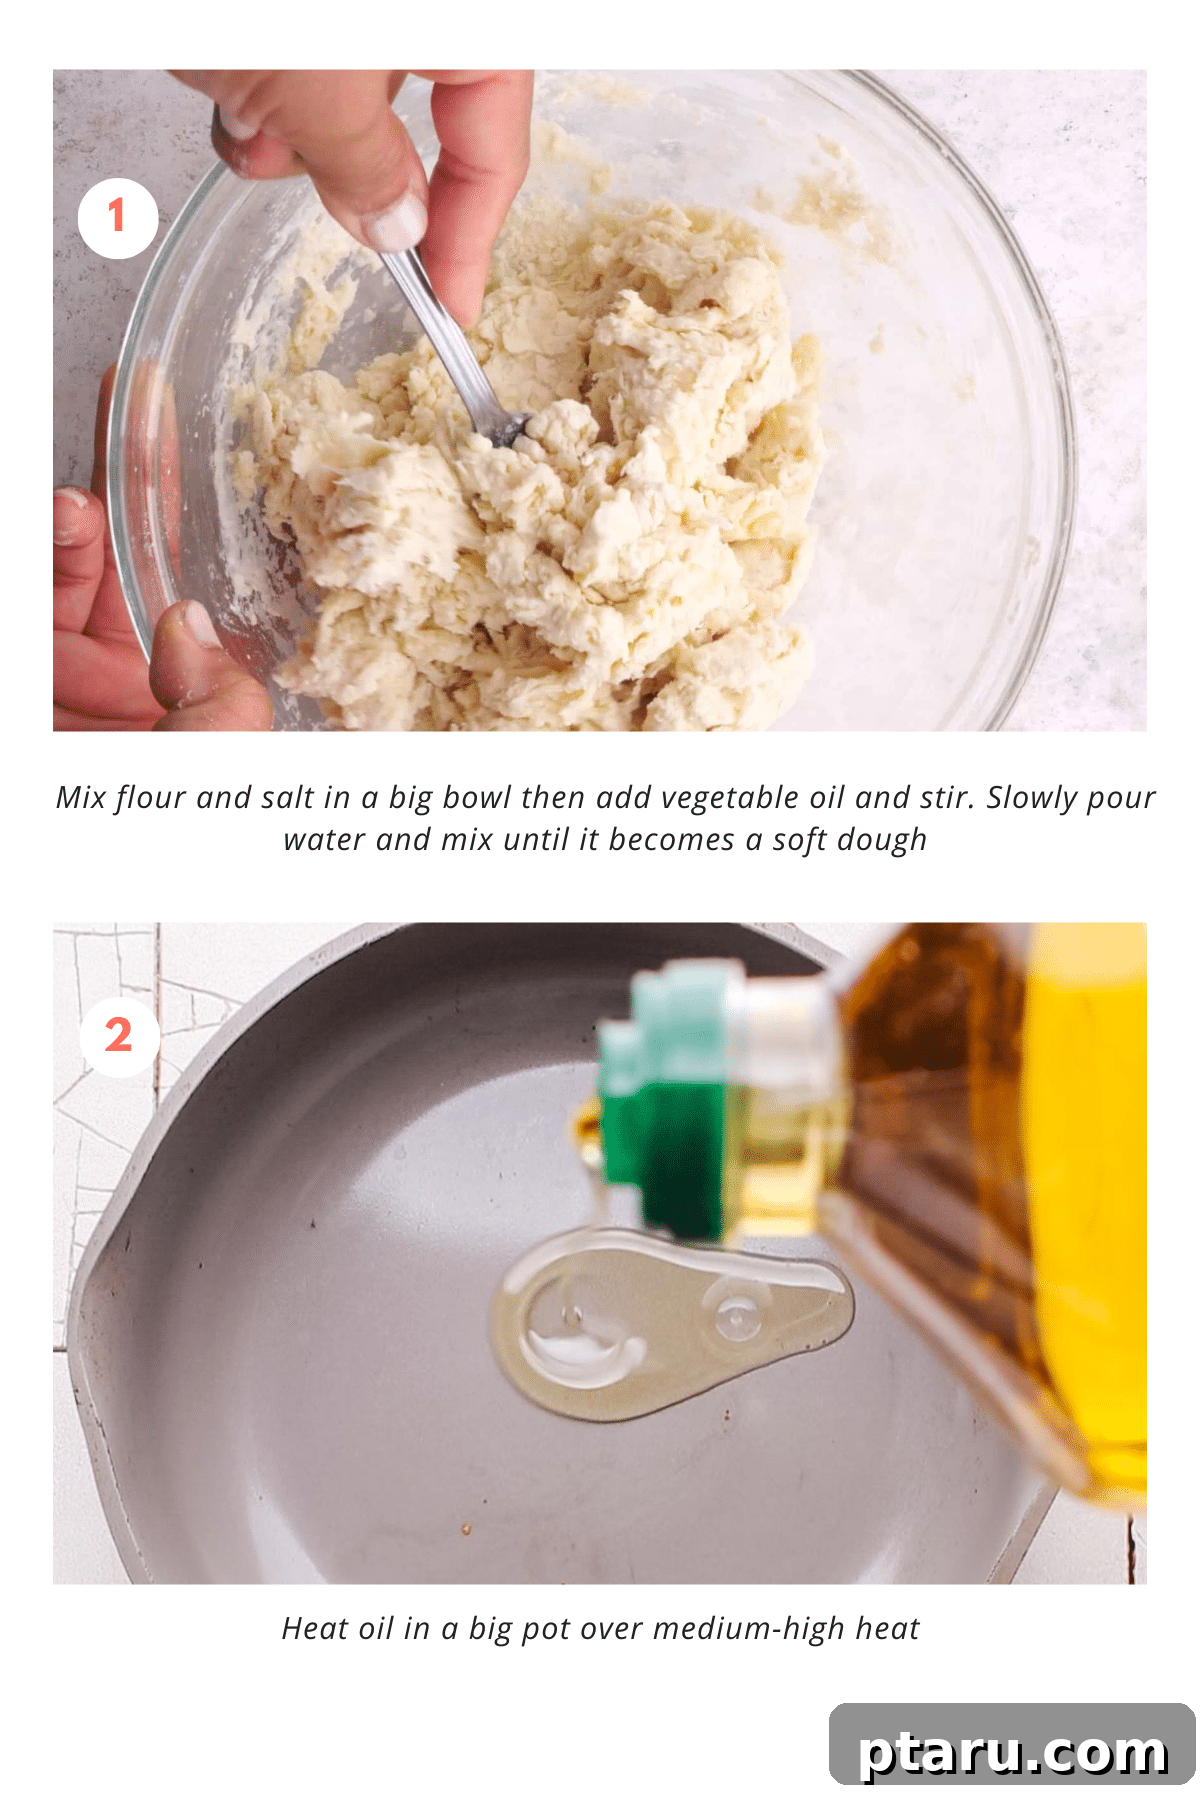
- In a large mixing bowl, combine the all-purpose flour and salt. Whisk them together to ensure even distribution.
- Add the vegetable oil to the flour mixture. Using your fingertips, rub the oil into the flour until the mixture resembles coarse breadcrumbs. This step is crucial for achieving a flaky, crispy pastry.
- Gradually add water, a little at a time, mixing initially with a spoon and then with your hands. Continue adding water until a soft, pliable dough forms. Be careful not to add too much water; the dough should be firm but not sticky.
- Turn the dough out onto a lightly floured surface and knead it for 5-7 minutes until it becomes smooth and elastic. This develops the gluten, making the dough easier to roll.
- Shape the dough into a smooth ball, wrap it tightly in a damp kitchen towel or plastic wrap, and let it rest at room temperature for at least 30 minutes. This resting period allows the gluten to relax, making the dough much easier to roll out thinly.
Step 2: Cook the Flavorful Beef Samosa Filling
- Heat 1 tablespoon of vegetable oil in a large, heavy-bottomed pot or skillet over medium-high heat.
- Add the finely chopped onion, grated ginger, grated garlic, and ½ teaspoon of salt to the hot oil. Sauté for about 2-3 minutes, stirring frequently, until the onion softens and becomes translucent. Avoid browning them too much at this stage.
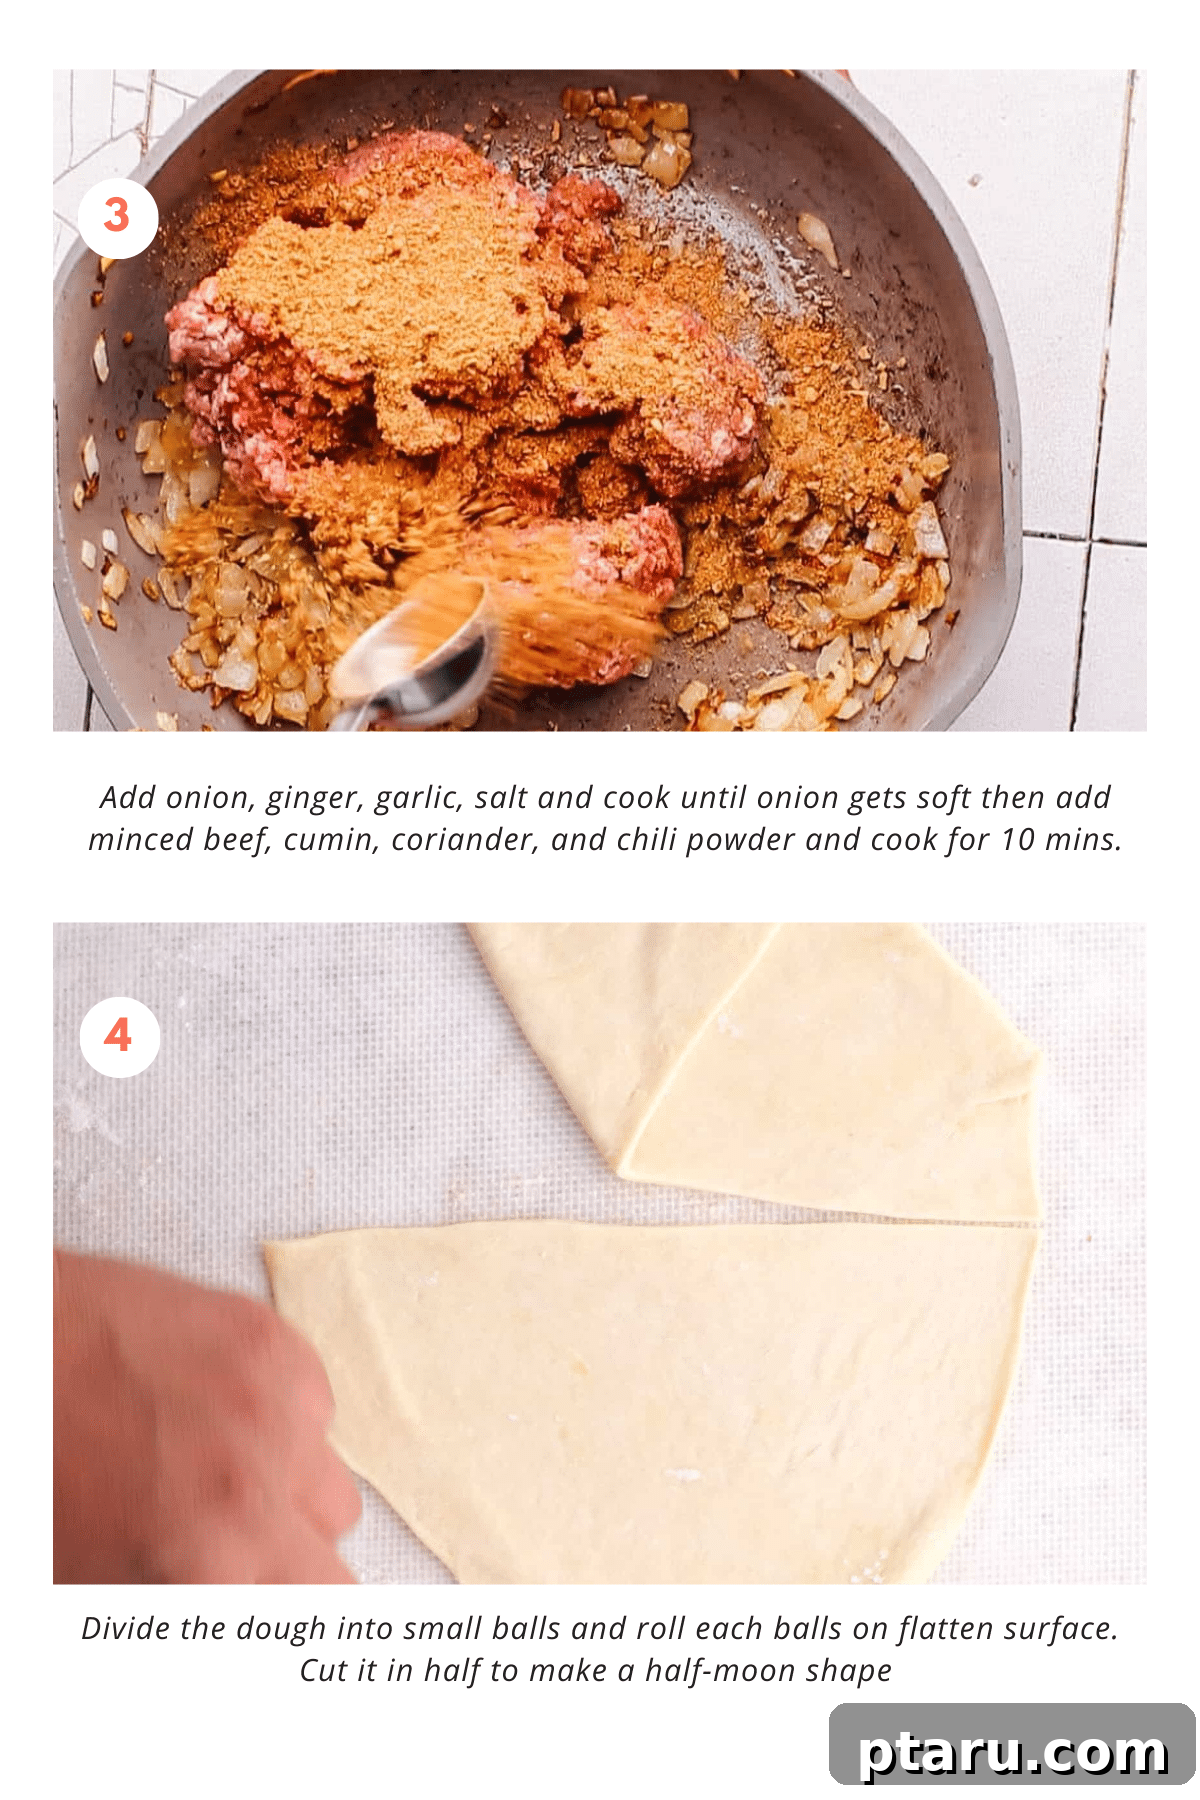
- Add the minced beef to the pot, breaking it up with a spoon. Sprinkle in the remaining ½ teaspoon of salt, ground cumin, ground coriander, and chili powder.
- Cook the beef mixture for approximately 8-10 minutes, stirring occasionally, until the beef is fully browned and any liquid released has evaporated. It’s important for the filling to be relatively dry to prevent soggy samosas.
- Sprinkle the garam masala over the cooked beef and stir well to combine. Add the frozen green peas. Continue to cook for another 3-5 minutes, allowing the peas to warm through and the flavors to meld beautifully.
- Taste the filling and adjust seasoning if necessary, adding more salt or chili powder to your preference. If you’re using green chilies, stir them in now for an extra kick of heat.
- Remove the filling from the heat and transfer it to a separate bowl. Allow the beef filling to cool completely to room temperature before assembling the samosas. This prevents the dough from becoming soggy or tearing during shaping.
Step 3: Shape Your Samosas
- Divide the rested dough into 6 equal pieces. Roll each piece into a smooth ball on a lightly floured surface.
- Take one dough ball and flatten it into a thin, oval or slightly oblong shape, approximately 6-7 inches long and 4-5 inches wide. Aim for an even thickness of about 1/8 inch for consistent crispiness.
- Cut the oval dough in half lengthwise, creating two half-moon shapes.
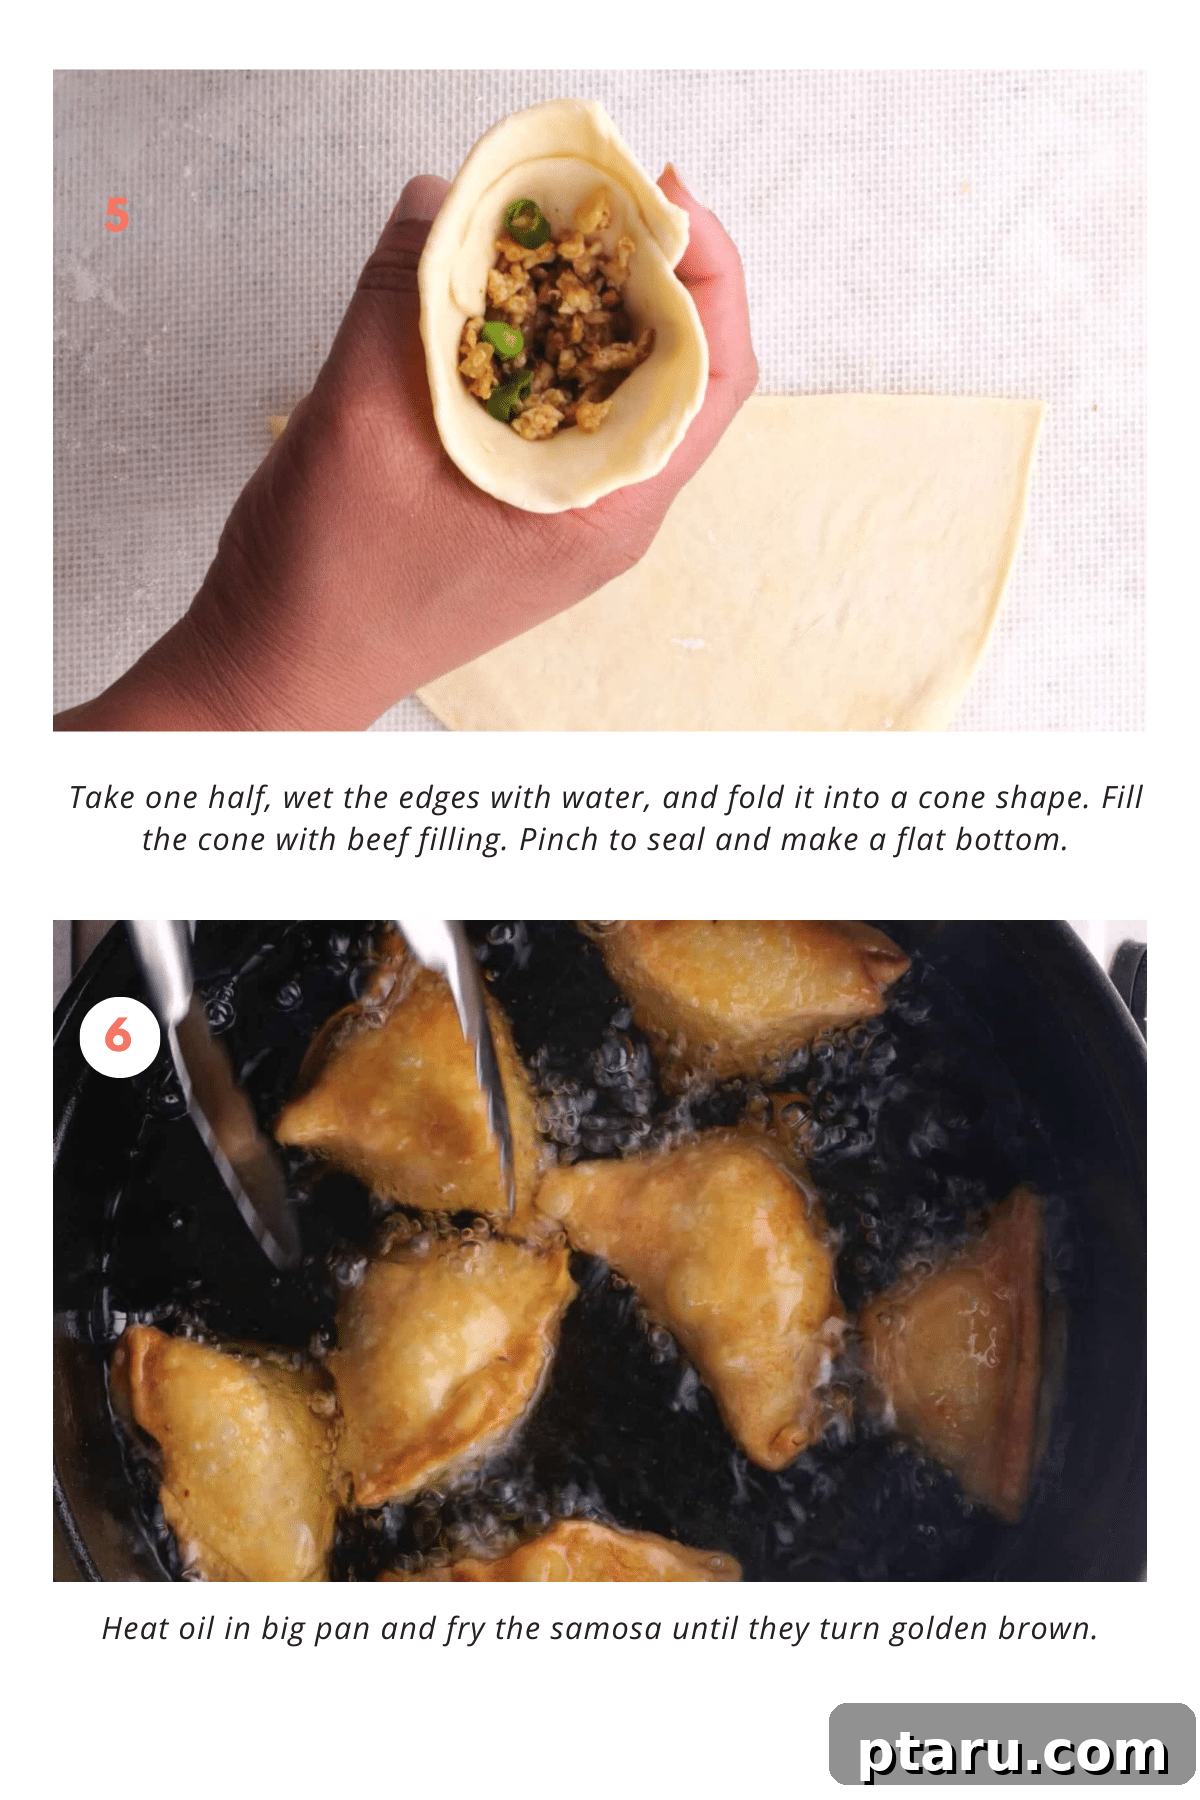
- Take one half-moon. Lightly moisten the straight edge with a little water (this acts as a glue). Bring the two ends of the straight edge together to form an open cone shape, overlapping them slightly (about ¼ inch). Press firmly along the overlapped seam to seal it securely, ensuring there are no gaps.
- Hold the cone in your hand and carefully fill it with about 1.5 to 2 tablespoons of the cooled beef filling. Do not overfill, as this can cause the samosas to burst during frying.
- Moisten the remaining open edges of the cone with water. Pinch and pleat the edges together, sealing the samosa completely into its classic triangular shape. Gently press the bottom seam to create a flat base, allowing the samosa to stand upright.
- Repeat this process with the remaining dough halves and beef filling. Place the assembled samosas on a tray lined with parchment paper, ensuring they don’t touch each other, to prevent sticking.
Step 4: Fry the Samosas to Golden Perfection
- Pour vegetable oil into a deep pot, Dutch oven, or deep-fat fryer, ensuring it is at least 3 inches deep. Heat the oil over medium heat.
- To test the oil temperature, drop a tiny piece of dough into it. If it sizzles gently and slowly rises to the surface, the oil is ready. The ideal frying temperature for samosas is around 200°F (95°C) initially. For best results, use a kitchen thermometer.
- Carefully place 3-4 samosas into the hot oil, ensuring not to overcrowd the pot. Overcrowding will drop the oil temperature and lead to greasy samosas.
- Fry the samosas in batches for about 15 minutes over medium-low heat. This slow frying process is critical, as it allows the dough to cook through evenly and become thoroughly crispy. The samosas should turn a light golden color during this stage.
- After 15 minutes, increase the heat to medium-high for the last 3-5 minutes of frying. This higher heat will give the samosas their characteristic deep golden-brown color and extra crispiness.
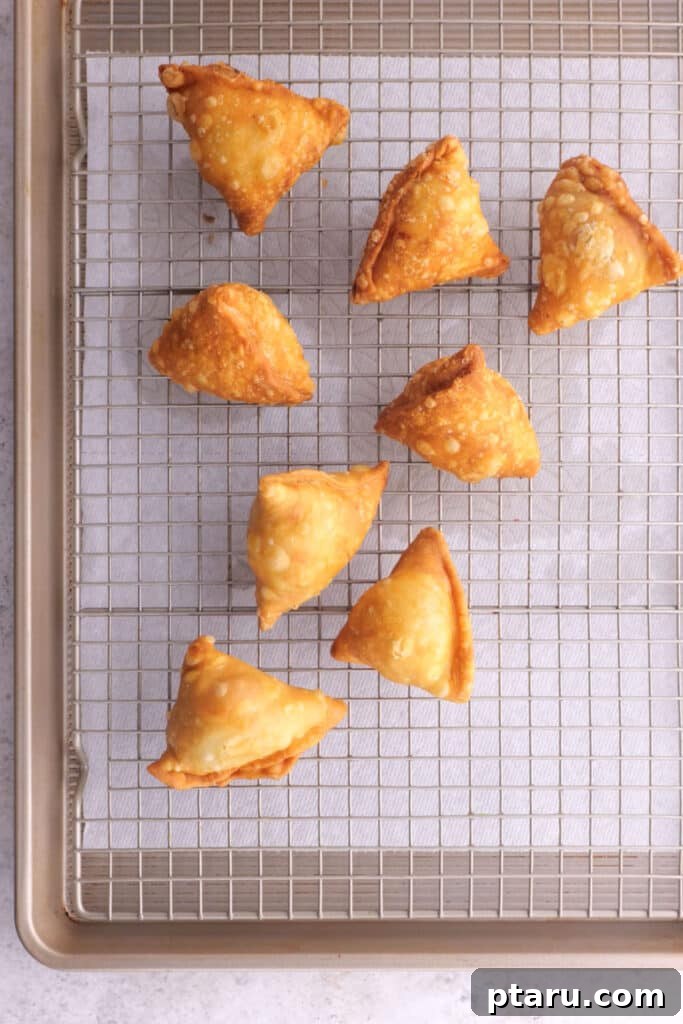
- Once deep golden brown and crispy, remove the samosas from the oil using a slotted spoon or spider. Transfer them immediately to a wire rack lined with paper towels to drain any excess oil. This helps them maintain their crispness.
- Repeat with the remaining batches of samosas, ensuring the oil returns to the correct temperature before adding the next batch.
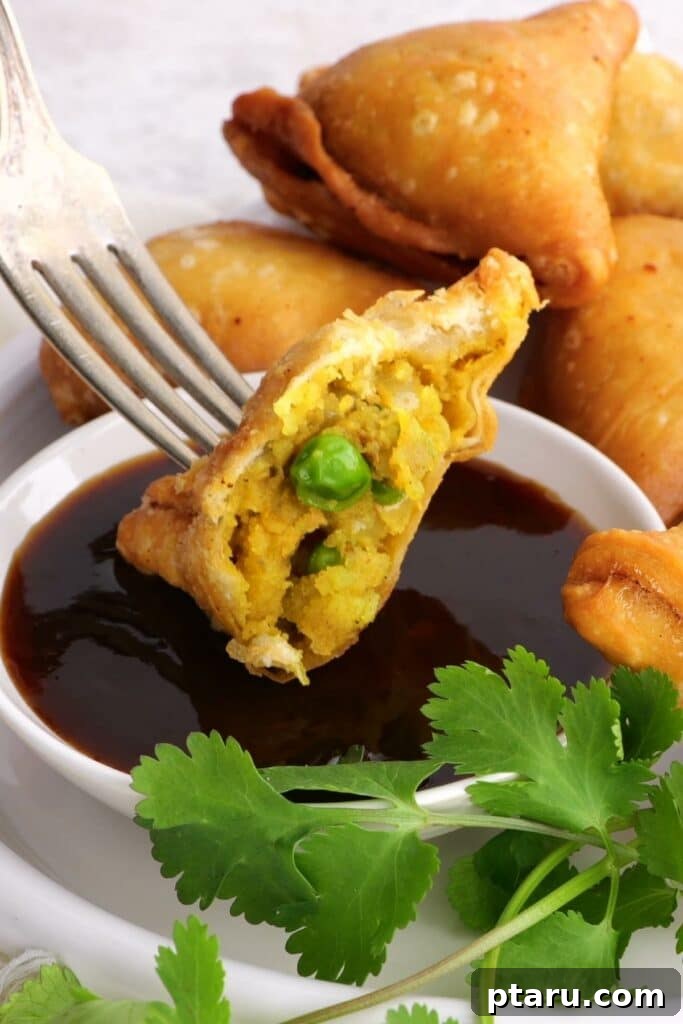
- Serve your homemade beef samosas warm with your favorite chutneys or dipping sauces.
Make Ahead and Storage Tips for Samosas
Samosas are excellent for preparing in advance, making them a fantastic option for entertaining or convenient meal solutions. Here’s how to store them effectively, both cooked and uncooked:
Preparing Components Ahead of Time:
- Samosa Dough: The prepared dough can be wrapped tightly in plastic wrap or placed in an airtight container and stored in the refrigerator for up to 2-3 days. Bring it to room temperature for about 30 minutes before rolling.
- Beef Filling: The cooked beef filling can be made ahead of time. Allow it to cool completely, then transfer it to an airtight container and refrigerate for up to 2-3 days. Ensure it’s completely cool before using to prevent soggy samosas.
Freezing Samosas for Later:
- Uncooked Samosas: This is a fantastic option for future frying! Arrange the assembled, uncooked samosas in a single layer on a baking sheet lined with parchment paper. Freeze until they are solid (this usually takes 1-2 hours). Once frozen solid, transfer them to a freezer-safe bag or an airtight container, separating layers with parchment paper to prevent sticking. They can be stored for up to 3 months. When ready to cook, fry them directly from frozen, adding a few extra minutes to the initial frying time at a lower temperature to ensure they cook through evenly.
- Cooked Samosas: If you have leftover cooked samosas or want to freeze a batch after frying, allow them to cool completely to room temperature. Arrange them on a baking sheet and flash freeze until solid. Then transfer to a freezer-safe bag or airtight container. They will retain their quality for up to 2 months.
Reheating Frozen or Leftover Samosas:
- For Cooked Samosas (Refrigerated or Frozen): The best way to reheat samosas to restore their crispiness is in an oven or air fryer.
- Oven: Preheat your oven to 350°F (175°C). Place refrigerated samosas on a baking sheet and heat for 10-15 minutes, or until warmed through and crispy. For frozen cooked samosas, bake for 15-25 minutes, or until heated through and crisp.
- Air Fryer: Preheat air fryer to 325°F (160°C). Place refrigerated samosas in a single layer and air fry for 5-8 minutes. For frozen cooked samosas, air fry for 10-15 minutes, shaking the basket halfway through, until hot and crispy.
- Avoid Microwave: While a microwave will heat samosas, it will render them soggy. It’s best reserved for quick warming only if crispiness is not a priority.
Whether freshly made or perfectly reheated, samosas are always best enjoyed warm and crispy. Serve them alongside your favorite sweet and tangy tamarind chutney, fresh mint chutney, or a cooling yogurt raita for a truly delicious snack or meal.
5 Common Mistakes to Avoid When Making Beef Samosas
Even experienced cooks can make small errors. Knowing what pitfalls to avoid will significantly improve your homemade samosa game. Here’s what NOT to do when striving for those perfectly crispy beef samosas:
- Overfilling the Samosas: This is a classic rookie mistake. Stuffing too much filling into your samosas puts excessive pressure on the dough, often leading to them bursting open during frying. Not only does this create a mess, but it also allows oil to seep in, making the samosa greasy.
**Solution:** Use a moderate amount of filling—aim for 1.5 to 2 tablespoons per samosa, depending on the size of your dough wrapper. Ensure there’s enough dough margin to securely seal the edges without strain. - Incorrect Sealing of the Dough: A poorly sealed samosa is an invitation for the flavorful filling to escape into the hot oil, resulting in a soggy, broken mess.
**Solution:** Always moisten the edges of the dough with water before folding and pressing. Water acts as a natural glue. Press firmly along all seams, crimping with a fork or pinching tightly with your fingers to ensure a strong, leak-proof seal. Pay special attention to the bottom seam where the cone meets the flat base. - Overcooking or Under-Seasoning the Filling: An overcooked beef filling can become dry, tough, and lose its vibrant spice notes. Conversely, an under-seasoned filling will result in bland samosas, despite the crispy exterior.
**Solution:** Cook the beef thoroughly until it’s no longer pink and all moisture has evaporated, but resist the urge to cook it excessively. Taste and adjust seasoning as you go, especially after adding the garam masala. Remember, flavors can mellow slightly after frying, so ensure the filling is well-seasoned. - Rolling the Dough Too Thick or Too Thin: The thickness of your samosa dough directly impacts its texture. Dough that’s too thick will result in a heavy, chewy, and bread-like samosa, while dough rolled too thin can tear easily during shaping or burn quickly during frying, making it brittle.
**Solution:** Aim for an even thickness of approximately 1/8 inch (about 3mm). This provides enough structural integrity for handling and yields that perfect balance of crispy yet tender pastry. Practice makes perfect when it comes to rolling! - Frying at an Incorrect Oil Temperature: This is perhaps the most critical factor for crispy, non-greasy samosas. If the oil is too hot, the exterior will brown rapidly while the inside remains uncooked, potentially causing the samosa to burst. If the oil is too cool, the samosas will absorb too much oil, becoming heavy and soggy.
**Solution:** Use a kitchen thermometer to maintain the ideal oil temperature. Start frying at a lower temperature (around 200°F / 95°C) to allow the dough to cook through slowly, then increase the heat towards the end (around 350-375°F / 175-190°C) for a final golden crisp. Fry in small batches to maintain a consistent temperature.
Pro Tips & Science-Backed Secrets for Samosa Success
Crafting perfect beef samosas truly is a blend of art and culinary science. As a food scientist, I can offer these insights to help you achieve professional-level results and truly understand the magic behind each crispy bite:
- The Power of Mise en Place: “Preparation is half the battle.” Ensure all your ingredients are measured, chopped, and ready (mise en place) before you begin assembly. This includes having your beef filling fully cooked and cooled, your dough rested and portioned, and a small bowl of water for sealing at hand. This organized approach minimizes stress and helps maintain a smooth workflow.
- Mastering Flavor Balance: To achieve a truly remarkable filling, consider the interplay of key flavors. The ginger and garlic provide pungency, the spices bring warmth and depth, and a touch of salt enhances everything. A splash of lemon juice or a final sprinkle of fresh cilantro just before filling can introduce a bright, fresh counterpoint that lifts all the rich, savory flavors.
- The Importance of a Cooled Filling: This is a critical scientific secret for crispiness. Using a hot or even warm filling will generate steam inside the raw dough. This steam can make the dough soggy, difficult to handle, and increase the likelihood of the samosa bursting open during frying as trapped steam expands. Always ensure your filling is completely cooled to room temperature, or even slightly chilled, for optimal results.
- Consistency in Shape and Size: Aim for uniformly sized dough portions and consistent shaping of your half-moon cutouts. This isn’t just for aesthetics; it ensures that all your samosas cook evenly in the oil. Samosas of varying sizes will require different cooking times, making it challenging to achieve a perfectly golden and crispy batch.
- Unlocking Flavor with the Maillard Reaction: The browning of your onions and minced beef at the beginning of the filling preparation is crucial. This isn’t just about cooking; it’s about initiating the Maillard reaction – a complex chemical reaction between amino acids and reducing sugars that gives browned food its distinctive flavor and aroma. Ensure your pan is adequately hot and avoid overcrowding to allow for proper browning, developing deeper, richer, and more complex savory notes in your filling.
- Draining for Ultimate Crispiness: After frying, resist the urge to pile the samosas directly onto paper towels. Instead, place them on a wire rack set over paper towels. This allows air to circulate around all sides, preventing steam build-up and ensuring any excess oil drips away, preserving that coveted crisp texture.
Frequently Asked Questions About Beef Samosas
Got a quick question about making beef samosas? We’ve got answers to the most common queries right here:
For the best beef samosas, opt for lean ground beef. It cooks quickly and blends beautifully with the spices, creating a tender and flavorful filling without excess grease. Ground lamb is another excellent choice for a richer flavor.
Absolutely! Baking is a healthier alternative to deep-frying. Preheat your oven to 375°F (190°C), brush your assembled samosas with a little oil or an egg wash for a golden sheen, and bake for 20-25 minutes, or until they are golden brown and crispy. An air fryer also works wonderfully at 350°F (175°C) for 15-20 minutes.
Several factors contribute to soggy samosas. First, ensure your filling is not too wet and has cooled completely before assembling. Excess moisture will steam the dough. Second, fry your samosas at the correct oil temperature (around 200°F initially, then higher to 350-375°F) to ensure the dough crisps up properly and doesn’t absorb too much oil.
Beef samosas pair wonderfully with a variety of dipping sauces. Classic choices include tangy tamarind chutney, refreshing mint chutney, or a cool yogurt raita. They also make a great accompaniment to a simple fresh salad or can be served as part of a larger platter of appetizers.
Samosas typically burst open for a few key reasons: they might be overfilled, not sealed properly, or have air pockets trapped inside. To prevent this, ensure you don’t overstuff the pastry, seal the edges securely with a flour-and-water paste (or just water) and firm pressure, and gently press out any trapped air before sealing.
Traditional beef samosa filling typically features a fragrant blend of spices including ground cumin, ground coriander, chili powder (for heat), and garam masala. Fresh aromatics like grated ginger, garlic, and finely chopped onions are also indispensable for building a deep, rich flavor profile. Green chilies are often added for extra spice.
Yes, absolutely! While homemade dough offers a superior texture, store-bought spring roll wrappers, filo pastry, or even puff pastry can be a convenient shortcut. The flavor of the filling will still shine through. Follow the package instructions for cooking times, as they may differ from homemade dough.
Explore More Samosa Favorites
If you’ve enjoyed making these beef samosas, you might love exploring our other popular samosa recipes and variations:
- Classic Potato Samosas
- Flavorful Chicken Samosas
- Easy 4-Ingredient Samosa Dough Recipe (for a quick start!)
- Versatile Samosa Filling Recipe
- Unique Samosa Pie
- Shortcut Samosas with Puff Pastry
Pin Recipe
Print Recipe
Crispy Beef Samosas
Jennifer Pallian BSc, RD
30 minutes
15 minutes
45 minutes
12 samosas
Ingredients
For the dough:
- 1 ½ cups all-purpose flour
- ½ tsp salt
- 2 tbsp vegetable oil
- ¾ cup plus 1 tbsp water
For the filling:
- 1 tbsp vegetable oil
- 1 medium onion, finely chopped
- 1 tbsp grated fresh ginger
- 1 tsp grated fresh garlic
- 1 tsp salt, divided
- 8 oz (about 225g) lean minced beef
- ½ tsp ground cumin
- ½ tsp ground coriander
- ¼ tsp chili powder (adjust to taste)
- 1 tsp garam masala
- ¼ cup frozen green peas
- 2 green chillies, chopped (optional, for extra heat)
Instructions
Make the Dough
- Combine flour and salt in a large mixing bowl. Stir in vegetable oil, rubbing it into the flour until crumbly.
- Gradually add water, mixing until a soft, pliable dough forms. Knead on a floured surface for 5-7 minutes until smooth.
- Form the dough into a ball, wrap it in a damp kitchen towel or plastic wrap, and let it rest at room temperature for 30 minutes.
Prepare the Filling
- Heat 1 tbsp oil in a deep saucepan over medium-high heat.
- Add onion, ginger, garlic, and ½ tsp salt; cook for 2-3 minutes until the onion softens.
- Add minced beef, remaining ½ tsp salt, cumin, coriander, and chili powder. Cook for 8-10 minutes, breaking up the beef and stirring occasionally, until browned and liquid has evaporated.
- Sprinkle with garam masala and add frozen peas. Stir and cook for 3-5 more minutes.
- Taste and adjust salt if needed. Stir in chopped chillies if using. Remove from heat and let cool completely.
Shape the Samosas
- Divide the dough into 6 equal portions. Roll each into a thin oval (approx. 6-7 inches long), then slice in half lengthwise to create half-moon shapes.
- Take one half-moon. Moisten the straight edge with water, then fold it into an open cone shape, overlapping and pressing firmly to seal.
- Fill the cone with about 1.5-2 tbsp of the cooled beef filling. Moisten the open edges, then pinch and pleat to seal into a triangular shape with a flat bottom.
- Repeat with the remaining dough and filling. Place assembled samosas on a parchment-lined tray.
Fry the Samosas
- Pour vegetable oil into a deep pot to a depth of 3 inches. Heat over medium heat to about 200ºF (95°C).
- Carefully fry the samosas in batches (3-4 at a time) for about 15 minutes over medium-low heat, until light golden.
- Increase heat to medium-high and cook for 3-5 more minutes until deep golden brown and crispy.
- Remove with a slotted spoon and place on a wire rack lined with paper towels to drain excess oil. Serve warm.
Notes
Filling Moisture: Ensure the beef filling is not too wet. Excess moisture can make the samosas soggy and may cause them to burst during frying. Cook until the liquid has completely evaporated and the mixture is fairly dry.
Cooling the Filling: Allow the beef filling to cool completely before filling the samosa dough. Hot filling can make the dough soft and difficult to handle, and can create steam that makes the samosas soggy or causes them to burst.
Dough Thickness: Roll out the dough to an even thickness of about 1/8 inch (3mm). This uniform thickness ensures the samosas cook evenly and achieve a perfect, crisp texture. Dough that is too thick will be chewy, while dough that is too thin may tear or become brittle.
Nutrition Information (per samosa)
Carbohydrates: 13g |
Protein: 5g |
Fat: 8g |
Saturated Fat: 2g |
Polyunsaturated Fat: 2g |
Monounsaturated Fat: 3g |
Trans Fat: 0.3g |
Cholesterol: 13mg |
Sodium: 331mg |
Potassium: 79mg |
Fiber: 2g |
Sugar: 1g |
Vitamin A: 37IU |
Vitamin C: 3mg |
Calcium: 19mg |
Iron: 1mg
Nutrition information is automatically calculated and should only be used as an approximation.
Tried this recipe? Share your thoughts!
Leave a comment below to let us know how your beef samosas turned out!