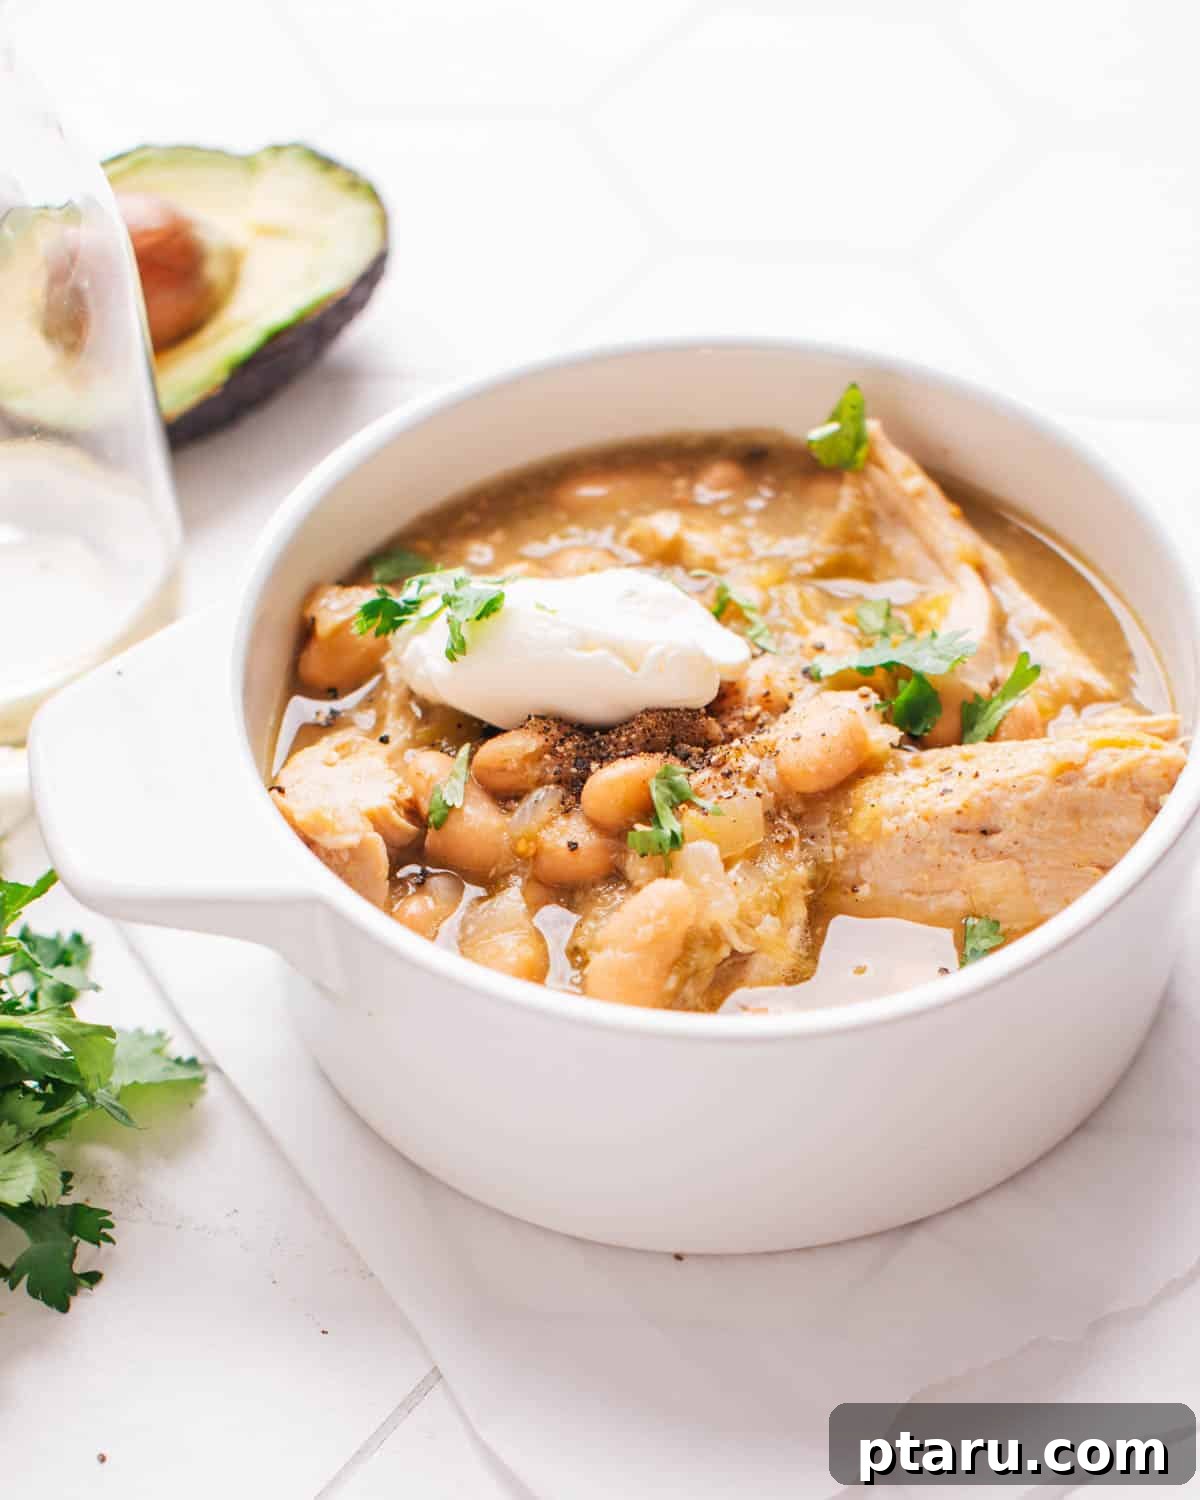
Welcome to your new go-to recipe for a truly unforgettable Green Chicken Chili. This isn’t just any chili; it’s a vibrant, flavor-packed meal that effortlessly brings together tangy, savory, and subtly spicy notes in a single pot. Perfect for cozy evenings or quick weeknight dinners, this recipe promises delicious results in under an hour, largely thanks to a brilliant secret ingredient that simplifies the cooking process without compromising on taste. Prepare to transform your dinner routine with this incredibly satisfying and easy-to-make dish.
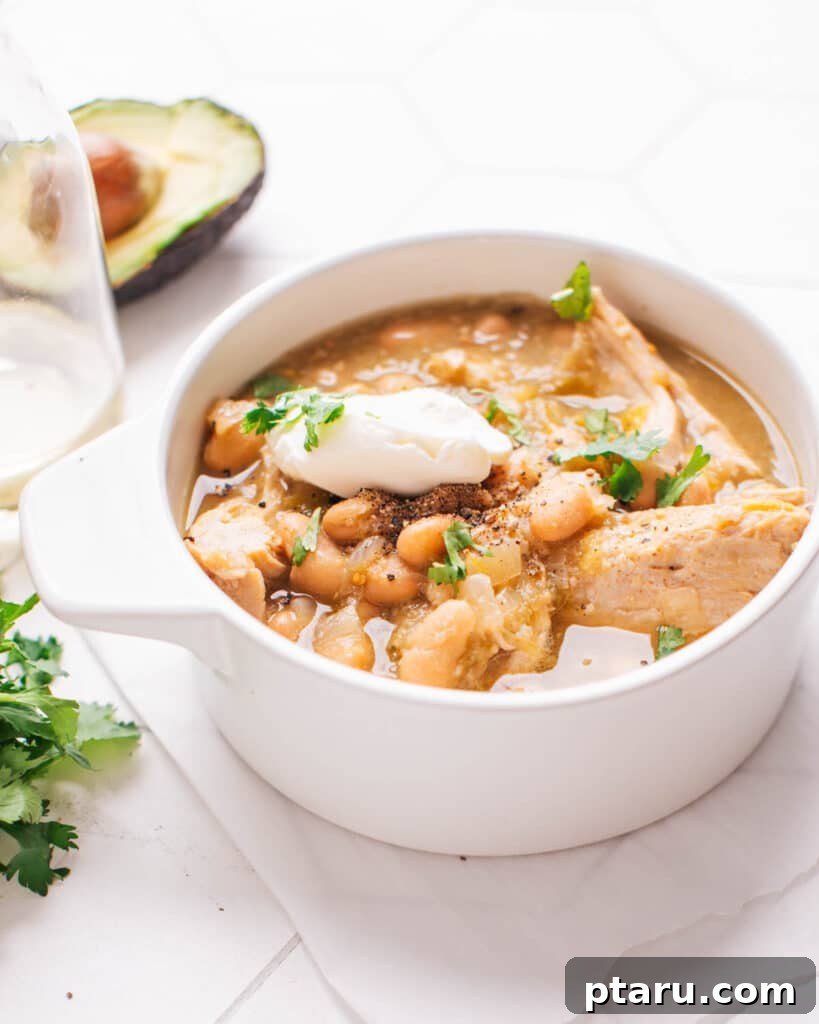
Why This Green Chicken Chili Will Become Your Favorite
Beyond its vibrant color and incredible taste, there are numerous reasons why this Green Chicken Chili stands out as a must-try recipe. It’s designed for maximum flavor with minimal effort, making it ideal for both seasoned cooks and kitchen novices alike.
- The Power of the Secret Ingredient: Salsa Verde. The true magic of this chili lies in its reliance on high-quality salsa verde (also known as green salsa). This seemingly simple jarred ingredient is a flavor powerhouse, expertly blending the distinct tang of tomatillos with the subtle heat of green chilies (like poblanos or jalapeños) and the aromatic depth of garlic. It acts as an instant flavor base, infusing the chili with a complex, authentic taste that would otherwise require multiple fresh ingredients and more prep time. It’s a genius shortcut to achieving profound, layered flavors effortlessly.
- Effortless One-Pot Wonder: Quick and Easy. Life is busy, and sometimes the thought of elaborate cooking can be daunting. This Green Chicken Chili is a true one-pot solution, streamlining both the cooking and cleanup processes. From sautéing your aromatics to simmering the chicken and beans, everything happens in a single pot. This not only saves you precious time in the kitchen but also makes post-dinner cleanup a breeze. The smart use of canned beans and jarred salsa verde further cuts down on preparation, allowing you to go from raw ingredients to a comforting meal in under an hour.
- Perfectly Tender Texture Every Time. One common challenge with chicken chili is ensuring the chicken remains juicy and tender. Our method addresses this by cooking whole chicken breasts (or thighs) directly in the flavorful sauce before shredding them. This gentle simmering technique prevents the chicken from drying out, allowing it to absorb all the delicious liquids and spices, resulting in incredibly moist, fall-apart tender chicken. Paired with creamy cannellini beans, the chili achieves a delightful, satisfying texture that’s neither too thick nor too thin, making every spoonful a joy.
This chili is remarkably forgiving, making it nearly impossible to “mess up.” Its robust flavors and straightforward process guarantee a delicious outcome, which is why it’s so easy to fall in love with.
Essential Ingredients for Your Green Chicken Chili
Crafting this flavorful Green Chicken Chili requires a blend of fresh produce and convenient pantry staples. Here’s a detailed look at what you’ll need to gather, along with some insightful notes on each component.
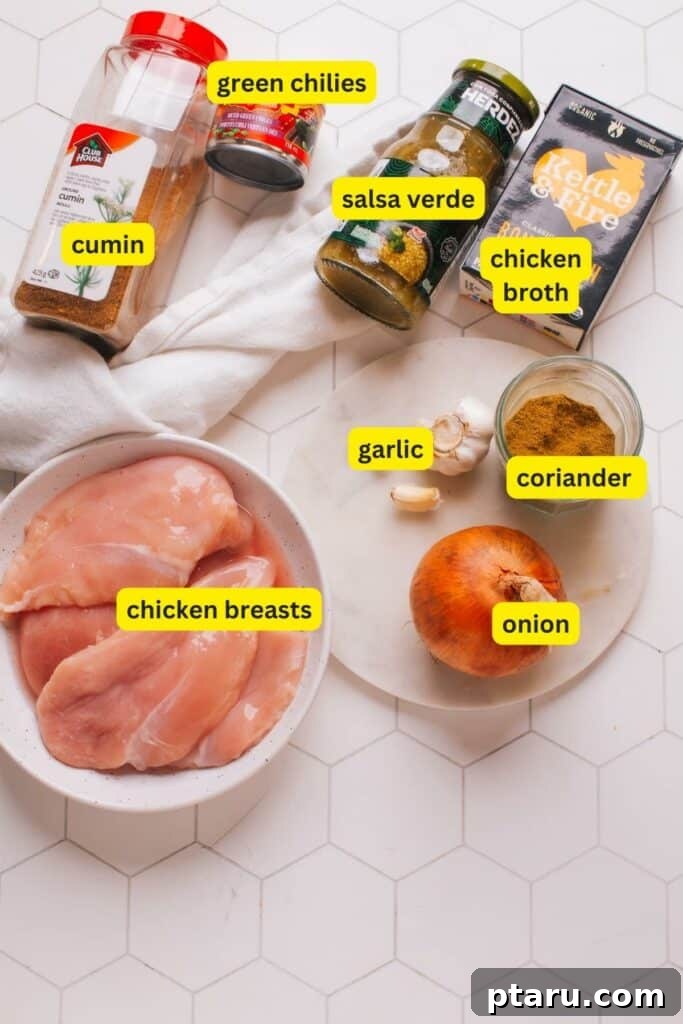
Green Chicken Chili Ingredients Breakdown
- Chicken Breasts or Boneless, Skinless Chicken Thighs: The lean protein base of our chili. Chicken breasts offer a lighter texture, while thighs provide richer flavor and juicier results due to their higher fat content.
- Olive Oil: The foundation for sautéing, helping to build the initial flavor layers by softening the aromatics.
- Onion and Garlic: These indispensable aromatics form the backbone of the chili’s flavor. Diced onions add a sweet, pungent base, while minced garlic contributes a warm, savory depth.
- Ground Cumin, Salt, and Pepper: Key seasonings that define the chili’s profile. Cumin provides an earthy, warm spice essential to Mexican-inspired dishes. Salt balances all the flavors, and pepper adds a subtle kick.
- Low-Sodium Chicken Broth: The liquid component that creates the savory, simmering base for the chili. Using low-sodium broth allows you to control the overall saltiness of the dish.
- Salsa Verde (Green Salsa): Our secret weapon! This jarred green salsa is made from tomatillos, green chilies (such as poblano or jalapeño), and often garlic and onion. It provides the signature tangy, bright, and moderately spicy flavor.
- White Beans: Opt for cannellini, great northern, or white kidney beans. These add a creamy texture, heartiness, and a boost of plant-based protein and fiber, making the chili more substantial.
- Diced Green Chiles: Typically mild, these canned chilies enhance the green chili flavor without adding excessive heat, contributing an authentic Southwestern nuance.
- Chopped Cilantro: A final flourish of freshness, cilantro adds a bright, herbaceous note that perfectly complements the chili’s rich flavors.
- Fresh Lime Juice: A squeeze of fresh lime juice at the end brightens the entire dish, cutting through the richness and enhancing the tang of the salsa verde.
- Optional Toppings: Customize your bowl with avocado slices for creamy richness, shredded cheese (like Monterey Jack or cheddar) for gooey texture, a dollop of sour cream for cooling contrast, and extra fresh cilantro for garnish.
Customizing Your Chili: Variations and Substitutions
This recipe is incredibly flexible, allowing you to tailor it to your preferences or whatever you have on hand. Don’t hesitate to get creative!
- Chicken Shortcuts: For an even faster meal, use pre-cooked rotisserie chicken. Simply shred it and add it to the chili during the last 10 minutes of simmering, skipping the initial chicken cooking step.
- Bean Alternatives: If cannellini beans aren’t available, navy beans or Great Northern beans are excellent substitutes, offering similar creaminess and texture.
- Boost the Veggies: Enhance the nutritional value and texture by stirring in corn kernels (frozen or canned), diced bell peppers (green or red), or even a handful of fresh spinach during the last few minutes of cooking.
- Adjusting Heat Levels: The spiciness of your chili can be easily controlled. Choose a milder or spicier salsa verde according to your preference. For an extra kick, add a pinch of cayenne pepper, a few dashes of hot sauce, or fresh chopped jalapeños or serrano peppers (remove seeds for less heat).
- Make it Creamy: For a richer, creamier chili, stir in 2-4 ounces of cream cheese or a splash of heavy cream at the very end, allowing it to melt and combine. For a dairy-free option, a swirl of full-fat coconut milk can add a lovely richness.
- Vegetarian Option: To make this chili vegetarian, simply omit the chicken and use vegetable broth instead of chicken broth. Boost the protein by adding an extra can of white beans or incorporating other hearty vegetables like diced zucchini or mushrooms.
Essential Kitchen Tools for This Recipe
You don’t need a professional kitchen to whip up this amazing chili. A few basic tools will do the trick:
- Large Pot or Dutch Oven: This is your primary vessel for sautéing, simmering, and bringing all the flavors together. A Dutch oven is ideal for its even heat distribution.
- Wooden Spoon: Perfect for stirring ingredients and scraping the bottom of the pot to prevent sticking.
- Two Forks: Your go-to tools for easily shredding the cooked chicken directly in the pot.
- Cutting Board and Sharp Knife: Essential for safely and efficiently dicing onions, mincing garlic, and chopping fresh cilantro.
- Citrus Juicer (Optional): While you can squeeze lime by hand, a juicer makes the process much easier and extracts more juice.
My Favorite Dutch Oven For Chilis
With these straightforward ingredients, adaptable variations, and simple kitchen tools, you’re perfectly equipped to create a comforting and incredibly flavorful pot of Green Chicken Chili that will impress everyone.
How to Make Green Chicken Chili: A Step-by-Step Guide
Get ready to cook! This easy-to-follow guide breaks down each step of making your Green Chicken Chili, ensuring a delicious and satisfying meal with minimal fuss.
Step 1: Prepare the Flavorful Base
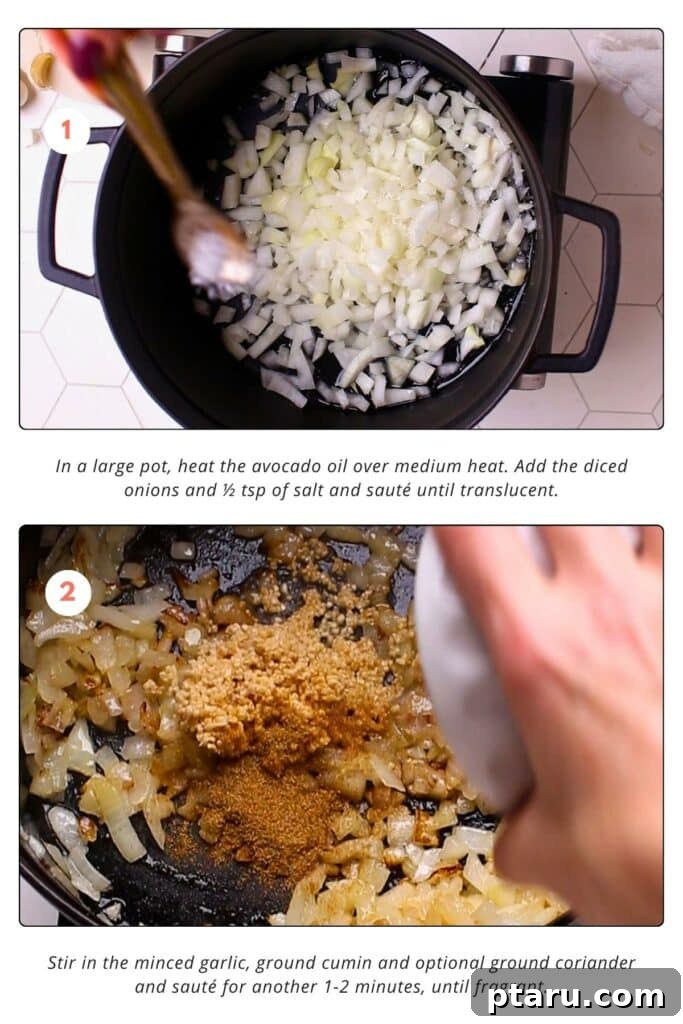
- Begin by heating 3 tablespoons of olive oil in your large pot or Dutch oven over medium heat. Once shimmering, add the diced large onion along with ½ teaspoon of kosher salt. Sauté the onion for about 5-7 minutes, stirring occasionally, until it becomes soft and translucent, releasing its natural sweetness.
- Next, stir in 2 tablespoons of minced garlic and 1 teaspoon of ground cumin. If using, add ¼ teaspoon of ground coriander now as well. Continue to sauté for another 1-2 minutes. This step is crucial as it allows the spices to “bloom” in the hot oil, intensifying their aromas and flavors. The kitchen will begin to smell wonderfully fragrant.
Step 2: Season the Chicken
- While the base is cooking, prepare your chicken. Sprinkle the whole chicken breasts (or thighs) evenly with the remaining 1 teaspoon of kosher salt. This initial seasoning ensures the chicken is flavorful from the inside out.
Step 3: Combine Main Liquid Ingredients
- Pour the entire 16-ounce jar of green salsa (salsa verde), 2 cups of low-sodium chicken broth, and the 4-ounce can of diced green chiles into the pot with the sautéed aromatics. Stir well to combine all the liquids and spices thoroughly, creating a cohesive and aromatic broth.

Step 4: Cook the Chicken to Perfection
- Gently place the seasoned chicken breasts or thighs into the simmering liquid. Ensure they are mostly submerged. Bring the entire mixture to a gentle simmer, then cover the pot with a lid. Let it cook for approximately 20-25 minutes. The goal is to cook the chicken thoroughly until it reaches an internal temperature of 165°F (74°C). Simmering, rather than boiling, is key to keeping the chicken moist and tender.
Step 5: Shred the Tender Chicken
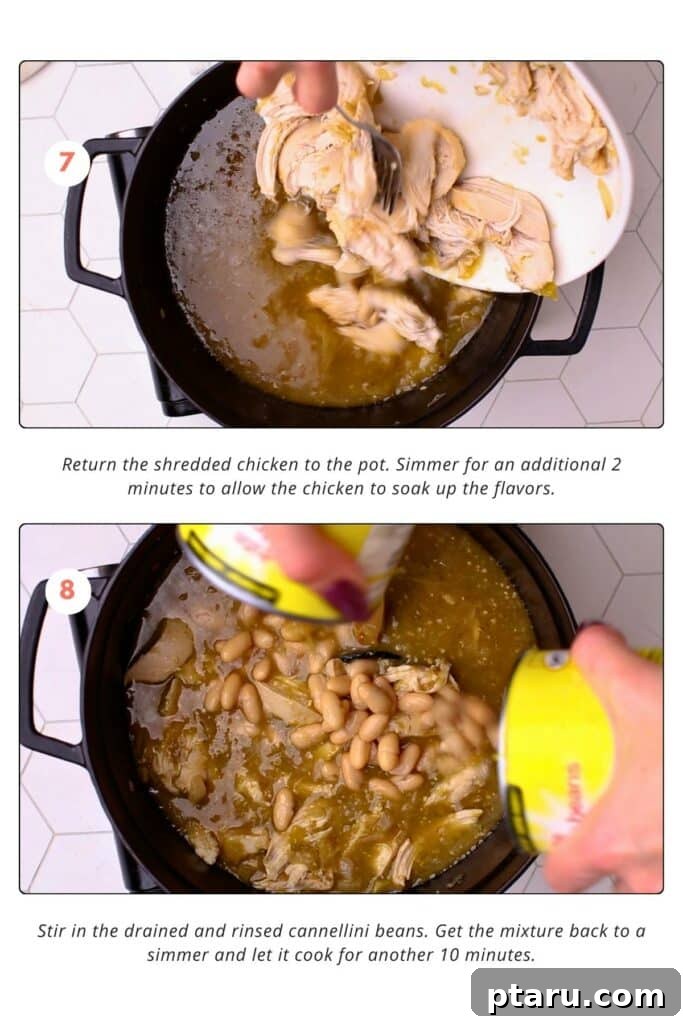
- Carefully remove the fully cooked chicken breasts from the pot using tongs or a slotted spoon. Transfer them to a clean cutting board or a shallow dish. Using two forks, shred the chicken into bite-sized pieces. It should be very tender and easy to pull apart. Once shredded, return all the chicken back into the pot with the chili base. Stir it in, allowing the chicken to soak up even more of the delicious green chili flavors for another 2 minutes.

Step 6: Add Beans and Simmer
- Drain and rinse two 19-ounce cans of white beans (cannellini, Great Northern, or navy beans) thoroughly. Stir these rinsed beans into the pot with the shredded chicken and chili base. Bring the mixture back to a gentle simmer and let it cook for another 10 minutes. This allows the beans to warm through and absorb the incredible flavors of the chili.
Step 7: The Final Flavor Touches
- Just before serving, stir in the fresh chopped cilantro and the juice of one lime. Give the chili a good stir to ensure all the fresh elements are evenly distributed.
- Taste the chili and adjust the seasoning as needed. You might want to add a pinch more salt, pepper, or even a dash of hot sauce if you prefer more heat. The fresh lime brightens the entire dish, and cilantro adds a burst of herbaceousness.
Step 8: Serve Your Delicious Chili
- Once the flavors have perfectly melded, ladle the hot Green Chicken Chili into individual bowls.
- Now comes the fun part: topping! Offer an array of optional garnishes like creamy avocado slices, shredded cheese, a dollop of cooling sour cream, or extra fresh cilantro. A few pickled jalapeños can also add a delightful tangy kick.
And there you have it! A hearty, flavorful, and vibrant pot of Green Chicken Chili, ready to be savored. Enjoy every comforting spoonful!

Make Ahead and Storage Tips for Green Chicken Chili
One of the many advantages of this Green Chicken Chili recipe is how well it adapts to meal prepping and future enjoyment. Whether you’re planning ahead for a busy week or want to save leftovers, these tips will ensure your chili stays delicious.
- Preparation in Advance: This chili is a fantastic make-ahead meal. You can prepare the entire pot up to 2-3 days before you plan to serve it. Allow it to cool completely before transferring it to an airtight container. Store it in the refrigerator, and the flavors will actually deepen and meld even further overnight, often tasting even better the next day!
- Effortless Reheating: To reheat, simply transfer the chili to a pot or Dutch oven and warm it gently over low to medium heat on the stovetop, stirring occasionally, until it’s heated through. If you’re reheating individual portions, a microwave-safe bowl works perfectly. Heat in 1-minute intervals, stirring between each, until it reaches your desired temperature. Add a splash of broth or water if it seems too thick.
- Freezing for Future Meals: This Green Chicken Chili freezes beautifully, making it an excellent option for long-term meal planning. Once cooled, divide the chili into freezer-safe airtight containers or heavy-duty freezer bags. Ensure you leave a little headspace for expansion. It can be stored in the freezer for up to 3 months without losing quality.
- Thawing Frozen Chili: For best results, thaw frozen chili overnight in the refrigerator. Once thawed, reheat using the stovetop or microwave methods described above. You can also reheat directly from frozen on the stovetop over very low heat, stirring frequently and breaking up the frozen block, though this will take longer.
- Refrigerator Storage: Any leftover chili can be safely stored in an airtight container in the refrigerator for up to 5 days. Always ensure it’s cooled quickly after cooking to prevent bacterial growth.
How to Serve This Versatile Green Chicken Chili
This Green Chicken Chili is a wonderfully versatile dish, enjoyable in many forms beyond just a bowl. Its balanced flavors and hearty consistency make it a crowd-pleaser for various occasions.
- The Classic Chili Bowl: The most straightforward way to enjoy this chili is in a warm bowl, generously topped with your favorite garnishes. Because it’s a thick, saucy chili, it feels both substantial and comforting, much like a hearty soup.
- Hearty Over Rice: For a more complete and extended meal, serve this flavorful chili over a bed of warm, fluffy white or brown rice. The rice beautifully absorbs all the vibrant flavors of the chili, making each bite even more satisfying.
- With Warm Tortillas: Scoop up the chili with warm corn or flour tortillas for a hands-on, interactive dining experience. This method is particularly popular and adds a delightful textural contrast.
- Creative Culinary Uses: Don’t limit yourself to just bowls! Use leftover chili as a filling for burritos or quesadillas, spoon it over nachos for a quick appetizer, or even use it as a topping for baked potatoes.
Delicious Green Chicken Chili Toppings:
Toppings are key to personalizing your chili experience. Offer a diverse spread so everyone can customize their bowl:
- Sliced Avocado: Adds a creamy, rich texture and healthy fats.
- Shredded Cheese: Monterey Jack, cheddar, or a Mexican blend melts beautifully and adds a savory note.
- Sour Cream or Greek Yogurt: Offers a cooling, tangy contrast to the chili’s spice.
- Fresh Cilantro: A final sprinkle for a burst of fresh, herbaceous flavor.
- Pickled Jalapeños: Provides a tangy, slightly spicy crunch.
- Crushed Tortilla Chips: For added crunch and a salty kick.
- Diced Red Onion: Adds a sharp, fresh bite.
Perfect Side Dishes for Green Chicken Chili:
Round out your meal with these complementary side dishes:
- Cornbread or Cornbread Casserole: A classic pairing, perfect for soaking up every last bit of chili.
- Tortilla Chips: Excellent for dipping and adding crunch.
- Simple Green Salad: A light, crisp salad with a vinaigrette dressing provides a refreshing contrast.
- Mexican Rice: For an extra dose of flavor and carbohydrates.
For a comprehensive list of ideas, explore all the best side dishes to eat with chili.
Frequently Asked Questions About Green Chicken Chili
Here are answers to some of the most common questions about making and enjoying this delicious Green Chicken Chili:
Absolutely! Boneless, skinless chicken thighs are an excellent alternative. They tend to be more forgiving during cooking, offering a richer flavor and even juicier texture than chicken breasts.
Yes, easily! To convert this to a vegetarian dish, simply omit the chicken entirely and swap the chicken broth for vegetable broth. To ensure it’s still hearty and satisfying, consider adding an extra can of white beans, or incorporating other vegetables like diced zucchini, corn, or bell peppers.
The spiciness level of this chili is generally mild to medium, largely depending on the specific brand of salsa verde you choose. Canned diced green chilies are typically very mild. If you prefer a milder chili, select a mild green salsa. For those who enjoy more heat, opt for a spicy salsa verde or add fresh jalapeños or a dash of cayenne pepper.
If you don’t have cannellini beans, Great Northern beans or navy beans are perfect substitutes. They offer a similar creamy texture and mild flavor that blends well with the chili.
When stored properly in an airtight container, your Green Chicken Chili will remain fresh and delicious in the refrigerator for up to 5 days.
Yes, this Green Chicken Chili recipe is naturally gluten-free. However, it’s always a good practice to double-check the labels of your specific salsa verde, chicken broth, and canned beans to ensure they don’t contain any hidden gluten-containing additives, as formulations can vary by brand.
This recipe results in a thick, hearty chili, not a thin soup. The combination of shredded chicken and creamy cannellini beans provides a substantial texture, while the broth ensures it’s saucy enough to be comforting and flavorful.
From a culinary perspective, “Chili Verde” (which means “Green Chili” in Spanish) traditionally refers to a specific Mexican stew, typically featuring slow-cooked pork in a sauce made with tomatillos and green chili peppers. “Green Chili” is a broader term that encompasses any chili with a green hue, often featuring chicken, white beans, and green components like tomatillos or green chilies, as in our recipe. While similar in flavor profile, the ingredients and preparation can differ.
For this Green Chicken Chili, low-sodium chicken broth is highly recommended. It provides a rich, savory base that enhances the chicken and spices without adding excessive salt. Vegetable broth is also an excellent alternative if you’re aiming for a vegetarian version or prefer a lighter flavor.
Explore More Delicious Chili Recipes
If you’ve fallen in love with this Green Chicken Chili, you’re in for a treat! The world of chili is vast and varied, offering countless flavors to discover. Here are some other fantastic chili recipes to expand your culinary repertoire:
- Cream Cheese Chicken Chili – This unique chili offers a delightful creamy and tangy twist, thanks to the addition of cream cheese, creating a rich and comforting experience.
- White Chicken Chili – A lighter, often milder alternative to traditional beef chili, made with tender chicken, white beans, and a creamy, savory broth.
- Green Chile (Authentic Pork Chile Verde) – For those craving traditional flavors, this recipe delivers fall-apart tender pork bathed in a rich, tangy, and spicy green chili sauce.
- Chili Con Carne – The ultimate classic chili recipe, renowned for its hearty and bold flavor, typically featuring ground beef, chili powder, and a medley of spices for a truly satisfying dish.
- Instant Pot Chicken Chili – Designed for convenience, this recipe leverages the pressure cooker to create tender chicken, hearty beans, and savory spices in a fraction of the time, perfect for busy weeknights.
To truly elevate your chili creations, consider making your own spice blends. A homemade Chili Seasoning Recipe allows you to customize the flavor profile and ensures the freshest, most vibrant spices in your pot, often more economically than store-bought mixes.
And for the ultimate chili night experience, don’t forget the accompaniments! Explore my comprehensive suggestions on What to Serve with Chili. From a diverse array of toppings and complementary side dishes to delightful desserts, you’ll find everything you need to create a complete and memorable meal.

Green Chicken Chili
Video
Equipment
-
Measuring Cups and Spoons
-
Knife
-
Cutting Board
-
Dutch Oven
-
Tongs
-
Wooden Spoon
-
Air Tight Containers
Ingredients
- 2 lbs chicken breasts
- 1 ½ tsp kosher salt divided use
- 3 tbsp avocado oil or vegetable oil
- 1 large onion diced
- 2 tbsp minced garlic
- 1 tsp ground cumin
- ¼ tsp ground coriander optional
- 1 16-ounce jar green salsa (salsa verde)
- 2 cups regular chicken broth
- 2 19- oz cans white beans
- 1 4-ounce can diced green chiles
- Sour cream pickled jalapenos and/or fresh cilantro for garnish
Instructions
Prepare the Base
-
In a large pot, heat the avocado oil over medium heat.
-
Add the diced onions and ½ tsp of salt and sauté until translucent.
-
Stir in the minced garlic, ground cumin and optional ground coriander and sauté for another 1-2 minutes, until fragrant.
Season the Chicken
-
Season the whole chicken breasts evenly with 1 tsp of kosher salt.
Add Remaining Ingredients
-
Pour the green salsa, chicken broth, and diced green chiles into the pot.
Cook the Chicken
-
Nestle in the chicken breasts, bring to a simmer, cover, and let it cook for about 20 minutes or until the chicken breasts are fully cooked through.
Shred the Chicken
-
Remove the chicken breasts from the pot and shred them using two forks.
Combine and Cook Further
-
Return the shredded chicken to the pot.
-
Simmer for an additional 2 minutes to allow the chicken to soak up the flavors.
Add Beans
-
Stir in the drained and rinsed cannellini beans.
-
Get the mixture back to a simmer and let it cook for another 10 minutes.
Season and Serve
-
Add in the chopped cilantro and the juice of one lime. Give it a good stir to mix everything well.
-
Taste and adjust seasoning with more to taste.
-
Serve hot, garnished with sour cream, pickled jalapenos, and/or fresh cilantro.
Notes
*This recipe was tested using regular chicken broth. If using unsalted, you’ll have to add another 1 tsp of kosher salt to season it.
Nutrition
Nutrition information is automatically calculated, so should only be used as an approximation.