
There’s a universally acknowledged truth among dessert lovers: the raw cookie dough is often just as good, if not better, than the baked cookies themselves. But the lingering question of “is it safe?” often stops us in our tracks. Enter our utterly irresistible Edible Cookie Dough Bites! These charming, bite-sized delights are crafted to perfectly mimic the creamy, sweet, chocolatey goodness of classic chocolate chip cookie dough, all while being completely safe to enjoy raw. Forget the oven and those pesky raw egg concerns – these no-bake cookie dough truffles are your dream come true. Whether you choose to enrobe them in a smooth, rich chocolate coating or savor them plain, they promise a delightful indulgence that’s perfect for satisfying those spontaneous cookie dough cravings anytime, anywhere.

Why You’ll Fall in Love with These Safe No-Bake Cookie Dough Bites
For anyone who has ever secretly spooned raw dough directly from the mixing bowl, these little cookie dough truffles represent a culinary revelation. They perfectly capture the nostalgic comfort and exquisite taste of homemade chocolate chip cookie dough in a perfectly portioned, incredibly simple, and entirely safe format. They’re more than just a treat; they’re an experience waiting to happen, offering a guilt-free indulgence that’s hard to resist. Here’s why these edible cookie dough bites are destined to become a beloved staple in your dessert repertoire:
- Guilt-Free Indulgence, Every Time: The innovative method for heat-treating flour is a game-changer, ensuring these bites are completely safe to consume without any baking. Coupled with a recipe that wisely omits raw eggs, you can enjoy every creamy, chocolatey morsel with absolute peace of mind, free from worries about foodborne illness.
- Effortlessly Easy Preparation: Boasting a straightforward list of common pantry ingredients and a refreshingly simple, no-bake process, these delectable bites can be whipped up in remarkably little time. They are the ideal solution for satisfying impromptu cravings, preparing a quick yet impressive dessert for guests, or simply enjoying a sweet moment without the fuss of complex baking.
- Unforgettable Flavor & Perfectly Balanced Texture: Each bite delivers the quintessential chocolate chip cookie flavor profile – rich, sweet, and wonderfully satisfying, with hints of vanilla and brown sugar. The texture is perfectly balanced, offering a smooth, melt-in-your-mouth experience punctuated by delightful, soft bursts of chocolate. It’s truly like snacking on your favorite cookie dough, but elevated and perfected.
- Versatile, Visually Appealing, and Perfect for Any Occasion: Beyond their incredible taste, these edible cookie dough bites are surprisingly versatile and incredibly charming. They make a really pretty and festive addition to holiday cookie trays, bringing a special touch to Christmas gatherings or other celebrations. They also serve as fantastic homemade gifts, lovingly packaged for friends and family, or as delightful contributions to any party spread, guaranteed to impress and disappear quickly.
- A Modern Classic for All Ages: In a world that values instant gratification and safe indulgence, these cookie dough bites truly stand out. They embody the pure joy of childhood treats with the invaluable peace of mind of responsible preparation, making them a modern classic that appeals to both children and adults alike. Prepare to become everyone’s favorite baker (even without an oven!).

Essential Ingredients for These Decadent Chocolate Chip Cookie Dough Bites
Ready to embark on a delightful culinary adventure and create the most exquisite Chocolate Chip Cookie Dough Bites? You’ll be pleased to discover that the ingredient list is composed of readily available, basic pantry staples, ensuring that this indulgent treat is always within easy reach. Understanding the role of each component, along with exploring exciting variations and the right kitchen tools, will make your no-baking experience seamless, successful, and incredibly enjoyable.
Core Ingredients for Your No-Bake Edible Cookie Dough Balls
Each ingredient in this recipe plays a crucial, distinct role in achieving the perfect flavor, texture, and stability for your edible cookie dough balls. Appreciating their purpose will help you master the magic behind this wonderfully simple treat:
- All-Purpose Flour: This forms the foundational structure and body of our cookie dough bites. Critically, unlike traditional cookie dough for baking, it is absolutely vital to heat-treat the flour before mixing it into the dough. This essential step renders it completely safe for raw consumption, eliminating any food safety concerns.
- Salt: Far from being a minor detail, a small pinch of salt is a culinary masterstroke. It perfectly balances and enhances the sweetness from the sugars and the inherent richness of the chocolate, bringing all the complex flavors into a harmonious and irresistible balance.
- Unsalted Butter (Softened): Butter is undeniably the heart and soul of any truly exceptional cookie dough. When softened to room temperature, it creams beautifully and effortlessly with the brown sugar, contributing a rich, luxurious, and creamy texture, alongside that irreplaceable, deeply satisfying buttery flavor that makes these bites so utterly addictive.
- Brown Sugar (Firmly Packed): This isn’t just about sweetness; brown sugar imparts a wonderful depth of flavor thanks to its natural molasses content. Furthermore, it is instrumental in achieving that distinctively soft, moist, and delightfully chewy cookie dough texture that is universally adored.
- Pure Vanilla Extract: Often considered the soul of countless classic desserts, pure vanilla extract infuses the dough with a warm, inviting, aromatic, and classically sweet essence. It subtly elevates the entire flavor profile of your cookie dough, making it more complex and appealing. Opt for a good quality vanilla for the best results.
- Milk (Any Kind – Dairy or Plant-Based): A measured amount of milk is key to moistening the dough, bringing all the ingredients together into the ideal consistency for rolling and shaping. It ensures the dough is smooth, pliable, and easy to work with, preventing it from becoming crumbly or dry.
- Chocolate Chips (Mini or Regular): The undisputed star of these edible cookie dough bites! Chocolate chips provide delightful bursts of sweet, melty, and utterly satisfying chocolate in every single bite. While regular chocolate chips work wonderfully, mini chocolate chips are often favored for truffles or bites, as they tend to distribute more evenly, ensuring a consistent chocolatey experience in every morsel.
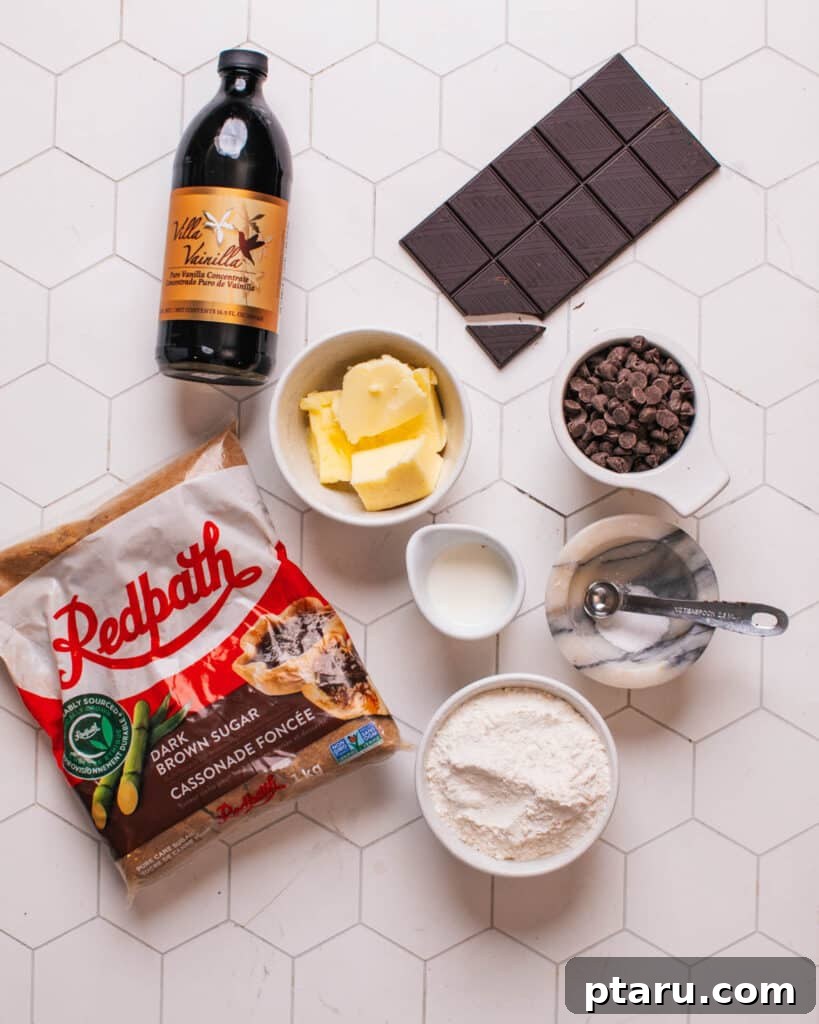
For the Decadent Chocolate Coating:
While the edible cookie dough bites are undeniably delicious on their own, enrobing them in a smooth chocolate coating adds an extra layer of decadence and creates a stunning, professional presentation, transforming them into elegant, bite-sized truffles.
- High-Quality Chocolate (Chips or Chopped Bars): For the smoothest, glossiest, and most professional-looking finish, especially if presentation is paramount, high-quality chocolate bars (finely chopped) are highly recommended. However, readily available and budget-friendly milk or dark chocolate chips will also work perfectly well, offering a simpler melting process and delicious results. Feel free to choose your preferred type of chocolate to match your taste.
- Oil (Neutral-Flavored, e.g., Coconut or Vegetable Oil): A small but critical amount of neutral oil is the secret to achieving a beautifully thin, smooth, and wonderfully workable chocolate coating. It significantly aids the chocolate in melting more evenly, prevents it from becoming too thick or seizing, and allows for effortless dipping, resulting in a flawless, shiny finish.
Optional, but Highly Recommended: A delicate sprinkle of flaky sea salt on top of the wet chocolate coating. This simple yet sophisticated addition is a true game-changer, providing a delightful textural contrast and a sophisticated hint of salinity that masterfully enhances the richness of the chocolate and cuts through the sweetness of the cookie dough, creating an incredibly balanced and utterly addictive flavor profile that will leave everyone craving more.

Unlimited Variations and Smart Substitutions to Customize Your Bites
One of the most exciting aspects of these edible cookie dough bites is their incredible adaptability. This recipe serves as a fantastic canvas for your culinary creativity. Feel absolutely free to unleash your inner chef and customize them to suit your exact taste preferences, seasonal themes, or dietary needs. The possibilities for delicious modifications are truly endless!
- Add a Delightful Nutty Crunch: For an extra layer of texture, a satisfying crunch, and a richer, more complex flavor profile, consider folding in finely chopped nuts such as pecans, walnuts, almonds, or even pistachios into the cookie dough. For an even deeper, more robust flavor, try lightly toasting the nuts in a dry pan for a few minutes before adding them to the dough.
- White Chocolate Wonderland: For a sweeter, creamier, and visually lighter twist, swap out the traditional semi-sweet chocolate chips for white chocolate chips within the cookie dough. Alternatively, use melted white chocolate for the coating to create a beautiful, elegant contrast with the brown dough, or an entirely white, luxurious treat. You could even create a stunning marbled effect by drizzling both dark and white chocolate over the finished bites.
- Embrace Gluten-Free Indulgence: Making these delicious bites gluten-free is remarkably simple and straightforward! Easily substitute the all-purpose flour with your favorite gluten-free flour blend. For optimal results, ensure it’s a 1:1 baking blend designed to replace wheat flour directly. Some culinary adventurers also find success experimenting with almond flour, which can impart a delicate nutty flavor and a denser texture, though it might require minor adjustments to the liquid content for the perfect consistency.
- Dairy-Free & Vegan Friendly Options: Effortlessly transform this recipe into a delightful vegan treat. Simply opt for a high-quality vegan butter alternative and a plant-based milk (almond, soy, oat, or cashew milk all work wonderfully and contribute slightly different flavor nuances). Crucially, remember to double-check and verify that your chosen chocolate chips are also certified dairy-free to ensure the entire recipe remains completely plant-based.
- Flavor Extract Adventures: While the classic warmth of vanilla is always a winner, don’t hesitate to embark on flavor extract adventures! A touch of almond extract can introduce a sophisticated, marzipan-like depth, while peppermint extract can create a wonderfully festive, refreshing mint chocolate experience, especially during the holiday season. Other intriguing options include coconut extract for a tropical vibe, orange zest/extract for a citrusy zing, or even a hint of espresso extract to deepen the chocolate notes.
- Candy & Topping Galore: Beyond just chocolate chips, the possibilities for mix-ins are vast! Consider folding in mini M&M’s for color and crunch, crushed Oreos for a cookies-and-cream twist, colorful sprinkles for a celebratory feel, buttery toffee bits, or even small, chewy chopped caramel pieces directly into the dough for varied textures and exciting flavors. For external toppings, get creative with shredded coconut, finely chopped pistachios, a dusting of cocoa powder, or even edible glitter for extra sparkle.
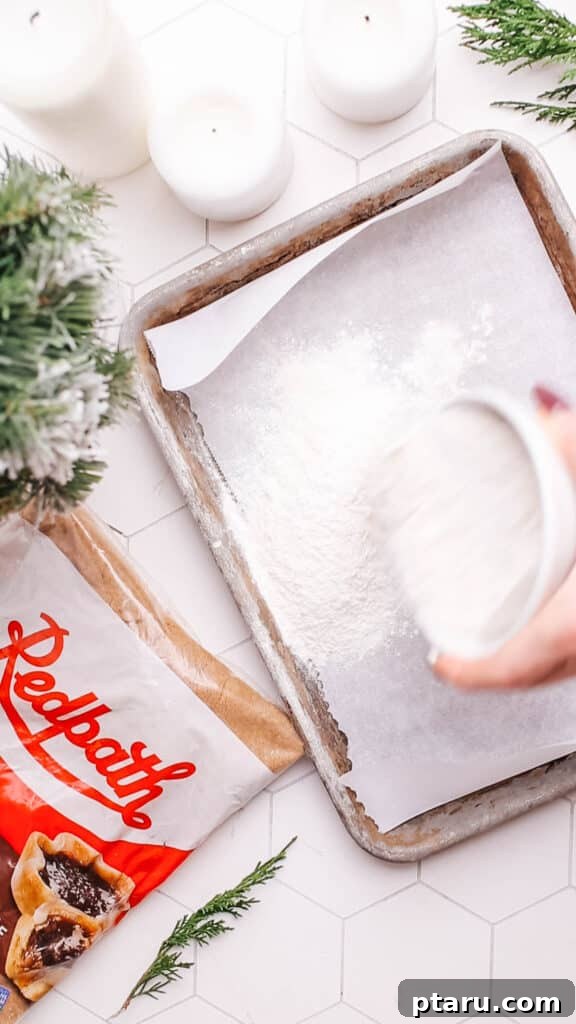
The Crucial Step: Why Raw Flour Isn’t Safe to Eat (And How to Fix It!)
When it comes to enjoying cookie dough safely, understanding and mitigating the risks associated with raw flour is just as paramount as avoiding raw eggs. While raw eggs are commonly highlighted as a concern due to the potential presence of salmonella, raw flour presents its own, often overlooked, and equally serious set of potential hazards. Flour, in its purest, natural state, is an uncooked agricultural product. This means that during its journey from the field where wheat is harvested, through the milling process, and finally to your pantry, it can potentially come into contact with various environmental contaminants.
The primary and most significant concern with consuming raw flour is the potential presence of harmful bacteria, most notably E. coli (Escherichia coli). These bacteria can contaminate grains directly in the field, often through animal waste, and have the capability to persist and survive through the entire milling process, ultimately ending up in your seemingly harmless bag of flour. Consuming raw flour that contains these pathogens can lead to severe foodborne illnesses, characterized by a range of unpleasant symptoms including severe stomach cramps, profuse diarrhea (which can often be bloody), and persistent vomiting. In rare but severe instances, an E. coli infection can progress to a life-threatening condition known as hemolytic uremic syndrome (HUS), particularly in young children and the elderly.
Fortunately, eliminating this health risk is both straightforward and remarkably simple: through the process of heat-treating the flour. This involves briefly heating the flour to a specific temperature that is sufficiently lethal to any potential bacteria, thereby rendering it completely safe for consumption in uncooked dishes. The scientifically recommended target internal temperature for heat-treated flour is a minimum of 160ºF (71ºC). This vital temperature can be reliably achieved through two common and accessible methods:
- Microwave Method: For a quick approach, spread the desired amount of all-purpose flour thinly and evenly in a microwave-safe bowl. Microwave on high power, ensuring you stir the flour thoroughly every 30 seconds, until it reaches an internal temperature of 160ºF (71ºC). This process typically takes approximately 1 to 2 minutes, though it can vary based on your microwave’s wattage and the quantity of flour. Always use an instant-read thermometer to accurately verify the temperature. After heating, allow the flour to cool completely before incorporating it into your recipe.
- Oven Method: Alternatively, for a slightly larger batch or if you prefer using your oven, spread the flour evenly in a thin layer across a clean baking sheet. Bake in a preheated oven at 350°F (175°C) for a duration of 5 to 10 minutes. It’s important to stir the flour halfway through the baking time to promote even heating. Again, the use of an instant-read thermometer is crucial to confirm it has reached the safe internal temperature of 160ºF (71ºC) throughout. Once heated, allow the flour to cool down completely to room temperature before use.
Once the flour has been properly heat-treated and allowed to cool thoroughly, it is rendered sterile and perfectly safe to use in your edible cookie dough recipe. This indispensable step is what truly transforms a potentially risky indulgence into a worry-free, absolutely delicious treat, ensuring that every single bite of your homemade cookie dough is as delightful as it is safe and healthy.

Your Kitchen Toolkit: Essential Tools for Crafting Perfect Edible Cookie Dough Bites
Making these irresistible edible cookie dough bites doesn’t necessitate a professional-grade kitchen, but having a few basic, readily available tools at your disposal will undoubtedly make the entire preparation process incredibly smooth, efficient, and thoroughly enjoyable. Here’s a detailed list of what you’ll likely need and a brief explanation of why each item is a helpful addition to your cookie dough crafting:
- Baking Sheet: A sturdy and flat baking sheet is truly indispensable for two key stages in this recipe. Firstly, it’s perfect for spreading the flour evenly in a thin layer when you’re heat-treating it in the oven. Secondly, it serves as the ideal surface for arranging your freshly formed cookie dough balls for chilling and eventually, for letting their luscious chocolate coating set perfectly.
- Microwave-Safe Bowl (Optional but Recommended): If you opt for the quick and convenient microwave method to heat-treat your flour, or to gently melt your chocolate for the coating, a good quality microwave-safe bowl is absolutely essential. It ensures even heating without scorching and prevents any potential damage to your dishes.
- Large Mixing Bowl or Stand Mixer: For combining all your cookie dough ingredients, a generously sized mixing bowl offers ample space to prevent any spills and allows for thorough, effortless mixing. While a stand mixer fitted with a paddle attachment makes creaming butter and sugar exceptionally easy and results in a lighter, fluffier dough, a hand mixer or even a sturdy wooden spoon with a bit of good old-fashioned elbow grease will work just as effectively.
- Measuring Cups and Spoons: In the realm of baking, even for no-bake recipes, precision is key. Accurately measuring your ingredients with reliable measuring cups and spoons ensures you achieve the correct ratios for that perfect consistency and irresistible flavor every single time, guaranteeing consistent success.
- Rubber Spatula: This highly versatile kitchen tool is a true workhorse! It’s perfect for expertly scraping down the sides of your mixing bowl, gently folding in delicate ingredients like chocolate chips, and skillfully coating your cookie dough bites in melted chocolate with ease and precision. Its flexibility makes it ideal for handling sticky doughs and delicate coatings without waste.
- Parchment Paper: A genuine kitchen hero, especially for sticky, no-bake treats! Lining your baking sheets with parchment paper serves multiple crucial functions: it prevents the cookie dough bites from sticking to the surface, makes cleanup an absolute breeze, and allows for incredibly easy transfer of your chilled, frozen, or freshly coated treats without any fuss or mess.
- Refrigerator/Freezer: These are absolutely crucial for the no-bake nature of this recipe. The refrigerator is used for initially chilling the dough, making it much easier to handle, shape, and roll. The freezer, on the other hand, is key for rapidly firming up the dough balls before they are dipped, ensuring they hold their shape perfectly, and also helps the chocolate coating set quickly and beautifully, giving you that satisfying snap.
- Instant-Read Thermometer: An indispensable tool for ensuring food safety. It is absolutely vital for verifying that your flour reaches the minimum safe internal temperature of 160ºF (71ºC) during the heat-treating process. This small, affordable tool provides immense peace of mind and guarantees that your edible cookie dough is safe to consume.
How to Make Irresistible Edible Cookie Dough Bites: A Step-by-Step Guide
Crafting these delectable Chocolate Chip Cookie Dough Bites is an incredibly straightforward, immensely satisfying, and surprisingly quick process. By following these detailed steps, you’ll be able to create perfectly safe, incredibly tasty, and visually appealing treats that everyone will adore. Paying attention to precision and patience at each stage will undoubtedly lead to the most delicious and successful results.
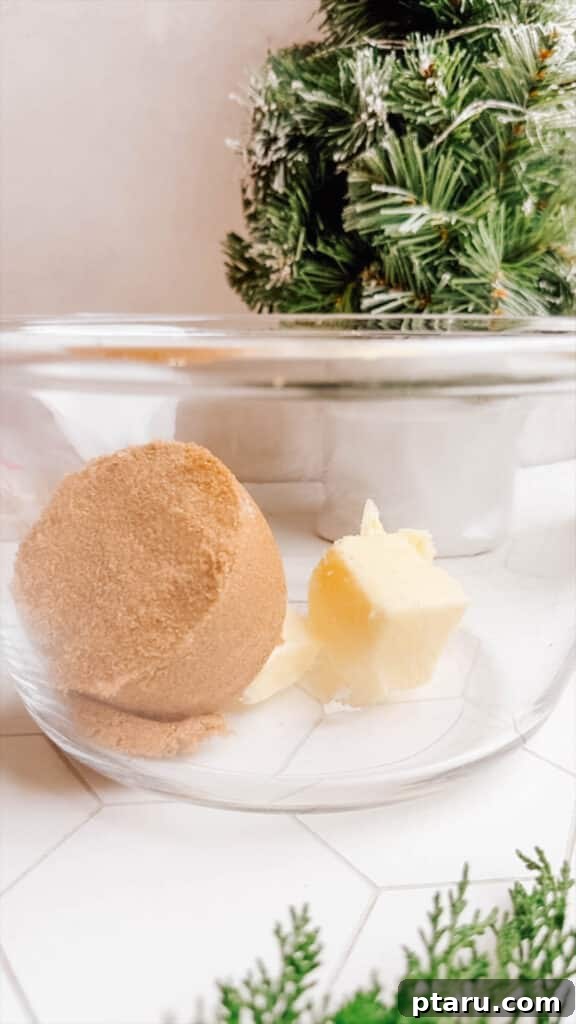
Step 1: Preparing the Safe Edible Cookie Dough
- Heat-Treat the Flour (Crucial Food Safety Step): This step is non-negotiable for ensuring your cookie dough is safe for raw consumption.
- Oven Method: Spread your measured all-purpose flour evenly in a thin layer across a clean baking sheet. Bake in a preheated oven at 350°F (175°C) for a duration of 5 to 10 minutes. It is vital to stir the flour halfway through the baking time to ensure it heats evenly. Use an instant-read thermometer to confirm the internal temperature reaches a minimum of 160ºF (71ºC). Once heated, transfer the flour to a separate bowl and allow it to cool completely to room temperature before proceeding.
- Microwave Method: Place the measured flour in a microwave-safe bowl. Microwave on high power for 1 minute and 30 seconds in total, ensuring you stir the flour thoroughly every 30 seconds to promote even heating. Again, use an instant-read thermometer to verify that it reaches 160ºF (71ºC). Allow the flour to cool completely before incorporating it into your dough.
Pro Tip: Cooling the flour completely is absolutely crucial. Warm flour will melt the softened butter in your dough, leading to an oily, greasy, and ultimately unmanageable consistency that will be difficult to roll.
- Cream Butter and Sugar: In a large mixing bowl (or the bowl of a stand mixer fitted with a paddle attachment), combine the softened unsalted butter and the packed brown sugar. Beat on medium speed for 2-3 minutes until the mixture is visibly light, fluffy, and thoroughly combined. This step effectively incorporates air, contributing to a wonderfully soft and airy dough texture.
- Incorporate Wet Ingredients: Add the pure vanilla extract and the milk to the creamed butter and sugar mixture. Mix until these wet ingredients are fully incorporated and the mixture is smooth. Remember to scrape down the sides of the bowl with your spatula to ensure everything is evenly blended and no ingredients are left unmixed.
- Combine Dry and Wet Ingredients: Gradually add the cooled, heat-treated flour and the salt to the wet ingredients. Mix on low speed, or stir gently with a spatula, until the ingredients are just combined. Be careful not to overmix the dough; stop as soon as no dry streaks of flour remain visible. Overmixing can sometimes lead to a tougher texture.
- Fold in Chocolate Chips: Finally, gently fold in your chosen chocolate chips (whether mini or regular) using a rubber spatula. Distribute them as evenly as possible throughout the cookie dough, ensuring every bite will have a delightful chocolatey burst.
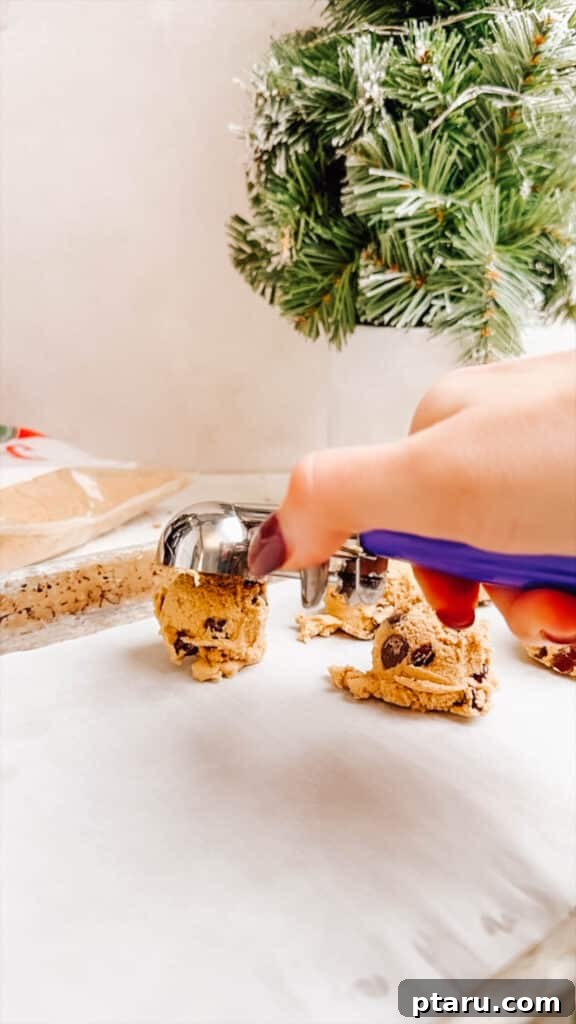
Step 2: Chilling, Shaping, and Freezing the Dough for Perfect Form
- Initial Dough Chill: Once your cookie dough is thoroughly mixed, cover the bowl tightly with plastic wrap and place it in the refrigerator. Chill for at least 10 minutes. This brief chilling period is crucial as it allows the dough to firm up slightly, making it significantly easier to handle, scoop, and roll into smooth, consistent balls without becoming sticky or messy.
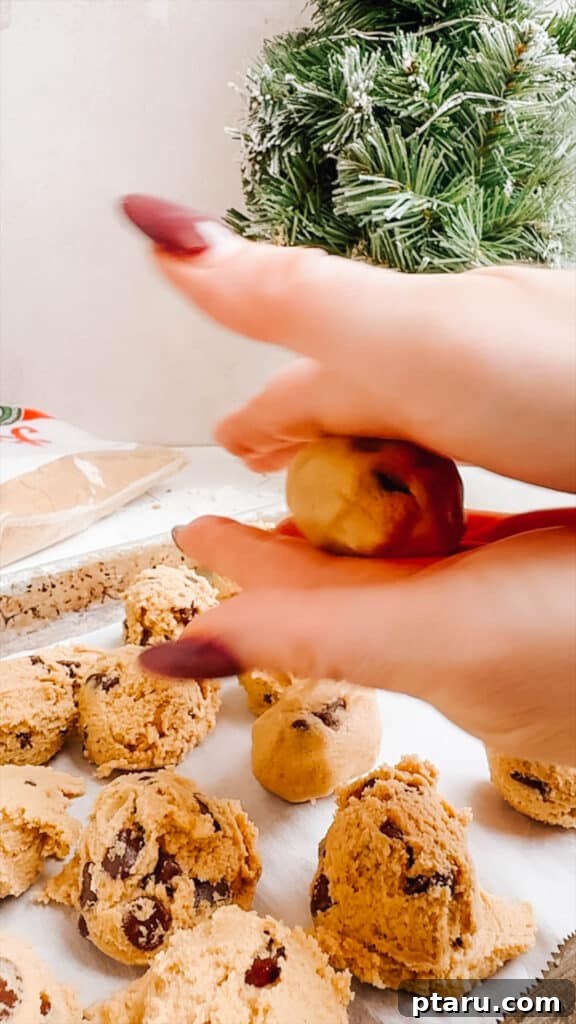
- Forming the Bites: While the dough chills, prepare a clean baking sheet by lining it generously with parchment paper. Scoop out small, even portions of the chilled dough – a small cookie scoop (about 1 tablespoon in size) or a simple teaspoon works perfectly for achieving consistent sizing. Roll each portion gently between the palms of your hands to form smooth, compact, and round balls. Aim for uniformity in size for the best presentation. Place these perfectly formed dough balls onto the prepared, parchment-lined baking sheet, leaving a small space between each.
- Freeze for Firmness: Once all your cookie dough balls are formed and arranged on the baking sheet, transfer the entire sheet to the freezer. Freeze for approximately 15-20 minutes. This crucial freezing step ensures that the dough balls become firm enough to withstand being dipped in the warm melted chocolate without losing their shape, becoming too soft, or falling apart during the coating process.
Step 3: Preparing the Chocolate Coating & Expert Dipping
- Melt the Chocolate Coating: While your cookie dough bites are firming up in the freezer, it’s time to prepare your luscious chocolate coating.
- Microwave Method: In a microwave-safe bowl, combine your chosen chocolate chips and the oil. Microwave at 50% power in short 30-second intervals, ensuring you stir the chocolate thoroughly after each interval. Continue this process until the chocolate is completely smooth and fully melted. This gentle, incremental heating prevents the chocolate from scorching or seizing.
- Double Boiler Method: Alternatively, for a more controlled melting process, place the chocolate chips and oil in a medium heatproof bowl. Set this bowl over a saucepan of barely simmering water, ensuring that the bottom of the bowl does not touch the water itself. Stir continuously with a spatula until the chocolate is completely smooth and beautifully melted. Remove the bowl from the heat immediately once fully melted.
Pro Tip: The small amount of oil is absolutely essential here for achieving a smooth, thin, and easily pourable consistency for your chocolate coating. If, after melting, your chocolate still seems too thick, you can add another tiny drop (⅛ to ¼ teaspoon) of oil and stir vigorously until the desired consistency is reached.
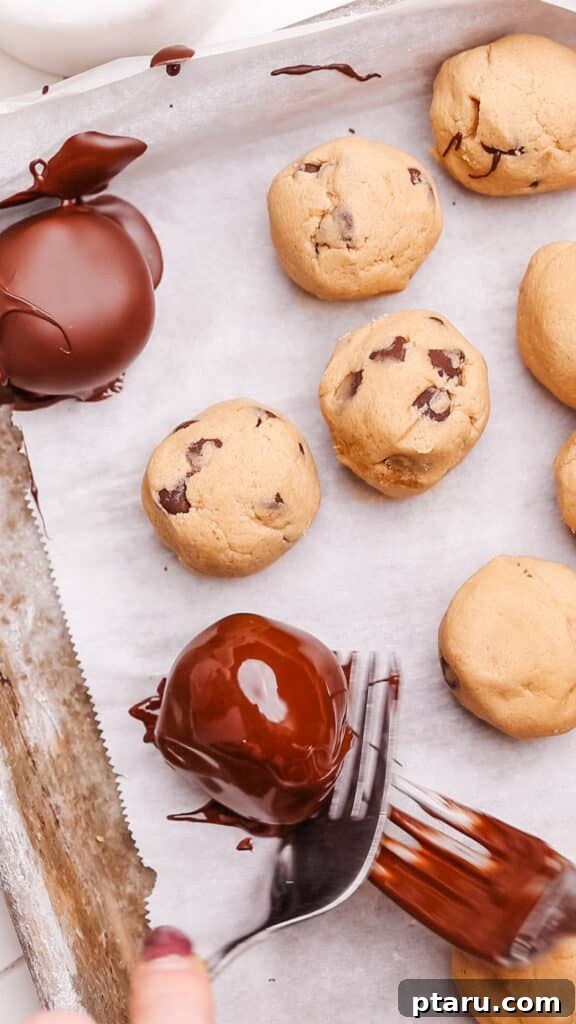
- Dip the Dough Bites: Once your chocolate is perfectly melted and smooth, retrieve your frozen cookie dough balls from the freezer. Working efficiently but carefully, use a fork or a specialized dipping tool to dip each frozen dough ball into the melted chocolate. Ensure that each bite is completely coated on all sides. Gently tap off any excess chocolate against the side of the bowl to avoid pooling at the bottom.
- Set the Chocolate Coating: Carefully place each chocolate-coated bite back onto the parchment-lined baking sheet. Allow them to stand undisturbed at room temperature until the chocolate coating fully sets and hardens. This process can take anywhere from 30 to 60 minutes, depending on the ambient room temperature.
Important Note on “Chocolate Bloom”: While refrigerating the coated bites will undoubtedly speed up the setting process (to about 10 minutes), a rapid temperature change can sometimes cause a phenomenon known as “chocolate bloom.” This results in a whitish, streaky, or dull appearance on the chocolate surface. While purely cosmetic and not affecting the taste or safety of the bites, for the best visual appeal and a truly glossy finish, it is often recommended to allow them to set naturally at room temperature if time permits.

Step 4: Optional Finishing Touches (Highly Recommended for Extra Flair!)
- Elegant Chocolate Drizzle: If you find yourself with any melted chocolate remaining after dipping, don’t let it go to waste! For an extra touch of elegance and a professional, bakery-worthy finish, spoon the leftover chocolate into a small plastic bag (a Ziploc snack bag works perfectly). Snip a tiny hole in one corner of the bag. Then, artfully drizzle the chocolate in a decorative zigzag pattern across the tops of the coated cookie dough balls. This simple step adds a beautiful visual appeal.

- A Sprinkle of Flaky Sea Salt: Immediately after applying any drizzle (or directly after dipping, if you’re not drizzling), while the chocolate is still wet and tacky, sprinkle a tiny pinch of flaky sea salt over the top of each cookie dough bite. The addition of sea salt is a true game-changer: it not only enhances the visual appeal with a sophisticated sparkle but also provides a delightful savory counterpoint to the rich sweetness of the chocolate and the cookie dough. This creates an incredibly balanced, complex, and utterly addictive flavor profile. Be sure to add the salt before the chocolate begins to harden, otherwise, it won’t adhere properly.

Make Ahead and Storage Tips for Lasting Freshness
These delightful Edible Cookie Dough Bites are not only incredibly delicious but also remarkably convenient, as they can be effortlessly prepared in advance and stored to ensure future enjoyment. Proper storage techniques are key to ensuring they maintain their perfect texture, irresistible flavor, and fresh quality for extended periods.
- Prepare Dough Ahead: The raw, heat-treated cookie dough is excellent for make-ahead planning. You can prepare the dough up to 2 days in advance. Simply transfer the mixed dough to an airtight container or cover the mixing bowl tightly with plastic wrap and keep it chilled in the refrigerator. In fact, allowing the dough to chill for a longer period can often deepen and meld the flavors, and it also makes the dough even easier to handle and roll into perfectly uniform balls.
- Freezing Uncoated Dough Balls: For longer-term storage and ultimate convenience, you can freeze the rolled cookie dough balls before they are coated with chocolate. Once formed, place them in a single layer on a parchment-lined baking sheet and freeze until they are completely solid. After they are firm, transfer the frozen dough balls to a freezer-safe airtight bag or container. They will maintain their delicious quality beautifully for up to 3 months.
- Thawing Frozen Dough: When you’re ready to proceed with the chocolate coating step, simply transfer the frozen dough balls from the freezer to the refrigerator and let them thaw for a few hours until they are soft enough to dip. Alternatively, you can allow them to sit at room temperature for approximately 15-20 minutes for a quicker thaw.
- Storing Finished (Coated) Bites: Once your edible cookie dough bites are fully coated in chocolate and the chocolate has completely set, store them in an airtight container. Keep this container in the refrigerator for up to 1 week. Storing them in the fridge is ideal as it helps maintain their firm, chewy texture and keeps the chocolate coating from becoming too soft or sticky, ensuring optimal enjoyment.
- Freezing Coated Bites: Yes, you can absolutely freeze the chocolate-coated bites for even longer preservation! Arrange them in a single layer within a freezer-safe airtight container, using layers of parchment paper between them to prevent any sticking. They can be safely frozen for up to 3 months.
- Serving Frozen Coated Bites: For the best eating experience after freezing, allow the chocolate-coated bites to thaw in the refrigerator for a few hours. If you’re in a hurry, you can let them sit at room temperature for about 30 minutes before serving. This brings them to that delightful, perfectly chewy, and satisfying consistency.
Frequently Asked Questions About Edible Cookie Dough Bites
Here are quick, concise, and helpful answers to some of the most common questions regarding these delightful no-bake cookie dough bites, ensuring you have all the information you need to create a perfect batch every single time and enjoy them with confidence.
- Are these cookie dough bites truly raw?
These cookie dough bites are meticulously designed to deliver the irresistible taste and texture of traditional raw cookie dough, but with a crucial difference: they are made entirely safe to eat. They contain absolutely no raw eggs, and most importantly, the flour used is always heat-treated to eliminate any potential harmful bacteria, making them perfect for guilt-free indulgence. - Is it safe to eat these cookie dough bites since they’re not baked?
Absolutely, yes! These cookie dough bites are perfectly safe to consume precisely because their recipe specifically omits raw eggs (thus removing the risk of salmonella), and the all-purpose flour undergoes a crucial heat-treatment process. This heat treatment effectively kills any potential bacteria that might be present in the raw flour, ensuring a delicious, worry-free treat. - Can I use store-bought heat-treated flour for this recipe?
Yes, definitely! If you have access to commercially pre-packaged heat-treated flour (which is sometimes conveniently labeled as “ready-to-eat” or “culinary flour” in stores), you can certainly use it directly in this recipe. This will allow you to confidently skip the step of heat-treating the flour at home, saving you a bit of valuable time and effort in the kitchen. - How long do these cookie dough bites last, and what’s the best way to store them?
You can store these delicious edible cookie dough bites in an airtight container within the refrigerator for up to 1 week. For a longer shelf life, they can be frozen for up to 3 months. Always ensure they are stored in a well-sealed container to prevent freezer burn and to protect them from absorbing other food odors present in your fridge or freezer. - Can I adapt this recipe to be vegan or gluten-free?
Yes, this recipe is wonderfully versatile and easily adaptable to accommodate dietary needs! To make them entirely vegan, simply use a plant-based butter alternative, a dairy-free milk (such as almond or oat milk), and ensure that your chosen chocolate chips are certified vegan. For a gluten-free version, simply substitute the all-purpose flour with a high-quality 1:1 gluten-free baking flour blend. - Do I have to include chocolate chips in the dough?
While chocolate chips are undoubtedly a beloved classic and a fantastic addition to cookie dough, you absolutely do not have to use them! Feel completely free to customize your dough with other delightful mix-ins such as finely chopped nuts, white chocolate chips, butterscotch chips, colorful sprinkles, or even small pieces of dried fruit. The base cookie dough is wonderfully versatile for many creative variations. - What causes chocolate “bloom” and how can I avoid it?
Chocolate bloom refers to the whitish, streaky, or dull appearance that can sometimes develop on the surface of chocolate. It typically occurs due to rapid or fluctuating temperature changes during storage or setting. It’s caused by cocoa butter separating and recrystallizing on the surface. To minimize bloom, allow the chocolate-coated bites to set slowly at room temperature rather than immediately refrigerating them, and store them in a cool, consistent temperature. It’s important to remember that bloom is completely harmless and only affects the visual appearance, not the taste or safety. - Can I skip the chocolate coating altogether?
Certainly! These edible cookie dough bites are incredibly delicious and satisfying on their own, even without any chocolate coating. If you prefer a simpler, more rustic treat, or wish to save a step in the preparation process, feel entirely free to enjoy the plain cookie dough balls. They’re still packed with all that wonderful, rich cookie dough flavor you crave. - What’s the best way to serve these edible cookie dough bites?
For the absolute best texture and flavor, these bites are most enjoyable when served chilled directly from the refrigerator. At this temperature, their texture is wonderfully firm, delightfully chewy, and the chocolate coating (if used) offers a satisfying crisp snap. They make a fantastic, convenient dessert for parties, a thoughtful and much-appreciated homemade gift, or a simply satisfying sweet snack any time of day.
Explore More Popular Cookie Recipes from Our Kitchen
If you’ve enjoyed crafting these delightful edible cookie dough bites, you might be looking for other delicious cookie creations to try next. Here are some of our community’s most beloved and highly-rated cookie recipes, perfect for expanding your baking (or no-baking) horizons and satisfying any sweet tooth:
- Toblerone Cookies: Indulge in rich, chocolatey cookies generously studded with irresistible chunks of the famous Toblerone chocolate.
- Chewy Chocolate Chip Cookies: The ultimate classic cookie, perfectly chewy with plenty of gooey, melty chocolate chips in every bite – a timeless favorite.
- Chocolate Snowball Cookies: Experience melt-in-your-mouth tender cookies, delicately dusted with a generous coating of powdered sugar, making them a festive and elegant treat.
- Greek Almond Cookies (Kourabiedes): Discover these traditional Greek shortbread cookies, rich with butter and fragrant almonds, typically enjoyed and cherished during the joyous holiday season.
- Mint Chocolate Cookies: Enjoy a refreshing and harmonious combination of cool, invigorating mint and decadent chocolate, all encapsulated in a delightful cookie format.
- Hermit Cookies: Delight in these wonderfully spiced, chewy cookies packed generously with sweet dates and plump raisins – a comforting and wholesome old-fashioned favorite.
Discover More Viral Social Media Recipes You’ll Absolutely Love!
Our Edible Cookie Dough Bites have certainly captured the hearts and taste buds of many online, becoming a viral sensation for their sheer ease, incredible deliciousness, and guilt-free nature. If you appreciate quick, innovative, and highly popular recipes that frequently light up social media feeds, you’ll definitely want to explore these other viral hits from our very own kitchen:
- 3-Ingredient Banana Pancakes: A ridiculously simple, naturally sweet, and surprisingly healthy breakfast recipe that took the internet by storm for its ease and taste.
- Our viralNaan Recipe that’s garnered over 22 million views on Instagram: Learn to effortlessly make fluffy, authentic, and restaurant-quality naan bread right in your own kitchen.
- 3-IngredientBanana Ice Cream: The easiest, healthiest, and most refreshing way to create creamy, delicious “nice” cream using just frozen fruit – no ice cream maker required!
- Frozen Yogurt Bark: A customizable, incredibly refreshing, and unbelievably simple frozen treat. It’s perfect for satisfying sweet cravings on hot days or as a healthy, guilt-free snack.
- ChocolateDate Bark: A surprisingly addictive and naturally sweet snack sensation, creatively combining chewy dates with rich chocolate and a variety of exciting toppings.
- Chocolate Peanut Butter Banana Bites: A harmonious trio of beloved flavors – chocolate, peanut butter, and banana – all packed into convenient, freezer-friendly, and utterly delightful bites.
- ImpossiblySoft Cinnamon Rolls: Achieve bakery-level soft, gooey, and incredibly tender cinnamon rolls topped with luscious cream cheese frosting, guaranteed to be a crowd-pleaser.

Print Recipe
Cookie Dough Bites (Quick + Easy Recipe!)
Jennifer Pallian BSc, RD
20 minutes
5 minutes
20
Ingredients
For Cookie Dough:
- 1⅓ cup all-purpose flour
- ¼ tsp salt
- ½ cup butter softened
- ¾ cup brown sugar packed
- 2 tsp pure vanilla extract
- 3 tbsp milk
- 1 cup chocolate chips
For Chocolate Coating:
- 2 cups milk or semi-sweet chocolate chips
- 1 tsp oil
Instructions
-
1. Pre-Cook the Flour: To ensure the flour is safe to eat, microwave the flour on high in a microwave-safe bowl for 1 minute 30 seconds, stirring every 30 seconds. Alternatively, spread it on a baking sheet and bake at 350°F for 5-10 minutes. It should reach an internal temperature of 160ºF. Allow to cool completely before use.
-
2. Make Cookie Dough: In a mixing bowl, cream together softened butter and brown sugar until creamy. Blend in the vanilla extract and milk. Stir in the cooled, pre-cooked flour and salt until just combined. Gently fold in the chocolate chips.
-
3. Form Bites: Chill the dough in the refrigerator for about 10 minutes to firm up. Scoop out small portions and roll into smooth balls. Place on a parchment-lined baking sheet. Freeze for 15 minutes to help them hold their shape.
-
4. Melt Chocolate for Coating: Combine chocolate chips and oil in a microwave-safe bowl. Microwave at 50% power, stirring every 30 seconds, until smooth. Alternatively, melt in a bowl set over simmering water (double boiler method), stirring until smooth.
-
5. Coat Bites: Dip each frozen dough bite into the melted chocolate, ensuring it’s completely coated. Tap off excess chocolate and place back on the parchment-lined baking sheet.
-
6. Chill to Set: Allow the coated bites to set at room temperature until the chocolate hardens, or refrigerate for about 10 minutes for faster setting (be aware of potential chocolate bloom with rapid temperature changes).
Notes
Flaky Sea Salt: For an enhanced flavor and elegant presentation, sprinkle flaky sea salt over the chocolate-coated bites while the chocolate is still wet. This adds a wonderful contrast to the sweetness.
Storage: Store the finished edible cookie dough bites in an airtight container in the refrigerator for up to one week. They can also be frozen for up to 3 months.
Serving Suggestion: For the best texture and flavor, enjoy these bites chilled directly from the refrigerator.
Allergy-Friendly Options: Easily make these gluten-free by using a gluten-free flour blend. For a vegan version, swap out dairy ingredients for plant-based alternatives (vegan butter, plant-based milk, dairy-free chocolate chips).
Variations: Experiment with adding chopped nuts, white chocolate chips, or different flavor extracts like almond or peppermint for a customized treat.
Nutrition
Nutrition information is automatically calculated, so should only be used as an approximation.
Tried this recipe? Share your thoughts!
We’d love to hear about your experience in the comments section below.