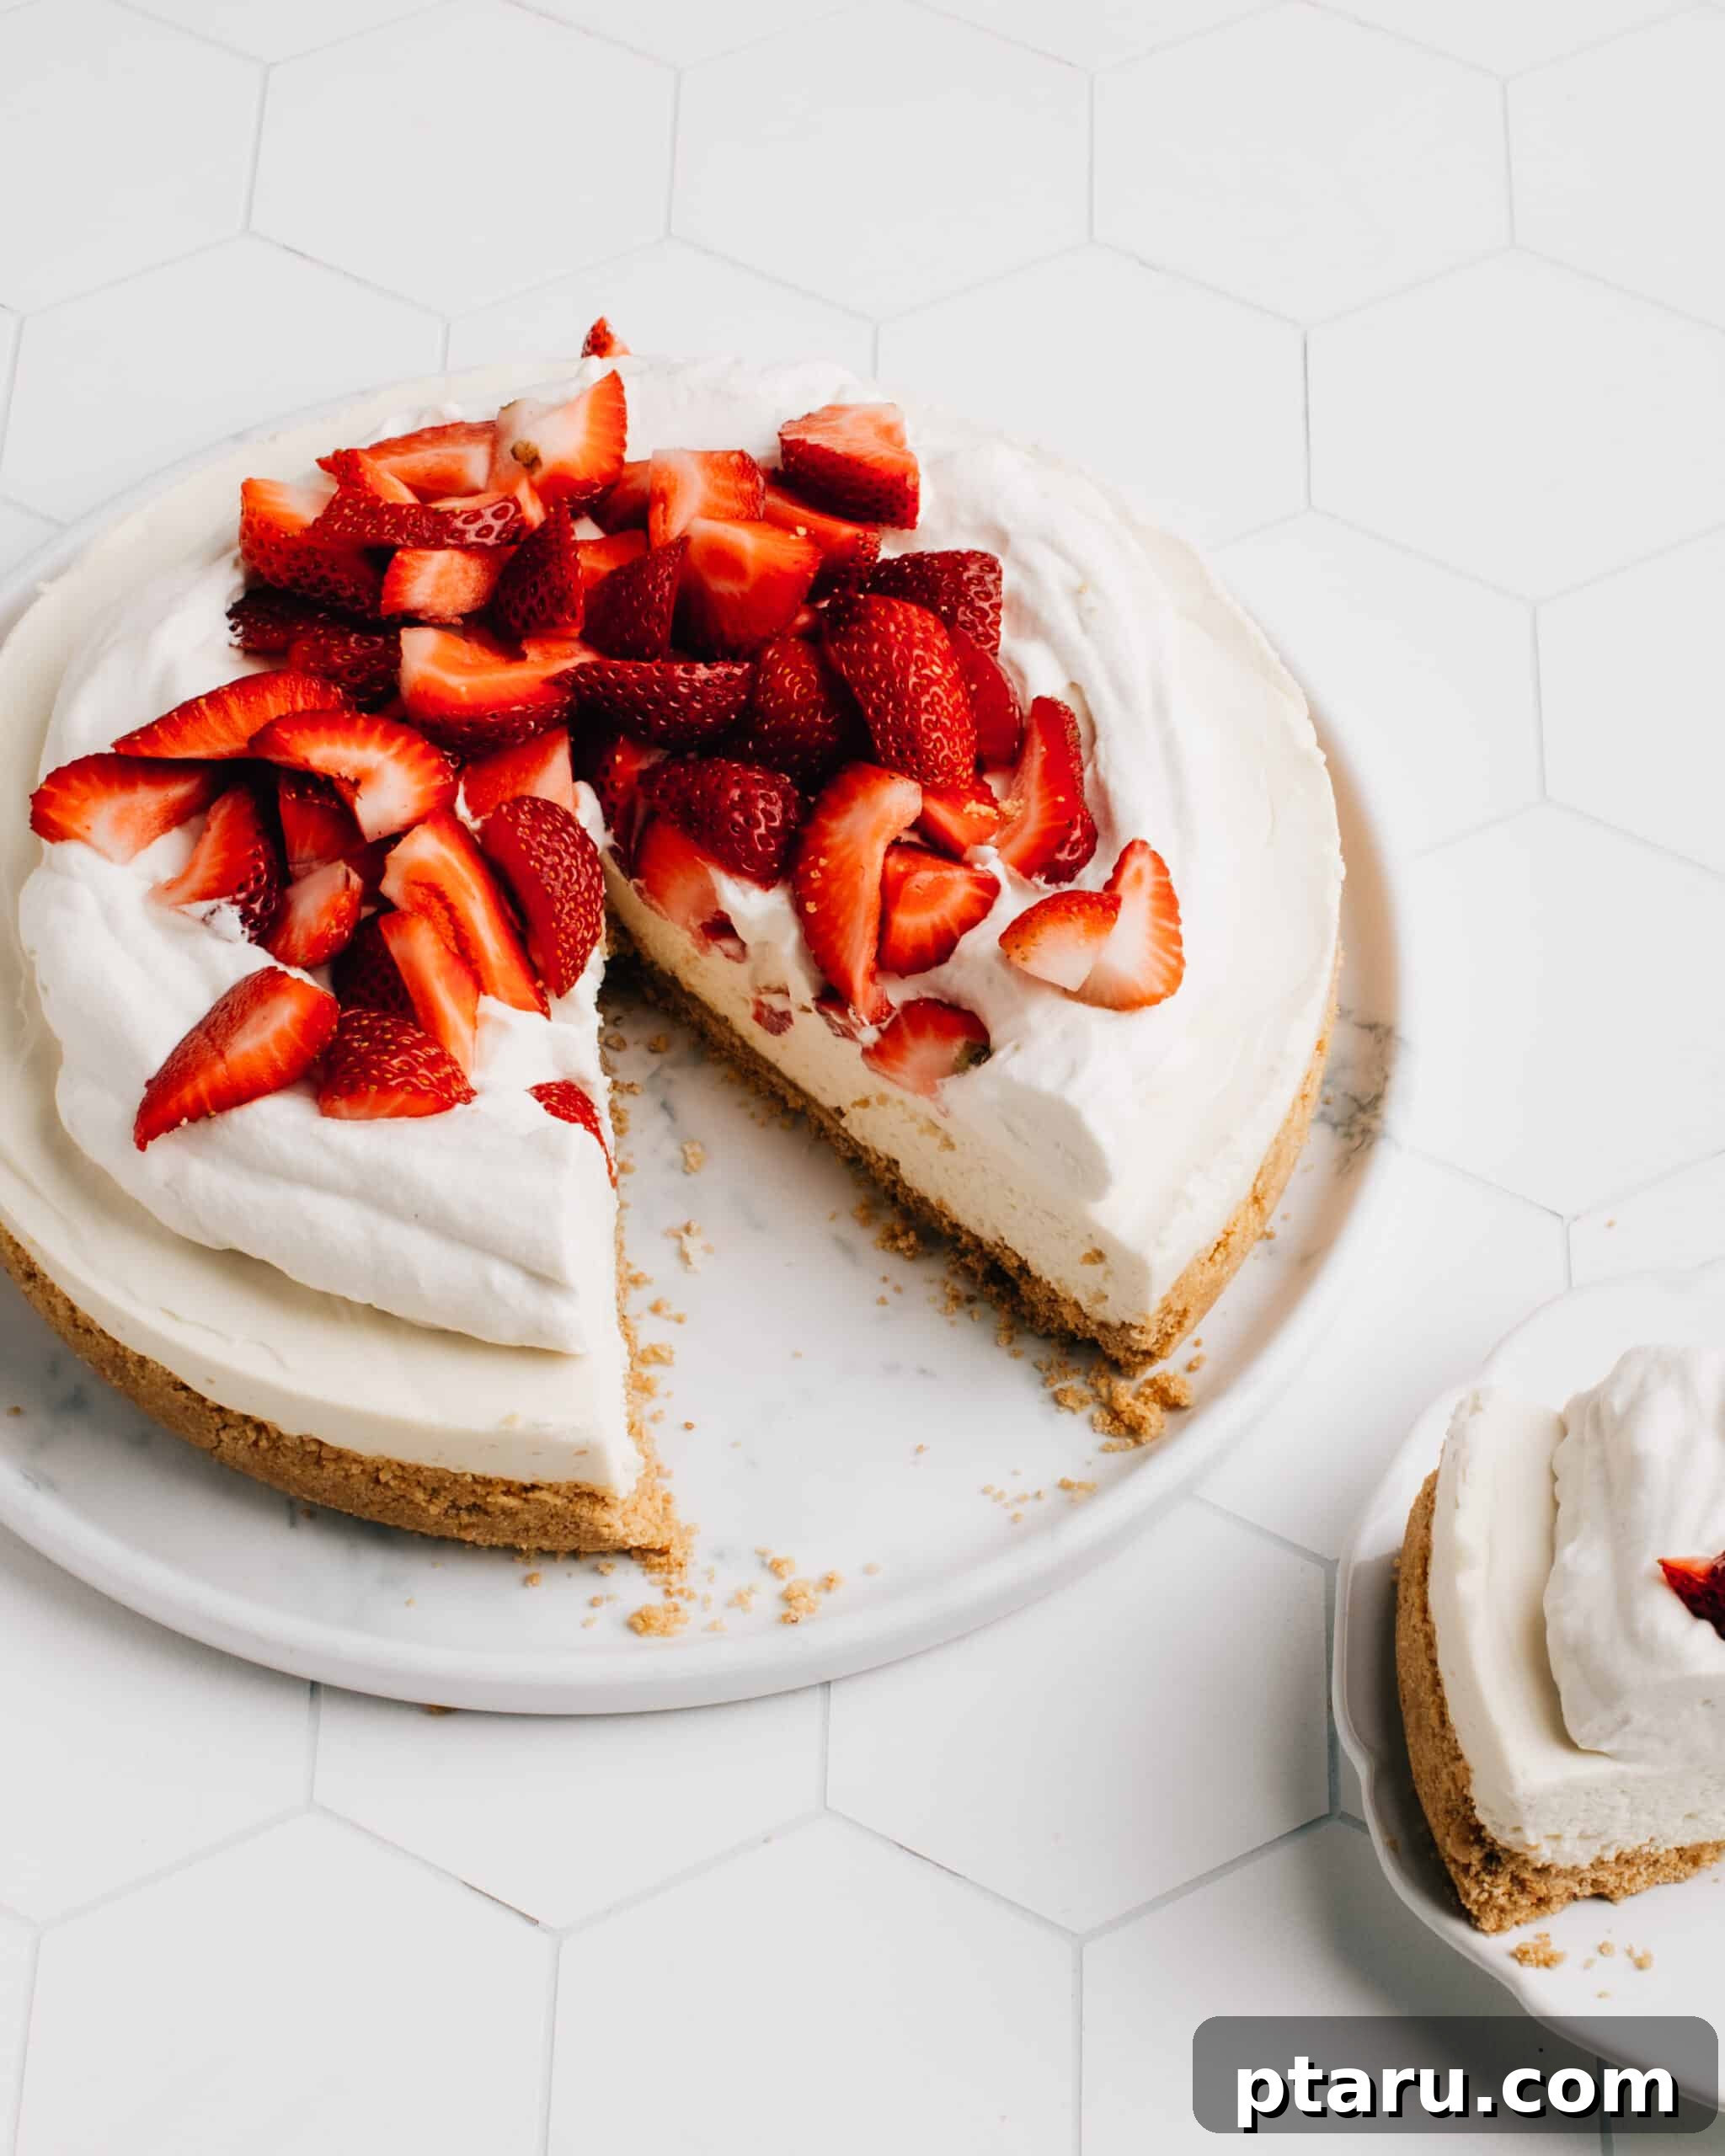
Fluffy No Bake Cheesecake: Your New Go-To Dessert! Welcome to my absolute favorite No Bake Cheesecake recipe! This isn’t just any no-bake cheesecake; it’s a food science-backed creation that promises a texture beyond compare – incredibly fluffy, beautifully sliceable, and bursting with rich flavor. Crafted with only real, wholesome ingredients, you won’t find any gelatin or Cool Whip here. I’ve perfected this recipe over dozens of test batches, ensuring it’s foolproof for you to enjoy every single time.
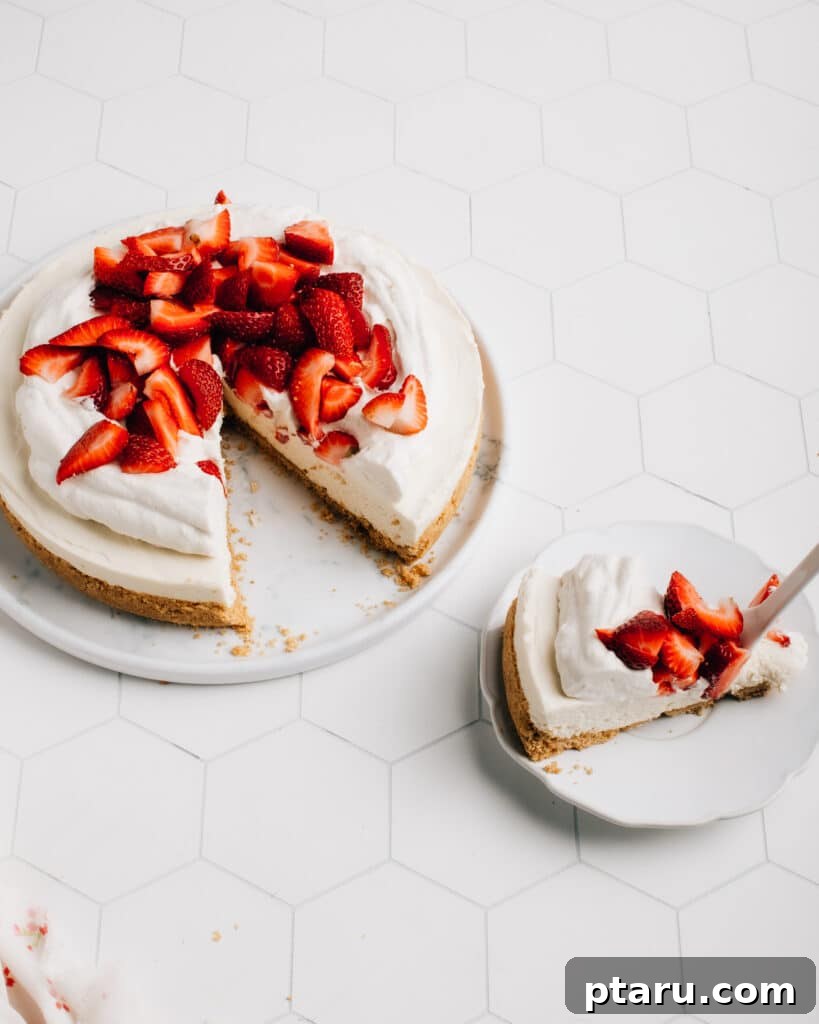
There are days when you crave something decadently rich and creamy, but the thought of turning on the oven feels like a chore. That’s precisely when this Easy No Bake Cheesecake steps in as your culinary hero. It’s my ultimate solution for a luxurious dessert that requires minimal effort and no baking whatsoever.
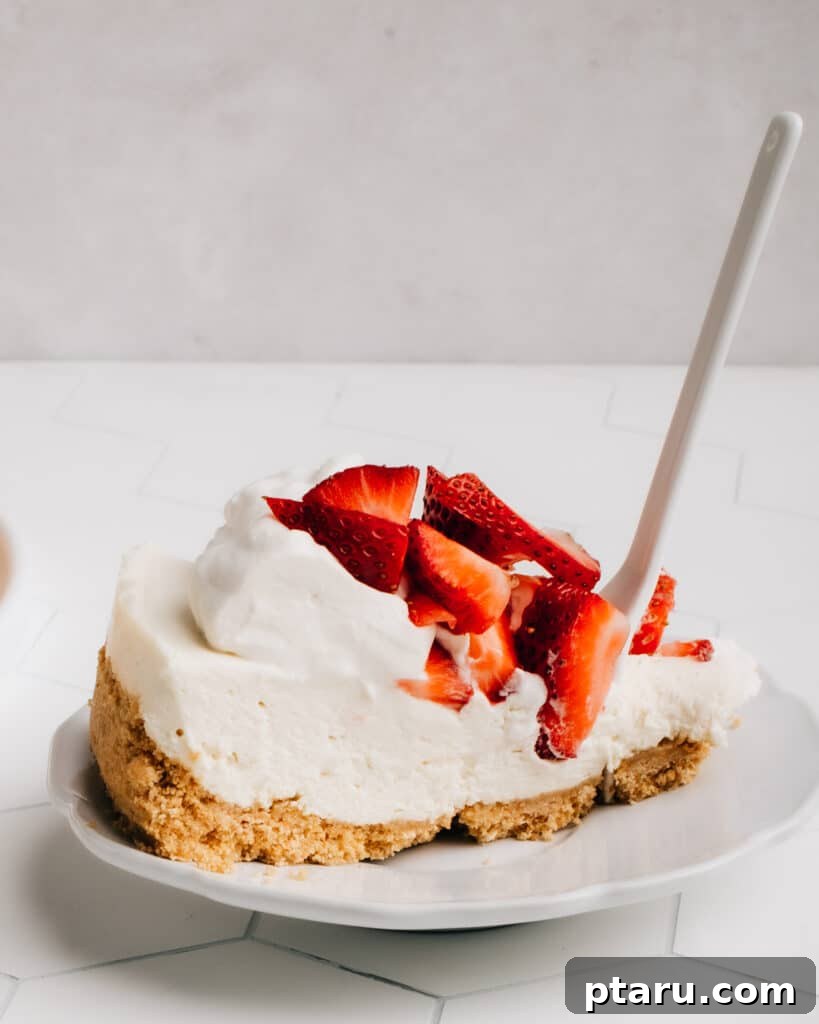
- The texture is nothing short of divine – light, airy, and fluffy, striking the perfect balance between a delicate mousse and a substantial classic baked cheesecake. Each slice holds its shape beautifully, making it as elegant to serve as it is delightful to eat.
- The taste and consistency are truly heavenly. This versatile recipe forms the foundation for some of my most popular creations, including my irresistible No-Bake Cherry Cheesecake Squares and festive Easter Cheesecake recipe, proving its adaptability and crowd-pleasing appeal.
Essential Ingredients for Your No Bake Cheesecake
Crafting this delicious no-bake cheesecake involves two straightforward components: a rich, buttery graham cracker crust and a smooth, lusciously whipped cheesecake filling. Each ingredient plays a crucial role in achieving that perfect texture and flavor.
Graham Cracker Crust Ingredients: The Perfect Foundation
A great cheesecake starts with a fantastic crust. While I have a comprehensive guide dedicated to my favorite graham cracker crust recipes, here’s a quick rundown of what you’ll need for this specific no-bake wonder:
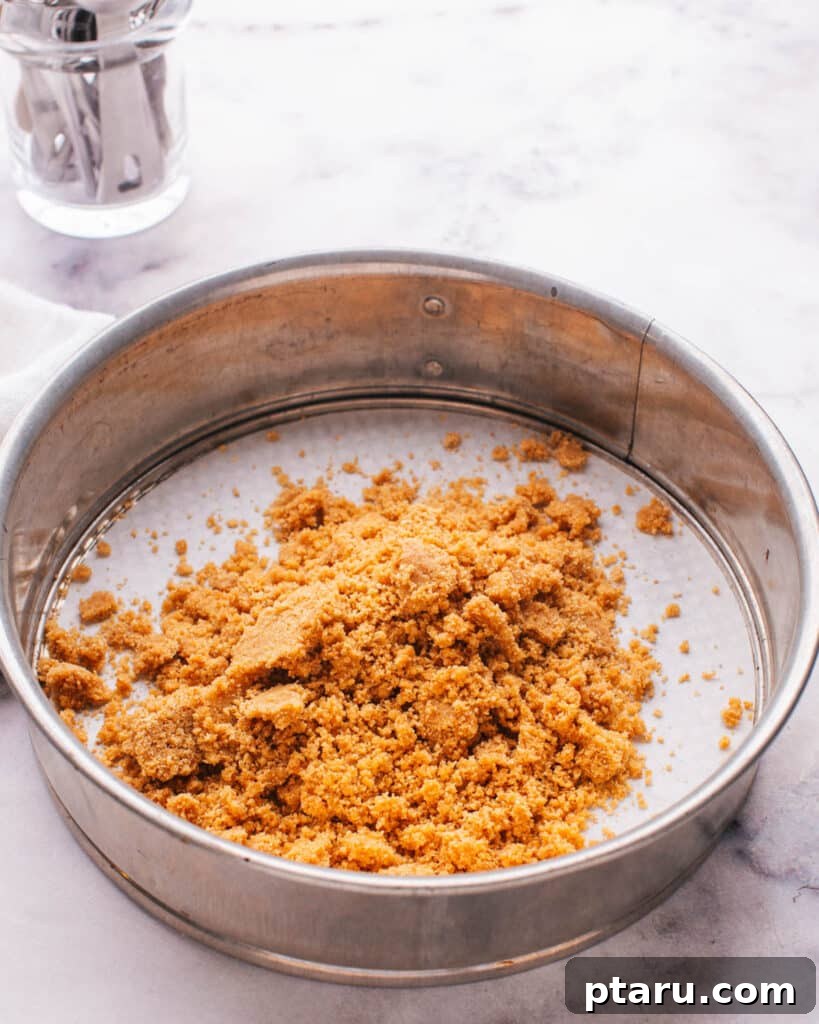
- Graham Cracker Crumbs: These form the backbone of your crust. You can buy them pre-crushed or easily make your own by pulsing whole graham crackers in a food processor until fine. The finer the crumbs, the more compact and stable your crust will be.
- Melted Butter: This is the crucial binding agent. As it chills, the butter solidifies, firmly holding the crumbs together and giving the crust its structural integrity. If you’re using unsalted butter, a small pinch of salt will enhance the flavor of the crust beautifully. Don’t skimp on the butter; it’s essential for a crust that doesn’t crumble.
- Granulated Sugar: A touch of sugar adds a subtle sweetness to the crust, complementing the rich filling. It also helps the crust achieve a pleasant, slightly crisp texture once chilled.
The combination of these simple ingredients creates a robust and flavorful base that perfectly cradles the creamy cheesecake filling. The key is to ensure all ingredients are well combined and evenly pressed into the pan.
No-Bake Cheesecake Filling Ingredients: Creamy, Tangy Perfection
Unlike a rich, dense Philadelphia-style baked cheesecake, this no-bake version boasts a wonderfully light and airy texture. The magic happens with a blend of key ingredients that firm up beautifully without any baking or artificial thickeners.
- Heavy Whipping Cream: When whipped to stiff peaks, this ingredient introduces air and volume, giving the filling its signature light, mousse-like consistency. Ensure your cream is very cold for optimal whipping results. This is what truly makes our cheesecake fluffy.
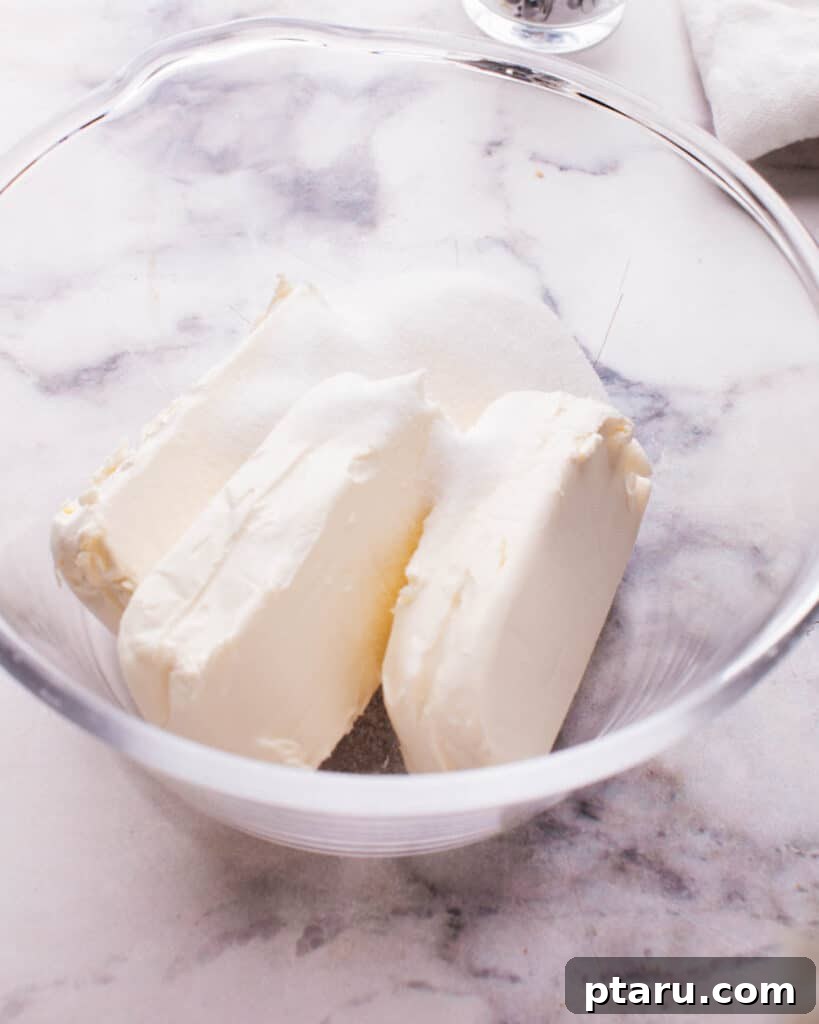
- Full-Fat Cream Cheese: This is the star of the show! Always opt for regular, full-fat block cream cheese. It contains enough fat to solidify and set firmly when chilled, allowing for clean, perfect slices. Avoid light, reduced-fat, or spreadable cream cheese varieties, as they contain more water and less fat, which will prevent your cheesecake from setting properly and result in a runny filling. For best results, ensure it’s softened to room temperature before mixing.
- Plain Greek Yogurt: This clever addition serves multiple purposes. It imparts a delightful tang that cuts through the richness of the cream cheese, and critically, its natural acidity and protein content help the filling firm up beautifully without the need for gelatin or other artificial setting agents.
- Granulated Sugar: Provides the essential sweetness, balancing the tang from the cream cheese and yogurt. Adjust to your personal taste, but the amount specified creates a perfectly balanced dessert.
- Fresh Lemon Juice: Another vital component for structure and flavor. The acidity from fresh lemon juice helps to slightly acidify the dairy components, further aiding in the setting process and lending a bright, zesty note that perfectly complements and balances the richness of the cream cheese. Always use fresh for the best flavor!
- Vanilla Extract: A classic flavor enhancer that adds depth and warmth to the cheesecake, bringing all the other flavors together in harmony. Pure vanilla extract is always recommended for superior taste.
Exciting Variations and Substitutions to Make It Your Own
One of the joys of this no-bake cheesecake recipe is its versatility. Feel free to unleash your creativity and customize it with these delicious tweaks and substitutions:
- Experiment with the Crust: While graham crackers are classic, don’t limit yourself!
- Digestive Biscuits: A popular choice in many parts of the world, offering a slightly less sweet, buttery flavor.
- Gluten-Free Graham Crackers: Easily adapt the recipe for those with dietary restrictions.
- Biscoff Cookies: For a delightful, spiced caramel flavor that pairs wonderfully with cream cheese.
- Chocolate Wafers or Oreos: Create a rich, dark chocolate crust that’s perfect for chocolate lovers. Crush them finely and mix with melted butter as you would with graham crackers.
- Swap the Yogurt: If you don’t have Greek yogurt on hand, or prefer a different flavor profile, you can use:
- Full-Fat Sour Cream: Sour cream is an excellent substitute for plain Greek yogurt, offering a similar tang and richness that contributes to the cheesecake’s set. Ensure it’s full-fat for the best results.
- Create Mini Cheesecakes: Perfect for parties or individual servings!
- Line muffin tins with paper liners, press a small amount of crust mixture into each, and then spoon in the filling. These no-bake cheesecake bites are adorable, easy to serve, and still require the same chilling time.
Essential Tools for a Seamless No-Bake Cheesecake Experience
Having the right tools can make all the difference in ensuring a smooth and enjoyable cheesecake-making process. Here’s what I recommend to achieve perfection:
- 9-inch Springform Pan: This specialized pan is invaluable for cheesecakes. Its removable sides allow you to effortlessly release the cheesecake, resulting in pristine, clean slices without damaging the delicate structure.
- Parchment Paper: Lining the bottom of your springform pan with parchment paper is a simple trick that prevents the crust from sticking, making transfer and serving much easier.
- Mixing Bowls: You’ll need at least two – one for preparing the crust ingredients and another, preferably chilled, for whipping the heavy cream. Having separate bowls prevents cross-contamination of textures and ensures efficient workflow.
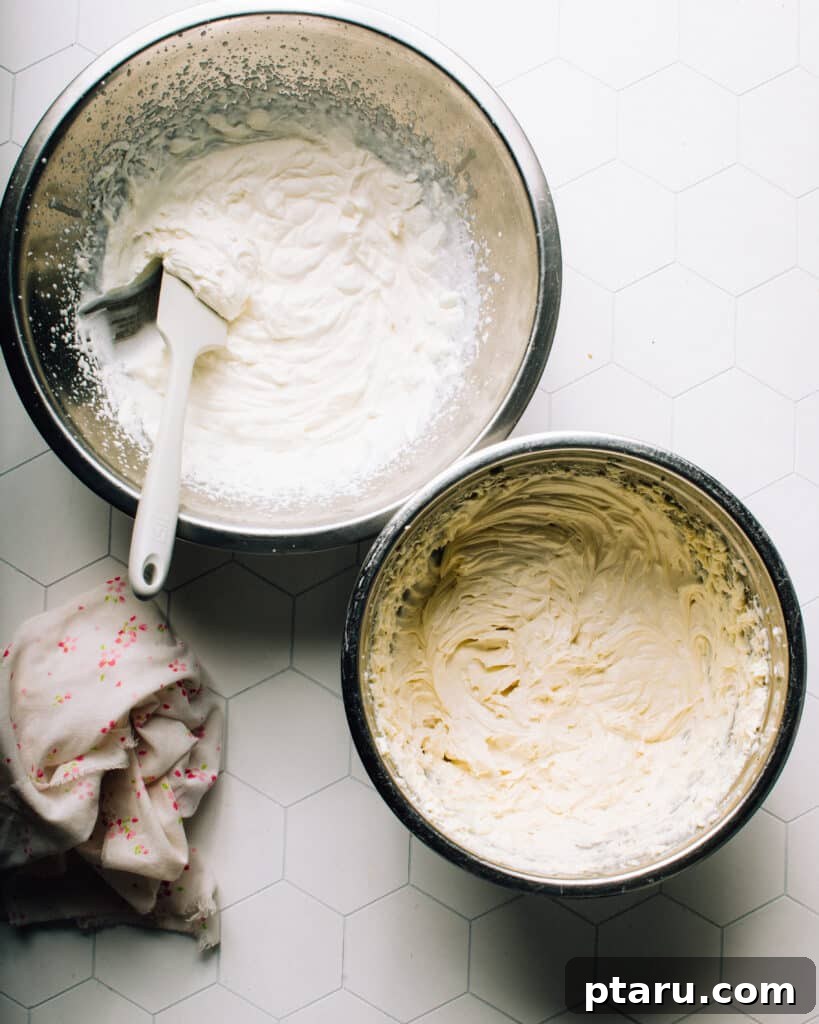
- Stand Mixer or Hand Mixer: This recipe relies heavily on whipping air into ingredients. A powerful stand mixer with a whisk attachment or a reliable hand mixer is absolutely essential for achieving stiff peaks with your cream and for thoroughly fluffing the cream cheese mixture to the right consistency.
- Measuring Cups and Spoons: Accuracy is key in baking and no-bake desserts. Precise measurements ensure you get the perfect ratios for a balanced flavor and a beautifully set cheesecake every time.
- Rubber Spatula: Indispensable for gently folding the whipped cream into the cream cheese mixture without deflating the air, and for scraping down the sides of your bowls to ensure everything is perfectly combined.
- Flat-Bottomed Glass or Measuring Cup: This simple tool is perfect for pressing the graham cracker crust evenly and firmly into the bottom and up the sides of your springform pan, creating a compact and sturdy base.
How to Make No-Bake Cheesecake: A Foolproof Step-by-Step Guide
While this recipe is incredibly fast to prepare, remember that the magic truly happens during the chilling process. Plan ahead, as ample refrigeration time is key to achieving that perfect set and sliceable texture. The longer it rests, the better the texture develops.
Step 1: Prepare the Crust
For detailed step-by-step photos and extra tips on achieving the perfect base, refer to my dedicated graham cracker crust recipe guide. However, here’s what you need to do for this cheesecake:
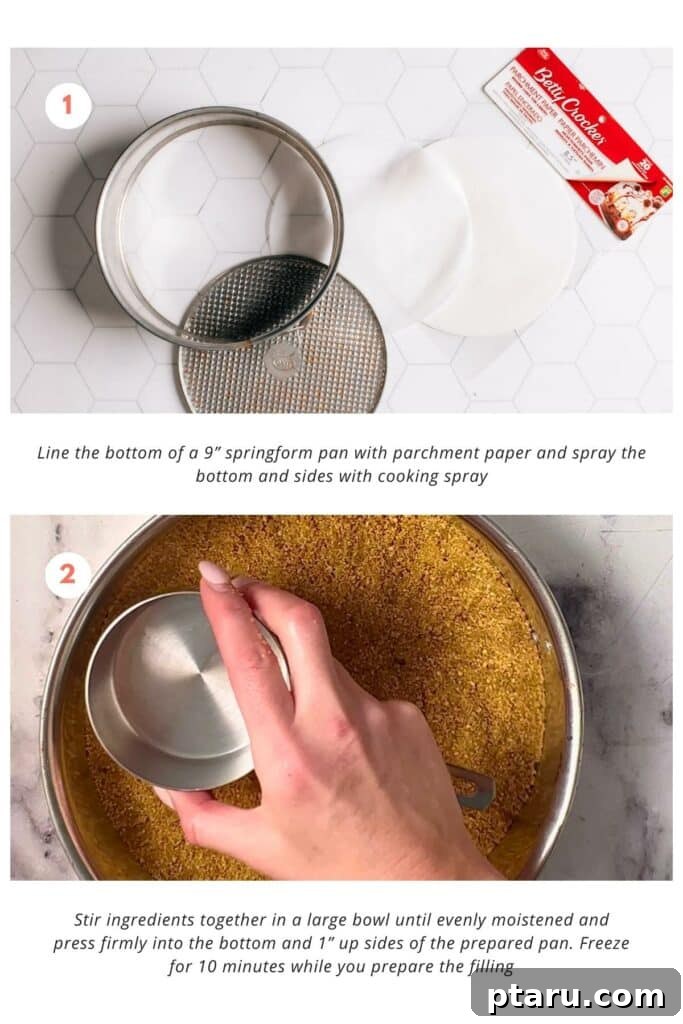
- First, line the bottom of your 9-inch springform pan with a circle of parchment paper. Lightly spray the bottom and sides of the pan with cooking spray to ensure easy release.
- In a large mixing bowl, combine the graham cracker crumbs, melted butter, and sugar. Stir these ingredients thoroughly until the crumbs are uniformly moistened, resembling wet sand.
- Pour the mixture into the prepared springform pan. Using the bottom of a flat measuring cup or a glass, press the crust firmly and evenly into the bottom of the pan and about 1 inch up the sides. A tight pack is essential for a sturdy crust.
- TIP: Place the prepared crust in the freezer for about 10 minutes while you get started on the filling. This helps it firm up quickly, preventing it from getting soggy when the filling is added.
Step 2: Whip the Cream
This step is crucial for the fluffy texture of your no-bake cheesecake. Ensure your heavy cream is very cold for the best results.
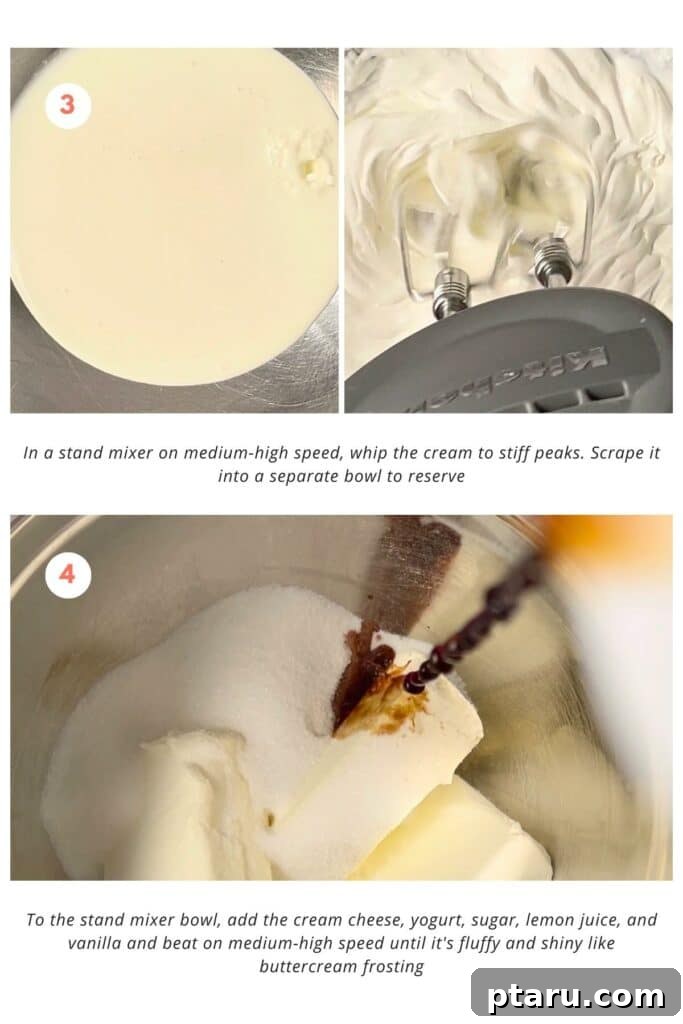
- In the bowl of a stand mixer fitted with the whisk attachment, or using a medium bowl with a hand mixer, whip the cold heavy whipping cream on medium-high speed. Continue whipping until it forms stiff peaks – meaning when you lift the whisk, the cream holds its shape firmly.
- Carefully scoop the whipped cream into a separate, clean bowl and set it aside.
You don’t need to wash the mixer bowl before proceeding to the next step, as the remaining ingredients are compatible.
Step 3: Prepare the Cream Cheese Filling
This is where the magic of the cheesecake filling comes alive, transforming simple ingredients into a smooth, fluffy base.
- Using the same mixer bowl (no need to wash it after whipping the cream), add the softened full-fat cream cheese, plain Greek yogurt, granulated sugar, fresh lemon juice, and vanilla extract.
- Begin mixing on a low speed to incorporate the ingredients without splattering, then gradually increase to medium-high speed. Beat the mixture thoroughly until it becomes wonderfully fluffy and shiny, resembling a light buttercream frosting. This whipping process can take up to 5 minutes, so be patient! The goal is to incorporate plenty of air and ensure everything is silky smooth with no lumps.
- Troubleshooting Tip: If your cream cheese was too cold and isn’t fluffing up properly, don’t despair. Simply wrap a hot, damp towel around the base of the mixer bowl for a few minutes. The gentle warmth will help soften the cream cheese just enough to whip into that airy consistency.
Step 4: Fold and Fill
This delicate step ensures your cheesecake remains light and airy.
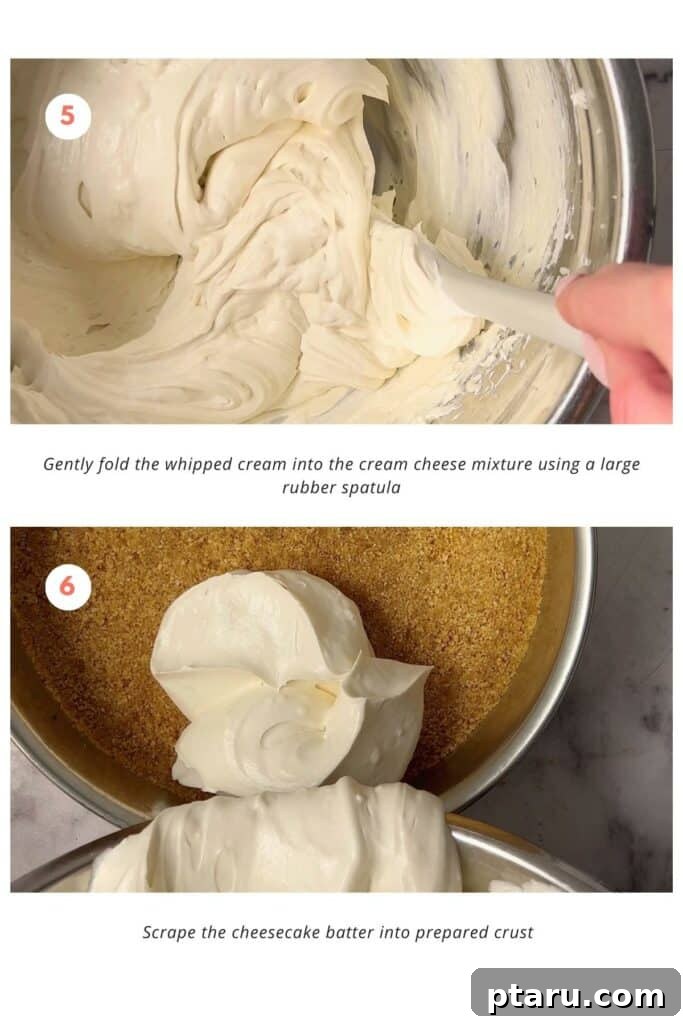
- Grab your reserved whipped cream and, using a large rubber spatula, gently fold it into the cream cheese mixture. The key here is to be gentle.
- Avoid vigorous stirring, which can deflate the air you’ve worked so hard to incorporate. Instead, use a folding motion: cut down through the middle of the mixture, sweep the spatula across the bottom of the bowl, and then fold it over the top. Rotate the bowl as you go.
- Continue folding until the whipped cream is just combined with the cream cheese mixture and no streaks of white remain. The consistency should be uniformly light and smooth.
- Carefully pour the fluffy filling into your prepared graham cracker crust. Use an offset spatula or the back of a spoon to gently smooth the top surface, creating an elegant finish. An offset spatula will give you the cleanest, most professional-looking result!
Step 5: Chill and Serve
Patience is a virtue, especially when it comes to setting your no-bake cheesecake!
- Place the cheesecake in the refrigerator and allow it to chill for a minimum of 8 hours. This extended chilling time is crucial for the filling to firm up properly and become sliceable. For best results, I often chill mine overnight.
- Just before serving, you can top your cheesecake as desired. Fresh berries, a drizzle of chocolate, or a dollop of extra whipped cream are all fantastic options.
- When ready to serve, use a sharp knife to cut slices while the cheesecake is still cold. For exceptionally clean cuts, dip your knife in hot water and wipe it clean between each slice. This creates those beautiful, pristine edges.
Make-Ahead and Storage Tips for Your No Bake Cheesecake
This no-bake cheesecake is an ideal dessert for entertaining or for simply having a sweet treat ready when a craving strikes. Its make-ahead friendly nature is one of its best qualities!
Make Ahead Instructions
You can prepare this cheesecake a full day in advance. Simply assemble it in the springform pan, cover it tightly with aluminum foil or plastic wrap, and let it chill in the refrigerator. Wait to add any toppings until just before you plan to serve it to ensure freshness and prevent sogginess.
Storing Leftovers
- If you have any leftovers (a rare occurrence!), wrap them tightly with plastic wrap or transfer them to an airtight container. Store in the refrigerator.
- For the best taste and texture, consume the cheesecake within 3 days. The crust, in particular, may start to soften slightly after the first day, but the filling will remain delicious.
Freezing Your No Bake Cheesecake
- Freezing is an option, but I’ll be honest, it’s not my first choice. The texture of no-bake cheesecake can subtly change once thawed, sometimes becoming a bit grainier or less fluffy than when freshly chilled.
- Having said that, life gets busy! When I’m short on time and need to prepare dessert well in advance, I will make and freeze the cheesecake until it’s firm, rather than waiting the full 8 hours for it to set in the fridge.
- To freeze: Once the cheesecake is assembled and smoothed, cover it tightly with plastic wrap, then a layer of aluminum foil. Freeze for up to 1-2 months.
- To thaw: Transfer the frozen cheesecake to the refrigerator and let it thaw for several hours or overnight. For optimal slicing and serving, I often slice it while it’s still partially frozen and allow the individual slices to soften slightly at room temperature before enjoying.
The Science Behind a Perfectly Set No-Bake Cheesecake
As a food scientist, I’m fascinated by how ingredients interact to create delicious results. This no-bake cheesecake isn’t just a recipe; it’s a testament to smart ingredient choices that work in harmony to achieve a fantastic texture without any baking or artificial aids.
Final Notes, Pro Tips & Science-Based Secrets for Success
Unlock the full potential of your no-bake cheesecake with these key takeaways and scientific insights:
- No Gelatin Needed, Thanks to Smart Formulation: This recipe is meticulously designed to set naturally. The combination of full-fat cream cheese, protein-rich Greek yogurt, and tangy lemon juice creates an environment where the ingredients firm up perfectly on their own during chilling, eliminating the need for gelatin or other stabilizers.
- Fat is Your Friend for Firmness: The high fat content in full-fat cream cheese is critical. When chilled, these fats solidify, providing the necessary structure and body to the filling. This is precisely why using low-fat or spreadable cream cheese will result in a runny, unstable cheesecake – they simply don’t have enough fat to firm up adequately.
- Lemon and Yogurt Do the Rest: The acidity in both fresh lemon juice and plain Greek yogurt plays a crucial role. The lemon juice slightly acidifies the cream and dairy proteins, helping them to coagulate and firm up. Similarly, the lactic acid bacteria in Greek yogurt contribute to its thickness and tang, further assisting in the natural setting of the filling without any extra thickeners. This acidic environment essentially acts as a natural setting agent, creating a stable, yet tender, consistency.
- Room Temperature Cream Cheese is a Must: While chilling is important for setting, ensure your cream cheese is completely softened to room temperature before mixing. Cold cream cheese will result in a lumpy filling that’s hard to get truly smooth and fluffy.
- Don’t Overmix the Whipped Cream: Whip the heavy cream just until stiff peaks form. Over-whipping can lead to a grainy texture in the finished cheesecake.
- Gentle Folding is Key: When combining the whipped cream with the cream cheese mixture, fold gently with a rubber spatula. This preserves the air pockets in the whipped cream, contributing to the cheesecake’s signature light and airy texture.
FAQs About No-Bake Cheesecake
Just skimming through? Here are some quick answers to the most commonly asked questions about no-bake cheesecakes:
For optimal firmness and clean slicing, your no-bake cheesecake should chill in the refrigerator for at least 8 hours. Overnight chilling is often recommended for the best results.
No-bake cheesecake contains dairy and becomes quite soft at room temperature. It should not be left out for more than 20 minutes, especially on a warm day. Always store it in the refrigerator.
Homemade no-bake cheesecake keeps well in an airtight container in the fridge for 1 to 3 days. Be aware that the graham cracker crust may start to soften slightly after the first day.
The topping possibilities are endless! Flavor your no-bake cheesecake by adding fresh berries (strawberries, raspberries, blueberries), a vibrant lemon curd, classic blueberry or cherry pie filling, a sweet strawberry sauce, indulgent caramel sauce, or a rich chocolate ganache. For a beautiful finish, I often pipe some extra whipped cream around the edges.
More Irresistible Cheesecake Recipes to Try
If you’ve fallen in love with this no-bake wonder, you might enjoy these other reader favorites from my collection:
- Pumpkin Cheesecake Bars – Perfect for autumn festivities!
- Lemon Swirl Cheesecake – A vibrant and zesty baked delight.
- Cheesecake Bites – Adorable, portion-controlled mini cheesecakes.
- Chocolate Cheesecake – A rich, decadent treat for chocolate lovers.
- Caramel Mascarpone Cheesecake – An elegant and indulgent dessert with a twist.
Easy No Bake Cheesecake (Foolproof Recipe!)
Ingredients
For Crust:
- 1 ½ cups graham cracker crumbs
- ¼ cup salted butter, melted
- 2 tbsp granulated sugar
For Filling:
- 1 cup heavy whipping cream, very cold
- 3 (8-oz packages) full-fat cream cheese, softened (do not use low-fat or spreadable)
- ¼ cup plain Greek yogurt
- 1 cup granulated sugar
- ¼ cup fresh lemon juice
- 2 tsp vanilla extract
Instructions
Make the Crust:
-
Line the bottom of a 9” springform pan with parchment paper and spray the bottom and sides with cooking spray.
-
Stir graham cracker crumbs, melted butter, and sugar together in a large bowl until evenly moistened. Press firmly (using a flat-bottomed measuring cup or glass) into the bottom and 1 inch up the sides of the prepared pan. Freeze the crust for 10 minutes while you prepare the filling.
Make the Filling:
-
In a stand mixer on medium-high speed (using the whisk attachment), whip the very cold heavy cream to stiff peaks. Scrape the whipped cream into a separate bowl and set aside. There’s no need to wash the stand mixer bowl before the next step.
-
To the same stand mixer bowl, add the softened cream cheese, Greek yogurt, sugar, lemon juice, and vanilla extract. Beat on medium-high speed until the mixture is fluffy, smooth, and shiny, resembling buttercream frosting. This can take up to 5 minutes to achieve the desired airy consistency. If your cream cheese is too cold, gently warm the base of the bowl with a hot, damp towel to help it fluff up.
-
Using a large rubber spatula, gently fold the reserved whipped cream into the cream cheese mixture until just combined and no streaks remain. Be careful not to stir vigorously, which can deflate the air.
-
Scrape the entire fluffy filling into the prepared crust. Use an offset spatula or the back of a spoon to smooth the top evenly. Chill the cheesecake in the refrigerator for at least 8 hours to set fully, or freeze for 1-2 hours for a faster firming process (though longer chilling is recommended).
Top the cheesecake as desired just before serving. Wrap any leftovers tightly with plastic wrap and store them in the refrigerator.
Notes
Whipping Cream: For the best fluffy texture and stable set, always use heavy whipping cream (typically 36% fat). Avoid anything labeled “light cream” or “table cream” as these will not whip to the desired consistency. Ensure it’s very cold before whipping.
Yogurt: Plain Greek yogurt not only adds a delightful tang but also contributes to the cheesecake’s structure without gelatin. Its natural acidity helps the filling set. Full-fat sour cream can be used as a substitute in a pinch.
Lemon Juice: Fresh lemon juice is key. Its acidity helps to firm up the dairy components naturally while adding a bright, balancing flavor to the rich filling.
Crust Options: Get creative with your crust! Instead of graham crackers, consider digestive biscuits for a slightly less sweet base, crushed Oreos for a chocolatey twist, or gluten-free cookies for dietary needs. Biscoff cookies also make a fantastic spiced crust.
Freezer Shortcut: If you’re in a hurry, you can freeze the cheesecake for 1-2 hours to firm it up more quickly. However, for the best texture, always allow it to thaw partially or fully in the refrigerator before serving. Slice while still firm for clean cuts.
Serving Tips: Always slice the cheesecake while it’s cold for neat, clean portions. For extra pristine slices, dip your sharp knife in hot water and wipe it clean between each cut.
Make Ahead: This is truly an excellent make-ahead dessert. You can prepare and chill the cheesecake in its springform pan for up to 24 hours, covered, before adding any decorative toppings. This saves you valuable time on the day of serving.
Storage: Leftover no-bake cheesecake will keep beautifully in the refrigerator for 2–3 days when wrapped tightly. Be aware that the crust might soften slightly over time, but the filling remains delicious.
Nutrition
Nutrition information is automatically calculated, so should only be used as an approximation.
There you have it – a magnificent, fluffy, and effortlessly delicious No Bake Cheesecake ready to impress. This recipe proves that you don’t need an oven or complicated ingredients to create a show-stopping dessert. With its smooth, creamy filling and sturdy, flavorful crust, it’s perfect for any occasion, from casual family dinners to elegant gatherings. Give it a try, and prepare to fall in love with your new favorite dessert!