Effortless No-Knead Dutch Oven Bread: Your Guide to Artisan Baking
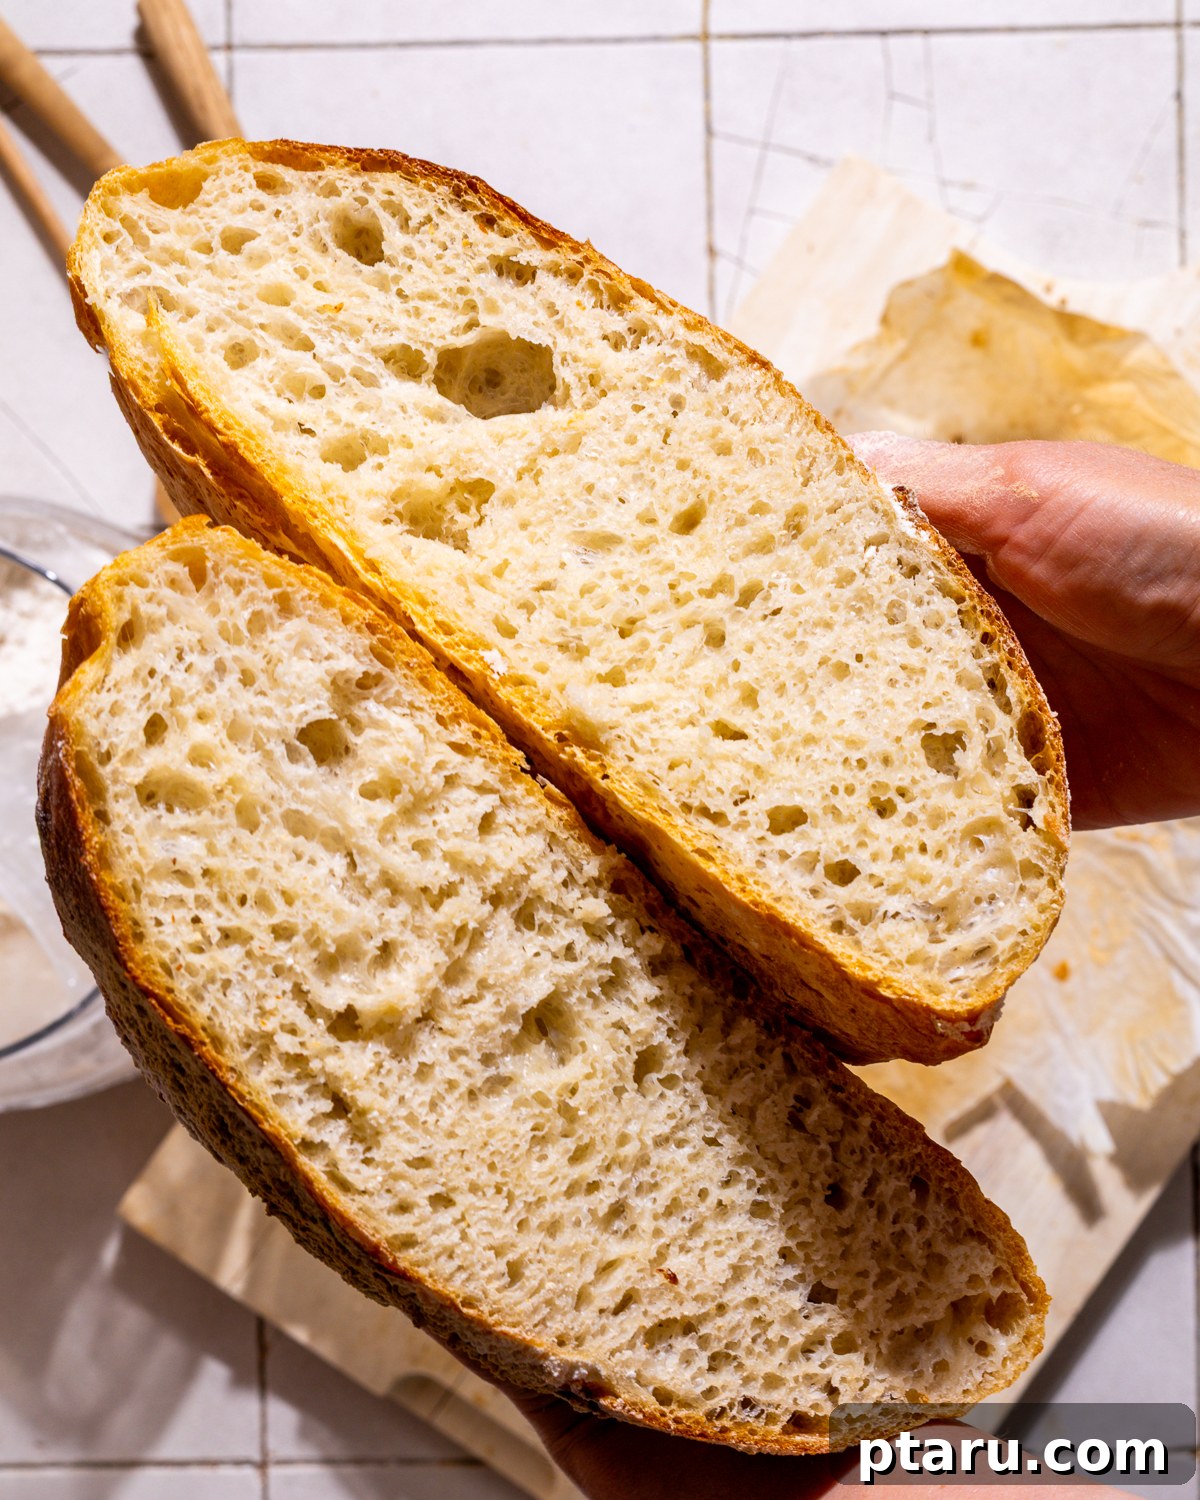
Imagine pulling a loaf of warm, crusty bread from your oven, its aroma filling your kitchen with comfort. This No-Knead Dutch Oven Bread recipe makes that dream a reality for everyone. Whether you’re a seasoned baker or have never made bread before, this incredibly straightforward method allows anyone who can use a wooden spoon to create truly gorgeous loaves of artisan bread. Expect a wonderfully crusty exterior, a tender and airy interior, and a flavor as delicious and complex as any bakery offers.
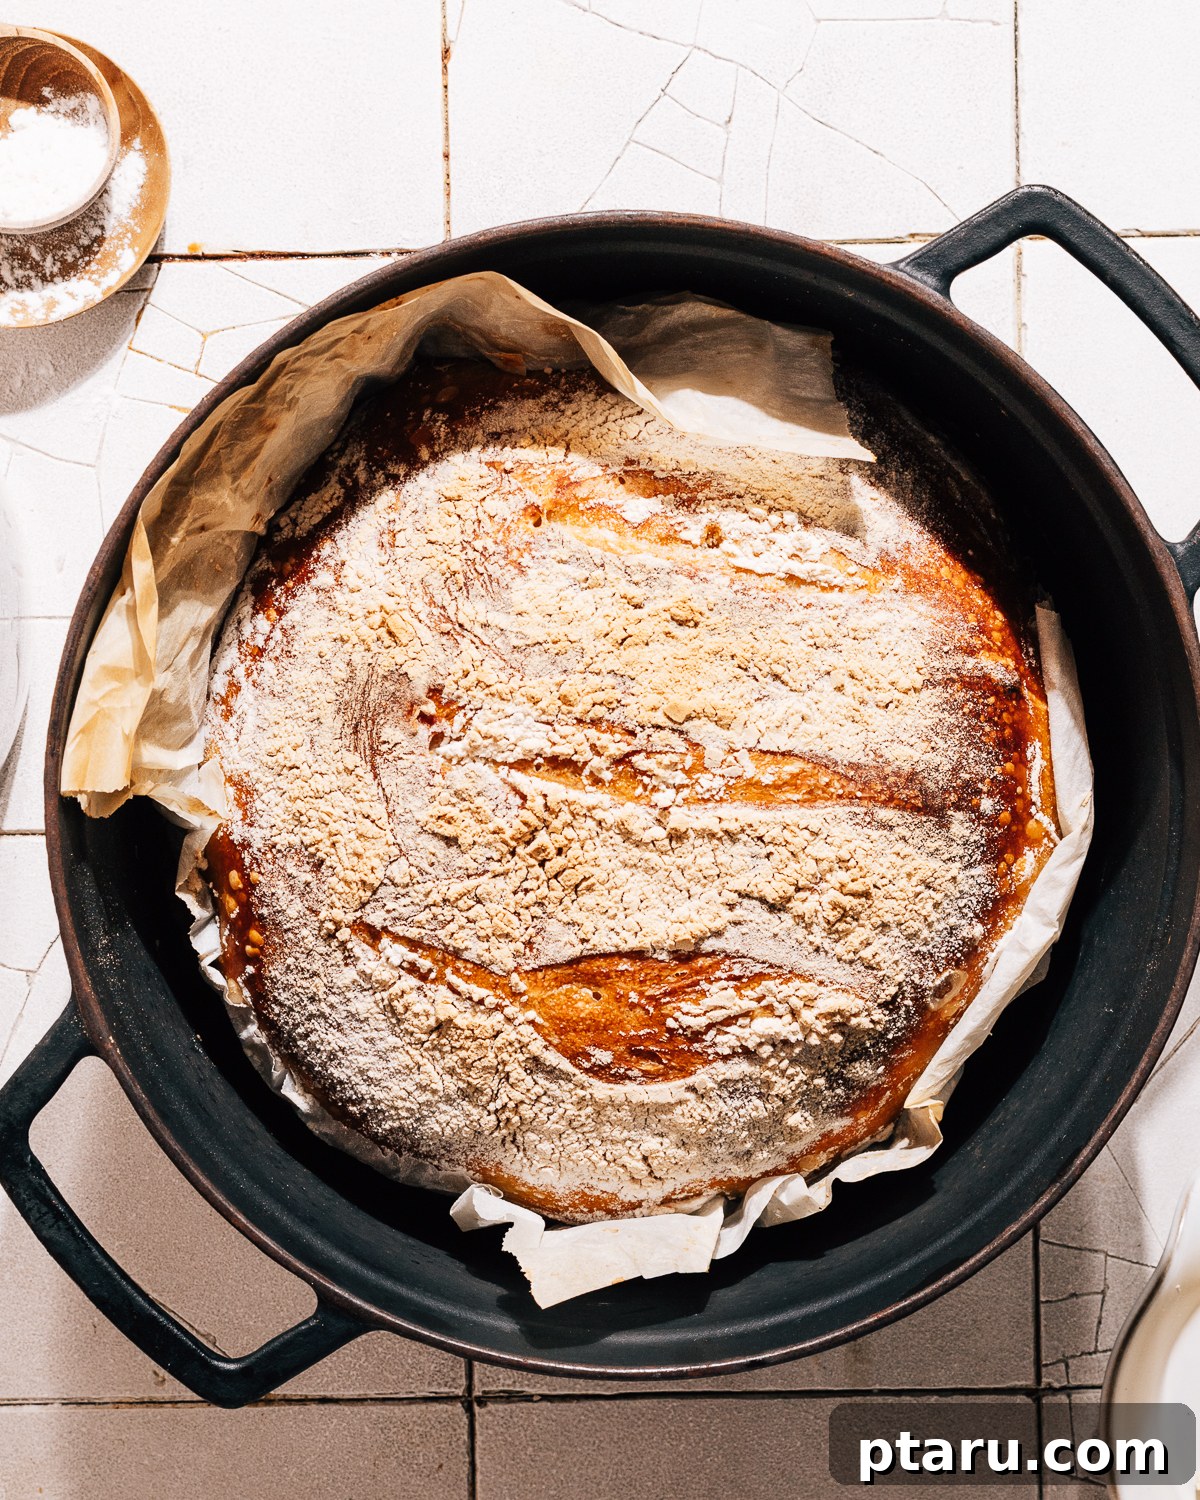
What makes this recipe truly exceptional is its convenience. This single recipe yields enough dough for three magnificent loaves of Dutch Oven Bread. You have the flexibility to bake one loaf at a time and store the remaining dough in your refrigerator for up to two weeks. This means you can invest a small amount of effort once, then simply shape and bake a fresh loaf whenever the craving strikes. Enjoy warm, homemade bread throughout the week with minimal fuss!
Dutch Oven Bread: Artisan Quality Anyone Can Achieve!
My career began in the fascinating world of food science and recipe development, specifically working for a prominent flour company. During that time, I rigorously tested countless bread recipes and dedicated hours to assisting bakeries in resolving their most challenging baking dilemmas. When I tell you I understand what constitutes truly good bread, you can be assured it comes from a place of deep expertise and experience.
Typically, achieving homemade bread of exceptional quality is a craft that demands precise technique, impeccable timing, and a significant amount of experience. Such mastery naturally comes with a certain sense of accomplishment and even bragging rights. However, this revolutionary no-knead Dutch oven bread recipe utterly transforms the landscape of home baking.
It’s so remarkably simple that anyone—literally anyone who knows how to stir ingredients together—can create beautiful loaves of crusty, tender artisan bread that rival those from the fanciest bakeries. This incredible accessibility is precisely why this recipe has been a staple in my household, a weekly ritual, for my entire adult life. It democratizes the art of baking, allowing everyone to enjoy the unparalleled satisfaction of fresh, homemade bread.
Mastering Dutch Oven Bread: Essential Ingredients & Tools
Before you embark on your journey to create this magnificent Dutch oven bread, let’s ensure you have everything prepared. Gathering your ingredients and tools beforehand will make the entire process smooth and enjoyable.
Key Ingredients for Perfect Bread
Here’s a breakdown of the fundamental ingredients required for this recipe, along with their specific roles in creating your perfect loaf:
- All-purpose flour: Surprisingly, there’s no need for specialized bread flour. Standard all-purpose flour works beautifully, contributing to the bread’s tender crumb and rustic texture.
- Whole wheat flour: A small addition of whole wheat flour adds a subtle layer of complexity to the flavor profile. It also tends to ferment faster due to its higher nutrient content, which aids in a more robust rise. Don’t worry, this small quantity is completely undetectable in taste and texture; it won’t make your bread dense or give it a strong “whole wheat” flavor.
- Yeast: I typically use instant yeast, which is also known as bread machine yeast, quick-rise yeast, or pizza yeast – they are all essentially the same. If you opt for active dry yeast, remember to proof it first. Simply stir it into the warm water specified in the recipe and let it stand for about 5-10 minutes until it becomes foamy before adding it to your flour mixture.
- Kosher salt: This is a crucial ingredient for both enhancing the bread’s flavor and regulating the yeast’s activity. It ensures a balanced taste and controlled fermentation.
Variations and Smart Substitutions
Feel free to customize this recipe or make adjustments based on what you have on hand:
- No whole wheat flour? No problem! You can easily swap it out for an equal amount of additional all-purpose flour. This will result in a slightly lighter loaf.
- Delicious Add-ins: Get creative! Experiment by tossing in some freshly chopped herbs (rosemary, thyme), shredded cheese, cinnamon and raisins for a sweeter loaf, or various seeds (sesame, poppy, sunflower) to add texture and flavor. Incorporate these during the initial mixing phase.
Essential Tools for Baking Success
Having the right equipment ready before you begin will ensure a smooth and enjoyable baking process:
- Large mixing bowl: This is where all the magic happens! You’ll need your largest mixing bowl, as it will hold the dough during both the mixing and the initial rising stages. Anticipate that the dough will more than double in volume. A large stock pot or even an extra Dutch oven (one that you won’t be using for baking!) can also serve as an excellent vessel for the rising dough.
- Plastic wrap or a tight-fitting lid: Essential for covering the mixing bowl while the dough rises, preventing it from drying out.
- Wooden spoon or sturdy silicone spatula: Perfect for mixing the sticky dough without overworking it.
- Parchment paper: An absolute game-changer! It prevents the dough from sticking to your Dutch oven and makes transferring the delicate shaped dough incredibly easy.
- Dutch oven (cast iron pot) or cast iron skillet: The star of the show! A heavy cast iron pot with a lid provides consistent, even heat distribution and creates a steamy environment that is crucial for developing that signature crisp crust and soft interior.
- Serrated knife or kitchen scissors: You’ll need these for cleanly cutting portions of the sticky dough and for scoring the top of your loaf before baking, which allows for controlled expansion.
Doubling Your No-Knead Dutch Oven Bread Recipe
I almost invariably double this dough recipe, finding it the perfect way to ensure my family of five enjoys fresh, homemade bread throughout the week. When doubling the batch, the primary consideration is providing ample space for the dough to rise effectively. For this purpose, I often utilize an IKEA Krispig cake carrier, inverted to function as a spacious bowl with a lid, boasting a generous capacity of 4.5 gallons (or 17 liters).
Alternatively, a very large stock pot – what many from the East coast might affectionately call a “lobster pot” – is another excellent option for accommodating this larger volume of dough. If you don’t have such a large container, simply divide the doubled dough into two normal-sized portions, each fitting comfortably into standard mixing bowls.
Beyond finding a suitable container for the initial rise, there’s truly nothing else complex to consider when doubling this recipe, apart from ensuring you have adequate space in your refrigerator to store the extra dough!
How to Make Dutch Oven Bread: A Simple Step-by-Step Guide
Crafting this no-knead Dutch oven bread is astonishingly simple. The entire process begins with a bowl and a spoon – just stir everything together! The resulting gloriously yeasty, puffy dough is then transferred to a container, popped into the fridge, and you simply cut off a hunk whenever you’re ready for a fresh, warm loaf. It’s genuinely that uncomplicated; even my four-year-old can (and does!) help with the mixing!
1. Mix the Bread Dough to Perfection
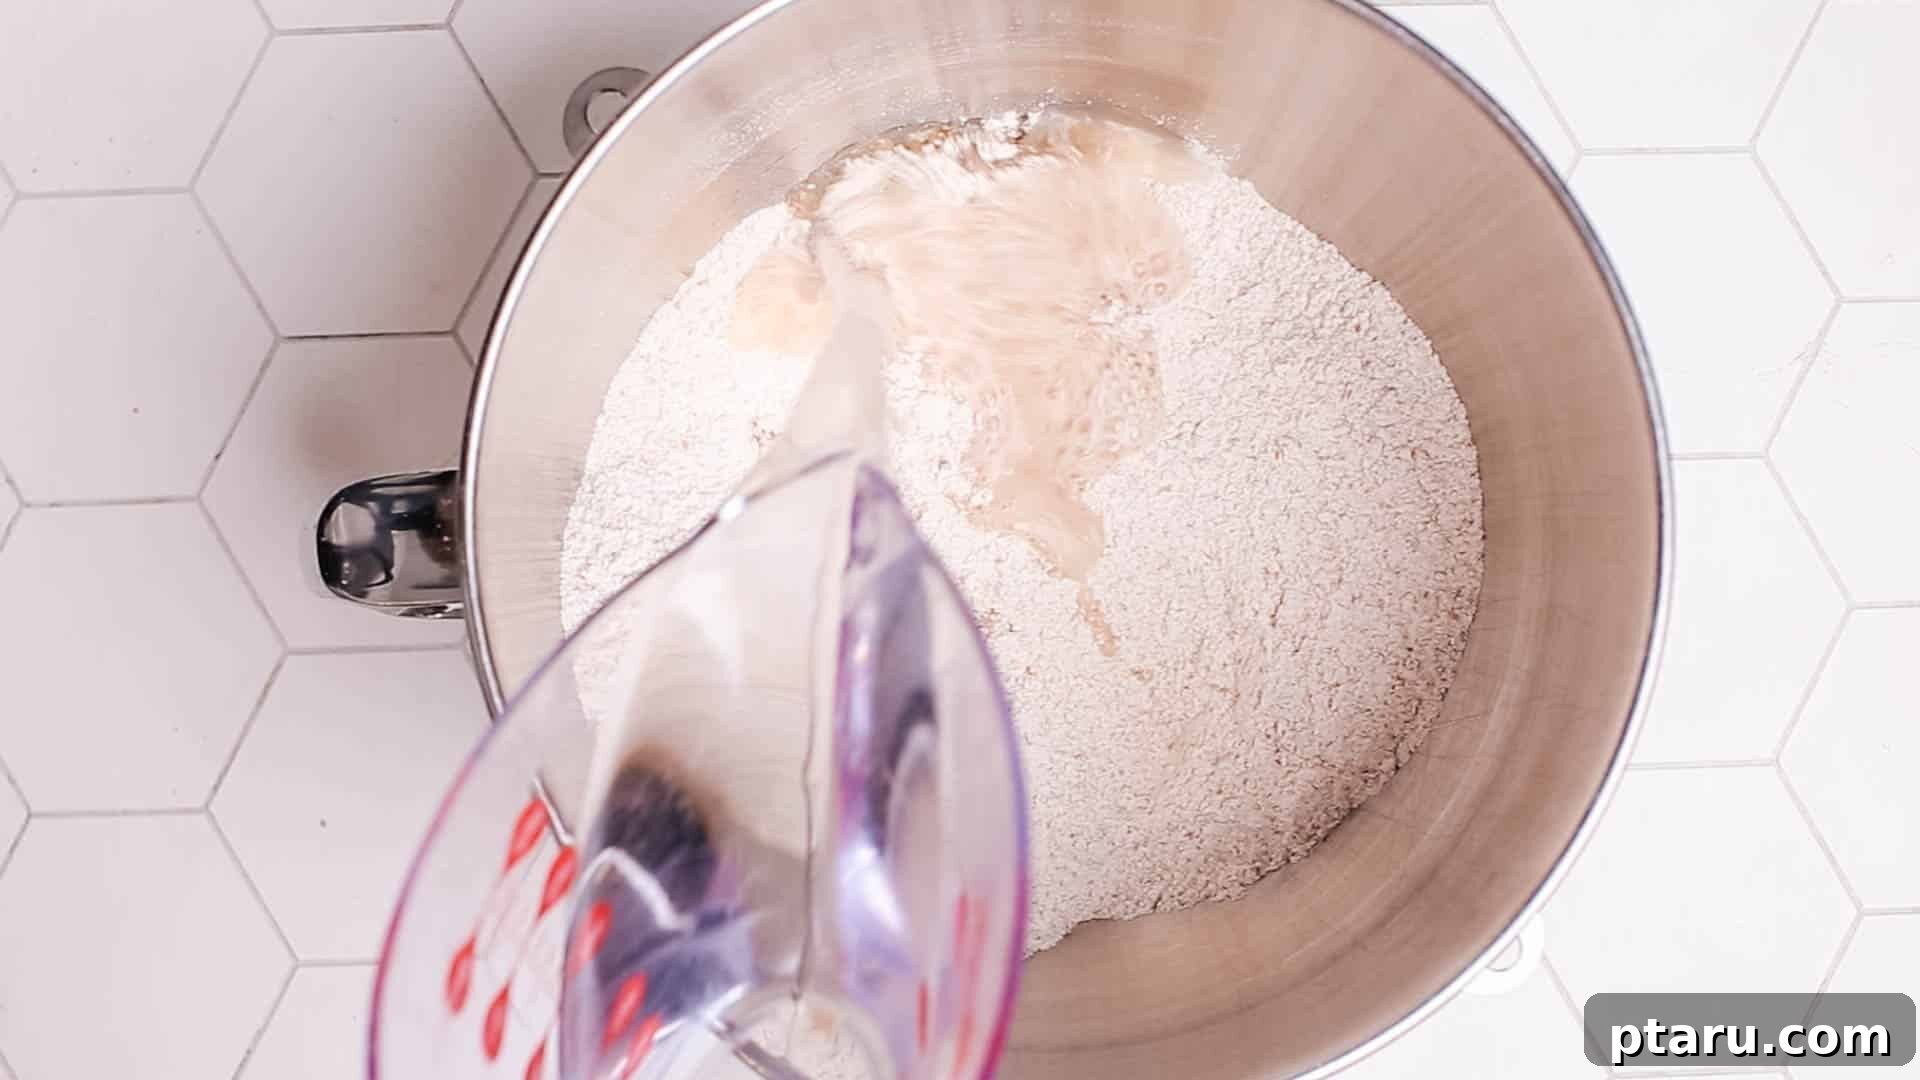
The foundation of this incredible bread lies in its effortless mixing. Start by combining all your dry ingredients, including the yeast, in your largest mixing bowl. Once thoroughly mixed, pour in the warm water. There’s no need for elaborate techniques or strenuous kneading—just mix until all the ingredients are well incorporated and you have a shaggy, sticky dough. A kitchen scale can be incredibly helpful here for accuracy and to minimize dirty measuring cups; simply tap the “Metric” button in the recipe card below to view ingredients by weight.
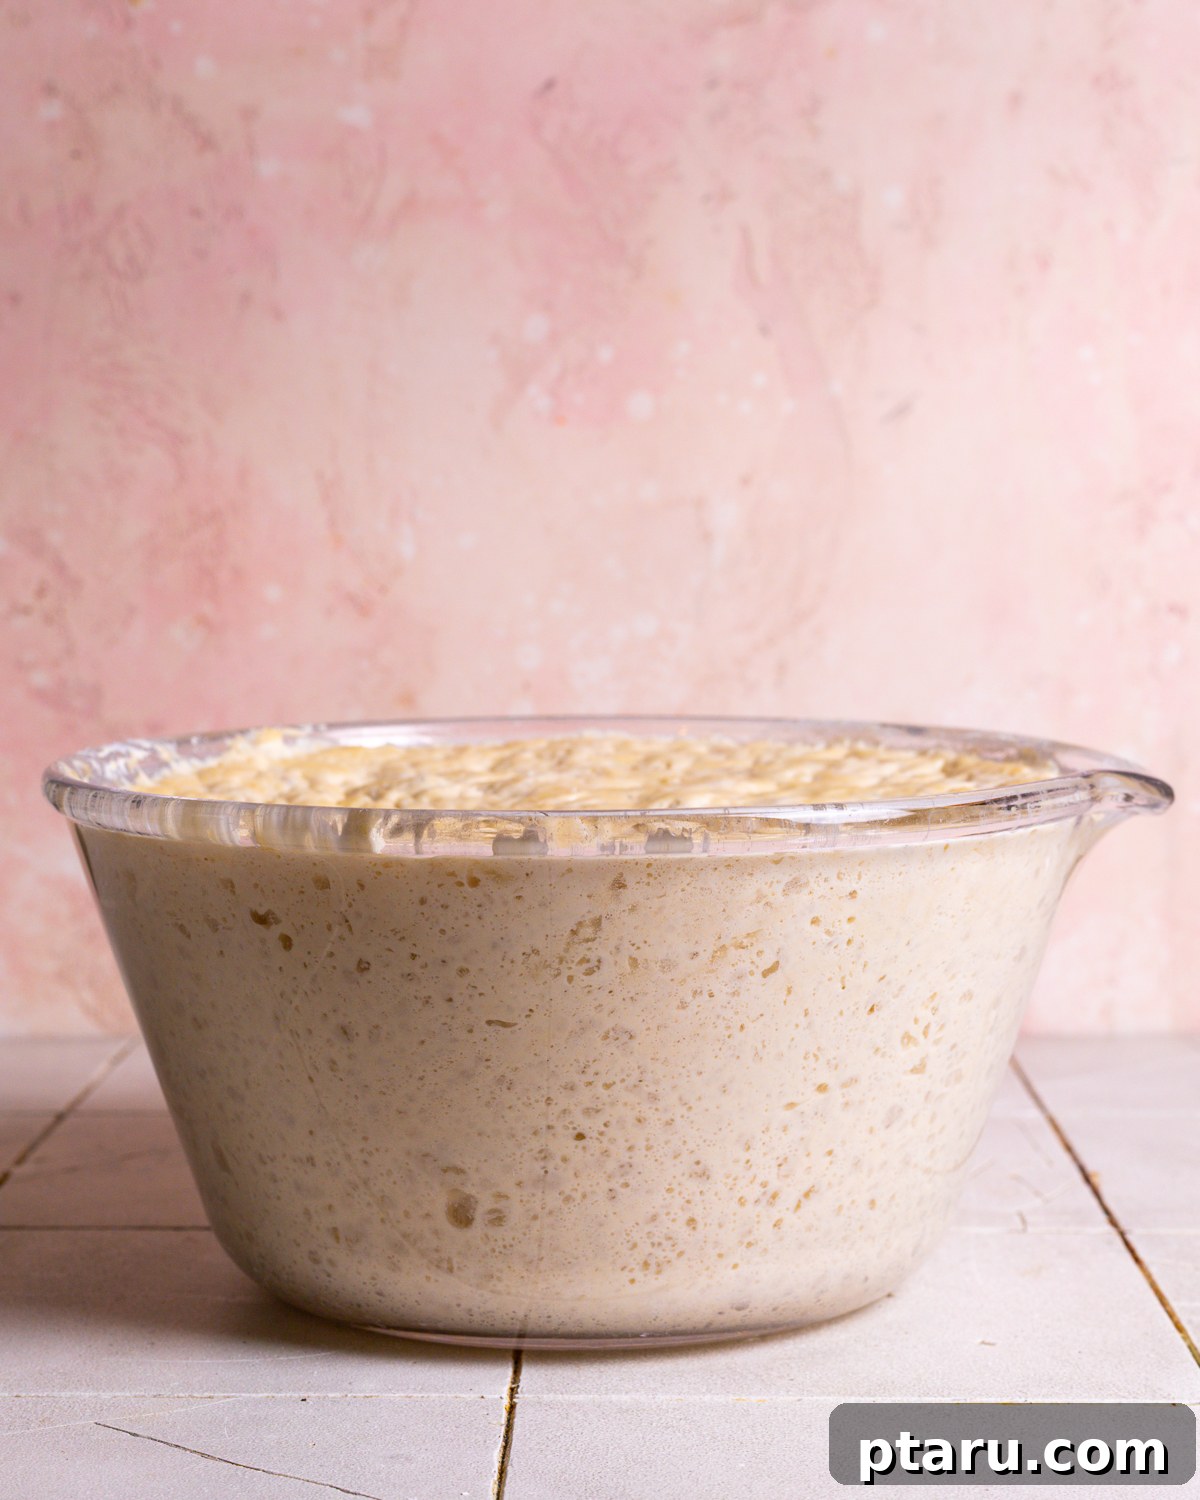
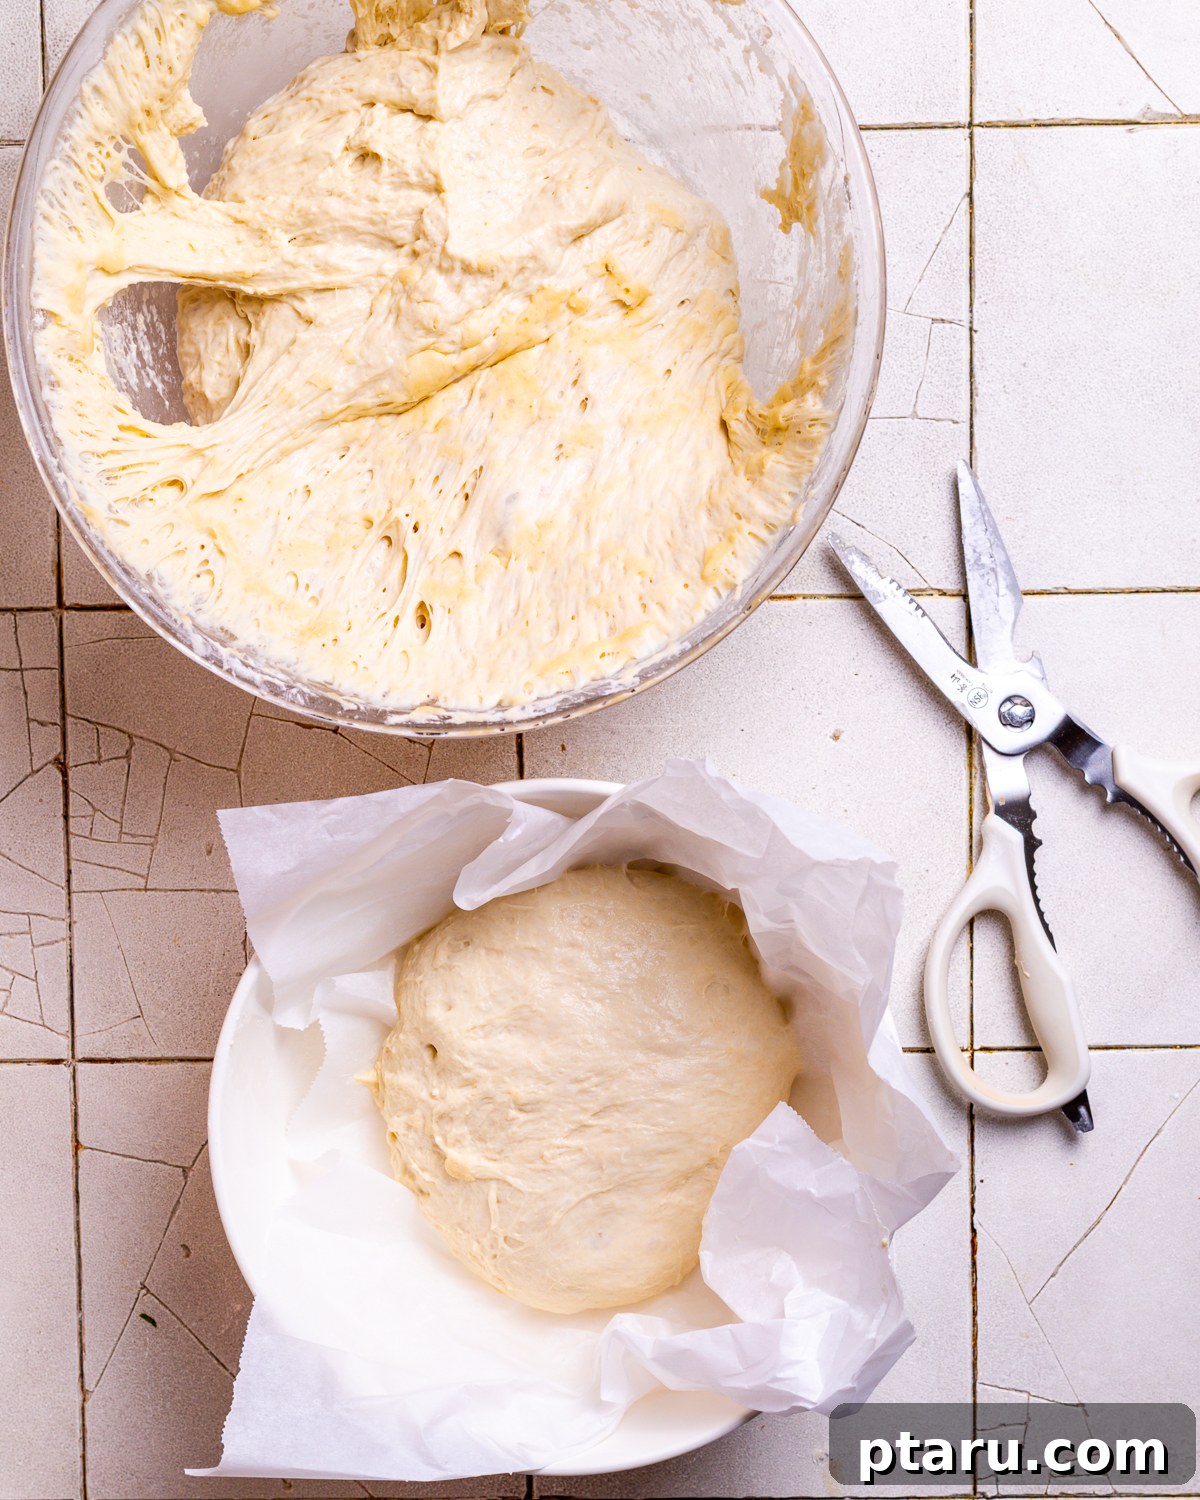
After mixing, allow the dough to undergo its initial rise in the bowl. This process typically takes two hours or more. The beauty of this recipe is that this initial rise doesn’t require constant supervision; simply let it rest and do its thing until it has visibly risen and become puffy.
2. Store the Dough for Future Freshness
Once the initial rise is complete, your dough will be beautifully puffy and filled with wonderful yeasty goodness. At this stage, you have a choice: you can proceed to bake a loaf immediately, or you can transfer the dough to an airtight container and place it in the refrigerator. Stored correctly, this versatile dough can remain fresh for up to two weeks, ready to be transformed into a warm loaf at a moment’s notice.
Pro Tip: The longer the dough rests in the refrigerator, the more time the flavors have to develop and deepen. This extended fermentation also contributes to larger, more irregular air holes (a desirable trait!) in the baked bread. You’ll notice an improvement in taste and texture even after just 24 hours, and after 14 days, the bread will take on complex, sourdough-like notes.
3. Shape Your Loaf with Ease
When you’re ready to enjoy a fresh loaf, generously dust the surface of the dough with flour. Using a serrated knife or kitchen scissors, cut off a portion (approximately one-third of the total dough for a single loaf). The dough will be quite sticky and loose in texture, so wetting your hands slightly before handling will make shaping much easier.
Gently shape the dough by stretching its surface and tucking the edges underneath, creating tension that results in a smooth, taut surface on top. Imagine you’re gently wrapping the dough around an invisible baseball at its core. Once shaped, place the dough on a piece of parchment paper inside a large bowl or a pie plate. This helps the dough maintain its rounded form and rise upwards rather than spreading outwards. Allow the shaped dough to rest for approximately 40 minutes for its final proof.
The parchment paper is your best friend here, as it makes transferring the delicate dough into the screaming hot Dutch oven incredibly simple and prevents any deflation.
4. Bake Your Artisan Bread to Perfection
Baking this bread in a Dutch oven is the secret weapon for achieving that coveted perfectly crusty loaf with a wonderfully tender and airy interior. Here’s a detailed guide to the baking process:
- Preheat the Dutch Oven: Approximately 30 minutes before you plan to bake, place your Dutch oven (with its lid on) into your oven and preheat it to 450°F (232°C). This crucial preheating step is vital because it creates an intensely hot, steamy environment inside the pot. This steam is what allows the bread to develop an incredibly crisp, golden-brown crust while ensuring the inside remains beautifully soft and airy.
- Transfer the Dough to the Hot Dutch Oven: Once the dough has completed its final rest and the oven is fully preheated, carefully remove the searing hot Dutch oven from the oven using sturdy oven mitts. Gently lift the shaped dough using the parchment paper and carefully lower it into the preheated Dutch oven. Exercise extreme caution, as the pot will be intensely hot. Before replacing the lid, dust the top of your dough generously with flour and make a few slashes with a serrated knife. These slashes, known as scoring, allow the bread to expand evenly and beautifully during baking. Replace the lid using oven mitts.
- Bake Covered: Return the Dutch oven, lid on, to the preheated oven. Bake for precisely 30 minutes with the lid securely in place. The enclosed environment traps the steam released from the dough, which is the key to developing that desirable crackly, robust crust and encouraging maximum oven spring (how much the bread rises in the oven).
- Bake Uncovered: After the initial 30 minutes, carefully remove the lid from the Dutch oven. Continue baking for an additional 10-15 minutes, or until the crust achieves a deep, golden-brown hue and feels wonderfully crisp. This uncovered phase allows the crust to truly crisp up and develop its rich color.
- Cool the Bread Completely: Once baked to perfection, carefully remove the bread from the Dutch oven using the parchment paper. Transfer it immediately to a wire rack and allow it to cool completely before attempting to slice it. This cooling period is absolutely essential; it allows the bread’s internal structure (the crumb) to set properly, ensuring that your slices are clean, the texture is perfect, and the flavor fully develops. Cutting into hot bread often results in a gummy texture.
Baking in a Dutch oven is a remarkably effective method for producing bakery-quality bread right in your own kitchen with surprisingly minimal effort. The heavy cast iron pot excels at distributing heat evenly, and the trapped steam works wonders, helping the bread achieve an impressive rise and that irresistible gorgeous crust.
No-Knead Bread Without a Dutch Oven
If you don’t own a Dutch oven, you can still enjoy fantastic no-knead bread! Simply bake the dough on a preheated cast iron skillet, a pizza stone, or a regular baking sheet. In this case, you will skip the covered baking step and bake the bread uncovered for the entire duration, until it is golden brown and sounds hollow when tapped.
Delightful Ways to Serve Your Homemade Bread
This Dutch Oven Bread, like most freshly baked homemade breads, is an absolute revelation when served warm. There’s nothing quite like a slice slathered with rich butter or dipped in a fragrant, high-quality olive oil. Its rustic charm and satisfying texture make it an ideal companion for a comforting bowl of soup or a hearty stew.
Imagine pairing it with a classic tomato soup, a nourishing vegetable orzo soup, a robust ground turkey soup, a creamy zucchini and potato soup, a savory ham and lentil soup, or a timeless old-fashioned vegetable beef soup. For an extra burst of flavor, try serving it with a zesty garlic butter sauce for dunking. Beyond meal accompaniments, this bread also makes the best-ever toast for breakfast or the perfect foundation for a satisfying meatloaf sandwich.
Optimal Storage for Long-Lasting Freshness
Proper storage is paramount to keeping your homemade Dutch oven bread fresh, flavorful, and enjoyable for as long as possible. Follow these essential tips to extend its shelf life:
- Room Temperature Storage: For short-term storage (up to two days), keep your bread in a paper bag, a dedicated bread box, or an airtight container at room temperature. A paper bag helps maintain the crispness of the crust while allowing the bread to breathe, preventing it from becoming soggy. An airtight container will keep it softer.
- Avoid the Refrigerator: Resist the temptation to store bread in the refrigerator! Cold temperatures drastically accelerate the staling process, primarily by speeding up starch retrogradation. This molecular change causes the bread to dry out and become tough much faster than if left at room temperature.
- Freezing for Long-Term Storage: If you anticipate not finishing the entire loaf within a couple of days, freezing is your best option for long-term preservation. For maximum convenience, slice the bread first, then wrap the slices tightly in plastic wrap or place them in a freezer-safe bag. This method allows you to thaw individual slices as needed, without compromising the freshness of the rest of the loaf.
- Reheating Frozen Bread: To refresh frozen bread, you can either toast individual slices or warm a whole loaf in a preheated oven at 350°F (175°C) for approximately 10-15 minutes. This reheating process will help restore some of the crust’s original crispiness and revive the bread’s soft interior, making it almost as good as freshly baked.
Final Tips for Your Artisan Bread Success:
- Flour Flexibility: No whole wheat flour on hand? No problem at all! Simply substitute it with an equal amount of all-purpose flour for a equally delicious, slightly lighter loaf.
- Flavor Development: The dough is wonderfully forgiving and can be stored in the fridge for up to 14 days. The longer it rests, the more complex and nuanced its flavor will become, often developing notes akin to sourdough.
- Patience is Key: Always allow your freshly baked bread to cool completely on a wire rack before attempting to slice it. This critical step ensures that the internal crumb sets perfectly, resulting in clean slices and the ideal texture.
- Smart Storage: Store any leftover bread in a paper bag at room temperature for up to two days. For longer storage, freeze it. Remember, avoid refrigerating bread as it paradoxically causes it to stale much faster.
No-Knead Dutch Oven Bread Recipe
Jennifer Pallian BSc, RD
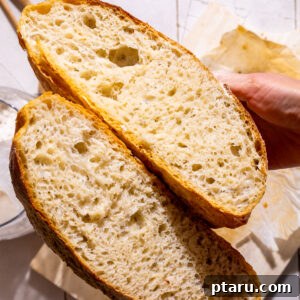
This No-Knead Dutch Oven Bread recipe consistently delivers the best bread I’ve ever tasted. It’s incredibly crusty on the outside, wonderfully tender inside, and so easy that anyone who can stir can make it. This recipe yields enough dough for 3 loaves, allowing you to bake one fresh loaf and conveniently store the remaining dough in the fridge for up to two weeks.
5 minutes
40 minutes
3 loaves
Ingredients
- 6 ⅓ cups all-purpose flour
- ½ cup whole wheat flour
- 1 tbsp yeast (instant or active dry, proofed if active dry)
- 1 tbsp kosher salt
- 3 cups warm water
Instructions
- In a large bowl, combine the all-purpose flour, whole wheat flour, yeast, and kosher salt. Stir in the warm water until fully mixed and a sticky dough forms. Cover the bowl loosely with plastic wrap or a lid and let the dough rise in a warm place for at least 2 hours, or until significantly increased in volume. If you’re not baking immediately, cover the bowl tightly and refrigerate the dough.
- When you’re ready to bake, line a pie plate or medium bowl with parchment paper to help the dough hold its shape during its final rise. Generously dust the surface of your stored dough with flour. Using a serrated knife or kitchen scissors, cut off a piece of dough (approximately 1/3 of the total dough) to make one loaf. (Remember, this recipe makes 3 loaves, and the remaining dough can be refrigerated for up to 2 weeks for future baking.) Since the dough is quite wet and sticky, wet your hands to prevent it from sticking while shaping. Gently shape the dough by stretching its surface and tucking the edges underneath to create a smooth, taut top. Place the shaped dough into the parchment paper-lined dish. Let it rest in a warm spot for 60-90 minutes for its final proof.
- In the final 30 minutes of the dough’s resting period, preheat your oven to 450°F (232°C) with the Dutch oven (and its lid) inside. Once the oven and Dutch oven are fully preheated, carefully remove the hot Dutch oven. Using the parchment paper, carefully lift and transfer the shaped dough into the hot Dutch oven. Dust the top of the dough with a little flour, then use a serrated knife to make a few slashes across the top. This scoring allows the bread to expand properly during baking. Carefully place the lid back on the Dutch oven (using oven mitts!). Bake with the lid on for 30 minutes. After 30 minutes, remove the lid and continue baking for an additional 10-20 minutes, or until the crust is deeply browned and the bread reaches an internal temperature of at least 190ºF (88°C) or sounds hollow when tapped.
Notes
HANDLING DOUGH: The dough is intentionally wet and sticky. Wetting your hands before shaping is a simple trick to prevent it from adhering to your fingers.
NO DUTCH OVEN? You can successfully bake this bread on a preheated cast iron skillet, pizza stone, or baking sheet. Simply skip the covering step and bake uncovered for the entire duration.
YIELD: This recipe is designed to yield 3 generous loaves of bread.
NUTRITION: The provided nutrition values are based on 1/8th of a single loaf, representing a nice, substantial slice.
FLOUR SUBSTITUTION: If whole wheat flour isn’t available, feel free to substitute with an equal amount of additional all-purpose flour.
DOUGH STORAGE: The versatility of this dough allows it to be stored in the refrigerator for up to 14 days. Baking loaves later in this period can result in a more complex and flavorful bread due to extended fermentation.
COOLING: It’s crucial to let the bread cool completely on a wire rack before slicing. Cutting into hot bread can lead to a gummy texture and prevents the crumb from setting properly.
BREAD STORAGE: Store any leftover bread in a paper bag at room temperature for up to 2 days to maintain crust crispness. For longer storage, freeze it. Avoid refrigerating baked bread, as it tends to stale much faster in cold temperatures.
Nutrition
Calories: 174kcal | Carbohydrates: 38g | Protein: 6g | Fat: 2g | Saturated Fat: 0.02g | Polyunsaturated Fat: 0.3g | Monounsaturated Fat: 0.3g | Sodium: 439mg | Potassium: 16mg | Fiber: 5g | Sugar: 2g | Vitamin A: 0.3IU | Vitamin C: 0.001mg | Calcium: 35mg | Iron: 2mg
Nutrition information is automatically calculated and should only be used as an approximation.