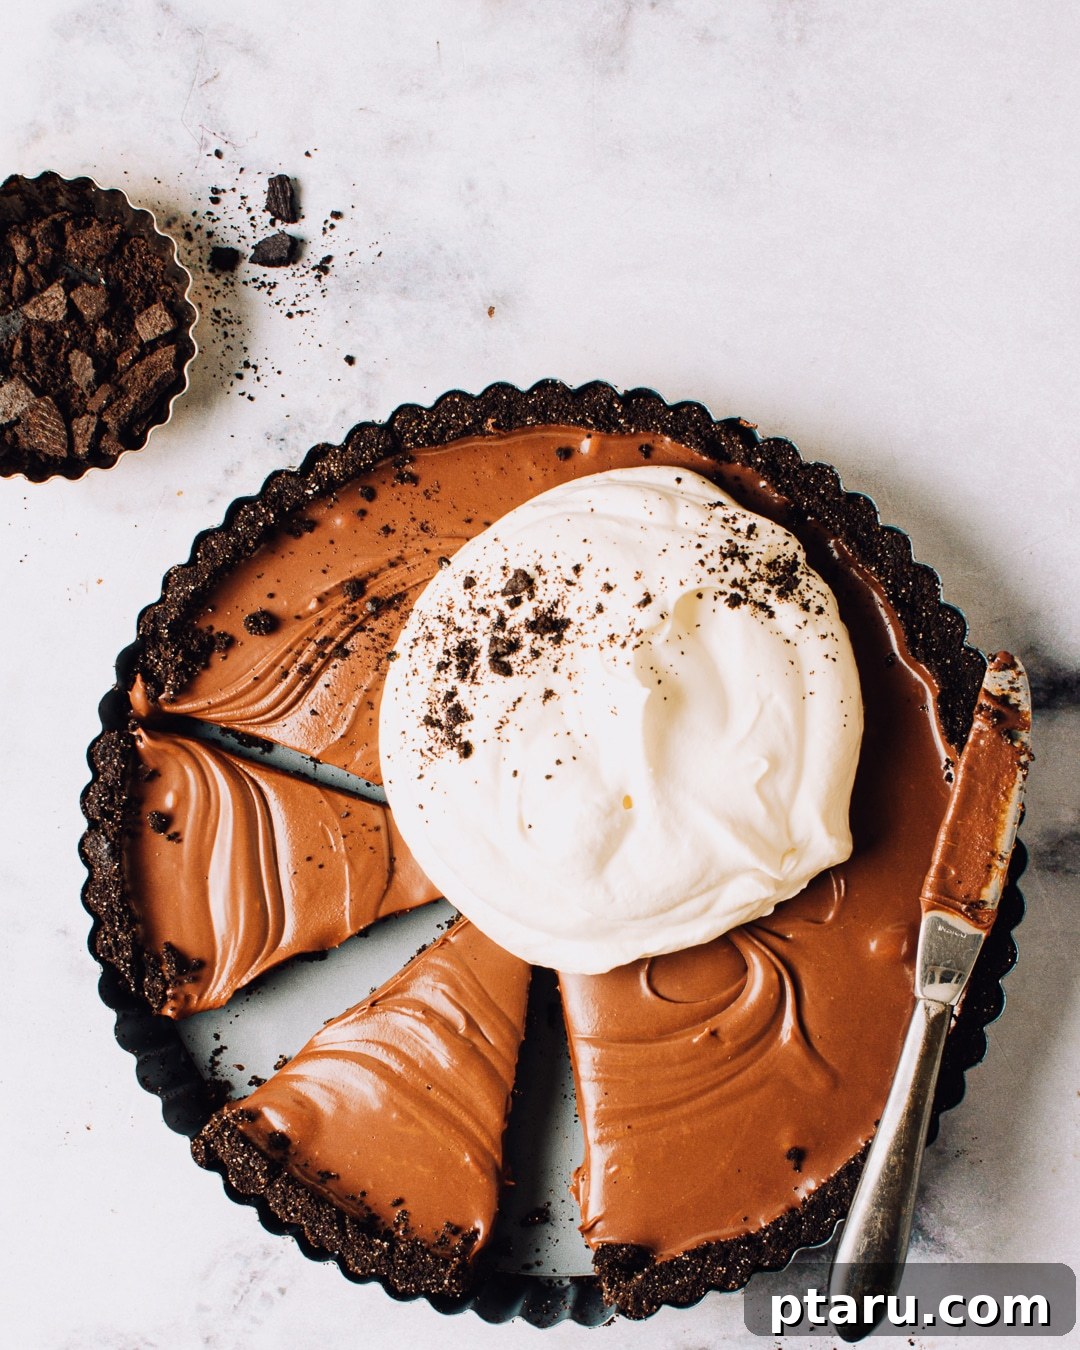
Indulge in the ultimate dessert experience with this unbelievably easy **no-bake chocolate tart recipe**. Featuring a rich, crumbly Oreo cookie crust and a velvety smooth, **no-bake ganache filling**, this dessert is so simple to prepare, it’s practically foolproof. Forget complicated baking steps; if you can boil water, you can master this decadent treat!
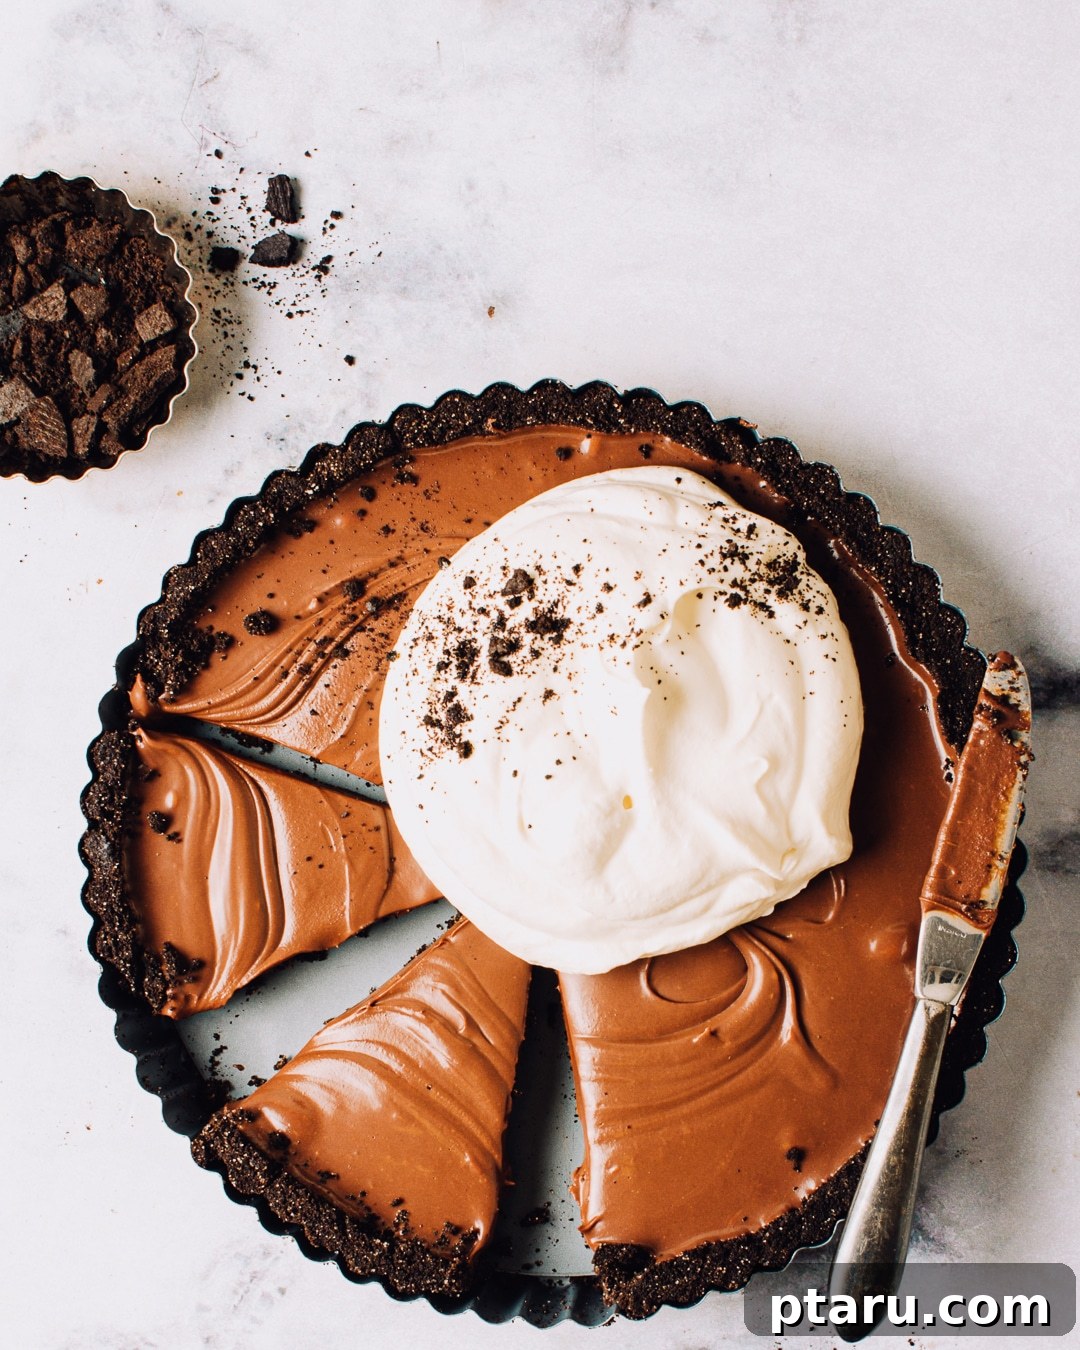
Easy No-Bake Chocolate Tart: The Ultimate Indulgence
Are you searching for a show-stopping dessert that requires minimal effort but delivers maximum flavor? Look no further! This no-bake chocolate tart has become a staple in my kitchen, especially since I experimented with a delightful Baileys variation before the holidays. It’s perfect for busy hosts, beginner bakers, or anyone craving a luxurious chocolate fix without the stress of oven timers.
This recipe promises an incredibly simple process with very little hands-on time, allowing you to spend more moments enjoying your company or simply relaxing. Get ready to impress with a dessert that tastes gourmet but is surprisingly accessible.
Why This No-Bake Chocolate Tart Stands Out
This isn’t just any chocolate tart; it’s a meticulously crafted recipe designed for convenience and extraordinary taste. It’s truly a chocolate lover’s dream come true, combining a crisp, deeply chocolatey crust with a melt-in-your-mouth creamy, rich ganache filling. Beyond its decadent flavor, its ease of preparation is what truly sets it apart.
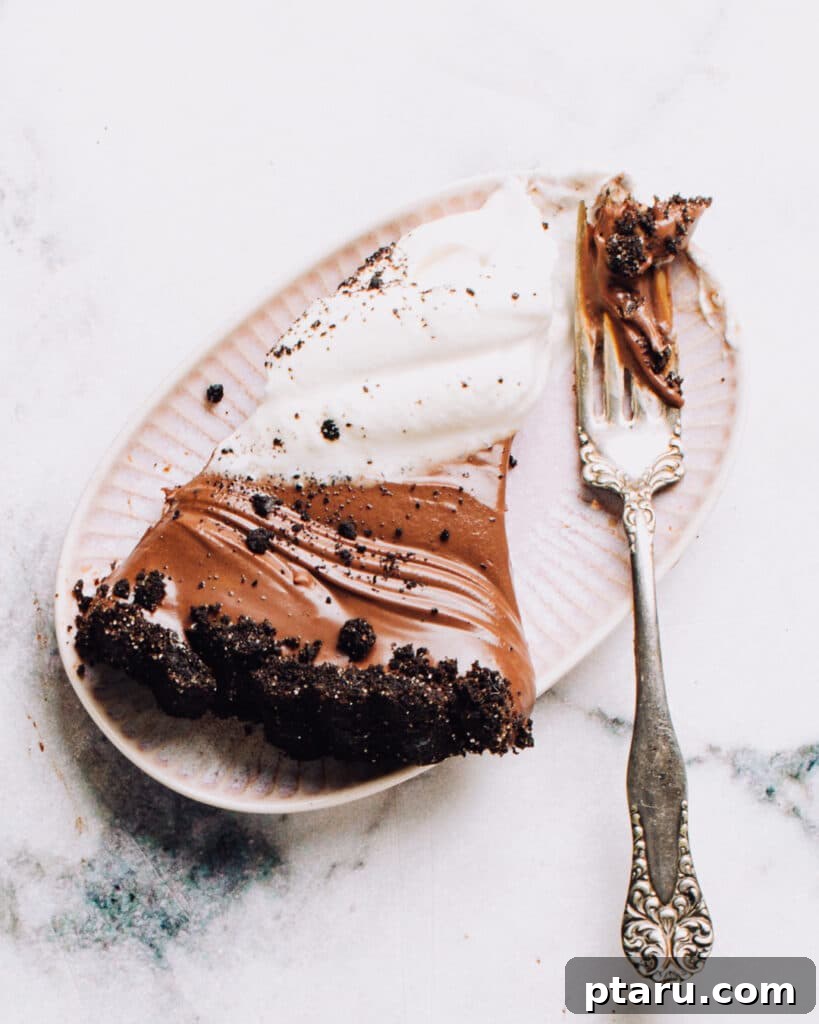
Here’s why you’ll fall in love with this recipe:
- Effortless No-Bake Filling: Say goodbye to the anxiety of over-baking or under-baking. The ganache filling requires no oven time. Simply combine your ingredients, pour, and chill. This method ensures a consistently smooth and perfectly set ganache every single time.
- Readily Available Ingredients: You won’t need to hunt for exotic components. This recipe relies on common, easy-to-find ingredients that are likely already in your pantry or readily available at any grocery store, making spontaneous dessert cravings easy to satisfy.
- Fail-Proof Gentle Melting Method for Chocolate: Our secret to a silky-smooth ganache lies in a gentle, controlled melting technique. By pouring hot cream over the chocolate, we minimize the risk of the chocolate seizing or becoming grainy. This ensures your ganache is always wonderfully smooth and glossy, making you feel like a pastry chef without the advanced techniques.
With these clever, foolproof features, even absolute beginners can confidently create this stunning tart. Experienced bakers, too, will appreciate its elegant taste, luxurious texture, and the sheer simplicity of achieving such a gourmet-quality dessert.
Essential Ingredients and Tools for Your No-Bake Chocolate Tart
Before you embark on crafting this mouthwatering dessert, it’s wise to gather all your necessary ingredients, think about any fun variations you might want to try, and ensure you have the right kitchen tools on hand. Preparation is key to a smooth and enjoyable baking (or rather, no-baking) experience.
No-Bake Chocolate Tart Ingredients
A decadent, rich chocolate ganache nestled within a crisp Oreo crust—what could be more divine? Here’s a detailed breakdown of what you’ll need to create this masterpiece:
For the Chocolate Tart Crust:
- Chocolate Cookie Crumbs: These form the foundational layer of your crust. The deep, dark chocolate flavor from crushed Oreo cookies (or similar chocolate wafers) provides a rich and robust base that perfectly complements the ganache. For convenience, you can buy pre-made crumbs, or simply process whole Oreo cookies in a food processor until finely ground.
- Granulated Sugar: A touch of sugar helps to sweeten the crust, balancing the intensity of the chocolate cookie crumbs and creating a more harmonious flavor profile.
- Melted Butter: The magical binding agent! Melted butter coats the cookie crumbs, allowing them to compact firmly into a sturdy crust that holds its shape beautifully once chilled.
For the Velvety Ganache Filling:
- High-Quality Dark Chocolate: This is the undeniable star of our ganache. Opt for a dark chocolate with a cocoa percentage you enjoy, as its flavor will shine through prominently. Whether you choose chocolate chips or finely chopped bars, quality here makes a significant difference.
- Heavy Cream: Also known as whipping cream or 35% m.f. (milkfat) cream, this ingredient is crucial for creating the ganache’s luxurious creaminess and smooth texture. The high fat content helps emulsify the chocolate, leading to that irresistible silkiness.
- Softened Butter: A final addition of softened butter at the end of the ganache preparation contributes extra richness, a beautiful glossy sheen, and helps the ganache set with a wonderful, almost fudge-like consistency.
Choosing the Perfect Chocolate for Your Ganache
The ganache filling is designed to be luscious, creamy, and have a delightful chew, much like a really thick, luxurious hot fudge. The key to achieving a deep, rich flavor lies in your choice of dark chocolate. With so few ingredients, the quality and flavor profile of the chocolate itself truly take center stage.
I personally find that stocking up on high-quality dark chocolate bars, such as Lindt, in bulk from stores like Costco, offers excellent value and flavor. However, I’ve also had fantastic results with large 500g grocery-store-brand Swiss dark chocolate bars, which are often a fraction of the price but still deliver superb taste.
The best advice is to choose a chocolate that you would happily nibble on straight from the package. If that means your favorite brand of dark chocolate chips, then absolutely use those! Trust your taste buds, as the better the chocolate you choose, the more exquisite your ganache will be.
Creative Variations and Smart Substitutions
Feel free to unleash your inner pastry artist and customize this tart to your liking. Here are some ideas to add your unique twist:
- Crust Flavor Swap: Instead of chocolate cookie crumbs, try using classic graham cracker crumbs or even Biscoff cookie crumbs for a different, equally delicious base.
- Infuse New Flavors: Elevate your ganache by infusing the heavy cream before heating. Add fresh mint leaves, orange zest, or even a cinnamon stick to the cream, let it steep, then strain it out before pouring over the chocolate. A splash of espresso powder or a teaspoon of vanilla extract can also deepen the chocolate notes.
- Alter Chocolate Sweetness: For a milder, sweeter tart, substitute dark chocolate with milk chocolate or semi-sweet chocolate. Remember that the sweetness level will change, so adjust accordingly.
- Gluten-Free Option: Easily make this tart gluten-free by swapping standard cookie crumbs for a certified gluten-free variety. Alternatively, a finely ground almond meal mixed with a touch of sugar and butter can create a nutty, gluten-free base. Always double-check all other ingredients for hidden gluten.
- Vegan or Dairy-Free Alternative: This recipe is naturally egg-free, making it easy to adapt for vegan or dairy-free diets. Replace the butter with coconut oil (refined for a neutral taste, or unrefined for a subtle coconut flavor). For the heavy cream, use full-fat canned coconut cream (the thick part from a chilled can, not coconut milk) or a high-quality plant-based whipping cream. Ensure your chocolate and cookies are also certified vegan.
Essential Kitchen Tools for a Smooth Process
Having the right equipment makes preparing this tart an absolute breeze. Ensure you have these kitchen essentials:
- 9-inch Tart Pan: A tart pan with a removable bottom is highly recommended. It allows for effortless removal of the finished tart, preserving its beautiful, fluted edges and making slicing and serving much easier.
- Microwave-safe Bowl: Ideal for quickly heating the heavy cream. If you prefer, a small saucepan on the stovetop will work just as well to bring the cream to a steaming hot temperature.
- Whisk: Essential for thoroughly combining the ganache ingredients, ensuring a smooth, lump-free consistency as the chocolate melts into the hot cream.
- Rubber Spatula: Perfect for scraping down the sides of your bowl, ensuring no precious ganache is left behind, and for smoothing the filling evenly into the crust.
With your ingredients prepped and tools at the ready, you are now perfectly poised to create this irresistible No-Bake Chocolate Tart with Ganache. Let’s get started on the simple steps!
How to Make No-Bake Chocolate Tart: A Simple Guide
Once you discover just how effortless it is to create this incredibly delicious chocolate tart, you’ll find yourself making it again and again. The process is designed to be straightforward, yielding impressive results with minimal fuss.
Here’s a quick overview of how to assemble this decadent no-bake chocolate tart:
- Combine chocolate cookie crumbs with melted butter, press into a tart pan, and freeze to set.
- Gently heat heavy cream until simmering, then pour it over chopped dark chocolate. Cover and let stand to melt. Whisk in softened butter until smooth.
- Pour the luscious ganache into the chilled crust and refrigerate until firm.
Now, let’s dive into the details for each step, ensuring your tart is nothing short of perfection:
Crafting the Perfect No-Bake Chocolate Cookie Crust
- Begin by preparing your 9-inch tart pan. There’s no need to preheat your oven, as this is a wonderful no-bake dessert.
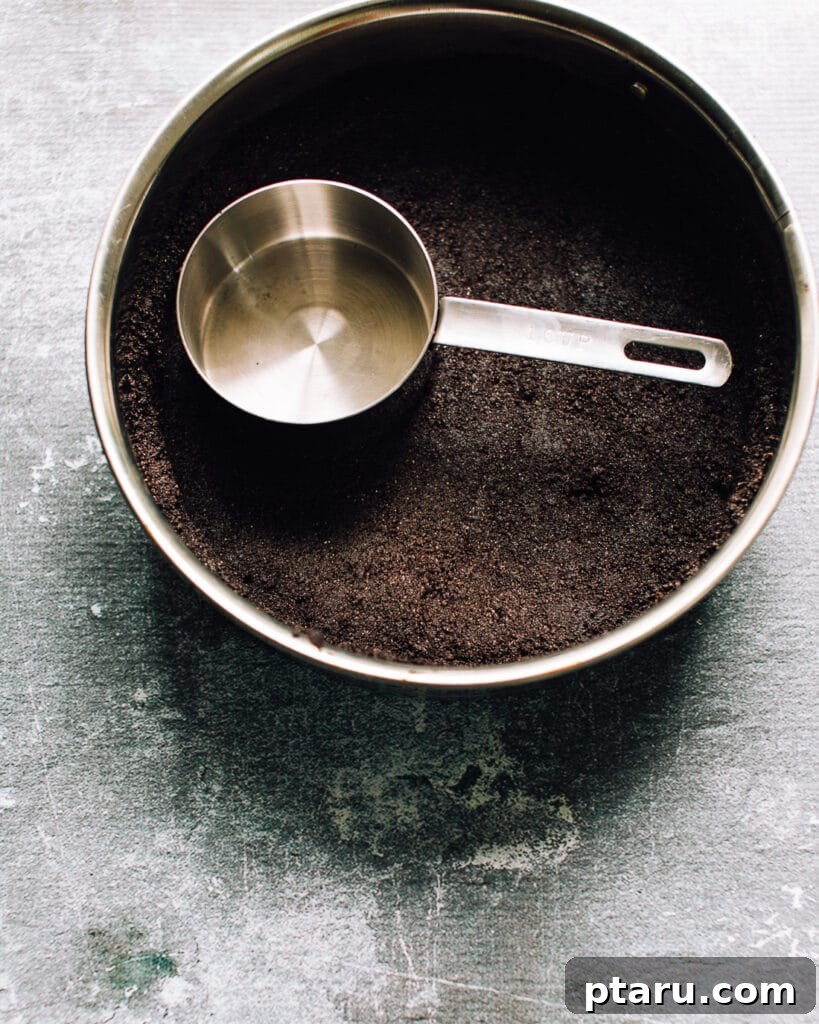
- In a large mixing bowl, combine the chocolate cookie crumbs, granulated sugar, and melted butter. Stir these ingredients thoroughly until the crumbs are evenly moistened and resemble wet sand. The goal is to achieve a texture that is moist enough to hold together when pressed.
- Transfer this mixture into your tart pan. Use the bottom of a flat-sided measuring cup or your fingers to firmly press the mixture into an even layer across the bottom and up the sides of the pan. Pressing firmly is crucial to create a stable crust that won’t crumble when sliced.
- Place the prepared crust in the freezer for approximately 15 minutes. This quick chill helps the butter solidify, setting the crust and making it firm enough to hold the ganache without losing its shape.
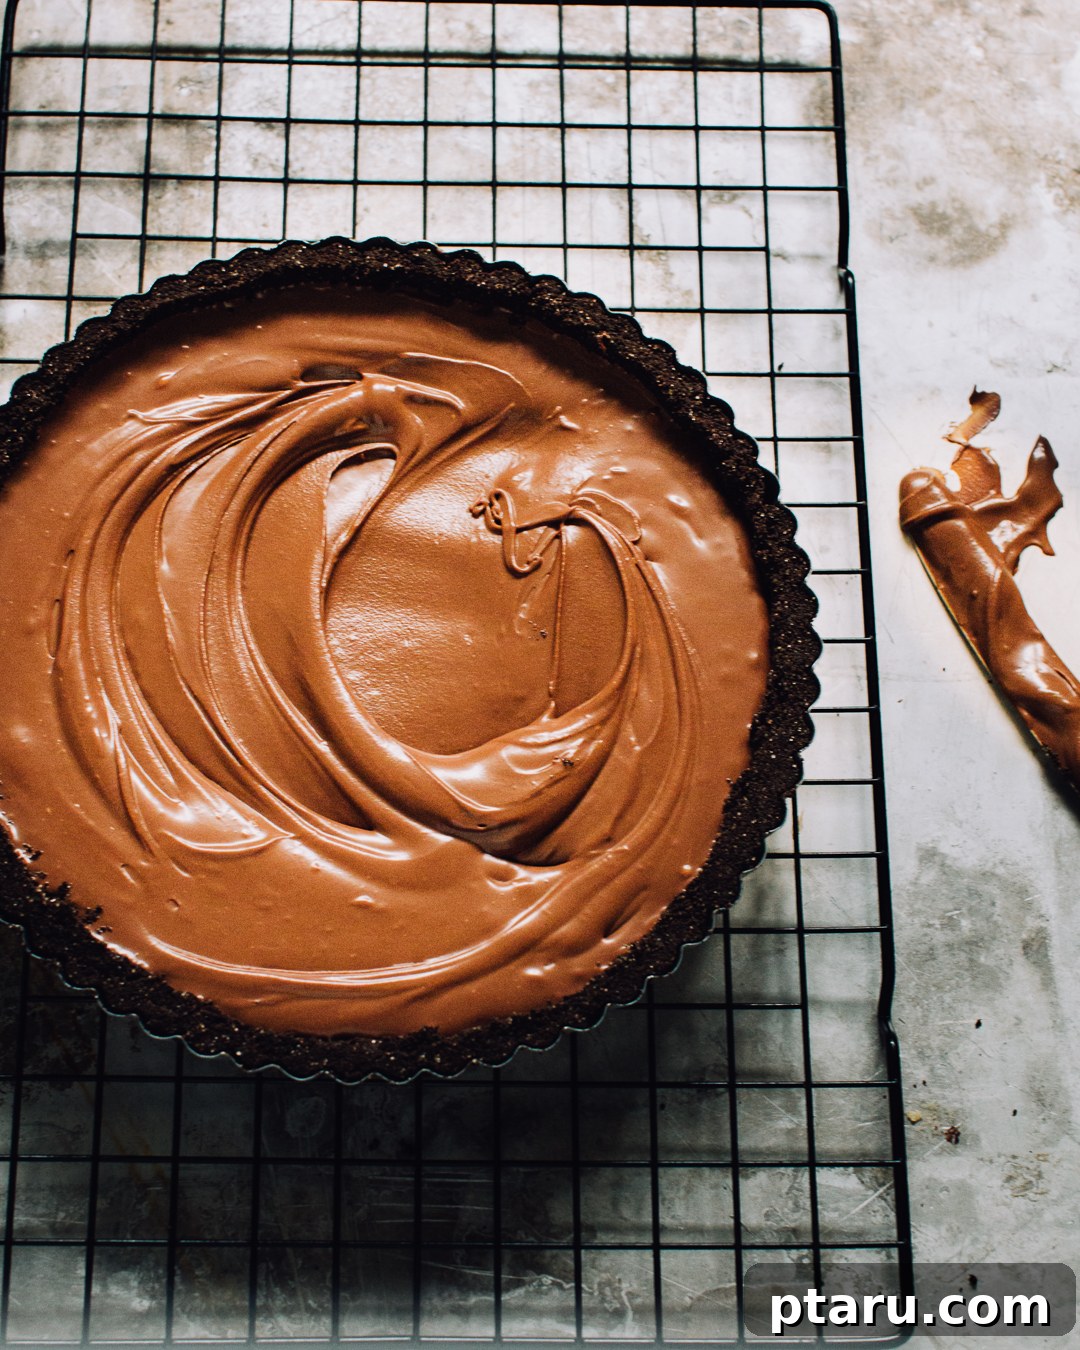
Preparing the Silky Smooth Chocolate Ganache Filling
- While your crust is chilling, place your finely chopped dark chocolate (or chocolate chips) in a large, heat-safe mixing bowl.
- Pour the heavy whipping cream into a microwave-safe bowl. Heat it on high power for about 1 ½ to 2 minutes, or until it is steaming hot and small bubbles begin to form around the edges. Alternatively, heat it in a small saucepan on the stovetop until just simmering.
- Immediately pour the hot cream over the chocolate in the other bowl. The heat from the cream will begin to melt the chocolate.
- Cover the bowl tightly with a large plate or a baking sheet. Let it stand undisturbed for 5 minutes. This allows the residual heat from the cream to gently and evenly melt the chocolate, preventing it from seizing.
- After 5 minutes, remove the cover and add the softened butter. Begin to whisk the mixture gently from the center outwards until it transforms into a completely smooth, glossy, and emulsified ganache. If you notice any stubborn, unmelted chocolate bits, you can microwave the ganache at 50% power in 30-second intervals, stirring thoroughly after each interval, until it reaches perfect smoothness.
Assembling and Chilling Your Chocolate Tart
- Retrieve your chocolate cookie crust from the freezer, ensuring it’s nicely set and firm.
- Carefully pour the warm, smooth ganache filling into the chilled crust. Use a rubber spatula to gently spread it evenly across the crust, creating a beautiful, flat surface.
- Place the assembled tart into the refrigerator. Allow it to chill for a minimum of 4 hours. This crucial chilling period gives the ganache ample time to firm up and set completely, ensuring clean slices and the ideal, rich texture.
And voilà! Your exquisite No-Bake Chocolate Tart with Ganache is now ready to be sliced, garnished, and savored. Prepare for compliments!
Chocolate Tart: Make Ahead and Storage Tips
Keeping your No-Bake Chocolate Tart with Ganache fresh and utterly delicious is wonderfully simple with these handy tips. This dessert is fantastic for making in advance, reducing stress when entertaining.
- Make Ahead Perfection: This tart is an ideal make-ahead dessert! You can prepare the crust and the ganache up to two days before you plan to serve. Store the pressed crust tightly covered in the freezer, and keep the prepared ganache in an airtight container in the refrigerator. When you’re ready to assemble, gently rewarm the ganache slightly (if needed) to make it pourable, then combine with the crust and chill as directed.
- Refrigeration for Freshness: Once fully assembled and set, your chocolate tart should always be stored in the refrigerator. Tightly wrap it with plastic wrap or keep it in an airtight tart carrier to prevent it from absorbing other odors and to maintain its fresh taste and texture. It will remain perfectly fresh and delightful for up to 5 days.
- Freezing for Longer Enjoyment: To extend the life of your chocolate tart, it freezes beautifully for up to a month. To freeze, ensure the tart is completely chilled and firm. Wrap it very tightly first in plastic wrap, then in a layer of aluminum foil. This double-layer protection is essential to prevent freezer burn and keep it tasting its best.
- Thawing Instructions: When you’re ready to enjoy a frozen tart, transfer it to the refrigerator and allow it to thaw slowly overnight. This gradual thawing helps preserve the ganache’s creamy texture and prevents condensation from forming on the surface.
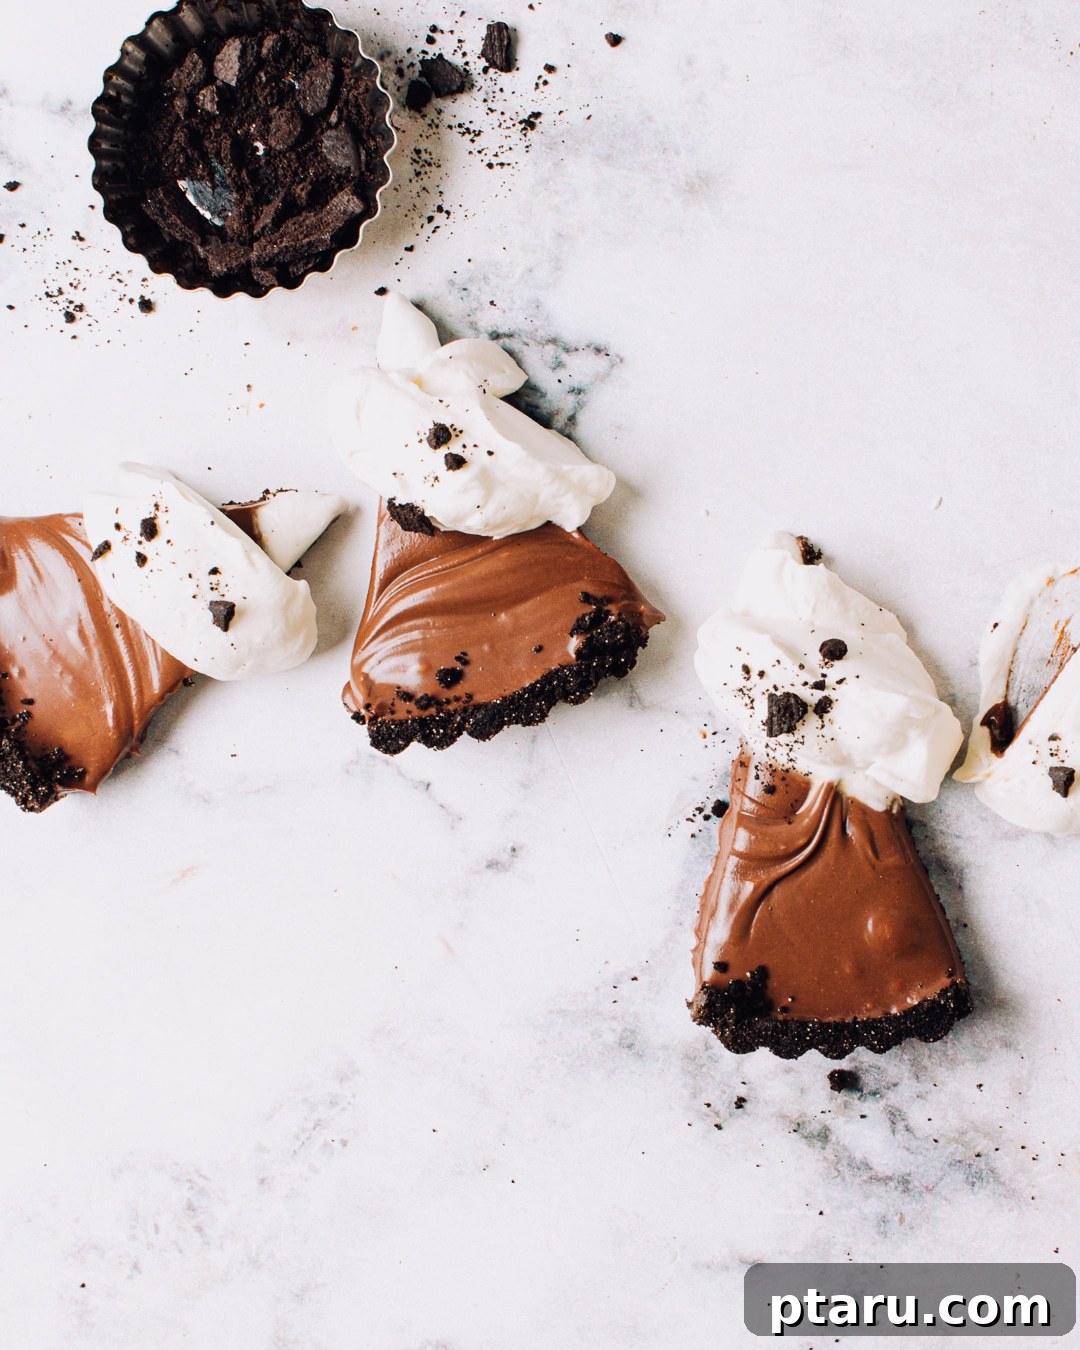
How to Serve This No-Bake Chocolate Tart with Ganache
This rich and decadent chocolate tart is truly a star on its own, but a few simple accompaniments can elevate it even further, adding delightful contrasts in texture and flavor. A generous dollop of sweetened whipped cream provides a welcome light, fluffy counterpoint to the dense ganache, while a simple sprinkling of flaky sea salt is often all that’s needed to truly enhance the chocolate’s depth.
- Perfect Slicing Technique: For clean, elegant slices, use a sharp, thin-bladed knife. Dip the knife in hot water and wipe it clean between each slice. This warms the blade slightly, allowing it to glide through the ganache without tearing.
- Delightful Accompaniments:
- Whipped Cream: A cloud of freshly whipped cream, lightly sweetened, is a classic pairing.
- Fresh Berries: The tartness of fresh raspberries, strawberries, or blueberries provides a refreshing contrast to the rich chocolate.
- Caramel or Raspberry Sauce: A delicate drizzle of warm caramel sauce or a vibrant raspberry coulis can add another layer of flavor and visual appeal.
- Flaky Sea Salt: A tiny pinch of flaky sea salt (like Maldon) sprinkled just before serving beautifully enhances the chocolate’s complexity and cuts through the richness.
- Espresso Powder/Cocoa Dusting: A light dusting of unsweetened cocoa powder or a tiny sprinkle of instant espresso powder can intensify the chocolate aroma and flavor.
- Vanilla Ice Cream: A scoop of high-quality vanilla bean ice cream melting alongside a warm slice (if you allow it to come to room temp) is pure bliss.
- Optimal Serving Temperature: This tart is best served chilled, directly from the refrigerator. If desired, you can let individual slices sit at room temperature for 10-15 minutes before serving for a slightly softer ganache texture and enhanced flavor complexity.
- Consider Portion Size: Given its rich and indulgent nature, small slices are usually perfectly sufficient. This makes it an excellent dessert for serving a larger group, ensuring everyone gets a satisfying taste without feeling overwhelmed.
3 Most Common Mistakes When Making No-Bake Chocolate Tart
Even with an “easy” recipe, a few common pitfalls can hinder your success. Being aware of these frequent mix-ups will help you achieve a flawless No-Bake Chocolate Tart with Ganache every single time:
- Causing the Chocolate to Seize: This is arguably the most feared baking mishap when working with chocolate. Seizing occurs when chocolate comes into contact with even a tiny amount of moisture or is heated too quickly, causing it to become grainy, clumpy, and unusable. Our method of pouring hot cream over the chocolate is specifically designed to prevent this. It ensures a gentle, controlled melting process where the chocolate slowly warms and emulsifies with the hot fat from the cream, minimizing the risk of seizing. Unlike finicky double boiler methods or direct microwaving (which can easily overheat chocolate), this technique results in a foolproof, luxurious ganache every time.
- Not Chilling the Crust Sufficiently: Rushing the crust chilling process is a common mistake. If the cookie crust isn’t allowed to freeze for the recommended 15 minutes, the melted butter won’t have enough time to solidify. This can result in a crust that is too soft, doesn’t hold its shape when the ganache is added, or crumbles excessively when you try to slice the finished tart. A well-chilled crust provides a stable and delicious foundation.
- Rushing the Ganache Setting Time: Patience is a virtue when it comes to setting ganache. While the process of making the ganache is quick, it absolutely requires ample time in the refrigerator to firm up properly. If you attempt to slice the tart before the minimum 4-hour chilling period (or preferably longer), the ganache will likely be too soft and runny, resulting in messy slices and a less satisfying texture. Plan ahead and allow your tart the necessary time to set for that perfect, sliceable consistency.
FAQs About No-Bake Chocolate Tart
Just skimming through? Here are some quick answers to the most commonly-asked questions about making and enjoying a no-bake chocolate tart.
Frequently Asked Questions About Chocolate Tart
Here are concise answers to the questions people often ask:
What can I use instead of chocolate cookie crumbs for the crust?
You can easily substitute chocolate cookie crumbs with graham cracker crumbs, digestive biscuit crumbs, or even finely crushed shortbread cookies for a delicious alternative crust.
Can I use milk chocolate instead of dark chocolate?
Absolutely! You can certainly replace dark chocolate with milk chocolate or semi-sweet chocolate. Just be aware that this will result in a significantly sweeter and possibly less intense chocolate flavor for your tart.
How can I make a dairy-free version?
To create a dairy-free chocolate tart, replace the butter with coconut oil (or a solid vegan butter substitute). For the heavy cream, use full-fat canned coconut cream (the thick, solidified part from a can chilled overnight) or a good quality dairy-free whipping cream. Ensure all your chocolate and cookie choices are vegan-friendly.
Do I have to use a tart pan?
No, a specialized tart pan isn’t essential. A regular 9-inch pie dish or a springform pan can serve as excellent alternatives for creating this no-bake dessert. Just be mindful that a pie dish won’t give you the fluted edges.
Can I add flavorings to my ganache?
Yes, adding flavorings can beautifully enhance your ganache! Consider incorporating a teaspoon of vanilla extract, a pinch of instant espresso powder to deepen the chocolate, or a few drops of food-grade essential oils like mint or orange for a distinct twist.
How do I store leftovers?
For optimal freshness, store any leftover chocolate tart tightly wrapped in plastic wrap or in an airtight container in the refrigerator. It will stay delicious for up to 5 days.
Why did my chocolate tart not set?
If your tart didn’t set, it could be due to a few reasons: insufficient amount of chocolate relative to the cream, not allowing enough chilling time, or using a low-fat cream instead of full-fat heavy whipping cream, which provides the necessary richness to solidify.
What do you serve with a chocolate tart?
Chocolate tart pairs wonderfully with a dollop of whipped cream, a scoop of vanilla ice cream, or a handful of fresh berries such as raspberries or strawberries. A light dusting of cocoa powder or a sprinkle of flaky sea salt also works wonders.
What wine goes with chocolate tart?
A sweet, fortified wine like Port or a rich Banyuls pairs exceptionally well with chocolate tart, complementing its intensity. Other delightful options include red dessert wines, a late-harvest Zinfandel, or even a bold Cabernet Sauvignon if you prefer drier reds with dark chocolate.
How long do chocolate tarts last in the fridge?
When properly stored in an airtight container or tightly wrapped, a chocolate tart will maintain its quality and freshness in the refrigerator for 4-5 days.
Can you freeze chocolate tart?
Absolutely! Chocolate tart freezes beautifully. Ensure it’s thoroughly chilled, then wrap it tightly in plastic wrap followed by aluminum foil to prevent freezer burn. It’s best consumed within a month for peak quality and flavor.
Easy No-Bake Chocolate Tart Recipe
By: Jennifer Pallian BSc, RD
This incredibly easy chocolate tart recipe features a decadent, crumbly Oreo cookie crust and a rich, creamy, no-bake ganache filling that’s simple to prepare and truly to die for. Perfect for any occasion, it comes together with minimal effort and delivers maximum indulgence.
Prep Time: 20 minutes
Cook Time: 0 minutes
Total Time: 20 minutes (plus 4 hours chill time)
Servings: 10
Ingredients
For the Tart Shell
- 1 ¼ cups chocolate cookie crumbs (from about 15-18 Oreo cookies)
- 2 tbsp granulated sugar
- 4 tbsp melted unsalted butter
For the Chocolate Filling (Ganache)
- 14 oz (approximately 400g) dark chocolate (chocolate chips or finely chopped bars)
- 1 cup heavy whipping cream (35% milkfat)
- 4 tbsp softened unsalted butter
Instructions
Prepare the Tart Shell
- In a 9-inch tart pan, combine the chocolate cookie crumbs, granulated sugar, and melted butter.
- Stir the mixture until the crumbs are evenly moistened and resemble wet sand.
- Press the crumb mixture firmly and evenly into the bottom and up the sides of the tart pan. Use the flat bottom of a cup or your fingers to compact it well.
- Place the prepared tart crust in the freezer for at least 15 minutes to allow it to set firmly.
Prepare the Chocolate Ganache Filling
- Place the chopped dark chocolate in a large, heat-safe bowl.
- Pour the heavy whipping cream into a separate microwave-safe bowl. Microwave on high power for 1 ½ – 2 minutes, or until the cream is steaming hot and small bubbles appear around the edges. (Alternatively, heat in a small saucepan on the stovetop until simmering.)
- Immediately pour the hot cream over the chocolate in the large bowl.
- Cover the bowl tightly with a baking sheet or a large plate and let it stand undisturbed for 5 minutes. This gentle steaming will melt the chocolate evenly.
Assemble and Chill
- After 5 minutes, remove the cover, add the softened butter, and begin whisking from the center outwards until the mixture is completely smooth, glossy, and well-combined.
- If there are any lingering unmelted chocolate bits, microwave the ganache at 50% power in 30-second intervals, stirring thoroughly after each, until perfectly smooth.
- Remove the chilled crust from the freezer and pour the warm ganache filling into it, spreading it evenly with a spatula if necessary.
- Place the assembled tart in the refrigerator and chill for at least 4 hours, or preferably overnight, until the ganache is fully set.
Notes
Be sure to plan ahead and allow the tart to chill for a minimum of 4 hours before serving so that the ganache can set properly and achieve its ideal texture.
For the tidiest slices, briefly pop the chocolate tart into the freezer for about 30 minutes before cutting. Then, allow individual slices to come to room temperature for a bit on their plates before serving for the best flavor and mouthfeel.
Serve your tart with a dollop of freshly whipped cream and a light dusting of cocoa powder (achieve an even dusting by shaking it through a fine-mesh sieve).
Nutrition (per serving, approximate)
Calories: 474kcal | Carbohydrates: 29g | Protein: 5g | Fat: 38g | Saturated Fat: 22g | Polyunsaturated Fat: 2g | Monounsaturated Fat: 10g | Trans Fat: 0.4g | Cholesterol: 53mg | Sodium: 131mg | Potassium: 321mg | Fiber: 4g | Sugar: 15g | Vitamin A: 661IU | Vitamin C: 0.1mg | Calcium: 49mg | Iron: 5mg
Nutrition information is automatically calculated and should only be used as an approximation.
Other tested-till-perfect chocolate desserts you will love:
Moist Chocolate Cake
Easy Chewy Brownies
Best-Ever Chocolate Cheesecake
Chocolate Pudding Cake