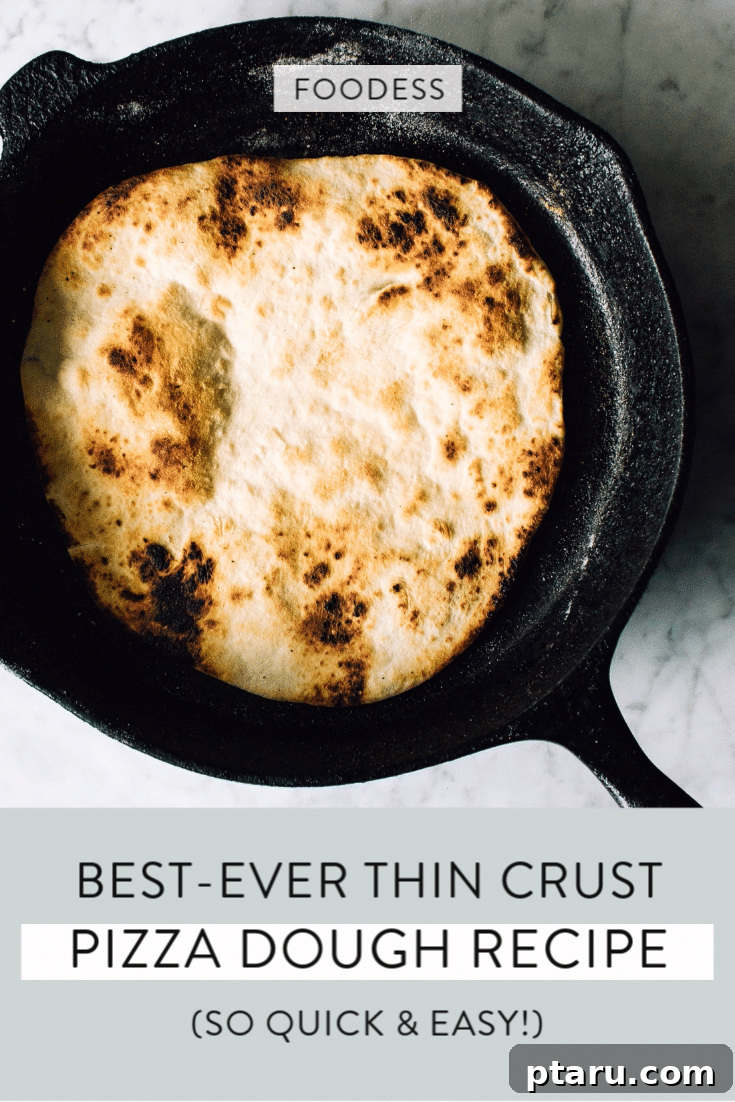
Unlock the secret to pizzeria-quality pizza right in your own kitchen! If you’ve been searching for the ultimate homemade pizza dough recipe that delivers a perfectly thin, crispy crust akin to what you’d get from a wood-fired oven, your culinary quest ends here. We’ve mastered some ingenious tips and tricks that make crafting an incredibly quick and easy pizza dough achievable for any home cook, transforming your pizza nights forever. Prepare to impress your family and friends with a truly authentic taste and texture that rivals your favorite gourmet pizzerias.

Essential Ingredients and Equipment for the Best Homemade Pizza Dough
Creating exceptional pizza dough starts with understanding the role of each ingredient and having the right tools at your disposal. This section details everything you need to embark on your journey to homemade pizza perfection.
Key Ingredients for Easy Homemade Pizza Dough
Every ingredient plays a vital role in developing the flavor, texture, and rise of your homemade pizza dough. Here’s a breakdown of what you’ll need and why each element is crucial:
- Warm Water: Not too hot, not too cold – this is the crucial element that awakens your yeast. Aim for around 105-115°F (40-46°C). Water that’s too cold won’t activate the yeast, while water that’s too hot can kill it, preventing your dough from rising. It’s the starting point for a successful fermentation process.
- Active Dry Yeast: The living organism responsible for the dough’s airy, soft texture. When activated, yeast consumes sugars and releases carbon dioxide, creating the bubbles that make your dough rise. Fresh yeast is key for optimal results.
- Granulated Sugar: More than just a sweetener, sugar acts as immediate fuel for the yeast, helping it to activate and multiply quickly. It also contributes to the browning of the crust during baking and adds a subtle depth of flavor that balances the savory notes.
- Extra Virgin Olive Oil: Beyond adding a rich, luscious flavor, olive oil contributes significantly to the dough’s elasticity and tenderness. It helps to create a soft, pliable texture that’s easy to work with and ensures a more tender bite in the finished crust. It’s also indispensable for greasing your mixing bowl, preventing the dough from sticking during its crucial rising phase.
- Coarse Salt: Essential for enhancing the overall flavor of the dough, salt also plays a critical role in controlling yeast activity. It slows down fermentation slightly, allowing for a more developed flavor profile and a stronger gluten structure. Don’t skip it, as unsalted dough will taste bland.
- Bread Flour or All-Purpose Flour: The structural backbone of your pizza dough. While both can be used, their protein content dictates the final texture. Bread flour, with its higher protein, develops more gluten, leading to a chewier, sturdier crust that can be stretched very thin without tearing. All-purpose flour yields a softer, more tender crust, which is also delicious but might be less “chewy” than a pizzeria-style crust.
Choosing the Best Flour for Pizza Dough: Bread Flour vs. All-Purpose
The choice of flour is one of the most critical decisions when making pizza dough, directly impacting the crust’s texture. Bread flour boasts a higher protein content, typically ranging from 12-14%. When this protein interacts with water and is subjected to kneading, it forms gluten – the elastic network that gives bread and pizza dough its structure and chewiness. A higher-protein flour, like bread flour, results in a more robust and resilient dough. This means you can stretch it thinner without it tearing, and it will produce a chewier crust, which is highly sought after in traditional pizzeria-style pizzas.
For comparative purposes, I’ve rigorously tested this recipe with both bread flour and standard all-purpose flour. Both variations produced excellent results. The dough made with all-purpose flour was notably softer and more tender, appealing to those who prefer a less chewy crust. However, the bread flour version delivered that satisfying, resilient chew that’s characteristic of authentic pizza. Most professional pizzerias opt for bread flour or specialty “00” flour, which is finely milled and also high in protein, creating that perfect crispy-chewy balance. If you have bread flour on hand, definitely use it for an elevated experience. If all-purpose flour is your only option, don’t fret; it will still yield a fantastic homemade pizza, just with a slightly different texture. The key is to understand these differences and choose according to your preference and availability.
Creative Variations and Substitutions to Customize Your Pizza Dough
One of the joys of homemade pizza is the ability to customize it to your heart’s content. These variations and substitutions allow you to tailor your pizza dough to specific dietary needs or flavor preferences:
- Gluten-Free Alternative: For those with gluten sensitivities or celiac disease, simply substitute regular wheat flour with a high-quality, all-purpose gluten-free flour blend. Look for blends designed for baking, often containing a mix of rice flour, tapioca starch, and xanthan gum to mimic gluten’s elasticity. Be aware that the dough’s texture and handling might differ slightly, requiring less kneading.
- Hearty Whole Wheat Dough: Swap out a portion or all of the white flour for whole wheat flour to introduce a nuttier, earthier flavor and a boost of dietary fiber. Whole wheat flour absorbs more liquid, so you might need a tiny bit more water, and the dough might be slightly denser. It’s a fantastic option for a more rustic and wholesome pizza.
- Aromatic Herbed Dough: Elevate your crust’s flavor by incorporating dried herbs directly into the dough mix. Popular choices include 1-2 teaspoons of dried oregano, basil, Italian seasoning, or a pinch of finely chopped fresh rosemary. These herbs infuse the crust with a delightful aroma and taste, complementing your toppings beautifully.
- Savory Garlic Infusion: For garlic lovers, add 1-2 teaspoons of garlic powder or a tablespoon of finely minced fresh garlic to the dough. This creates a wonderfully fragrant crust that enhances any savory topping combination, especially those with red sauces and cheeses.
- Yeast Alternatives for Convenience: While active dry yeast is preferred for its slower, more flavor-developing rise, instant yeast (also known as rapid-rise or bread machine yeast) can be used as a direct substitute. Unlike active dry yeast, instant yeast doesn’t require proofing in warm water; you can add it directly to the dry ingredients. It will likely reduce the rising time, but keep in mind that a quicker rise can sometimes lead to a less complex flavor profile.
Essential Kitchen Tools for Effortless Pizza Dough Making
Having the right equipment can make a significant difference in the ease and success of your pizza dough preparation. While some tools are optional, they certainly enhance the experience:
- Stand Mixer with Dough Hook: A true game-changer for dough making. A stand mixer equipped with a dough hook takes all the strenuous work out of kneading, ensuring consistent gluten development with minimal effort. If you don’t have one, don’t worry – kneading by hand is a perfectly viable and therapeutic alternative, building strong arms in the process!
- Measuring Cups and Spoons: Accuracy is paramount in baking. A reliable set of measuring cups and spoons ensures that you add the precise amounts of ingredients, which is crucial for the delicate balance in dough chemistry.
- Digital Kitchen Scale: For professional-level precision, a digital scale is invaluable, especially for flour. Flour density can vary greatly based on how it’s scooped, leading to inconsistent results. Measuring flour by weight (ounces or grams) eliminates this variability, guaranteeing the exact flour-to-liquid ratio every time for a perfect dough.
- Large Mixing Bowls: You’ll need at least one spacious mixing bowl for combining your ingredients and, crucially, for allowing the dough to rise without overflowing. Glass or ceramic bowls are excellent as they retain warmth, aiding the rising process.
- Cast Iron Skillet: This is one of our secret weapons for achieving that coveted crispy bottom crust. A preheated cast iron skillet provides intense, even heat, mimicking the floor of a professional pizza oven. Its ability to retain high temperatures is unmatched for creating a beautifully charred and crisp base.
- Rolling Pin: Essential for rolling out your dough to your desired thinness and shape. A classic wooden rolling pin or a French-style tapered pin will work perfectly.
- Baking Sheet, Pizza Pan, or Pizza Stone: Your choice here depends on your oven and preference. A heavy-duty baking sheet can work well. A pizza pan (especially perforated ones) promotes airflow for a crispier crust. For the ultimate crispy base, a preheated pizza stone or steel is highly recommended as it absorbs and radiates heat directly into the dough.
- Spatula or Pizza Peel: To safely transfer your delicate, topped pizza onto your hot baking surface and then retrieve it from the oven, a sturdy, flat spatula or a dedicated pizza peel is a must-have. A light dusting of cornmeal or flour on the peel will ensure a smooth slide.
How to Make the Ultimate Easy Homemade Pizza Dough: A Step-by-Step Guide
Follow these meticulously detailed steps to create a flawless pizza dough that will be the foundation of your next incredible homemade pizza. Pay attention to each stage, as they all contribute to the final taste and texture.
- Activate the Yeast (Proofing): In the bowl of your stand mixer (or a large mixing bowl if kneading by hand), combine the warm water, active dry yeast, and granulated sugar. Give it a gentle stir. Let this mixture sit for 5-10 minutes. During this time, the yeast should dissolve and begin to froth or bloom on the surface, indicating it’s active and alive. If you don’t see this frothy layer, your yeast might be old or the water temperature was off, and it’s best to start again. This proofing step is vital for a properly risen dough.
- Create the Flavorful Liquid Base: Once your yeast is visibly active, add the olive oil and coarse salt to the yeast mixture. The olive oil contributes richness and elasticity, while the salt enhances flavor and moderates yeast activity. Stir gently to combine these ingredients.
- Begin Initial Mixing with Flour: With the dough hook attached to your stand mixer (or using a sturdy spoon for hand mixing), begin adding about half of the total flour to the wet ingredients. Start the mixer on low speed. Mix until the flour is mostly incorporated and a shaggy, sticky dough begins to form. This gradual addition helps prevent lumps and ensures proper hydration of the flour.
- Gradually Add Remaining Flour for Dough Ball Formation: Continue adding the rest of the flour slowly, about half a cup at a time, allowing each addition to incorporate before adding more. The goal is for the dough to come together into a relatively smooth ball. It should still feel sticky or tacky to the touch, but it should pull away cleanly from the sides of the mixing bowl. Resist the urge to add too much flour; an overly stiff dough will be dense and difficult to stretch.
- Kneading for Gluten Development: Once the dough ball has formed, increase the mixer speed to low-medium and let it knead for approximately 5-7 minutes. If kneading by hand, turn the dough out onto a lightly floured surface and knead vigorously for 8-10 minutes. Kneading is crucial for developing the gluten structure, which makes the dough elastic, smooth, and capable of trapping air bubbles, resulting in a light and chewy crust. The dough should feel noticeably smoother and more elastic after kneading.
- The Essential First Rise (Bulk Fermentation): Lightly oil a clean, large mixing bowl (the same one you just used works fine, just wipe it out). Place the kneaded dough ball into the oiled bowl, turning it once to coat all sides with a thin layer of oil. This prevents the dough from drying out and sticking. Cover the bowl tightly with plastic wrap or a clean kitchen towel. Let the dough rise in a warm, draft-free place for 1.5 to 2 hours, or until it has roughly doubled in size. This first rise, known as bulk fermentation, is essential for flavor development and achieving the proper texture.
- Prepare Your Delectable Toppings: While your dough is happily rising, take this opportune time to prepare all your pizza toppings. Chop vegetables, shred cheese, cook any meats, and have your sauce ready. This ensures a smooth and quick assembly process once the dough is ready, preventing any delay that could cause your hot skillet to cool.
- Preheat for Wood-Fired Excellence: About 20-30 minutes before your dough is ready to bake, place your large cast-iron skillet (or pizza stone) in the oven and preheat the oven to its highest temperature, typically 475-500°F (245-260°C). Crucially, also preheat your broiler element. High heat is the secret to a crispy, wood-fired-like crust that cooks quickly.
- Divide and Shape the Dough: Once the dough has doubled, gently punch it down to release the air. Turn it out onto a lightly floured surface. Divide the dough into smaller, equal-sized balls (this recipe typically yields 8 personal-sized pizzas). Lightly flour your work surface and rolling pin, then roll each dough ball into a thin, even circle to your desired crust thickness.
- Initial Pan Cooking for Crispy Bottom: Carefully transfer one rolled-out pizza dough round to your screaming hot cast-iron skillet (or pizza stone). Cook for about 60-90 seconds, or until visible bubbles form on the surface and the underside is beautifully browned and slightly charred. This pre-cooking step is vital for achieving an exceptionally crispy bottom crust, preventing sogginess.
- Top and Final Broil: Using a pizza peel or a large, sturdy spatula, carefully transfer the pre-cooked crust to a baking sheet. Quickly add your prepared sauce, cheese, and toppings. Place the baking sheet under the preheated broiler. Broil for 3-5 minutes, watching very carefully, until the cheese is bubbly and melted, and the crust edges are perfectly golden brown and slightly charred. Broiling provides intense top-down heat, mimicking a wood-fired oven.
- Optional Dough Freezing for Future Feasts: If you’re planning ahead or making a large batch, this dough freezes exceptionally well. After the first rise, divide the dough into balls, then place them on a baking sheet lined with parchment paper and freeze until solid. Once frozen, transfer the individual dough balls to airtight freezer bags. This allows for convenient, impromptu pizza nights whenever the craving strikes.
Make-Ahead Strategies and Smart Storage Solutions for Your Pizza Dough
Efficiency in the kitchen is key, and this pizza dough recipe is incredibly versatile for make-ahead preparations and effective storage, ensuring that delicious homemade pizza is always within reach:
- Advance Dough Preparation: You can prepare this dough up to two days in advance. After the initial rise, simply transfer the covered mixing bowl, or individual dough balls in airtight containers, to the refrigerator. The cold temperature significantly slows down the yeast activity, allowing for a long, slow fermentation that often develops a more complex and flavorful dough. Before rolling out, remove the dough from the fridge and let it sit at room temperature for about 20-30 minutes. This allows it to relax and become easier to handle, guaranteeing a flexible, pizzeria-quality crust.
- Effortless Freezer-Friendly Batches: This pizza dough excels as a freezer-friendly staple. Consider making a double or triple batch for future use. After the first rise and dividing the dough into individual balls, place them on a parchment-lined baking sheet and freeze until solid. Once frozen, transfer them to heavy-duty freezer bags or vacuum-seal them. This method prevents the dough balls from sticking together and protects them from freezer burn. Frozen dough can be stored for up to 2-3 months. For an impromptu pizza night, simply thaw the dough overnight in the refrigerator or for a few hours on the counter at room temperature before using. Dinner is sorted in a snap!
- Reviving Leftover Slices: Don’t let leftover pizza go to waste! To bring back that freshly baked crispiness and oozy, melted cheese, avoid the microwave. Instead, reheat individual slices in a hot cast-iron skillet over medium heat for a few minutes until the bottom is crispy and the cheese starts to melt. Alternatively, pop them into a preheated oven or toaster oven at 350°F (175°C) for 5-10 minutes.
- Optimized Topping Storage: To make future pizza assembly even quicker, pre-chop and store your favorite toppings in separate airtight containers in the refrigerator. This not only saves time but also keeps your ingredients fresh and ready to go.
- Prepare Your Sauce in Advance: Pizza sauce often tastes even better after the flavors have had a chance to meld. Prepare your pizza sauce a day or two ahead and store it in an airtight jar in the fridge. This simple step can significantly deepen the flavor profile of your homemade pizza.
By planning wisely and utilizing these make-ahead and storage tips, homemade pizza transforms from a special occasion meal into a convenient, delicious, and tempting option any night of the week!
Notes, Pro Tips, and Science-Based Secrets for Perfect Pizza Dough
My experience working in a test kitchen for a flour company taught me invaluable insights into the science behind bread doughs. These professional tips and scientific explanations will elevate your pizza-making skills, ensuring consistent, delicious results every time.
Mastering Ingredient Order for Consistent Dough: The sequence in which you add ingredients profoundly impacts the dough’s consistency. The most reliable method is to start with your liquids (water, yeast, sugar, oil) in the mixing bowl. This ensures proper yeast activation and even distribution of fats and salts. Then, gradually add the flour in stages. This approach allows you to accurately gauge the dough’s hydration. It’s significantly easier to incorporate more flour if your dough is too sticky than it is to add more moisture if it has become too dry and stiff. For this specific pizza dough recipe, the ideal texture is smooth and distinctly sticky to the touch, yet it should cleanly pull away from the sides of the bowl without clinging excessively.
The Precision of Weighing Ingredients: If you own a kitchen scale, I cannot stress enough how beneficial it is to use it, particularly for flour. There is a vast variability in how much flour constitutes a “cup” when measured by volume. Factors such as how densely packed the flour is in its bag or how heavily it’s scooped can result in significant discrepancies, throwing off your dough’s crucial flour-to-liquid ratio. A scale eliminates this guesswork, providing exact measurements for consistent results. If a scale isn’t available, follow best practices for volume measurement: first, fluff the flour in its container. Then, using a spoon, gently spoon the flour into your measuring cup until it’s overfilled. Finally, level off the top with a straight edge like a knife, avoiding compacting the flour.
Embracing the “Sticky” Factor: This pizza dough is designed to be slightly tackier than a typical bread dough, a characteristic largely due to the generous amount of olive oil it contains. This stickiness, however, does not mean it will inconveniently adhere to your counter. Embrace this texture; it’s a sign of proper hydration and contributes to the dough’s elasticity and final tenderness. Resist the temptation to over-flour your dough in the mixer bowl or during initial handling. Excessive flour can lead to a denser, stiffer crust that is challenging to roll out thinly and lacks the desired chewiness. You can always incorporate a minimal amount of additional flour onto your work surface as you begin the rolling process if needed, to prevent sticking.
The Virtue of a Slow Rise: While it might be tempting to accelerate the dough’s rising process by placing it in a warm oven on a proof setting or in another heated environment, I strongly advise against it. A slower, more gradual rise at room temperature is paramount for developing a rich, complex flavor profile in your dough. Rapid fermentation, driven by excessively warm temperatures, can result in a dough with a more pronounced alcoholic or overtly yeasty flavor, lacking the subtle, nuanced, almost sourdough-like notes achieved through a patient, unhurried rise.
Optimizing Water Temperature for Yeast: The temperature of your water is critical for yeast activation. It should be warm, but not hot – think bathwater temperature, approximately 105-115°F (40-46°C). Water that is too cold will fail to activate the yeast, leading to a sluggish or non-existent rise. Conversely, water that is too hot will kill the yeast, rendering it inactive and your dough flat. Using a thermometer is highly recommended to hit this sweet spot consistently, ensuring your yeast performs optimally for a beautiful, airy rise.
The Cast Iron Skillet + Broiler Synergy: This dynamic duo is the secret to replicating the intense heat of commercial pizza ovens at home. A preheated cast-iron skillet provides incredible conductive heat to the bottom of the crust, creating that desirable crispy, slightly charred base that prevents sogginess. Following this initial pan cooking with a powerful broiler ensures that the toppings cook rapidly, the cheese melts and bubbles beautifully, and the crust’s edges crisp up and achieve that characteristic wood-fired blister, all without overcooking the rest of the pizza. This combination provides both direct bottom heat and intense top heat, mimicking the best qualities of a professional pizza oven.
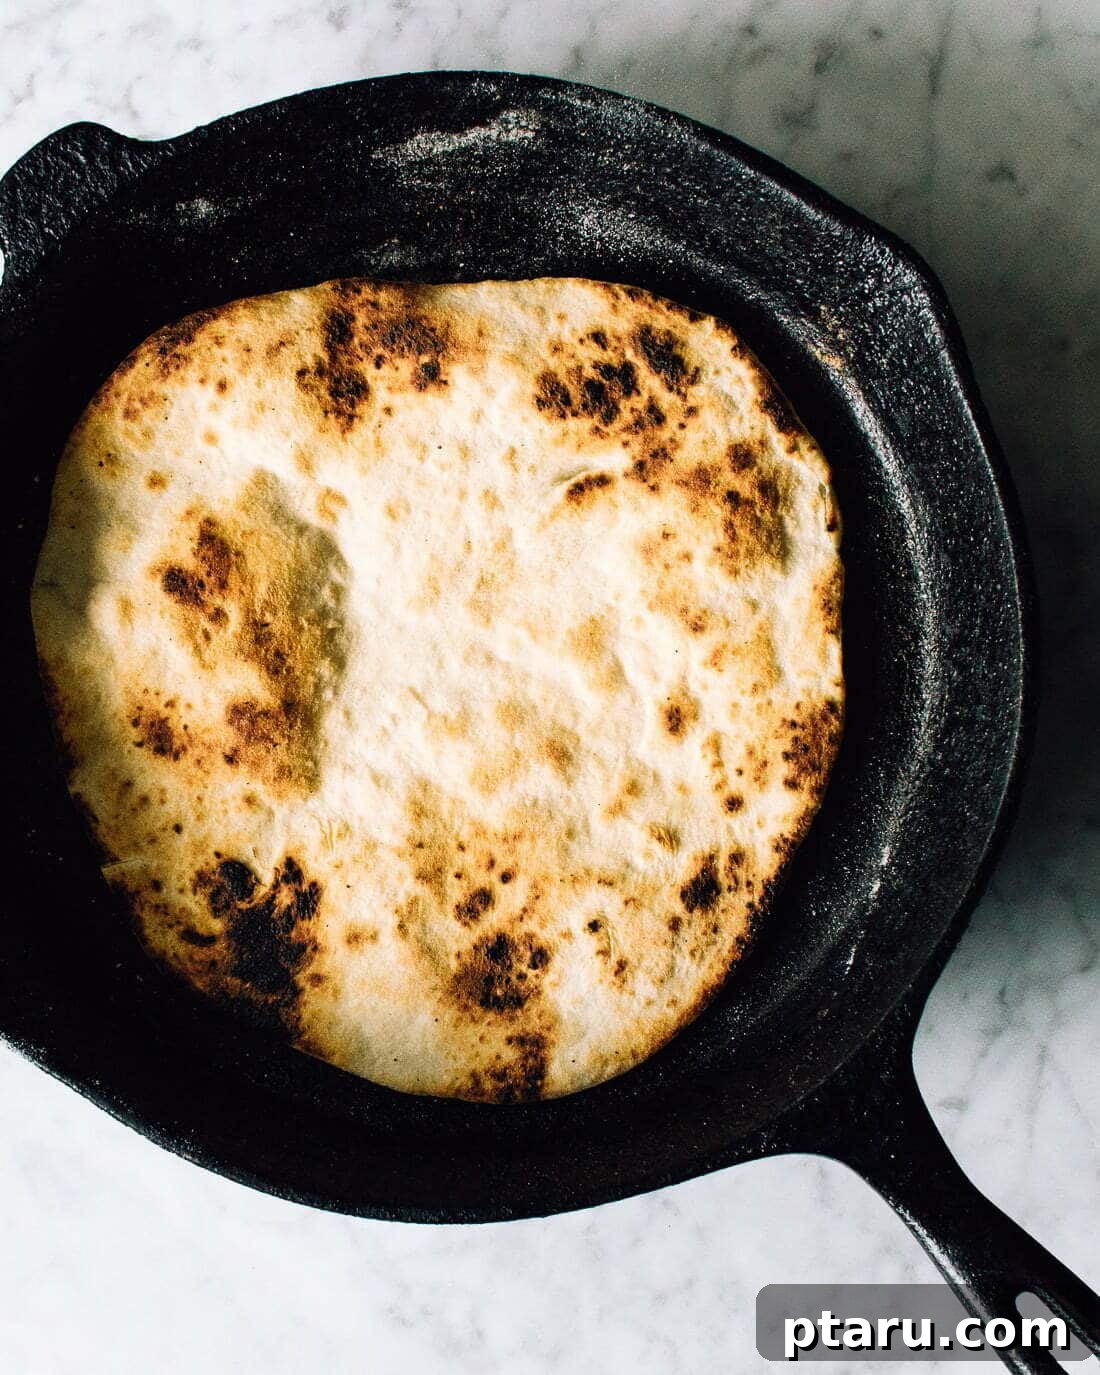
Achieving Thin Crust, Crispy, Wood-Fired Pizza at Home: The Ultimate Technique
The quest for a thin, crispy pizza crust with that unmistakable wood-fired char at home often feels elusive, but it fundamentally boils down to two critical factors. First, your pizza dough recipe must yield a dough that is exceptionally flexible and extensible, allowing it to be stretched and rolled very thinly without tearing. This recipe below is specifically formulated to achieve that pliability. Second, and perhaps even more importantly, you need to cook the pizza using exceptionally high heat, with particular attention to how the bottom crust cooks.
Many home cooks attempt to mimic high-heat baking by preheating a pizza stone in the oven at 500°F (260°C) for an hour or more. While effective, my secret trick achieves infinitely better results in a fraction of the time, typically just minutes. It leverages the intense conductive heat of a cast-iron skillet combined with the direct radiant heat of your oven’s broiler, creating a cooking environment that closely replicates the blistering temperatures and rapid cooking of a commercial wood-fired oven.
Understanding Yeast: Can You Substitute Instant or Rapid-Rise for Active Dry Yeast in Pizza Dough?
Yes, absolutely! Instant yeast, rapid-rise yeast, and bread machine yeast are essentially the same product, often just marketed under different names to appeal to specific uses. They are all designed to be fast-acting and don’t strictly require the initial “proofing” step in warm water that active dry yeast does. You can typically add any form of instant yeast directly to your dry ingredients, and it will still perform effectively as indicated in the recipe.
However, while it’s perfectly acceptable to dissolve instant yeast in liquid as you would active dry yeast (you can simply skip the waiting time and proceed to the next step), there’s a nuanced reason why active dry yeast is often preferred in recipes aiming for a more complex flavor profile. Instant yeast, by its nature, promotes a quicker rise. While this is convenient, a faster fermentation process can lead to a less developed flavor in the dough. You might notice a more pronounced “yeasty” or even slightly alcoholic aroma, rather than the richer, more complex, and subtle sourdough-like flavors that emerge from a slower, more extended fermentation period.
For this very reason, I also strongly advise against using any tricks to hasten the rising process, such as placing your dough in an oven set to a “proof” function or any other environment warmer than comfortable room temperature. While you might be tempted to speed things up, doing so invariably comes at the expense of developing the nuanced, deep flavors that make truly great pizza dough so irresistible.
The Optimal Temperature and Technique for Baking Pizza Dough at Home
This is indeed the sweet spot, the ‘gold standard’ for achieving truly exceptional homemade pizza, and where my unique tricks truly shine. My primary goal was to meticulously emulate the intensely crispy crust and subtly charred flavor profile characteristic of authentic wood-fired pizzas, and I’ve successfully cracked the code.
Our method begins by slapping the thinly rolled dough directly into a screaming hot cast-iron skillet. This initial contact with extreme heat is crucial. The cast iron’s high thermal mass and excellent heat retention immediately begin to cook the bottom of the crust through conduction, creating instantaneous blistering. You’ll observe bubbles rapidly forming on the surface, and the underside will achieve that desirable browned and charred perfection within mere seconds. This step is the key to preventing a soggy bottom and ensuring a robustly crispy base.
Immediately after this crucial initial crisping, we swiftly add our chosen toppings. Then, without delay, we transfer the pizza to the oven, engaging the broiler function. The broiler provides intense, radiant heat from above, directly mimicking the fierce top-down temperatures of a professional pizza oven. This dual-heat approach rapidly cooks the toppings, melts the cheese into a bubbling, golden masterpiece, and simultaneously crisps and slightly chars the crust’s edges, delivering that coveted wood-fired aesthetic and flavor.
For those with a convection setting on their oven, I highly recommend using the convection while broiling. The circulating hot air ensures more even cooking throughout the dough, preventing any doughy spots in the middle. If your oven doesn’t offer a broil-plus-convection setting, you’ll want to be extra vigilant during the cast-iron skillet phase. Consider giving the dough a quick flip in the hot pan for an additional 30 seconds or so on the second side after the first side has browned. This small extra step ensures the crust is thoroughly cooked through and eliminates any risk of a raw or undercooked middle when served, guaranteeing a consistently perfect pizza experience.

Maximizing Convenience: Can You Freeze Pizza Dough?
Absolutely! One of the fantastic advantages of this quick and easy pizza dough recipe is its excellent freezer-friendliness. Pizza dough, in general, freezes beautifully, making it an ideal candidate for meal prep and spontaneous pizza nights. Having a stash of pre-made dough in your freezer is a game-changer for effortless entertaining or a speedy weeknight dinner solution.
To properly freeze your pizza dough, follow these simple steps: allow the dough to complete its first rise as indicated in the recipe. Once risen, gently punch it down to release the air. Then, divide the dough into your desired individual portions (e.g., 8 balls for personal-sized pizzas) and shape each into a smooth ball. To prevent them from sticking together, place these individual dough balls onto a baking sheet lined with parchment paper, ensuring they don’t touch. Transfer the baking sheet to the freezer and allow the dough balls to freeze completely until solid, typically a few hours.
Once the dough balls are frozen solid, you can transfer them to heavy-duty, airtight freezer bags or vacuum-seal them individually. This trick prevents them from sticking together in the bag and protects them from freezer burn, preserving their quality. Frozen pizza dough can be stored for up to 2-3 months without a significant loss in quality. When you’re ready to use them, simply transfer the frozen dough balls to the refrigerator overnight to thaw slowly, or place them on a lightly floured countertop for 3-4 hours until they are soft and pliable. Once thawed, let them come to room temperature for about 20-30 minutes before rolling them out and proceeding with the recipe instructions, ensuring a perfectly fresh-tasting crust every time.
Popular Foodess Pizza Recipes for Topping Inspiration
Now that you have the ultimate pizza dough, unleash your creativity with these delectable topping ideas:
- Famous Butter Chicken Pizza
- Lamb Donair White Pizza
- Pear, Bacon, Crispy Brussels Sprouts & Blue Cheese Pizza
- Shrimp Pizza with Garlicky Cream Sauce
- Caramelized Onion & Goat Cheese Pizza
Elevating Your Dining Experience: How to Serve This Perfect Pizza Recipe
Serving your homemade pizza is an art form that can elevate a simple meal into a memorable culinary experience. Here are some expert tips to make the most out of your freshly baked masterpiece:
- Precision Slicing Tools: For clean, effortless slices that keep your toppings perfectly in place and your crispy crust intact, invest in a high-quality pizza wheel. Alternatively, a large, sharp chef’s knife or a mezzaluna (rocker knife) can also achieve excellent results, especially for thicker crusts.
- Thoughtful Pairing Ideas: Complement the richness and flavors of your pizza with carefully chosen sides and beverages. A crisp, refreshing green salad dressed with a tangy vinaigrette offers a perfect counterpoint, cutting through the richness of the cheese and toppings. For drinks, a cold, crisp lager or a medium-bodied red wine (like a Sangiovese or Chianti) makes an ideal pairing, enhancing the overall dining experience.
- Dipping Sauces for Extra Flavor: Offer a variety of dipping sauces on the side to provide an additional layer of flavor and interactive enjoyment. Classic choices include a rich garlic butter, a cool and creamy ranch dressing, or even a spicy marinara for those who enjoy a kick.
- Optimizing Crust Crispiness: If you adore an extra-crispy crust, here’s a pro tip: after slicing your pizza, place the individual pieces back into a hot oven (or even the cast-iron skillet) for just 1-2 minutes. This brief reheat crisps up the edges and bottom even further without drying out your perfectly melted cheese and toppings.
- Rustic, Pizzeria-Style Presentation: For a truly authentic pizzeria aesthetic, serve your entire pizza (or individual slices) on a large wooden pizza peel or a substantial cutting board. This rustic presentation adds visual appeal and makes for a charming centerpiece on your dining table.
- Gourmet Garnishes for the Finishing Touch: A sprinkle of fresh, vibrant basil leaves, a light drizzle of high-quality extra virgin olive oil, or a dusting of finely grated Parmesan or Pecorino Romano cheese just before serving can transform your homemade pizza from delightful to truly gourmet. These fresh garnishes add brightness, aroma, and a final burst of flavor.
With these serving tips in your arsenal, you are fully equipped to impress your guests, and indeed yourself, with a homemade pizza experience that rivals the finest establishments!
Frequently Asked Questions for Pizza Perfection
Navigating the nuances of pizza making can bring up several questions. Here are answers to common queries to help you achieve consistent pizza perfection:
- Is homemade sauce a necessity for great pizza? While a vibrant homemade pizza sauce undeniably adds a personal touch and can elevate your pizza with fresh, nuanced flavors, it’s certainly not a strict necessity. Many high-quality store-bought sauces are available that can serve as an excellent base, especially when time is a factor. Focus on finding a brand with good ingredients and a balanced flavor profile.
- Why is my pizza crust soggy, and how can I prevent it? A soggy crust is a common culprit of homemade pizza woes, often stemming from too many wet toppings, insufficient oven temperature, or not pre-cooking the crust. To combat this, ensure your oven is preheated to its highest temperature and your cast-iron skillet or pizza stone is screaming hot. Consider pre-cooking any particularly watery ingredients (like mushrooms or spinach) to remove excess moisture. Additionally, our technique of initially cooking the dough in a hot cast-iron skillet before adding toppings is specifically designed to create a crispy barrier, significantly reducing the chance of a soggy crust.
- Can this recipe be adapted to make a vegan pizza? Absolutely, this pizza dough recipe is inherently vegan. To create a delicious vegan pizza, simply ensure all your toppings are plant-based. This includes using your favorite brand of vegan cheese alternatives, a rich tomato sauce, and an abundance of fresh or roasted vegetables. The dough itself provides a perfect foundation for any vegan culinary creation.
- Do I really need a pizza stone to achieve a crispy crust? While a pizza stone or a pizza steel is an excellent tool for achieving a very crispy crust by providing sustained, high heat, it is not strictly essential. As demonstrated in this recipe, a heavy-duty, preheated cast-iron skillet combined with your oven’s broiler can yield equally impressive, if not superior, results for crispiness and char. If you don’t own a pizza stone, a regular heavy baking sheet, thoroughly preheated, can also work effectively, though the cast iron method is highly recommended for ultimate crispness.
- How long can I safely store leftover pizza? Leftover pizza can be safely stored in an airtight container or tightly wrapped in aluminum foil in the refrigerator for up to 3-4 days. For optimal enjoyment, reheat using the methods suggested in the “Make Ahead and Storage” section (hot skillet or oven) to revive its crispness, rather than microwaving.

The Ultimate Easy Pizza Dough Recipe
Ingredients
- 1 ¾ cups warm water (about 110ºF)
- 1 package 2 1/4 tsp active dry yeast
- 1 tsp granulated sugar
- ¼ cup olive oil plus more for bowl
- 1 ½ tsp coarse salt
- 19.5 oz (4 1/3 cups lightly spooned into measuring cup and levelled off) bread flour or all-purpose flour
Instructions
- Combine water, yeast and sugar in bowl of stand mixer and let stand 10 minutes to proof. Yeast should be dissolved and frothy. Add oil and salt.
- Attach dough hook to mixer and turn it on low speed. Slowly add about half of the flour, mixing until it forms a sticky dough. Add remainder of dough a bit at a time until it forms a smooth ball. It’ll still be tacky to touch, but won’t stick to the sides of the bowl. Let mixer knead the dough on low speed for five minutes.
- Lightly oil the bowl and the dough (I just splash a glug of oil and roll the dough all around and up the sides of the bowl to grease the whole thing). Cover and let rise for 1 1/2 hours, until doubled in size.
- Meanwhile, prepare all of your toppings.
- When dough has risen, preheat a large cast-iron pan on high heat for five minutes. Turn on your broiler (with convection turned on if you have it). Set out large baking sheets.
- Divide dough into 8 pieces and roll each into a ball. On a lightly floured counter, roll each ball into a circle of desired crust thinness. Transfer first pizza dough round to hot cast iron pan. When bubbles form and bottom is nicely browned, about 60 seconds, lift it out with a spatula and place on a baking sheet. (If your oven doesn’t offer a convection setting on broil, flip the dough over and let it cook for 30 seconds on the other side, too to make sure it’ll be cooked through.) Repeat with remaining crusts.
- Arrange toppings on pizza crusts and broil until toppings are bubbly and edge of crust is charred in spots (about 5 minutes, but watch carefully and don’t walk away).
Notes
Pin Me!