Crispy & Delicious Homemade Pakora: The Ultimate Indian Fritter Recipe
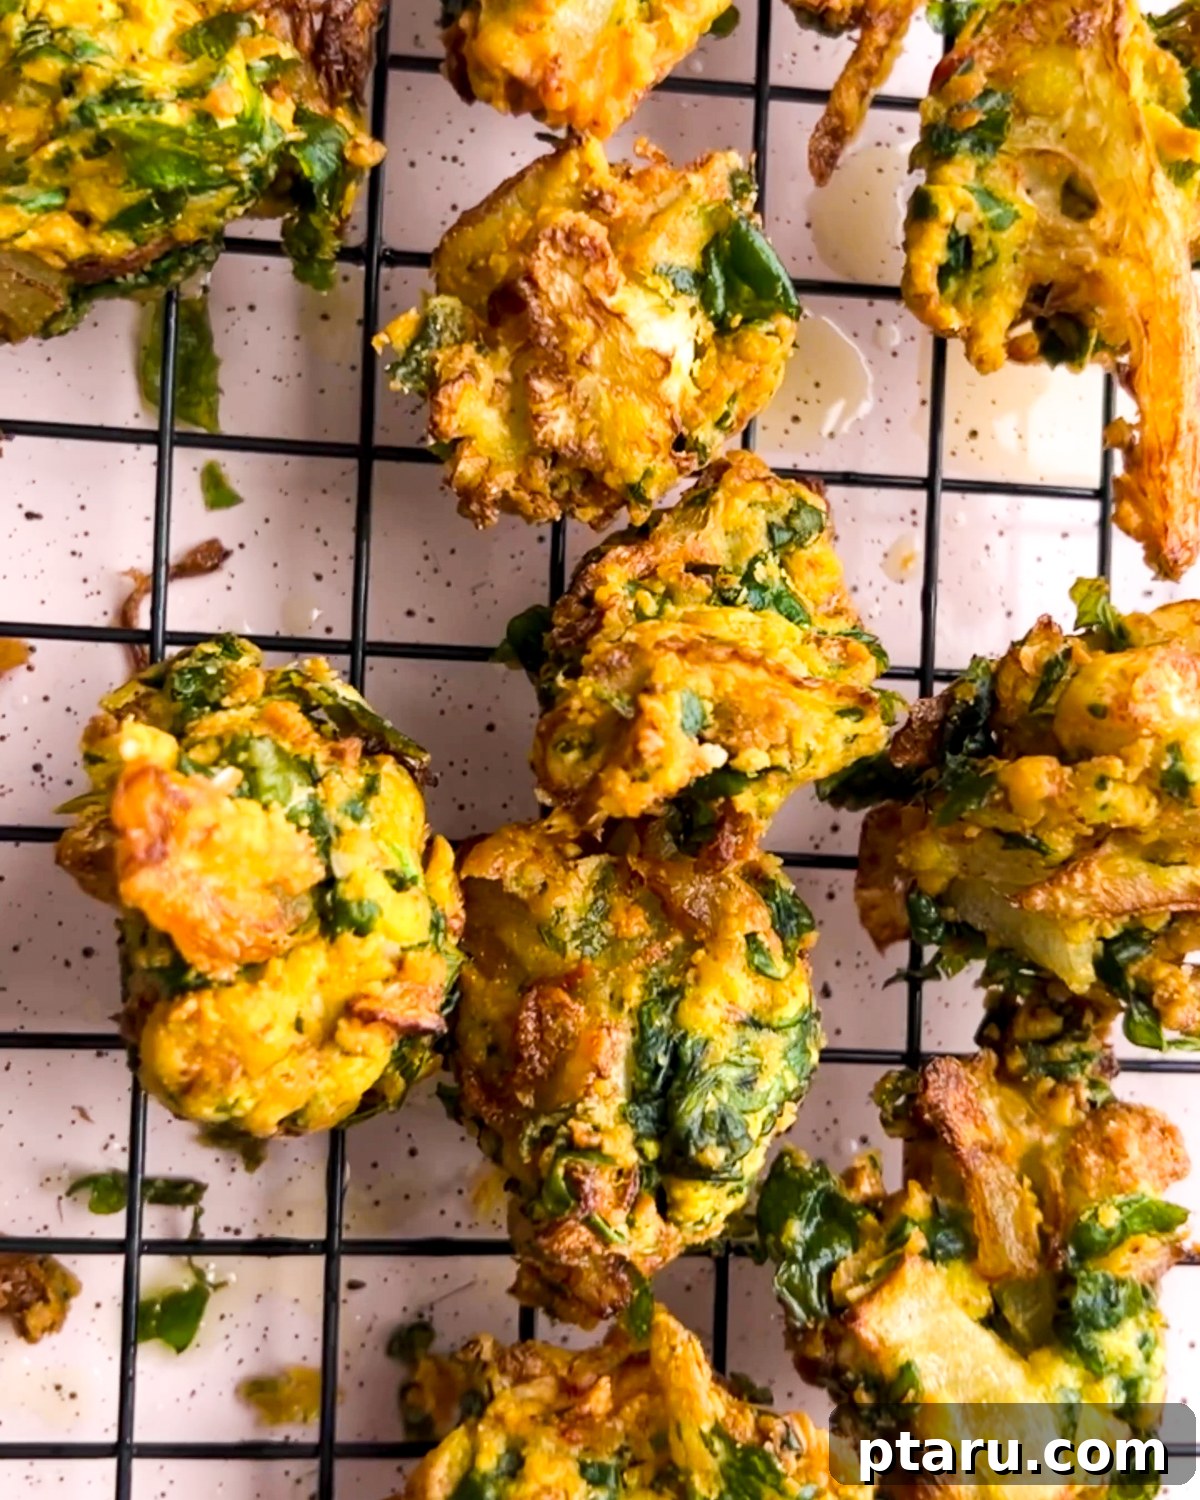
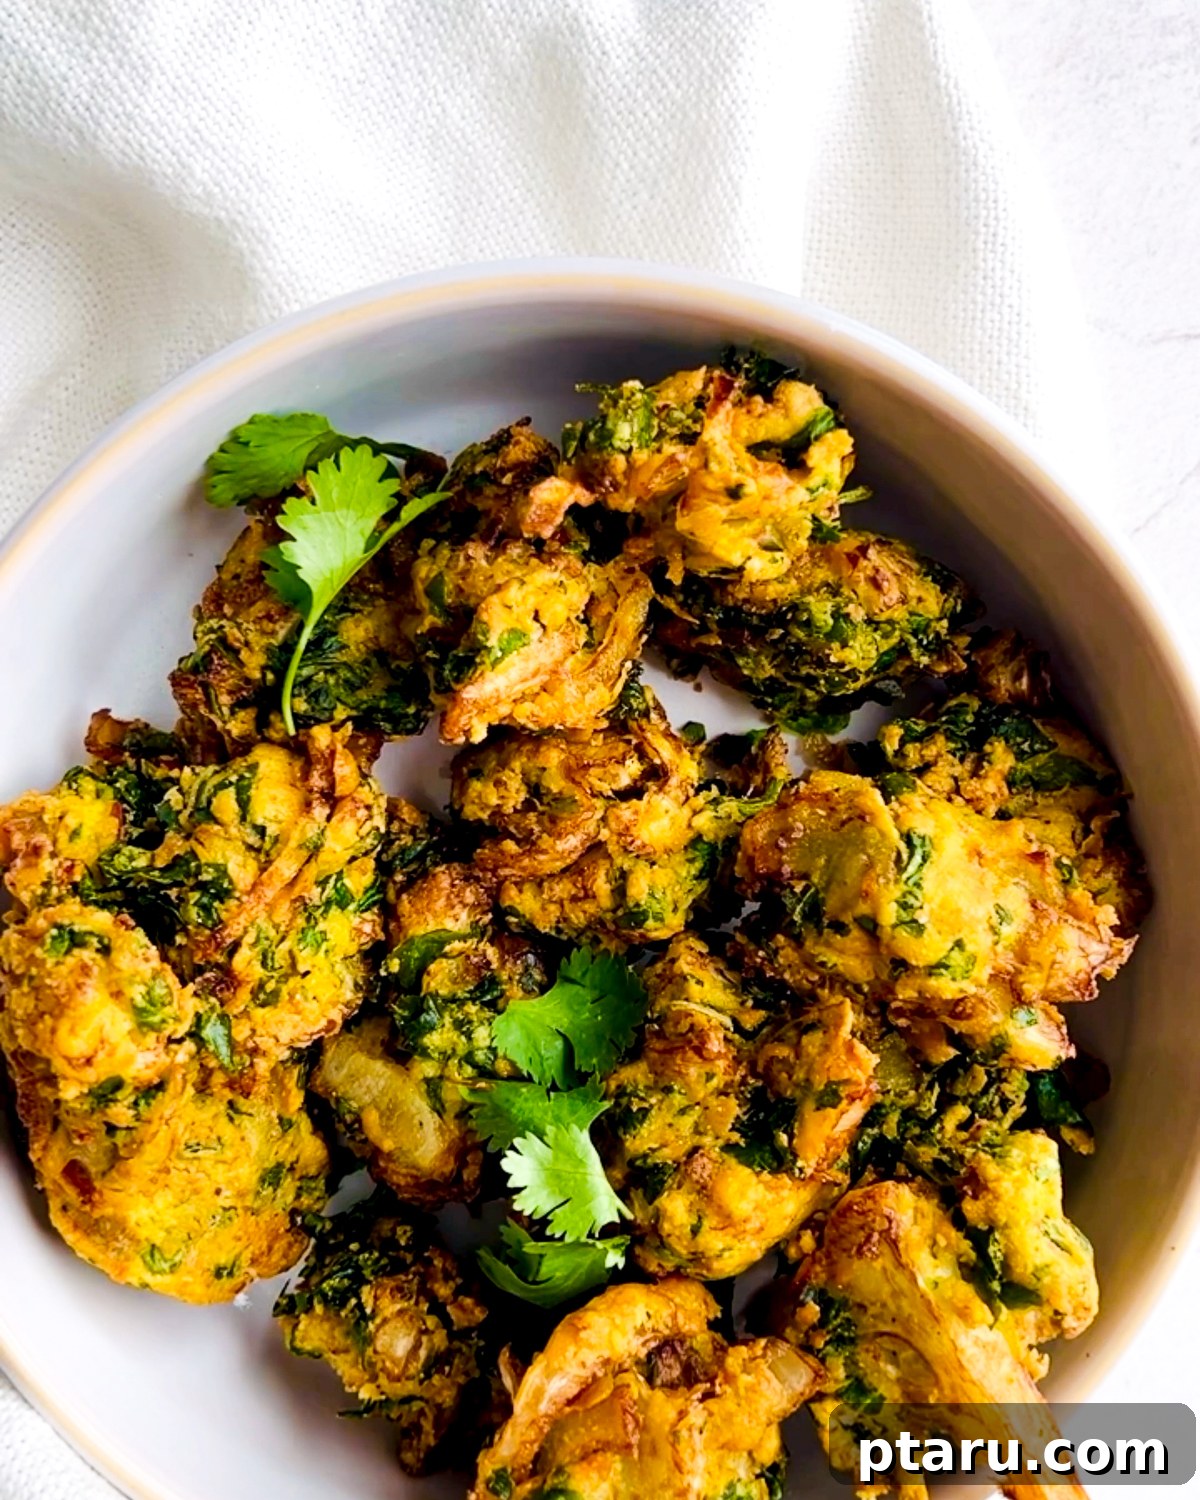
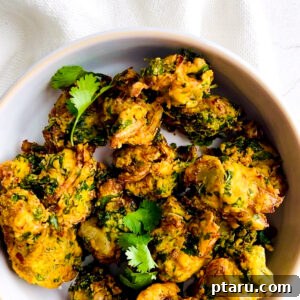
Embark on a culinary journey to India right from your kitchen with this incredible recipe for homemade Pakora. These iconic Indian vegetable fritters are a symphony of textures and flavors, boasting a ridiculously crisp, golden-brown exterior that gives way to a wonderfully soft and fluffy center. It’s a delightful experience that promises love at first bite, making them an instant addiction for anyone who tries them. Light, airy, and utterly addictive, pakoras are best savored fresh, moments after emerging from the hot oil.
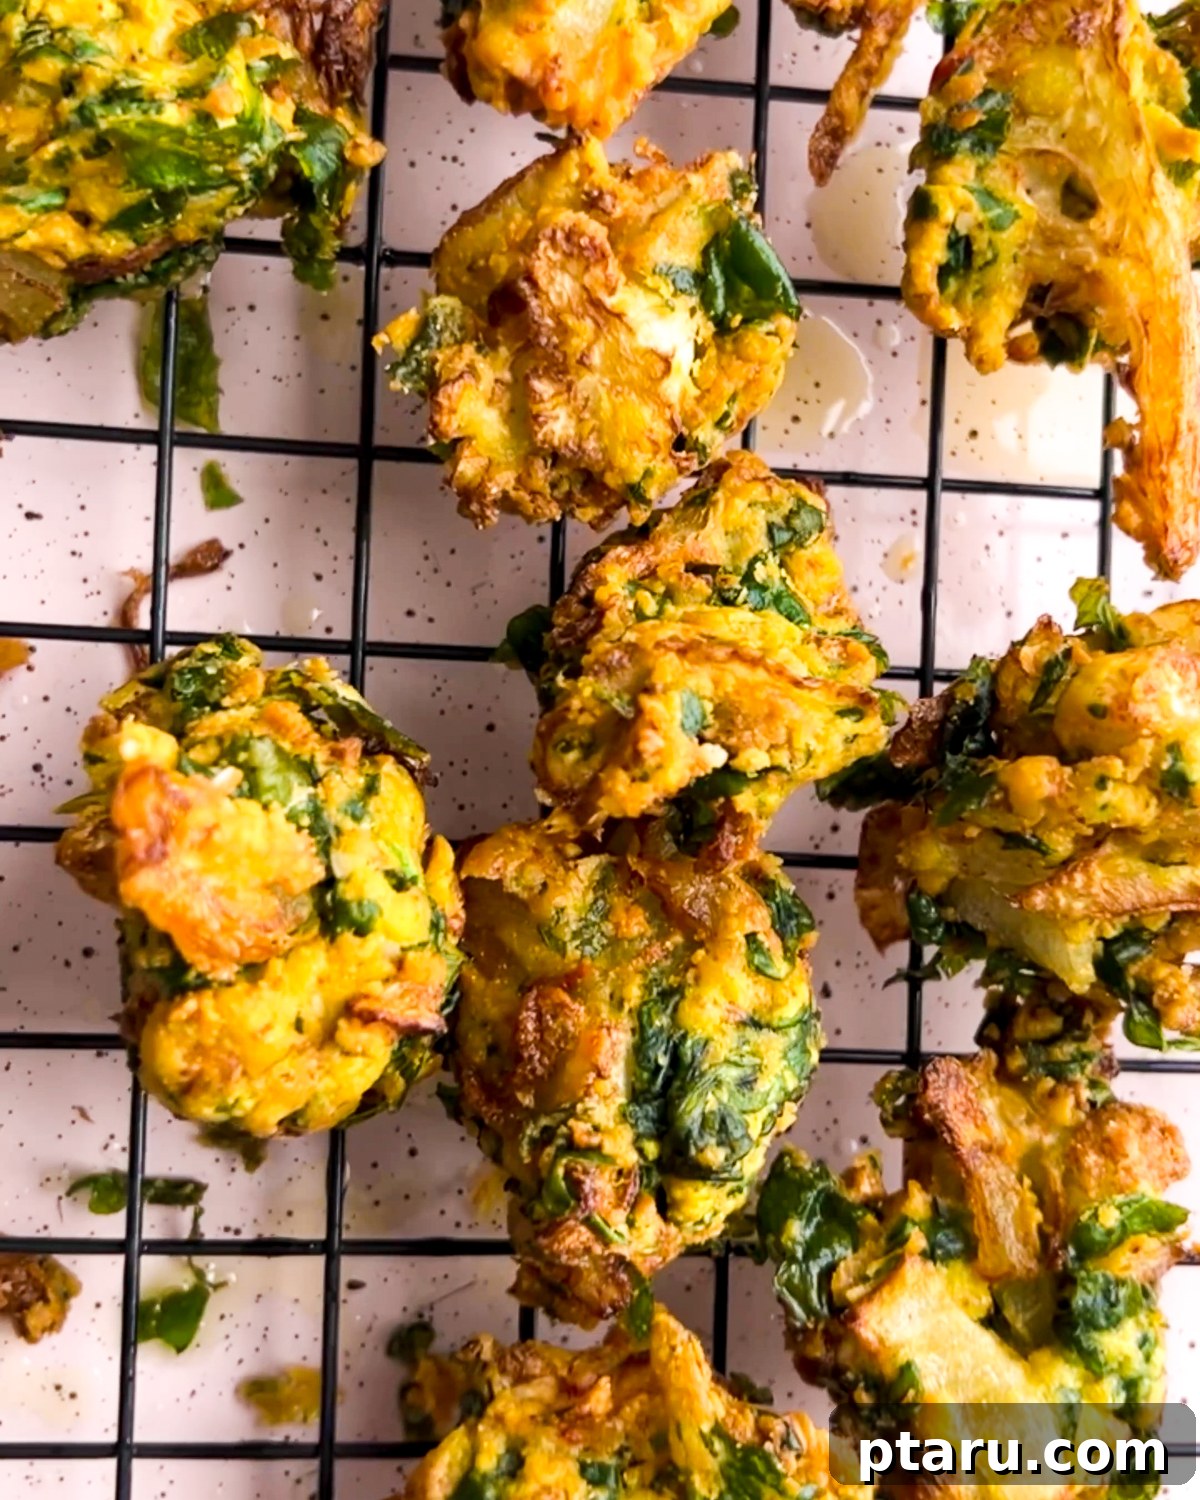
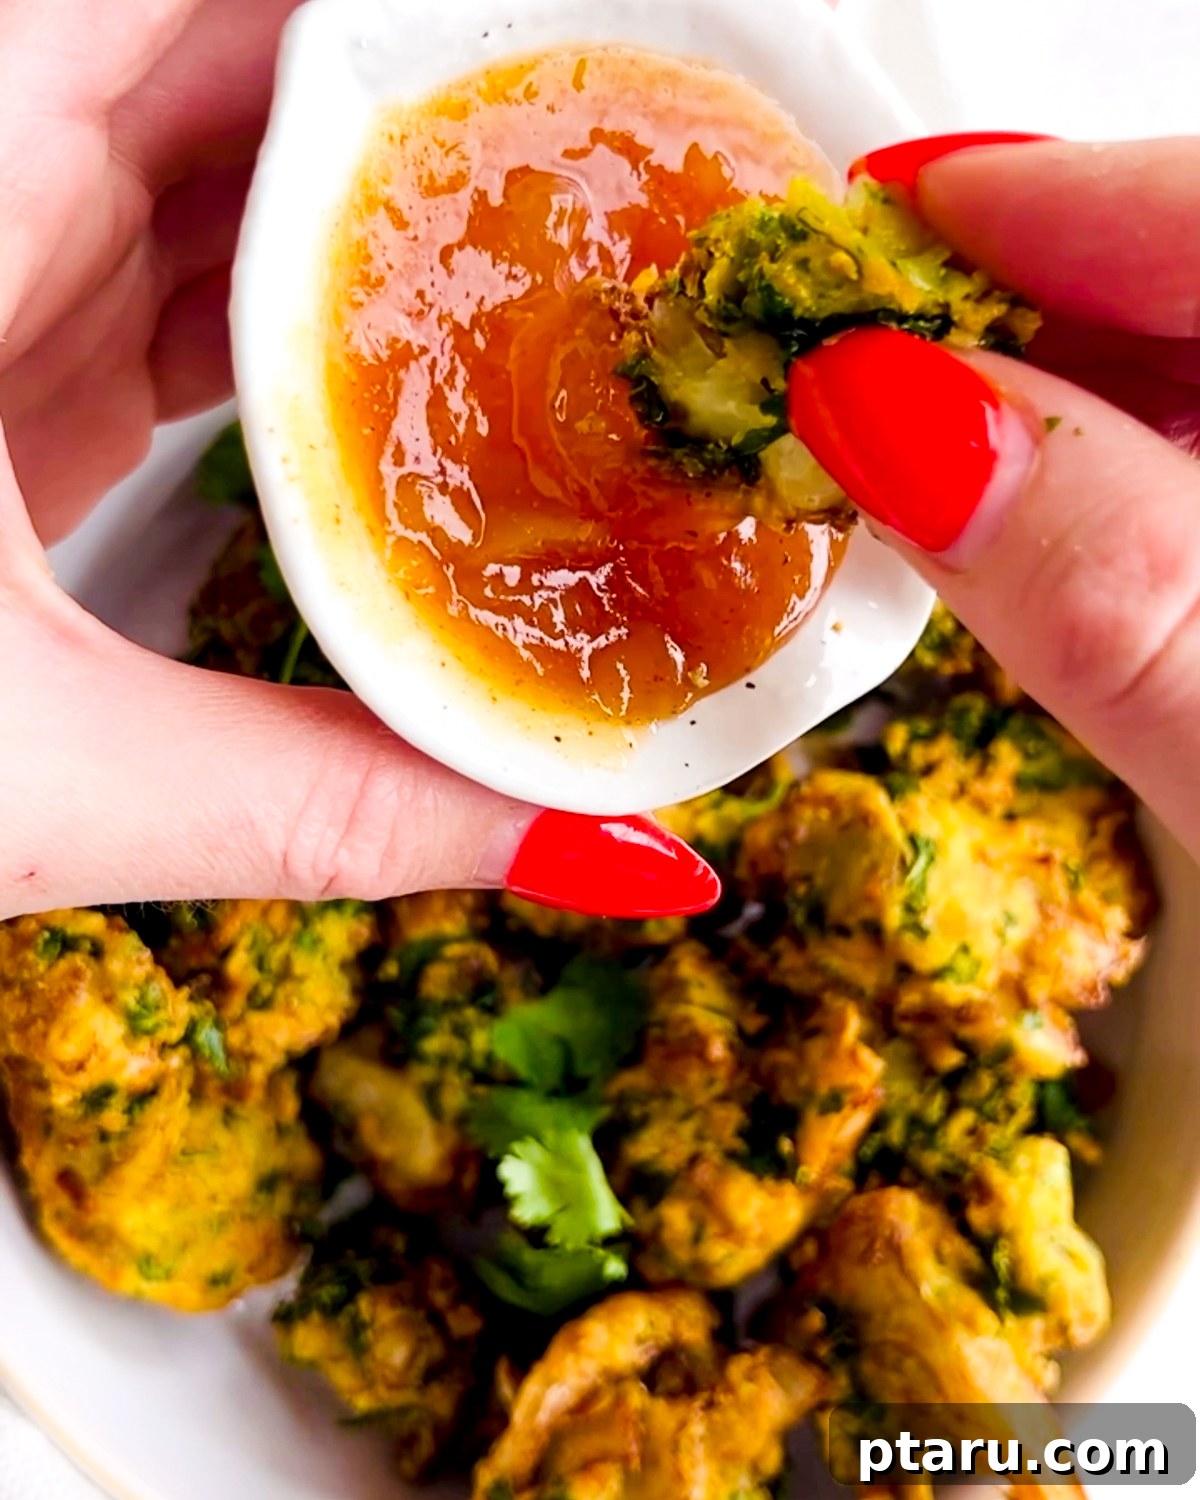
Pakoras are more than just a snack; they’re a celebration of Indian street food culture, often enjoyed during monsoon seasons with a hot cup of tea or as a savory appetizer. Their versatility allows them to be paired with a variety of vibrant Indian-style sauces. I personally love serving these savory bites alongside a cooling Indian yogurt sauce, a sweet and tangy mango chutney, or a refreshing mint chutney. For the complete experience, accompany them with a steaming mug of aromatic masala chai. Surprisingly, my Indian husband, much like many others, often enjoys them simply with tomato ketchup, proving that their deliciousness transcends traditional pairings!
If you’re a connoisseur of Indian snacks, especially those irresistible crispy and crunchy delights, then this recipe is an absolute must-try. Beyond pakoras, explore other fantastic Indian treats like my incredible chicken samosas or the equally delicious potato samosas for a perfect vegetarian option. These recipes will further immerse you in the rich tapestry of Indian flavors.
What Are Pakora? A Brief Introduction
Pakora, also known as pakoda, bhaji, bhajia, or ponako, is a beloved fried snack (fritter) that originated in the Indian subcontinent. Typically, it consists of a principal ingredient, such as chopped vegetables, paneer, or sometimes meat, coated in a seasoned chickpea flour (besan) batter and deep-fried until golden and crispy. The term “pakora” itself is derived from Sanskrit, meaning “cooked small pieces,” perfectly describing these delightful bites. They are a staple across India, Pakistan, Bangladesh, and Nepal, with countless regional variations reflecting the diverse culinary landscape of these countries. Whether served as a quick snack, an appetizer, or part of a larger meal, pakoras embody comfort food at its finest, offering a satisfying crunch and a burst of aromatic spices with every mouthful.
Why Make Homemade Pakora? The Benefits of Freshness
While you can find delicious pakoras at many Indian restaurants and street food stalls, making them at home offers unparalleled benefits. Firstly, freshness is key. There’s nothing quite like pakoras served piping hot, straight from the oil, at their peak of crispness and flavor. Secondly, homemade pakoras allow you complete control over the ingredients. You can choose organic vegetables, adjust the spice levels to your preference, and ensure the use of high-quality oil for frying. This also means you can cater to dietary needs, easily making them gluten-free with chickpea flour and entirely vegan by opting for vegetable-based variations. Finally, the process of making pakoras is surprisingly simple and immensely rewarding, filling your home with the inviting aromas of Indian spices and creating a memorable cooking experience.
Gather Your Ingredients: The Heart of Authentic Pakora
To create your perfect batch of pakora, you’ll need a selection of fresh vegetables and key pantry staples for the flavorful batter. Each component plays a vital role in achieving that signature taste and texture. Round up these essential ingredients:
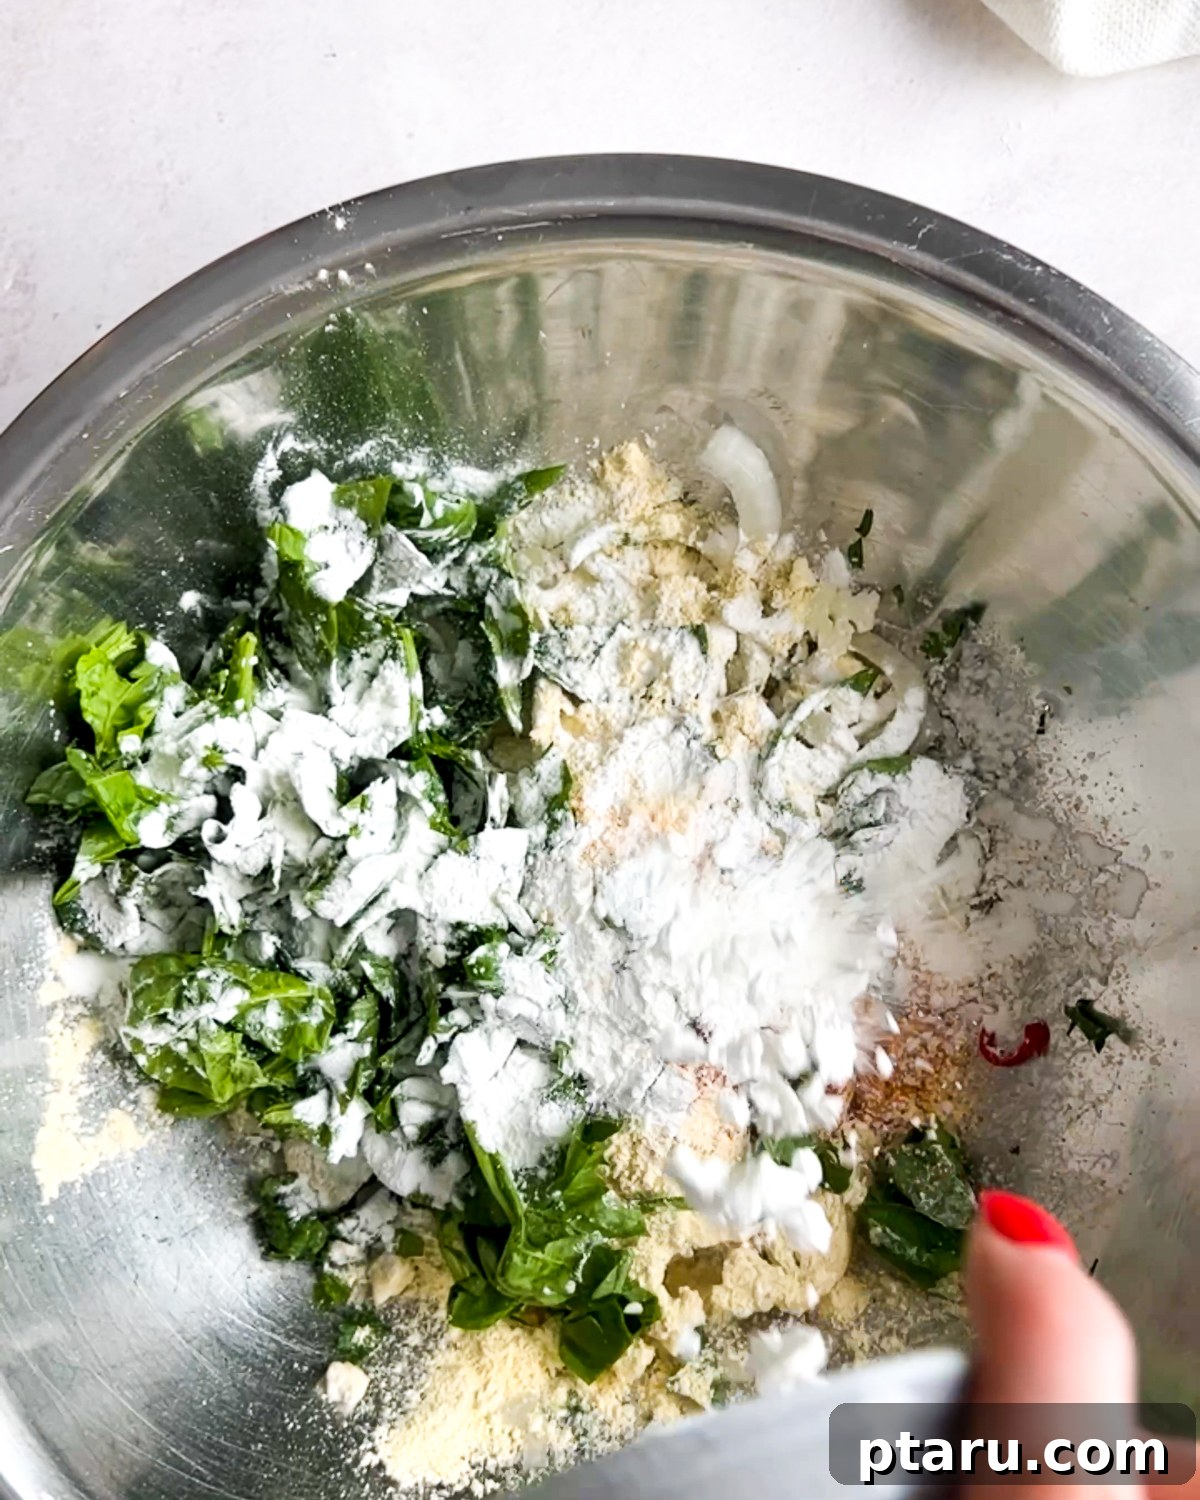
Ingredients for this Pakora Recipe
For the Vegetables
- Thinly-sliced Medium Onion: Onions are a quintessential pakora ingredient, adding a delightful sweetness and the nicest crunch to the fritters when fried. Their delicate slices ensure even cooking and a wonderful texture.
- Thinly-sliced Cauliflower Florets: These contribute a mild, nutty taste and a hearty, satisfying texture to the pakoras. Cauliflower absorbs the spices beautifully, adding depth without overpowering other flavors.
- Baby Spinach, Coarsely Chopped: Spinach introduces a refreshing earthiness and a touch of vibrant color, balancing the richer flavors of the other ingredients. It wilts down perfectly during frying, adding a soft element.
- Green Chilli (like Serrano Pepper or Thai Chilies), Minced: For those who enjoy a kick, minced green chilies provide a wonderful warmth and subtle heat. This ingredient is entirely optional; adjust the quantity to suit your preferred spice level.
- Coarsely Chopped Cilantro (Coriander) Leaves: Do not skip this! Fresh cilantro is crucial for authentic Indian flavor, lending a bright, citrusy, and slightly peppery note that elevates the entire dish.
- Kosher Salt: More than just a seasoning, salt plays a critical role in drawing out moisture from the vegetables, which is essential for achieving a crispy pakora, and enhancing all the other flavors.
For the Batter
- Chickpea Flour (Gram Flour or Besan): This is the foundation of our pakora batter. Chickpea flour provides a distinctive nutty flavor and is responsible for creating that wonderfully crispy and light texture. It’s also naturally gluten-free, making pakoras accessible to more people.
- Cornstarch (or Rice Flour): Adding cornstarch or rice flour to the batter is a secret to achieving an even lighter and crispier coating. It helps create a delicate crispiness that prevents the pakoras from becoming dense.
- Red Chilli Powder or Cayenne Pepper: This spice adds a vibrant color and a gentle warmth to the batter. Feel free to adjust the amount based on how much heat you desire in your pakoras.
- Turmeric: Turmeric is a powerhouse spice, contributing a beautiful golden color to the pakoras and a warm, earthy flavor with subtle bitterness. It’s also known for its health benefits.
- Water: Water is essential for binding all the dry ingredients and creating a smooth, cohesive batter. The amount should be adjusted carefully to achieve the desired consistency – thick enough to coat the vegetables but not overly runny.
Substitutions and Creative Variations for Your Pakora
The beauty of Indian fritters lies in their incredible adaptability! There are countless ways to customize this recipe. Here are some fantastic substitutions and variations to inspire your culinary creativity:
- Chickpea Flour Alternatives: While chickpea flour (besan) is traditional for its unique flavor and texture, if you’re out, you can substitute it with all-purpose flour or a gluten-free flour blend. Bear in mind that the flavor and texture will differ slightly, often resulting in a less distinctly “Indian” taste.
- Cornstarch Swaps: For that coveted crispy texture, rice flour is an excellent alternative to cornstarch. Potato starch can also be used effectively, providing a similar light and airy crispness.
- Mixed Vegetable Pakora Extravaganza: Unleash your imagination! Combine a vibrant assortment of vegetables like finely chopped medium potatoes, broccoli florets, shredded cabbage, grated carrots, thinly sliced bell peppers (capsicum), and even delicate slices of eggplant. This creates a colorful, nutrient-rich, and incredibly flavorful pakora mix. A fantastic bonus: most vegetable pakoras are naturally vegan!
- Paneer Pakora Indulgence: For a richer, creamier treat, swap the vegetables entirely for cubes of paneer (Indian cottage cheese). The soft paneer contrasts beautifully with the crispy batter, creating a truly luxurious variation.
- Chicken Pakora Delight: Elevate your pakoras by marinating small pieces of boneless chicken in a blend of spices before coating them in the batter and frying. These are exceptionally delicious, especially with a squeeze of fresh lemon juice over them.
- Simple Spinach and Onion Pakora: Sometimes, simplicity is key. Focus solely on thinly sliced onions and fresh spinach for a classic, crowd-pleasing combination. These are fantastic dipped in any of your favorite chutneys.
- Amplify with Extra Herbs and Spices: Deepen the flavor profile by incorporating more fresh herbs into the batter, such as finely chopped mint, dill, or parsley. For an aromatic boost, add a tablespoon of toasted cumin seeds or a pinch of asafoetida (hing) for a savory, onion-garlic like undertone.
- Cheesy Twist: For an indulgent treat, add a small amount of grated cheese (like mozzarella or cheddar) and a sprinkle of crushed carom seeds (ajwain) to the batter. The cheese will melt into a gooey center, while the carom seeds add a unique, pungent aroma.
- Sweet Dessert Pakora: For a truly unique dessert experience, try dipping slices of banana or apple wedges into a slightly sweetened version of the batter (perhaps with a touch of sugar and cardamom) and frying them until golden. Serve these sweet fritters with a dusting of powdered sugar or a drizzle of warm honey.
Essential Tools to Grab for Perfect Frying
Having the right equipment makes the pakora-making process smooth and enjoyable. Here are the items you’ll need to make these crispy treats:
- Large Bowl: Indispensable for mixing the vegetables with salt and later combining them with the batter.
- Dutch Oven or Deep Pot: Ideal for deep-frying, a heavy-bottomed Dutch oven maintains consistent oil temperature, which is crucial for even cooking and perfect crispness. Ensure it’s deep enough to safely hold the oil.
- Slotted Spoon or Spider Skimmer: Used for carefully adding and removing pakoras from the hot oil, allowing excess oil to drain away.
- Wire Rack with a Tray Beneath: Essential for draining the freshly fried pakoras. Placing them on a wire rack ensures air circulation, preventing them from becoming soggy compared to draining on paper towels.
- Kitchen Thermometer (Optional but Recommended): A thermometer helps you precisely monitor the oil temperature, guaranteeing optimal frying conditions and preventing common mistakes.
How to Make Pakora: An Easy Step-by-Step Guide
Follow this detailed guide to create delicious, crispy pakoras that will impress everyone. Each step is designed for ease and perfection:
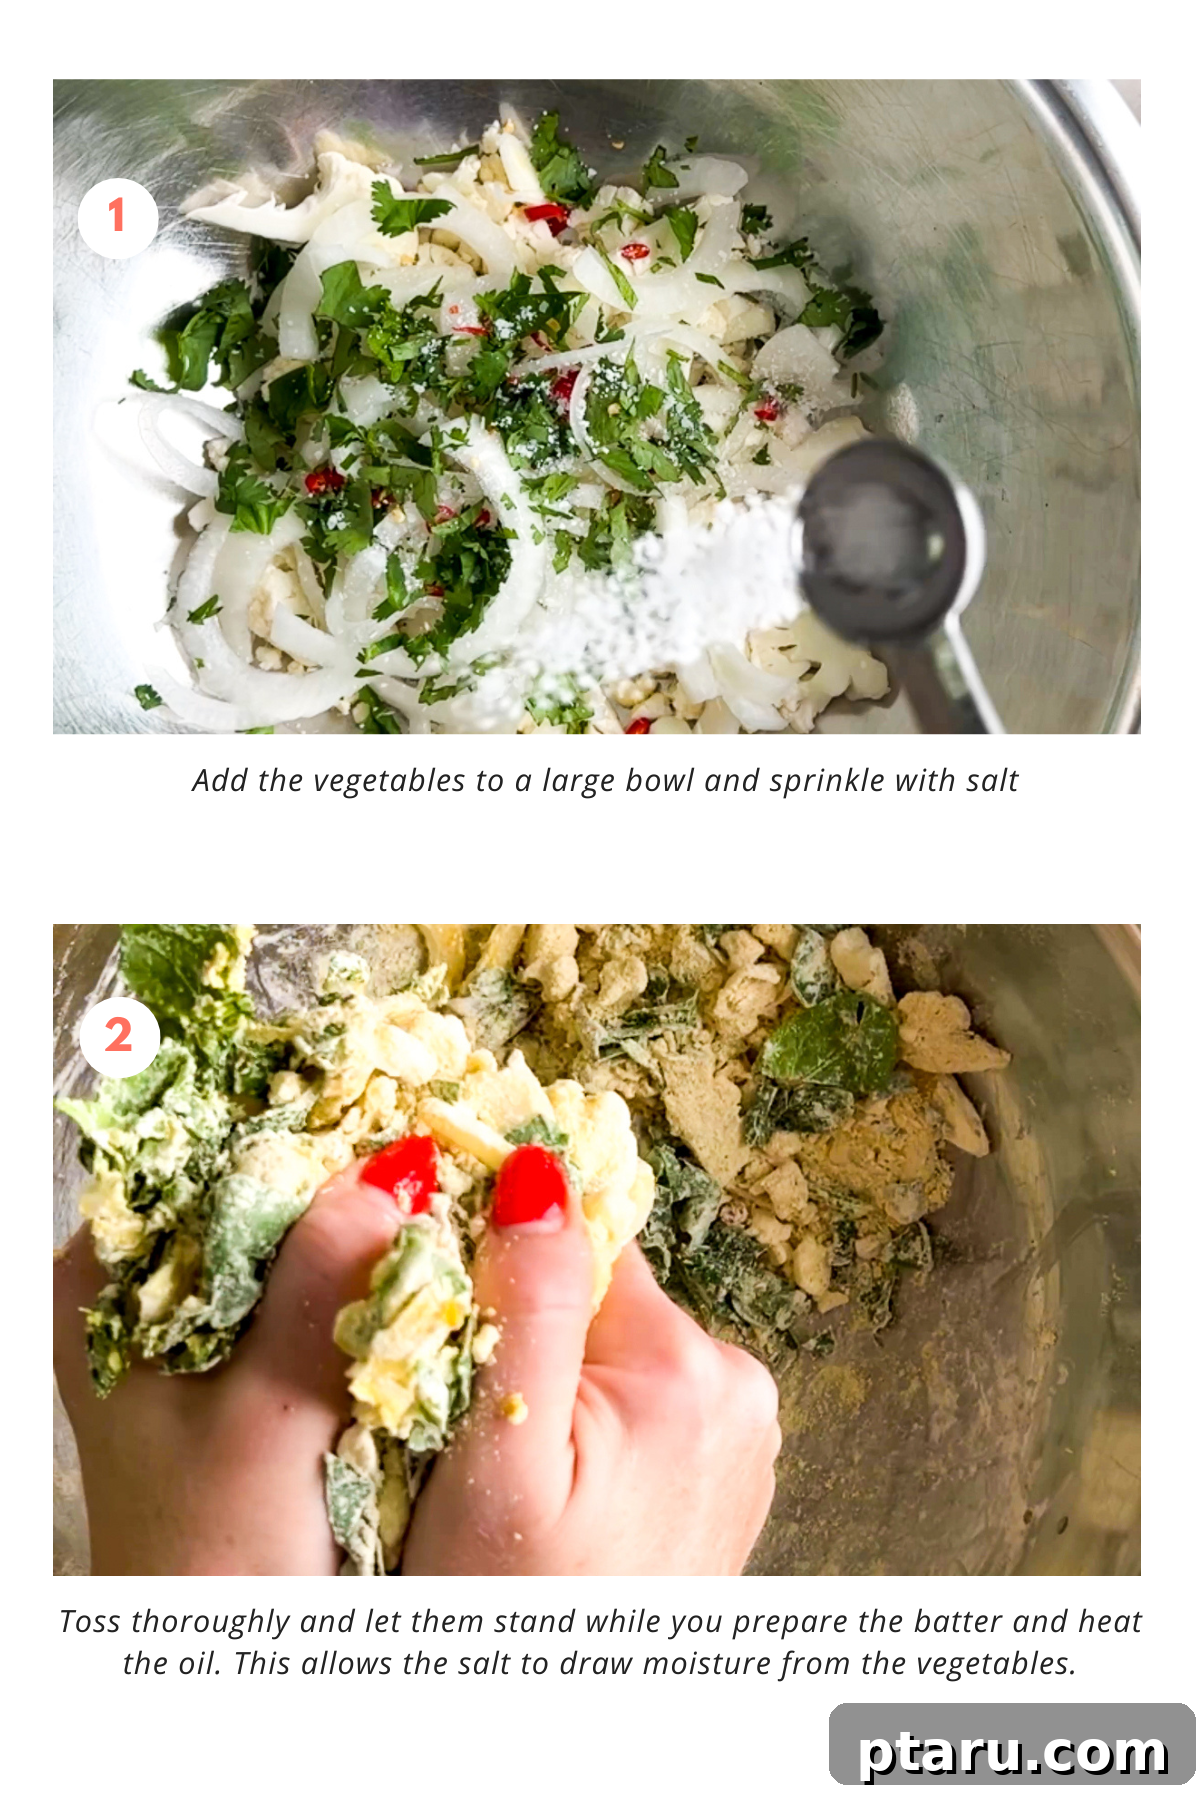
Step 1: Preparing the Vegetables for Optimal Crispness
Begin by adding all your thinly sliced and chopped vegetables to a large mixing bowl. Sprinkle them generously with kosher salt. Toss the vegetables thoroughly with your hands, ensuring the salt is evenly distributed. Let the seasoned vegetables stand for at least 10-15 minutes while you prepare the batter and heat the oil. This crucial step allows the salt to draw out excess moisture from the vegetables, which is vital for preventing soggy pakoras and achieving that desirable crisp exterior. You’ll notice a small pool of liquid at the bottom of the bowl—this is exactly what we want to avoid in our final product.
Step 2: Heating the Oil to the Perfect Frying Temperature
Pour 2-3 inches of neutral oil (such as vegetable, canola, or peanut oil) into a large Dutch oven or a deep, heavy-bottomed pot. Place the pot over medium heat. It’s essential to ensure the sides of your pot are at least twice the depth of the oil to prevent any potential overflow or splattering during frying. Heat the oil until it reaches a precise temperature of 375ºF (190ºC). Using a kitchen thermometer is highly recommended for accuracy, as maintaining the correct oil temperature is key to perfectly cooked pakoras. If the oil is too cold, the pakoras will absorb too much oil and become greasy; if too hot, they will burn on the outside and remain raw inside.
Step 3: Crafting the Flavorful Batter
While the oil heats up and the vegetables release their moisture, prepare your dry batter mix. In a separate medium bowl, whisk together the chickpea flour, cornstarch (or rice flour), red chilli powder (or cayenne pepper), and turmeric. Whisk them until they are well combined and there are no lumps. This dry mixture forms the spiced coating for your vegetables.
Step 4: Combining Vegetables and Batter to Form the Mixture
Return to your salted vegetables. Gently squeeze handfuls of the vegetables to remove any excess water that has accumulated, then discard the liquid. Now, sprinkle the prepared chickpea flour mixture over the drained vegetables. Add just 1 tablespoon of water to the bowl. Using your hands, firmly toss and press the mixture together. The goal is for all the flour to be moistened and adhere to the vegetables, forming a thick, shaggy mass. It will initially seem quite dry, and this is completely normal – resist the urge to add more water! Let the mixture rest for 5 minutes; this allows the flour to fully hydrate and the flavors to meld.
Step 5: Forming and Carefully Frying the Pakoras
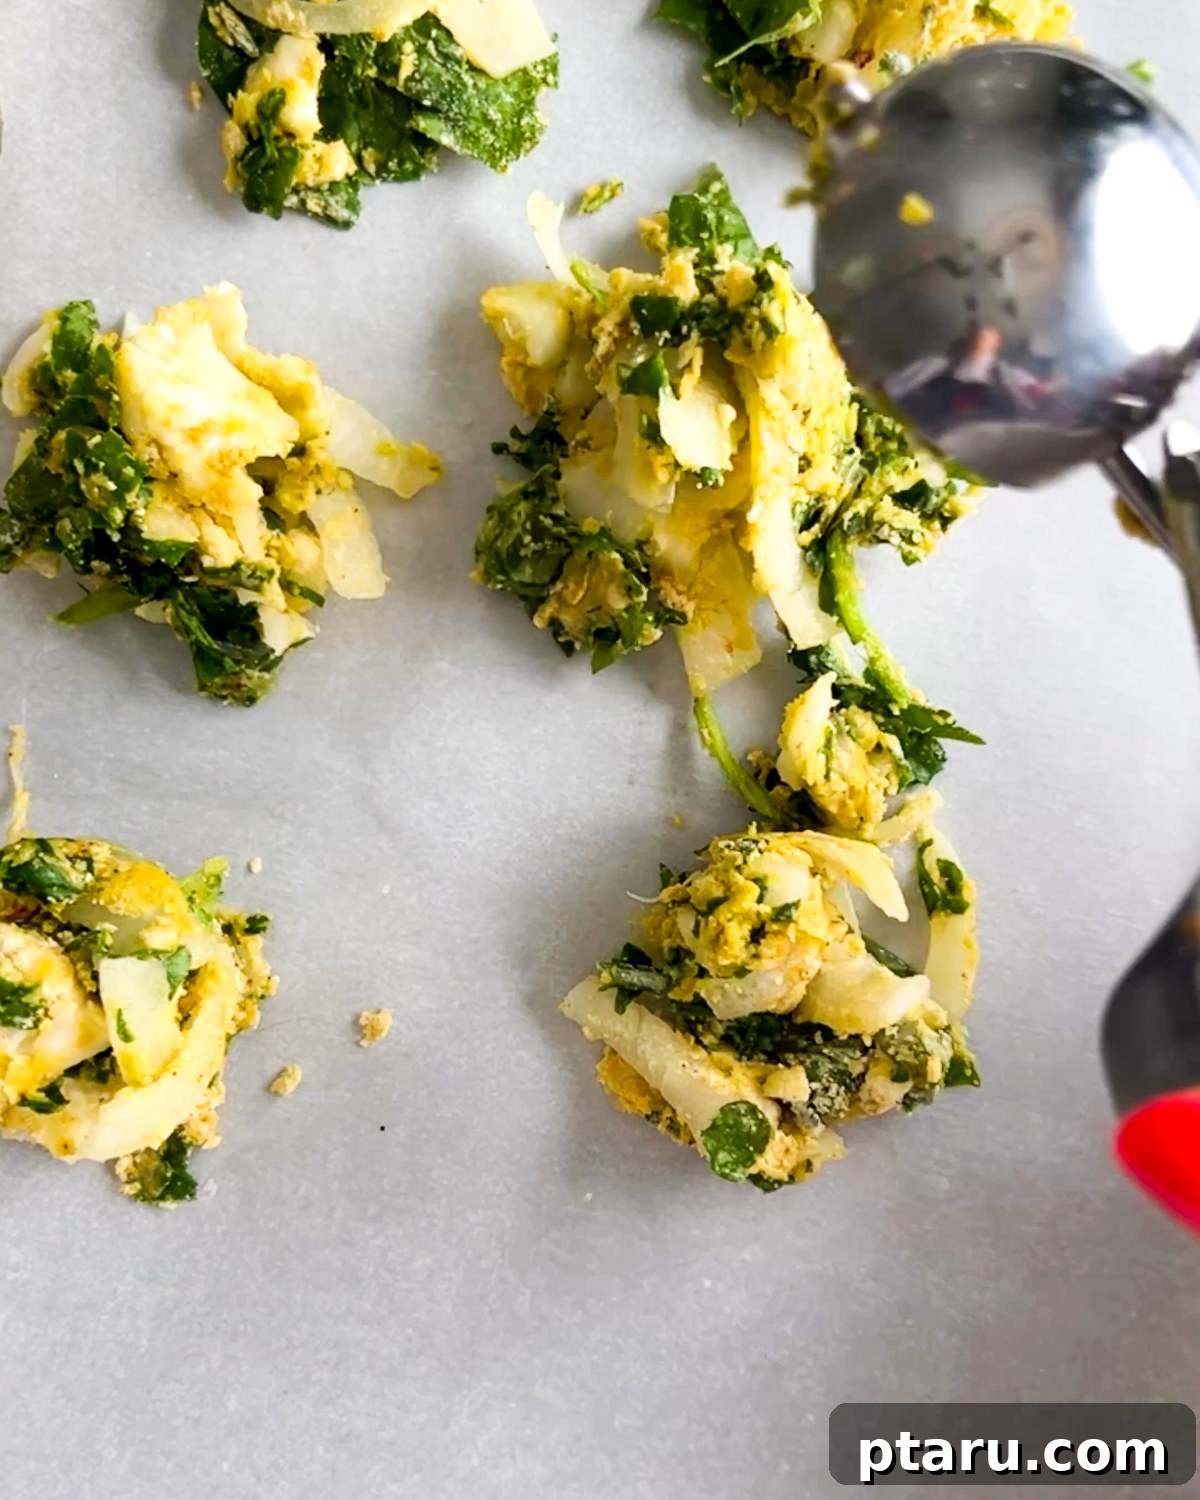
Lightly dampen your hands with water to prevent the mixture from sticking. Take approximately 1 ½ tablespoon-sized portions of the vegetable mixture and firmly squeeze them into compact balls or irregular fritter shapes. Use tongs to carefully and gently slide 6-8 pakoras into the hot oil, one at a time. Be mindful not to overcrowd the pot, as this will drop the oil temperature and lead to greasy, unevenly cooked pakoras. Give each pakora enough space to fry properly.
Step 6: Achieving Golden Perfection Through Frying
Fry the pakoras for a total of 3-4 minutes. Halfway through the cooking time, use your slotted spoon or tongs to gently flip them over, ensuring both sides cook evenly. Continue frying until they are deeply golden brown and beautifully crispy on all sides. The vibrant color indicates that the batter is cooked through and the exterior has developed that irresistible crunch.
Step 7: Draining and Serving Your Delicious Pakoras
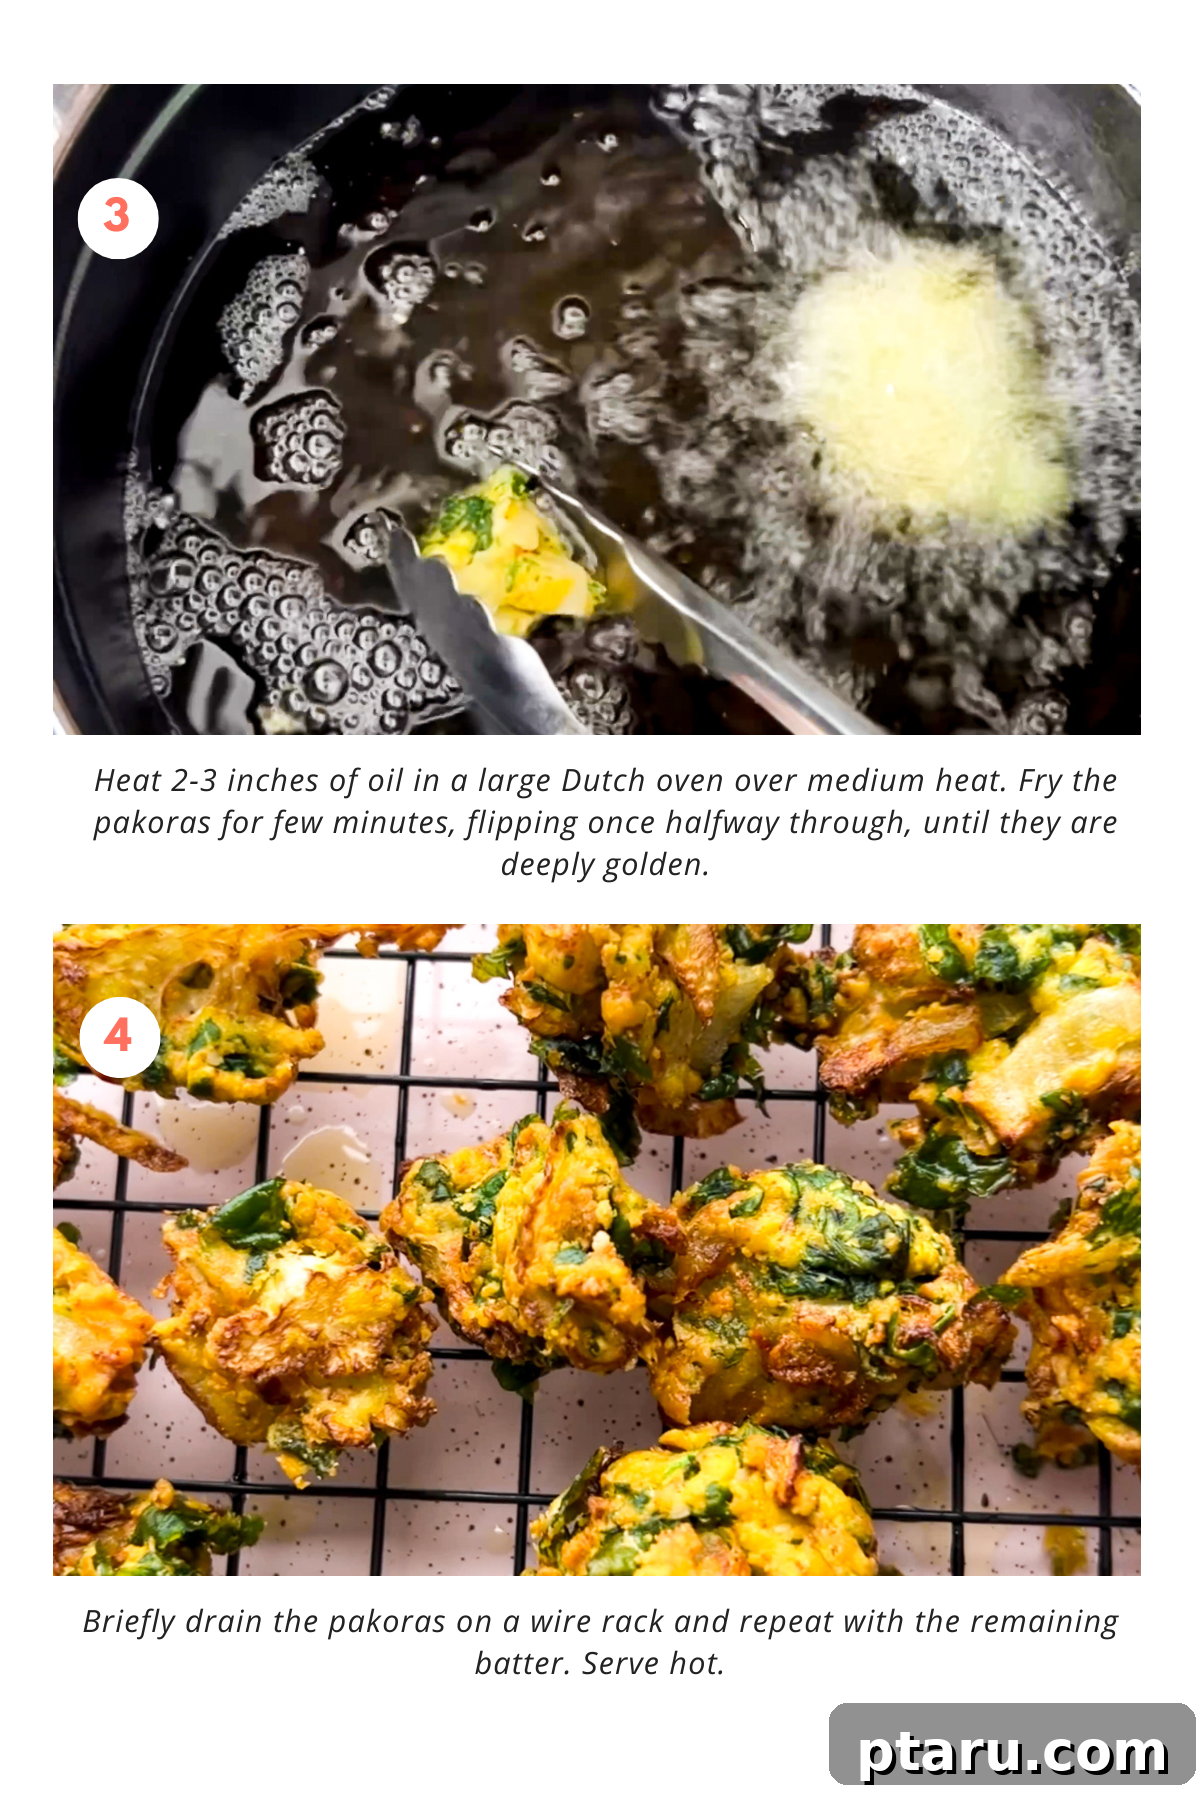
Once fried to perfection, use your slotted spoon to remove the pakoras from the hot oil. Briefly hold them over the pot to allow any excess oil to drip back into the pan, then transfer them immediately to a wire rack placed over a baking sheet. This allows air to circulate around them, preventing sogginess and maintaining their crispness. Repeat the frying process with the remaining batter, working in small batches until all pakoras are cooked. Serve your pakoras piping hot with your favorite chutneys or sauces. Enjoy the crispy, flavorful goodness!
5 Common Mistakes When Making Pakora (and How to Avoid Them!)
Even seasoned cooks can fall victim to common pitfalls when making pakora. Understanding these typical mistakes and how to sidestep them will ensure your fritters are always perfectly crispy and flavorful:
- Not Squeezing Excess Moisture from Vegetables: This is perhaps the most common mistake leading to soggy pakoras. Vegetables naturally release water, especially when salted. If this moisture isn’t removed, it dilutes the batter and steams the pakoras instead of frying them.
Solution: After salting your vegetables, let them stand for 10-15 minutes, then firmly squeeze out as much water as possible before mixing with the batter. This concentrates the vegetable flavor and ensures a crisper result. - Using Too Much Water in the Batter: A runny batter is difficult to work with and results in a thin, weak coating that won’t adhere well to the vegetables, leading to crumbling during frying or a less crispy finish.
Solution: Start with the minimal amount of water suggested in the recipe (often just a tablespoon or two initially). The batter should be thick and just moistened enough to bind the vegetables. Remember, the vegetables themselves will release a little more moisture even after squeezing, contributing to the final batter consistency. Trust the process; a seemingly dry mixture is often correct. - Incorrect Oil Temperature Issues: Frying in oil that is either too hot or not hot enough will compromise your pakoras. Too hot, and the pakoras will brown quickly on the outside, appearing cooked while remaining raw and doughy inside. Too cold, and they will absorb excessive oil, becoming heavy, greasy, and soft instead of crispy.
Solution: Maintain the oil temperature at a consistent 375ºF (190ºC). Use a kitchen thermometer to monitor it accurately. Adjust your stove’s heat as needed throughout the frying process to keep the temperature stable. - Overcrowding the Pot During Frying: Dropping too many pakoras into the oil at once significantly lowers the oil temperature. This leads to uneven cooking, where some pakoras might be done while others are still absorbing oil, and none achieve optimal crispness.
Solution: Always fry pakoras in small batches (typically 6-8 at a time), allowing ample space for them to cook evenly and for the oil temperature to recover quickly between additions. Patience here pays off immensely in terms of quality. - Skipping the Batter Rest Time (or Vegetable Stand Time): Forgetting to let the salted vegetables stand, or skipping the short rest time after mixing the batter, can result in a less cohesive and poorly hydrated mixture. The flour needs time to fully absorb moisture.
Solution: Allow the salted vegetables to stand for 10-15 minutes, then squeeze them. After mixing the batter with the vegetables, let the whole mixture rest for another 5 minutes. This hydration period is critical for the chickpea flour to fully bind, creating a stronger, more consistent coating that holds together beautifully during frying.
Make-Ahead and Storage Tips for Pakora
While pakoras are undeniably at their best when served fresh and hot, there are smart ways to prepare ahead and store leftovers to enjoy later. Proper storage ensures you can savor their deliciousness even after the initial frying.
Make-Ahead Preparation: You can prepare the vegetable mixture and the dry batter ingredients separately up to 24 hours in advance. Store the prepared vegetables (after salting and squeezing out excess moisture) in an airtight container in the refrigerator. Keep the dry batter mix in a sealed container at room temperature. When you’re ready to cook, simply combine the prepped vegetables with the dry ingredients, add the specified amount of water, and proceed directly to the frying steps. This method is perfect for entertaining or when you want to minimize last-minute prep.
Storage of Leftovers: Once cooked, pakoras are truly best enjoyed immediately. However, any leftovers can be stored in an airtight container in the refrigerator for up to 2 days. To prevent them from becoming soggy, ensure they have cooled completely before sealing them in the container.
Reheating for Crispness: Avoid microwaving pakoras, as this will inevitably make them soft and rubbery. For best results, reheat them in a preheated oven or air fryer. Place them in a preheated oven at 350ºF (175ºC) for 10-15 minutes, or in an air fryer at 375ºF (190ºC) for 5-8 minutes, flipping halfway through. Reheat until they are heated through and regain their desirable crisp texture.
Final Notes, Pro Tips & Science-Based Secrets for Perfect Pakora
As a passionate foodie and enthusiast of all things Indian, both sweet and savory, I’ve gathered my top tips and a sprinkle of culinary science to help you achieve pakora perfection every single time:
- Consistent Slicing for Uniform Cooking: Ensure all your vegetables are thinly sliced and, most importantly, uniformly sized. This consistency is crucial for even cooking, preventing some pieces from being undercooked while others are perfectly crisp.
- Trust the Dry Batter Consistency: When you first mix the dry batter with the vegetables and minimal water, the mixture will seem quite dry and shaggy. This is normal and desired. Resist the urge to add more water initially; the flour needs a moment to hydrate and will come together after mixing and resting.
- Maintain Optimal Oil Temperature (The Golden Rule): The oil temperature is arguably the most critical factor for crispy pakoras. Invest in a good kitchen thermometer and aim for a consistent 375ºF (190ºC). Frying at the right temperature ensures the pakoras cook through evenly, developing a crispy exterior without absorbing too much oil. Too low, and they’ll be greasy; too high, and they’ll burn outside and remain raw inside.
- Fry in Small Batches for Superior Results: Overcrowding the frying pot is a common mistake that causes the oil temperature to drop rapidly. This leads to soggy, undercooked pakoras. Always fry in small batches (e.g., 6-8 pakoras at a time) to allow the oil to maintain its temperature and ensure each pakora cooks evenly and becomes beautifully crisp.
- Proper Drainage for Lasting Crispness: After frying, immediately transfer the pakoras to a wire rack set over a baking sheet. Avoid draining them on paper towels, as this can trap steam underneath, leading to sogginess. The wire rack allows air to circulate freely around the pakoras, ensuring they stay crisp as they cool slightly.
- The Magic of Chickpea Flour (Besan): Chickpea flour is not just a gluten-free alternative; it’s fundamental to pakora’s unique texture and flavor. Its high protein and fiber content create a robust binding structure for the fritters, contributing to their nutty flavor and providing the necessary compounds for that irresistible browning during frying.
- The Role of Cornstarch/Rice Flour for Extra Crunch: The addition of cornstarch or rice flour to the batter is a clever trick to achieve an even lighter and crispier texture. These flours contain starches that, when heated, undergo a process called gelatinization, which helps absorb moisture and forms a delicate, crunchy crust.
Frequently Asked Questions About Pakora
Just skimming through this recipe? Here are some key takeaways and common questions answered:
The spiciness of pakoras is entirely adjustable and depends on the amount and type of chili used in the batter. You can tailor the quantity of green chilies or cayenne pepper to suit your taste, or omit chilies entirely for a milder, family-friendly version. Always taste your batter (before adding to raw vegetables) to get an idea of the spice level.
While pakoras are undeniably best when enjoyed fresh, you can freeze them after frying. Allow them to cool completely, then arrange them in a single layer on a baking sheet and freeze until solid. Transfer to an airtight freezer-safe bag or container for up to 1-2 months. To reheat, place them directly from frozen into a preheated oven at 375ºF (190ºC) for 15-20 minutes, or an air fryer, until heated through and crispy again.
Yes, traditional pakoras made with chickpea flour (besan) are naturally gluten-free. It’s important to ensure that all other ingredients you use, such as baking powder or any spice blends, are also certified gluten-free if you have specific dietary restrictions or allergies.
The versatility of pakoras allows for a wide array of vegetables. Common choices include thinly sliced onions, cauliflower florets, spinach, potatoes, and eggplant. However, feel free to experiment with other vegetables like bell peppers, zucchini, cabbage, carrots, or even corn kernels for unique flavor and texture combinations. Ensure all vegetables are finely chopped or thinly sliced for even cooking.
While deep-frying is what gives pakoras their signature crispiness and authentic texture, you can achieve a healthier version by baking or air-frying. To bake, arrange them on a parchment-lined baking sheet and bake at 400ºF (200ºC) for 20-25 minutes, flipping halfway through, until golden and cooked. For air-frying, cook at 375ºF (190ºC) for 15-20 minutes, also flipping halfway, until crispy.
Sogginess is a common issue often stemming from a few key factors: not squeezing enough excess moisture from the vegetables before mixing with the batter, overcrowding the frying pan (which drops the oil temperature), or frying at too low a temperature. To achieve crispy pakoras, always thoroughly drain vegetables, fry in small batches, and maintain an oil temperature of 375ºF (190ºC).
Pakora Recipe Card
Pakora
Jennifer Pallian BSc, RD
15 minutes
11 minutes
26 minutes
20 pakora
Ingredients
For vegetables:
- 1 cup thinly-sliced onion
- 1 cup thinly-sliced cauliflower florets
- 1 cup loosely-packed baby spinach coarsely-chopped
- 1 serrano pepper or 2 Thai red chilies, minced (optional)
- 2 tbsp coarsely chopped cilantro leaves
- 1 tsp kosher salt
For batter:
- ⅔ cup chickpea flour (besan)
- 3 tbsp cornstarch or rice flour
- ¼ tsp cayenne pepper or red chili powder
- ¼ tsp turmeric
- 1 tbsp water (adjust as needed)
Instructions
-
Add veggies to a large bowl and sprinkle with salt. Toss thoroughly and let stand for 10-15 minutes while you prepare the batter and heat the oil. This gives the salt time to draw moisture from the vegetables. After standing, gently squeeze out any excess water from the vegetables.
-
Heat 2-3 inches of oil in a large Dutch oven or deep pot over medium heat until it reaches 375ºF (190ºC). Ensure the sides of the pot are at least twice the depth of the oil to prevent overflow.
-
Meanwhile, in a medium bowl, whisk together chickpea flour, cornstarch, cayenne pepper, and turmeric until well combined.
-
Sprinkle the chickpea mixture over the drained vegetables and add the water. Use your hands to toss and press the mixture together until all flour is moistened and adheres to the vegetables. It will seem quite dry – this is normal. Let it rest for 5 minutes to hydrate.
-
Using slightly dampened hands, squeeze the mixture into 1 ½ tablespoon-sized balls or irregular fritter shapes to form pakoras. Use tongs to carefully slide 6-8 pakoras into the hot oil, one at a time, being careful not to overcrowd the pot.
-
Fry for 3-4 minutes, flipping once halfway through, until deeply golden brown and crispy.
-
Briefly drain pakoras on a wire rack set over a baking sheet, then repeat with the remaining batter. Serve hot immediately with your favorite chutneys.
Nutrition
|
Carbohydrates: 5g
|
Protein: 1g
|
Fat: 0.3g
|
Saturated Fat: 0.05g
|
Polyunsaturated Fat: 0.1g
|
Monounsaturated Fat: 0.1g
|
Sodium: 122mg
|
Potassium: 72mg
|
Fiber: 1g
|
Sugar: 1g
|
Vitamin A: 160IU
|
Vitamin C: 4mg
|
Calcium: 7mg
|
Iron: 0.3mg
Nutrition information is automatically calculated, so should only be used as an approximation.
Other Indian Snacks You’ll Love
Do you share my love for Indian dishes, savory snacks, and delightful treats? Me too! Here are a few more incredible recipes to expand your Indian culinary repertoire:
- Indian Spiced Fish Cakes: A flavorful twist on classic fish cakes, infused with aromatic Indian spices.
- Butter Chicken Pizza: A fantastic fusion dish combining the creamy richness of butter chicken with the beloved Italian staple.
- Indian Chickpea Salad: A light, refreshing, and protein-packed salad bursting with tangy and savory Indian flavors.
- Homemade Naan Bread: Master the art of Indian flatbreads with these delicious recipes:
- Cheese Naan: Soft, fluffy naan filled with gooey melted cheese – an absolute delight.
- Keema Naan: Savory naan stuffed with spiced minced meat, perfect for a hearty meal.
- Aloo Naan: A comforting and flavorful naan filled with a spiced potato mixture.