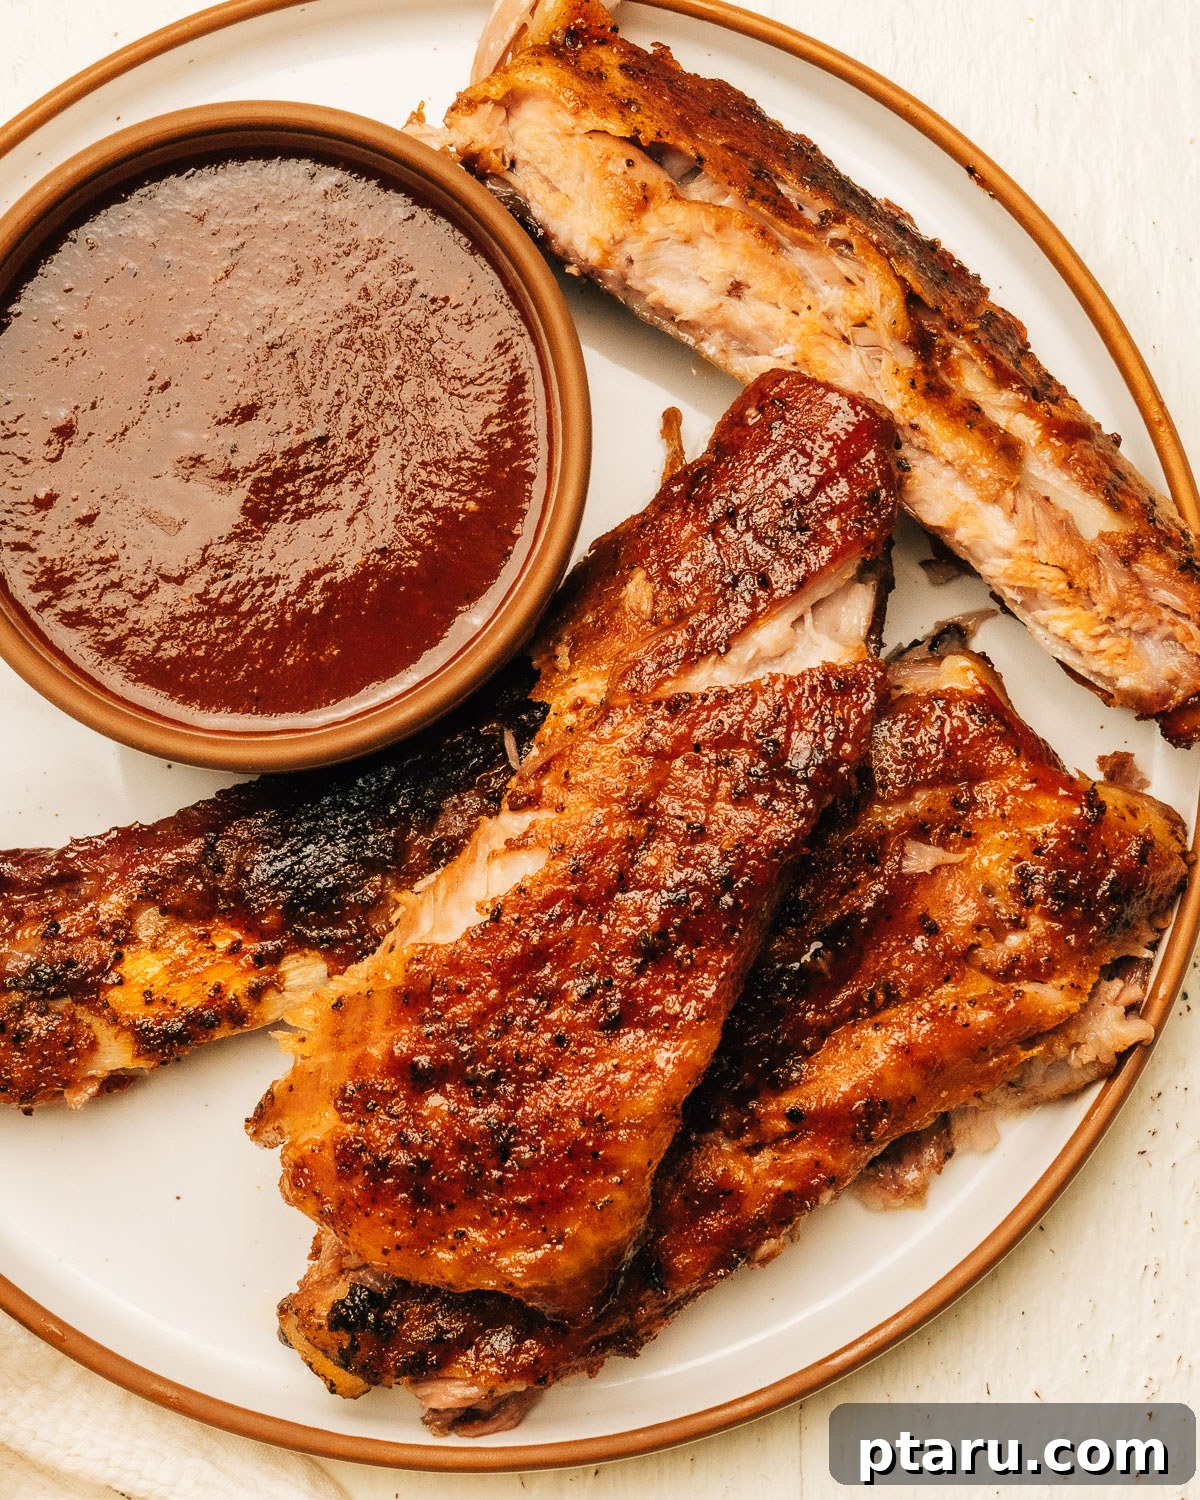
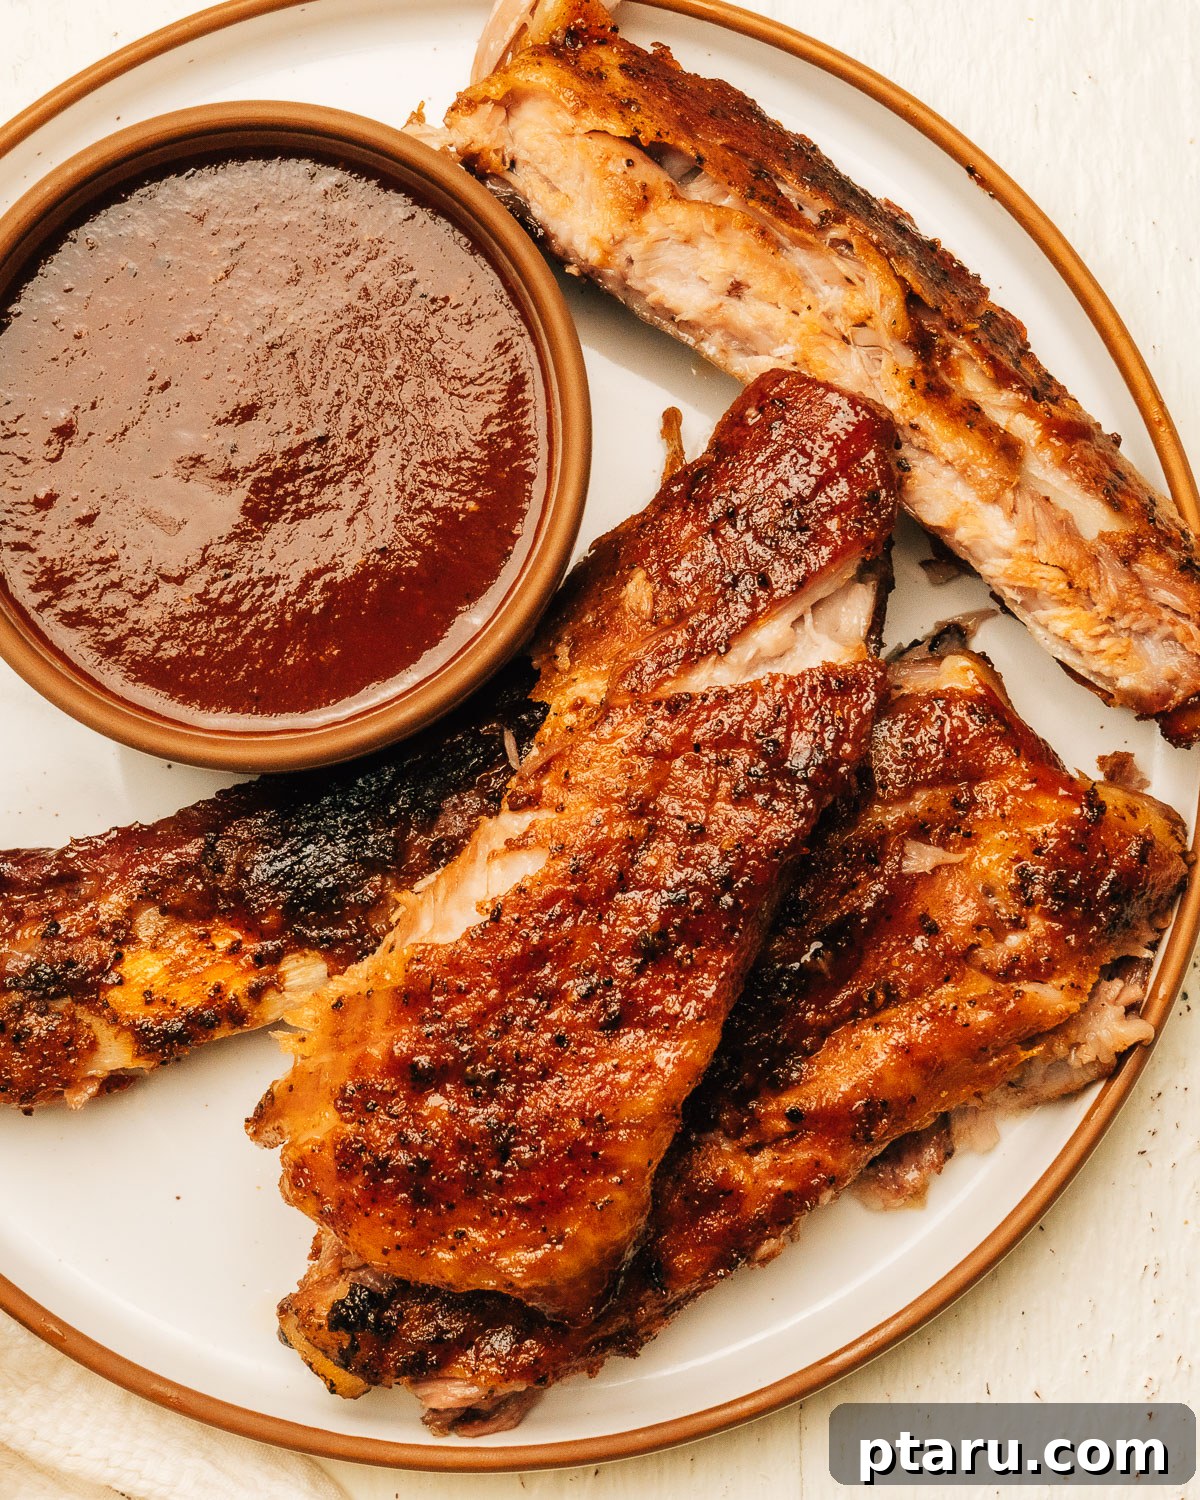
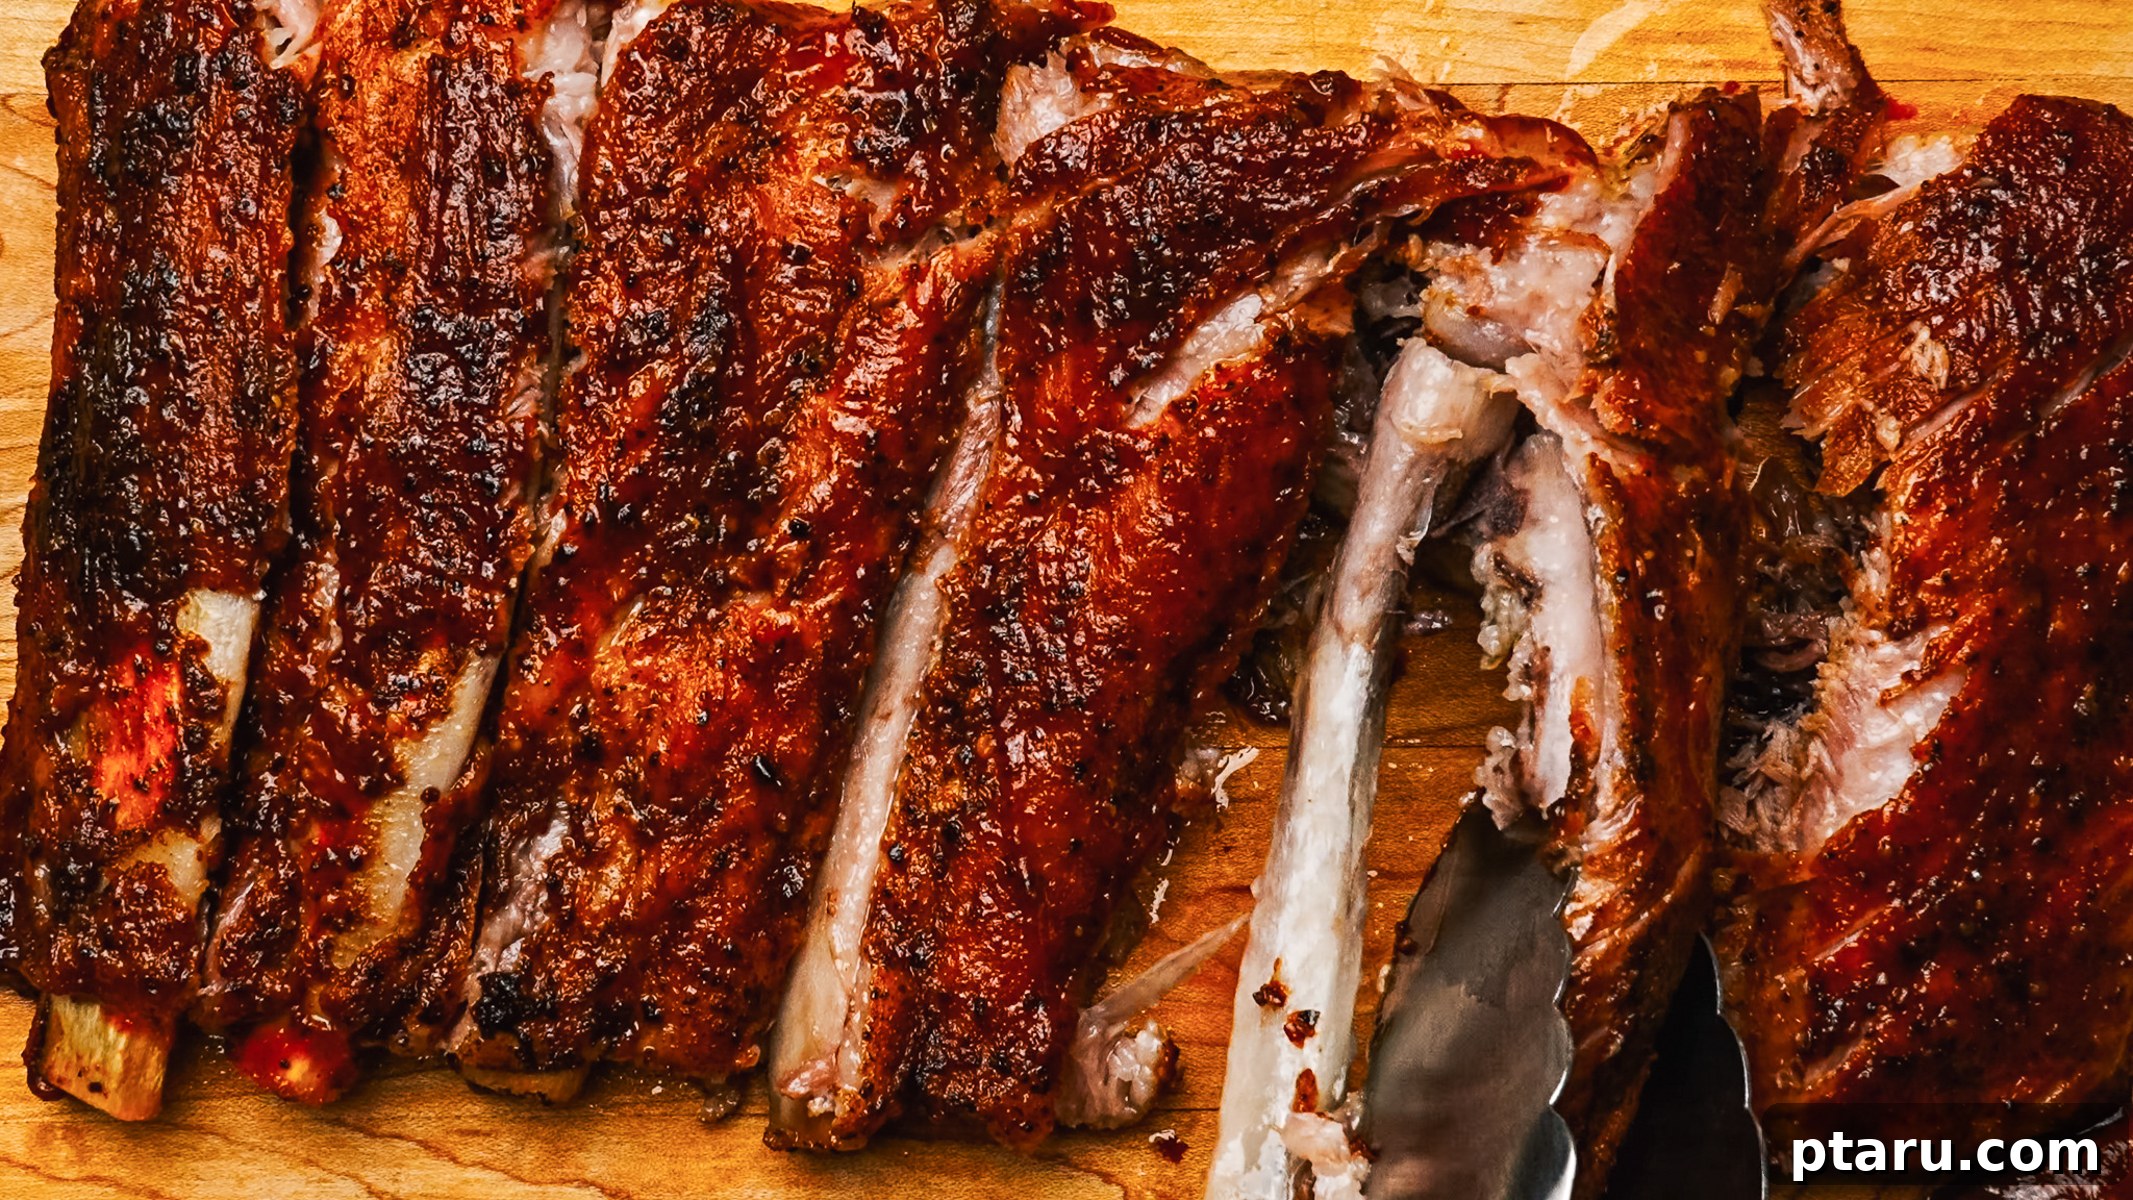
Experience the ultimate comfort food with these **fall-off-the-bone tender pork spare ribs**. Coated in an aromatic, smoky dry rub and finished with a rich, sticky homemade BBQ glaze under the broiler, these ribs are designed to impress. This easy, oven-baked recipe unveils the culinary secrets, often shared by food scientists, to ensure your ribs are consistently perfect—juicy, flavorful, and so tender a knife will slide through with minimal effort. Forget the grill or smoker; your oven is all you need for an unforgettable barbecue experience.
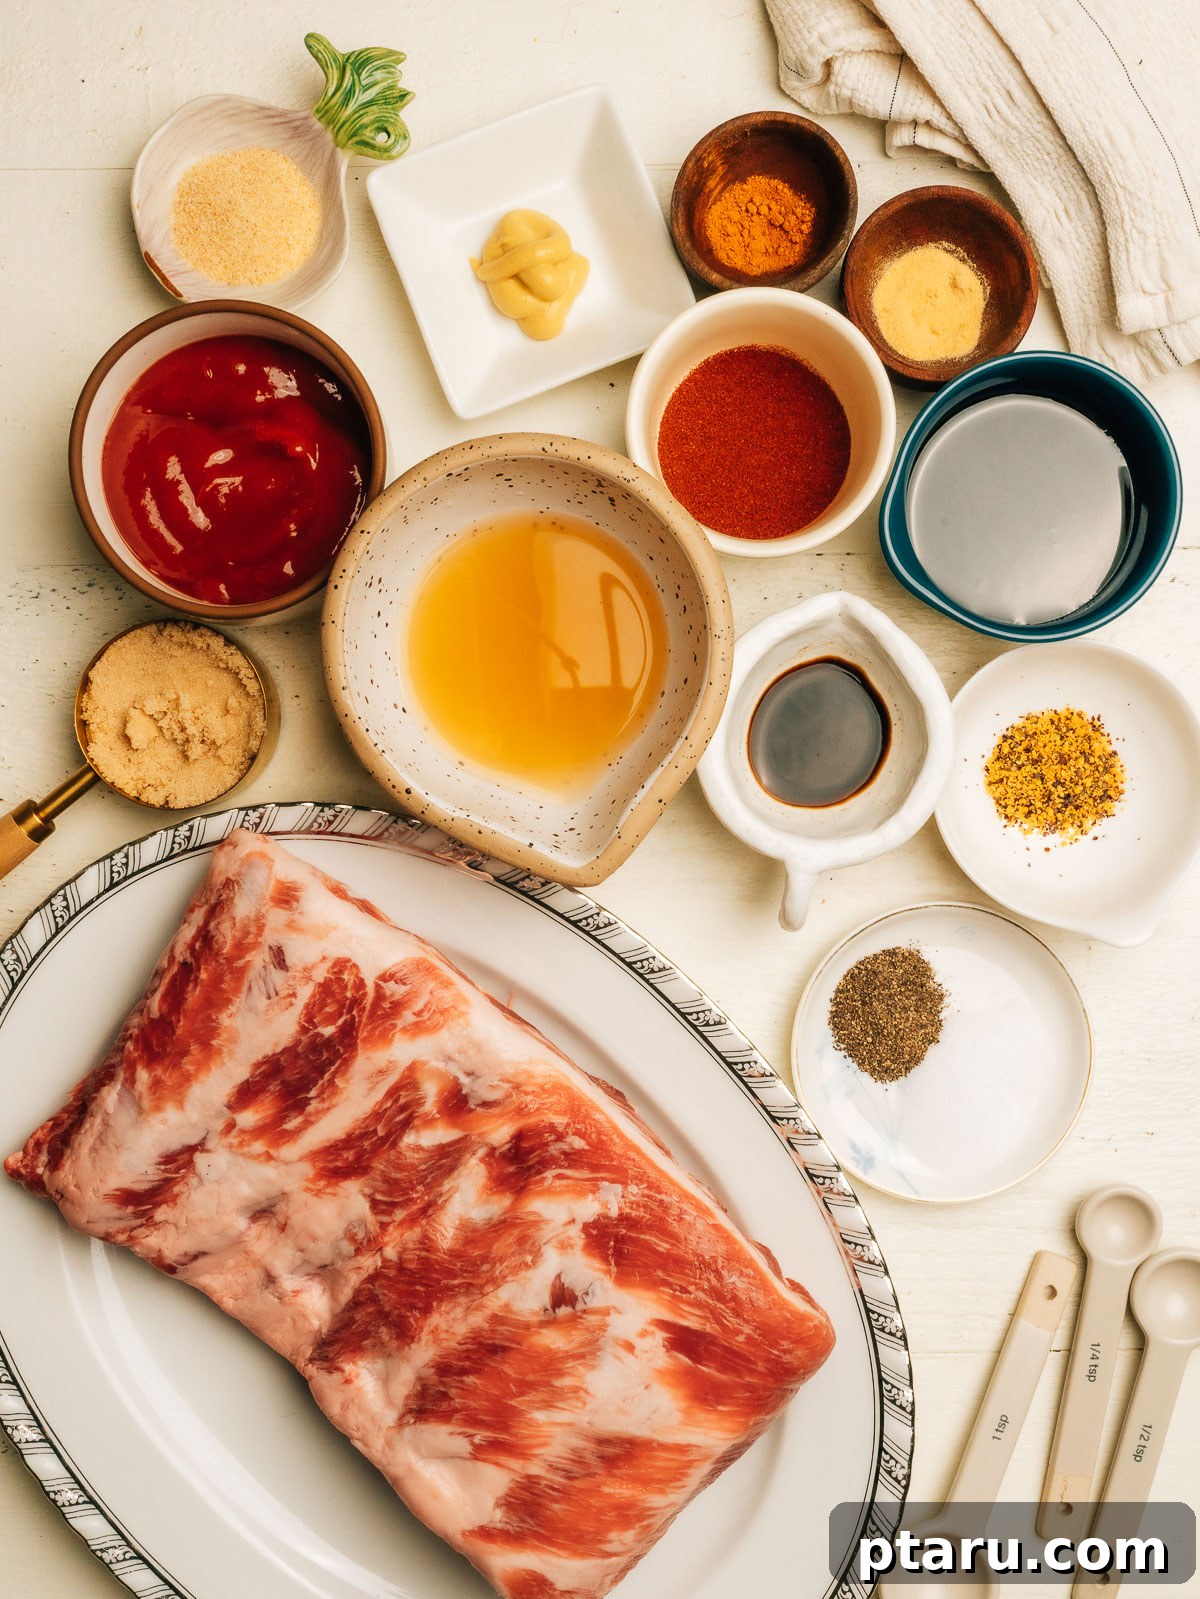
Essential Ingredients for Perfect Spare Ribs
When these finger-licking barbecue **pork spare ribs** emerge from your oven, they’ll be so tender that a knife will glide effortlessly between the bones. Prepare to be amazed and have plenty of napkins on hand for this delightful feast!
For the Ribs: Choosing the Best Cut
- Pork spare ribs: This recipe calls for two full racks, typically weighing about 6 to 7 lbs total. Spare ribs are sourced from the belly side of the pig, close to the breastbone. What makes them exceptional for slow cooking is their generous marbling of fat and abundant connective tissue, which, under low heat, slowly breaks down into gelatin, resulting in incredibly tender and rich meat. For even cooking, select racks that are relatively uniform in thickness. This ensures consistent results across both racks.
The Flavorful Dry Rub Ingredients
Our dry rub is the foundation of flavor, designed to infuse the pork with deep, smoky notes and a hint of sweetness that caramelizes into a beautiful crust.
- Brown sugar: Essential for creating that coveted caramelized, sticky crust that all the best barbecue ribs possess. It also plays a vital role in helping the homemade BBQ sauce cling perfectly during the final broiling step. Do not skip this ingredient, as it significantly contributes to both flavor and texture.
- Smoked paprika: This is your secret weapon for imparting a deep, authentic smoky flavor that usually comes from a grill or smoker. It’s crucial to use *smoked* paprika, not sweet or hot paprika, as its unique profile is doing a lot of heavy lifting in establishing the characteristic BBQ taste.
- Garlic powder: Provides an earthy, savory depth that seamlessly blends into the rub. Unlike fresh garlic, which can burn and turn bitter during the long baking process, garlic powder distributes evenly and withstands the heat beautifully.
- Onion powder: Complements the garlic powder, rounding out the savory profile and adding another layer of aromatic complexity to the rub.
- Dry mustard: Introduces a subtle tang and a touch of sharpness that might not be overtly noticeable but contributes significantly to the overall balance and prevents the flavors from tasting flat. You’ll definitely miss it if it’s omitted!
- Cayenne pepper: A modest 1/2 tsp adds a gentle background warmth, enhancing the complexity without overwhelming the palate. Feel free to adjust the quantity up or down based on your personal preference for heat.
- Kosher Salt & Black Pepper: These foundational seasonings are crucial for enhancing all other flavors in the rub and ensuring the meat is perfectly seasoned from within.
Crafting the Quick Homemade BBQ Sauce
A final quick broil with our homemade BBQ glaze is what gives these ribs their irresistible caramelized, slightly charred finish. While you can certainly use your favorite bottled sauce, our easy recipe offers a fresh, balanced flavor that perfectly complements the dry rub.
- Ketchup: Forms the robust tomato base of the barbecue sauce, providing essential body, natural sweetness, and that classic, appetizing BBQ color.
- Apple cider vinegar: Crucial for cutting through the richness of the pork and the sweetness of the sauce. It adds a bright tang that prevents the sauce from tasting overly sweet or one-dimensional, ensuring a well-balanced flavor profile.
- Brown sugar: Beyond adding sweetness, brown sugar aids in thickening the sauce and facilitates beautiful caramelization under the broiler, creating that desirable sticky texture.
- Molasses: Contributes a deep, rich, slightly bitter, and smoky undertone that adds incredible complexity. For a milder, sweeter variation, pure maple syrup makes an excellent 1:1 substitute.
- Worcestershire sauce: A powerhouse of umami, this ingredient adds a subtle savory depth and complexity, making the sauce taste more layered and sophisticated.
- Dijon mustard: Provides a sharp, pungent tang that prevents the sauce from becoming cloyingly sweet, adding another dimension of flavor.
- Smoked paprika: Echoes the smokiness from the dry rub, expertly tying the flavors of the sauce and the seasoned ribs together for a cohesive taste experience.
- Garlic powder: Offers quick and effortless flavor distribution throughout the sauce, ensuring every bite is infused with savory notes.
- Kosher salt: Essential for balancing the sweetness and enhancing all the other wonderful flavors present in the sauce, bringing everything into perfect harmony.
You’ll find the precise quantities for all ingredients listed in the comprehensive recipe card located at the conclusion of this post.
Versatile Variations and Smart Substitutions
This oven-baked spare ribs recipe is remarkably adaptable, allowing for customization to suit various tastes or ingredients on hand. If you’re looking for a different flavor profile, consider my Chinese restaurant-style Honey Garlic Spare Ribs. Below are the most practical swaps and tweaks to make this recipe truly your own:
- Baby back ribs: While our recipe focuses on spare ribs, baby back ribs can absolutely be used with the same flavorful dry rub and BBQ sauce. Keep in mind that baby back ribs are leaner and generally thinner than pork spare ribs, which means they will cook faster. Reduce the covered bake time to approximately 2 to 2.5 hours and begin checking for doneness earlier to prevent overcooking.
- Beef spare ribs: The same low-and-slow cooking methodology works wonderfully for both pork and beef ribs. However, beef ribs are typically larger and denser, so anticipate a longer baking time, potentially up to 4 hours or more. Always rely on the knife test (meat should easily separate from the bone) to determine doneness rather than solely the clock.
- Molasses substitute: For the BBQ sauce, pure maple syrup is the most straightforward 1:1 swap. The resulting sauce will be slightly lighter in flavor and color, but still delicious. In a pinch, honey can also be used, though it will yield a different sweetness profile.
- Adjusting heat level: To amplify the spice, increase the cayenne pepper in the dry rub to 1 full teaspoon, or incorporate a pinch of chipotle chili powder for a smokier heat dimension. For those who prefer a milder flavor, especially for children, simply omit the cayenne pepper entirely from the rub.
- Store-bought BBQ sauce: Don’t hesitate to use your favorite store-bought barbecue sauce for the glaze if time is short or you have a preferred brand. The dry rub contributes the majority of the deep, complex flavor to the ribs, so the sauce primarily serves to provide that desired sticky, caramelized finish.
- No broiler? No problem!: If your oven lacks a dedicated broil setting, you can still achieve a beautiful glaze. After baking and applying the sauce, increase your oven temperature to 450°F (232°C) and roast the glazed ribs, uncovered, for 8 to 10 minutes. It’s crucial to watch them very closely during this step to prevent the sugars in the rub and sauce from burning, which can happen quickly at high temperatures.
Do you love easy pork dinners? My slow cooker pork shoulder and crockpot pork loin are two more incredibly delicious, crowd-pleasing recipes that are definitely worth adding to your meal rotation.
Essential Tools for Oven-Baked Ribs
You don’t need any specialized or fancy equipment to bake incredible spare ribs right in your home oven. Here’s a list of the basic, yet crucial, tools that will ensure your success:
- Large rimmed sheet pan: You’ll need a baking sheet that is large enough to comfortably fit both racks of ribs flat in a single layer. The rimmed edges are absolutely essential, as ribs release a significant amount of flavorful liquid during the long baking process, and the sides will keep it contained, preventing messes in your oven.
- Aluminum foil: This is a versatile and indispensable tool for two key tasks: first, for lining the sheet pan, which makes cleanup incredibly easy; and second, for covering the ribs tightly during the initial low-and-slow bake. A tight, secure seal is paramount here, as it traps the steam, creating a moist cooking environment that is crucial for tenderizing the ribs. Press the edges down firmly around the pan’s rim to ensure no steam escapes.
- Small bowl: Perfect for thoroughly mixing all the dry rub ingredients together before you apply them to the ribs.
- Small saucepan: Required for simmering and developing the homemade BBQ sauce. Choose one with a little extra room to prevent the sauce from bubbling over as it thickens.
- Pastry brush or spoon: Used for evenly applying the BBQ glaze both before and during the final broiling stage. A silicone pastry brush is often preferred for its ability to give the most even and smooth coat of sauce.
- Tongs: Your go-to tool for performing the “bend test” to check for doneness. When lifted from one end, a perfectly cooked rack of ribs will flex easily and show signs of almost breaking in the middle. If it remains stiff, it simply needs more time.
- Sharp knife: Essential for both checking the doneness between the bones (it should slide in effortlessly) and for cleanly slicing the finished ribs into individual portions. A sharp chef’s knife will provide cleaner cuts compared to a serrated blade in this instance.
- Paper towels: Handy for two important steps: providing a firm grip when peeling off the membrane from the bone side of the ribs, and for thoroughly patting the ribs dry before applying the dry rub, which helps the rub adhere better and form a more delicious crust.
Mastering Oven-Baked Spare Ribs: A Step-by-Step Guide
Achieving truly tender, fall-off-the-bone ribs is simpler than you might think, especially with this oven-baked method, which is surprisingly hands-off for most of the cooking time. Follow these steps to create the best ribs recipe you’ve ever made!
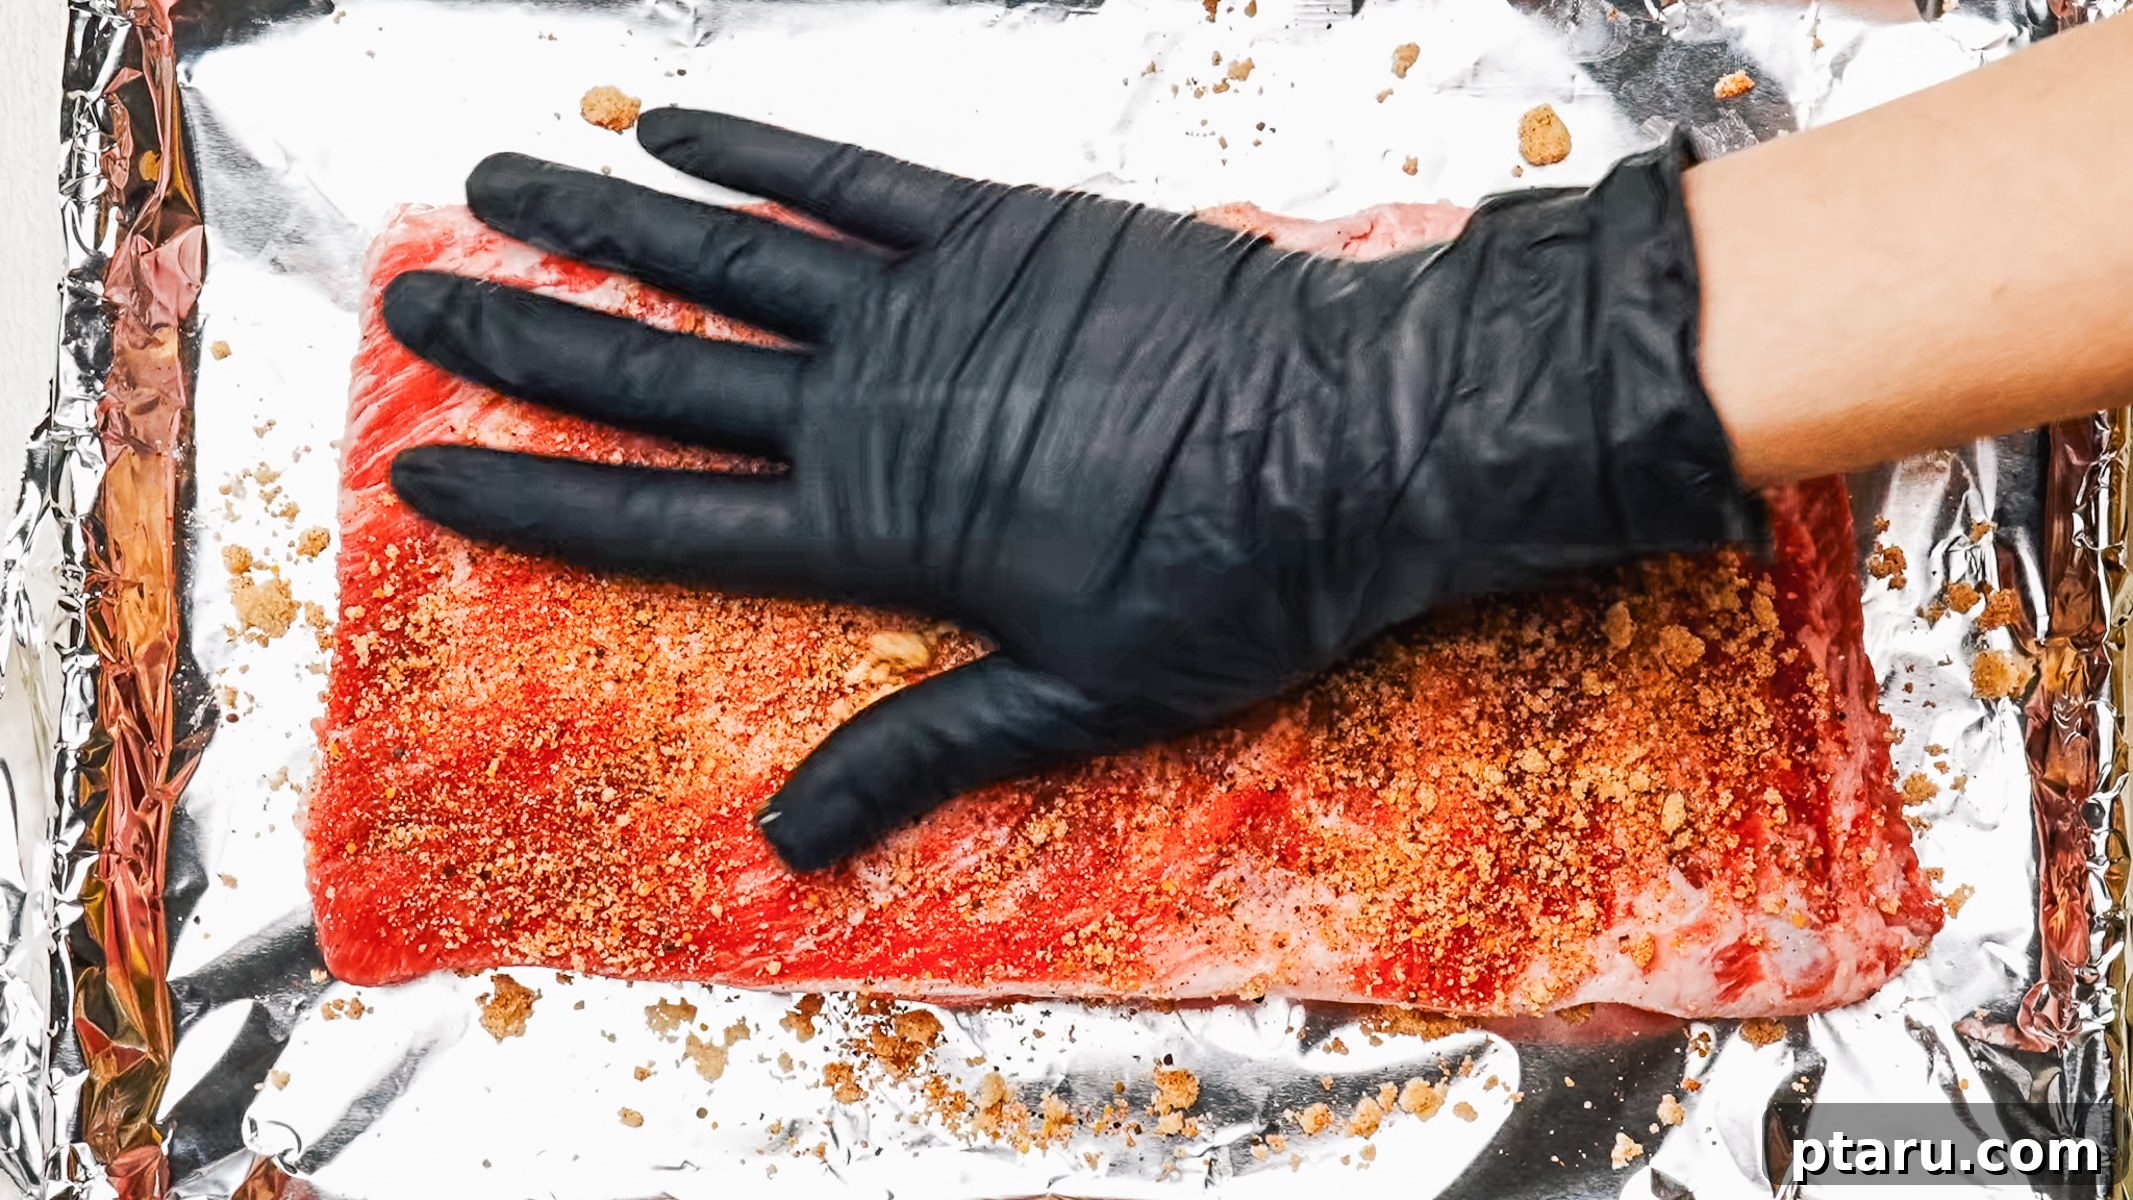
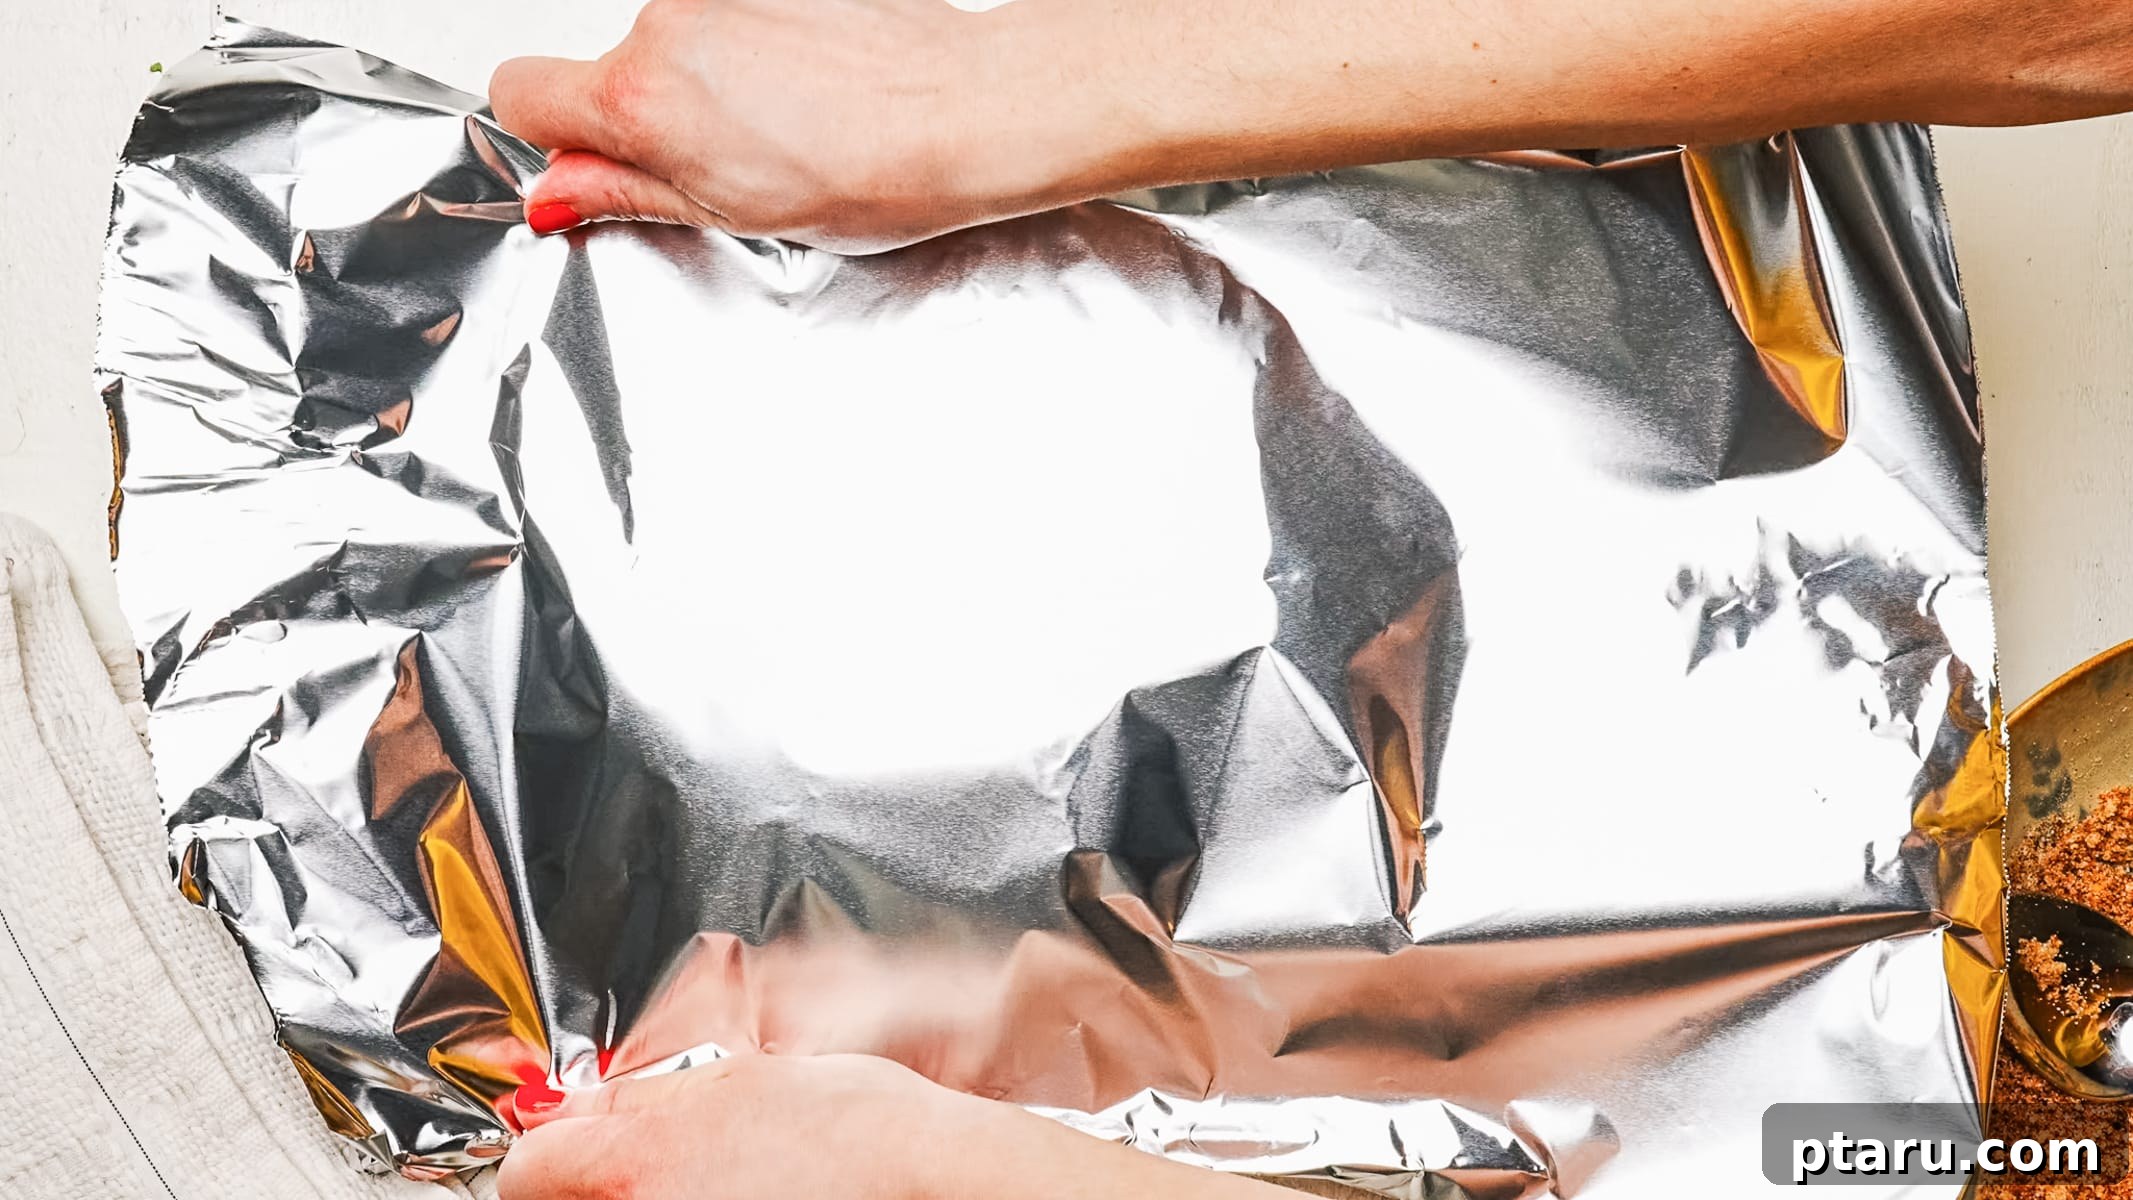
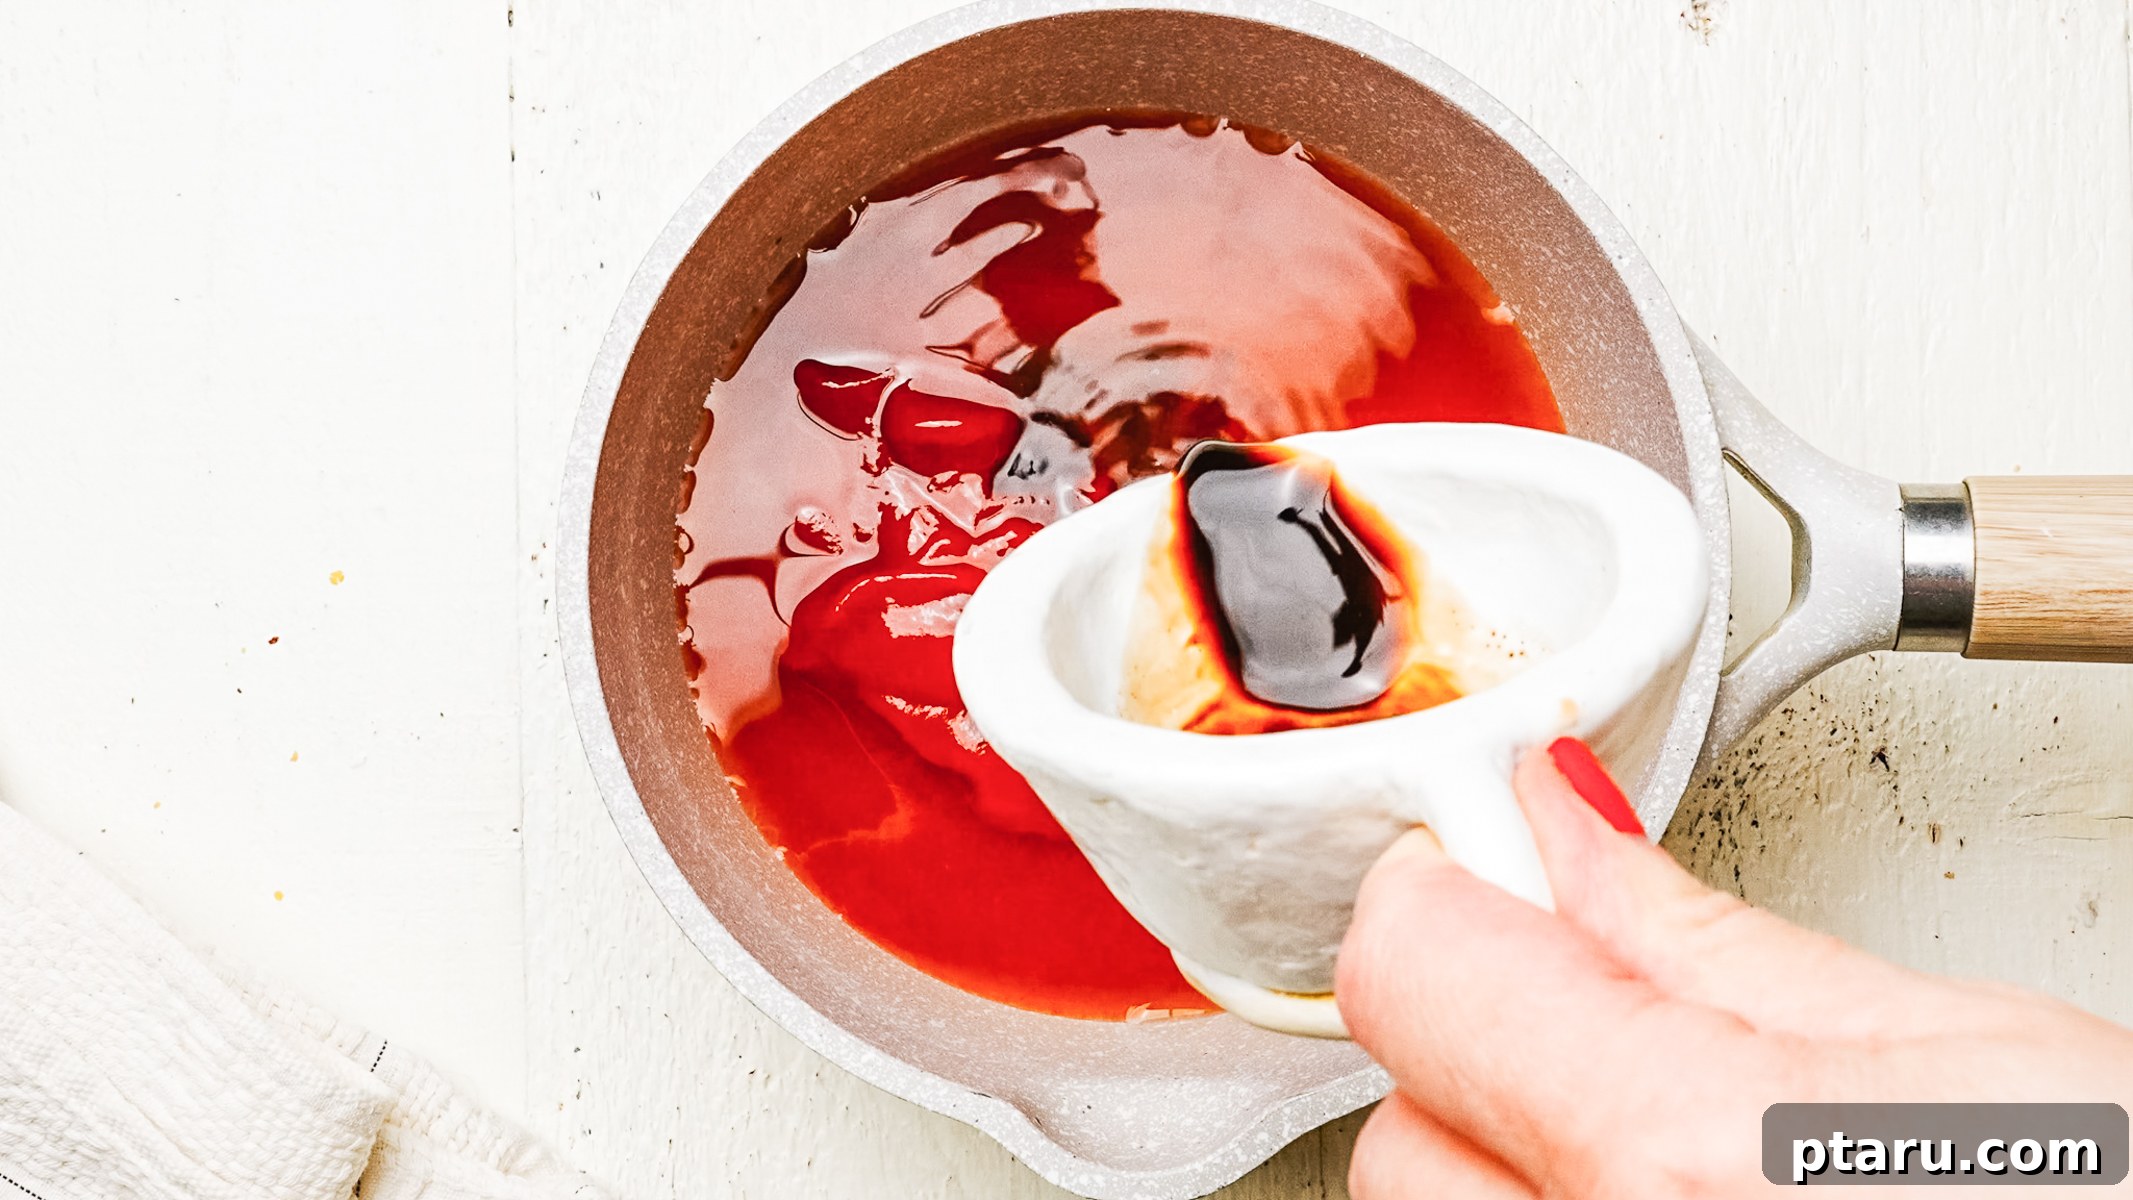
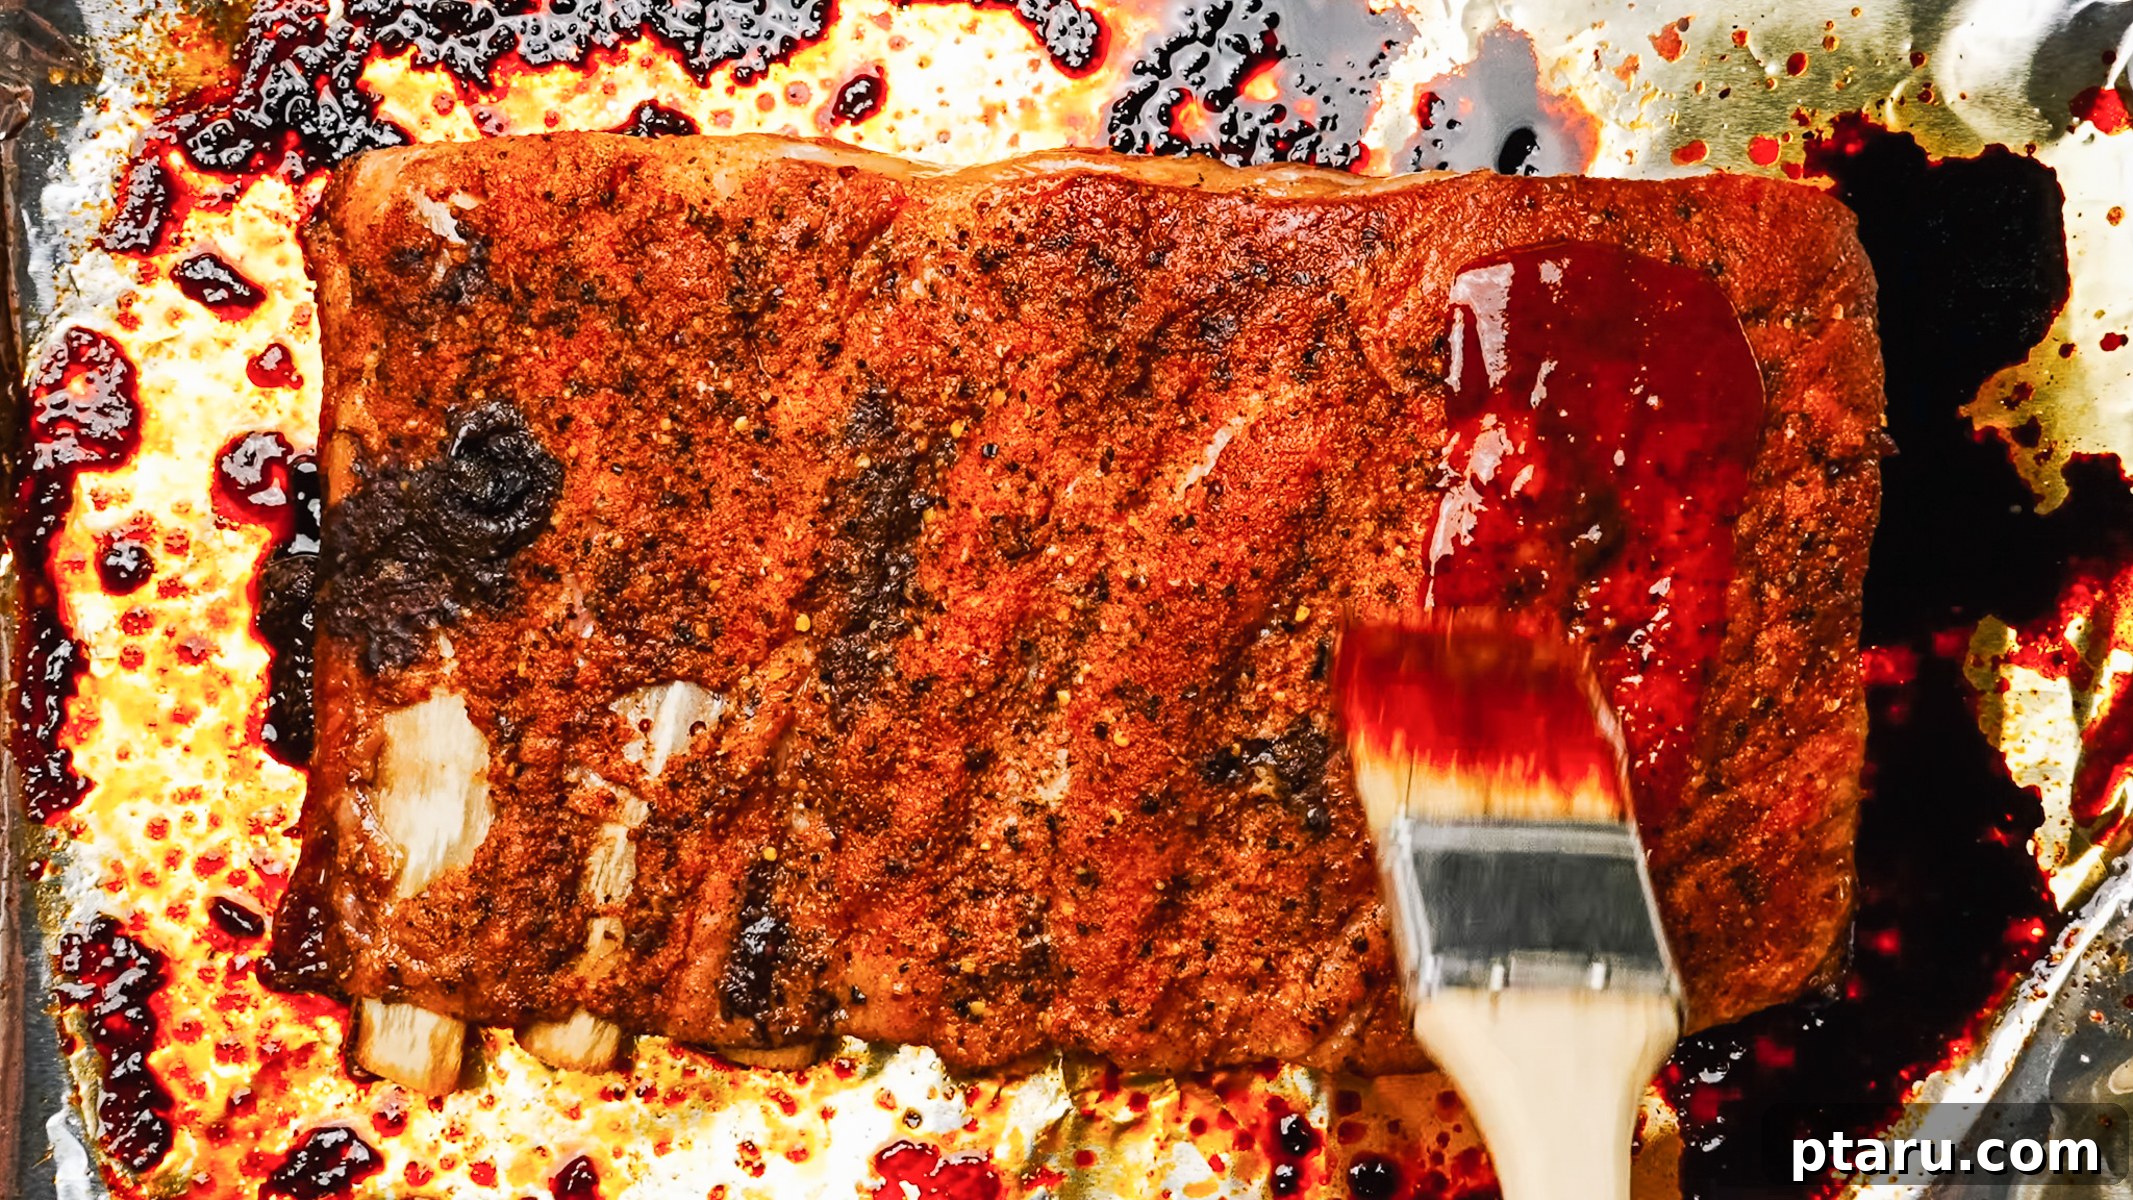
1. Preparing the Ribs and Preheating the Oven
Begin by preheating your oven to 275°F (135°C). Next, carefully flip each rack of ribs so the bone side is facing up. On this side, you’ll find a thin, silvery membrane stretched across the bones. To remove it, slide a butter knife or the handle of a spoon gently under one end of the membrane, working it loose. Once you have a good grip, use a paper towel to firmly grasp the membrane and pull it off in one swift, continuous piece. It typically peels away with surprising ease once you get it started. Removing this membrane is a critical step; it prevents the ribs from becoming tough and rubbery during cooking and allows the flavorful dry rub to better penetrate and season the meat underneath, making the finished ribs much more enjoyable to eat.
2. Applying the Flavorful Dry Rub
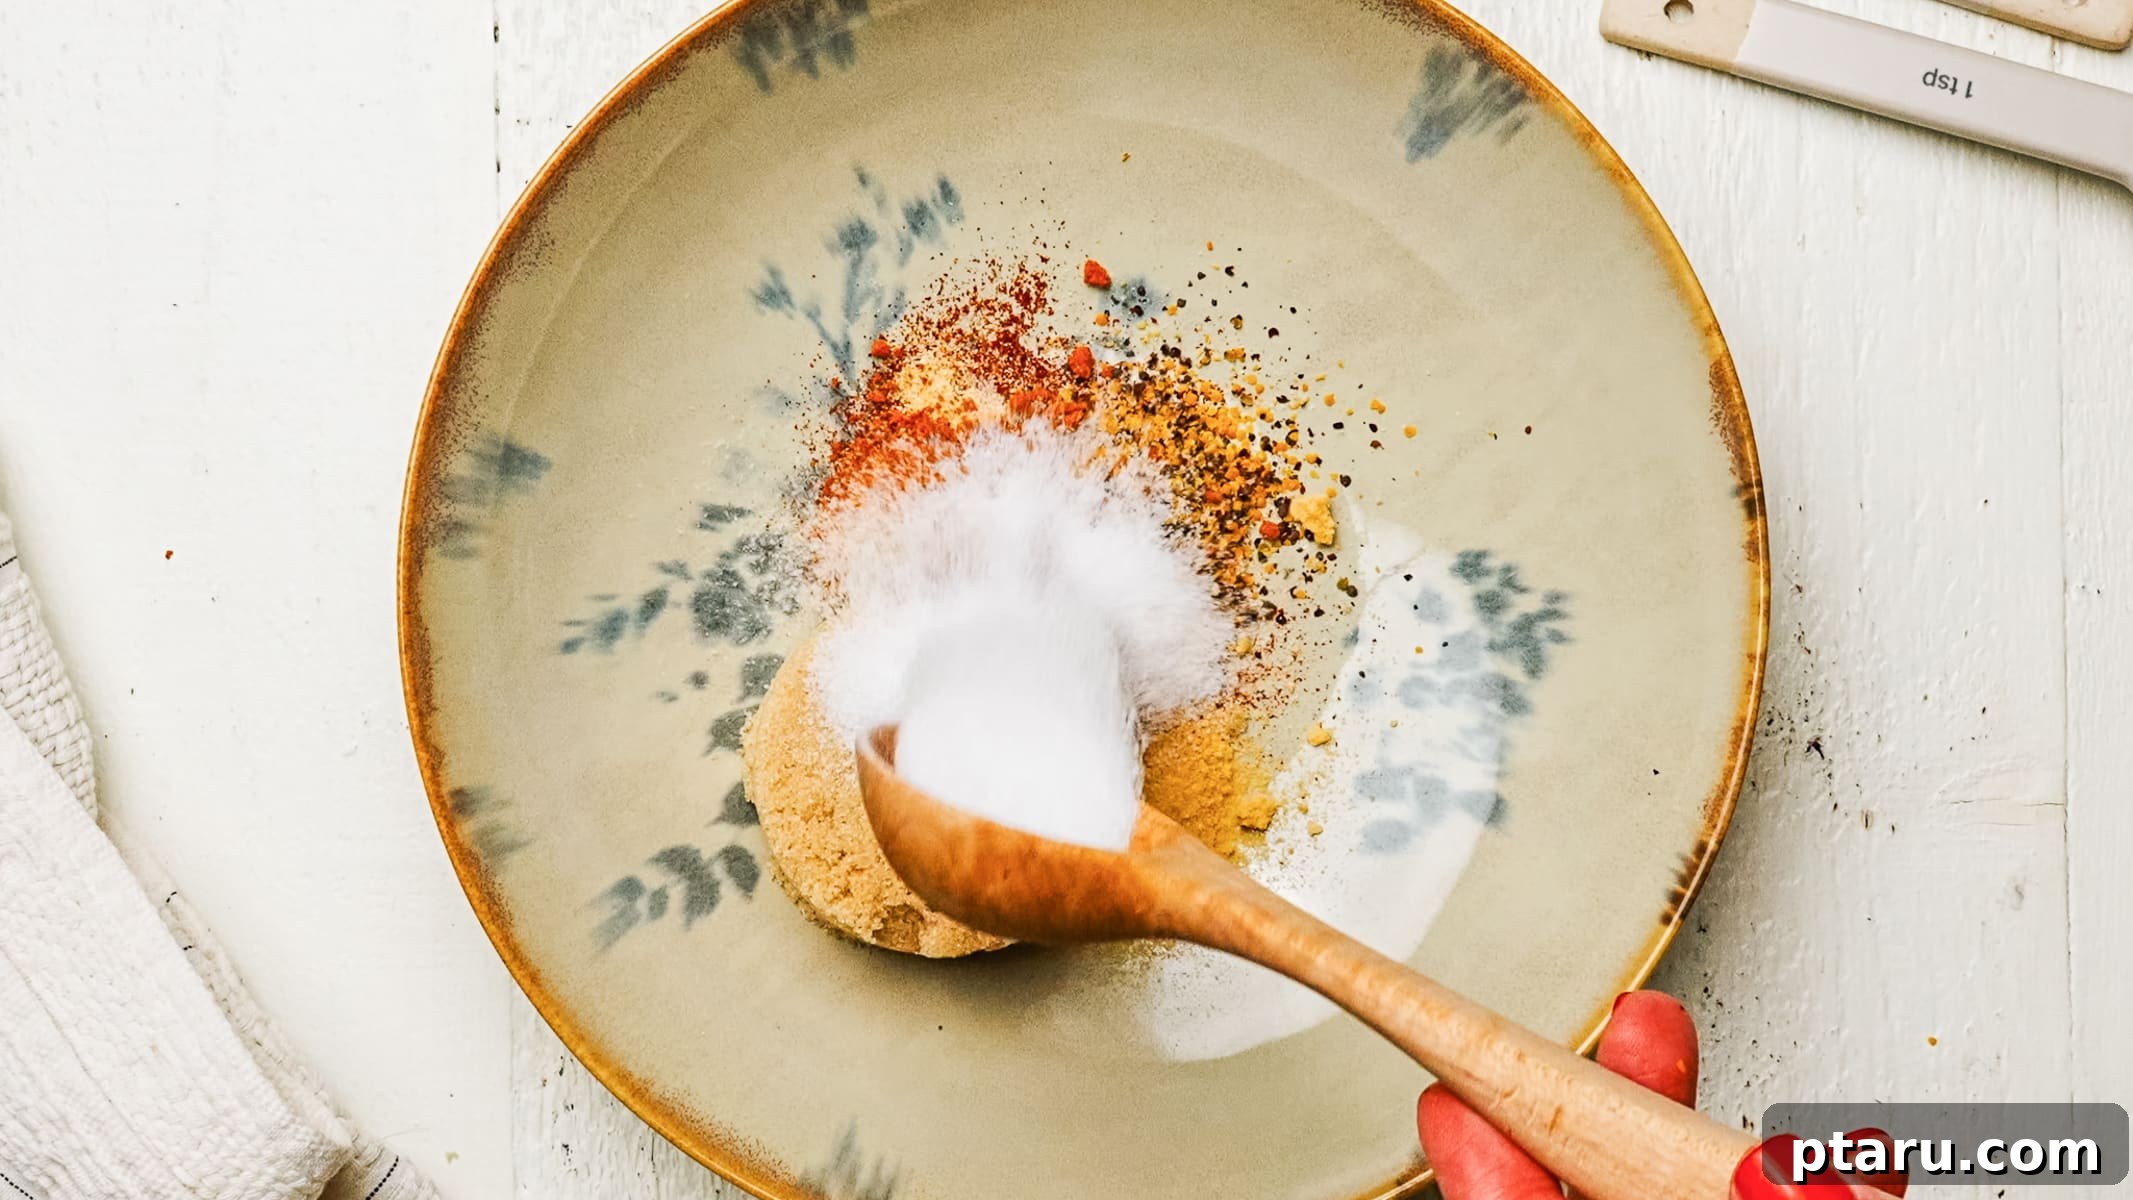
In a small bowl, combine all the ingredients for your dry rub, mixing them thoroughly until well blended. Before applying the rub, pat the ribs thoroughly dry with paper towels. This crucial step helps the rub adhere properly to the surface of the meat and aids in forming a delicious, caramelized crust during baking. Generously press the prepared dry rub all over both sides of each rack of ribs, using your hands to ensure it is firmly worked into the meat. Once coated, place the seasoned racks meaty side up on a large, rimmed sheet pan that has been lined with aluminum foil for easy cleanup.
3. The “Low and Slow” Covered Bake
Cover the sheet pan tightly with a second sheet of aluminum foil. It’s imperative to press the edges of the foil down firmly around the rim of the pan to create a tight, secure seal. This seal is doing vital work by trapping the steam inside, creating a moist cooking environment that tenderizes the meat from within. Bake the ribs in your preheated oven for 2 hours 45 minutes to 3 hours 15 minutes. The ribs are done when a sharp knife slides in easily between the bones with almost no resistance. For a double-check, use tongs to grab one end of a rack and lift it gently. A perfectly cooked rack will bend and flex significantly in the middle, indicating that the connective tissues have broken down. If the rack feels stiff and holds its shape, it needs more time. Reseal the foil tightly and bake for another 15 minutes, then test again. Trust the test, not just the clock!
4. Preparing the Quick BBQ Sauce
About 20 minutes before the ribs are scheduled to finish their long bake, begin preparing your quick homemade BBQ sauce. Combine all the sauce ingredients in a small saucepan. Bring the mixture to a gentle simmer over medium heat, then reduce the heat to medium-low. Allow the sauce to cook for 8 to 10 minutes, stirring frequently to prevent scorching, especially as it thickens. The sauce is ready when it appears glossier, has deepened in color, and is thick enough to coat the back of a spoon. Remember, it will continue to thicken slightly more as it cools.
5. Glazing and Broiling for the Perfect Finish
Once the ribs are tender from baking, carefully remove the top layer of aluminum foil. Now, switch your oven setting to broil on high. Brush the ribs generously with a thick layer of your prepared BBQ sauce. Slide the pan under the broiler, keeping a very close eye on them. Broil for 2 to 4 minutes, watching constantly, until the sauce begins to bubble actively and the edges start to char and caramelize beautifully. Immediately pull them out, apply a second, slightly thinner layer of sauce, and broil for another 1 to 2 minutes. This second layer builds on the first, intensifying the glaze. **Do not walk away from the oven during this step.** The brown sugar present in both the dry rub and the BBQ sauce can burn extremely fast under the intense heat of a broiler.
6. Resting and Slicing for Maximum Juiciness
After their final broil, remove the ribs from the oven and let them rest uncovered on the pan for a crucial 10 minutes before you begin slicing. This resting period is vital; it allows the internal juices, which have been driven to the center during cooking, to redistribute back throughout the meat. If you cut into them immediately, those precious juices will simply run out onto the cutting board, resulting in drier ribs. Once rested, use a sharp chef’s knife to slice straight down between the bones, creating individual rib portions. Serve your magnificent ribs immediately, with any remaining homemade barbecue sauce on the side for dipping.
5 Common Mistakes to Avoid When Making Spare Ribs
Even with an easy-to-follow recipe, certain pitfalls can prevent your oven-baked spare ribs from reaching their full potential. Here are the most frequent mix-ups to avoid:
- Skipping the membrane: The thin, silvery skin on the bone side of the ribs is often overlooked, but it’s a critical element to address. If left intact, this membrane transforms into a tough, rubbery texture during cooking, making the ribs difficult and unpleasant to chew. More importantly, it acts as a barrier, preventing your flavorful dry rub from properly seasoning the meat underneath. Removing it takes less than a minute once you learn the technique (slide a knife under one corner, use a paper towel for grip, and pull). This small step makes a monumental difference in the finished texture and flavor of your ribs.
- Not sealing the foil tightly enough: The “low and slow” baking method relies heavily on steam to tenderize the meat. When the pan is covered, the aluminum foil traps this steam, creating a mini-steamer effect that breaks down the tough collagen and connective tissues from the inside out. Any gap or loose edge in the foil allows this essential steam to escape, leading to dry, tough ribs before the collagen has had adequate time to transform into succulent gelatin. Always press the aluminum foil down firmly and completely around all four edges of the baking pan to create an airtight seal before the pan goes into the oven. This seal is performing crucial tenderizing work.
- Pulling them before they’re truly done: The cooking time provided in this oven-baked ribs recipe is a general range, not an absolute fixed number. Factors like the exact thickness of your ribs, your oven’s calibration, and even humidity can influence the total cooking duration. Relying solely on the clock can lead to undercooked (tough) or overcooked (mushy) ribs. Instead, use the knife test and the bend test as your definitive indicators. Stiff ribs that don’t flex easily when lifted with tongs unequivocally need more time. Give them another 15 minutes covered, then retest. Patience is key for perfect tenderness.
- Walking away during the broil: The broiling stage is short but intense, lasting only about 3 to 6 minutes in total. This is where the magic of caramelization happens, transforming your glazed ribs into a sticky, beautifully charred masterpiece. However, the line between perfectly caramelized and completely burned is incredibly narrow. The high sugar content in both the dry rub and the barbecue sauce means they can go from golden to black in a matter of seconds. Stay right by the oven door and check your ribs every 60 to 90 seconds. This is the one step where multitasking is absolutely not recommended.
- Slicing immediately after baking: It’s incredibly tempting to carve into those hot, fragrant ribs straight out of the oven, but resisting this urge is paramount for juicy results. When meat cooks, its muscle fibers tighten, pushing the juices towards the center. Allowing the ribs to rest uncovered for 10 minutes after baking permits these juices to redistribute evenly throughout the meat. If you slice them prematurely, all that delicious moisture will simply pour out onto your pan or cutting board, leaving you with drier, less flavorful ribs. This is arguably the easiest step in the entire recipe, yet it’s often the one most frequently skipped, to the detriment of juiciness.
Make Ahead and Storage Tips
These oven-baked ribs are an excellent candidate for making ahead, allowing you to enjoy a stress-free meal or entertain with ease. They reheat beautifully, maintaining their tender texture and rich flavor.
Storing Leftovers
- Refrigerator: To maintain their moisture and flavor, store any leftover ribs in an airtight container or wrapped very tightly in aluminum foil. Properly stored, they will remain delicious for up to 4 days. Remember, air is the enemy of moist leftovers, so ensure a good seal.
- Make ahead: This recipe is perfect for partial preparation. You can bake the ribs fully through the covered low-and-slow step. Once they are cooked to tenderness, allow them to cool completely, then refrigerate them. When you are ready to serve, simply brush them generously with the BBQ sauce and run them under the broiler for a fresh, caramelized glaze. The texture will be just as good as if they were made fresh, and some argue the flavors deepen overnight.
Freezing Spare Ribs
- After baking: If you’re planning to freeze your ribs, ensure they are completely cooled first. Then, wrap them tightly in plastic wrap, followed by a layer of aluminum foil, or place them in a freezer-safe zip-top bag, removing as much air as possible. They can be frozen for up to 3 months. For easier portioning later, consider slicing the ribs into individual pieces before freezing.
- Thawing: Always thaw frozen ribs overnight in the refrigerator before reheating. Attempting to reheat ribs directly from frozen is not recommended, as the exterior tends to scorch or dry out significantly before the center has a chance to warm through properly.
Reheating Spare Ribs for Best Results
- Oven: The oven is the best method for reheating ribs, as it helps retain their juiciness. Place the leftover ribs on a foil-lined baking pan, cover them tightly with another sheet of aluminum foil, and reheat at 300°F (150°C) for 20 to 25 minutes, or until thoroughly warmed. For that fresh-off-the-broiler taste, uncover them, brush with a little more BBQ sauce, and broil for 2 to 3 minutes until the glaze re-caramelizes.
- Microwave: For a quick weeknight leftover, the microwave can be used, though it’s not ideal for texture. Place ribs on a microwave-safe plate, cover loosely (a damp paper towel helps), and heat in 60-second bursts until hot. A quick brush with extra sauce before serving will freshen them up.
- Avoid uncovered high heat: Reheating ribs uncovered at a high oven temperature or grilling them without proper moisture can quickly dry out the meat, turning your tender ribs tough. Always cover them with aluminum foil until they are warmed through before proceeding to any glazing or broiling steps.
Perfect Pairings: How to Serve These Delicious Spare Ribs
While these oven-baked spare ribs are undoubtedly a meal in themselves, pairing them with the right side dishes and toppings can elevate them into a magnificent spread worthy of any gathering. Here are some ideas to complete your barbecue feast:
Spare Rib Toppings and Flavor Enhancers
- Extra BBQ sauce on the side (always recommended!): A must-have for dipping and ensuring every bite is perfectly saucy.
- Pickled jalapeños or quick pickled red onions: The bright acidity and subtle heat of these toppings expertly cut through the richness of the ribs, providing a refreshing contrast.
- Fresh cilantro or sliced green onion: A sprinkle of fresh herbs adds a vibrant pop of color and a touch of herbaceous freshness that brightens the overall flavor profile.
- Hot sauce: For those who crave an extra kick, a drizzle of your favorite hot sauce on individual ribs can take the heat level up a notch.
Classic Side Dishes for Spare Ribs
- Creamy coleslaw: The quintessential pairing for BBQ ribs. Its cool, crunchy, and tangy profile provides a perfect counterpoint to the sticky, smoky sweetness of the ribs. This is a side I always ensure is on the table when spare ribs are on the menu.
- Creamy mashed potatoes: Rich, fluffy, and incredibly comforting, mashed potatoes are excellent for soaking up any extra barbecue sauce on your plate. They are one of my all-time favorite sides for any saucy pork dish.
- Macaroni salad: A cool, creamy pasta salad is a barbecue table staple for a reason. Its refreshing and hearty nature perfectly balances the heat and richness of oven-baked ribs.
- Corn on the cob: Simple, sweet, and bursting with summer flavor, corn on the cob is always a universally loved hit alongside any BBQ-style recipe.
- Cornbread or soft dinner rolls: Essential for mopping up every last bit of that delectable sauce from your plate, ensuring no flavor goes to waste.
Achieving BBQ Perfection: Final Notes and Expert Secrets
Beyond the steps, there are fundamental principles that elevate truly great oven-baked spare ribs above merely average ones. These insights, gleaned from culinary experience and a touch of food science, are your keys to success:
- 275°F is the magic temperature for tenderness: This specific low temperature is not arbitrary. Cooking lower than 275°F (135°C) would extend the cooking time unnecessarily, while a higher temperature risks drying out the exterior of the ribs before the tough connective tissues have sufficient time to slowly break down into succulent gelatin. This precise low oven method is what consistently yields those coveted fall-off-the-bone results, mimicking the effect of a smoker or grill without needing one.
- Always pat the ribs dry before applying the rub: This seemingly minor step is crucial. Drying the surface of the meat with paper towels ensures that the dry rub adheres properly and forms a more robust, flavorful crust during the long bake. If the meat surface is wet, the rub will clump, slide around, and fail to create that essential, delicious outer layer, diminishing both flavor and texture.
- Brown sugar performs double duty for optimal results: This humble ingredient is a true workhorse in our recipe. In the dry rub, brown sugar not only adds sweetness but also draws out moisture from the surface of the meat, contributing to the formation of a caramelized, sticky crust. In the barbecue sauce, it helps the sauce thicken beautifully and caramelize intensely under the broiler, creating that perfect sticky glaze. Do not be tempted to reduce its quantity in either component, as it’s integral to the signature taste and texture.
- The bend test is your most reliable indicator of doneness, not a timer: While a cooking time range is provided, every rack of ribs and every oven is unique. A perfectly done rack of spare ribs will visibly bend and flex with minimal resistance when lifted from one end with tongs. If the rack feels stiff and holds its shape rigidly, it unequivocally requires more cooking time. Trust your tactile judgment over the clock, and always ensure a tight foil seal during baking to facilitate maximum tenderness.
- Apply two distinct layers of glaze under the broiler: This layering technique is key to a superior caramelized finish. The first generous coat of BBQ sauce gets sticky and sets, forming a base layer. The second layer then builds upon this, achieving a deeper caramelization and those desirable charred edges without burning the underlying sauce. Applying two thinner coats yields a much better result than one heavy application, which can bubble excessively, slide off, or burn unevenly before fully caramelizing.
- Smoked paprika is a flavor cornerstone, invest in quality: This spice is central to the smoky depth of these oven-baked spare ribs, featured prominently in both the dry rub and the BBQ sauce. It’s the primary reason these ribs taste as smoky and complex as they do without ever touching a grill. The quality of your smoked paprika makes a significant difference; a fresh, vibrant jar will impart a much richer, more authentic smoky flavor than a stale, faded one.
Frequently Asked Questions About Spare Ribs
Just skimming through? Here are some quick answers to the most commonly asked questions about cooking spare ribs, designed for clarity and conciseness.
Spare ribs are almost always pork. They originate from the belly side of the pig, situated near the breastbone and cut from the lower part of the rib cage. While beef ribs (such as short ribs and back ribs) do exist, when “spare ribs” are mentioned on a menu or in a recipe, it nearly always refers to pork spare ribs, renowned for their rich flavor and tenderness when cooked correctly.
Spare ribs and baby back ribs come from different anatomical parts of the pig. Spare ribs are notably larger, possess more meat, and contain a higher proportion of fat and connective tissue, which contributes to a richer flavor when slow-cooked. Baby back ribs, conversely, are smaller, leaner, and located higher on the pig’s back near the spine. Spare ribs demand a longer cooking time but reward patience with unparalleled richness, whereas baby back ribs cook faster and yield a leaner result.
Yes, spare ribs typically feature a thin, silvery membrane (or silverskin) stretched across the bone side of the rack. It is highly recommended to remove this membrane before cooking. If left intact, it becomes tough and rubbery during the extended baking process, and also hinders the dry rub from properly seasoning the meat beneath. A butter knife can help loosen a corner, then a paper towel provides the grip needed to pull it off in a single piece, a task that generally takes less than a minute.
The optimal oven temperature for cooking tender spare ribs is 275°F (135°C). This low-and-slow method provides the necessary time for the collagen and other tough connective tissues to gradually break down into succulent gelatin without drying out the meat. Higher temperatures can cause proteins to tighten too quickly, preventing the ribs from achieving their desired tender texture. The total covered bake time at this temperature typically ranges from 2 hours 45 minutes to 3 hours 15 minutes.
The two most reliable tests for spare rib doneness are the knife test and the bend test. For the knife test, insert a sharp knife between two bones; it should glide in with very little resistance. For the bend test, grasp the rack with tongs and lift it from one end. A perfectly cooked rack will bend and flex easily in the middle, showing signs of the meat pulling away from the bone. If the rack feels rigid and stiff, it requires more cooking time; re-cover and bake for an additional 15 minutes, then retest.
Yes, spare ribs are an excellent dish to prepare in advance, making them ideal for entertaining or meal prepping. You can fully bake the ribs through the covered low-and-slow step. Once cooked, allow them to cool completely, then refrigerate for up to 24 hours. When ready to serve, simply brush them generously with barbecue sauce and broil them for a fresh, caramelized glaze. The texture remains superb, and many find the flavors are even more pronounced the next day.
Absolutely. Using your favorite store-bought barbecue sauce for the final glaze works perfectly well. In this spare ribs recipe, the dry rub carries the majority of the complex flavor profile. The sauce primarily serves to add that desirable sticky, caramelized finish and a layer of moisture under the broiler. For the best synergy, choose a smoky-style bottled sauce to complement the smoked paprika already infused into the ribs from the rub.
The best method for reheating spare ribs while preserving their juiciness is in the oven, covered. Place the ribs on a foil-lined pan, cover them tightly with aluminum foil, and reheat at 300°F (150°C) for 20 to 25 minutes, or until heated through. To refresh the glaze, uncover, brush with a little extra barbecue sauce, and broil for 2 to 3 minutes. Crucially, avoid reheating uncovered at high heat, as this will quickly dry out the meat and diminish its tenderness.
Other Delicious Pork Recipes You’ll Adore
- Honey Garlic Spare Ribs (Dry Garlic Ribs)
- Instant Pot Pulled Pork
- Perfect Roast Pork Loin with Easy Homemade Pork Gravy
- Quick Pulled Pork Tenderloin with Chipotle BBQ Sauce
- Instant Pot Pork Chops with Easy Gravy
Pin Recipe
Print Recipe
Fall-Off-the-Bone Oven-Baked Spare Ribs
Jennifer Pallian BSc, RD
15 minutes
3 hours 15 minutes
6
Video Guide
Ingredients
Ribs
- 2 pork spare rib racks (about 6-7 lb total)
Dry Rub
- 4½ tsp kosher salt
- 1½ tsp black pepper
- 4 tbsp brown sugar
- 2 tbsp smoked paprika
- 1 tbsp garlic powder
- 1 tbsp onion powder
- 1 tsp dry mustard
- ½ tsp cayenne pepper (adjust to taste)
Quick BBQ Sauce
- 1 cup ketchup
- ¼ cup apple cider vinegar
- 3 tbsp brown sugar
- 2 tbsp molasses (or maple syrup)
- 1 tbsp Worcestershire sauce
- 1 tsp Dijon mustard
- 1 tsp smoked paprika
- ½ tsp garlic powder
- ½ tsp kosher salt
Instructions
-
Preheat your oven to 275°F (135°C). Flip each rack of ribs bone-side up. Locate the thin membrane stretched across the bones, slide a butter knife or spoon handle under one end, grip it firmly with a paper towel, and pull it off in one piece.
In a small bowl, thoroughly mix all dry rub ingredients. Pat the ribs completely dry with paper towels, then generously coat both sides of each rack with the rub, pressing it firmly into the meat. Place the seasoned racks meaty side up on a large, foil-lined rimmed baking sheet. -
Cover the pan tightly with a second sheet of aluminum foil, crimping the edges securely around the rim to create an airtight seal.
Bake for 2 hours 45 minutes to 3 hours 15 minutes. The ribs are done when a knife slides easily between the bones with minimal resistance. To confirm, lift a rack with tongs; it should bend significantly and almost crack in the middle. If it still feels stiff, reseal the foil tightly and bake for another 15 minutes, then test again. -
While the ribs bake (start about 20 minutes before they’re done), combine all BBQ sauce ingredients in a small saucepan. Bring the mixture to a simmer over medium heat, then reduce to medium-low. Cook for 8 to 10 minutes, stirring frequently, until the sauce becomes glossy and thick enough to coat the back of a spoon. Remove from heat.
-
Once ribs are tender, remove the foil cover and switch your oven to broil on high. Brush the ribs generously with the prepared BBQ sauce. Slide the pan under the broiler and broil for 2 to 4 minutes, watching constantly, until the sauce begins to bubble and char at the edges. Brush with a second layer of sauce and broil for 1 to 2 minutes more. **Remain vigilant during this step, as the brown sugar can burn very quickly.**
-
Pull the ribs out of the oven and let them rest uncovered on the pan for 10 minutes before slicing. This allows the juices to redistribute, ensuring maximum juiciness. Slice straight down between the bones with a sharp knife. Serve immediately with any remaining BBQ sauce on the side for dipping.
Notes
For an even deeper flavor, you can apply the dry rub to the ribs and refrigerate them uncovered overnight (8-12 hours) before baking.
Store any leftover ribs in an airtight container or wrapped tightly in foil in the refrigerator for up to 4 days to maintain moisture.
To reheat, place ribs wrapped in foil on a baking sheet and heat at 300°F (150°C) for 20-25 minutes. Uncover, brush with extra sauce, and broil briefly for 2-3 minutes to re-caramelize the glaze.
Nutrition Information
Carbohydrates: 35g |
Protein: 36g |
Fat: 54g |
Saturated Fat: 17g |
Polyunsaturated Fat: 9g |
Monounsaturated Fat: 20g |
Trans Fat: 1g |
Cholesterol: 181mg |
Sodium: 2546mg |
Potassium: 914mg |
Fiber: 2g |
Sugar: 28g |
Vitamin A: 1597IU |
Vitamin C: 3mg |
Calcium: 86mg |
Iron: 4mg
Nutrition information is automatically calculated and should only be used as an approximation.
Tried this recipe? Share your thoughts!
Leave a comment below to let us know how your ribs turned out!