Indulge in the ultimate chocolate experience with these impossibly fudgy Brownie Cookies. Imagine the rich, intense flavor of a gourmet brownie, perfectly portioned into a chewy, delightful cookie. This recipe delivers everything you love about brownies – the coveted crackly tops, delightfully chewy centers, and a deep, decadent chocolate flavor – all in an irresistible cookie form that’s easy to make and even easier to devour. Get ready to discover your new favorite chocolate treat!
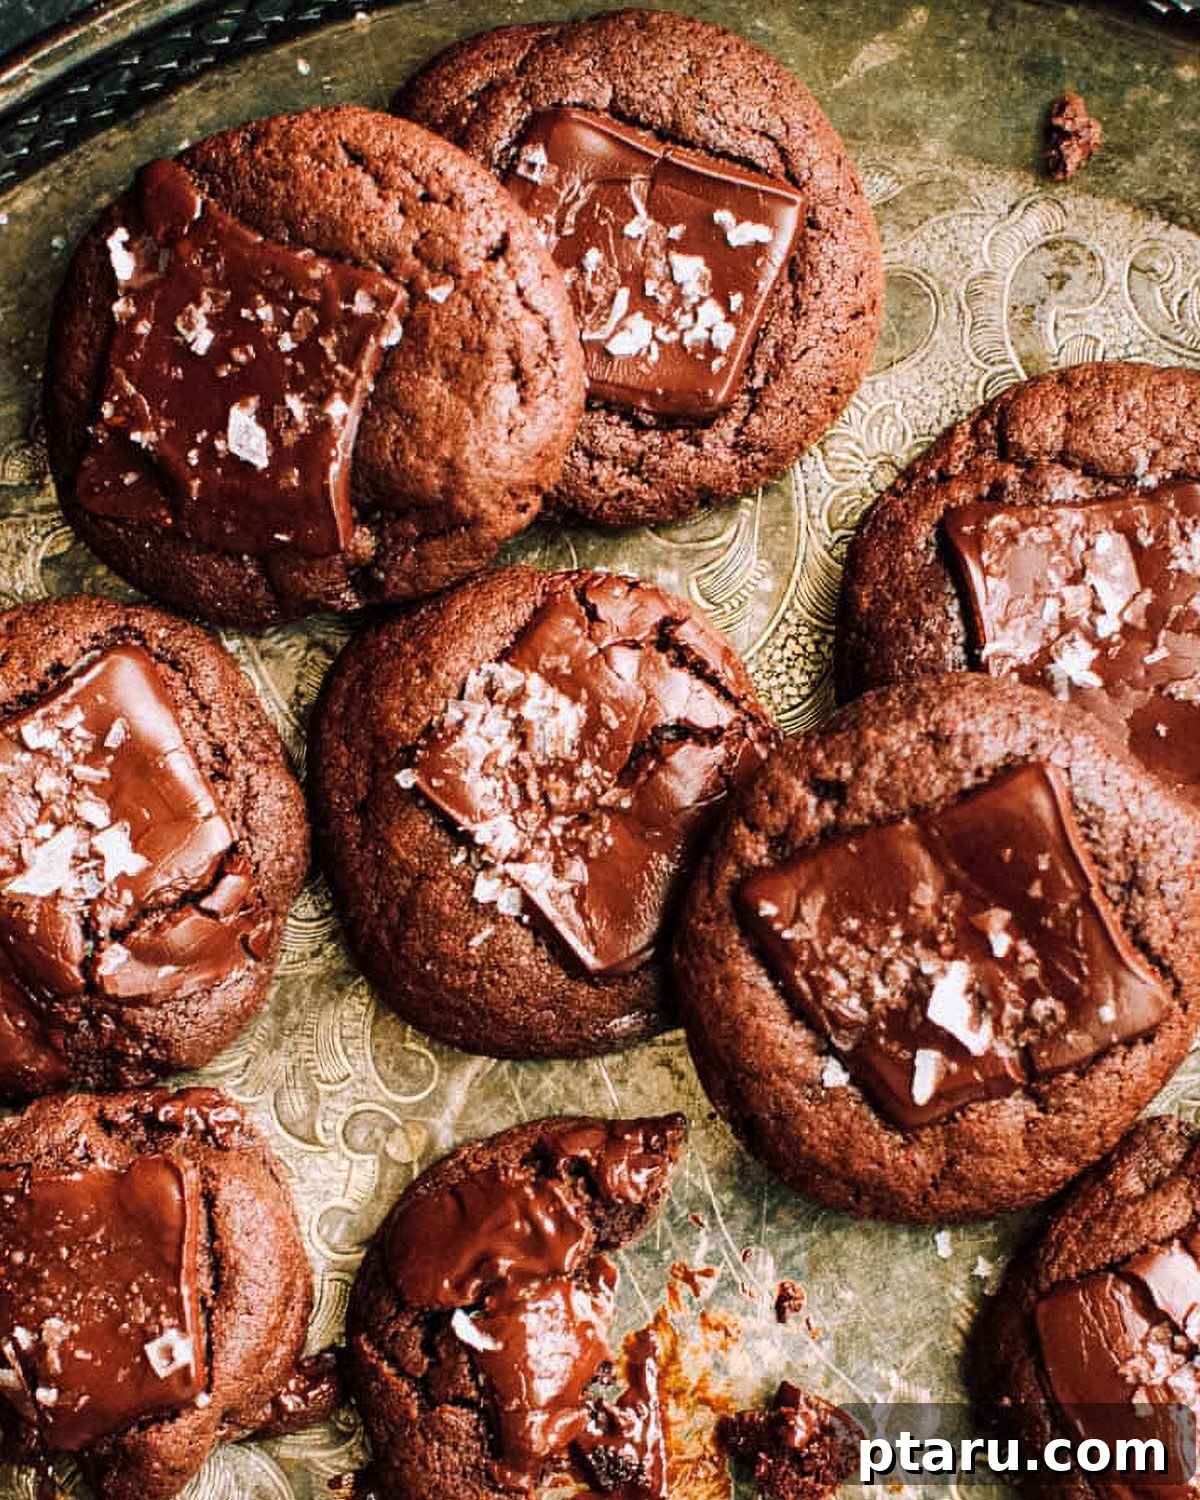
This Brownie Cookie recipe is an absolute dream come true for dedicated chocolate lovers and anyone who appreciates a truly chewy, satisfying baked good. It takes the best elements of a classic brownie – that dense, moist, and intensely chocolatey interior – and transforms them into a portable, perfectly chewy cookie. The secret to achieving this magical texture lies in a simple yet crucial technique: slight underbaking. You’ll want to pull these beauties from the oven when their centers still appear wonderfully soft, almost gooey. Don’t worry, this isn’t a mistake! As they rest and cool on the hot baking sheet, they will continue to firm up, but crucially, they’ll retain that incredible fudgy, chewy interior that makes these brownie cookies so addictive. This method ensures every bite is a delightful combination of crisp edges, a signature crackly top, and a melt-in-your-mouth fudgy core, reminiscent of your favorite brownie, but with the convenience and charm of a cookie.
Essential Ingredients for Decadent Brownie Cookies
Creating these remarkably fudgy chocolate cookies starts with a selection of high-quality ingredients, each playing a vital role in achieving their perfect taste and texture. Here’s a detailed look at what you’ll need to bake a batch of your own:
- Unsalted Butter: Always opt for softened, room-temperature unsalted butter, never melted. Softened butter is paramount for proper creaming with sugar, a process that incorporates air and contributes to the cookies’ light, crackly tops and tender crumb. If your butter is too cold, it won’t cream properly; if it’s melted, your cookies will be flat and greasy. Learn how to quickly bring ingredients to room temperature for best results.
- Granulated Sugar: This common pantry staple is more than just a sweetener here. Granulated white sugar is key to developing those desirable, shiny, crackly tops on your brownie cookies, mimicking the appearance of a perfectly baked brownie. It also aids in moisture retention, keeping the cookies deliciously chewy.
- Large Eggs: Two large eggs provide essential structure and richness to the cookie dough. They act as a binding agent, holding the ingredients together, and contribute to the fudgy texture and overall depth of flavor. Ensure your eggs are also at room temperature for better emulsion with the butter and sugar mixture.
- Pure Vanilla Extract: For the most exquisite flavor, always use pure vanilla extract. It enhances the deep chocolate notes without overpowering them, adding a subtle warmth and complexity that imitation vanilla simply can’t replicate.
- All-Purpose Flour: The foundation of many baked goods, all-purpose flour provides the necessary structure. For accurate measurements and consistent results, remember to spoon the flour into your measuring cup and level it off with a straight edge. Alternatively, using a kitchen scale for precise measurement (e.g., in grams) is even better for baking accuracy.
- Unsweetened Cocoa Powder: This is where the rich chocolate flavor truly shines. Both Dutch-process and natural unsweetened cocoa powder work beautifully. Dutch-process cocoa is treated with an alkali, making it less acidic and giving a darker, more mellow chocolate flavor and a stunningly deep brownie batter color. Natural cocoa, being more acidic, offers a fruitier, sharper chocolate taste. Either choice will yield delicious results, so pick the one that best suits your flavor preference.
- Baking Soda and Baking Powder: A dynamic duo! Both leavening agents are crucial for achieving the perfect chewy texture and slight rise in these cookies. Baking soda reacts with acidic ingredients (like natural cocoa if used) to create lift, while baking powder provides a more consistent, gentle rise, ensuring your cookies aren’t too dense or too cakey.
- Salt: A small amount of salt in the cookie batter is a flavor enhancer, balancing the sweetness and intensifying the rich chocolate notes. For an extra gourmet touch and a delightful sweet-salty contrast, I highly recommend a sprinkle of flaky sea salt on top of the warm cookies (this is optional, but highly encouraged!).
- High-Quality Chocolate: The type of chocolate you choose significantly impacts the final flavor and texture. I prefer using chopped Swiss dark chocolate bars (60-72% cocoa) for their superior melt and intense flavor, creating delightful pockets of gooey chocolate. However, high-quality dark or semi-sweet chocolate chips (like Ghirardelli or Guittard) also work wonderfully. Remember to reserve some extra chocolate pieces for pressing on top of the cookies before the final bake, which adds visual appeal and extra melty goodness.
Exact recipe quantities and detailed instructions are thoughtfully listed in the comprehensive recipe card located at the bottom of this article.
Exciting Variations and Delicious Substitutions
While the classic Brownie Cookie recipe is perfection, there are countless ways to customize these chocolatey delights to suit your cravings or any occasion. Here are some easy and inspiring variations to elevate your baking:
- Mint Chocolate Infusion: For a refreshing twist, swap out regular chocolate chips for chopped mint chocolate bars or even Andes Mints. The cooling mint perfectly complements the rich chocolate, creating a popular flavor combination. You might also love my fan-favorite Mint Chocolate Cookies or festive Candy Cane Cookies for seasonal flair.
- Espresso Powder Boost: Add 1 teaspoon of instant espresso powder or fine coffee grounds to your dry ingredients. This subtle addition doesn’t make the cookies taste like coffee; instead, it magically deepens and intensifies the chocolate flavor, making it even more pronounced and complex. It’s the same secret ingredient used in my famous Moist Chocolate Cake to bring out maximum chocolate richness.
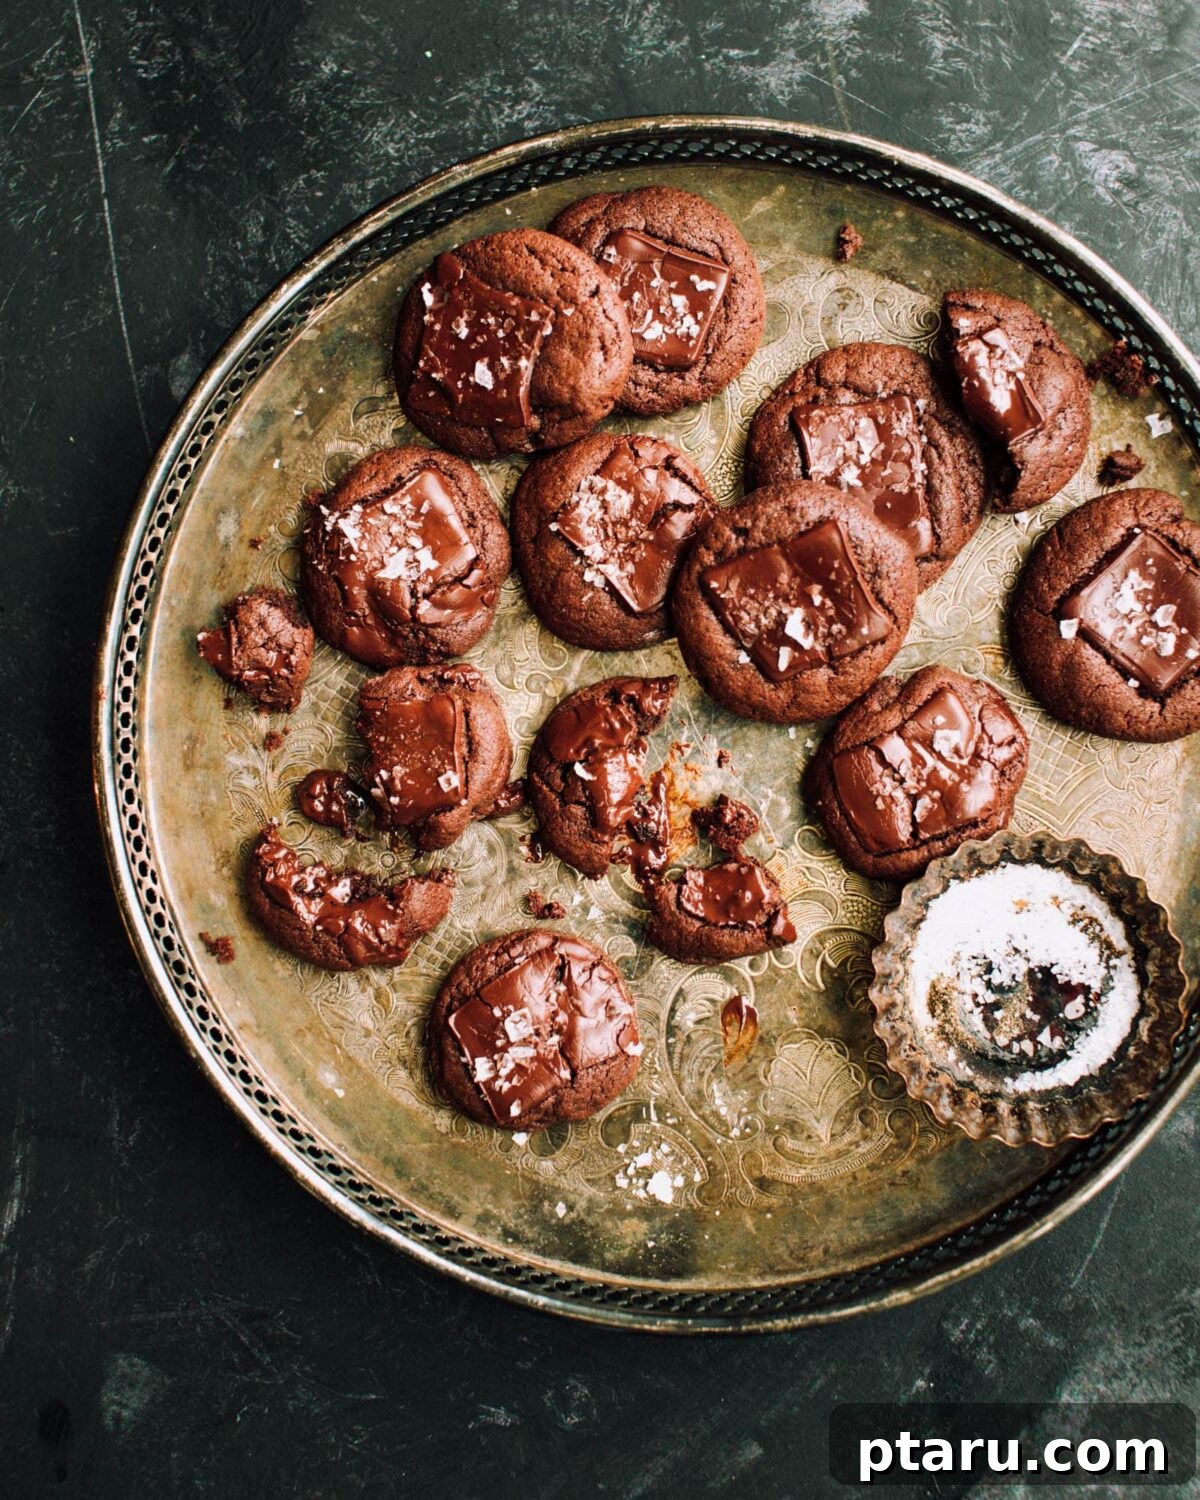
- Flaky Sea Salt Topping: Don’t underestimate the power of a sprinkle of flaky sea salt! Immediately after baking, while the cookies are still warm, sprinkle a few pinches of sea salt (such as Maldon) on top. The sweet-salty contrast is absolutely divine, enhancing the chocolate and adding a delightful textural crunch. This would also be fantastic on my Double Chocolate Muffins.
- Nutty Crunch: For added texture and flavor, fold in 1 cup of chopped walnuts, pecans, or even hazelnuts along with your chocolate chips. Toasting the nuts lightly before adding them can amplify their flavor even further.
- Gluten-Free Adaptation: Easily make these brownie cookies gluten-free by substituting the all-purpose flour with a high-quality 1:1 gluten-free baking blend that contains xanthan gum. Ensure your chosen blend is suitable for baking. If you’re baking for gluten-free chocolate lovers, you’ll also adore my rich and decadent flourless chocolate cake.
- White Chocolate Chunks: For a striking contrast in color and flavor, replace a portion of the dark chocolate with white chocolate chunks or chips. The sweet, creamy white chocolate pairs wonderfully with the deep cocoa base.
- Orange Zest Zing: A teaspoon of fresh orange zest folded into the batter can add a bright, aromatic note that beautifully complements chocolate. This classic pairing is sophisticated and incredibly delicious.
Essential Tools for Perfect Brownie Cookies
Having the right tools at hand makes the baking process smoother and helps ensure consistently delicious results. Here’s a list of the essential equipment you’ll need to whip up a batch of these incredible brownie cookies:
- Electric Mixer: A stand mixer with a paddle attachment or a good quality hand mixer is highly recommended. It makes the crucial step of creaming the butter and sugar much easier and more efficient, ensuring proper aeration that’s vital for those signature crackly tops and chewy texture.
- Two Baking Sheets: Prepare for baking success by having two standard baking sheets ready. Lining them with parchment paper is a game-changer – it prevents sticking, promotes even baking, and makes cleanup incredibly easy.
- Two Mixing Bowls: Keep your wet and dry ingredients separate until the right moment. Having one large bowl for creaming butter and sugar, and another medium-sized bowl for whisking dry ingredients, streamlines the mixing process and prevents overmixing.
- Whisk: A simple hand whisk is essential for thoroughly combining your dry ingredients. This ensures that the leavening agents (baking soda and baking powder) and salt are evenly distributed throughout the flour and cocoa powder, guaranteeing a consistent rise and flavor in every cookie.
- Small Cookie Scoop (1-inch or 1.5-inch): While optional, a cookie scoop is a fantastic tool for creating uniformly sized cookie dough balls. Uniformity is key for even baking, meaning all your cookies will cook at the same rate and have the same perfect texture. It also saves time and keeps your hands clean.
- Wire Cooling Rack: After a brief rest on the baking sheet, transferring the cookies to a wire rack is crucial. This allows air to circulate around the entire cookie, preventing the bottoms from becoming soggy and ensuring they cool evenly to maintain their chewy texture.
- Round Glass or Jar: This might sound unusual, but an overturned round glass or jar is your secret weapon for achieving perfectly circular cookies. As soon as the cookies come out of the oven and are still warm, you can gently “scoot” them into perfect rounds using the rim of the glass (see the video for a demonstration). This trick is great for bakery-style presentation.
How to Make The Best Brownie Cookies: A Simple Step-by-Step Guide
These fudgy brownie cookies are not only incredibly delicious but also surprisingly simple to make. They come together quickly and, wonderfully, require no chill time, meaning you can go from craving to biting into a warm, chocolatey cookie in under 30 minutes! For an extra special touch, I love to press additional chocolate chunks onto the tops of the cookies halfway through baking. This not only enhances their visual appeal, making them look even more irresistible, but also guarantees delightful pockets of melty chocolate in every single bite. Follow these easy steps to bake your perfect batch of chewy, crackly-topped brownie cookies.
1. Prepare Your Pans and Preheat Oven
Begin by preheating your oven to a precise 350°F (175°C). This ensures the oven is at the correct temperature for immediate baking once your dough is ready. Next, take two sturdy baking sheets and line them generously with parchment paper. This simple step is vital; it prevents the cookies from sticking, promotes even heat distribution for consistent baking, and makes for an incredibly easy cleanup once the baking is done. Do not skip this!
2. Cream the Butter and Sugar until Fluffy
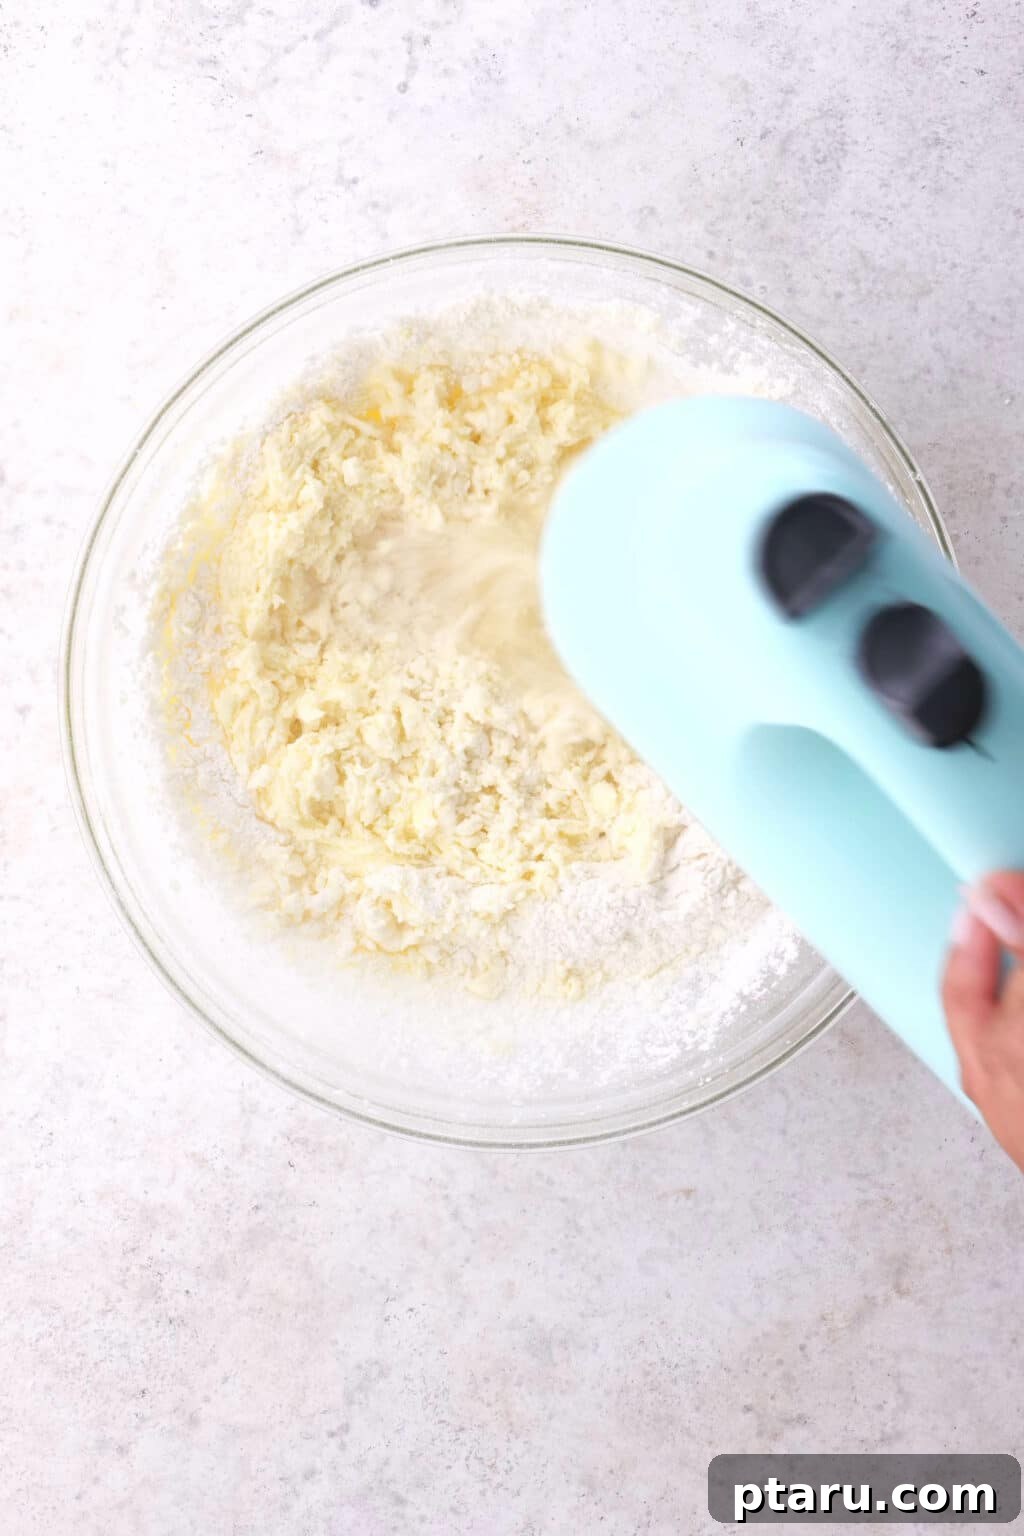
In a large mixing bowl, combine the softened unsalted butter and granulated sugar. Using an electric mixer (either a stand mixer with the paddle attachment or a hand mixer), beat the mixture on medium speed for a full 5 minutes. This might seem like a long time, but it’s a critical step that cannot be rushed. During this process, the butter and sugar become light, pale, and incredibly fluffy, incorporating a significant amount of air. This aeration is what contributes to the brownie cookies’ characteristic crackly tops and tender, chewy texture. Remember to pause at least twice to scrape down the sides of the bowl and the beater to ensure everything is thoroughly combined.
3. Incorporate the Wet Ingredients
Once your butter and sugar mixture is light and fluffy, crack in the two large eggs, one at a time, beating well after each addition until fully incorporated. Follow this by adding the pure vanilla extract. Continue to beat on medium-high speed for another minute until the mixture appears noticeably lighter in color and even fluffier. Scrape down the bowl and beater one last time to ensure all ingredients are perfectly blended.
4. Combine the Dry Ingredients Separately
In a separate, medium-sized bowl, whisk together the all-purpose flour, unsweetened cocoa powder, baking soda, baking powder, and salt. Thoroughly whisking these dry ingredients is crucial. It ensures that the leavening agents (baking soda and powder) are evenly distributed throughout the flour mixture. This even distribution means that every cookie will rise uniformly and achieve the perfect chewy texture, avoiding dense spots or uneven spreading.
5. Gently Combine and Add Chocolate
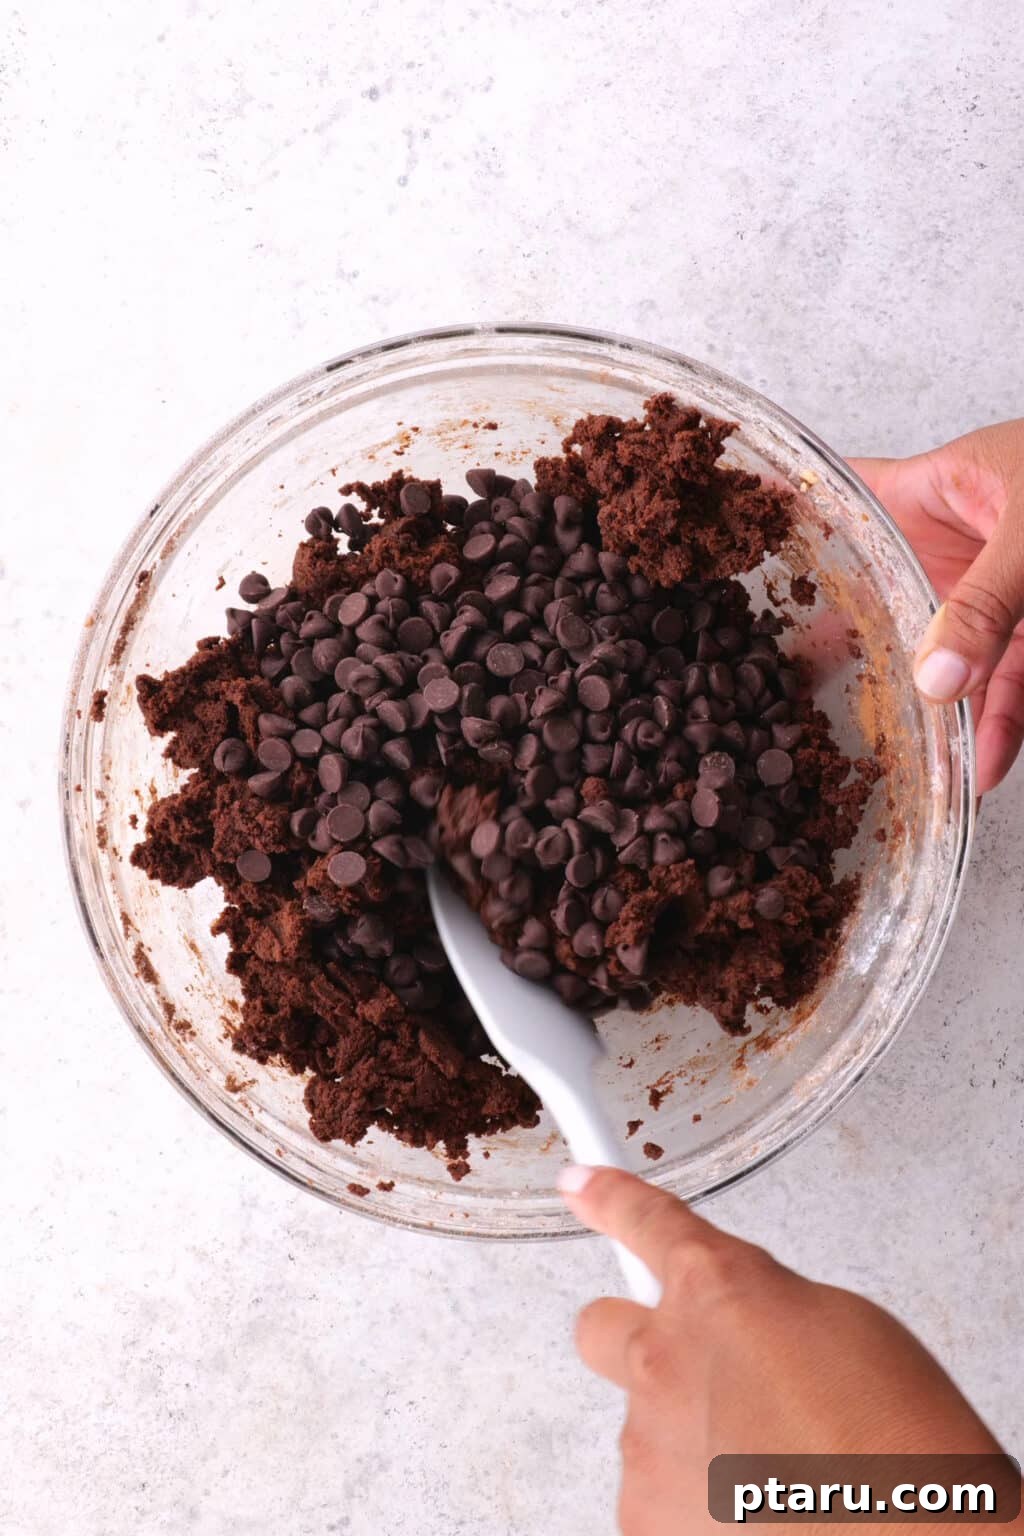
Add the whisked dry ingredient mixture to the wet ingredients in the electric mixer. Mix on low speed until the flour mixture is just combined. It’s absolutely essential not to overmix the dough at this stage; overmixing can develop the gluten in the flour too much, leading to tough, dry cookies instead of the desired fudgy, chewy texture. Once just combined, remove the bowl from the mixer and gently fold in about three-quarters of your chopped dark chocolate chips or chunks using a spatula. Reserve the remaining chocolate for pressing onto the cookie tops later.
6. Shape the Dough and Begin Baking
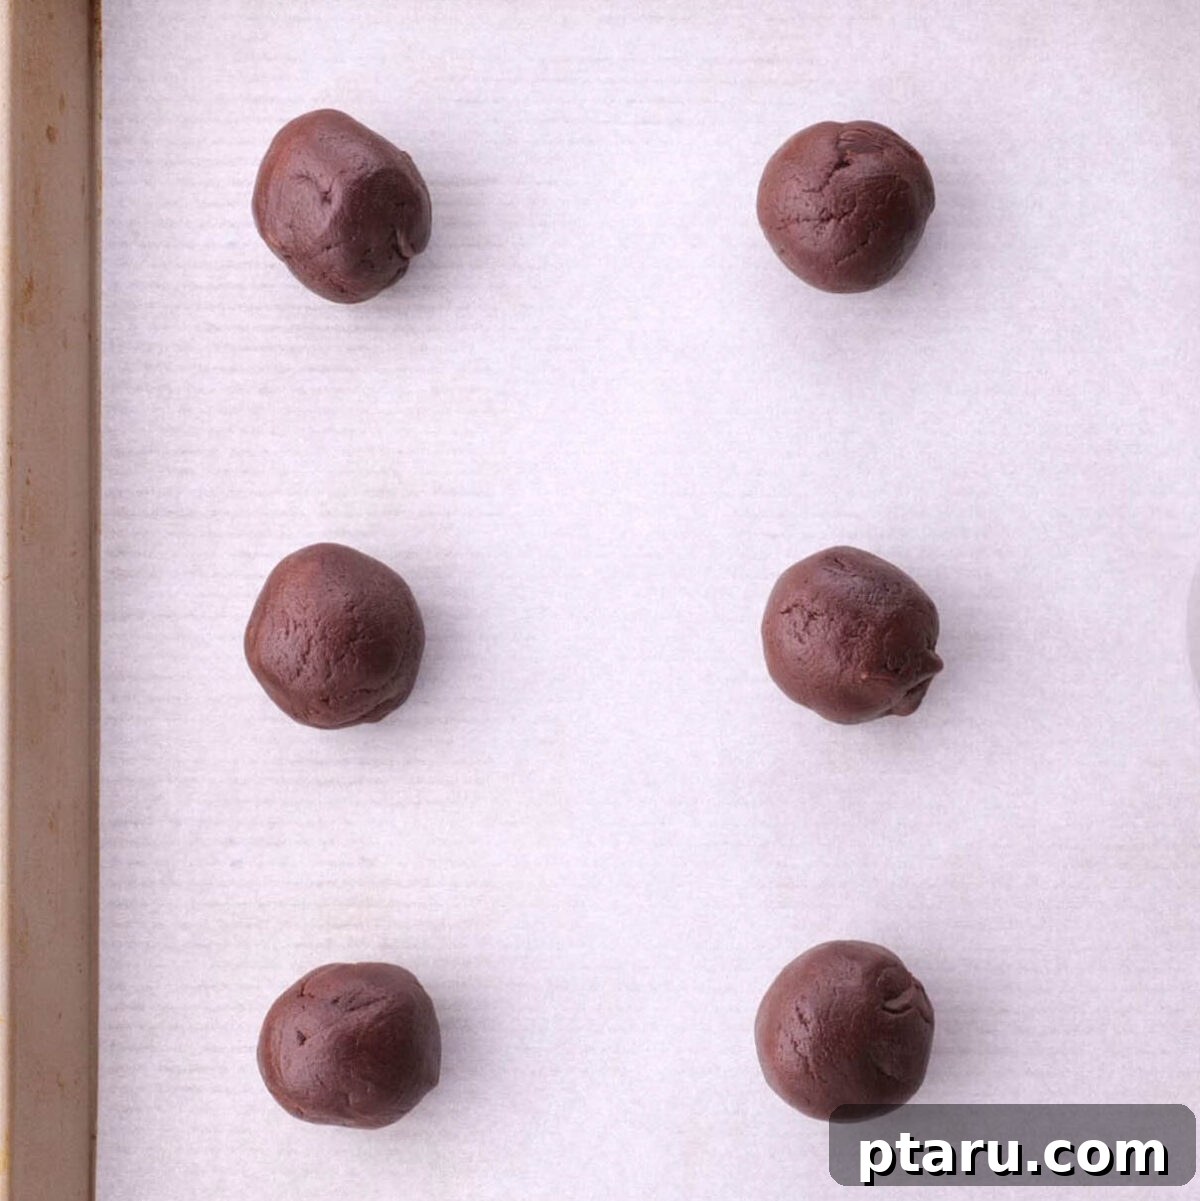
Take your cookie dough and either roll it into uniform 1-inch balls between your palms or use a small cookie scoop for consistent sizing. Rolling them smoothly helps achieve a nicer, more even appearance. Place the dough balls approximately 2 inches apart on your parchment-lined baking sheets to allow for proper spreading. Bake the cookies for an initial 6 minutes. This initial bake sets the edges slightly before the next critical step.
7. Execute the “Bang and Press” Trick
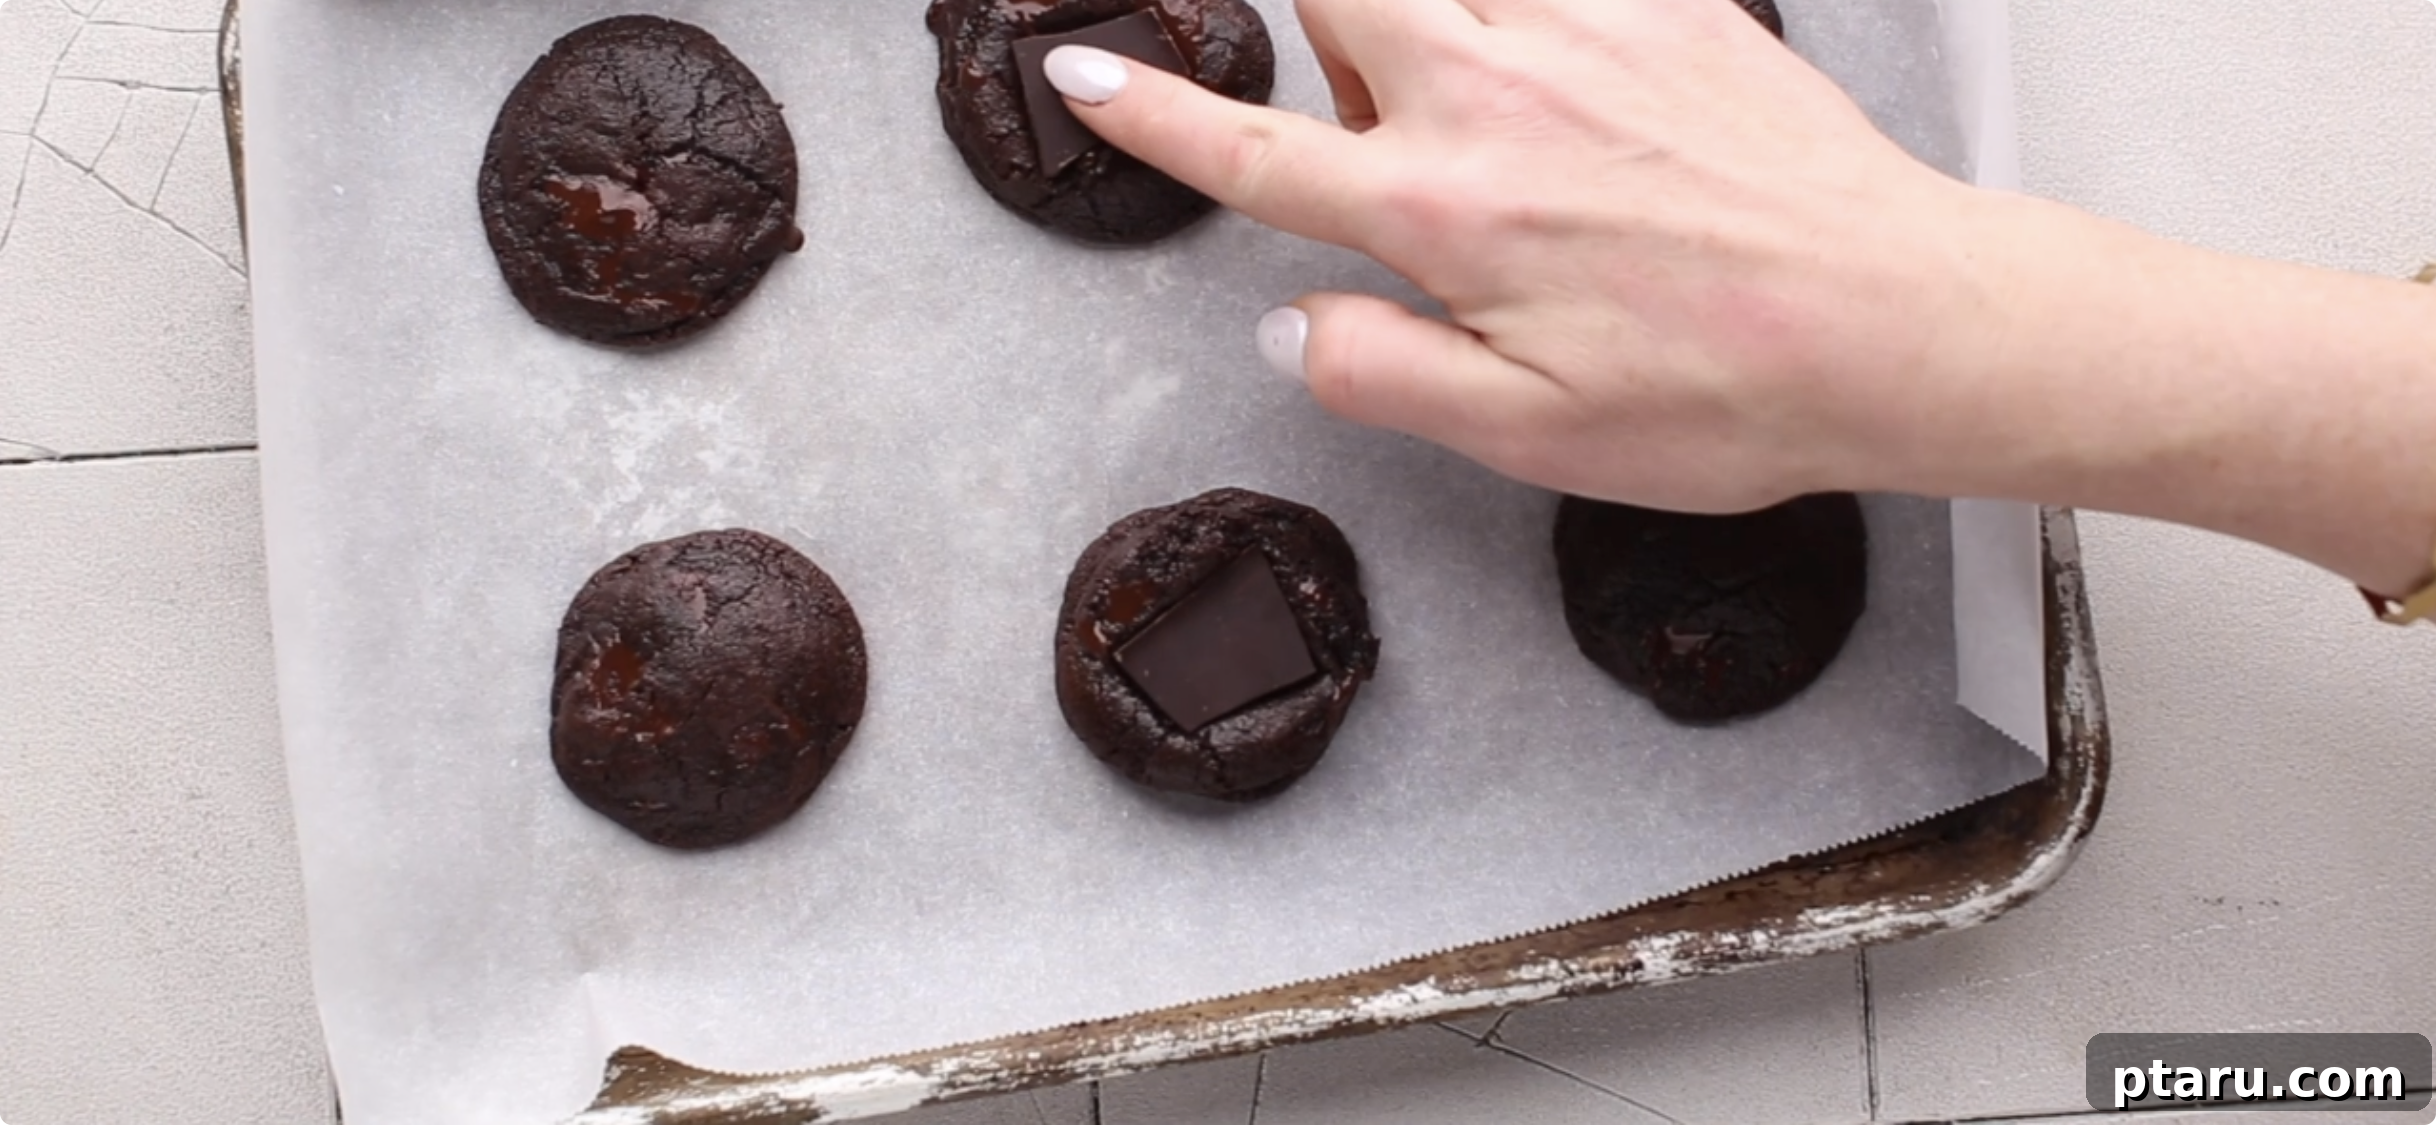
After the initial 6 minutes, carefully remove the baking pan from the oven. Here’s where the magic happens: firmly bang the baking sheet once or twice on your kitchen counter. This action causes the cookies to deflate slightly, pushing air out and encouraging those beautiful, crinkly, crackly tops that are characteristic of perfect brownies. Immediately after banging, take your reserved chocolate chips or chunks and gently press a few into the center of each partially baked cookie. This not only adds extra melty chocolate but also enhances the visual appeal. Return the pan to the oven and continue baking for another 3 minutes.
8. Proper Cooling for Fudgy Perfection
When you pull the cookies out after the second bake, they will still look gloriously soft and delightfully underdone in the centers. This is absolutely perfect! Resist the urge to bake them longer. The residual heat from the hot baking sheet will continue to cook them gently. Let the cookies cool undisturbed on the baking sheet for at least 5 minutes. This resting period is crucial for them to set properly and develop their full fudgy texture. After 5 minutes, carefully transfer the warm cookies to a wire cooling rack to cool completely. As they cool, they will firm up on the outside while retaining that wonderfully soft, chewy, and impossibly fudgy interior. Sprinkle with flaky sea salt while still warm, if desired.
Avoiding 5 Common Mistakes for Perfect Brownie Cookies
Even seasoned bakers can sometimes fall prey to common pitfalls when making brownie cookies. Understanding and avoiding these frequent mix-ups will ensure your cookies consistently turn out with that desired fudgy texture and crackly top. Here are the most important mistakes to steer clear of:
- Using Over-Softened or Melted Butter: The state of your butter is paramount. Room temperature butter is firm enough to hold air when creamed with sugar but soft enough to blend smoothly. If your butter is too soft (almost melted), it won’t incorporate enough air during the creaming process. This results in flat, greasy cookies that lack the desirable airy chew and crackly tops. Always ensure your butter is softened but still cool to the touch.
- Overbaking the Cookies: This is perhaps the most common mistake. Brownie cookies should look slightly underdone and very soft in the center when you pull them from the oven. The edges should be just set and perhaps faintly crackly, but the middle should still appear quite gooey. They will continue to cook and firm up as they cool on the hot baking sheet. Overbaking them by even a minute or two will lead to a drier, cakey texture instead of the rich, fudgy consistency you’re aiming for. Trust the process and pull them out early!
- Skipping the Pan Bang Trick: The pan-banging technique isn’t just for show; it’s a fundamental step for achieving those gorgeous, crinkly, crackly tops. Banging the baking sheet on the counter halfway through baking deflates the cookies, pushing air out from the center and encouraging the edges to spread. This creates the iconic texture and visual appeal that makes brownie cookies so irresistible. Don’t skip this easy yet impactful step!
- Incorrectly Measuring Flour: Flour measurement often trips up home bakers. Scooping flour directly from the bag with your measuring cup can compact it, adding significantly more flour to your batter than the recipe calls for. Too much flour results in dense, dry, and potentially crumbly cookies. Instead, always spoon your all-purpose flour into the measuring cup and then level it off with a straight edge (like the back of a knife). For ultimate accuracy, use a kitchen scale to measure by weight.
- Not Creaming Butter and Sugar Long Enough: The initial creaming of butter and sugar is a crucial stage for incorporating air into the mixture. Many bakers stop too soon. You need to beat them together for a full 5 minutes on medium speed until the mixture is visibly light, fluffy, and almost pale in color. This extended creaming creates numerous tiny air pockets, which are essential for the cookie’s internal structure, its tender chewiness, and those beautiful, signature crackly tops. Rushing this step will compromise the final texture and appearance of your brownie cookies.
Make-Ahead and Storage Tips for Brownie Cookies
One of the best things about these delectable brownie cookies is how well they keep. In fact, many people find that their flavor and fudgy texture deepen and improve even further by the next day! Here’s how to properly store them, freeze them, and even reheat them to enjoy that fresh-baked warmth whenever a craving strikes.
Storing Leftover Brownie Cookies
- Room Temperature Storage: Once completely cooled, store your brownie cookies in an airtight container at room temperature. They will remain wonderfully fresh, fudgy, and chewy for up to 5 days. Keeping them sealed prevents them from drying out and losing their delightful texture.
- Keep Them Soft with a Slice of Bread: For an extra trick to maintain that irresistible chewiness, place a fresh slice of bread inside the airtight container along with your cookies. The cookies will absorb moisture from the bread, keeping them soft and moist for longer. Just replace the bread slice every day or two as it hardens.
- Avoid the Refrigerator: While it might seem logical to refrigerate baked goods to keep them fresh, the refrigerator is actually the enemy of chewy cookies. The cold, dry air in a fridge tends to dry out baked goods much faster, turning your fudgy brownie cookies into hard, crumbly disappointments. Stick to room temperature storage for the best results.
Freezing Brownie Cookies for Later Enjoyment
- Freezing Baked Cookies: To freeze baked cookies, first ensure they are completely cool. Arrange them in a single layer on a baking sheet and freeze until solid (this prevents them from sticking together). Once frozen, transfer the cookies to a freezer-safe airtight container or a heavy-duty freezer bag. They will keep well for up to 3 months.
- Freezing Unbaked Cookie Dough: Prepare the cookie dough as directed, then roll it into individual balls (or scoop with a cookie scoop). Place the dough balls on a baking sheet lined with parchment paper and freeze until solid. Once firm, transfer the frozen dough balls to a freezer bag or airtight container. The dough can be stored for up to 3 months. When you’re ready to bake, place the frozen dough balls on a prepared baking sheet and bake directly from frozen, adding an extra 1-2 minutes to the specified baking time.
- Thawing Frozen Cookies: When you’re ready to enjoy frozen baked cookies, simply remove them from the freezer and let them thaw at room temperature for about 30 minutes. They will return to their soft, fudgy state.
Reheating Brownie Cookies for a Fresh-Baked Feel
- Quick Microwave Warm-Up: For a warm, gooey, straight-from-the-oven experience, pop a single brownie cookie into the microwave for about 10-15 seconds. Be careful not to overheat, or it can become tough. This brings back that wonderful melty chocolate and soft center.
- Oven Reheating for Crispier Edges: If you prefer to crisp up the edges slightly while warming through, reheat your cookies in a preheated oven at 300°F (150°C) for about 5 minutes. This method helps to restore a freshly baked texture.
Frequently Asked Questions About Brownie Cookies
Have a question or just skimming for quick answers? Here are some of the most commonly asked questions about making and enjoying these irresistibly fudgy brownie cookies, along with helpful insights.
The beautiful, crackly tops on brownie cookies are a hallmark of proper technique, primarily stemming from adequate creaming of butter and sugar. Ensure you beat the softened butter and granulated sugar for a full 5 minutes on medium speed. This extended creaming process incorporates a significant amount of air, which is essential for developing that signature crackly surface during baking. Additionally, don’t skip the “pan bang” step halfway through baking, as this also helps create those lovely cracks by deflating the cookies slightly.
Absolutely! Dutch-process cocoa powder works wonderfully in brownie cookies. It is less acidic than natural cocoa, which results in a darker, richer color and a slightly milder, less bitter chocolate flavor. Natural cocoa also yields excellent results, offering a more intense and sometimes slightly fruitier chocolate taste. Both varieties will produce delicious and fudgy brownie cookies, so feel free to use whichever you prefer or have on hand.
Determining doneness is crucial for achieving that perfect fudgy texture. Brownie cookies are done when their edges appear set and slightly crackly, but their centers still look noticeably soft and slightly underdone, perhaps even a little shiny. They will firm up considerably as they cool on the hot baking sheet due to residual heat. If you bake them until the centers look fully set, you’ll end up with cakey rather than deliciously fudgy cookies.
Yes, brownie cookie dough freezes beautifully, making it perfect for preparing ahead of time. To freeze, roll the dough into individual balls and arrange them on a baking sheet. Freeze until the balls are solid, then transfer them to a freezer-safe bag or airtight container. The frozen dough can be stored for up to 3 months. When you’re ready to bake, simply place the frozen dough balls on a prepared baking sheet and bake directly from frozen, adding an additional 1-2 minutes to the suggested baking time.
Banging the baking pan on the counter halfway through the baking process is a clever trick designed to achieve two key results. First, it helps deflate the cookies, pushing air out from their centers. Second, this action encourages the formation of those beautiful, crinkly, crackly tops that are a signature visual element of a well-made brownie or brownie cookie. It also aids in creating that desirable flat, chewy profile rather than a domed, cakey one.
While you certainly can, I generally recommend using dark chocolate chips (60-72% cocoa) or high-quality semi-sweet chocolate for the primary chocolate in brownie cookies. Milk chocolate contains a higher sugar content and can sometimes scorch or burn more easily at the temperatures required for baking. If you prefer the flavor of milk chocolate, consider adding it only as a topping, pressing milk chocolate chips into the warm cookies after the initial bake, rather than incorporating them into the dough.
This brownie cookie recipe is designed to yield approximately 36 delicious cookies when the dough is rolled into 1-inch balls, making them a perfect bite-sized treat. If you prefer larger, more indulgent bakery-style cookies, use a 2-tablespoon (1-ounce) medium cookie scoop; this will typically produce about 24 generously sized cookies. Remember to adjust your baking time accordingly for larger cookies, as they may require an extra minute or two in the oven.

Brownie Cookies (SO Rich and Fudgy)
Jennifer Pallian BSc, RD
15 minutes
9 minutes
24 minutes
36
Video
Ingredients
-
1
cup
unsalted butter
softened -
1 ¾
cups
granulated sugar -
2
large eggs -
1
tbsp
pure vanilla extract -
2
cups
all purpose flour -
1
cup
unsweetened cocoa powder -
1
tsp
baking soda -
½
tsp
baking powder -
½
tsp
kosher salt -
2
cups
chopped dark chocolate bars (60-72% cocoa)
or semisweet chocolate chips -
a few pinches of flaky salt (like maldon)
optional
Instructions
-
Preheat oven to 350°F (175°C). Line 2 baking sheets with parchment paper.
-
Using an electric mixer (with the paddle attachment if using a standing mixer), beat softened butter and granulated sugar in a large bowl for 5 minutes on medium speed until light and fluffy. Pause twice to scrape down the sides of the bowl and the beater.
Add eggs, one at a time, and beat on medium-high until well combined and fluffy, about 1 minute more, pausing twice to scrape down the bowl and beater. Stir in the pure vanilla extract. -
In a separate bowl, whisk together the all-purpose flour, unsweetened cocoa powder, baking soda, baking powder, and kosher salt until well combined.
Add the flour mixture to the wet ingredients in the mixer on low speed and beat until just combined. Be careful not to overmix. Gently fold in 3/4 of the chopped dark chocolate, reserving the rest for topping the cookies. -
Form the dough into 1-inch balls. For the nicest, most uniform appearance, roll the dough balls smoothly between your palms.
Place the cookie dough balls approximately 2 inches apart on your prepared baking sheets. -
Bake the cookies for 6 minutes. Then, remove them from the oven and firmly bang the baking pan once or twice on the counter to deflate the cookies and help create those signature crackly tops. Quickly press a few more reserved chocolate chips or chunks into the centers of each cookie.
Continue baking until the edges begin to firm up and look set, but the center still appears soft and slightly underdone, about 3 more minutes.
Allow the cookies to cool on the baking sheets for 5 minutes (they will continue to set). Then, carefully transfer the warm cookies to a wire cooling rack to cool completely.
If desired, sprinkle with flaky sea salt while the cookies are still warm for a delightful sweet-salty contrast.
Notes
-
- Here are my best tips on How to Quickly Bring Ingredients to Room Temperature, which is essential for perfect cookie texture.
- I find chilling the dough unnecessary for this recipe as it bakes beautifully without it. However, if your first batch spreads more than desired, you can briefly chill the remaining dough. (Excessive spreading usually indicates either the butter was too soft or you didn’t cream the butter and sugar for long enough.)
-
- For a perfectly round, bakery-style appearance, immediately after the cookies come out of the oven and while they are still warm, use an overturned glass or a round cookie cutter slightly larger than the cookie to gently “scoot” the edges into a perfect circular shape. This trick helps reshape any irregular edges.
Nutrition
Calories:
155
kcal
|
Carbohydrates:
21
g
|
Protein:
2
g
|
Fat:
8
g
|
Saturated Fat:
5
g
|
Polyunsaturated Fat:
0.3
g
|
Monounsaturated Fat:
2
g
|
Trans Fat:
0.2
g
|
Cholesterol:
23
mg
|
Sodium:
127
mg
|
Potassium:
42
mg
|
Fiber:
1
g
|
Sugar:
15
g
|
Vitamin A:
200
IU
|
Vitamin C:
0.3
mg
|
Calcium:
31
mg
|
Iron:
1
mg
Nutrition information is automatically calculated, so should only be used as an approximation.
Tried this recipe? Leave a comment!