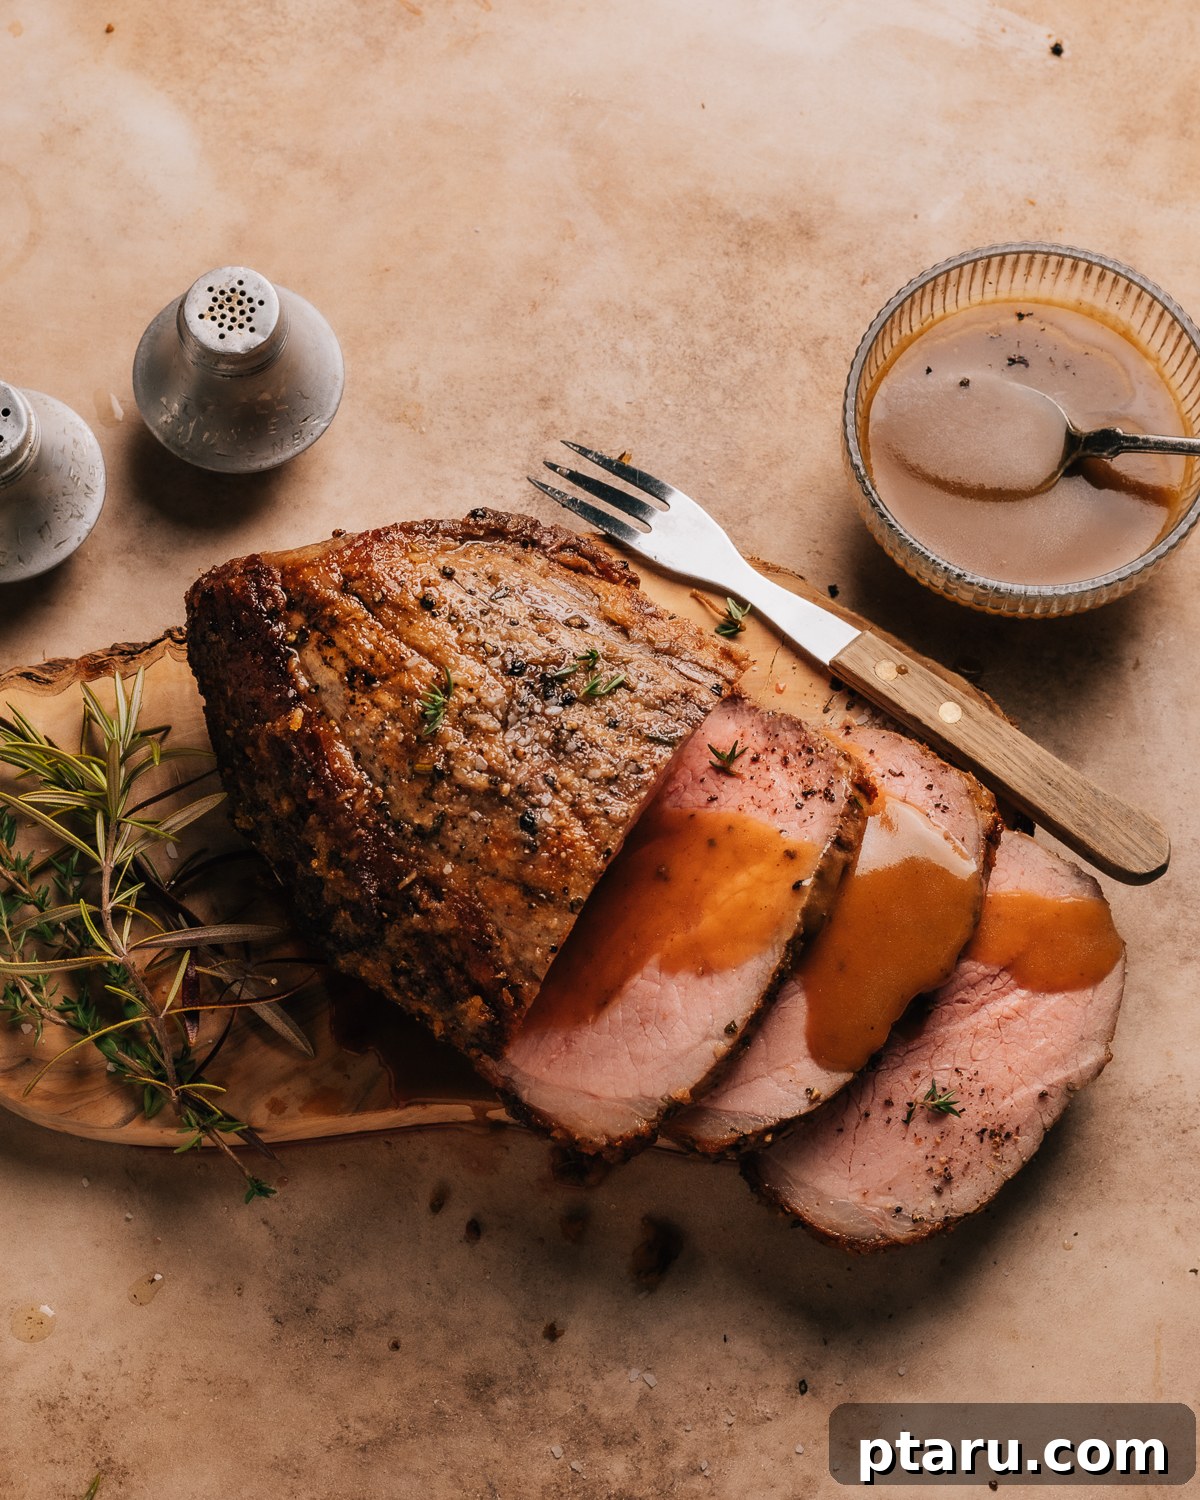
As a Food Scientist, I’m thrilled to share my ultimate guide to preparing a truly exceptional Eye of Round Roast. This isn’t just any roast beef recipe; it’s a meticulously developed method designed to transform a lean cut into a spectacularly tender and succulent centerpiece, complemented by an incredibly rich and savory gravy. Prepare to impress your guests and delight your family with a meal that tastes 10/10 delicious, all thanks to these foolproof, science-backed secrets. It’s time to elevate your home cooking! 👌
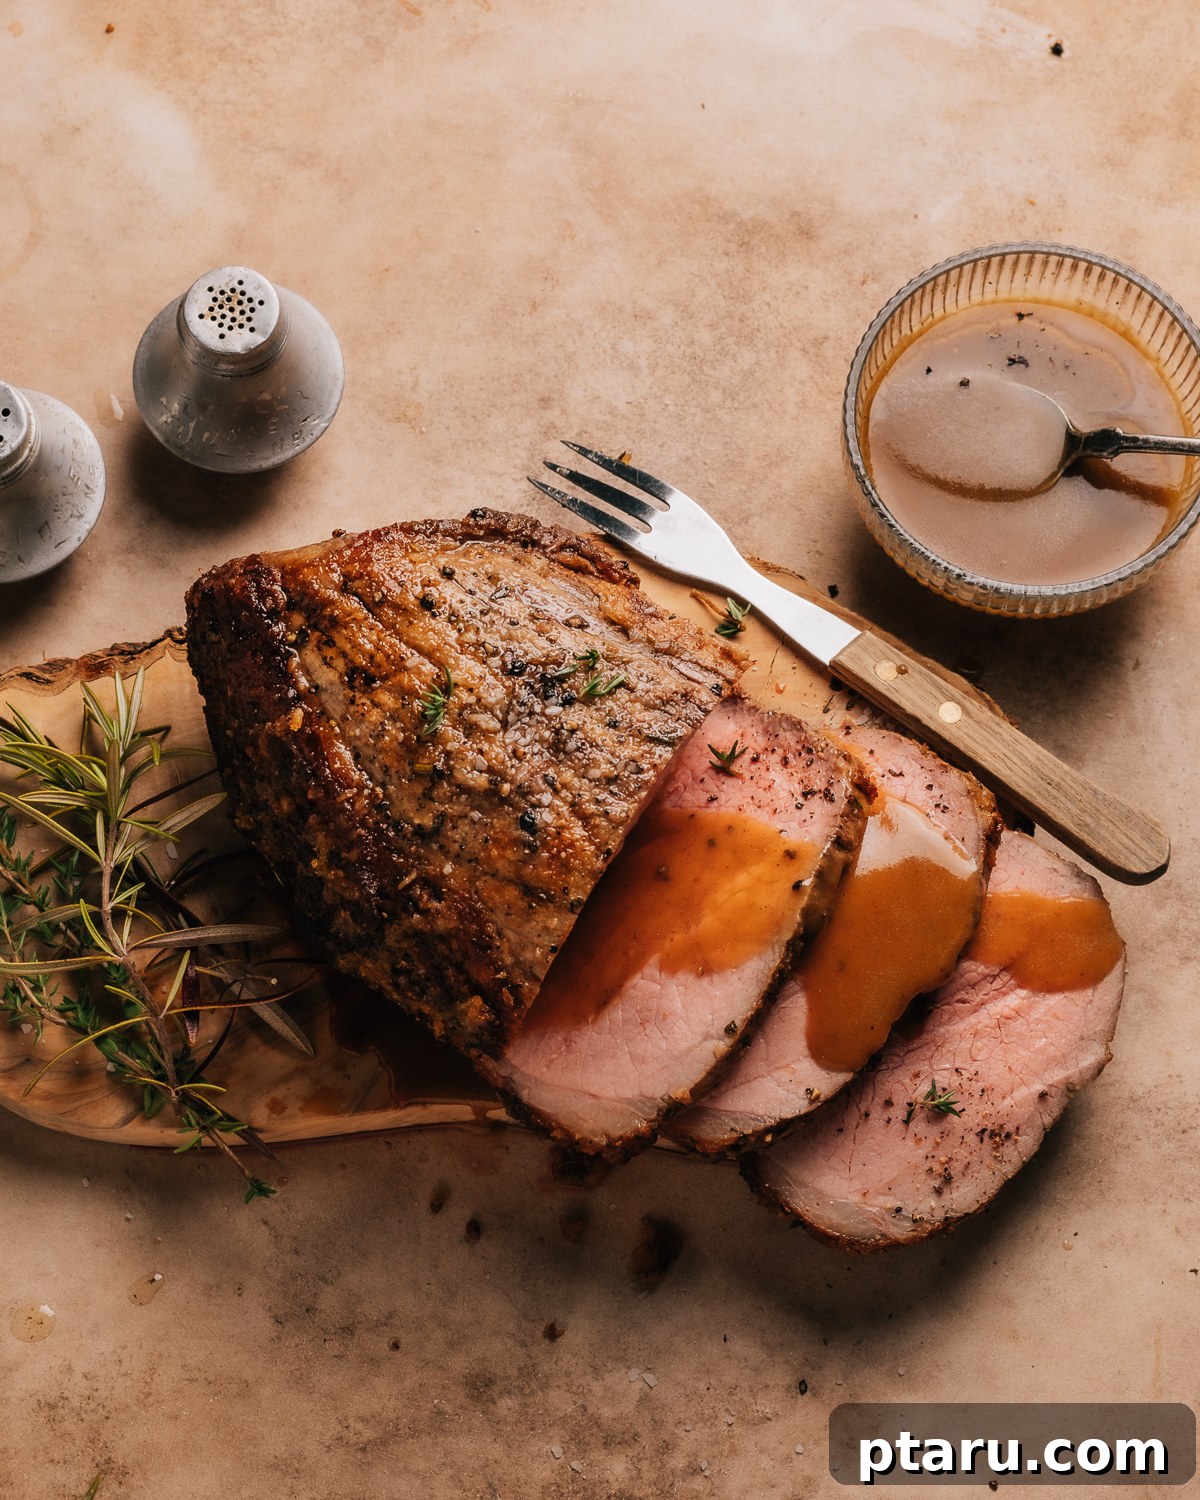
This recipe promises a tender eye of round roast beef that is not only succulent but bursting with deep, beefy flavor. There are compelling reasons why this easy-to-follow recipe will become a treasured staple in your culinary repertoire:
- Unrivaled Tenderness and Juiciness: While the eye of round is often perceived as a challenging, lean cut, this recipe employs specific, scientifically proven techniques to unlock its full potential. The result is a roast that defies expectations, delivering a juicy, tender texture that melts in your mouth and leaves a lasting impression. It’s a truly mouthwatering and memorable dish that redefines what you thought was possible with this cut.
- Unlock Professional Secrets: As a dedicated food scientist, I’m passionate about demystifying cooking processes and sharing actionable insights. This guide is packed with my personal “pro secrets” – common mistakes to diligently avoid and precise, science-backed tips that guarantee perfect, no-fail results every single time. From searing to resting, you’ll understand the ‘why’ behind each step, empowering you to cook with confidence and achieve culinary excellence.
- Exceptional Flavor at an Affordable Price: The Eye of Round Roast boasts a robust, beautiful beefy flavor that stands proudly alongside its pricier counterparts. Unlike more expensive cuts such as beef tenderloin or prime rib, the eye of round offers incredible value without compromising on taste. This makes it a smart choice for both grand special occasions and comforting, everyday family dinners, allowing you to enjoy gourmet quality without the gourmet price tag.
Essential Ingredients for Your Eye of Round Roast
One of the many joys of preparing this particular recipe is how accessible the ingredients are. Most of what you need to expertly season this delicious beef cut are likely already waiting in your pantry and fridge. It’s a true win for convenience and flavor!
Eye of Round Roast & Gravy Ingredients
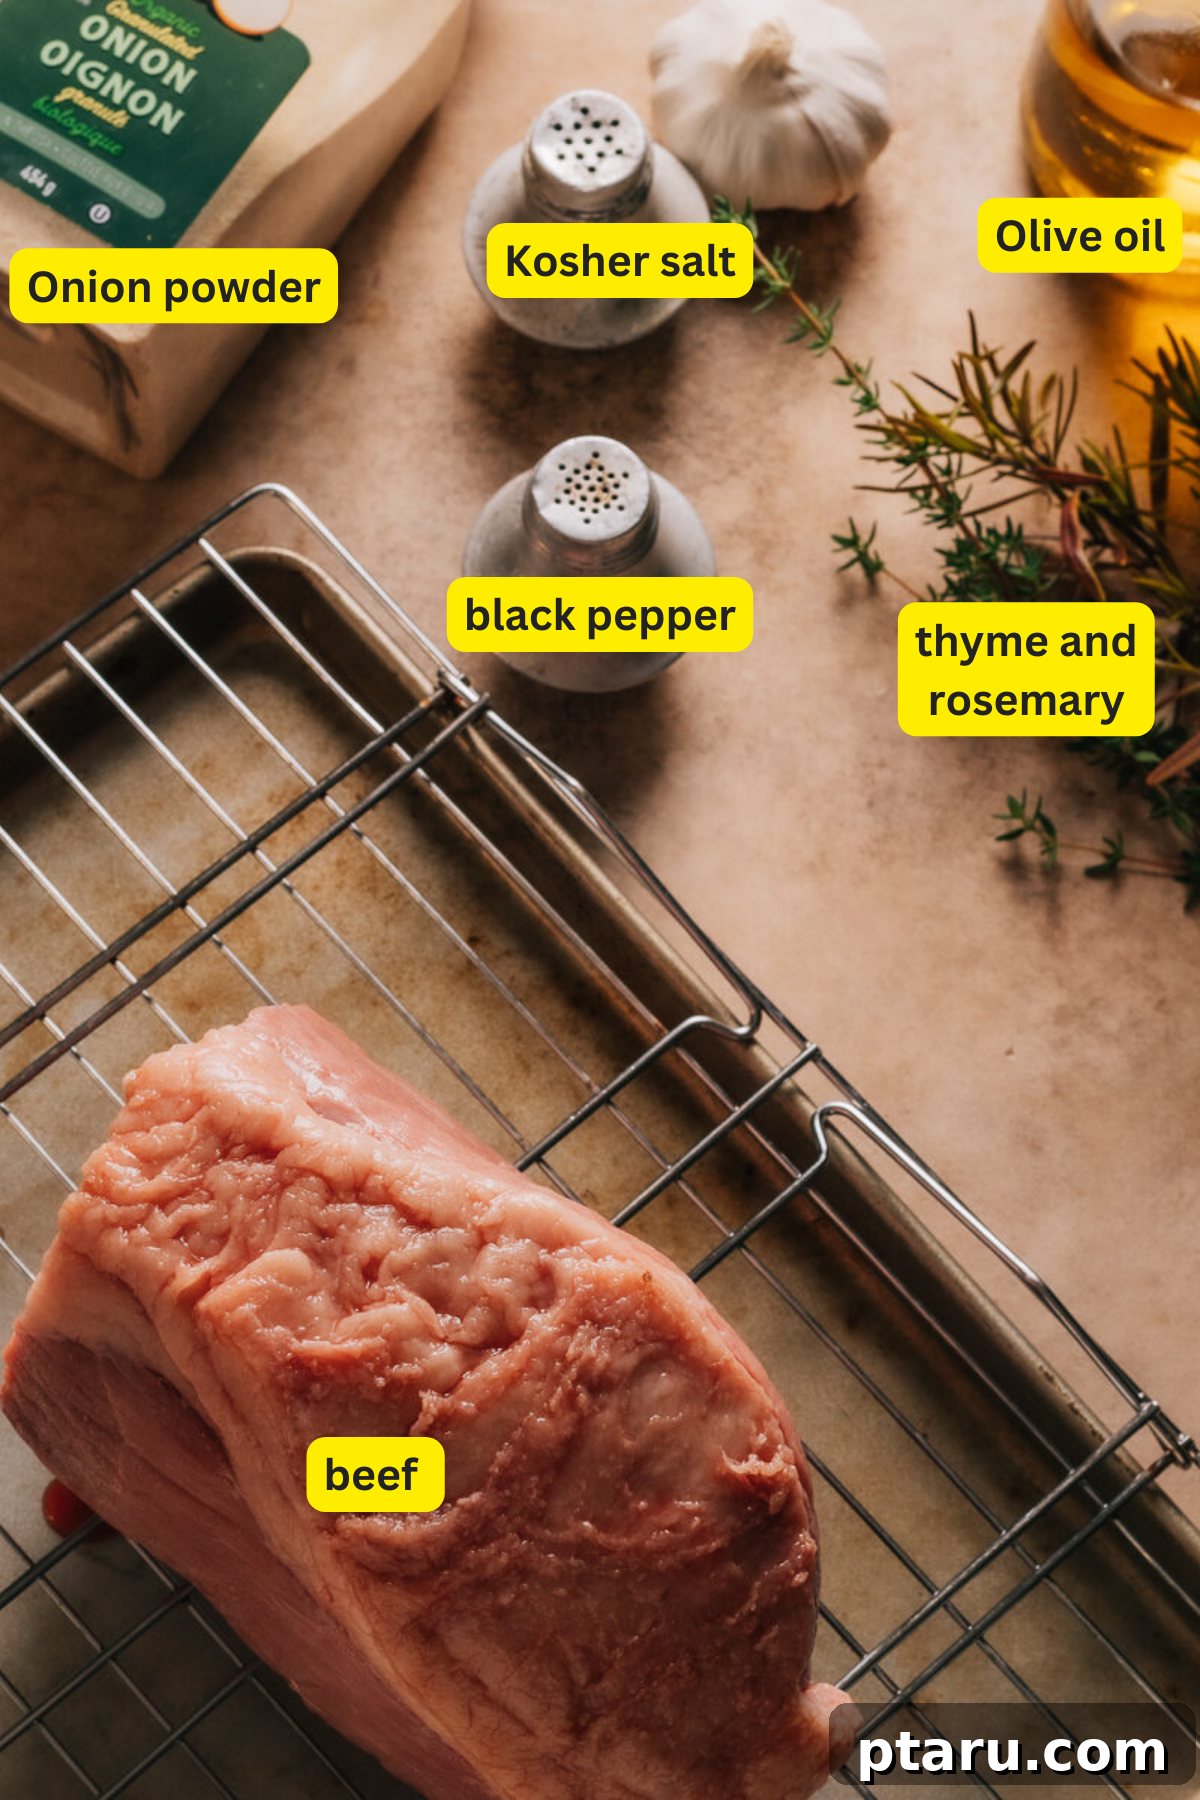
Ensure you have these readily available staples to make this remarkable eye-of-round roast recipe:
- Eye of Round Roast: This lean and economical cut of beef is characterized by its mild, pure beef flavor and firm texture. It’s an ideal candidate for roasting when handled with the correct technique, particularly when paired with a flavorful rub and cooked using a low-and-slow method after an initial sear.
- Olive Oil: Essential for the initial high-heat searing process. Olive oil helps to create a beautiful, rich brown crust on the exterior of the roast, which not only locks in moisture but also develops deep, complex flavors through the Maillard reaction.
- Kosher Salt and Black Pepper: These fundamental seasonings are critical. Generously seasoning the beef well before cooking is the absolute key to enhancing and bringing out the meat’s natural, robust flavor, ensuring every bite is perfectly balanced.
- Garlic: Provides an indispensable savory, pungent, and aromatic depth that flawlessly complements the rich taste of beef. You have the flexibility to use freshly minced garlic for a more intense, bold flavor, or opt for garlic powder for a milder, more evenly distributed aromatic note.
- Onion Powder: Adds a subtle yet crucial sweetness and an earthy, umami-rich layer to the overall flavor profile of the roast, enhancing the savory notes without overpowering them.
- Fresh Thyme and Rosemary: These classic fresh herbs are a culinary match made in heaven for beef. Their distinct aromatic qualities add multiple layers of sophisticated flavor, infusing the roast with their fragrant essence. While fresh is preferred for vibrancy, dried rosemary and thyme can be used as alternatives, but remember they are more concentrated, so adjust quantities accordingly.
- Unsalted Butter: This forms the foundational rich base for your luscious homemade gravy. Butter contributes a smooth, velvety texture and an incredible depth of flavor that binds all the gravy components together.
- All-Purpose Flour: The essential thickening agent for the gravy. When combined with butter to create a roux, it helps achieve the perfect, silky consistency that beautifully coats each tender slice of roast beef.
- Pan Drippings: These precious drippings, accumulated in the roasting pan, are gold. They capture all the concentrated, caramelized flavors from the roast itself, adding an unparalleled depth and richness to your gravy that simply cannot be replicated.
- Beef Broth: This liquid is vital for rounding out the gravy, infusing it with a robust, intensely beefy flavor. It harmonizes perfectly with the pan drippings and seasonings, creating a cohesive and delectable sauce that enhances the entire dish.
RELATED: For another fall-apart-tender beef experience, try our Pot Roast Dutch Oven Recipe.
Smart Substitutions and Creative Variations
Flexibility is key in the kitchen. Here are some simple yet effective swaps and creative twists to customize your eye of round roast:
- Olive Oil Alternatives: If olive oil isn’t on hand or you prefer a different flavor profile, consider using avocado oil, which has a high smoke point and neutral taste, or even melted unsalted butter. Both options will help achieve a beautiful sear and contribute unique nuances to the roast’s crust. Butter will add a richer, nuttier flavor, while avocado oil provides a clean crispness.
- Gravy Variations for Enhanced Depth: Elevate your gravy with a splash of flavor. A generous pour of dry red wine (like Cabernet Sauvignon or Merlot) added before the beef broth can introduce a sophisticated, deep complexity. Alternatively, a dash of Worcestershire sauce offers a tangy, umami kick. For those seeking an earthier dimension, swapping half or all of the beef broth with rich mushroom broth creates a wonderfully savory and distinct gravy.
- Spice It Up: Don’t hesitate to experiment with the seasoning mix to match your palate. Incorporate a teaspoon of smoked paprika for a smoky, warm note, a pinch of cumin for an earthy undertone, or even a modest amount of cayenne pepper for a subtle yet exciting warmth and complexity. These additions can transform the roast’s flavor profile, making it uniquely yours.
Essential Tools to Grab for Perfect Roasting
Having the right equipment ensures a smooth cooking process and the best possible results. Here’s what you’ll need to make this tender eye of round roast:
- Rimmed Baking Sheet or Roasting Pan: This foundational piece of equipment is essential. It provides a stable surface to hold your roast securely and, crucially, catches all the flavorful drippings that accumulate during cooking, which are vital for your gravy.
- Roasting Rack: Elevating the roast on a rack within the baking sheet is a non-negotiable step. This simple addition allows hot air to circulate evenly around all sides of the meat, promoting uniform cooking and the development of a beautifully crisp crust on the bottom, preventing it from steaming.
- Reliable Meat Thermometer: This is arguably your most important tool for cooking lean cuts like the eye of round. A high-quality meat thermometer is absolutely essential for accurately checking the internal temperature, ensuring precise doneness and preventing dreaded overcooking, which can lead to dry, tough meat.
- Small Mixing Bowl: A versatile mixing bowl is needed to combine your aromatic spice blends, herbs, and olive oil into a cohesive rub that will generously coat your roast, infusing it with layers of flavor.
- Aluminum Foil: After the roast finishes cooking, aluminum foil is used to “tent” the meat during its crucial resting period. This step traps heat, allowing the juices to redistribute evenly throughout the roast, ensuring maximum tenderness and juiciness.
How to Master Eye Of Round Roast: A Detailed Step-by-Step Guide
Achieving a perfectly tender and juicy eye of round roast is simpler than you might think when you follow these precise steps. My method combines high-heat searing with low-temperature roasting to create an exquisite crust and maintain succulence. Here is your comprehensive, step-by-step guide to making the absolute best eye of round roast:
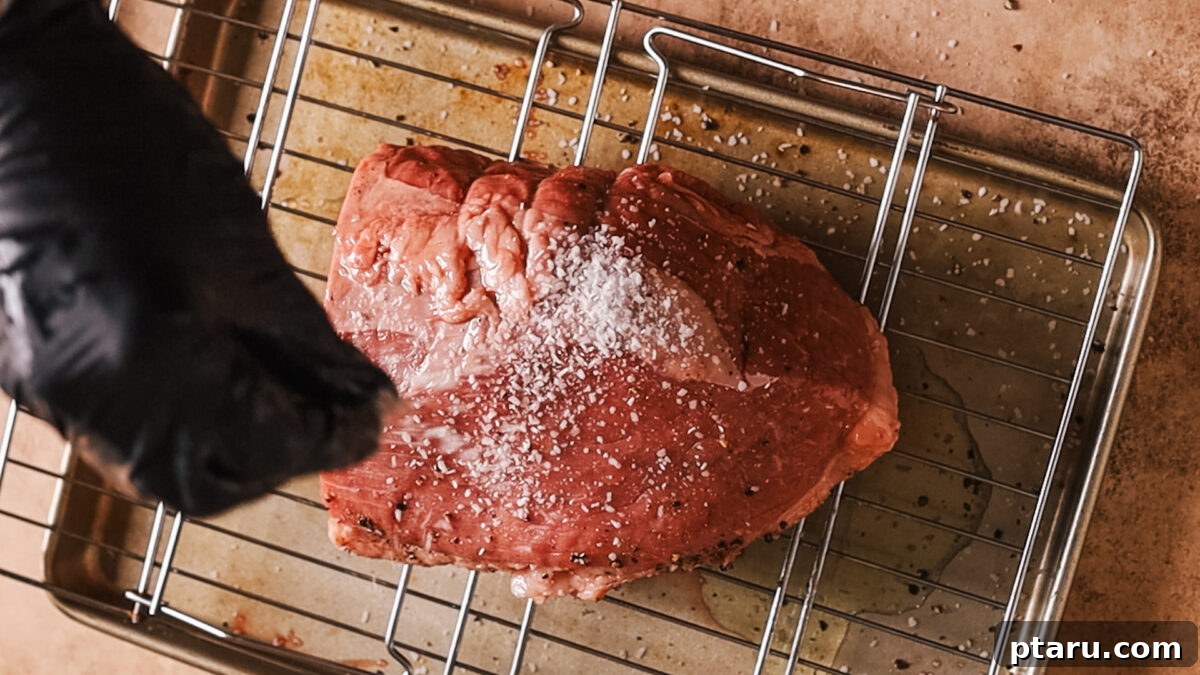
Step 1: High-Heat Sear for a Perfect Crust
Preheat Oven and Prepare Pan: Begin by preheating your oven to a scorching 500°F (260°C). This high temperature is crucial for the initial sear. Lightly oil a rimmed baking sheet or roasting pan, and make sure to oil the roasting rack that fits inside it. This prevents sticking and promotes even browning.
Prepare the Roast: Pat the eye of round roast thoroughly dry with paper towels. Removing excess surface moisture is paramount; it ensures the meat sears beautifully rather than steaming. Rub the entire roast generously with 1 tablespoon of olive oil, then season it liberally with kosher salt and freshly ground black pepper on all sides. Don’t be shy with the seasoning!
Sear in the Oven: Carefully place the seasoned roast on the prepared rack in your preheated oven. Roast for 20 minutes at 500°F (260°C). During this searing phase, it’s beneficial to turn the roast a few times to ensure an even, dark brown crust develops all around the exterior. This high-heat exposure triggers the Maillard reaction, creating incredibly rich flavors and a pleasing texture.
Step 2, 3 and 4: Flavor Infusion and Gentle Roasting
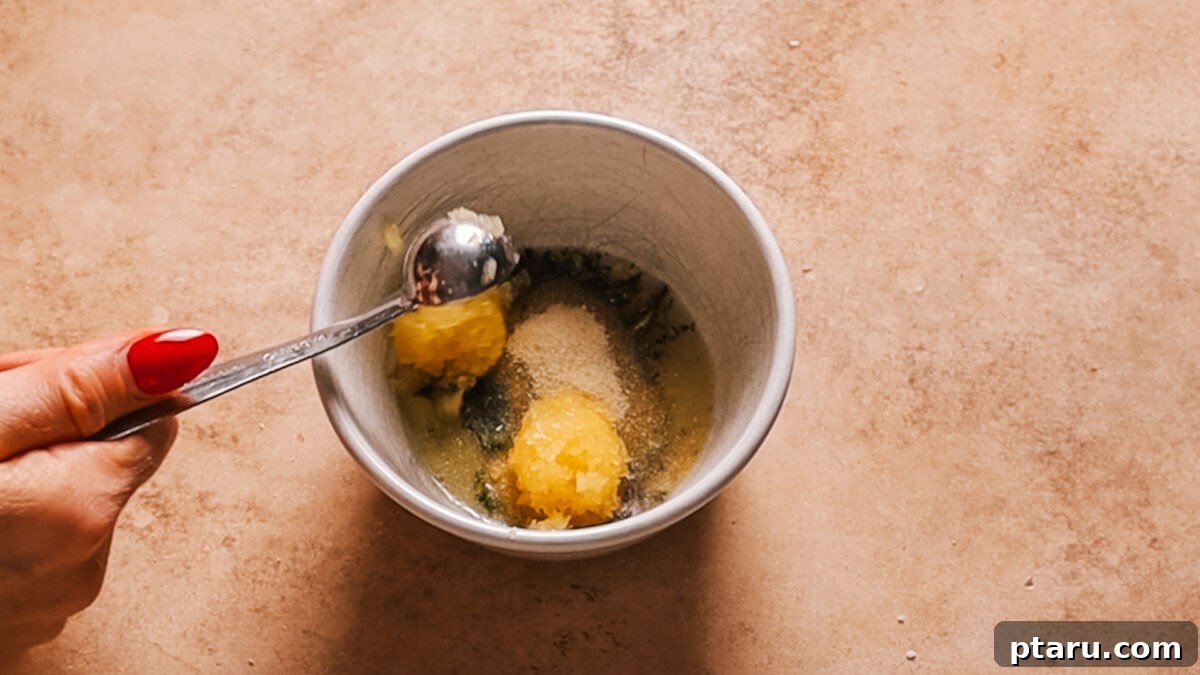
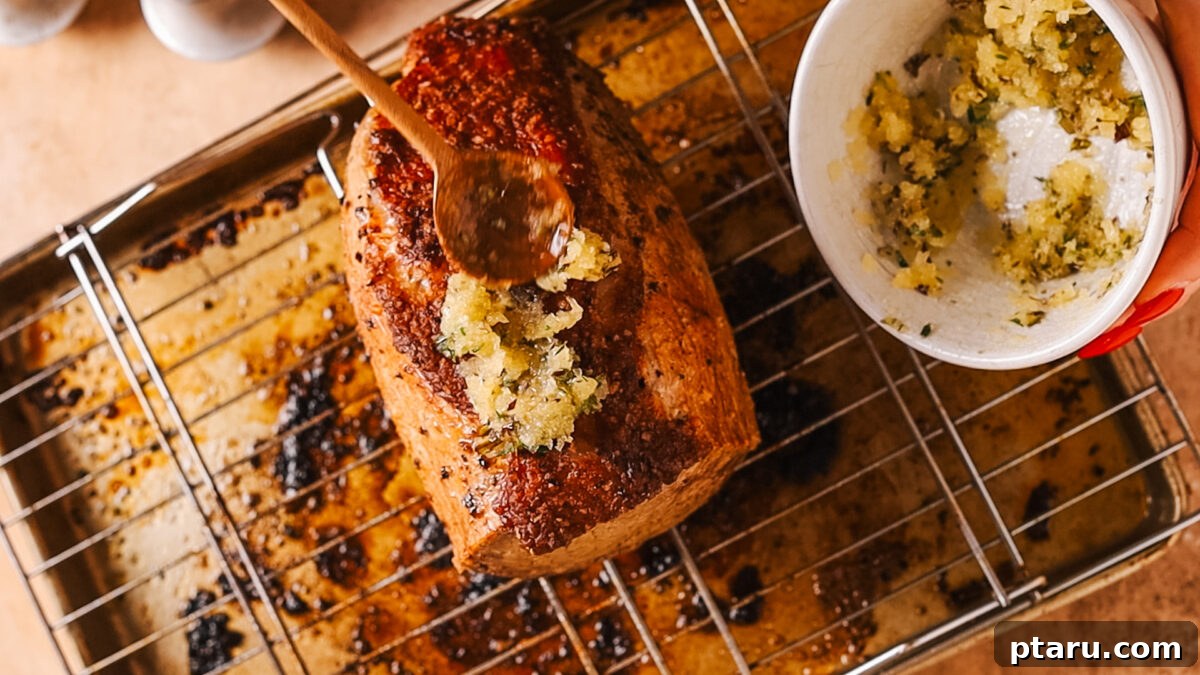
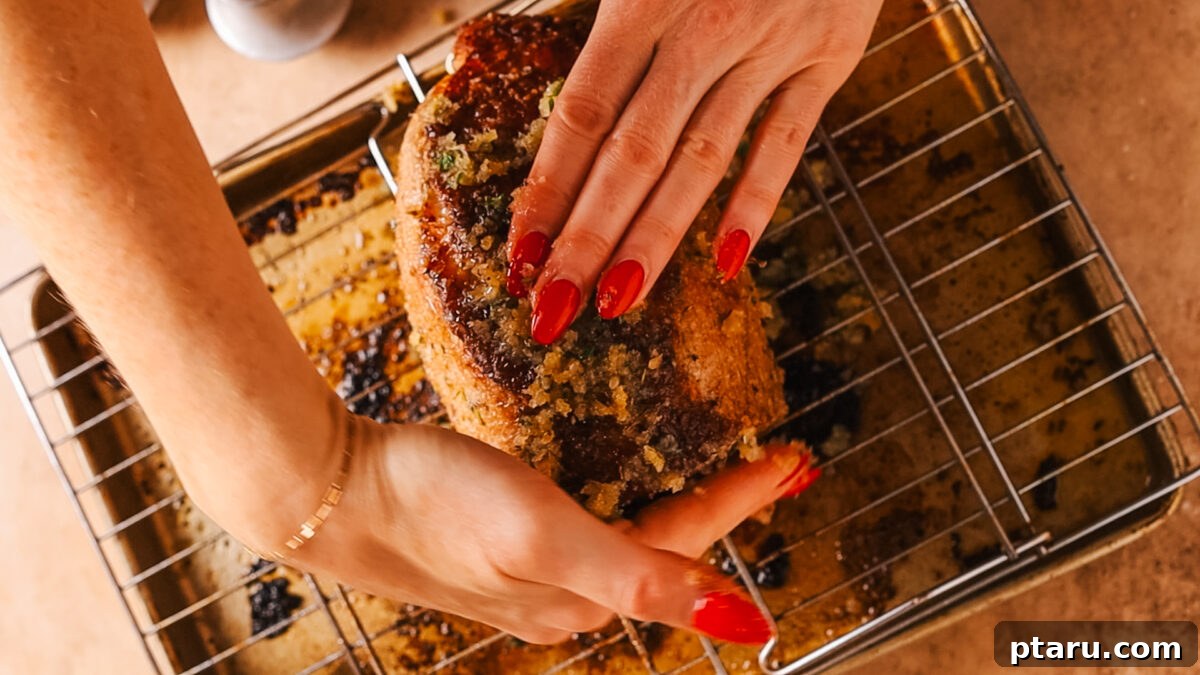
Prepare and Apply Aromatic Seasoning: While your roast is searing, take a small bowl and mix together the minced garlic (or garlic powder), onion powder, fresh thyme, fresh rosemary, and the remaining 1 tablespoon of olive oil. Once the 20-minute searing period is complete, carefully remove the roast from the oven. Evenly coat the seared exterior of the roast with this fragrant herb and garlic mixture. Adding these aromatics after the initial high-heat sear prevents them from burning and becoming bitter, ensuring their fresh flavors shine through.
Create Pan Moisture: Pour 1/2 cup of water into the bottom of the roasting pan, beneath the rack. This addition helps to create a moist environment during the slow roasting phase, preventing drippings from burning, and contributes essential liquid for your future gravy.
Lower Oven Temperature for Slow Roasting: Immediately reduce the oven temperature drastically to 225°F (107°C). This dramatic drop in temperature is a key technique for achieving tenderness in lean cuts. Continue to roast the beef for approximately 60 to 90 minutes. The cooking time will vary depending on the size and thickness of your roast. The critical factor is the internal temperature: roast until a reliable meat thermometer inserted into the thickest part of the meat (without touching bone) registers 125°F (52°C) for a perfect medium-rare doneness. This low and slow method allows the collagen in the meat to break down gradually, resulting in a tender texture.
Step 5: The Crucial Rest and Slice
Rest the Roast: Once your roast reaches the desired internal temperature, remove it from the oven immediately. Transfer it to a clean cutting board and loosely tent it with aluminum foil. Allow the roast to rest undisturbed for at least 15-20 minutes. This resting period is non-negotiable; it allows the muscle fibers to relax and reabsorb the juices that have been pushed to the center during cooking, ensuring a remarkably juicy and tender final product. Skipping this step will result in a dry roast as all the juices will escape when sliced.
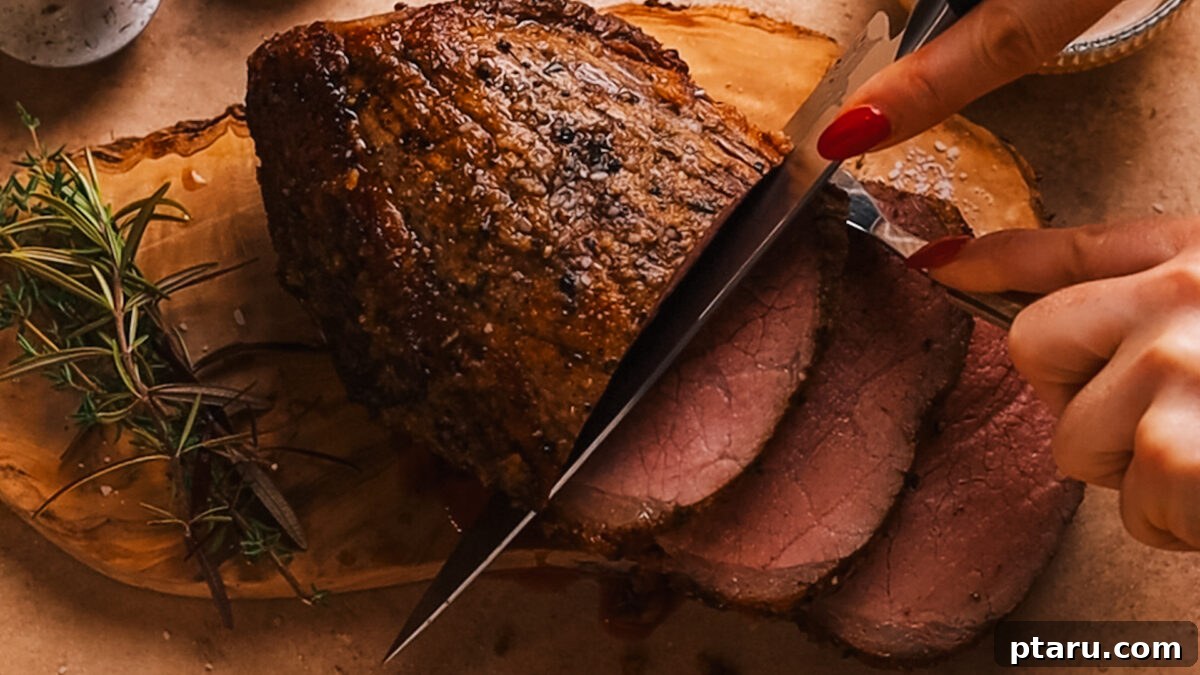
Slice and Enjoy: After resting, carve the roast thinly against the grain. Slicing against the grain shortens the muscle fibers, making each piece incredibly tender and easy to chew. Serve immediately with your homemade gravy and desired side dishes. Enjoy every tender, flavorful bite!
Avoid These 5 Common Mistakes for a Flawless Eye of Round Roast
As a food scientist, I’ve observed common pitfalls that can undermine even the best intentions when cooking roast beef. Understanding these “what not to do” notes will significantly improve your results:
- Skipping the Essential Sear: The initial high-temperature sear is more than just browning; it’s a vital step for creating a delicious, flavorful crust through the Maillard reaction. Neglecting this step means you’ll miss out on a significant depth of flavor and texture, leaving your roast with a less appealing exterior.
- Not Patting the Roast Dry Thoroughly: Moisture on the surface of your roast is the enemy of a good sear. If the meat isn’t patted completely dry with paper towels before hitting the hot pan or oven, it will steam rather than sear. This steaming action prevents the formation of that coveted golden-brown crust, resulting in a pale, less flavorful exterior. Always blot the roast exceptionally well!
- The Fatal Flaw of Overcooking: The eye of round is an inherently lean cut of beef, meaning it has very little fat marbling. This characteristic makes it highly susceptible to drying out quickly if cooked for too long or at too high a temperature. Overcooking is the number one culprit behind a tough, dry roast. Always use a reliable meat thermometer to diligently monitor the internal temperature, aiming for precisely 125°F (52°C) for a perfect medium-rare, ensuring maximum tenderness.
- Failing to Let the Roast Rest Adequately: Patience is a virtue, especially after cooking roast beef. Cutting into the roast immediately after removing it from the oven will cause all the precious, flavorful juices to rapidly escape, leaving you with dry and tough meat. The resting period, tented loosely with foil for at least 15-20 minutes, allows the muscle fibers to relax and reabsorb these juices, locking in moisture and ensuring every slice is incredibly tender and succulent.
- Incorrect Slicing – Ignoring the Grain: The eye of round, due to its lean nature, is naturally firm. Therefore, slicing against the grain is not just recommended, it’s absolutely crucial for achieving tender, easy-to-chew pieces. The “grain” refers to the direction of the muscle fibers; slicing perpendicular to these fibers shortens them, making the meat far more tender. Slicing with the grain will result in long, tough, and noticeably chewier strands of meat.
Make Ahead and Storage Tips for Your Eye of Round Roast
Planning ahead can make mealtime a breeze, and proper storage ensures you can enjoy your delicious roast for days to come. Here’s how to manage your eye of round roast:
Preparing Ahead
You can get a head start on this recipe by seasoning the roast up to a full day in advance. Simply rub the beef all over with olive oil, kosher salt, and black pepper. Once seasoned, wrap it tightly in plastic wrap and refrigerate. When you’re ready to cook, remove the roast from the refrigerator about 30 minutes before placing it in the oven, allowing it to come closer to room temperature for more even cooking.
Storing Leftovers
Properly stored, leftover roast beef remains delicious. Place any remaining roast slices or larger pieces in an airtight container and store them in the refrigerator for up to 3-4 days. To maintain maximum moisture and tenderness, it’s a good practice to slice only the amount you plan to eat immediately, keeping larger portions intact for later.
Pro tip: This tender roast beef makes the BEST sandwiches! Think classic roast beef with horseradish and provolone on a crusty roll.
Freezing for Future Meals
For longer-term storage, cooked eye of round roast freezes beautifully. Wrap individual leftover slices tightly in plastic wrap, then place them together in a freezer-safe bag or container. Freeze for up to 3 months. When ready to use, thaw the frozen roast in the refrigerator overnight before reheating.
Reheating for Optimal Taste and Texture
Reheating roast beef requires a gentle touch to prevent it from drying out. The best methods involve slow, low heat. Gently reheat slices in a preheated oven at a low temperature (around 250°F / 120°C) until just warmed through. Alternatively, you can warm them in a covered skillet on the stovetop over low heat with a splash of beef broth or water to create steam and prevent moisture loss. Absolutely avoid microwaving, as the high, uneven heat can quickly toughen the meat and compromise its tender texture.
Perfect Pairings: How to Serve This Incredible Eye Of Round Roast
This tender and juicy eye of round roast is incredibly versatile and pairs beautifully with a wide array of classic and creative side dishes. It’s truly a star that complements all my favorite accompaniments!
- For a touch of savory sweetness, serve it alongside candied Maple Bacon Brussels Sprouts. The crispness of the bacon and the sweetness of the maple provide a fantastic contrast to the rich beef.
- Classic comfort food demands my best mashed potatoes, whipped to creamy perfection. Their velvety texture and subtle richness are the ideal canvas for soaking up that delicious gravy.
- Don’t forget the bread! Fluffy buttermilk drop biscuits are wonderful for sopping up every last drop of the savory gravy.
- Keep it simple and fresh with lightly steamed carrots, offering a touch of natural sweetness and vibrant color.
- For a more indulgent potato side, our creamy scalloped potatoes add an extra layer of richness and cheesy goodness.
- Complete your traditional roast dinner with a comforting green bean casserole with crispy onions for a delightful crunch and familiar flavor.
Whether you’re aiming for a holiday feast or a cozy Sunday dinner, this eye of round roast and its accompanying gravy will be the undisputed highlight, beautifully complemented by these delicious sides.
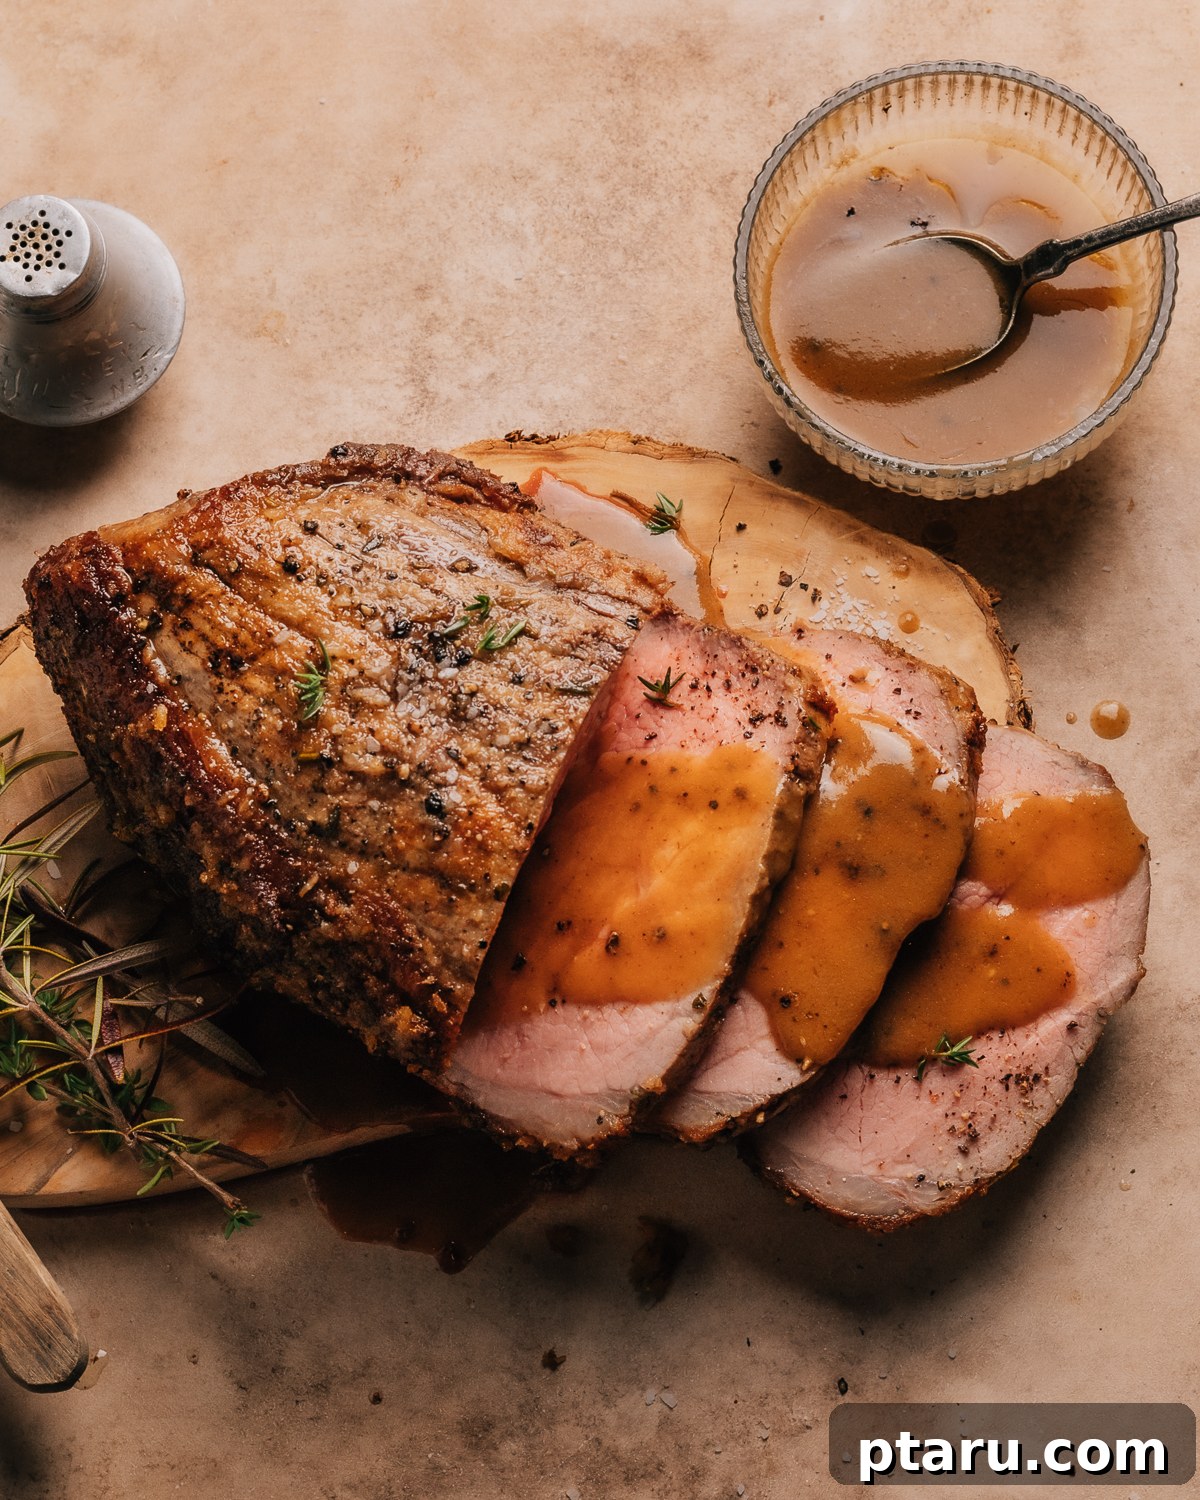
Final Notes, Pro Tips, and Science-Based Secrets for Roast Perfection
As a food scientist, my goal is to empower you with knowledge, not gatekeep culinary secrets. Here are my absolute best tips and pieces of food-nerd wisdom to help you achieve the most tender, flavorful eye of round roast possible:
- The Importance of a Room Temperature Start: Before you even think about putting your roast in the oven, allow it to sit out at room temperature for at least 30 minutes (or up to an hour for larger roasts). This seemingly small step is crucial because it helps the meat cook much more evenly from edge to center, significantly reducing the risk of a cold or undercooked core while ensuring the exterior doesn’t overcook.
- Your Best Friend: Invest in a Quality Meat Thermometer: For lean cuts like the eye of round, hitting that perfect doneness can be incredibly tricky. There’s a fine line between juicy medium-rare and dry overcooked beef. A reliable, instant-read meat thermometer is not just a tool; it’s an indispensable investment that guarantees accuracy and consistency, making it your best friend for avoiding the heartbreak of an overcooked roast.
- Building Flavor in Layers: The secret to truly restaurant-quality taste lies in building flavor in distinct layers. It starts with the generous initial rub of salt and pepper, followed by the aromatic garlic-herb crust applied strategically during cooking, and culminates with the rich, pan-dripping infused gravy. Each layer contributes to a complex, harmonious, and deeply satisfying flavor profile.
- The Science of Searing at High Heat (Maillard Reaction): Starting your roast at 500°F (260°C) is not just about browning; it’s about initiating the Maillard reaction. This complex chemical process, occurring between amino acids and reducing sugars at high temperatures, creates hundreds of new flavor compounds and the desirable caramelized crust. This intense initial heat also helps to “seal in” juices by creating a barrier, though its primary role is flavor development.
- The Magic of Resting for Juiciness: This is a critical step, often overlooked. When meat cooks, muscle fibers contract, squeezing juices towards the center. Resting the roast, tented with foil, allows these fibers to relax. As they relax, they reabsorb and redistribute the concentrated juices throughout the entire roast. Skipping this step means when you slice, all that valuable moisture will run out onto your cutting board, leaving you with dry meat.
- Slow Roasting for Unparalleled Tenderness: After the initial sear, dramatically lowering the oven temperature to 225°F (107°C) is key for a lean cut like eye of round. This slow, gentle roasting prevents the proteins from contracting too quickly and too tightly, which would otherwise result in a tough texture. It allows for a gradual and even cooking process, essential for achieving the melt-in-your-mouth tenderness we’re aiming for.
- Strategic Timing: Adding Garlic and Herbs After Searing: You might be tempted to add all seasonings at the beginning. However, adding the delicate garlic and fresh herbs *after* the initial high-heat sear is a deliberate culinary strategy. This timing prevents the more volatile aromatic compounds in garlic and herbs from burning or developing a bitter taste during the intense searing process, ensuring their fresh, vibrant flavors are preserved and infused beautifully into the roast during the gentle, longer cook time.
Frequently Asked Questions About Eye Of Round Roast
Just skimming through this post? Make sure you don’t miss these essential points to guarantee your roast beef success:
The most critical factor is to avoid overcooking. Always use a reliable meat thermometer to monitor the internal temperature, and remove the roast from the oven when it reaches 125°F (52°C) for medium-rare. Additionally, the mandatory resting period of 15-20 minutes after cooking, tented loosely with foil, is essential to allow juices to redistribute and remain locked within the meat fibers.
Absolutely! While the eye of round is specifically chosen for its lean nature and cost-effectiveness with this method, you can certainly adapt this technique for similar lean cuts. Good substitutes include top round or sirloin tip roasts. Keep in mind that cooking times may vary slightly based on the size, shape, and specific characteristics of the alternative cut, so always rely on your meat thermometer for accuracy.
No fresh herbs? No problem! Dried herbs are a perfectly acceptable and effective substitute. When using dried herbs in place of fresh, a general rule of thumb is to use about one-third the amount of dried herbs as fresh, because their flavors are significantly more concentrated. For example, if a recipe calls for 1 tablespoon of fresh rosemary, use 1 teaspoon of dried rosemary.
For a perfect medium-rare eye of round roast, you should aim for an internal temperature of 125°F (52°C) when you remove it from the oven. Remember, the roast will continue to cook a few more degrees as it rests (this is called carryover cooking), bringing it to the ideal 130-135°F (54-57°C) for serving. Always use an instant-read meat thermometer for precision.
Lumpy gravy often results from adding the liquid too quickly to the flour-butter roux or not whisking consistently. To fix it, remove the gravy from the heat and vigorously whisk until smooth. If lumps persist, you can strain the gravy through a fine-mesh sieve or use an immersion blender to achieve a silky-smooth consistency. Ensure your roux is fully cooked before adding liquid, and always whisk gradually.
Discover More Delicious Beef Recipes You’ll Love
If you enjoyed mastering this eye of round roast, you’ll surely love exploring more of my favorite beef-based recipes designed to bring flavor and joy to your kitchen:
- My Old-Fashioned Beef Vegetable Soup gives you fall-apart, butter-tender beef in a rich, comforting broth. It’s truly dreamy stuff for a cold day!
- For perfect roast beef in a fraction of the time, this Air Fryer Roast Beef recipe is a game-changer, delivering incredible results with minimal effort.
- You simply have to try my Instant Pot Steak – the internet is utterly obsessed with how incredibly tender and flavorful it turns out.
- Craving ultimate comfort? Beef Pot Pie, anyone? I know, right? It’s a hearty, satisfying meal that’s perfect for feeding a crowd or warming up on a chilly evening. Let’s go make it!
- Make this wholesome Beef and Barley Soup in your pressure cooker for an incredibly easy-going, nourishing, and deeply flavorful meal that practically cooks itself.
Print Recipe
Eye of Round Roast (Extra Tender + Juicy!)
This Eye of Round Roast recipe makes the most tender, succulent, and juicy roast beef with a delicious crust and a rich, savory gravy. It’s a foolproof 10/10 winner, guaranteed to impress!
Ingredients
- 3 lb eye of round roast
- 2 tbsp olive oil, divided use
- 2 ½ tsp kosher salt
- 1 tsp black pepper
- 4 garlic cloves, minced (or 1 tsp garlic powder as substitution)
- 2 tsp onion powder
- 1 tsp minced fresh thyme (or 1 tsp dried thyme as substitution)
- 1 tsp minced fresh rosemary (or 1 tsp dried rosemary as substitution)
For Gravy
- 3 tbsp unsalted butter
- 3 tbsp all-purpose flour
- Drippings from roasting pan
- 2 cups beef broth
Instructions
- Preheat Oven & Prepare Pan: Preheat your oven to 500°F (260°C). Lightly oil a rimmed baking sheet (or a roasting pan) fitted with a rack, oiling both the pan and rack.
- Prepare Roast: Pat the roast thoroughly dry with paper towels. Rub it all over with 1 tbsp olive oil, then season generously with salt and pepper.
- Sear in the Oven: Place the roast on the rack on the baking sheet. Roast for 20 minutes at 500°F (260°C) to sear the outside, turning the roast a few times to form a beautiful, golden-brown crust.
- Flavor the Roast: While the roast is searing, mix the minced garlic, onion powder, thyme, rosemary, and an additional 1 tbsp olive oil in a small bowl.
- Remove the seared roast from the oven and brush or spoon this aromatic mixture all over the hot roast.
- Pour 1/2 cup water into the bottom of the pan, beneath the rack.
- Lower Oven Temp & Slow Roast: Reduce the oven temperature to 225°F (107°C). Continue roasting for about 60-90 minutes or until the internal temperature reaches 125°F (52°C) for medium-rare. Use a meat thermometer for accuracy.
- Rest: Remove the roast from the oven and tent it loosely with foil. Let it rest for a crucial 15-20 minutes to allow the juices to redistribute, ensuring a tender and juicy result.
- Slice and Serve: Slice thinly against the grain and serve immediately with the prepared gravy.
To Make Gravy
- After removing the roast from the pan, place the pan over medium heat on the stovetop. Add the unsalted butter and let it melt. Whisk in the all-purpose flour, stirring constantly, until it forms a golden-brown paste (roux), about 1-2 minutes.
- Gradually whisk in the beef broth, continuously scraping up all the flavorful browned bits from the bottom of the pan. Stir until the gravy is smooth and thickened to your desired consistency, usually about 3-5 minutes. Adjust seasoning with additional salt and pepper as needed. Serve the warm, rich gravy generously over your sliced roast.
Notes
Adding the garlic and herbs after the initial searing phase is a key technique that allows you to build layers of flavor without the risk of burning these delicate aromatics, preserving their vibrant taste.
Nutrition
Nutrition information is automatically calculated, so should only be used as an approximation.