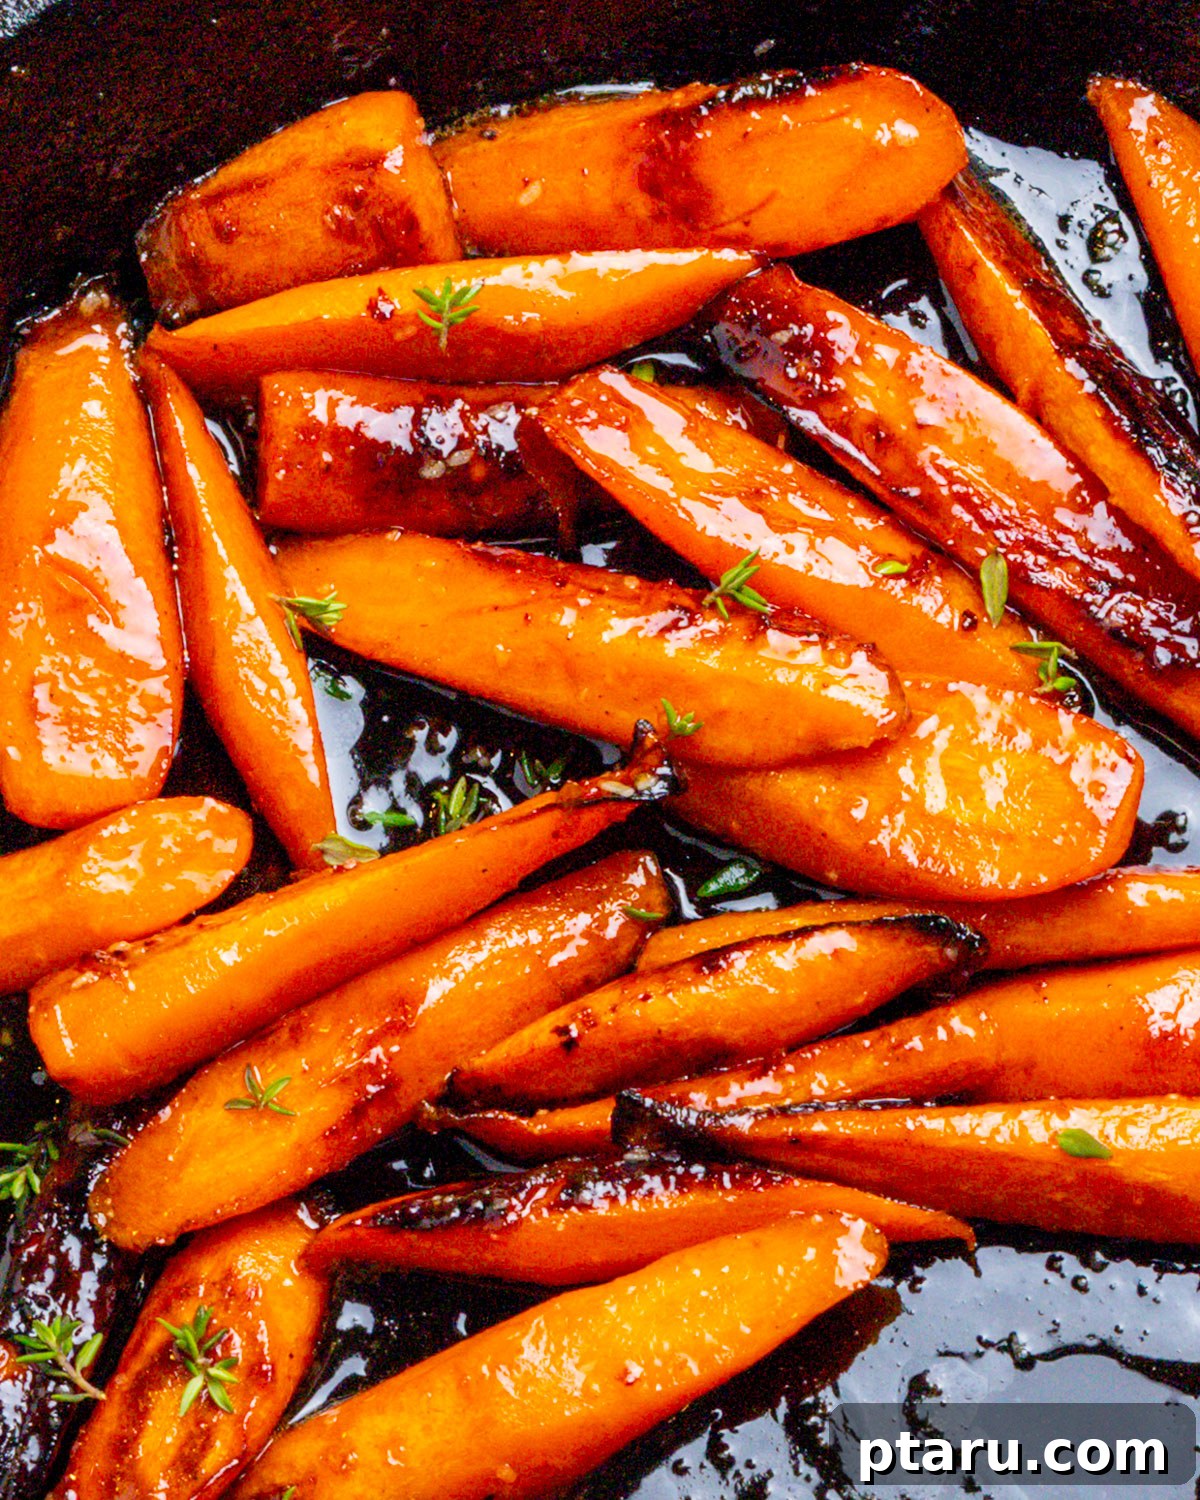
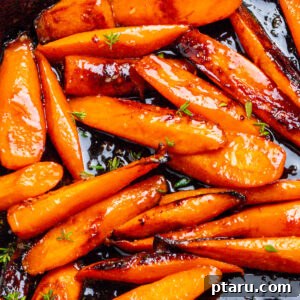
Prepare to fall in love with these easy Glazed Carrots! This recipe is so irresistibly delicious, you’ll find it hard not to devour the entire pan yourself. With just three core ingredients and a single skillet, you can whip up the most flavorful and quick side dish that complements nearly any meal. Forget bland boiled carrots; these glazed beauties boast a tender-crisp texture and a rich, sweet-savory caramelized coating that will become a staple in your kitchen.
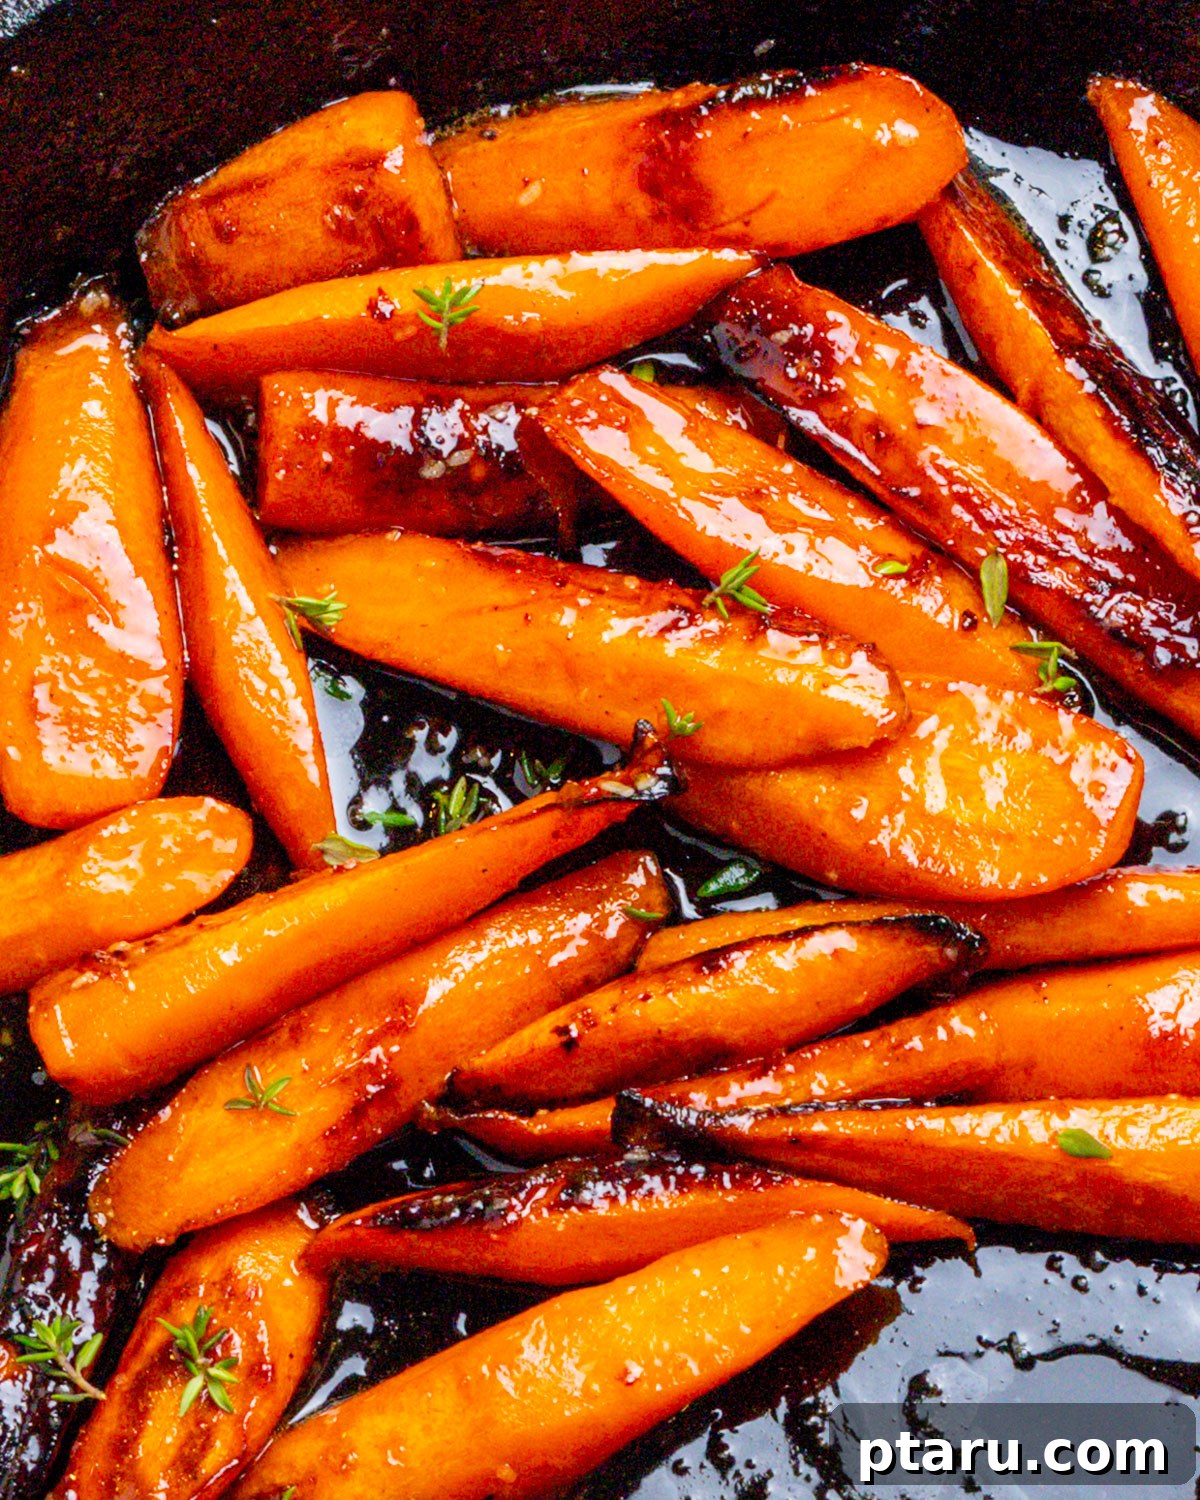
These Glazed Carrots are a testament to how simple ingredients can yield disproportionately delicious results. Their crazy-simple preparation belies the depth of flavor they offer. While they are phenomenal served straight from the skillet as a humble yet satisfying accompaniment, they can also be dressed up for special occasions. Imagine them elegantly arranged over a dollop of creamy labneh, or sprinkled with a dusting of tangy goat cheese and crunchy toasted pistachios for a sophisticated touch. No matter how you serve them, their glossy, tender perfection is sure to impress.
If you’re a fan of simple yet sensational vegetable sides, you’ll also adore our Candied Brussels Sprouts with Maple Bacon!
Essential Ingredients for Perfect Glazed Carrots
The magic of this easy Glazed Carrot recipe lies in its simplicity, requiring just a handful of staple ingredients. Here’s a detailed look at what you’ll need to create this incredibly flavorful side dish:
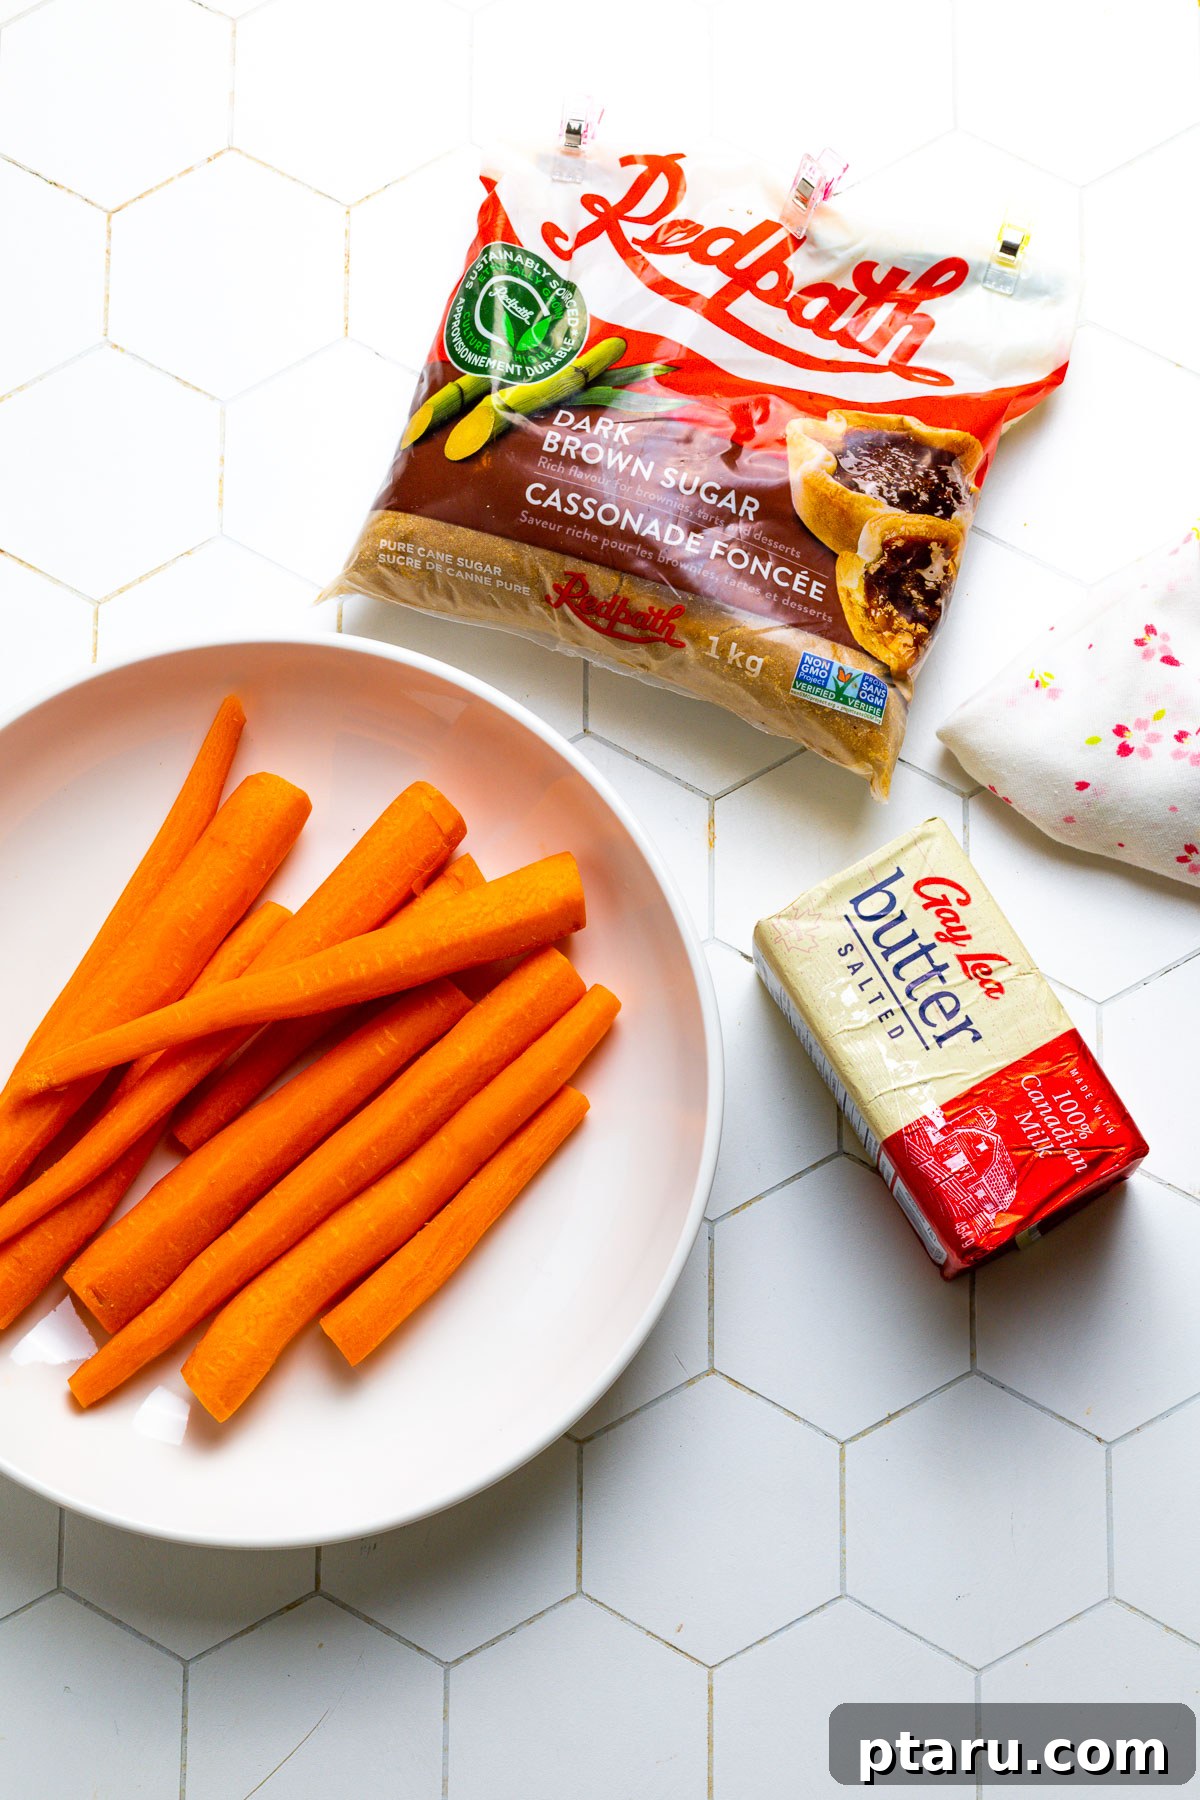
- Carrots: The star of the show! Choose fresh, firm carrots for the best flavor and texture. For an elegant presentation, we recommend peeling them and cutting them into long, uniform pieces or 1/4-inch thick rounds. Uniformity ensures even cooking and browning. About 1 pound of carrots is perfect for 4 servings.
- Salted Butter: Butter is crucial for developing that rich, glossy glaze and imparting a delectable flavor. Using salted butter adds an extra layer of seasoning that balances the sweetness of the sugar. If you only have unsalted butter, simply increase the amount of salt slightly.
- Dark Brown Sugar: This is the secret to the deep, complex caramelization and rich color of the glaze. Dark brown sugar contains more molasses than light brown sugar, offering a more robust flavor profile. It melts beautifully, creating a sticky, sweet coating that clings to every piece of carrot.
Beyond these three core components, you’ll also need a high-heat cooking oil (like refined olive oil or avocado oil) for searing and a touch of salt to enhance the overall taste.
Optional Add-ins to Elevate Your Glazed Carrots:
While delicious on their own, these optional ingredients can add exciting new dimensions to your glazed carrots:
- Cinnamon: A pinch of ground cinnamon introduces a warm, comforting spice that pairs beautifully with the sweetness of the carrots and brown sugar, making them ideal for holiday meals.
- Crushed Red Pepper Flakes: For those who appreciate a hint of heat, a dash of red pepper flakes offers a subtle contrast to the sweetness, creating a more dynamic flavor experience without being overly spicy.
- Fresh Herbs: Finishing your glazed carrots with freshly chopped herbs like thyme, chives, or parsley can add a burst of freshness and a vibrant aroma. Thyme offers an earthy note, chives a delicate oniony flavor, and parsley a bright, clean finish. Add these just before serving for maximum impact.
Exact ingredient quantities can be found in the comprehensive recipe section at the bottom of this article.
Flavorful Variations for Your Glazed Carrots
Beyond the classic recipe, these simple additions can transform your glazed carrots, offering new and exciting flavors:
- Warm Spices: Introduce a pinch of cloves, nutmeg, or a ready-made pumpkin pie spice blend for an autumnal twist. These spices enhance the natural sweetness of the carrots and are perfect for holiday feasts.
- Aromatic Boost: For a savory-sweet profile, add a teaspoon of fresh minced garlic and ginger during the glazing step. This combination brings a delightful warmth and a subtle kick, pairing wonderfully with Asian-inspired dishes.
- Sweetener Swap: Instead of dark brown sugar, experiment with honey or maple syrup. These natural sweeteners offer a different nuanced sweetness and a slightly lighter glaze, while still achieving beautiful caramelization.
- Crunchy Topping: Finish your dish with toasted nuts like pecans or walnuts. Their buttery crunch provides a fantastic textural contrast to the tender carrots and adds a nutty richness. Lightly toast them in a dry pan before sprinkling for the best flavor.
- Citrus Zest: A touch of orange zest can brighten the entire dish, adding a fresh, aromatic note that complements the carrots’ sweetness. Add it just before serving.
- Balsamic Glaze: For a more sophisticated savory-sweet profile, drizzle a balsamic glaze over the finished carrots. The tang of the balsamic pairs exceptionally well with the caramelized sugar.
Essential Kitchen Tools for Glazed Carrots
Making perfectly glazed carrots doesn’t require a lot of specialized equipment, but having the right tools on hand will ensure the best results:
- Large Skillet or Sauté Pan: This is arguably the most crucial tool. A large, heavy-bottomed skillet or sauté pan (10-12 inches) is ideal for achieving even browning and caramelization. Its wide surface area allows the carrots to spread out in a single layer, preventing them from steaming instead of searing. A cast-iron skillet works exceptionally well for even heat distribution and beautiful browning.
- Sturdy Spatula or Tongs: You’ll need a heat-resistant spatula or a pair of tongs for stirring and ensuring every carrot piece gets thoroughly coated in the luxurious glaze. Tongs are particularly helpful for arranging the carrots in a single layer during the searing phase.
- Pan Lid: A well-fitting lid for your pan is essential. After searing, covering the pan traps steam, allowing the carrots to cook through and become perfectly tender without losing their glossy glaze or browning.
- Measuring Spoons and Cups: Accurate measurements are key, especially for the glaze ingredients like brown sugar, butter, and salt. Have your standard set of measuring spoons and cups ready.
- Vegetable Peeler: While optional for very young and tender carrots, a good vegetable peeler makes quick work of preparing your carrots for a smoother texture and cleaner appearance.
- Sharp Knife and Cutting Board: For safely and efficiently slicing your carrots into uniform pieces, ensuring consistent cooking.
Having these simple tools prepared before you start cooking will make the entire process smooth and enjoyable, leading to consistently delicious glazed carrots every time.
How to Make Glazed Carrots: Your Simple Step-by-Step Guide
Creating these incredibly flavorful glazed carrots is surprisingly straightforward. Follow this easy, step-by-step guide to achieve perfectly tender, glossy, and caramelized carrots every single time:
1. Preheat Your Pan to Perfection
Begin by placing a large, heavy-bottomed skillet (ideally cast iron or stainless steel) over high heat. Let it preheat for 3-4 minutes. This initial high heat is crucial for achieving a proper sear. Once hot, add your chosen high-heat cooking oil (like refined olive oil, avocado oil, or grapeseed oil) and let it heat until it shimmers, about 30-60 seconds. You might even see a wisp of smoke, which indicates it’s ready for searing.
2. Sear the Carrots for Deep Flavor
Carefully add the prepared carrots to the hot skillet. The goal here is to spread them out in a single layer as much as possible. This is vital because only the carrot surfaces in direct contact with the hot pan will develop that beautiful, flavorful browning (the Maillard reaction). Avoid overcrowding the pan, as this will drop the temperature and cause the carrots to steam instead of sear, resulting in a less flavorful, mushy texture.
Cook the carrots uncovered, without stirring, for 3-5 minutes. During this time, resist the urge to move them! Let them sit undisturbed to allow a rich golden-brown crust to form on one side. Keep a close eye on them to prevent burning – the edges should be caramelized, not blackened.
3. Create the Luscious Glaze
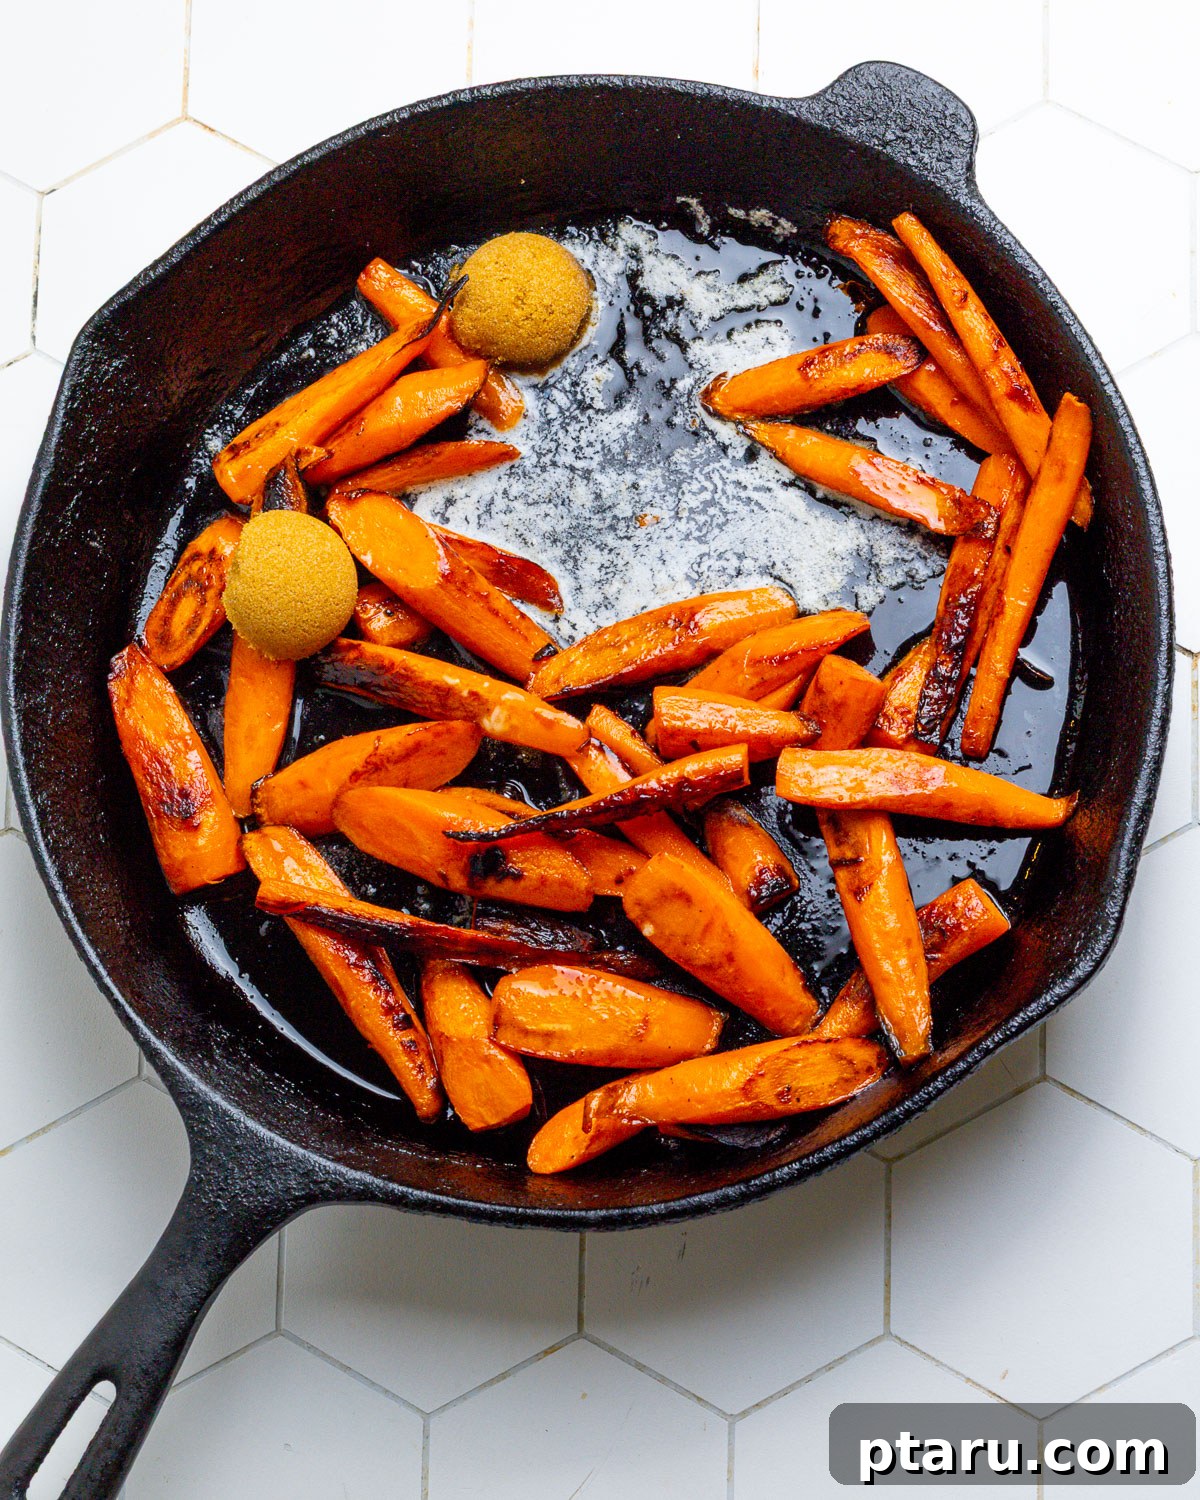
Once the carrots have developed a nice color, add the salted butter, dark brown sugar, and salt to the pan. If using optional cinnamon or red pepper flakes, add them now as well. The butter will melt quickly, combining with the brown sugar and the natural moisture released by the carrots to form a rich, bubbly glaze. Stir everything well with your spatula or tongs, ensuring that every carrot piece is evenly coated in this sweet, shimmering mixture.
4. Cover and Cook to Tender Perfection
Reduce the heat to medium-low. This lower heat prevents the glaze from burning while allowing the carrots to finish cooking. Cover the pan tightly with a lid and let them cook for 8-10 minutes. The steam trapped under the lid will gently cook the carrots through, making them tender while the glaze continues to thicken and cling. The carrots should emerge glossy and tender-crisp – cooked through but still retaining a slight bite.
5. Adjust Glaze Consistency (If Needed)
During the covered cooking phase, keep an eye on the pan. If the glaze starts to look too thick or the pan appears too dry before the carrots are fully tender, simply add a small splash of water (1-2 tablespoons). Stir it in to loosen the glaze and prevent any sticking. If, after cooking, there’s a bit too much liquid, simply remove the lid, increase the heat slightly, and simmer for another minute or two, stirring, until the glaze reduces to your desired thickness. Drain any excess water before serving if necessary.
6. Finish and Serve Warm
Once the carrots are tender and beautifully glazed, remove the pan from the heat. Taste a carrot and adjust the seasoning with a little more salt if desired. The salt enhances the sweetness and balances the flavors. If you’re using fresh herbs, sprinkle them over the glazed carrots now for a vibrant finish. Serve these delectable glazed carrots warm as an impressive and easy side dish!
Expert Tips & Science-Backed Secrets for Glazed Carrots
As a Food Scientist, I love delving into the ‘why’ behind successful cooking. Here are some of my favorite kitchen notes, pro tips, and science-based secrets to ensure your glazed carrots are nothing short of spectacular:
- The Science of Salt Timing: You might notice that I advise against adding salt until after the initial searing. This is a deliberate choice for superior browning. Salt is a hygroscopic compound, meaning it draws moisture out of food. If you add salt too early, the carrots will release their water prematurely, making it difficult for the Maillard reaction (the chemical process responsible for browning and flavor development) to occur effectively. By waiting, you allow the carrot surface to dry and caramelize more efficiently, resulting in a richer flavor and appearance.
- Lemon – A Mismatched Flavor: Out of scientific curiosity, I once tried adding a squeeze of lemon juice at the end of the cooking process. While lemon often brightens vegetable dishes, in this case, I strongly advise against it. The vibrant, sweet-savory profile of the glazed carrots is delicate, and the tartness of lemon tends to clash, creating an overly complex and slightly muddled flavor. Save your lemon for green veggies and let the pure, sweet carrot and caramel flavors shine.
- Cooking for a Crowd? Double the Pans!: If you’re preparing glazed carrots for more than four people, resist the urge to simply overcrowd a single large pan. This is a common mistake that leads to steamed, rather than seared and glazed, carrots. Instead, I highly recommend using two separate large skillets simultaneously. This ensures each batch of carrots has enough space to make proper contact with the hot pan, allowing for optimal browning and consistent glazing. Trust me, these carrots disappear quickly, so more is always better!
- Make-Ahead Mastery: These glazed carrots are fantastic make-ahead candidates. You can cook them fully, let them cool to room temperature, and then store them in an airtight container in the refrigerator. When you’re ready to serve, simply reheat them gently in a baking dish covered with aluminum foil in a moderate oven, or in a skillet over low heat with a splash of water, until warmed through.
- Choose the Right Oil: For the initial searing step, always opt for a high-heat cooking oil. Refined olive oil (not extra virgin olive oil, which has a lower smoke point), avocado oil, grapeseed oil, or even vegetable oil are excellent choices. These oils can withstand the high temperatures needed to create that beautiful sear without burning or imparting off-flavors.
- The Art of the Initial Sear (No Movement!): This is a critical technique for achieving superior browning. When you first add the carrots to the hot oil, spread them out and then absolutely do not move them for the first 3-5 minutes. This initial contact with intense heat is their one opportunity to develop a deep, rich caramelized crust. Once they start releasing moisture (which happens shortly after they begin cooking), significant browning will cease. So, let them be!
- Rotate for Even Heat: Even the best skillets can have slight hot spots on certain stovetops. To counteract this and ensure truly even browning across all your carrots, gently rotate the pan around the burner a couple of times during the initial searing phase. This small adjustment can make a big difference in consistency.
- Dark Brown Sugar for Depth: While light brown sugar can work, dark brown sugar is your best friend for glazed carrots. Its higher molasses content contributes to a richer, deeper caramel color and a more robust, complex flavor profile in the glaze. This subtle difference elevates the dish significantly.
- Doneness Check: The perfect glazed carrot is tender but not mushy, with a slight al dente bite. You can test for doneness by piercing a carrot with a fork – it should slide in with a little resistance. Overcooked carrots lose their appealing texture and can become watery.
Avoid These Common Mistakes for Flawless Glazed Carrots
Even though glazed carrots are simple, a few common missteps can prevent them from reaching their full delicious potential. Be mindful of these trip-ups to ensure your dish is a resounding success:
1. Skipping the Sear: This is perhaps the biggest mistake. Browning the carrots at the start isn’t just for aesthetics; it’s fundamental for flavor development. The Maillard reaction creates complex, savory notes that add incredible depth to the carrots, giving them a caramelized edge. Skipping this initial high-heat sear will result in carrots that taste flat, one-dimensional, and simply boiled with a sweet sauce.
2. Overcrowding the Pan: When carrots are piled high or too close together in the skillet, they don’t have enough direct contact with the hot surface. Instead of searing and caramelizing, the excess moisture released by the crowded vegetables creates steam, essentially steaming them. This leads to a pale, soft, and mushy texture without any of that desirable golden-brown exterior. Always arrange your carrots in a single layer, even if it means cooking in batches or using multiple pans.
3. Adding Salt Too Early: As discussed in our Pro Tips, salt draws out moisture. Adding it at the beginning of the cooking process can hinder the browning process, making it harder for the carrots to caramelize effectively. Wait until the glazing stage to incorporate salt for optimal flavor and texture.
4. Using Low-Heat Oil: If your oil has a low smoke point (like extra virgin olive oil), it will burn and smoke at the high temperatures required for searing, imparting unpleasant bitter flavors. Always use a refined, high-heat cooking oil for the initial searing step.
5. Overcooking the Carrots: While you want tender carrots, you don’t want them to be mushy. Overcooking will diminish their natural sweetness, reduce their vibrant color, and destroy their appealing texture. Keep an eye on the clock and check for doneness after the recommended cooking time.
Make Ahead and Storage Solutions for Glazed Carrots
Glazed carrots are not only delicious but also incredibly convenient, as they are a fantastic side dish to prepare in advance. Whether you’re planning for a holiday feast or just prepping for busy weeknights, knowing how to store and reheat them effectively will save you time and ensure every bite is as good as the first.
Storing Cooked Glazed Carrots
Once your glazed carrots have cooled completely to room temperature, transfer them to an airtight container. This is crucial for maintaining freshness and preventing them from absorbing other odors in your refrigerator. Store them in the refrigerator for up to 4 days. You might notice the glaze thickens slightly as it chills, but don’t worry – it will loosen beautifully when gently reheated.
Freezing Glazed Carrots for Later
Yes, you can freeze glazed carrots! While they might lose a tiny bit of their crispness compared to freshly made, they still retain wonderful flavor and a tender texture upon thawing. Allow the cooked carrots to cool completely. Then, transfer them to a freezer-safe container or a heavy-duty zip-top bag, ensuring as much air is removed as possible to prevent freezer burn. They can be frozen for up to 2 months. For best results, thaw them overnight in the refrigerator before reheating.
Reheating Your Glazed Carrots
There are a few excellent ways to reheat glazed carrots, depending on how much you’re reheating and what tools you have available:
- Skillet Method (Recommended): For the best results, reheat gently in a skillet over medium-low heat. Add a small splash of water (1-2 tablespoons) or an extra pat of butter if the glaze appears too thick or sticky. Stir frequently until the carrots are warmed through and the glaze is once again glossy and fluid. This method helps maintain their texture and prevents them from drying out.
- Oven Method: Preheat your oven to 300°F (150°C). Place the cooled glazed carrots in an oven-safe baking dish. Add a tablespoon or two of water to the bottom of the dish, then cover it tightly with aluminum foil. Reheat for 15-20 minutes, or until thoroughly warmed. The foil helps to steam them gently, keeping them moist.
- Microwave Method: For small portions or quick reheating, place the carrots in a microwave-safe dish. Add a tiny splash of water if needed. Heat in short bursts (30-60 seconds), stirring in between, until heated through. Be careful not to overheat, as this can make them rubbery.
Perfect Pairings: How to Serve These Delicious Glazed Carrots
These sweet, tender, and beautifully caramelized glazed carrots are incredibly versatile, making them a perfect side dish for almost any occasion. They shine brightly as a festive addition to holiday tables, like Thanksgiving or Christmas, beautifully complementing a bowl of the best fluffy mashed potatoes you’ll ever try. Yet, they are quick and easy enough to elevate a simple weeknight dinner into something special. Here are some fantastic ways to serve them:
As a Delightful Side to Beef Dishes
The sweet glaze on these carrots provides a wonderful contrast to rich, savory beef. They are a natural pairing:
- Classic Lipton Meatloaf (they are indeed one of my absolute favorite sides for meatloaf, cutting through its richness beautifully)
- Succulent Air Fryer Roast Beef
- Tender and juicy Eye of Round Roast
- Quick and flavorful Instant Pot Steak
- A hearty classic, Roast Beef with Gravy
Complementing Poultry Creations
Glazed carrots add a touch of sweetness and vibrant color that perfectly complements lighter poultry dishes:
- Healthy and flavorful Turkey Meatloaf
- Traditional and comforting Roast Turkey, especially for festive gatherings
- Perfect alongside a simple Roasted Chicken or Baked Chicken Thighs
- Pair with flavorful Duck Breast for an elegant meal
A Sweet Contrast to Pork Dishes
The sweetness of the glaze is an ideal counterpoint to the savory notes of pork, creating a harmonious balance:
- Effortless Slow Cooker Pork Loin
- Crispy and quick Air Fryer Pork Loin
- A holiday favorite, Easy Crockpot Ham
- Classic and satisfying Roast Pork Loin
- Juicy Easy Baked Pork Chops
- Smoked Pork Shoulder or Ribs for a BBQ-inspired feast
Beyond meats, these glazed carrots are also a fantastic side dish for salmon recipes, offering a delightful sweetness that enhances the rich flavor of fish. Try them with my flaky baked salmon with mayonnaise brushed recipe for a truly memorable meal.
Frequently Asked Questions About Glazed Carrots
Just whizzing through? Here are a few common queries you might have about making and enjoying glazed carrots:
Yes, absolutely! Baby carrots work wonderfully for this recipe and can save you some prep time. However, because they tend to release more moisture than cut whole carrots, they might take a slightly longer to brown initially. For the best caramelization, I recommend patting them very dry with a paper towel before adding them to the hot skillet.
Preventing the glaze from burning is key to a perfect dish. Once you’ve added the butter and sugar, keep the heat moderate (medium-low is ideal for the covered cooking phase). Stir frequently to ensure even coating and to prevent the sugar from sticking and burning to the bottom of the pan. If you notice the glaze becoming too thick or the pan getting too dry, don’t hesitate to add a splash of water (1-2 tablespoons) to loosen it and keep everything moving smoothly.
You certainly can! Glazed carrots are an excellent make-ahead side dish, perfect for busy hosts or meal prep. Cook them fully according to the recipe, then allow them to cool completely. Store them in an airtight container in the refrigerator for up to 4 days. When ready to serve, reheat gently in a covered baking dish in the oven or in a skillet on the stovetop until warmed through. The glaze will become luscious again upon reheating.
Peeling your carrots is generally recommended for the best texture and a more refined appearance, as it removes the tougher outer layer. However, if you’re using very young, tender carrots with thin skins, you can absolutely skip peeling. Just make sure to give them a very good scrub under running water to remove any dirt or impurities before cutting and cooking.
If your glaze is too thin, simply remove the lid from the pan during the last few minutes of cooking and increase the heat slightly. Stir continuously until the excess liquid evaporates and the glaze thickens to your desired consistency. If it’s too thick, add a small splash of water or a tiny pat of butter and stir until it loosens up.
Carrots are packed with vitamins and antioxidants, particularly Vitamin A. While the addition of butter and brown sugar makes them a treat, they are still a vegetable-based dish that can be part of a balanced diet. You can always reduce the amount of sugar or use a natural sweetener like honey or maple syrup for a slightly healthier alternative, or increase the serving size of carrots per person to boost veggie intake.
Other Delicious Vegetable Sides You’ll Love
If you enjoy simple and flavorful vegetable dishes, explore these other fantastic recipes:
- Easy Microwave Baked Potatoes
- Crispy Air Fryer Eggplant
- Instant Pot Sweet Potatoes
- Fried Potatoes (The Crispiest)
- Crisp Yam Fries with Chipotle Aioli
- Green Bean Casserole with Crispy Onions
- Perfectly Roasted Asparagus with Lemon
- Simple Sautéed Green Beans with Garlic
Pin Recipe
Print Recipe
Glazed Carrots (Easy 3-Ingredient Recipe!)
Ingredients
- 1 lb carrots peeled and sliced into 1/4″ thick rounds or cut into sticks
- 1 tbsp olive oil not extra virgin
- 1 tbsp salted butter
- 2 tbsp dark brown sugar or honey or maple syrup
- ½ tsp kosher salt
Optional Add-Ins:
- Pinch of cinnamon
- ⅛ tsp crushed red pepper flakes
- 1-2 tsp minced fresh thyme, parsley or chives
Instructions
-
Preheat a large skillet over high heat for 3-4 minutes. Add oil and heat until shimmering hot (30-60 seconds).
-
Add the carrots and arrange in a single layer as much as possible (as only the parts touching the pan will brown). Cook uncovered, without stirring, until they start to brown, 3-5 minutes. Keep a close eye so they don’t burn.
-
Add the butter, brown sugar and salt (plus cinnamon and/or red pepper flakes, if using). Once the butter has melted, stir well to coat.
-
Reduce heat to medium-low, cover, and cook until tender and glossy, about 8-10 minutes. If the pan gets dry before the carrots are done, add a splash of water.
-
Taste at the end and add a bit more salt if you like. Sprinkle with the fresh herbs, if using.
Notes
For beautiful browning, don’t move the carrots in the pan after adding them. When they first hit the hot oil, it’s their one shot to brown. After that, they start releasing moisture and no more browning will happen.
Wait until after the browning step to add salt, as salt draws moisture out faster.
I do like to rotate the pan around a couple of times on the burner to avoid any hot spots in the pan.
Dark brown sugar will give you the richest color and flavor!
Nutrition Information (per serving)
Carbohydrates: 17g |
Protein: 1g |
Fat: 7g |
Saturated Fat: 2g |
Polyunsaturated Fat: 1g |
Monounsaturated Fat: 3g |
Trans Fat: 0.1g |
Cholesterol: 8mg |
Sodium: 394mg |
Potassium: 373mg |
Fiber: 3g |
Sugar: 11g |
Vitamin A: 19050IU |
Vitamin C: 7mg |
Calcium: 44mg |
Iron: 0.4mg
Nutrition information is automatically calculated and should only be used as an approximation. It is recommended to verify with a registered dietitian or nutritionist for precise dietary needs.
Tried this recipe? Share your thoughts below!Your feedback helps us and other home cooks.