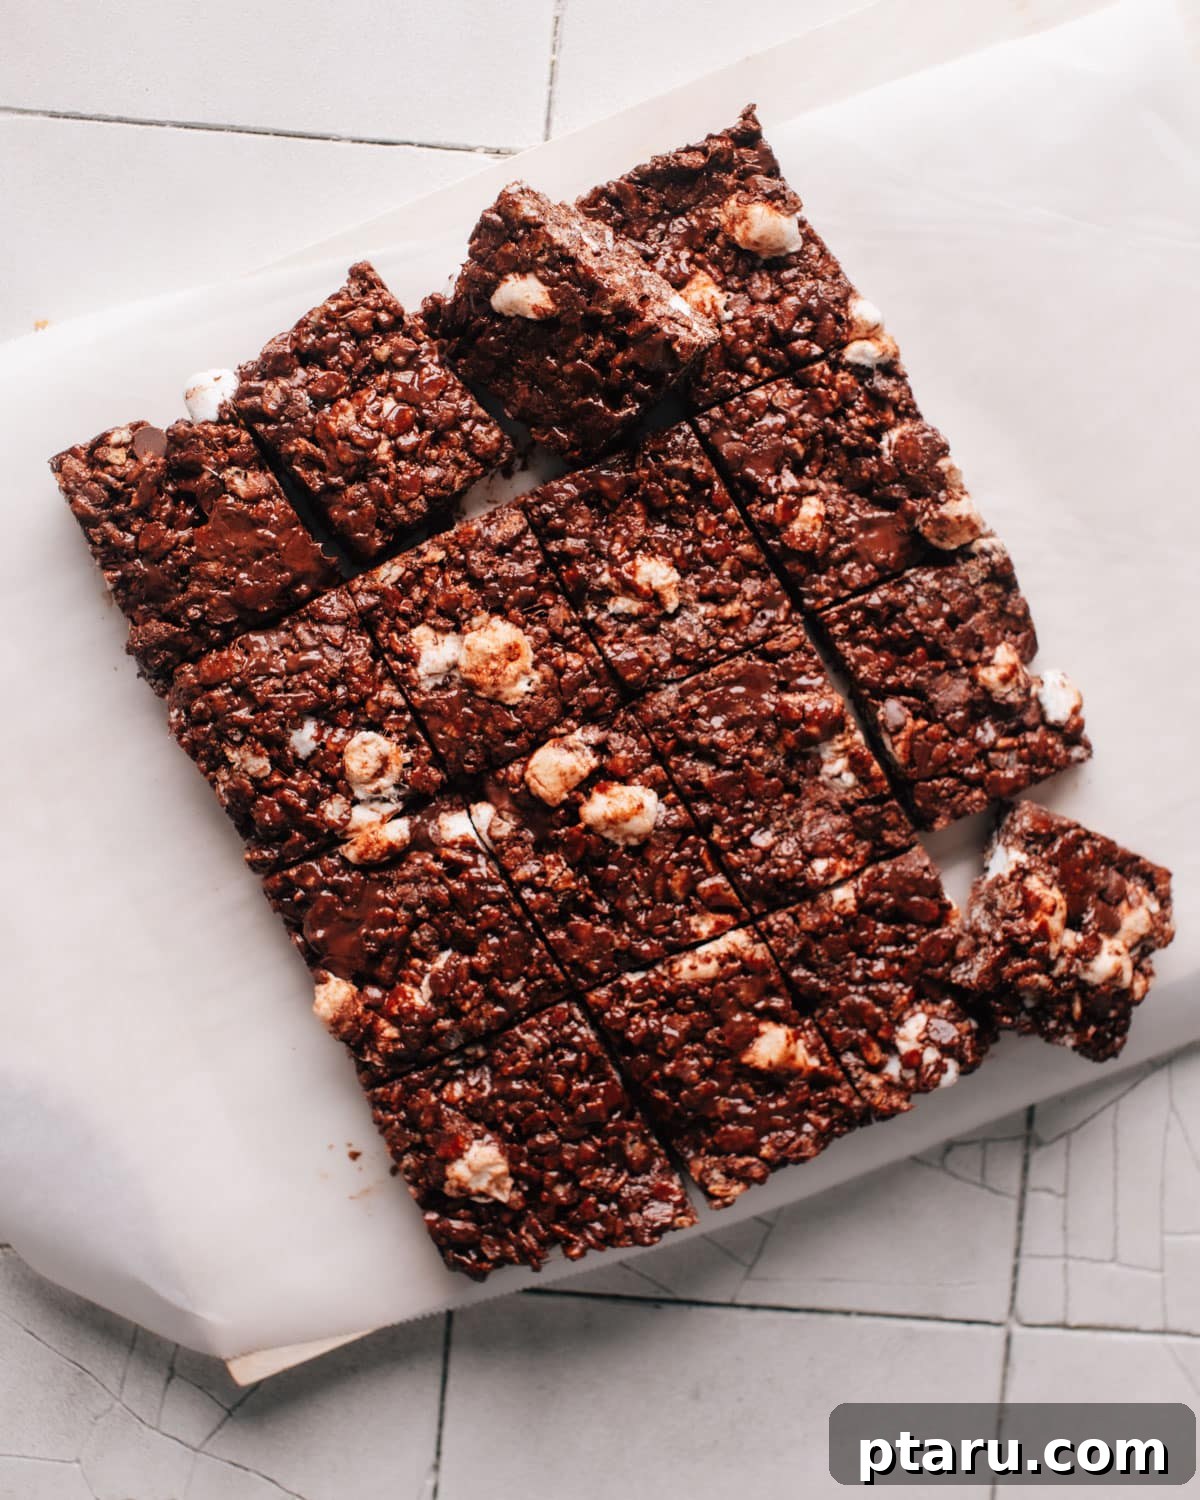
Chocolate Rice Krispie Treats – a timeless classic reborn with an intensely rich, chocolatey twist! Are you on the hunt for a treat recipe that’s not just good, but utterly perfect – one that boasts an exceptional balance of softness, chewiness, and undeniably delicious flavor? Look no further! We’re about to unveil the coveted secrets that will empower you to craft the most ooey-gooey, homemade chocolate Rice Krispie treats you’ve ever tasted. Forget hard, crumbly disappointments; get ready for a nostalgic dessert experience elevated to gourmet heights.
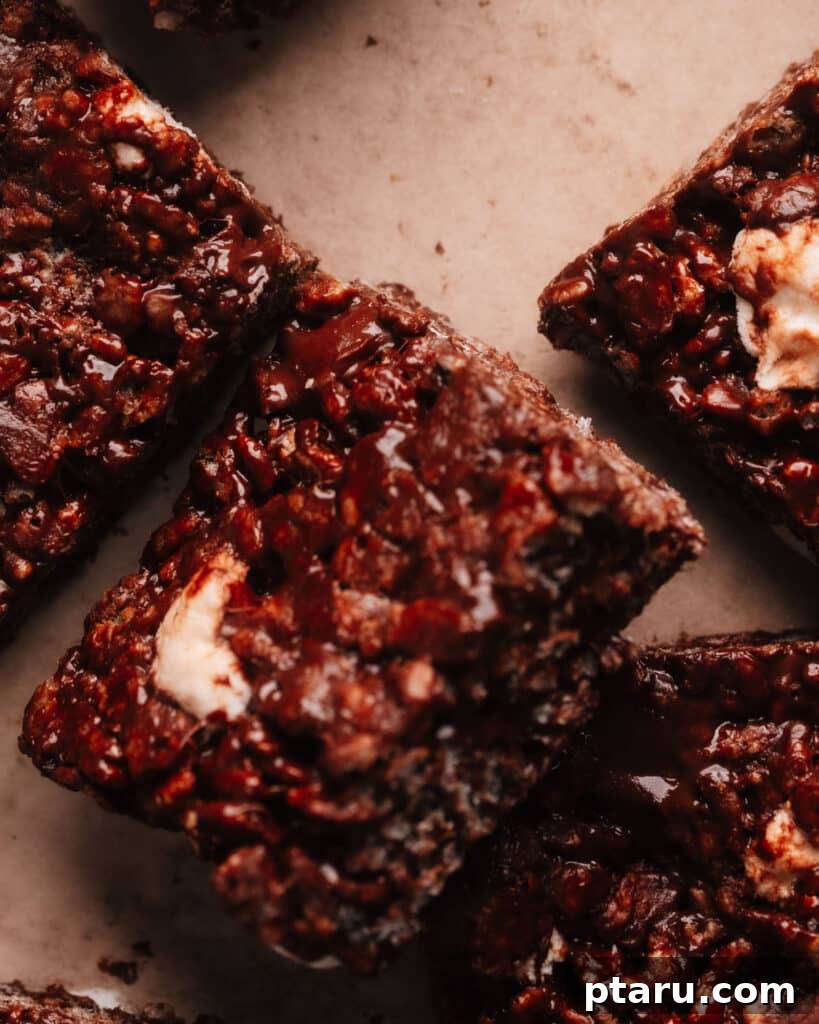
Essential Ingredients for Decadent Chocolate Rice Krispie Treats
Crafting these heavenly chocolate Rice Krispie treats is not only incredibly fun but also surprisingly simple. The magic lies in selecting the right ingredients and understanding their role in achieving that signature gooey, delightful texture. Here’s a breakdown of what you’ll need for the most delicious, nostalgic version of this beloved dessert:
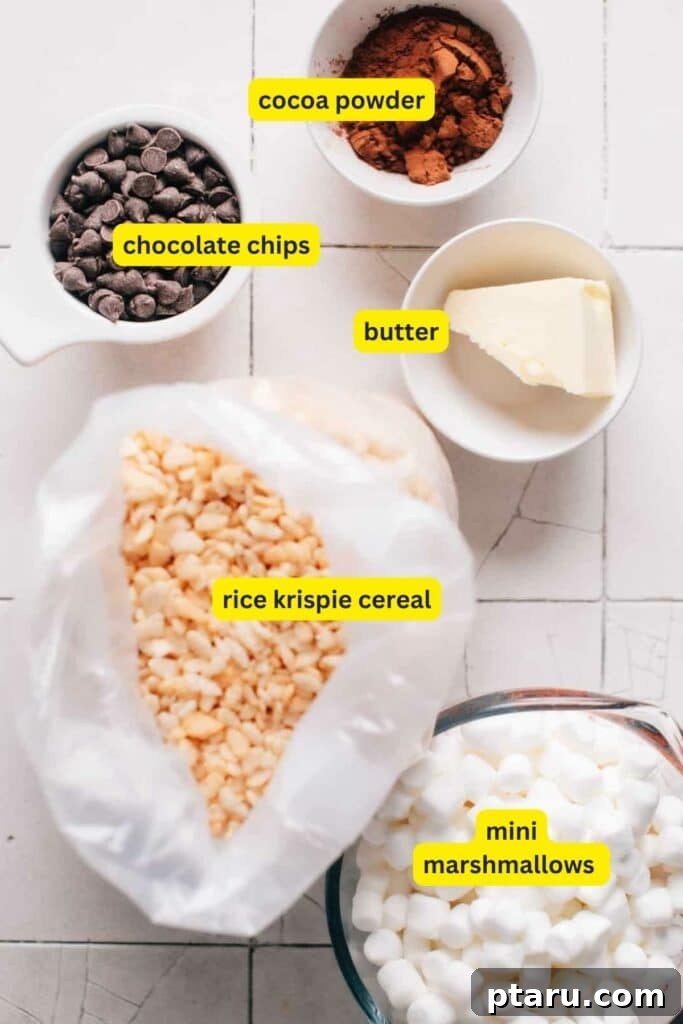
- Butter: This unsung hero is crucial for binding all the ingredients together, preventing stickiness, and imparting a rich, irresistible flavor. Opt for unsalted butter, as it allows you to control the overall saltiness of your treats. High-quality butter truly makes a difference in the final taste and texture.
- Mini Marshmallows: The heart and soul of any Rice Krispie treat! Marshmallows provide the essential sweetness and a wonderfully chewy texture. For an extra dimension of chewiness and visual appeal, briefly freeze a portion of mini marshmallows to stir in at the very end. This ensures delightful pockets of soft marshmallow throughout your finished treats, rather than having them all melt into the base. Always use fresh marshmallows for the best results, as stale ones can lead to hard treats.
- Chocolate Chips (Semi-Sweet or Dark): This is where the chocolate magic happens! Melted chocolate chips introduce a rich, intense chocolate flavor and contribute to a creamy, smooth texture. Like the marshmallows, freezing some chocolate chips to stir in at the end will create small, cool bites of un-melted chocolate, adding another layer of texture and flavor. We highly recommend using a high-quality chocolate for a truly luxurious treat that adults will swoon over. The depth of flavor from premium chocolate is simply unparalleled.
- Unsweetened Cocoa Powder: A secret weapon for an even deeper chocolate experience! This “double dose” of chocolate ensures your treats have an incredibly robust and satisfying cocoa flavor, complementing the sweetness of the marshmallows and chocolate chips without making the treats overly sweet.
- Rice Krispie Cereal: The iconic crisp texture that gives these treats their name! The airy, puffed rice cereal provides a delightful crunch that perfectly breaks up the soft, chewy marshmallow-chocolate mixture. For an even more intense chocolate flavor, you could “triple down” and use cocoa krispies instead of regular rice krispies. Ensure your cereal is fresh to maintain maximum crispness.
Step-by-Step Guide: How to Make the Best Chocolate Rice Krispie Treats
Follow this comprehensive guide to create the most delectable, soft, and chewy chocolatey Rice Krispie treats right in your own kitchen. Precision and a little patience are key to achieving perfection!
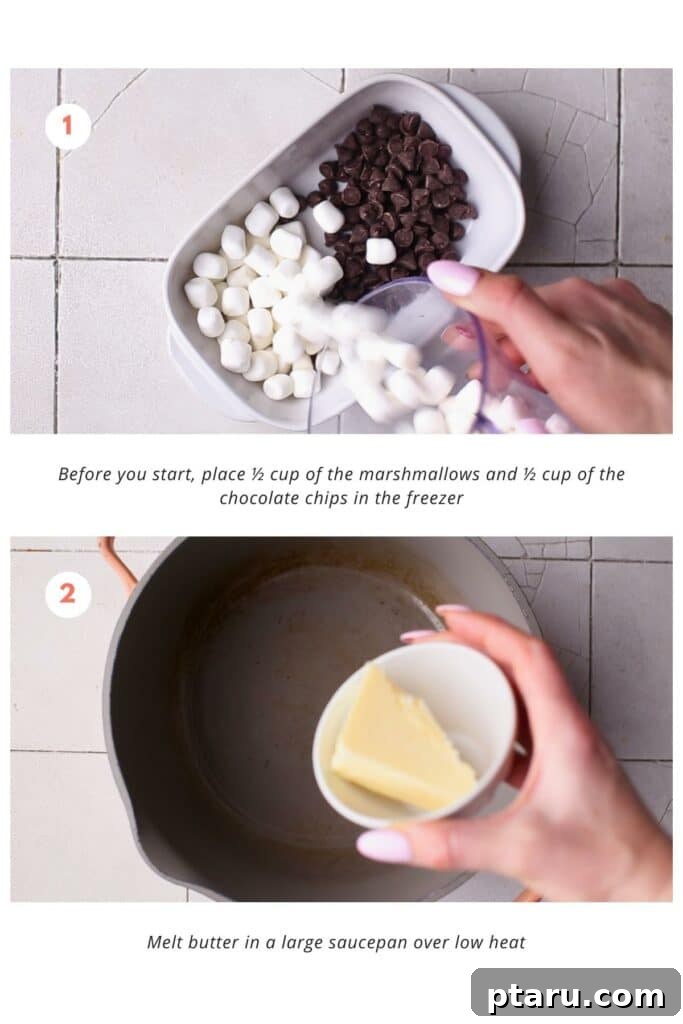
- Preparation is Key (5 minutes): Before you even touch the stove, take a moment for crucial prep work. Measure out ½ cup of mini marshmallows and ½ cup of chocolate chips, and place them in your freezer. This quick chill will help them retain their shape and provide delightful, un-melted pockets in your final treats. Next, prepare an 8-inch square baking pan. Grease it thoroughly with cooking spray or, even better, line it with parchment paper, leaving an overhang on two sides to easily lift out the treats later. This step ensures a clean release and perfectly shaped squares.
- Melt & Mix on the Stovetop (5 minutes): For the classic stovetop method, begin by setting your stove to a very low heat. This is perhaps the most critical secret to ensuring your treats remain wonderfully soft and chewy. High heat will cause the marshmallows to overcook and result in a hard, brittle treat. Place your large pot or saucepan on the low heat and add the butter. Allow it to melt slowly and completely. Once melted, add the remaining mini marshmallows (reserving the frozen ones), the remaining ½ cup of chocolate chips, and the unsweetened cocoa powder. Stir constantly with a heat-resistant spatula until everything is perfectly melted and smoothly combined into one glorious, gooey chocolate mixture. The goal is just melted and combined, not boiling or browning.
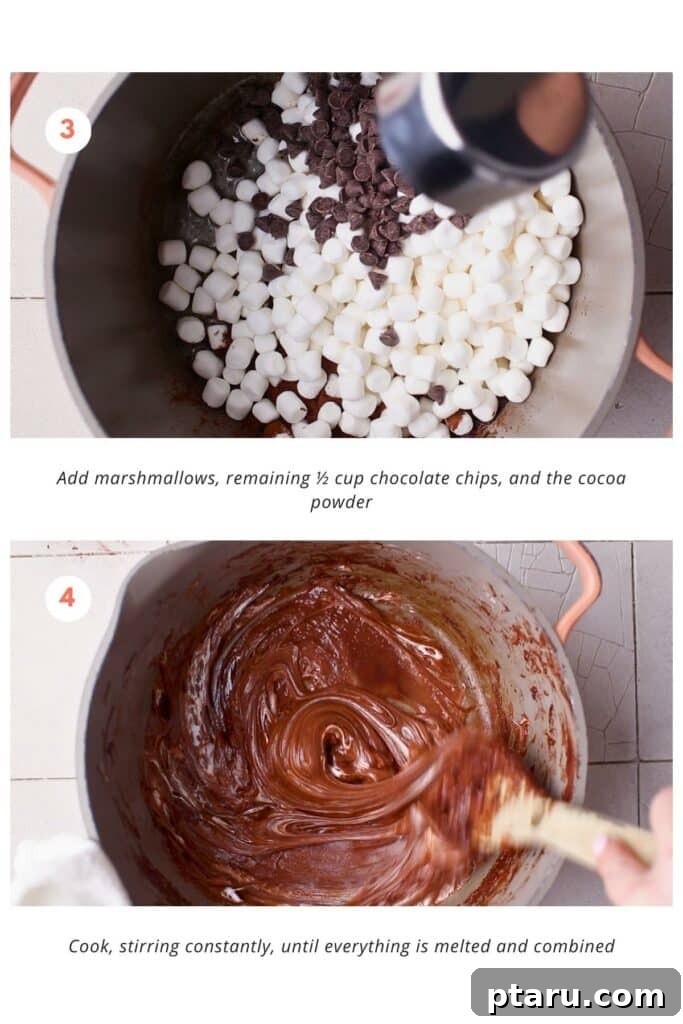
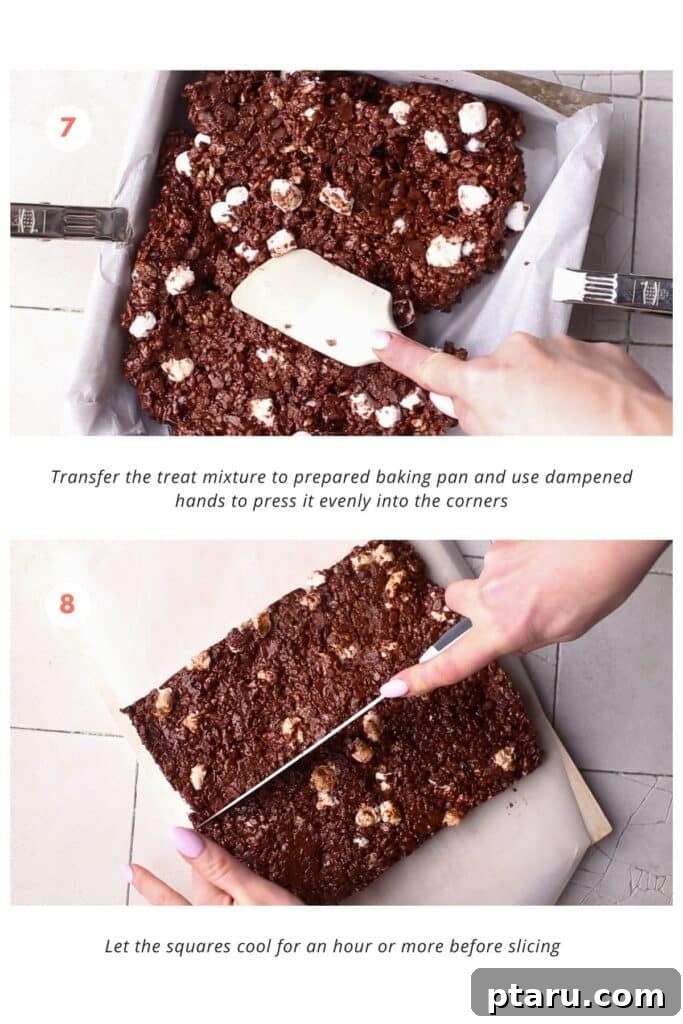
- Incorporate the Cereal and Cold Add-ins: Once your chocolate-marshmallow base is perfectly smooth and gooey, remove the pot from the heat. Add half of the Rice Krispies cereal to the mixture and stir gently but thoroughly, ensuring every piece gets coated in that perfect chocolaty goodness. Then, slowly add the rest of the cereal, a handful at a time, continuing to mix until all the cereal is evenly incorporated. This gradual addition helps prevent clumping and ensures uniform distribution. Finally, and quickly, sprinkle in the cold marshmallows and chocolate chips you set aside from the freezer. Give it one last gentle stir to distribute these delightful pockets throughout the mixture.
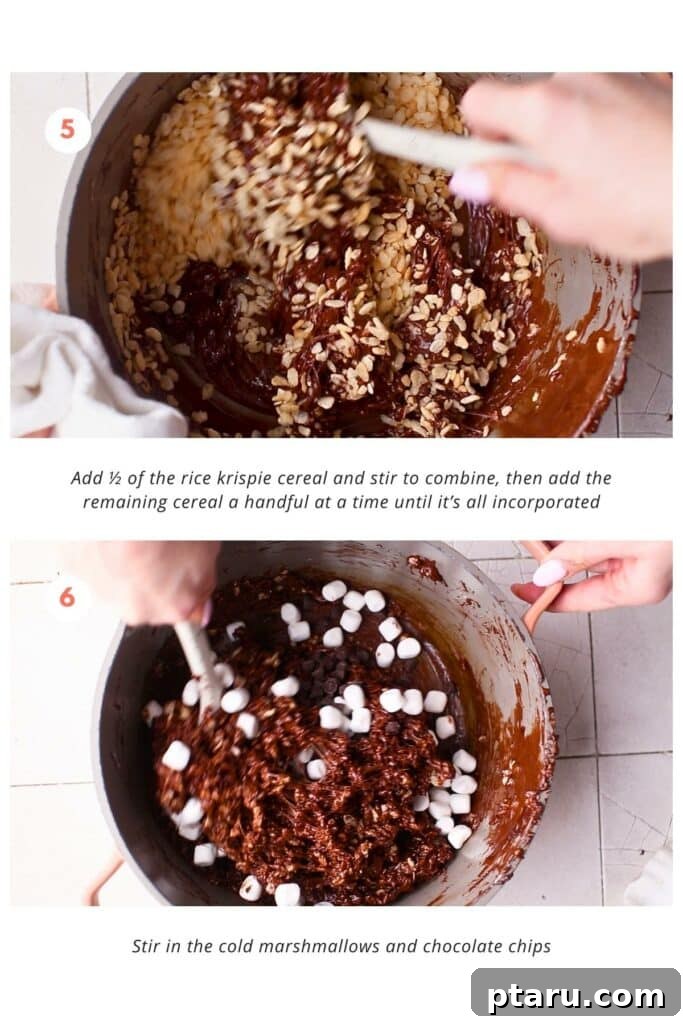
- Press and Cool to Perfection: Quickly transfer your warm, sticky treat mixture into the prepared baking pan. Now, here’s a pro tip for handling the stickiness: lightly dampen your hands with water (or use a greased spatula!). Use your damp hands to gently but firmly press the mixture evenly into all corners of the pan. Avoid over-compressing, as this can lead to harder treats. The goal is to create a cohesive, flat layer. Once pressed, resist the urge to cut immediately. Allow the treats to cool off completely at room temperature for at least an hour, or even longer, until they are firm enough to slice without falling apart. Feeling impatient? You can also pop the pan into the refrigerator for about 10-15 minutes to speed up the cooling process, but be mindful not to over-chill, as refrigeration can sometimes make them too firm initially.
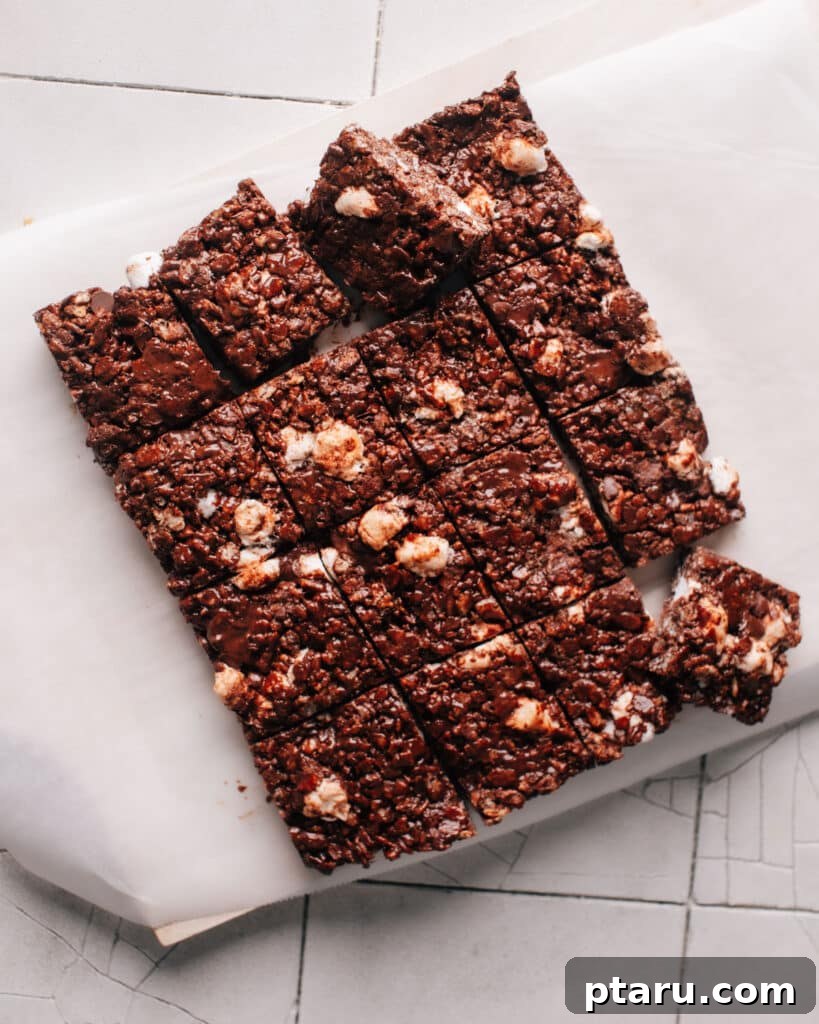
- Slice and Savor: Once thoroughly cooled and set, use the parchment paper overhang to carefully lift the entire slab of chocolate Rice Krispie treats out of the pan and onto a cutting board. With a sharp, lightly greased knife, cut them into your desired squares or bars. Now, stand back and revel in your creation! These homemade chocolate Rice Krispie treats will be 190% more delicious than you ever imagined this childhood favorite could taste. Say hello to pure deliciousness as you enjoy every single yummy, soft, and chewy bite!
4 Secrets for Achieving Perfectly Soft and Chewy Chocolate Rice Krispie Treats
The quest for the perfect classic chocolate Rice Krispie treat often leads to the desire for that ideal soft, chewy, and utterly delicious texture. While the recipe itself is straightforward, a few key techniques can elevate your treats from good to truly exceptional. Lucky for you, we’re revealing the tried-and-true secrets that will help you achieve this chocolatey perfection every single time.
- Always Use Fresh Marshmallows: This might seem obvious, but it’s paramount. Marshmallows that have been sitting open or are past their prime will be dry and hard, and unfortunately, this characteristic will transfer directly to your treats. Fresh marshmallows are pliable, soft, and full of moisture, which is essential for creating that signature gooey texture. If your marshmallows feel stiff, it’s best to grab a fresh bag.
- Never Overcook the Marshmallow Mixture: This is arguably the most crucial secret. Marshmallows are essentially a form of candy. When melted and heated for too long or at too high a temperature, the sugar structure undergoes changes. Moisture evaporates, and the marshmallows transition from a soft, gooey state to a hard, brittle candy state. Once this happens, there’s no going back – your treats will be firm and unyielding. The critical technique is to cook the butter and marshmallows over very low heat and stir constantly. Remove from heat as soon as they are mostly melted and smooth, using the residual heat to finish the melting process with stirring. This gentle approach preserves the moisture and maintains that coveted soft, chewy consistency.
- Be Generous with Your Butter: Don’t skimp on the butter! Its fat content is a secret weapon for moisture and richness. Butter adds a luxurious mouthfeel and contributes significantly to the chewiness of the treats. It helps to lubricate the mixture, preventing it from drying out and ensuring each bite is decadently soft. A little extra butter (within reason, of course) can make a remarkable difference in the overall texture and flavor.
- Master the Art of Proper Storage: How you store your chocolate Rice Krispie treats directly impacts their longevity and texture. To keep them perfectly soft and chewy, always store them in an airtight container at room temperature. Refrigeration, while seemingly helpful, actually causes the crispy rice cereal to stale much faster and can make the treats hard and dry. The cool, dry air of a fridge draws out moisture and affects the cereal’s texture. An airtight container prevents air exposure, which is the enemy of freshness, helping your treats maintain their ideal softness for days.
Storage Solutions: Do I Need To Refrigerate My Chocolate Rice Krispie Treats?
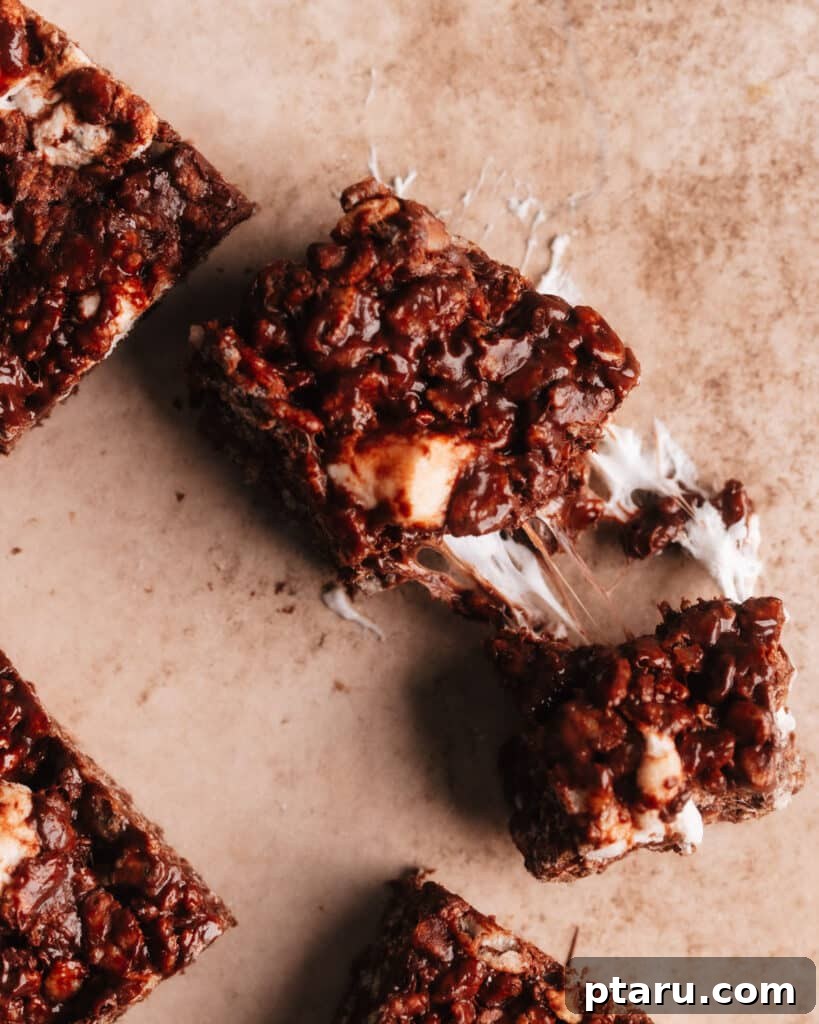
This is a common question, and the answer might surprise you: you absolutely do not need to refrigerate chocolate Rice Krispie treats. In fact, for optimal texture and freshness, you really shouldn’t! The cold, dry environment of a refrigerator causes the crispy rice cereal to stale significantly faster than storing them at room temperature. This is a crucial tip for anyone aiming for that consistently soft and chewy perfection.
When stored properly in an airtight container at room temperature, your delicious chocolate Rice Krispie treats will maintain their soft and chewy texture for up to 3-4 days. Beyond this timeframe, they will naturally start to lose some of their crispness and become a bit harder.
If you’re looking to extend their shelf life considerably, then freezing is your best option. Store them in an airtight container or freezer-safe bag, well-wrapped to prevent freezer burn, for up to 3 months. When you’re ready to enjoy them, simply take them out of the freezer and let them come back to room temperature before serving. This gradual thawing ensures they regain their delightful soft and chewy consistency.
How Do I Keep My Rice Krispie Treats Soft Overnight (and Beyond)?
The ultimate goal for any Rice Krispie treat enthusiast is that lasting softness. The key to keeping your treats delightfully soft overnight, or for several days, is all about moisture retention. Firstly, ensure you’ve applied the “4 Secrets” mentioned earlier, particularly the tips on using fresh marshmallows, avoiding overcooking, and being generous with butter, as these lay the foundation for a soft treat from the start.
Once your treats are made with all the pro tips in mind, preventing them from drying out is paramount. If you’re planning on storing them overnight (or even longer), the most effective method is to wrap them tightly. Use plastic wrap, aluminum foil, or a combination of both to create a barrier that prevents any air from getting in. Air exposure is the primary culprit behind stale, hard treats, as it draws out the moisture content.
For even better protection, place the tightly wrapped treats inside an airtight container. This double layer of protection ensures maximum freshness. Stored this way on your kitchen counter at room temperature, your delicious chocolate Rice Krispie treats should remain beautifully soft and chewy for up to 4 days. Remember, as discussed, avoid the refrigerator, as its cool, dry air will accelerate staling. Of course, that assumes you can actually manage to make them last for that long – good luck resisting these irresistible bites!
Quick and Easy: How To Make Chocolate Rice Krispie Treats in the Microwave
If you’re short on time or prefer a no-stove method, making chocolate Rice Krispie treats in the microwave is incredibly simple and quick! This method is perfect for whipping up a batch of these delicious treats in a flash.
First, prepare your baking pan as described in the stovetop method: line an 8-inch square pan with parchment paper or grease it well. Then, in a large, microwave-safe bowl, combine your butter and the main portion of mini marshmallows. Microwave on high power in short bursts, typically 30-second intervals. After each interval, pause and stir the mixture. Continue this process until the marshmallows are about 85% melted. It’s crucial to stir to finish the melting process outside of the microwave, using the residual heat, to ensure you don’t overcook the marshmallow mixture, which would lead to hard treats.
Once your butter and marshmallows are smoothly melted and combined, quickly stir in the unsweetened cocoa powder and the main portion of chocolate chips until everything is blended into a rich, uniform chocolate base. Finally, add your Rice Krispie cereal. Fold it in carefully, making sure every piece is evenly coated with the chocolate-marshmallow goodness. Don’t forget to incorporate the reserved frozen marshmallows and chocolate chips for added texture!
Press the mixture into your prepared baking dish using damp hands or a greased spatula, and let it cool completely at room temperature before cutting into squares. This microwave method makes whipping up a batch of these chocolatey delights easier than ever!
FAQs: Frequently Asked Questions About Chocolate Rice Krispie Treats
Absolutely! Chocolate Rice Krispie treats are an excellent make-ahead dessert. Preparing them the night before allows them ample time to cool and set, making them easier to cut and perfect for serving. Just ensure you store them properly in an airtight container at room temperature. As detailed above, avoid refrigerating them, as this can lead to harder, staler treats. Stored correctly, they will remain deliciously soft and chewy for 3-4 days, ready whenever you are.
For optimal freshness and texture, chocolate Rice Krispie treats should be consumed within 3-4 days when stored in an airtight container at room temperature. After this period, they may start to lose their signature crispness and become less soft. As a reminder, refrigerating them will only cause the cereal to stale faster and the treats to harden, so stick to room temperature storage for the best results. For longer storage, freezing is an excellent option.
Yes, absolutely! Freezing chocolate Rice Krispie treats is a fantastic way to extend their shelf life. To freeze them effectively, ensure they are completely cooled, then wrap individual treats tightly in plastic wrap or aluminum foil before placing them in an airtight, freezer-safe container or bag. This method helps prevent freezer burn and preserves their quality. They can be frozen for up to 3 months. For the best soft and chewy experience, allow them to thaw completely at room temperature for a few hours before serving.
Several common pitfalls can lead to less-than-perfect Rice Krispie treats. The two most frequent mistakes are:
1. Using stale marshmallows: If your bag of marshmallows has been left open, they’ve likely lost their crucial softness and moisture, resulting in hard, unyielding treats. Always use fresh, pliable marshmallows for that signature gooey texture.
2. Overcooking the marshmallow mixture: As mentioned, marshmallows are a form of candy. Excessive heat or prolonged cooking will cause them to transition from a soft, gooey state to a hard, brittle candy. Once overcooked, it’s impossible to recover that soft, chewy consistency. Always cook over very low heat and remove from the stove as soon as they are just melted and combined, stirring to finish.
Traditional Rice Krispies cereal typically contains malt syrup, which is derived from barley and therefore contains gluten. This means that standard Rice Krispie treats are generally not gluten-free. However, many brands now offer gluten-free rice cereals specifically made without malt syrup. To ensure your delicious chocolate treats are suitable for a gluten-free diet, always read the ingredient labels carefully to find a certified gluten-free rice cereal. Most other ingredients like butter, marshmallows, chocolate chips, and cocoa powder are naturally gluten-free, but always double-check labels for hidden gluten ingredients or cross-contamination warnings.
Absolutely! These chocolate Rice Krispie treats are incredibly versatile. Feel free to experiment with various mix-ins to customize them to your liking. Popular additions include chopped nuts (like pecans or walnuts), mini M&M’s, crushed cookies, pretzels for a salty crunch, or even a swirl of peanut butter or caramel. Add any extra mix-ins along with the cold marshmallows and chocolate chips at the end to ensure they don’t melt completely into the mixture. A sprinkle of flaky sea salt on top before they set can also beautifully enhance the chocolate flavor and cater to more sophisticated palates!
If you adore this rich chocolate Rice Krispie treats recipe, you certainly won’t want to miss out on our heavenly Salted Caramel Peanut Butter Rice Krispie Treats! These exquisite squares offer a delightful balance of classic marshmallow sweetness with a nutty peanut butter punch, a hint of sophisticated salted caramel, and bittersweet chocolate – truly an elevated take on a childhood favorite.
Chocolate Rice Krispie Treats
The Foodess Team
5 minutes
5 minutes
16
Video
No video available in static HTML. Please refer to the original source for a video tutorial.
Ingredients
- ¼ cup butter
- 5 ½ cups mini marshmallows (divided use)
- 1 cup semi-sweet chocolate chips (divided use)
- ¼ cup unsweetened cocoa powder
- 4 ½ cups rice krispie cereal
Instructions
-
Before you start, place ½ cup of the marshmallows and ½ cup of the chocolate chips in the freezer.
-
Line an 8-inch square baking pan with parchment paper or greased foil.
-
Melt butter in a large saucepan over low heat. Add marshmallows, remaining ½ cup chocolate chips, and the cocoa powder. Cook, stirring constantly, until everything is melted and combined.
-
Add ½ of the rice krispie cereal and stir to combine, then add the remaining cereal a handful at a time until it’s all incorporated. Stir in the cold marshmallows and chocolate chips.
-
Transfer the treat mixture to prepared baking pan and use dampened hands to press it evenly into the corners.
-
Let the squares cool for an hour or more before slicing.
Notes
Heat must be kept on low during the melting process. Using high heat will inevitably overcook the marshmallows, making your treats hard and brittle instead of wonderfully soft and gooey.
A little water on your hands makes it much easier to handle the sticky mixture when pressing it into the pan, preventing it from sticking to your fingers.
For an even more delicious treat, consider adding other mix-ins like chopped candy bars, different types of chocolate chips (like milk or white chocolate), or nuts for extra flavor and texture. For an adult-friendly twist, sprinkle them with flaky sea salt at the end to truly delight sophisticated tastebuds. Enjoy your irresistible chocolatey creation!
Nutrition
Per Serving (based on 16 servings):
- Calories: 181 kcal
- Carbohydrates: 28g
- Protein: 2g
- Fat: 8g
- Saturated Fat: 5g
- Polyunsaturated Fat: 0.3g
- Monounsaturated Fat: 2g
- Trans Fat: 0.1g
- Cholesterol: 8mg
- Sodium: 81mg
- Potassium: 97mg
- Fiber: 1g
- Sugar: 15g
- Vitamin A: 627 IU
- Vitamin C: 5mg
- Calcium: 11mg
- Iron: 3mg
Nutrition information is automatically calculated, so should only be used as an approximation. Actual values may vary based on specific ingredients and preparation methods.
Tried this recipe? Share your experience!
We’d love to hear how your Chocolate Rice Krispie Treats turned out. Leave a comment below!