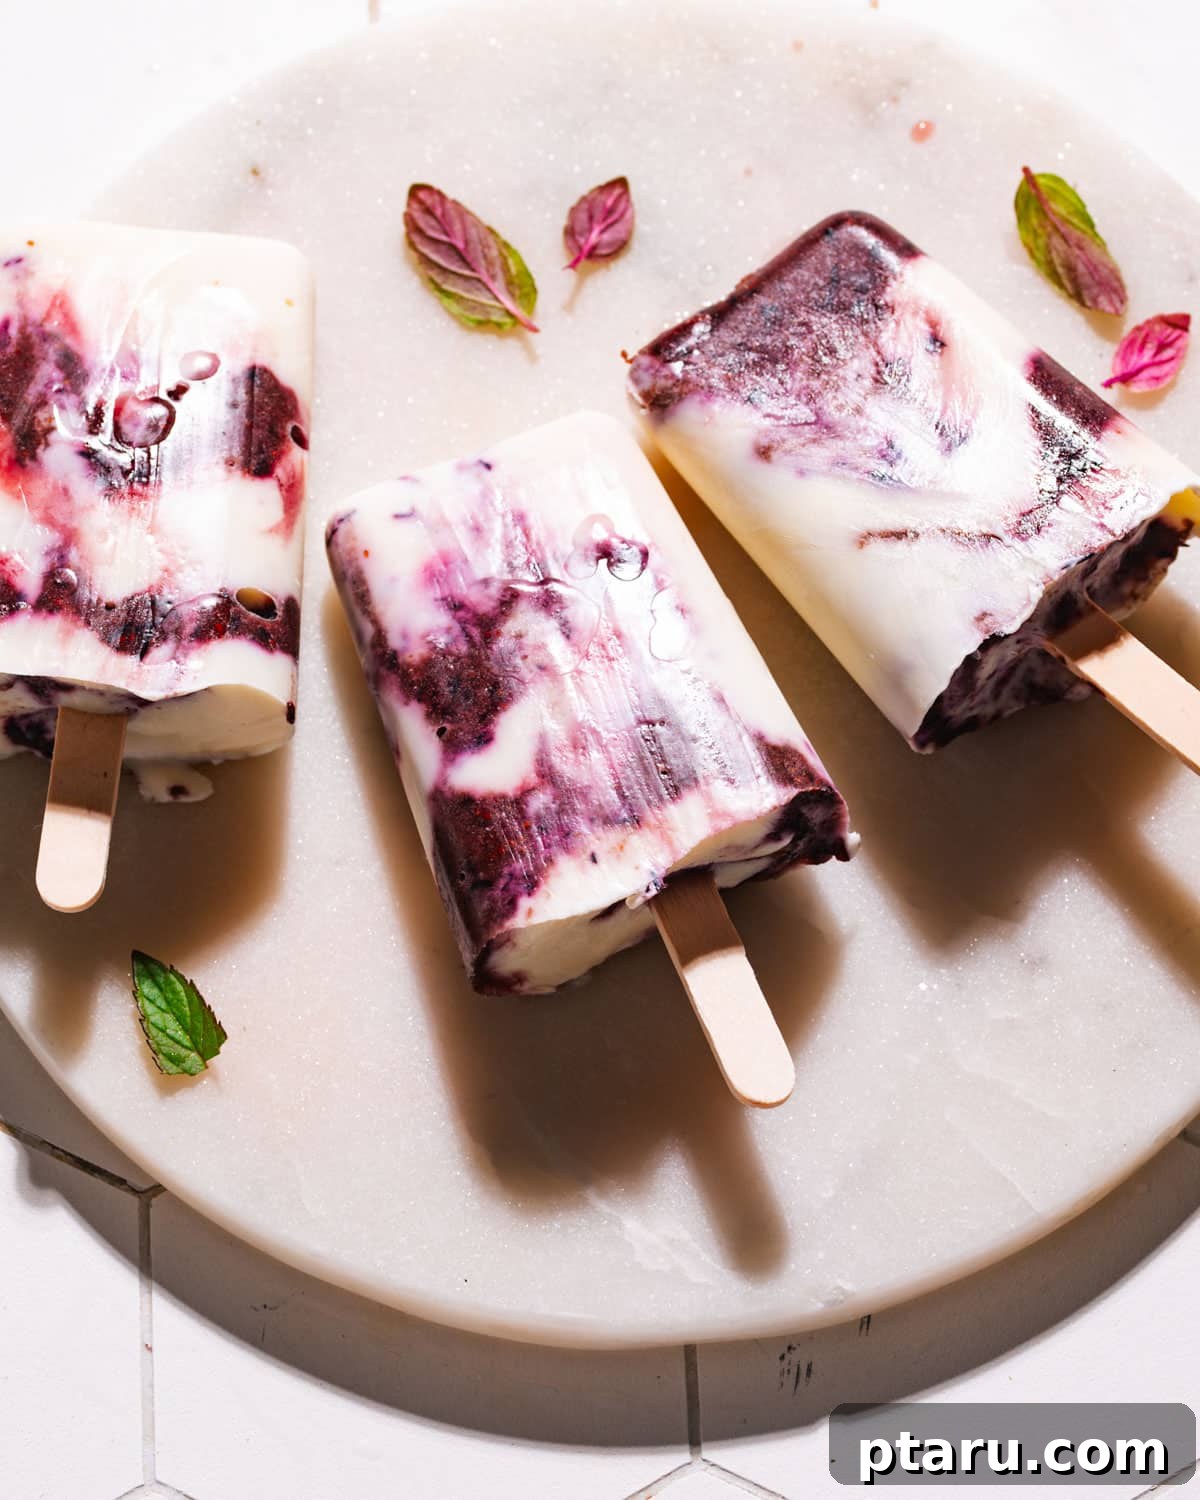
Prepare to fall in love with these incredibly creamy, refreshingly sweet, and delightfully simple yogurt popsicles! Crafted with just three core ingredients and requiring minimal effort, these frozen treats are destined to become your go-to snack all summer long. Imagine pulling a vibrant, icy delight from your freezer on a scorching day – pure bliss, right?
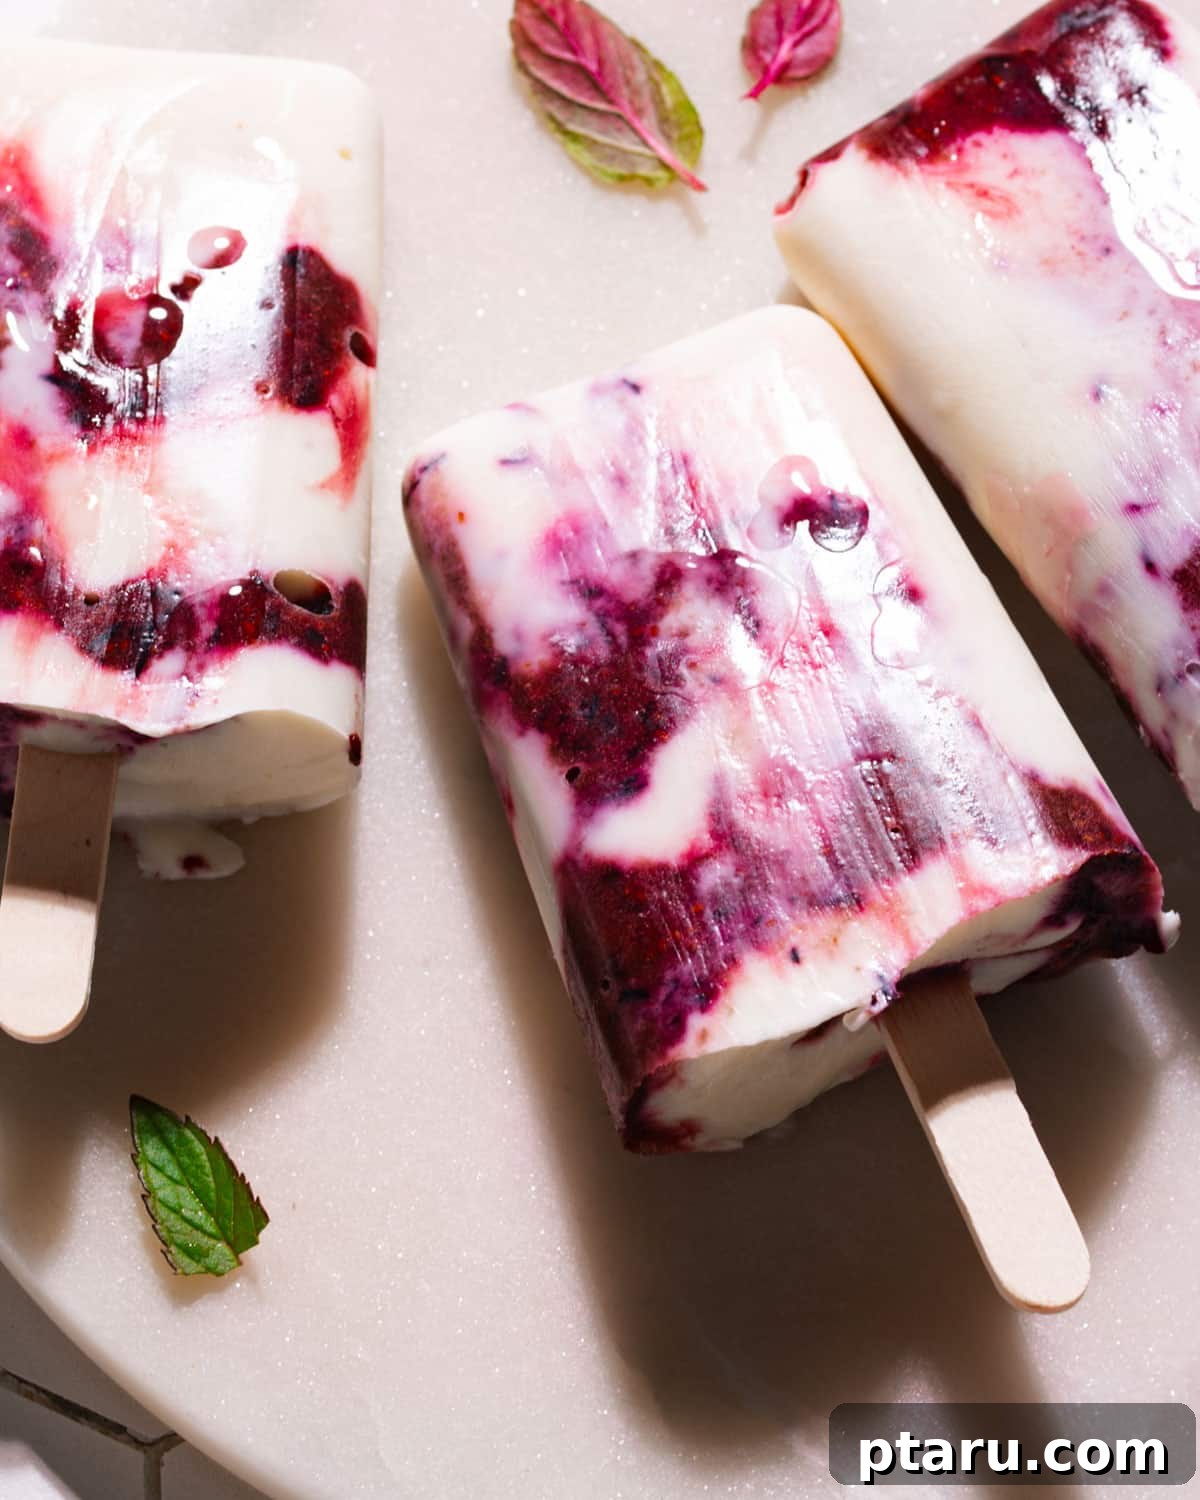
In mere minutes of prep time, you’ll be on your way to a batch of dreamy berry and silky frozen yogurt pops. Forget complicated recipes; this guide will show you how to achieve the yummiest results with absolute ease. Let’s dive into making these irresistible, healthy summer sensations!
Why You’ll Absolutely Love These Yogurt Popsicles
These homemade yogurt popsicles aren’t just a treat; they’re a revelation. Here’s why this recipe should be at the very top of your summer culinary adventure list:
- Unbeatable Simplicity: Only 3 Ingredients! All you truly need are quality Greek yogurt, your favorite fresh berries, and a touch of honey or maple syrup. That’s it! This minimal ingredient list means less shopping, less fuss, and more time enjoying your delicious creation. It’s the ultimate easy dessert recipe.
- Perfectly Kid-Friendly Fun: Making these popsicles is a fantastic activity to share with your children. They’ll love helping, and even more, they’ll love devouring their personalized, healthy summer snack. These berry yogurt pops also serve as a wonderful, nutritious alternative to traditional ice cream, packing in protein and fruit without excessive added sugars.
- Effortless Make-Ahead Convenience: Save yourself time and stress! Whip up a big batch of these frozen yogurt pops ahead of time and keep them stashed in the freezer. They’ll be ready to grab and enjoy whenever a craving strikes, making them perfect for busy weekdays or impromptu backyard gatherings.
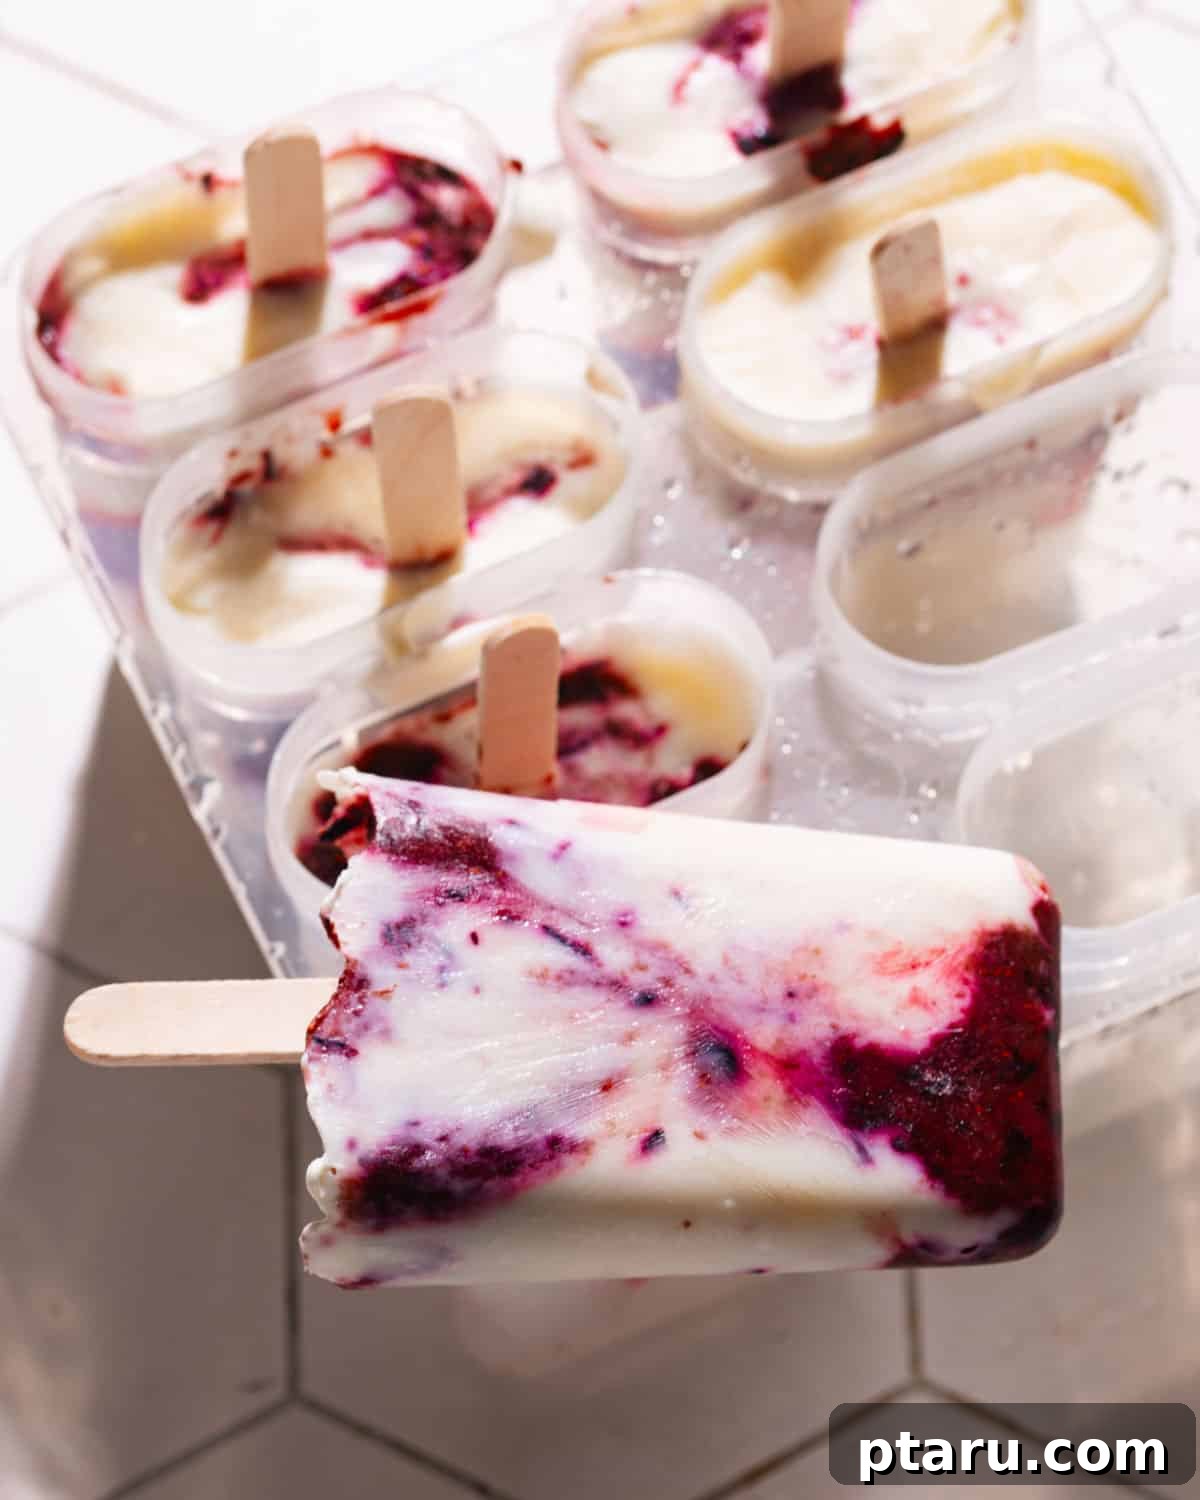
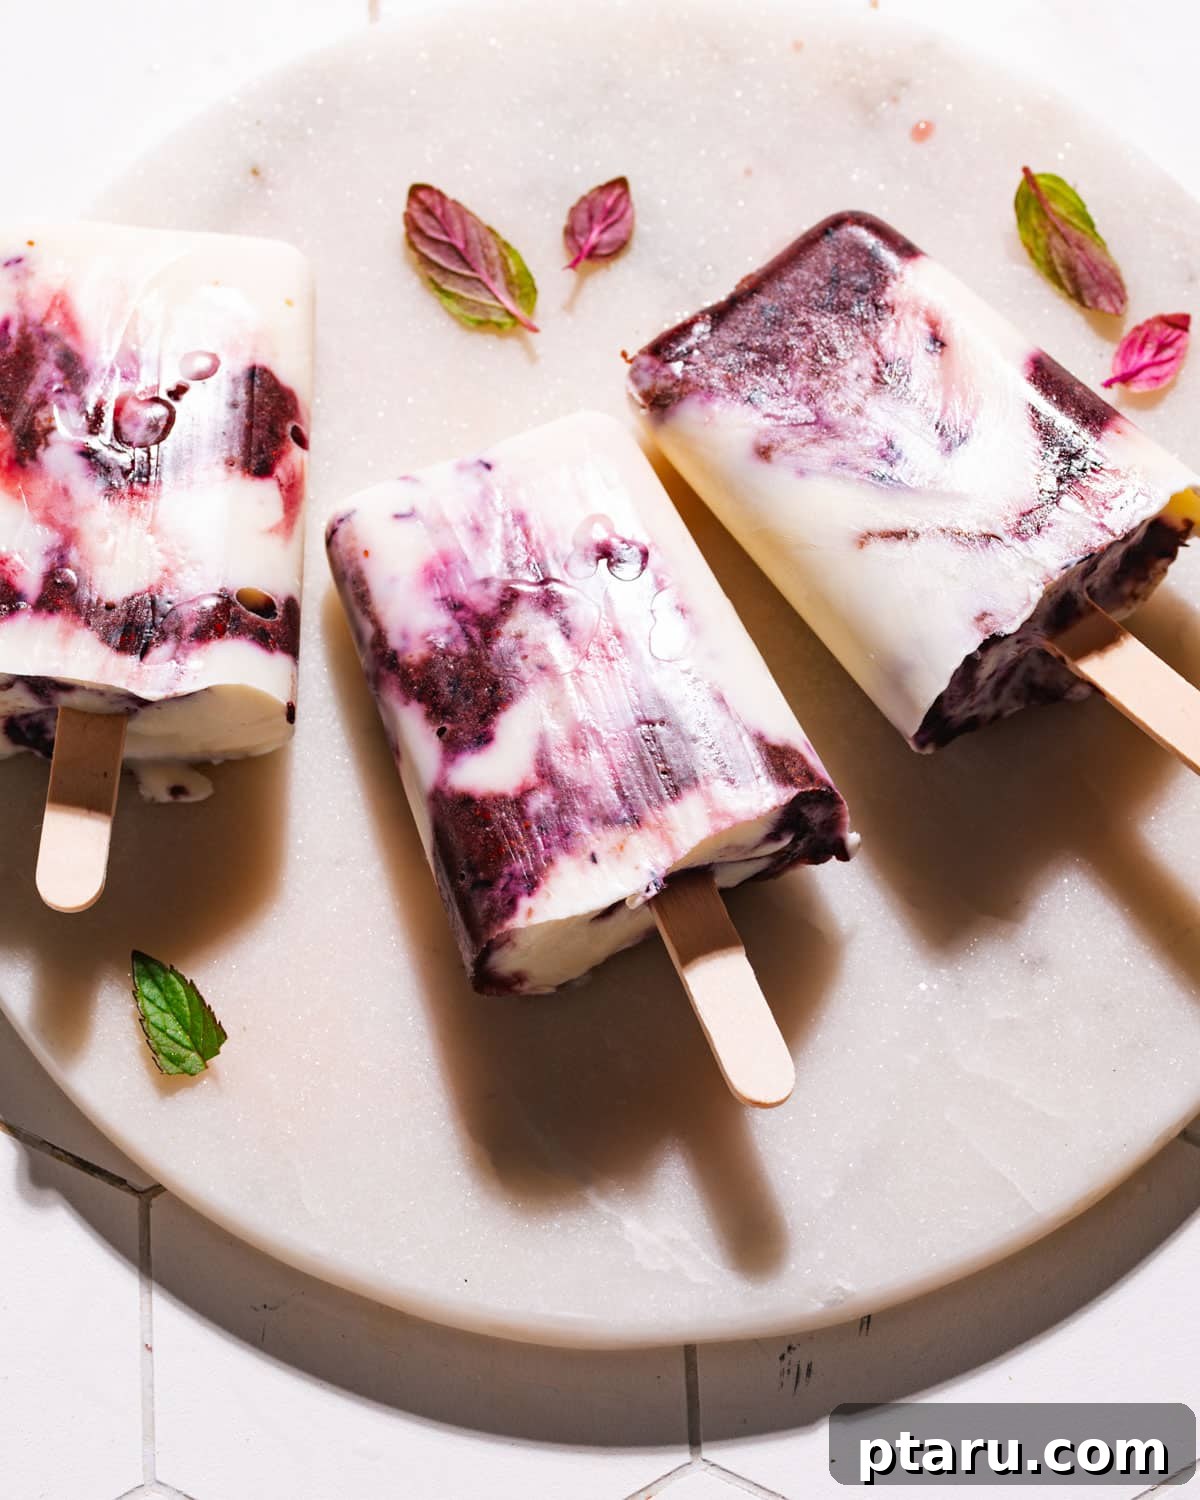
- Visually Stunning & Instagram-Worthy: Beyond their incredible taste, these popsicles are simply beautiful. The vibrant swirls of berry puree against the creamy yogurt create an artful marbled effect. Serve them in a large bowl surrounded by ice and fresh berries for a truly impressive and super cute presentation that will wow your guests.
- A Naturally Healthy Indulgence: Unlike many store-bought frozen treats loaded with artificial flavors and sugars, these homemade yogurt pops are packed with beneficial probiotics from the yogurt and essential vitamins and antioxidants from the fresh fruit. They’re a guilt-free pleasure you can feel good about enjoying daily.
- Infinitely Customizable Flavors: While the basic recipe is stellar, these popsicles are a blank canvas for your creativity. Experiment with different fruits, sweeteners, and delicious add-ins to discover your perfect flavor combination.
Essential Ingredients and Tools for Your Homemade Popsicles
Crafting these delightful frozen yogurt popsicles is incredibly straightforward, thanks to their minimal ingredient list and basic equipment requirements. Here’s a closer look at what you’ll need to get started:
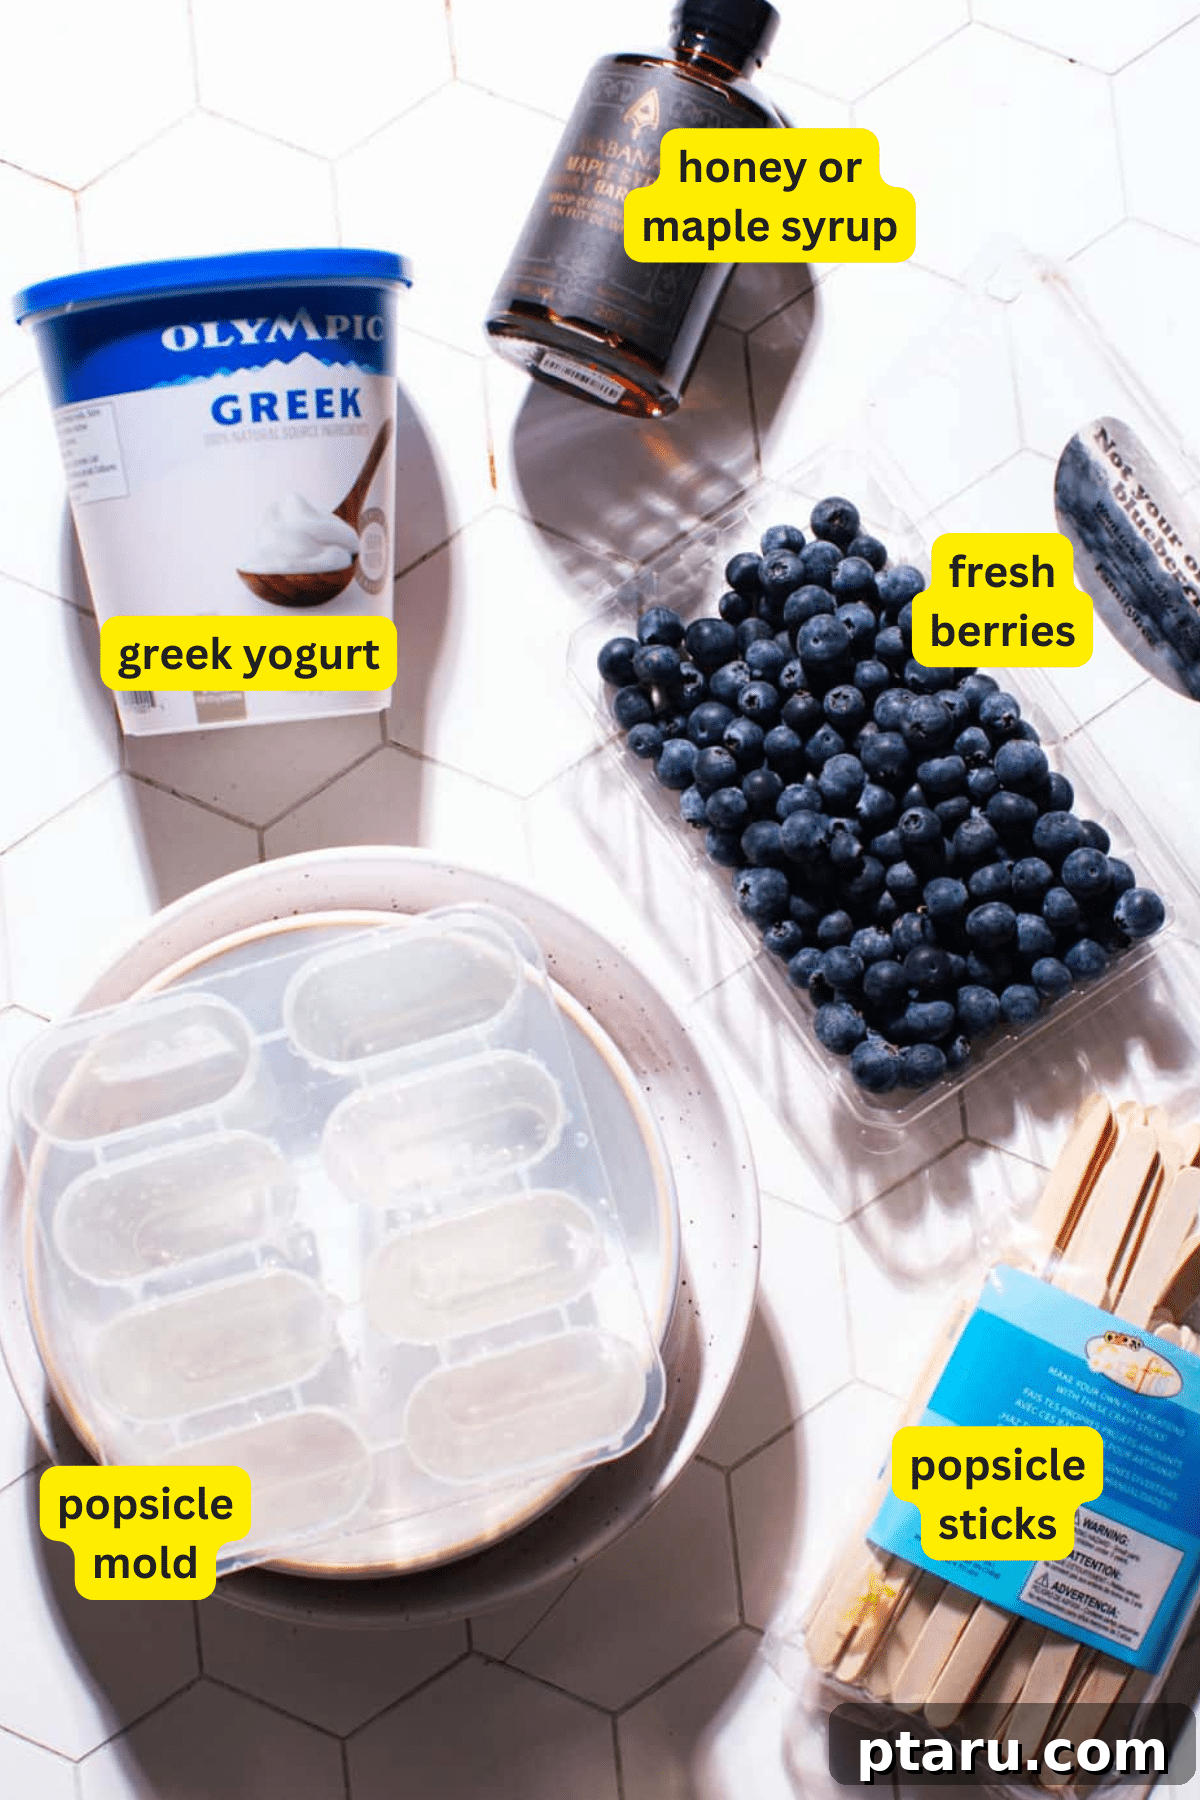
Key Ingredients for Creamy Perfection
These are the three foundational ingredients that make your frozen yogurt popsicles so wonderfully creamy and flavorful:
- Plain Greek Yogurt: This is the star of the show, providing a rich, thick, and tangy base that gives the popsicles their luxurious creaminess. For the absolute best results, opt for a thick, full-fat Greek yogurt (3.5% or higher). Its higher fat content prevents excessive ice crystal formation, resulting in a smoother, dreamier texture. Plain yogurt allows you full control over the sweetness and flavor profile.
- Honey or Maple Syrup: These natural sweeteners are perfect for balancing the tang of the Greek yogurt and enhancing the fruit’s sweetness. Both offer unique flavor notes: honey provides a floral richness, while maple syrup delivers an earthy, caramel-like undertone. Feel free to choose your favorite, or even use a combination, to sweeten your popsicle mix to perfection.
- Fresh Berries: The vibrant heart of your popsicles! Seasonal berries are highly recommended for their peak flavor and nutritional value. Strawberries, blueberries, raspberries, and blackberries are all fantastic choices, either individually or as a delightful mixture. Their natural sweetness and slight tartness create a beautiful contrast with the creamy yogurt.
Substitutions and Creative Variations
One of the best aspects of this yogurt popsicle recipe is its versatility. Feel free to get creative and customize your pops to suit your dietary needs or flavor preferences:
- Dairy-Free Delights: For a delicious dairy-free version, simply substitute the plain Greek yogurt with your favorite plant-based yogurt. Almond, coconut, or soy yogurts work wonderfully. Just ensure they are plain and unsweetened to maintain control over the final flavor and sweetness of your popsicles.
- Alternative Sweeteners: If honey or maple syrup aren’t your preference, consider using agave nectar. This plant-based sweetener offers a neutral, mild flavor, making it an excellent swap. You can also experiment with other natural sweeteners like stevia or monk fruit extract, adjusting amounts to taste.
- Embrace Frozen Berries: Don’t have fresh berries on hand? No problem! Frozen strawberries, blueberries, raspberries, or blackberries are perfectly acceptable. For the best texture, allow them to thaw slightly and drain any excess liquid before pureeing them for your Greek yogurt popsicles.
- Explore Other Fruits: The possibilities are endless when it comes to fruit! Substitute berries with other fresh fruits like ripe mango, sweet peaches, tangy kiwi, or tropical pineapple for a different flavor profile. Just make sure the fruit is ripe and naturally sweet.
- Exciting Add-ins: Elevate your popsicles with extra ingredients. Try blending in a ripe banana for added creaminess, a splash of vanilla extract for warmth, a squeeze of fresh lemon juice for brightness, or a few fresh mint leaves for a refreshing twist. For a touch of indulgence, consider mini chocolate chips or a sprinkle of finely chopped nuts (for those without allergies).
Simple Tools You’ll Need
Gathering the right tools will make the popsicle-making process even smoother:
- A Blender or Food Processor: Essential for achieving a smooth, vibrant berry puree. A small personal blender, an immersion hand blender used directly in a measuring cup, or a standard food processor will all work effectively to blend the berries with your chosen sweetener.
- Popsicle Molds: These are key for shaping your frozen treats. Silicone molds are popular for their flexibility, making unmolding a breeze, while traditional plastic molds are also very effective. You can find molds in various shapes and sizes to suit your preference.
- Popsicle Sticks: Standard wooden popsicle sticks are readily available, or you can opt for reusable plastic sticks that often come with molds.
How to Craft Your Perfect Yogurt Popsicles: A Step-by-Step Guide
Ready to create these incredibly silky and delicious yogurt popsicles? Follow these simple steps for a flawless result:
Step 1: Prepare Your Vibrant Fruit Puree
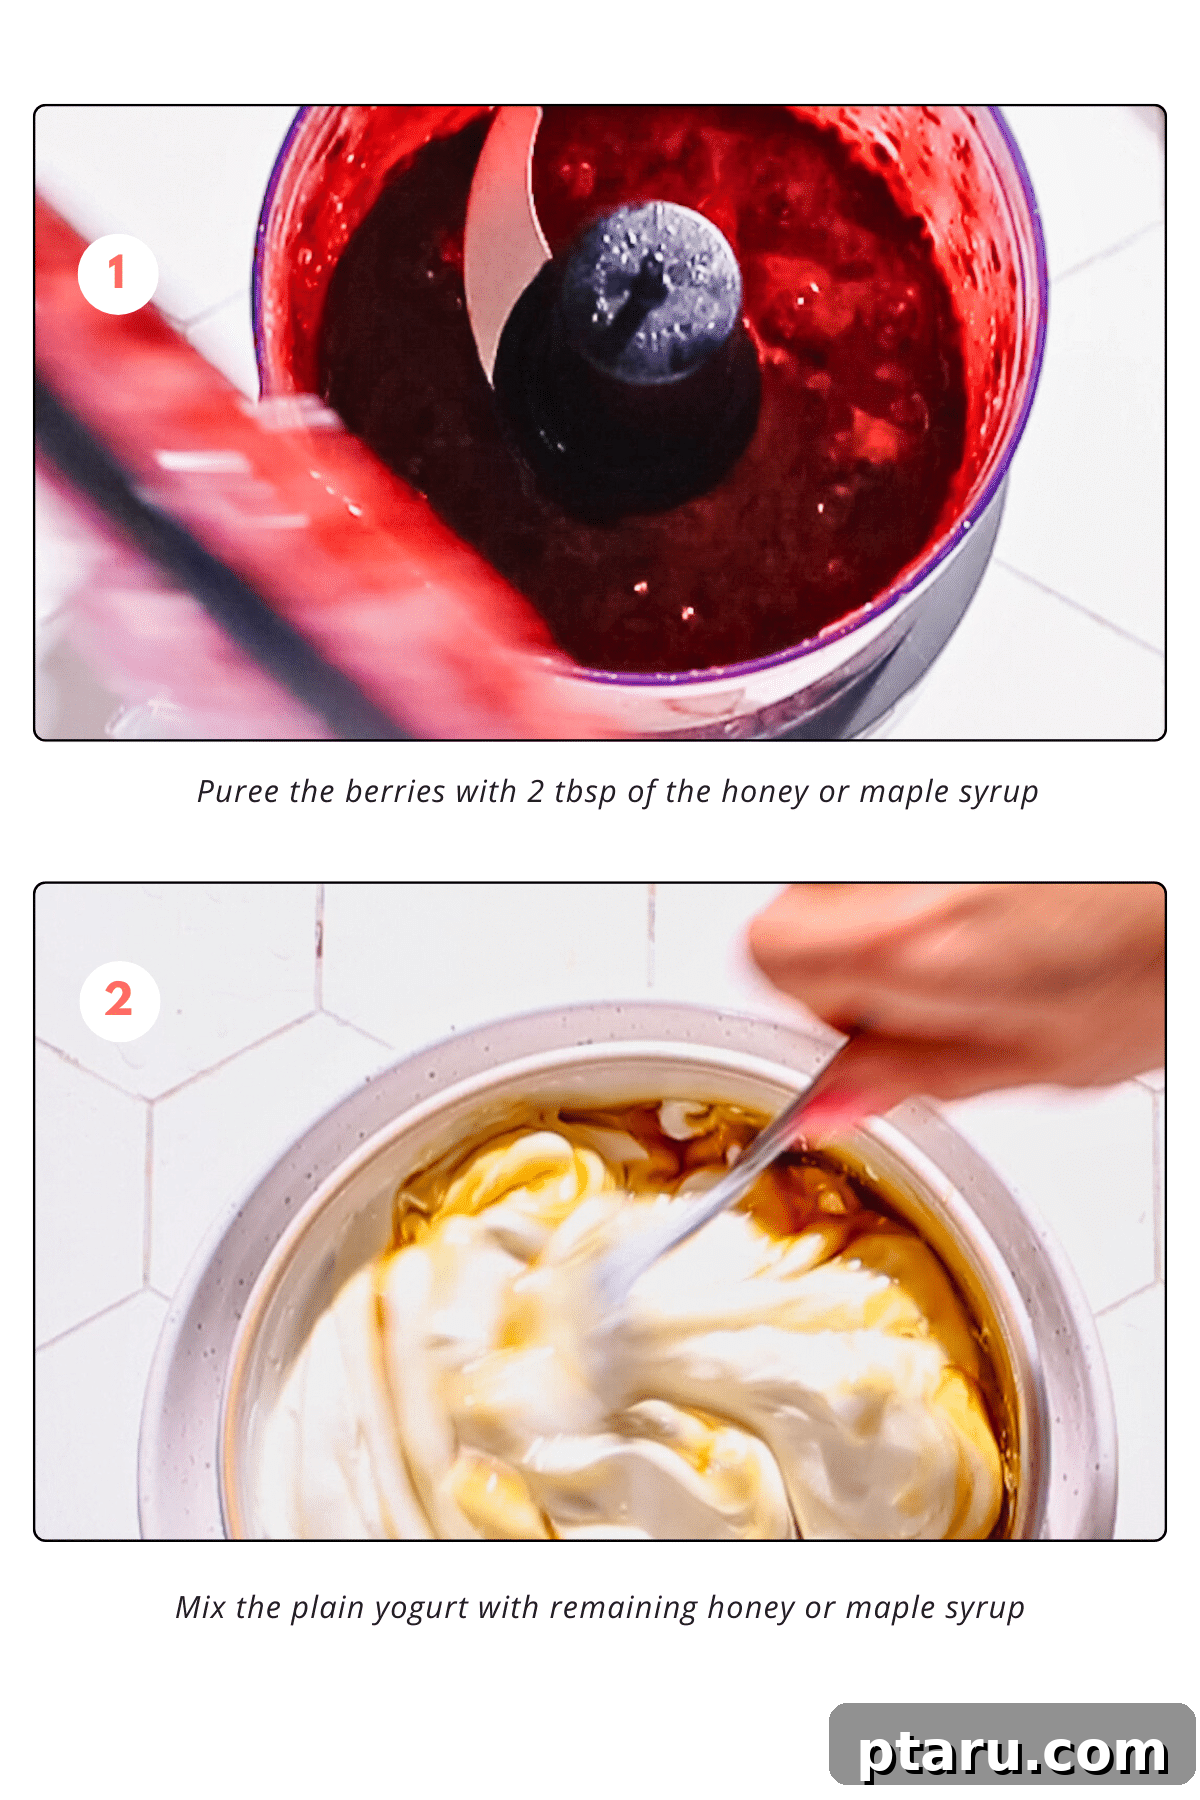
Begin by pureeing your fresh berries. Combine your chosen berries with 2 tablespoons of honey or maple syrup in a blender, a food processor, or using an immersion hand blender in a measuring cup. Blend until the mixture is smooth and free of large chunks. If you prefer a completely smooth puree, you can strain it through a fine-mesh sieve to remove any seeds, though this is optional.
Step 2: Sweeten and Mix the Creamy Yogurt Base
In a separate medium-sized bowl, add the plain Greek yogurt. Pour in the remaining honey or maple syrup. Stir the mixture thoroughly until the sweetener is completely incorporated and the yogurt is smooth and evenly sweetened. Taste and adjust the sweetness if desired.
Step 3: Layer, Swirl, and Create Marbled Magic
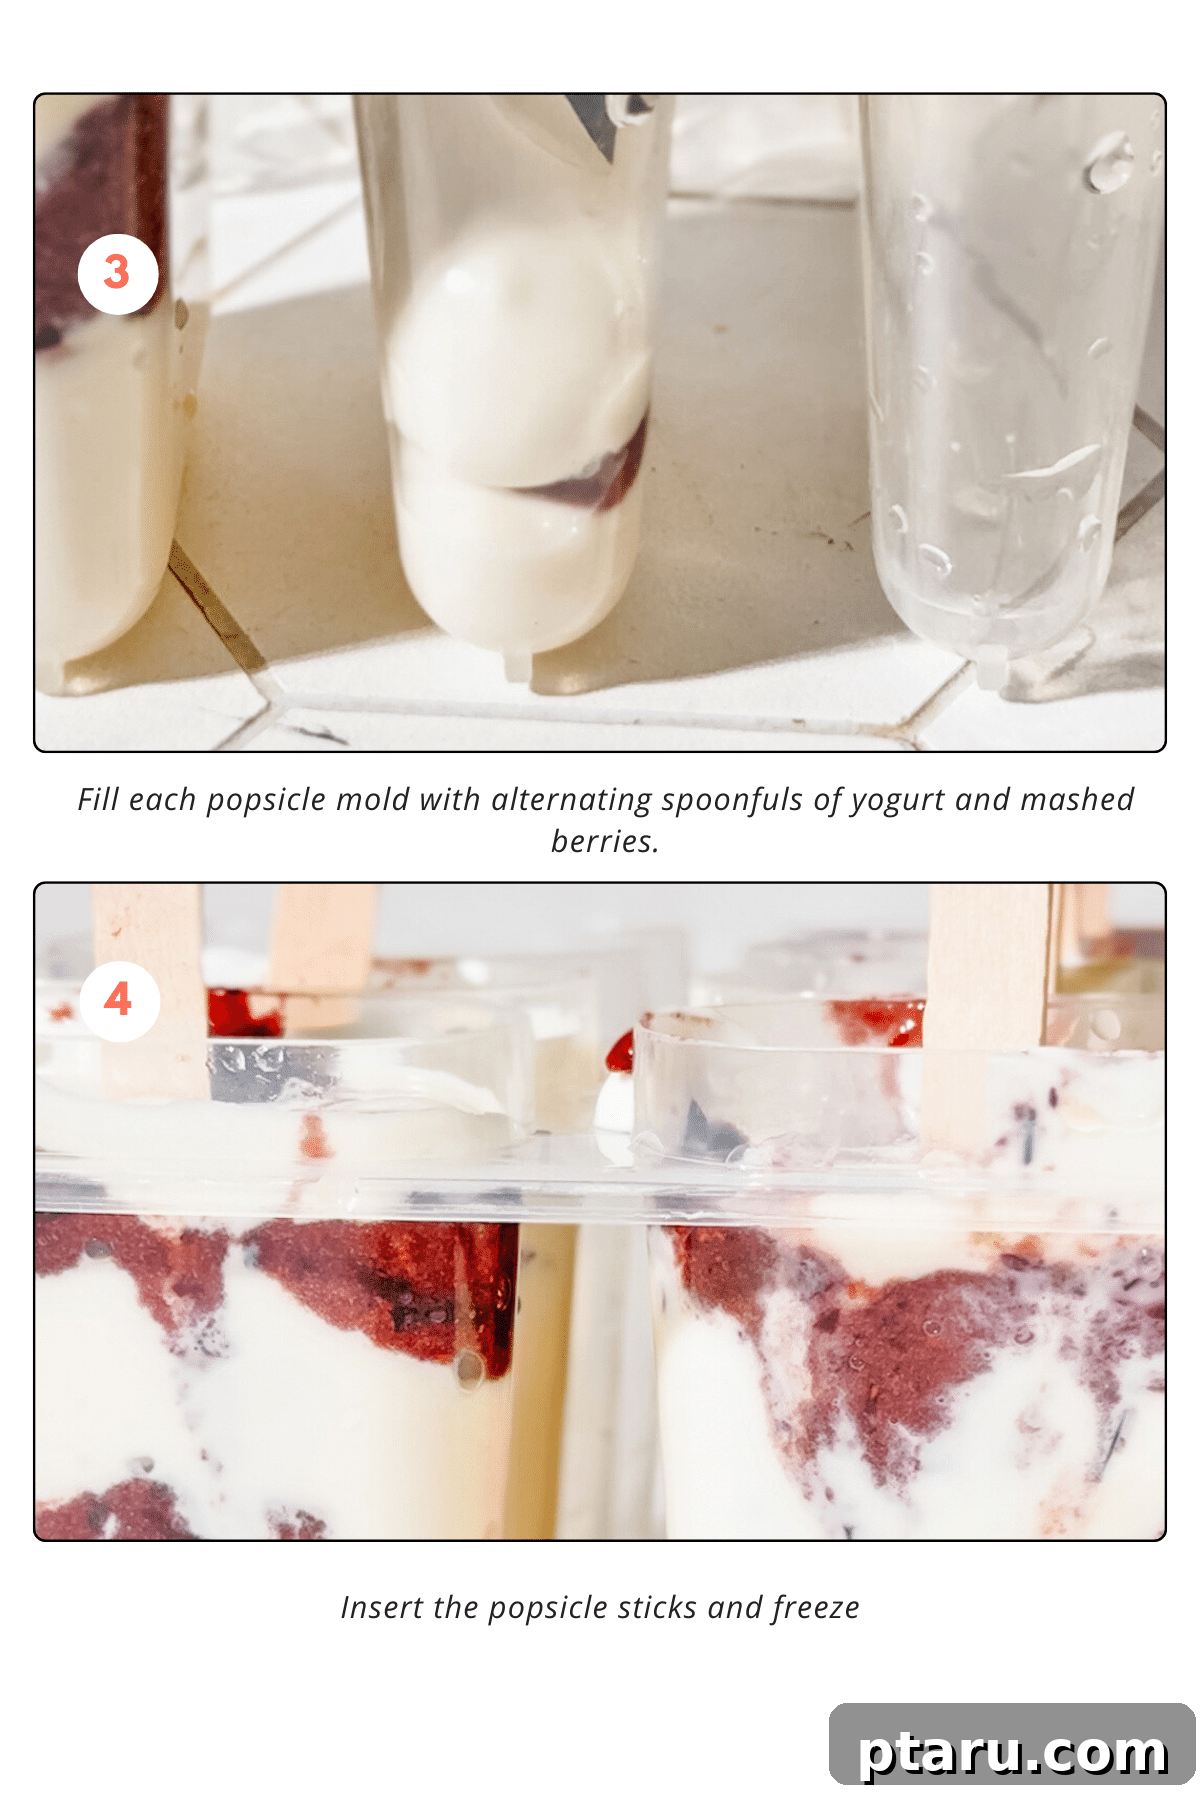
Now for the fun part – assembling your popsicles! Take your popsicle molds and begin to fill them by alternating spoonfuls of the creamy yogurt mixture with spoonfuls of the berry puree. Don’t worry about being too precise; random layers often create the most beautiful patterns.
Once the molds are filled, gently insert a skewer or a super-thin knife into each mold. Swirl the mixtures together with a few light twists. The goal is to create a lovely marbled effect, so be careful not to overmix, as this can muddle the distinct layers and colors.
Step 4: Freeze to Perfection
Carefully insert your popsicle sticks into the center of each filled mold. Ensure they are standing upright. Place the molds in the freezer and allow them to freeze for a minimum of 4-6 hours, or until they are completely solid. For the best, most firm results, freezing them overnight is highly recommended.
Make-Ahead Convenience and Smart Storage Tips
One of the many benefits of these homemade yogurt popsicles is their excellent make-ahead potential. Preparing them in advance means you’ll always have a healthy, refreshing treat readily available in your freezer, perfect for unexpected guests or quick snacks.
Storage for Lasting Freshness
Proper storage is key to maintaining the quality and preventing freezer burn for your delicious yogurt pops:
- In the Molds (Short-Term): Once the popsicles are fully frozen, you can leave them in their molds until you’re ready to enjoy them. This provides excellent protection and keeps them fresh for a few days without any extra effort.
- Individual Wrapping (Long-Term): For longer storage or to take up less freezer space, it’s best to remove the popsicles from their molds. Wrap each individual popsicle tightly in plastic wrap or parchment paper. This prevents them from sticking together, protects them from freezer odors, and significantly reduces the risk of freezer burn.
- Freezer-Safe Bag: After wrapping, place the individually wrapped popsicles into a large, heavy-duty freezer-safe zip-top bag. Squeeze out as much air as possible before sealing the bag. Removing air is crucial for minimizing freezer burn and extending their freshness.
- Airtight Container: Alternatively, you can arrange the wrapped popsicles in layers within an airtight freezer container. For best results, separate each layer with a sheet of parchment or wax paper to prevent sticking.
Stored correctly, your homemade yogurt popsicles will remain delicious and enjoyable for up to one month in the freezer. Always check for signs of freezer burn (discoloration or dry spots) before consuming.
Troubleshooting & Achieving Perfect Popsicles Every Time
While making yogurt popsicles is incredibly simple, a few common pitfalls can affect their texture and appearance. Here’s how to avoid them and ensure your pops turn out perfectly every time:
Common Mistakes to Avoid
- Over-Swirling the Layers: While a marbled effect is beautiful, too much swirling can cause the distinct layers of yogurt and fruit puree to completely blend together. This will result in a uniform color rather than the attractive marbled pattern. Aim for just a few gentle twists with your skewer or knife to create definition without muddling.
- Not Freezing Long Enough: Impatience can lead to disappointment! Ensure your yogurt popsicles are frozen for at least 4-6 hours, or until they are completely solid. If removed too early, they might be soft, fall apart easily, or leave the stick behind. For optimal firmness and ease of removal, freezing them overnight is always the best recommendation.
- Overfilling the Molds: Remember that liquids expand when they freeze. If you fill your popsicle molds right to the very top, the mixture will expand as it freezes, potentially overflowing and creating a messy freezer. Leave a small gap (about 1/4 to 1/2 inch) at the top of each mold to allow for this expansion.
Creative DIY Popsicle Molds & Stick Alternatives
No traditional popsicle molds? No problem! You can easily make delicious homemade popsicles using common items you already have around the house. Creativity is your best tool here!
Ingenious Homemade Mold Ideas
- Small Paper Cups: These are a classic and highly effective DIY mold. Simply pour your popsicle mixture into small paper cups (3-5 oz works well). Cover the top of each cup with a piece of aluminum foil, then carefully insert a popsicle stick through the foil into the center of the mixture. The foil helps to keep the stick upright. Once frozen, simply peel away the paper cup to reveal your homemade popsicle.
- Small Kids’ Plastic Cups: If you have a collection of small plastic cups, like those often found for toddlers or picnics, they make excellent reusable popsicle molds. Their size is often perfect for single servings, and they’re durable enough for repeated use.
- Ice Cube Trays: For mini popsicles, an ice cube tray is ideal. Fill the compartments with your mixture. For stick insertion, partially freeze the mixture for about 30-45 minutes until it starts to firm up but isn’t completely solid. Then, insert toothpicks or small cocktail sticks into the center of each cube. These mini frozen treats are great for little ones or for a quick, small refreshment.
- Silicone Muffin Molds or Cupcake Liners: Any flexible silicone mold, whether designed for muffins, cupcakes, or even fun shapes, can be repurposed as a popsicle mold. The flexible material makes it incredibly easy to pop out the frozen treats once they are solid, without needing to run them under warm water.
- Muffin Tins: A standard metal muffin tin can also work wonders. Pour your mixture into the muffin cups. For sticks, cover the tin with aluminum foil or plastic wrap, make small slits over each cup, and insert your popsicle sticks. To remove, briefly run the bottom of the muffin tin under warm water to loosen the popsicles, then carefully pull them out. You can remove them all at once and transfer them to a large freezer bag for longer storage.
DIY Popsicle Stick Alternatives
If you’re out of traditional popsicle sticks, raid your kitchen drawers for these handy alternatives:
- Small Spoons or Forks: Any small spoons or forks (plastic, wooden, or even metal ones from your cutlery drawer) can serve as effective handles for your popsicles. Just make sure they are clean and sturdy enough to hold the weight of the frozen treat.
- Toothpicks: As mentioned for ice cube trays, toothpicks are perfect for mini popsicles where a full-sized stick would be too large.
Pro Tips for Popsicle Perfection
Beyond the basic steps, these professional insights and clever tricks will help you achieve outstanding yogurt popsicles every single time:
- Effortless Removal from Molds: The secret to easily releasing your frozen yogurt pops without breakage is a quick warm water bath. Briefly run warm tap water over the outside of the mold for a few seconds (typically 10-15 seconds). Alternatively, let the molds sit at room temperature for 2-3 minutes. This slight warming helps the outer layer of the popsicle detach from the mold. Gently pull the popsicle stick to release. Once unmolded, immediately wrap each popsicle in plastic wrap to prevent them from sticking together or developing freezer burn.
- Properly Fill the Molds: As mentioned earlier, leaving a small gap (about ¼ to ½ inch from the top) in each mold is crucial. This accounts for the natural expansion of the liquid mixture as it freezes. Overfilling can lead to spills in your freezer and make the popsicles difficult to remove cleanly.
- Ensure Sticks Stay Put: Nothing is more frustrating than a loose popsicle stick! Here are two reliable tips:
- Aluminum Foil or Plastic Wrap Method: After filling your popsicle molds, cover the top of the entire mold tray tightly with aluminum foil or plastic wrap. Make small slits directly over the center of each filled mold compartment. Insert your popsicle sticks through these slits. The foil or wrap will securely hold the sticks upright and centered as the popsicles freeze.
- Partial Freeze and Insert: This method involves a two-stage freezing process. Partially freeze your mixture in the molds for about 30-45 minutes (or until it starts to firm up but is not yet solid). At this point, the mixture will be thick enough to hold the popsicle sticks firmly in place. Insert the sticks, then return the molds to the freezer to fully solidify.
- Go for Full-Fat Greek Yogurt: For the ultimate creamy texture that rivals traditional ice cream, always opt for full-fat (3.5% or higher) plain Greek yogurt. The fat content helps create a smoother consistency by minimizing the formation of large ice crystals.
- Taste and Adjust Sweetness: The natural sweetness of berries can vary greatly. Always taste your yogurt mixture and fruit puree before freezing. Add more honey or maple syrup if you prefer a sweeter popsicle, or a squeeze of lemon juice if your fruit is very sweet and you want to balance it.
Health Benefits of Homemade Yogurt Popsicles
Beyond being a refreshing and delicious treat, these homemade yogurt popsicles offer a surprising array of health benefits, making them an excellent choice for a nutritious snack:
- Rich in Protein: Greek yogurt is celebrated for its high protein content. This means your popsicles will help keep you feeling full and satisfied, making them a much more satiating snack than typical sugary frozen desserts. Protein is vital for muscle repair and growth, and generally supporting overall body function.
- Packed with Probiotics: Yogurt is a fantastic source of beneficial probiotics, which are live bacteria that support a healthy gut microbiome. A balanced gut is linked to improved digestion, enhanced immune function, and even better mood.
- Abundant in Vitamins and Antioxidants: Fresh berries are nutritional powerhouses. They are loaded with vitamins (like Vitamin C and K), minerals, and powerful antioxidants. Antioxidants help protect your body’s cells from damage caused by free radicals, potentially reducing the risk of chronic diseases.
- Lower in Added Sugar: When you make popsicles at home, you have complete control over the amount and type of sweetener used. This recipe utilizes natural sweeteners like honey or maple syrup and relies heavily on the natural sweetness of the fruit, resulting in a treat that’s typically much lower in refined sugars than store-bought alternatives.
- Healthy Bone Support: Yogurt is a good source of calcium, a mineral essential for strong bones and teeth. Enjoying these popsicles can contribute to your daily calcium intake, especially important for growing children.
- Hydrating: Especially on a hot day, these icy treats contribute to your fluid intake, helping you stay hydrated and cool down.
Frequently Asked Questions About Yogurt Popsicles
Got quick questions about these delightful frozen yogurt pops? Here are some common queries answered to help you master this easy recipe:
No worries at all! You can easily make popsicles without traditional molds. Excellent alternatives include small paper cups, silicone muffin cups, or even an ice cube tray (for mini pops). For paper or silicone cups, pour in your mixture, then partially freeze for about 30-45 minutes until the mixture begins to set. At this point, insert your popsicle sticks (or toothpicks for mini pops) so they stand upright, then return to the freezer to fully solidify.
Making dairy-free yogurt popsicles is incredibly simple. Just swap out the plain Greek yogurt for your preferred plant-based yogurt alternative. Excellent choices include almond yogurt, coconut yogurt, or soy yogurt. For the best flavor control, ensure you select plain and unsweetened varieties. This allows you to adjust the sweetness and flavor profile of your popsicles exactly to your liking with honey, maple syrup, or another chosen sweetener.
To easily release your frozen yogurt pops from their molds without sticking or breaking, there are a couple of effective methods. The most common technique is to briefly run warm water over the outside of the mold for about 10-15 seconds. This gently loosens the outer layer of the popsicle. Alternatively, you can simply let the molds sit at room temperature for a few minutes (typically 2-3 minutes) before gently pulling on the stick to unmold them. Avoid forcing them out, as this can cause breakage.
Absolutely! Frozen berries work just as well as fresh ones. For the best results, allow them to thaw slightly before pureeing. This will make them easier to blend and ensure a smoother consistency. You might want to drain any excess liquid that accumulates during thawing to prevent your puree from becoming too watery.
When stored properly, these homemade yogurt popsicles can last for up to one month in the freezer. To achieve this longevity, make sure each popsicle is individually wrapped tightly in plastic wrap or parchment paper after unmolding. Then, place the wrapped popsicles in an airtight freezer-safe bag or container to protect them from freezer burn and absorb unwanted odors.
Yes, you certainly can! The amount of honey or maple syrup is flexible and can be adjusted to your personal preference and the natural sweetness of your chosen berries. If your berries are very ripe and sweet, you might need less sweetener. Always taste the yogurt mixture and fruit puree before freezing and adjust accordingly.
Explore More Healthy Frozen Sweet Treats
If you loved these yogurt popsicles, you’re in for a treat! Discover other equally delicious and healthy frozen desserts perfect for any time of year:
- Peanut Butter Frozen Yogurt Bites
- Strawberry Frozen Yogurt Bites
- Banana Ice Cream
- Date Bark
- Frozen Yogurt Bark
- Banana Bites (Peanut Butter and Chocolate)
- Strawberry Popsicles
- Peanut Butter Frozen Yogurt Bark
Yogurt Popsicles (Quick, 3-Ingredient Easy Recipe!)
Ingredients
- 2 cups plain Greek yogurt
- 8 tbsp honey or maple syrup (divided use)
- 1 ½ cup fresh berries (like strawberries, blueberries, raspberries or blackberries)
Instructions
Prepare the Fruit:
- Puree the berries with 2 tbsp of the honey or maple syrup in a small blender, with an immersion hand blender in a measuring cup, or using a small food processor.
Prepare the Yogurt:
- In a bowl, mix the plain yogurt with remaining honey or maple syrup until well combined.
Layer and Swirl:
- Fill each popsicle mold with alternating spoonfuls of yogurt and mashed berries. Use a skewer or thin knife to gently swirl the mixtures together, creating a marbled effect. Be careful not to overmix to keep the swirls distinct.
Freeze:
- Insert the popsicle sticks and freeze for 4-6 hours or until completely solid.
Notes
- Use higher-fat (3.5% or higher) plain Greek yogurt for the best results and creamiest texture.
- Adjust the sweetness based on your preference and the natural sweetness of the berries. You can add more or less sweetener.
- These popsicles can be stored in the freezer for up to a month. For best storage, remove them from the molds and store flat in an airtight freezer bag, individually wrapped to prevent sticking and freezer burn. Enjoy!
Nutrition
Calories: 122 kcal | Carbohydrates: 23 g | Protein: 6 g | Fat: 1 g | Saturated Fat: 1 g | Polyunsaturated Fat: 0.1 g | Monounsaturated Fat: 0.03 g | Cholesterol: 3 mg | Sodium: 24 mg | Potassium: 27 mg | Fiber: 1 g | Sugar: 22 g | Vitamin A: 46 IU | Vitamin C: 1 mg | Calcium: 70 mg | Iron: 0.1 mg
Nutrition information is automatically calculated, so should only be used as an approximation and may vary based on specific ingredients and brands used.
We hope you love these delicious, healthy yogurt popsicles as much as we do! They’re truly the perfect treat for any hot day, or anytime you need a refreshing and guilt-free snack. Enjoy your homemade summer delights!