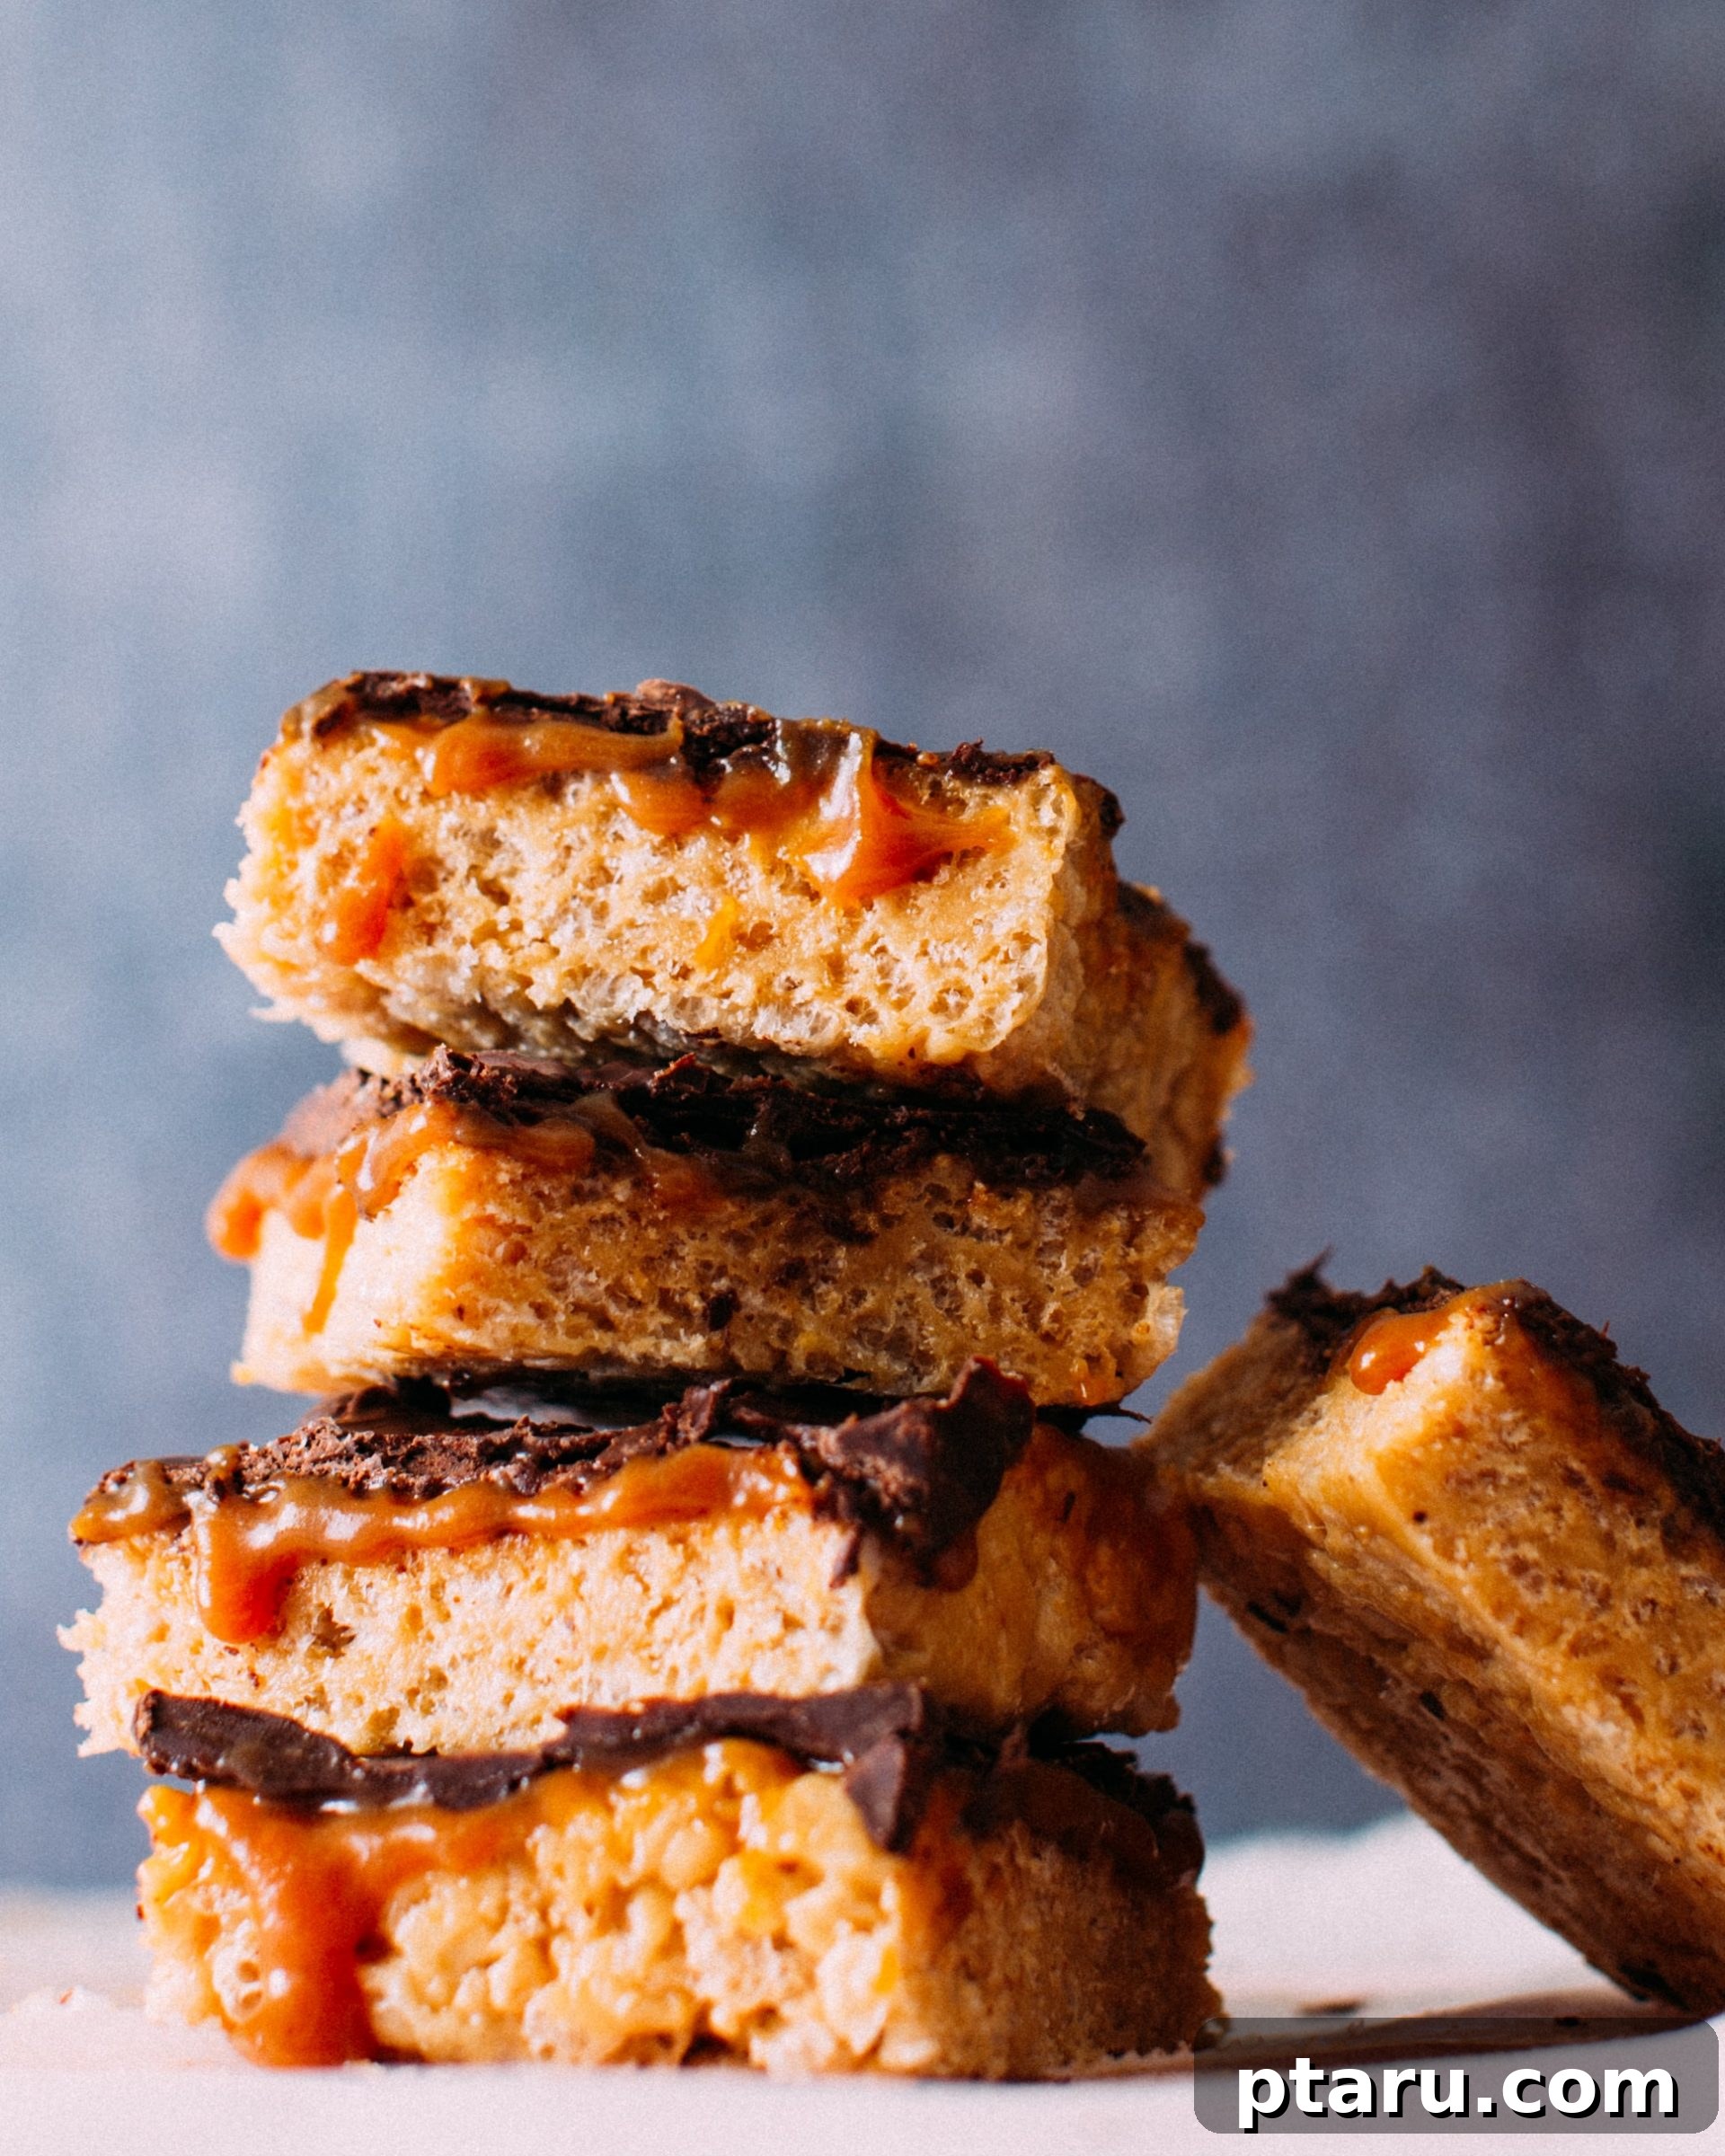
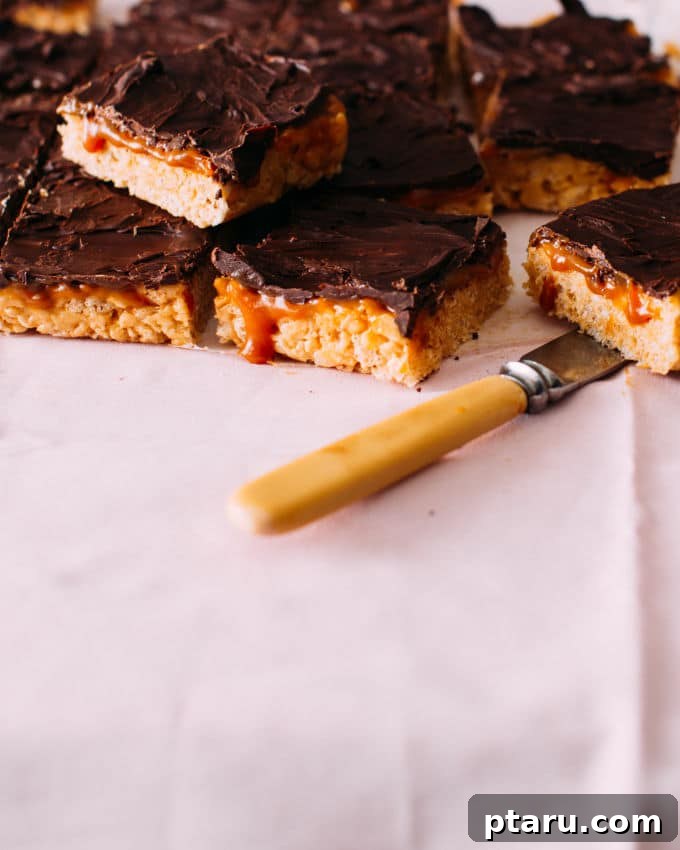
Prepare your taste buds for an extraordinary experience with these **Salted Caramel Rice Krispie Treats**. This isn’t your childhood Rice Krispie treat; it’s a sophisticated, “all grown up” version featuring a luscious, gooey layer of salted caramel that artfully drizzles between a delightfully chewy peanut butter Rice Krispie treat base and a crisp, thin layer of bittersweet dark chocolate. While the peanut butter adds an irresistible depth and chewiness, it can easily be omitted if you prefer. Either way, these layered delights promise a decadent texture and flavor profile that will leave you craving more.
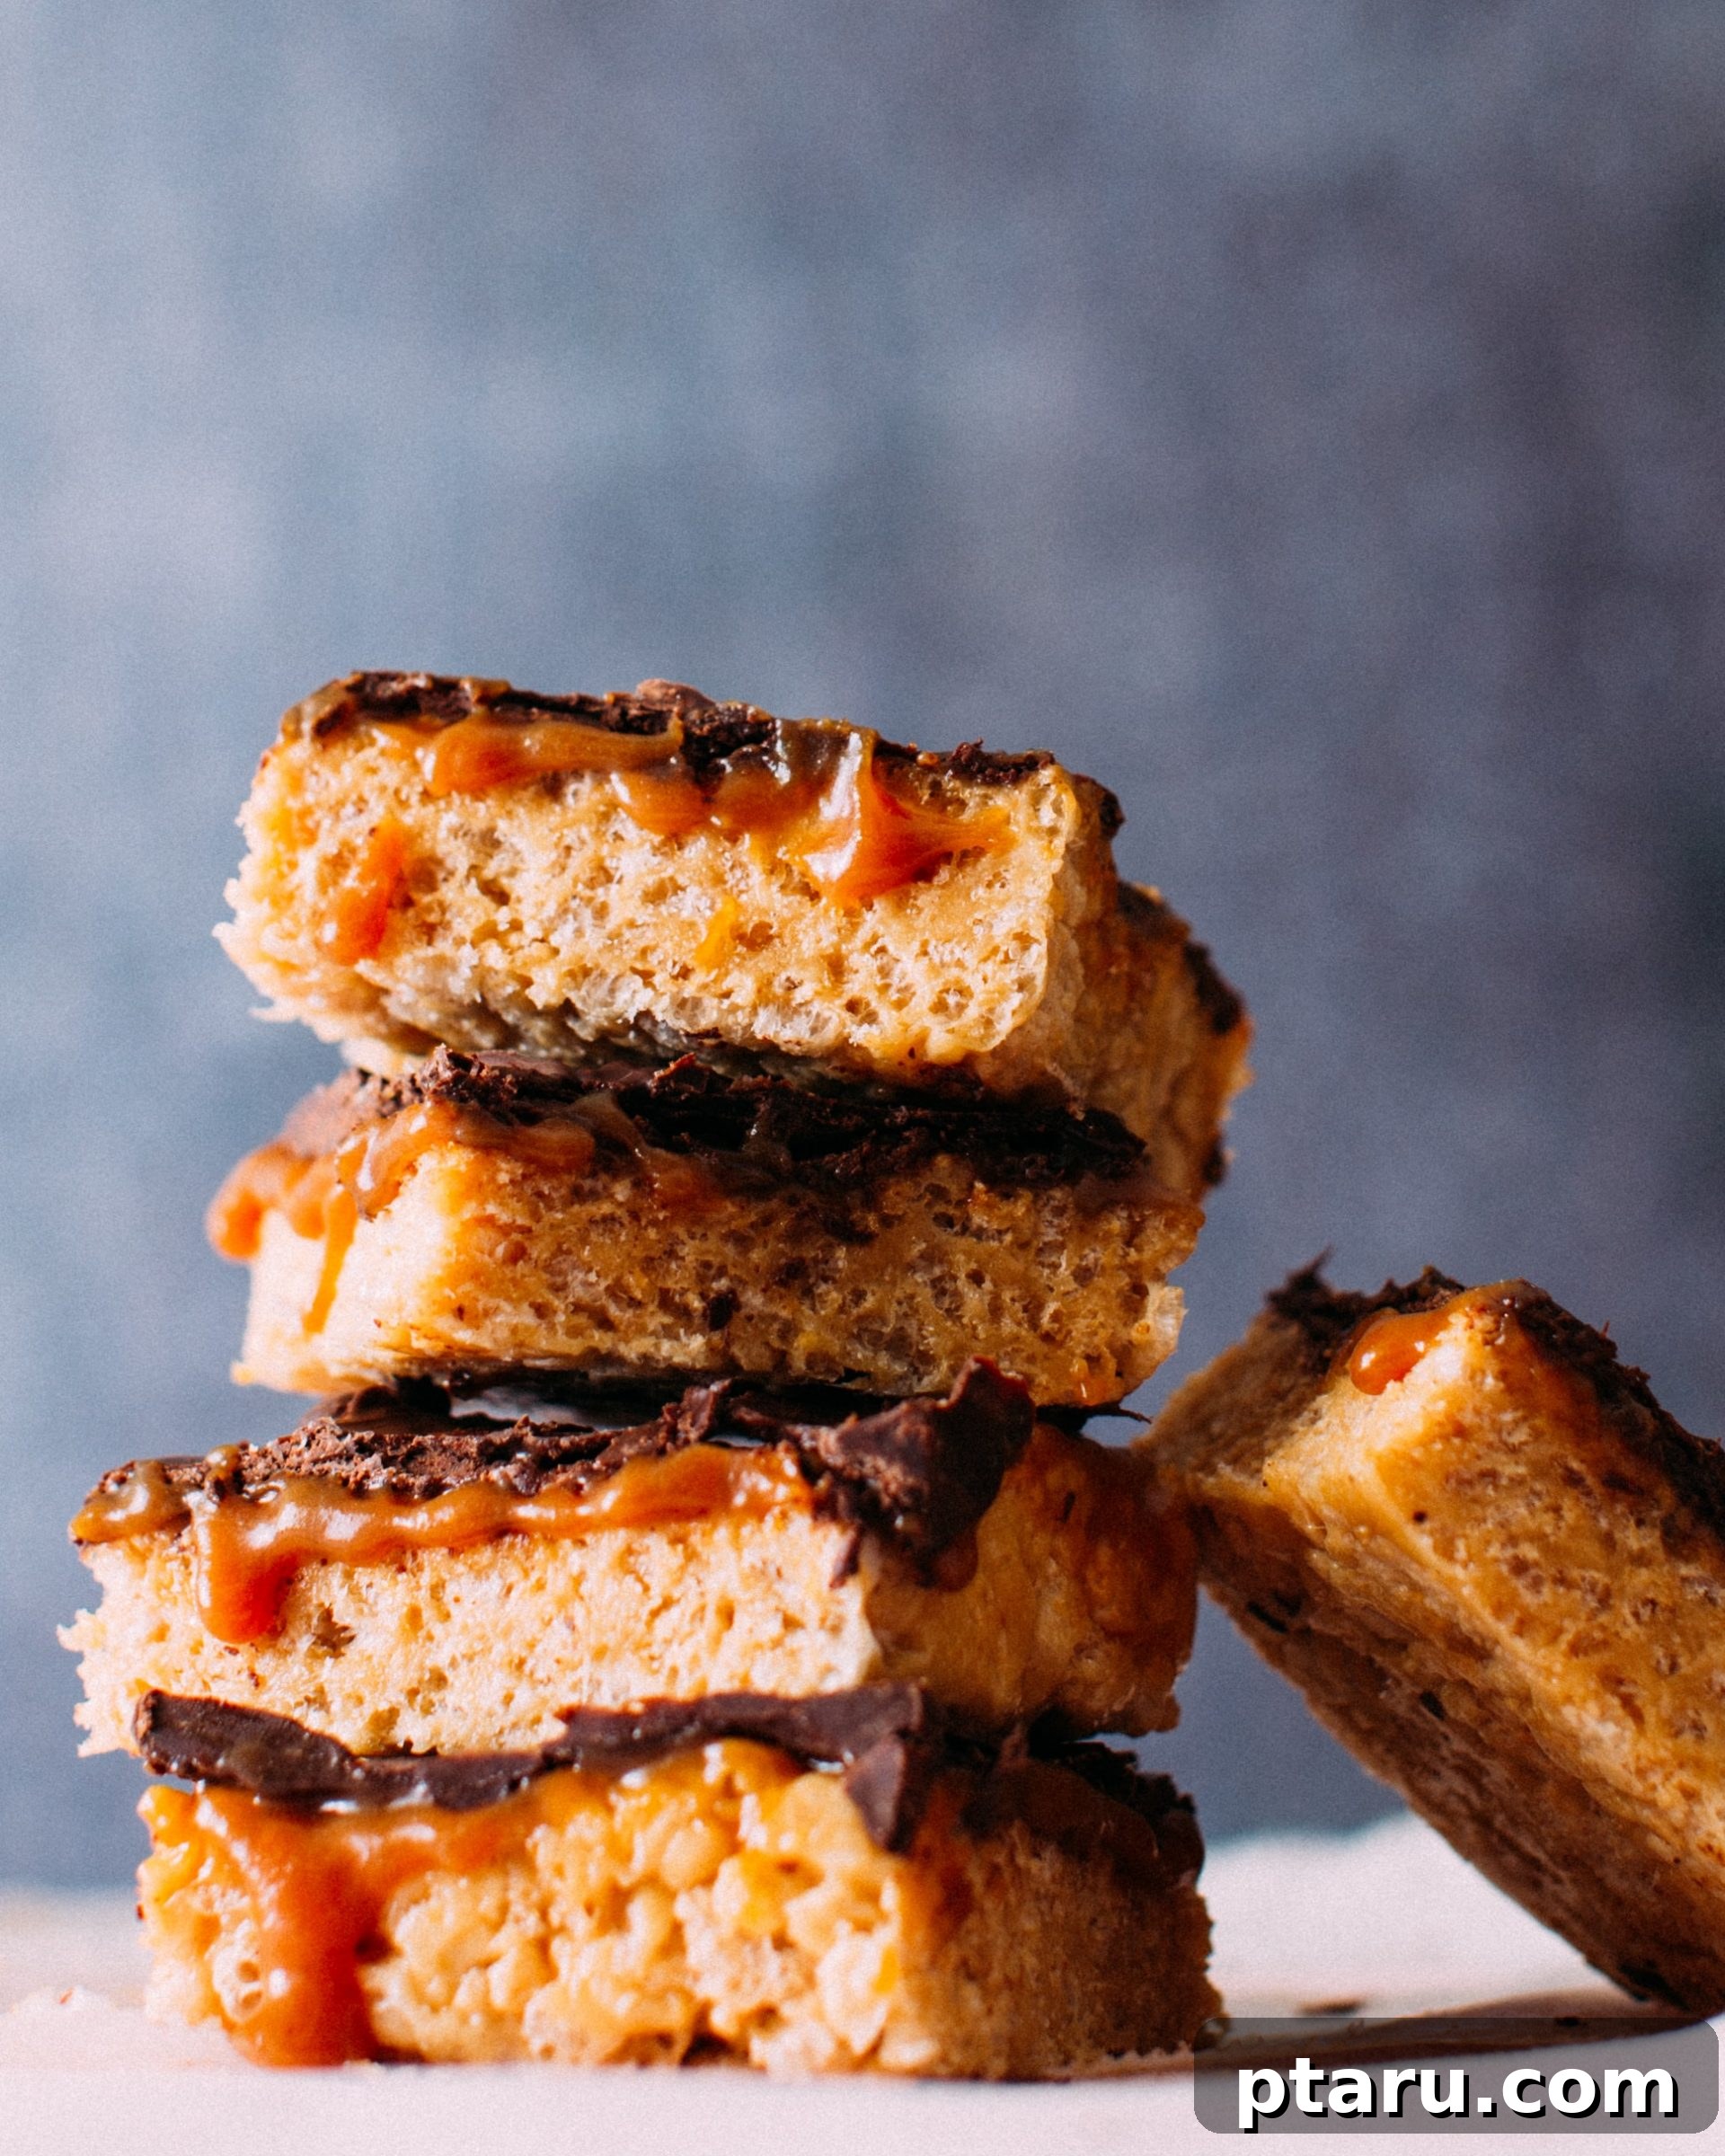
Irresistible Salted Caramel Rice Krispie Treats with Peanut Butter and Dark Chocolate
These Salted Caramel Rice Krispie Treats are more than just a dessert; they’re an indulgence that will redefine your perception of no-bake confections. Here’s why this recipe is destined to become your new favorite:
- A Symphony of Flavors and Textures: This might just be the most addictive Rice Krispie treat you’ll ever encounter. The classic sweetness of the marshmallow base is perfectly balanced by the rich, toasty notes of salted caramel and the subtle bitterness of dark chocolate. Each bite offers a delightful interplay of crunchy cereal, chewy marshmallow, soft caramel, and snappy chocolate.
- Enhanced Chewiness with Peanut Butter: The addition of peanut butter to the Rice Krispie base elevates the texture, making it wonderfully soft and chewy. This not only adds a comforting, nutty flavor that complements the caramel and chocolate but also provides a satisfying mouthfeel that’s a step above traditional treats. It’s a game-changer for those who love an extra layer of complexity in their desserts.
- Effortless Elegance with Store-Bought Caramel: Achieving gourmet results doesn’t have to mean spending hours in the kitchen. This recipe shines with its convenience, allowing you to use high-quality store-bought salted caramel sauce. This simple shortcut makes the entire process incredibly quick and easy, enabling you to whip up these sophisticated treats without the fuss of making caramel from scratch.
Choosing the Perfect Salted Caramel for Your Treats
The star of this recipe, undoubtedly, is the salted caramel layer. The beauty of these treats lies in their adaptability, allowing you to choose the caramel option that best suits your time and culinary ambition. Whether you’re a seasoned caramel maker or prefer the convenience of store-bought, you have fantastic choices:
- Homemade Classic Salted Caramel Sauce: For those who love the satisfaction of making things from scratch, a homemade salted caramel sauce offers unparalleled depth of flavor and a silky-smooth texture. If you’re looking to elevate these treats even further, consider preparing your own. You can find our classic salted caramel sauce recipe here, which is both delicious to make and incredibly rewarding.
- Quick & Easy Dulce de Leche: If you desire a homemade touch without the intricate process of traditional caramel, our 1-ingredient dulce de leche recipe is an excellent alternative. This method simplifies the process significantly, requiring minimal effort while still delivering a rich, creamy, and distinctively caramelized flavor that is perfect for these treats. It’s a fantastic middle-ground between fully homemade and store-bought.
- Convenient Store-Bought Caramel or Dulce de Leche: For the ultimate quickest and easiest option, high-quality store-bought caramel sauce is your best friend. Look for brands known for their rich flavor and good consistency. Adding a good pinch of sea salt to a plain caramel sauce will instantly transform it into salted caramel. Store-bought dulce de leche is also an excellent and often more economical choice, offering a naturally deep caramel flavor that pairs wonderfully with the other elements of this dessert. Brands like Bonne Maman offer fantastic caramel options that are readily available and deliver on taste and texture.
Crafting These Decadent Salted Caramel Rice Krispie Treats: A Step-by-Step Guide
Making these gourmet Rice Krispie treats is a straightforward process, but a few key techniques will ensure they turn out perfectly layered and utterly delicious. Follow these essential steps for success:
- The Marshmallow-Cereal Mix: When it comes to stirring the crisp rice cereal into the warm marshmallow mixture, be prepared to engage your muscles! This stage requires vigorous mixing to ensure every piece of cereal is evenly coated. A sturdy wooden spoon and a strong arm are your best tools here. It’s surprisingly good exercise for your triceps!
- The Caramel Layer’s Secret: To achieve a distinct, gooey layer of salted caramel that doesn’t bleed into the chocolate, the trick is simple: chill the caramel. After spreading the caramel over the Rice Krispie base, pop the entire dish into the freezer. Allowing it to firm up completely before adding the chocolate topping is crucial. This step creates a solid barrier, ensuring beautifully defined layers.
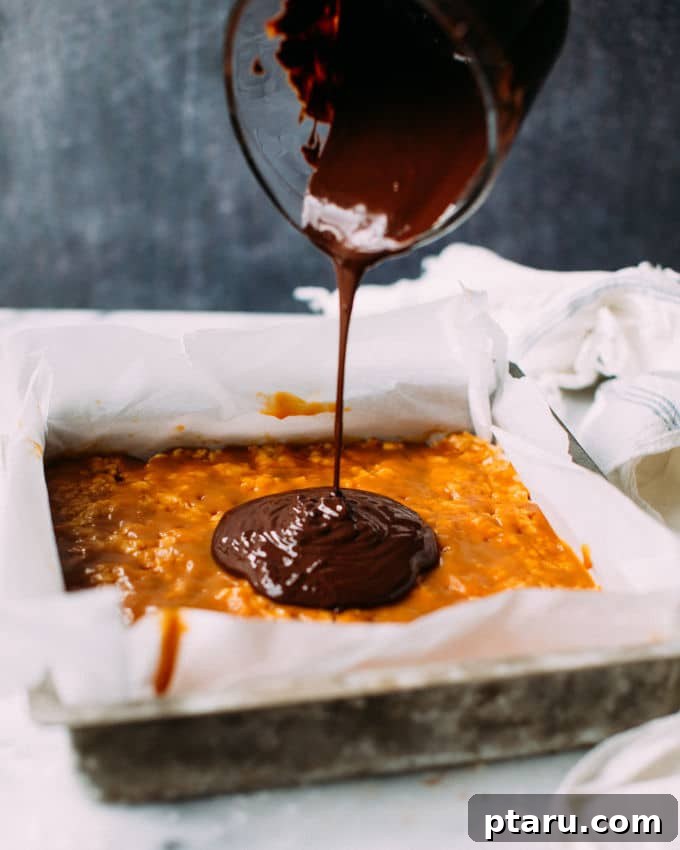
- Achieving a Smooth Chocolate Topping: For that beautifully smooth, glossy chocolate layer you admire in professional desserts, there’s a specific technique. Instead of overworking it with a spatula, simply pour the melted chocolate over the firmly chilled caramel layer. Then, gently tilt the pan from side to side to encourage the chocolate to spread evenly and reach all corners. Resist the urge to smooth it out with a utensil; letting it settle naturally creates a flawless finish.
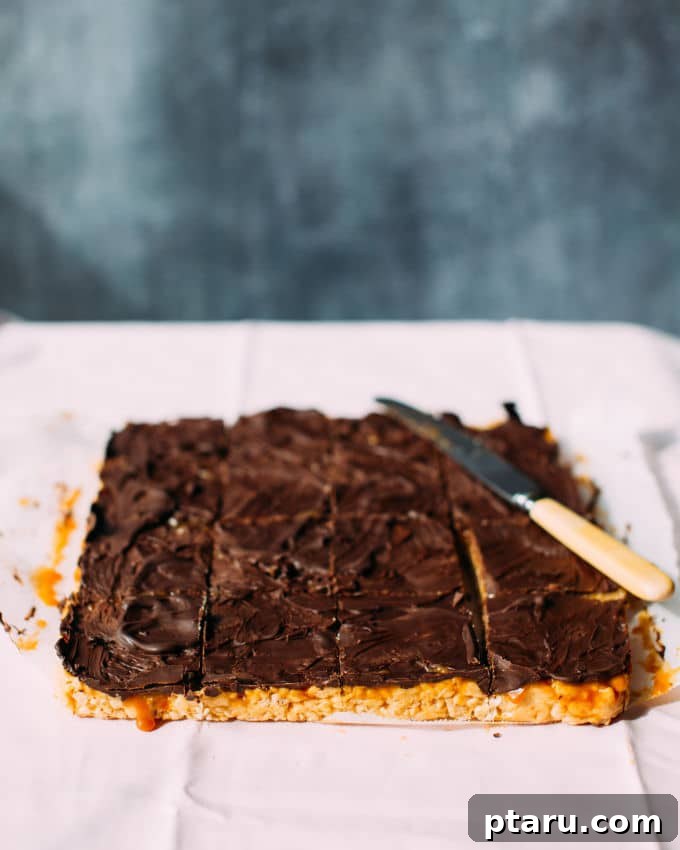
- Perfect Slices Every Time: Once your treats are fully set, lifting them out of the dish using the parchment paper overhang will make your life much easier. For clean, sharp slices that showcase all the magnificent layers, heat a sharp knife under hot running water and wipe it dry before each cut. This warmth helps the blade glide effortlessly through the chocolate and caramel without cracking or dragging, ensuring sixteen perfectly portioned bars.
Recipe: Gooey Salted Caramel Rice Krispie Treats with Peanut Butter and Chocolate

Rating: 5 out of 5 stars (based on 1 review)
By: Jennifer Pallian BSc, RD
These Gooey Salted Caramel Rice Krispie Treats with Peanut Butter and Chocolate are a truly decadent and delicious indulgence. Prepare for a nostalgic yet sophisticated treat that your inner child (and adult self!) will absolutely adore.
Prep Time: 15 minutes
Cook Time: 10 minutes
Total Time: 1 hour 25 minutes (includes crucial chilling time)
Servings: 16 squares
Ingredients
- ½ cup natural peanut butter
- ¼ cup unsalted butter
- 10 oz marshmallows (standard bag size)
- 4.5 cups crisp rice cereal (like Rice Krispies)
- 1 cup salted caramel sauce (see notes below for various options)
- 6 oz dark chocolate, coarsely chopped
- 1 tbsp avocado oil or other neutral-tasting oil (avoid coconut oil if you don’t want a coconut flavor)
Instructions
- Prepare the Rice Krispie Base: In a large, heavy-bottomed stockpot, melt the natural peanut butter, unsalted butter, and marshmallows over medium heat. Stir continuously with a sturdy wooden spoon or heat-resistant spatula until the mixture is completely smooth and all ingredients are fully combined. Once melted, remove the pot from the heat.
- Combine with Cereal: Add the crisp rice cereal to the warm marshmallow mixture. Using strong arm movements, stir vigorously until the cereal is thoroughly and evenly coated. This step ensures a consistent texture throughout your treats.
- Press into Pan: Transfer the sticky mixture into an 8×8-inch baking dish that has been lined with parchment paper. Ensure the parchment paper extends over the sides, creating a convenient overhang. Press the mixture firmly and evenly into the bottom of the dish. For easier handling and to prevent sticking, lightly dampen your hands before pressing.
- Apply Caramel Layer: Gently warm your chosen salted caramel sauce. This can be done by microwaving it in a microwave-safe bowl for short intervals (15-30 seconds) until it’s just spreadable, or by warming it on the stovetop over very low heat. Evenly spread the warmed caramel over the pressed Rice Krispie base layer.
- Chill Thoroughly: Transfer the baking dish to the freezer and chill for at least one hour, or until the caramel layer is completely firm to the touch. This step is critical for preventing the chocolate from mixing with the caramel and ensures clean, distinct layers.
- Melt Chocolate Topping: While the caramel chills, prepare the chocolate layer. In a separate microwave-safe bowl, combine the coarsely chopped dark chocolate and avocado oil. Microwave at 50% power for 2 minutes. The chocolate should be mostly melted, about 80%. Remove from the microwave and stir vigorously until the remaining chocolate melts completely and the mixture is smooth and glossy. If necessary, continue microwaving in additional 30-second intervals at 50% power, stirring well after each, taking care not to scorch the chocolate.
- Create Chocolate Layer: Once the caramel layer is completely firm, retrieve the pan from the freezer. Pour the melted chocolate evenly over the chilled caramel. Gently tilt the pan in various directions to allow the chocolate to spread naturally and evenly into all corners, creating a smooth finish. Avoid using a spatula to smooth it, as this can disturb the firm caramel layer underneath.
- Set and Slice: Let the treats stand undisturbed at room temperature for approximately 2 hours, or until the chocolate layer is completely hardened. While you can expedite this process by placing the pan back in the freezer, be aware that it might cause a “chalky bloom” on the chocolate, which is harmless but affects its glossy appearance. Once firm, use the parchment paper overhang to lift the entire block of treats out of the dish. For perfectly clean slices, run a sharp knife under hot water and wipe it dry between each cut. Slice into 16 equal bars.
- Storage: Store the finished treats in an airtight container at room temperature for up to 3 days. We predict they won’t last that long!
Recipe Notes
- Salted Caramel Options: For a true homemade touch, use our classic salted caramel sauce recipe here. For a simpler homemade alternative, try our 1-ingredient dulce de leche. Alternatively, any good quality store-bought caramel sauce with a pinch of added salt, or ready-made dulce de leche, will work beautifully for convenience.
- Peanut Butter Adjustment: If you prefer to omit peanut butter due to allergies or taste, simply increase the unsalted butter in the base mixture to ½ cup and add a small pinch (about ¼ teaspoon) of extra salt to balance the sweetness.
- Chocolate Variety: Dark chocolate provides a lovely bittersweet contrast to the sweetness of the caramel and marshmallow. However, feel free to use semi-sweet chocolate for a milder flavor or even milk chocolate for an even sweeter profile.
- Oil for Chocolate: The avocado oil helps thin the chocolate slightly, making it easier to spread smoothly and giving it a beautiful sheen. Neutral-tasting oils like grapeseed or vegetable oil also work well. Avoid coconut oil if you don’t want any subtle coconut flavor in your chocolate layer.
Nutrition Information (per serving)
- Calories: 230kcal
- Carbohydrates: 30g
- Protein: 3g
- Fat: 12g
- Saturated Fat: 5g
- Polyunsaturated Fat: 1g
- Monounsaturated Fat: 4g
- Trans Fat: 0.1g
- Cholesterol: 8mg
- Sodium: 43mg
- Potassium: 134mg
- Fiber: 2g
- Sugar: 18g
- Vitamin A: 101IU
- Vitamin C: 0.04mg
- Calcium: 17mg
- Iron: 2mg
Nutrition information is automatically calculated and should only be used as an approximation.
Why These Treats Are a Must-Try Dessert
These Salted Caramel Rice Krispie Treats are more than just a dessert; they are an experience. They capture the nostalgic comfort of a classic treat while elevating it to a sophisticated, modern indulgence. The interplay of textures, from the crispness of the cereal to the chewiness of the marshmallow, the luscious gooiness of the caramel, and the satisfying snap of the dark chocolate, creates a truly dynamic bite. The flavor profile is equally captivating: the inherent sweetness of the marshmallow and caramel is expertly balanced by a hint of salt and the bittersweet punch of dark chocolate, preventing it from being overly sugary. They are the perfect balance of sweet and salty, rich yet surprisingly light, and undeniably addictive. Whether you’re hosting a dinner party, preparing for a potluck, or simply craving a moment of pure bliss, these treats are guaranteed to impress and satisfy.
Expert Tips for No-Bake Perfection
Achieving truly exceptional no-bake treats comes down to a few expert techniques. Keep these tips in mind to ensure your Salted Caramel Rice Krispie Treats turn out flawlessly:
- Don’t Skimp on the Stirring: When combining the cereal with the melted marshmallow mixture, thoroughness is key. Ensure every piece of cereal is fully coated. This creates a cohesive base that holds together well and has uniform chewiness. If the mixture seems too stiff, work quickly, as it sets rapidly as it cools.
- Parchment Paper is Your Best Friend: Lining your baking dish with parchment paper and leaving an overhang is a game-changer. It prevents sticking and allows you to easily lift the entire slab of treats out of the pan, making both the layering process and slicing incredibly simple and mess-free.
- Chilling is Non-Negotiable: The step of freezing the caramel layer until firm is not optional. This crucial chilling time prevents the melted chocolate from blending with the caramel, ensuring those beautiful, distinct layers that make these treats so visually appealing and texturally satisfying. Patience here truly pays off.
- Gentle Chocolate Melting: When melting the chocolate, low and slow is the way to go. Microwaving at 50% power in short bursts, with stirring in between, prevents the chocolate from overheating and seizing. The added oil also contributes to a smoother, more fluid consistency, making it easier to spread without force.
- The Art of Slicing: A warm, dry knife is essential for clean cuts. The heat from the knife briefly melts the chocolate and caramel, allowing for a smooth glide rather than a tear or crack. Wiping the knife clean between each slice prevents sticky residue from affecting subsequent cuts.
Variations to Inspire Your Creativity
While this recipe is a masterpiece in its original form, it also offers a fantastic canvas for culinary creativity. Don’t hesitate to experiment with these delicious variations:
- Nut-Free Alternative: If you have a peanut allergy or simply prefer to go nut-free, it’s easy to adapt. Just omit the peanut butter and increase the unsalted butter in the base mixture to ½ cup. For a balanced flavor, add a small pinch (about ¼ teaspoon) of fine sea salt to the marshmallow mix.
- Explore Different Chocolates: Dark chocolate offers a delightful bittersweet contrast, but feel free to switch it up. Semi-sweet chocolate provides a milder profile, while milk chocolate will create a sweeter, creamier topping. For an extra touch of elegance, sprinkle some flaky sea salt over the wet chocolate layer just before it sets.
- Fun Mix-Ins: Consider folding in other ingredients into the Rice Krispie base for added texture and flavor. Mini chocolate chips, chopped toasted nuts (if not using peanut butter or wanting extra crunch), or even a teaspoon of vanilla extract can add another dimension to these treats.
- Seasonal Spices: For a cozy, autumnal twist, stir in a dash of cinnamon, nutmeg, or a chai spice blend into the melted marshmallow mixture. This will infuse the treats with a warm, inviting aroma and flavor.
Storage and Shelf Life Recommendations
To ensure your Salted Caramel Rice Krispie Treats maintain their optimal texture and flavor, proper storage is key. They are best enjoyed within **3 to 4 days** of preparation. Store them in an airtight container at room temperature. While it might be tempting to refrigerate them, doing so can cause the Rice Krispies to harden and lose their signature chewy texture, and the chocolate layer will become very firm, making slicing more challenging and diminishing the overall eating experience. For maximum deliciousness, keep them out on the counter, ready to be devoured!
Frequently Asked Questions (FAQs)
- Can I use any type of peanut butter?
- Natural peanut butter (the kind that separates, requiring a stir) is recommended for its texture and less added sugar, which helps control the overall sweetness. However, creamy conventional peanut butter can also be used, though the final texture might be slightly different.
- Why is my caramel layer sticky even after freezing?
- The caramel layer will firm up significantly in the freezer, but it won’t be rock hard like ice. It should be firm enough that when you pour the chocolate, it doesn’t immediately blend. The “gooey” nature of caramel means it will soften at room temperature, which is part of its charm in this recipe.
- What if I don’t have an 8×8 inch pan?
- You can use a similar-sized square pan. A slightly larger pan (e.g., 9×9 inch) will result in thinner treats, while a smaller one will make them thicker. Adjust chilling times accordingly.
- Can I make these treats in advance for a party?
- Absolutely! These treats are perfect for making ahead. Since they require chilling time to set, preparing them a day or even two days in advance for a party or gathering is ideal. Just store them properly at room temperature until serving.
- My chocolate topping isn’t perfectly smooth/glossy. What happened?
- The most common reasons for a less-than-perfect chocolate topping are overheating the chocolate (which can cause it to seize or look dull), or trying to spread it too much with a spatula once poured. Gently tilting the pan is key for a natural, smooth finish. Also, rapidly chilling chocolate can sometimes cause a “bloom” (a grayish appearance), which is why room temperature setting is recommended, if time allows.
Prepare to become absolutely obsessed with these **Salted Caramel Rice Krispie Treats with Peanut Butter and Dark Chocolate**. They offer a captivating symphony of textures and flavors – crisp, chewy, gooey, sweet, and salty – all masterfully combined into one glorious, irresistible bite. Whether you consider yourself a seasoned baker or a curious novice in the kitchen, this no-bake recipe is wonderfully straightforward and promises to deliver an unforgettable dessert that will delight friends and family alike. Dive in and savor every decadent square!